
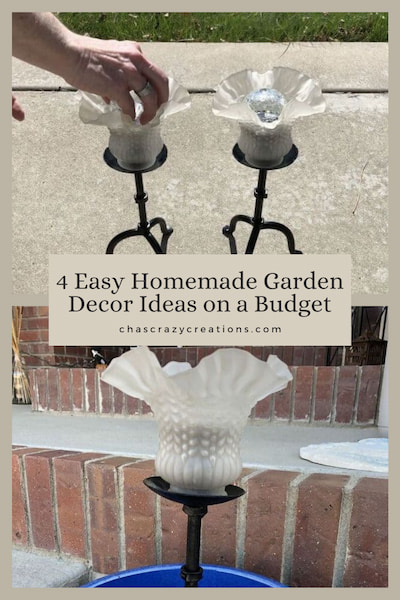
Easy Homemade Garden Decor Ideas on a Budget
Do you want homemade garden decor ideas? I have easy projects for diy garden decor that can be created and adapted, all using items from thrift stores. These garden ornaments can go in the backyard, patio, deck, lawn or blended in with your landscape.
I love going to thrift stores and letting my imagination run wild on how to give new life to old items. What is one person’s junk is another person’s treasure right? I took some of these items, updated them, added a solar light, and turned them into outdoor yard decor.
How to make a garden decor?
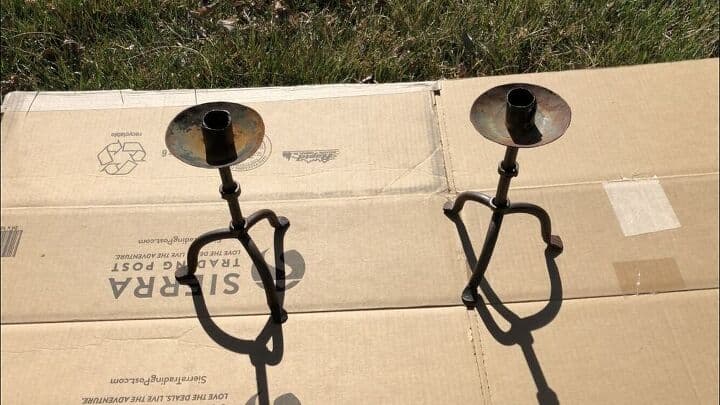
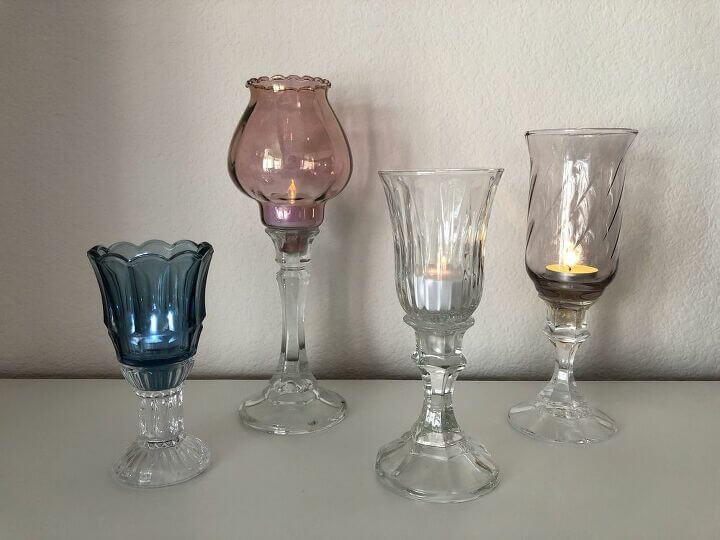
I had these 2 candle holders that I bought from a thrift store years ago. I had used them a while back when we were camping and you can see the tutorial steps here –Candle Holder to Traveling Solar Holder
Easy Homemade Garden Decor Ideas on a Budget Video
It was time to change them up for my home.
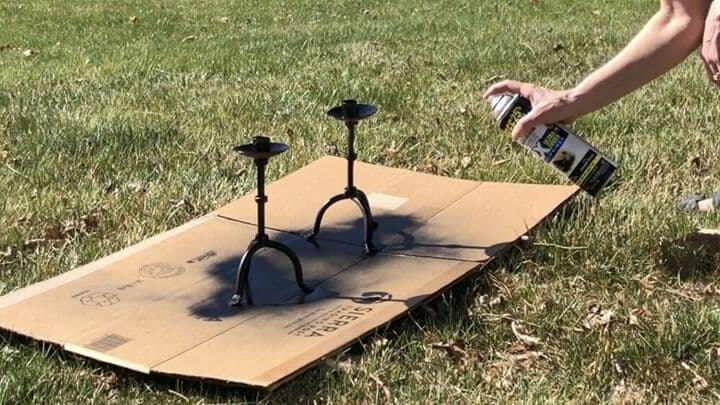
I washed them, and then gave them a new coat of Rustoleum black spray paint I had on hand.
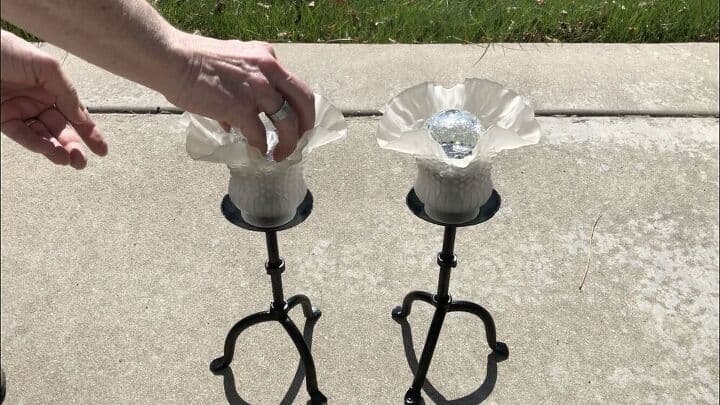
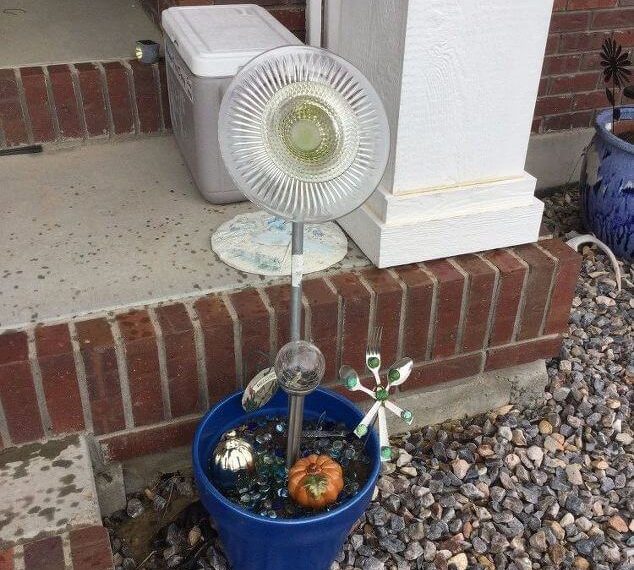
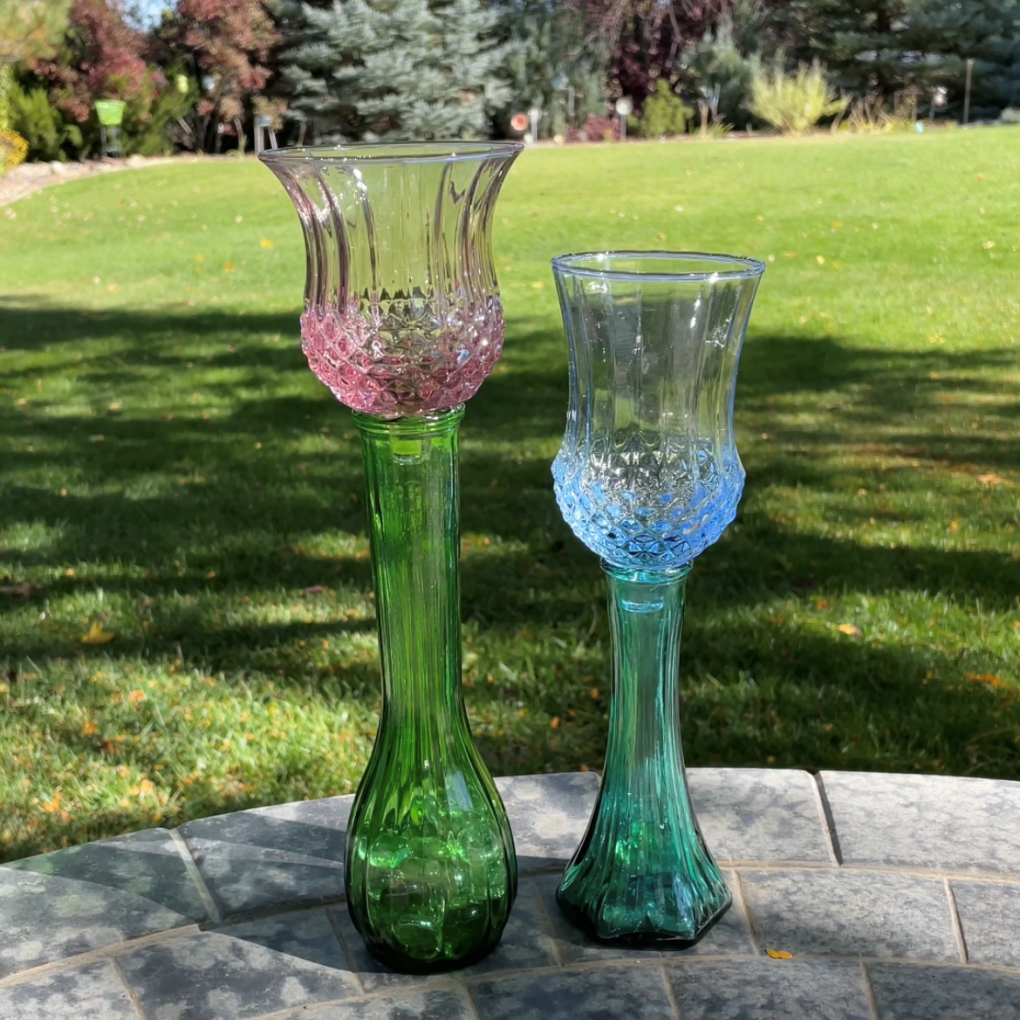
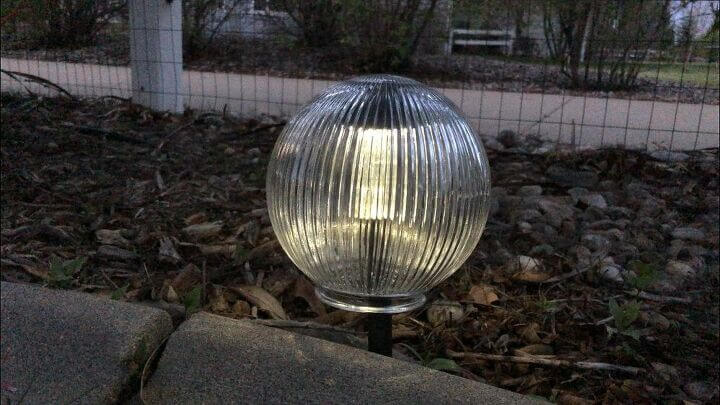
Once the paint dried, I put some old glass light fixtures on top of the candle holders and adhered them with silicone. I pulled the base off of 2 globe solar lights from Walmart and placed them inside the flower.
Now I have these solar flowers on either side of my porch. These would also be perfect to light a pathway.
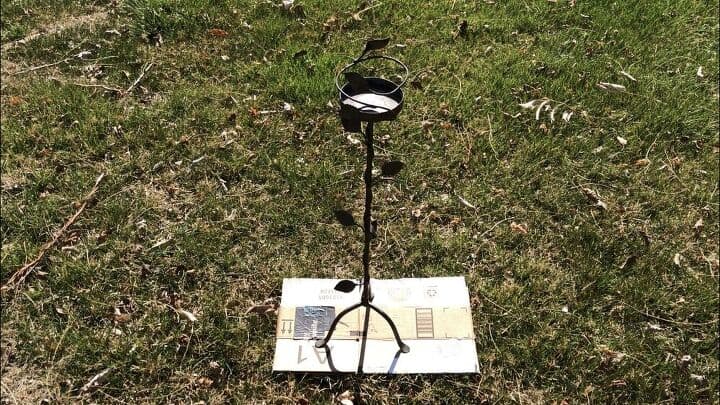
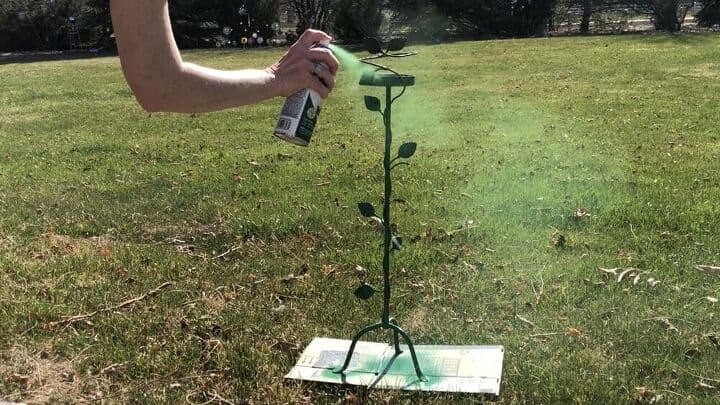
I washed the candle holder, and then spray painted it with Rustoleum green paint I had on hand.
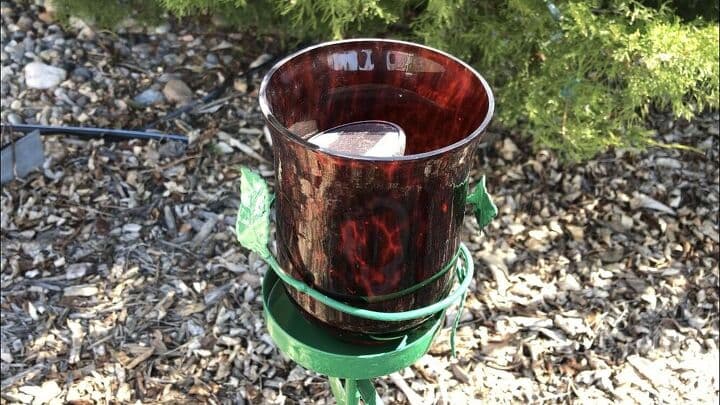
Once the paint dried I placed a red candle holder on top. I pulled the base off of a dollar store solar light and put it inside the red candle holder for added glow.
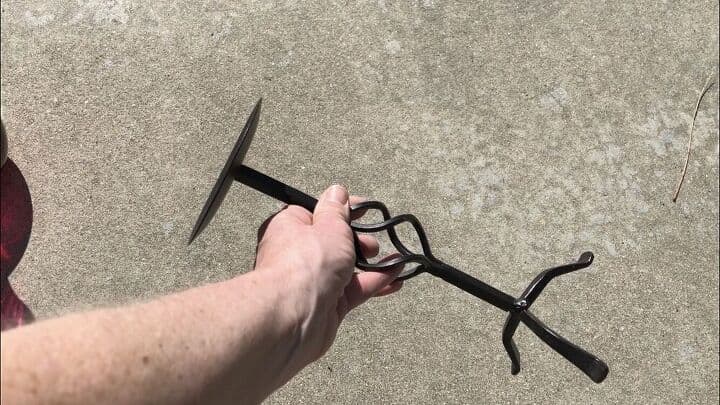
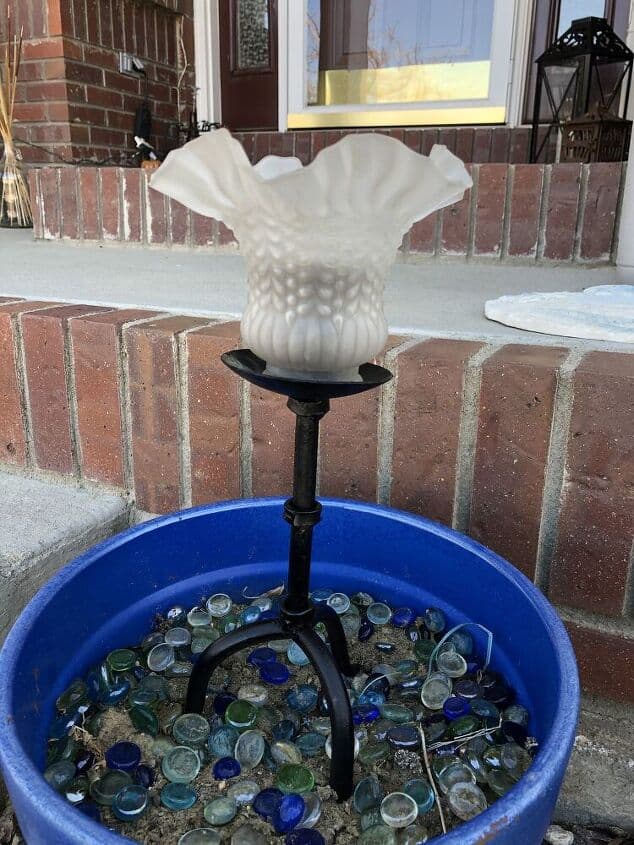
I had found this other wrought iron base at a thrift store.
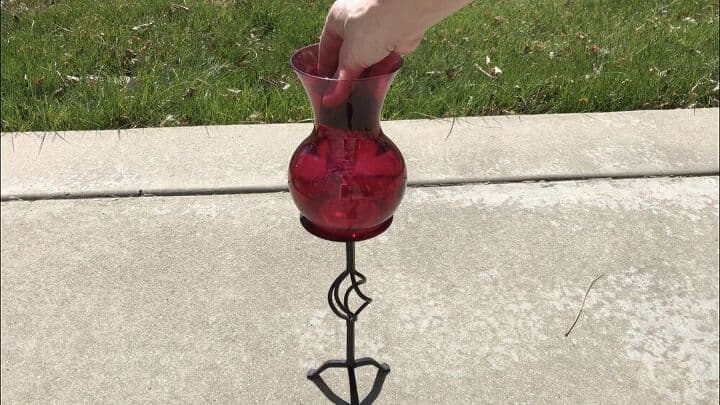
I glued this red vase that I also found at the same thrift store to the candle holder using silicone. I pulled the base off a dollar store solar light and placed it in the vase.
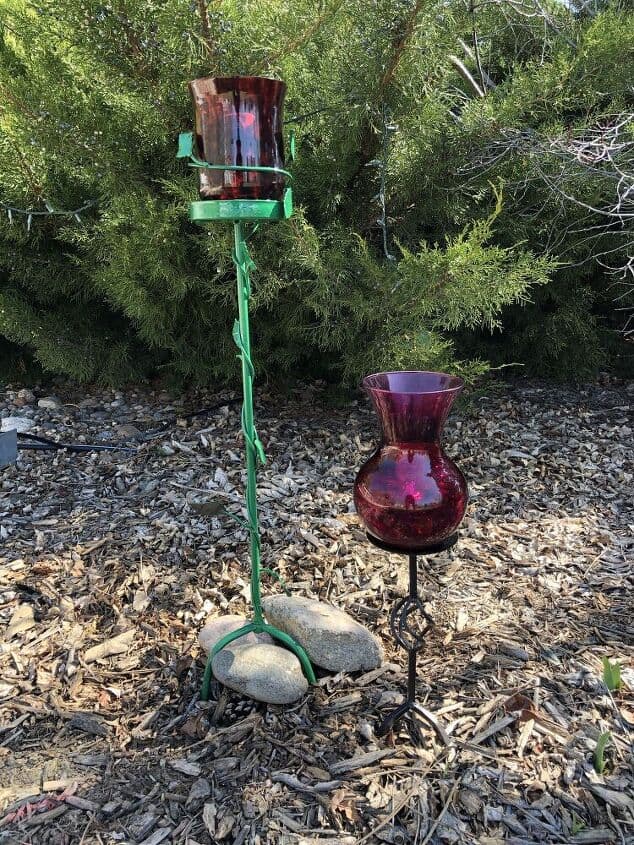
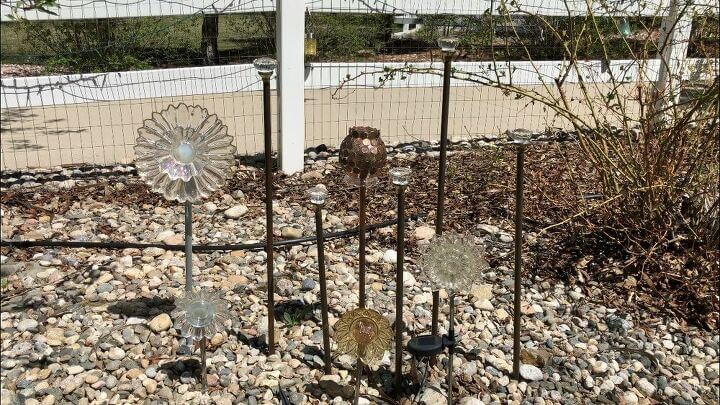
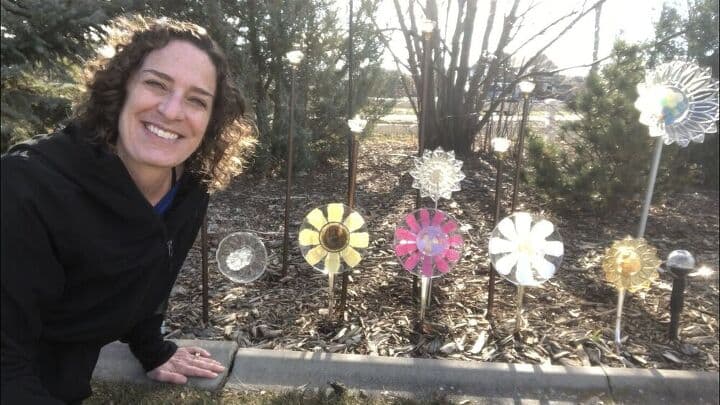
I placed the new flowers in my yard.
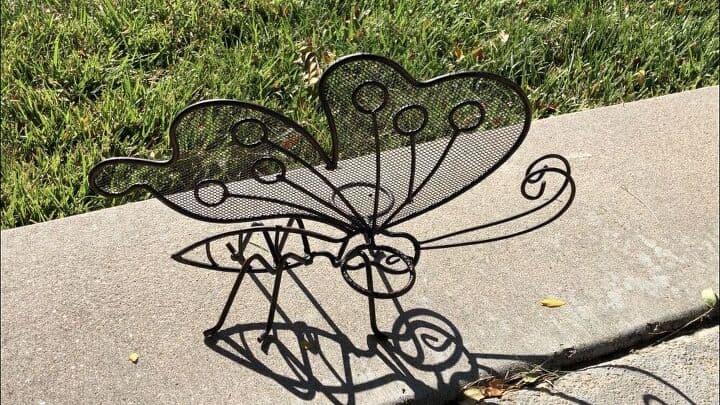
A friend of mine gave me this butterfly. It used to be a candle holder but the glass parts were long gone. I thought this would be perfect for garden art.
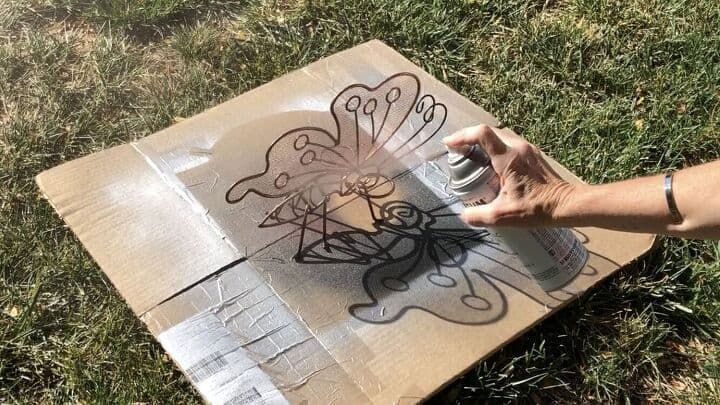
I washed it and spray painted it with Rustoleum copper paint I had on hand.
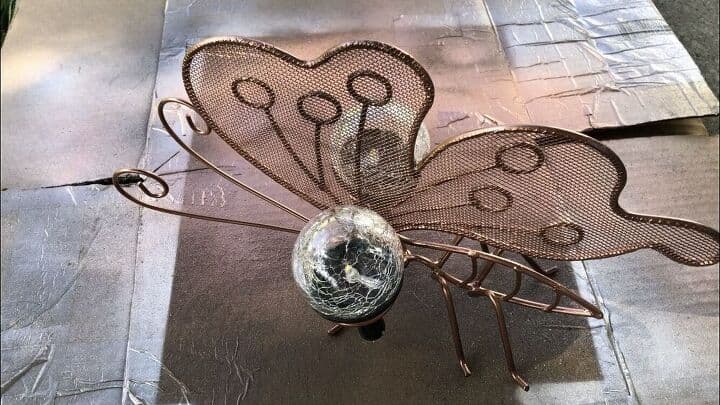
I pulled the base off of 2 globe solar lights from Walmart and slipped them into where the candle holders once were.
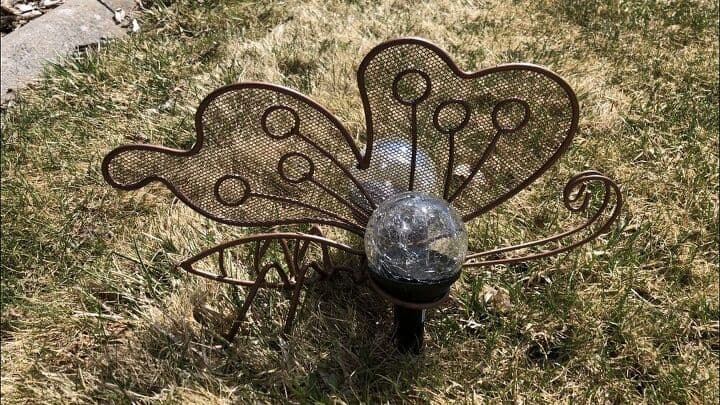
I placed my butterfly in the yard… now it reminds me of a firefly at night.
Easy Homemade Garden Decor Ideas on a Budget Video
Shop any of these stores and I receive a small commission at no cost to you.
 AMIR Solar String Lights Ou…Shop on Amazon
 Solar Lights Outdoor, Stain…Shop on Amazon
 Outdoor Solar Garden Stake …Shop on Amazon
 GE Sealants & Adhesives Adv…Shop on Amazon
 Rust-Oleum 245197 Universal…Shop on Amazon
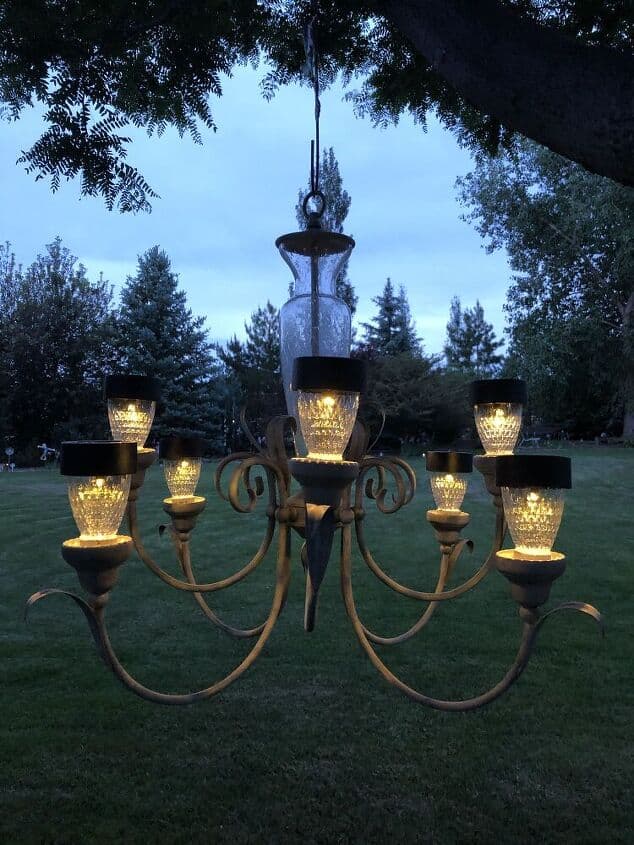
Repurposed Chandeliers and Solar Lights: Revamp Your Outdoor Space
Discover the beauty of repurposed chandelier solar lights. Upcycling an old chandelier into a captivating solar light fixture can be a fantastic way to brighten up your garden. Start by removing unnecessary pieces from the chandelier. Choose solar lights that suit your preference and place them into the chandelier. Hang the revamped chandelier on a shepherd’s hook or from a tree in your garden. As night falls, the solar lights will illuminate your garden, creating a magical ambiance.
- How To Make An Awesome and Easy Outdoor Solar Chandelier
- Easy Flower Basket to Solar Chandelier
- Upcycle an Outdated Chandelier to a Solar Chandelier
How do you make mushroom yard art?
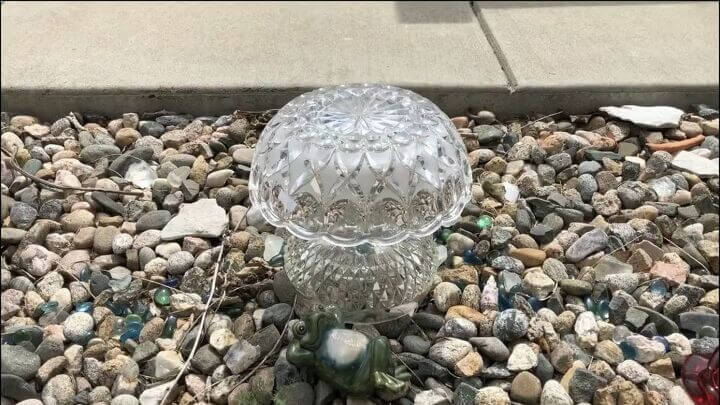
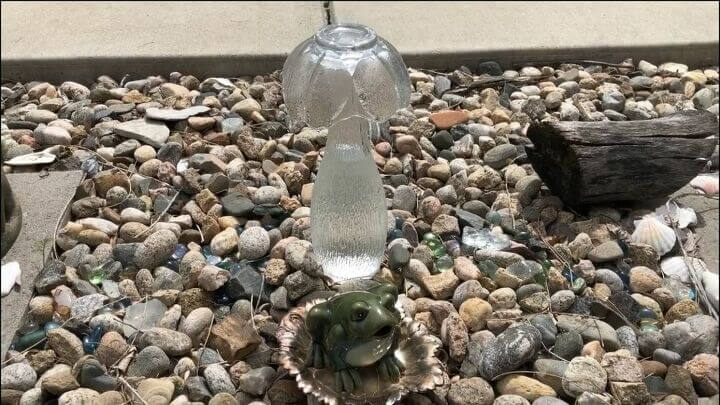
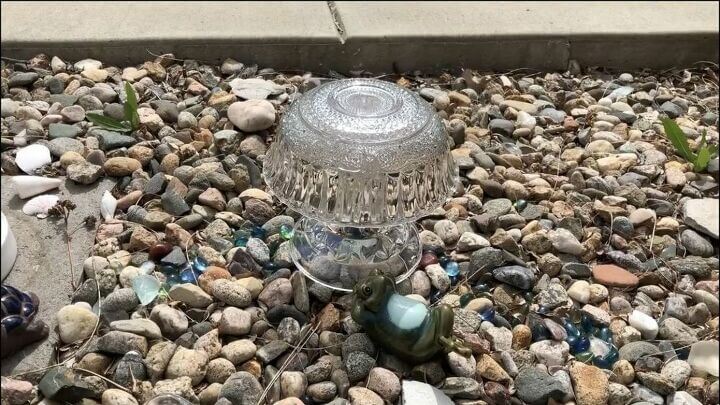
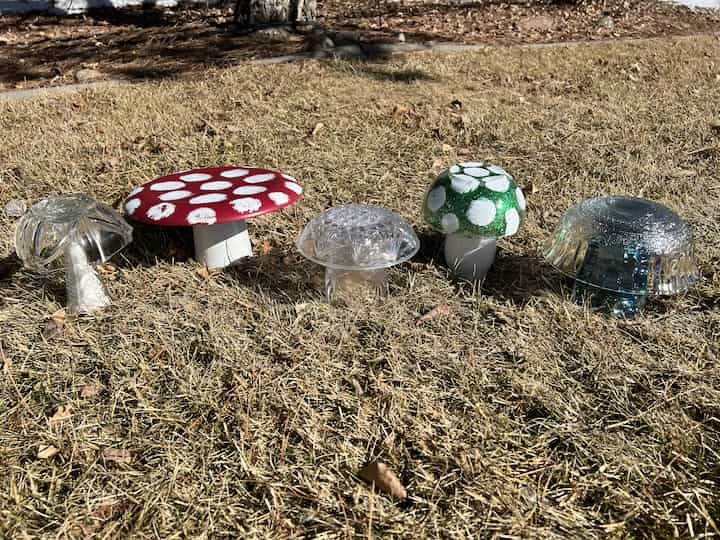
Whimsical Mushroom Solar Lights for Enchanting Gardens
Add a touch of whimsy to your garden with whimsical mushroom solar lights. Follow the easy guide to create these delightful solar light sculptures using Dollar Store materials. Watch as they glow and bring your garden to life after dusk.
Gather four vases, four bowls, and solar lights from the dollar store. Fill each vase with Dollar Store rocks to add weight. Remove the base from a solar light and place it inside a vase. Attach the bowl on top of the solar light using glue dots or your preferred adhesive. Repeat this process for each mushroom. Once completed, place these whimsical mushroom solar lights in your garden, ensuring they receive ample sunlight during the day. Watch as they glow beautifully in the evenings, adding a touch of whimsy to your outdoor space.
- Easy Dollar Tree DIY Mushroom Solar Light Decor with Video
- Super Easy DIY Garden Mushrooms on a Budget with Video
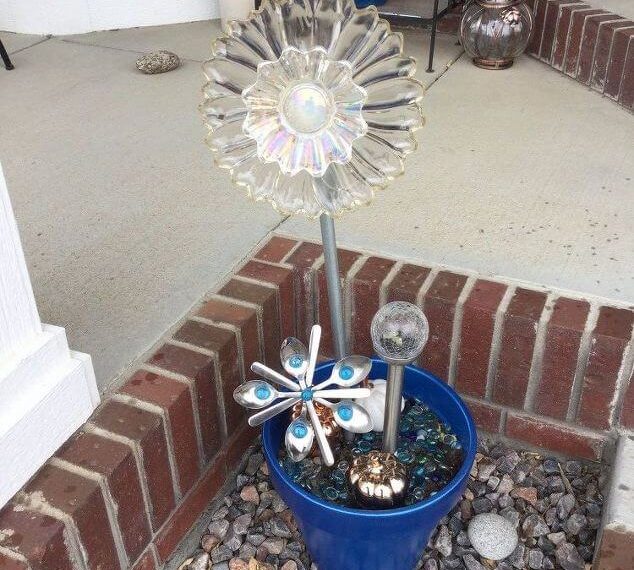
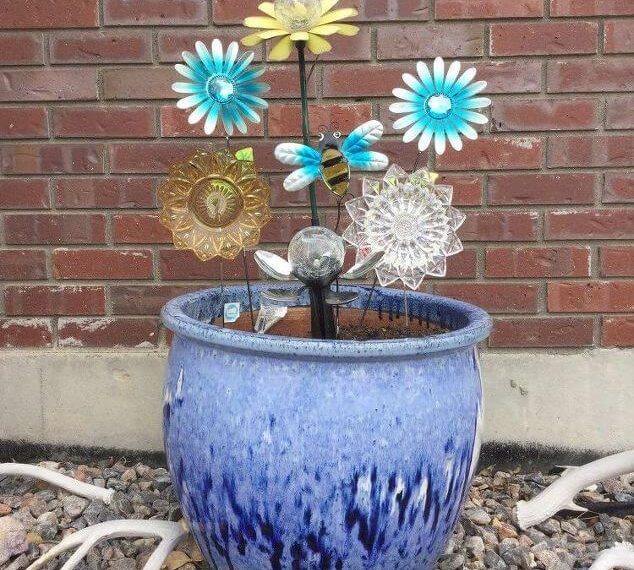
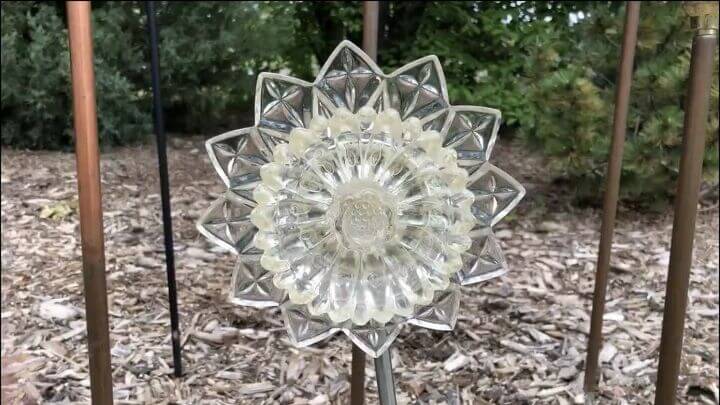
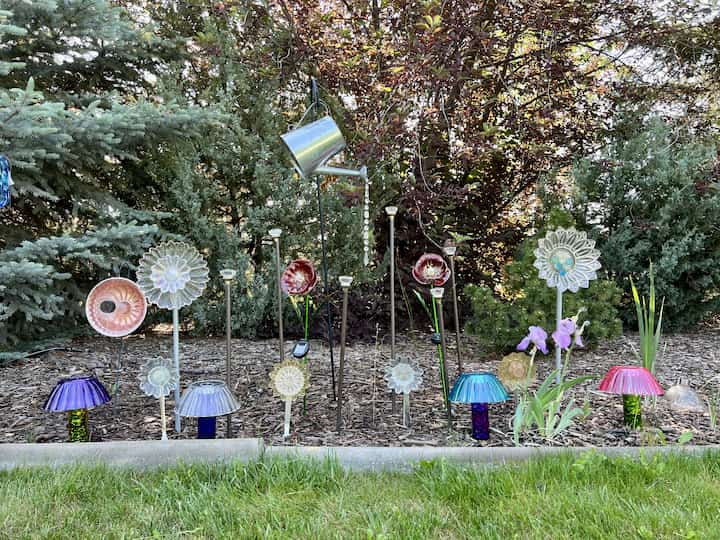
Step-by-Step Guide to Making Unique Dish Flowers for Your Garden
Transforming dishes and candle holders into charming dish flowers is a fun and artistic project. Experiment with various shapes and sizes of dishes, both plastic and glass, to achieve your desired look. Use glue to attach them together, creating unique floral designs. Add a touch of paint for added vibrancy and personality. These dish flowers require no watering and can withstand outdoor conditions effortlessly. Let your creativity bloom as you mix and match your dishes to create stunning and colorful garden decor.
Innovative Garden Accents: Infuse Personality into Your Outdoor Space
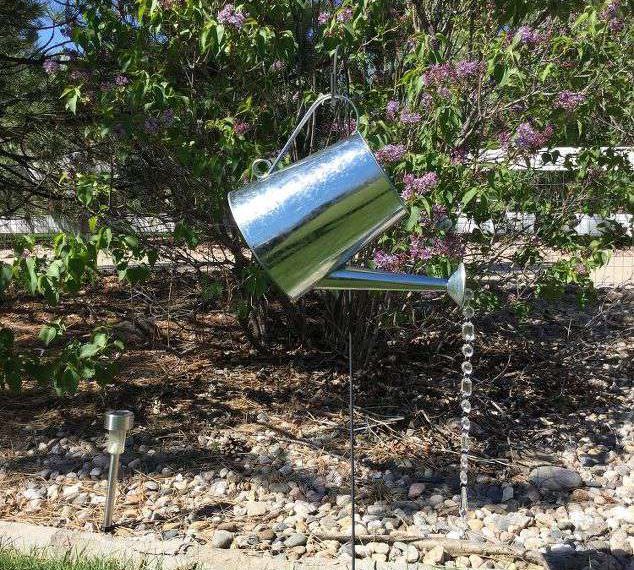
Discover a range of innovative garden accents to infuse personality into your outdoor space. Explore your creative side with additional garden decor ideas. Consider making a pouring watering can by attaching a galvanized watering can to a shepherd’s hook and adding beads to the front, cre
- Watering Can Yard Decor
- Upcycled Thrift Store Candle Holders
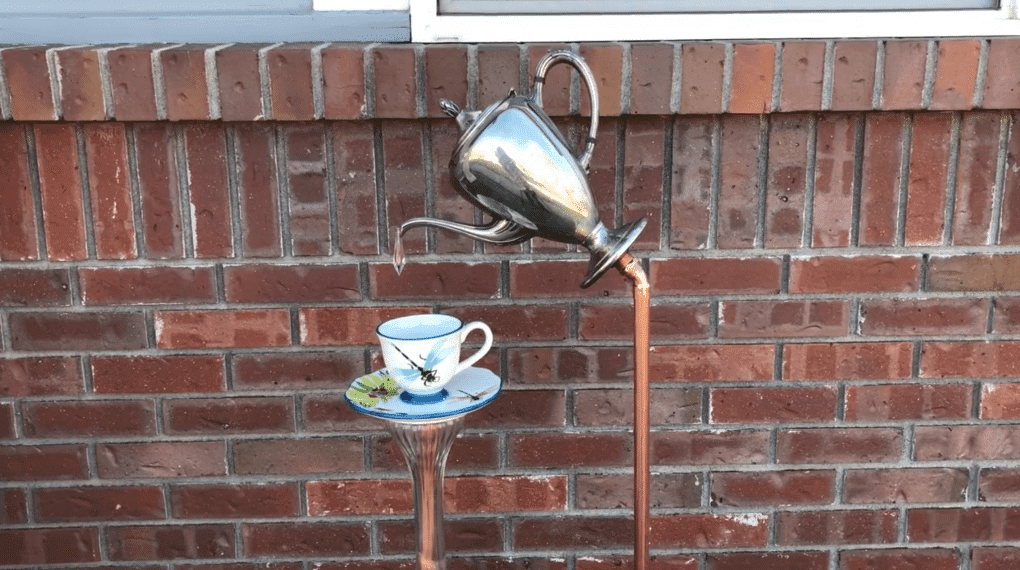
- Pouring Teapot & Tea Cup
- Pouring Tea Pot & Tea Cup Decor
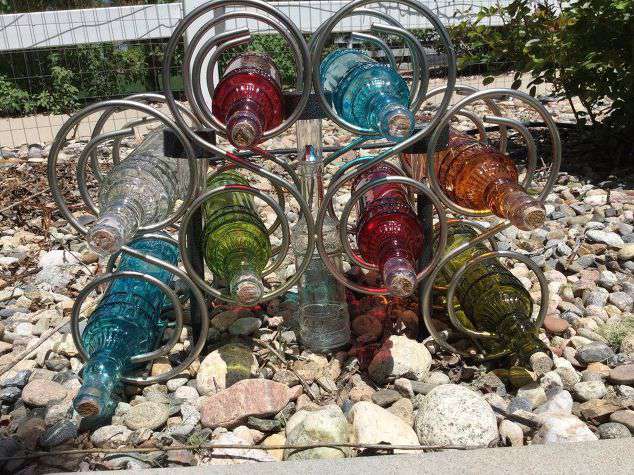
- Re-purposed Wine Rack to Solar Yard Decor
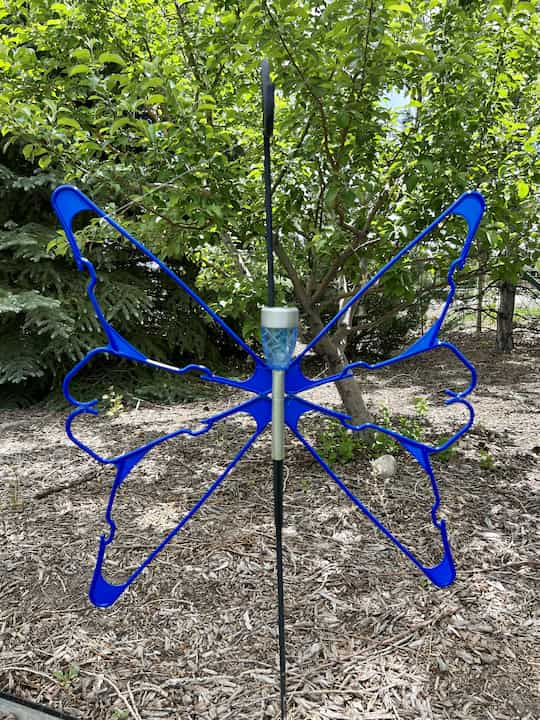
DIY Butterfly Solar Light Sculptures: Elegant Garden Decor
Craft DIY butterfly solar light sculptures for an elegant touch in your garden. Gather four hangers and a solar light. Lay the hangers in a butterfly shape, then use adhesive or zip ties to secure the centers and joints together. Attach the solar light to the center of the hangers. Create multiple butterfly sculptures and hang them in different areas of your garden. These beautiful creations will flutter gracefully during the day and illuminate your garden at night.
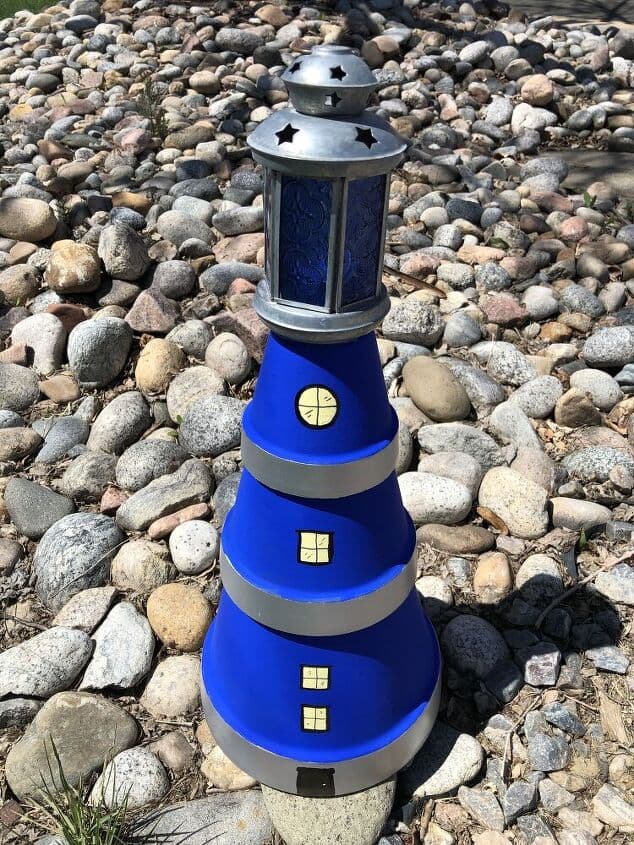
Create a Magical Garden Atmosphere with DIY Lighthouse and Terracotta Pots
Bring a touch of magic to your garden with a DIY lighthouse and terracotta pots. Learn how to paint and stack terracotta pots to create a captivating lighthouse. Add a solar light or candle holder to complete the enchanting effect in your garden.
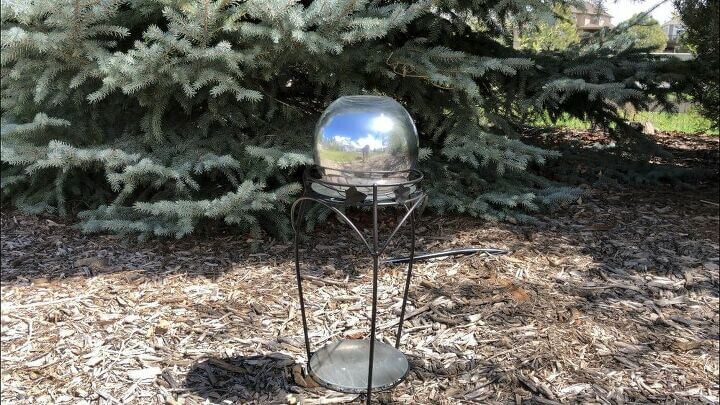
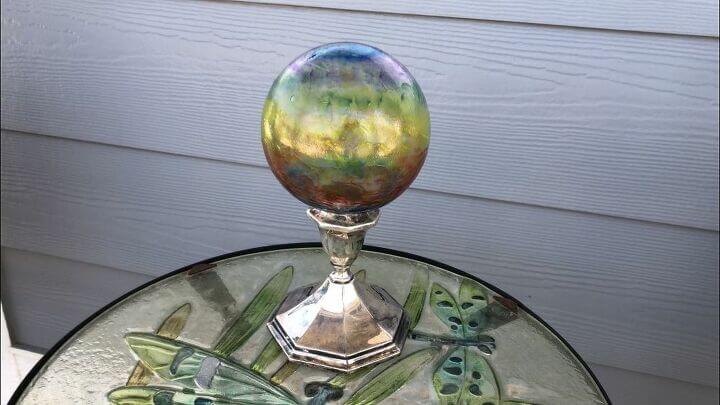
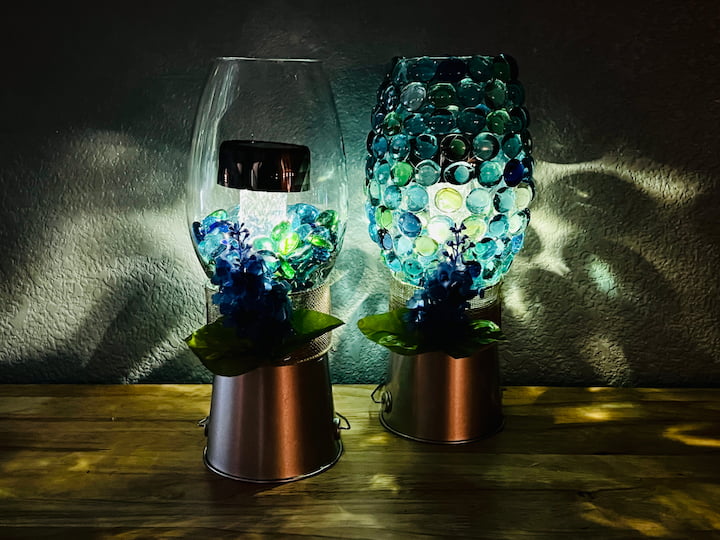
Easy and Awesome DIY Gazing Ball Garden Globe for your Yard
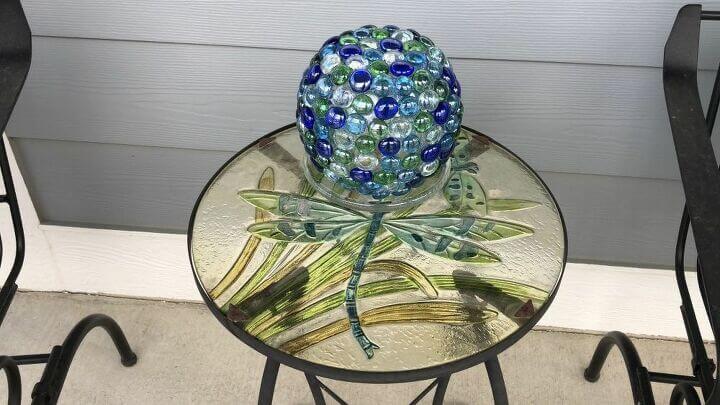
Transform your yard into a mesmerizing oasis with an easy and awesome DIY gazing ball garden globe. This garden decor idea adds a touch of elegance and enchantment to any outdoor space. Using a simple bowling ball or a thrifted glass globe, you can create a stunning focal point for your yard. Choose a variety of colorful glass gems, marbles, or mirror pieces to decorate the surface of the ball, creating a captivating mosaic design. Once completed, place your gazing ball on a pedestal, nestled among lush greenery or vibrant flowers, and watch as it reflects sunlight and adds a magical sparkle to your garden. This DIY project is a fantastic way to elevate your garden decor and impress your guests with its beauty and charm.
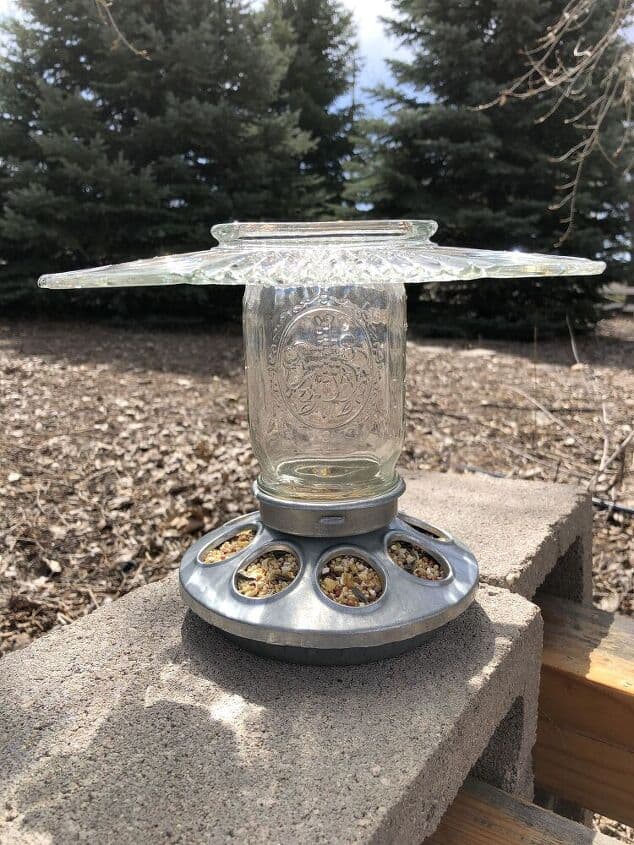
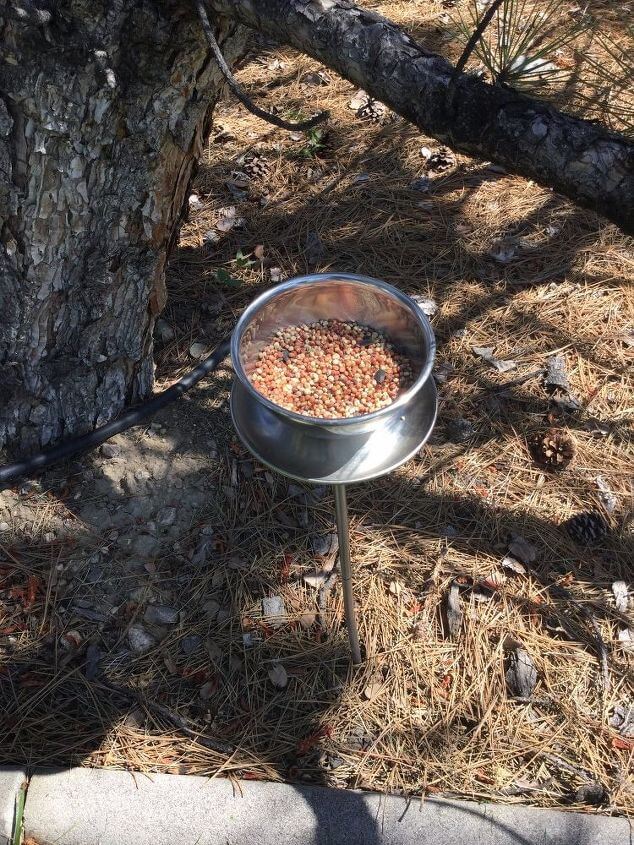
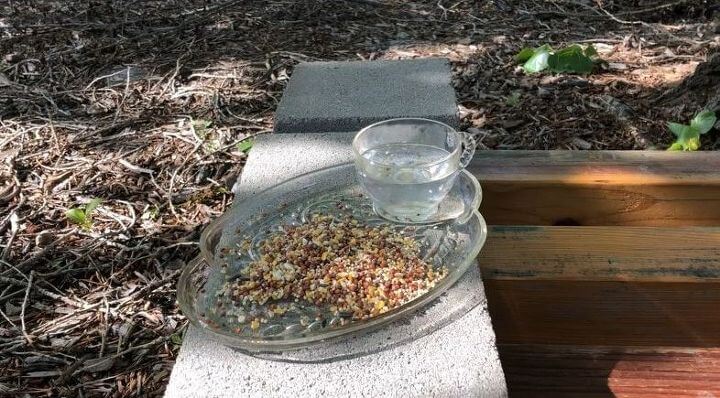
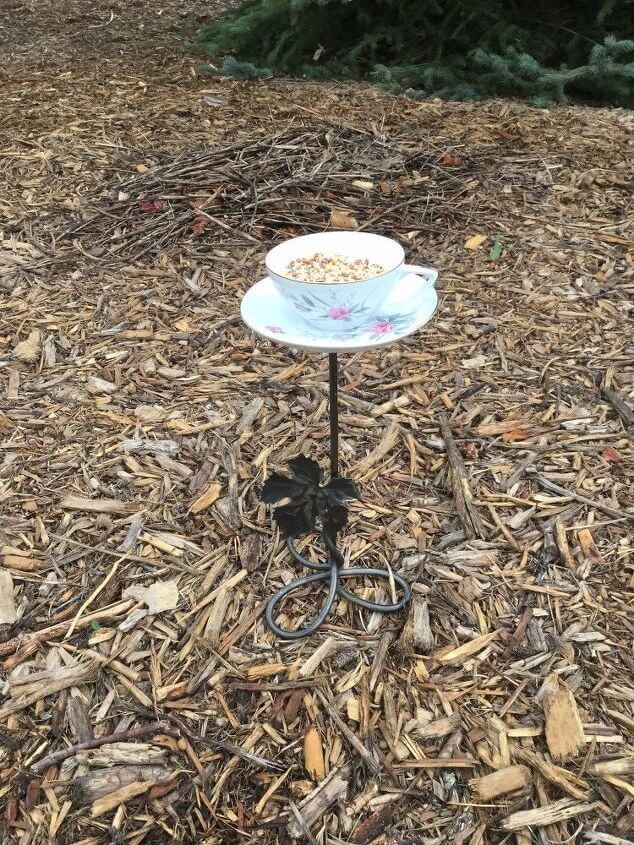
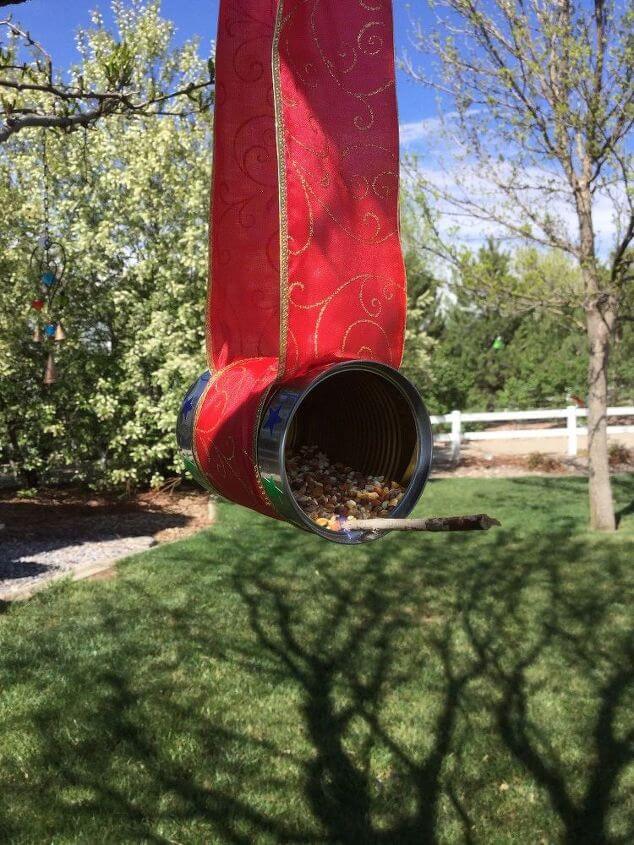
Easy and Amazing Bird Feeders for your garden decor
Invite the beauty of nature into your garden with delightful DIY bird feeders. These garden decor ideas not only add charm to your outdoor space but also provide nourishment and attract a variety of feathered friends. Get creative with materials such as recycled bottles, wooden pallets, or terra cotta pots to craft unique bird feeders. Add pops of color with paint or decorative elements to make them visually appealing. Hang these bird feeders from trees or install them on stakes to create feeding stations throughout your garden. Enjoy the delightful sights and sounds of birds visiting your garden while adding a touch of natural elegance with these DIY bird feeders.
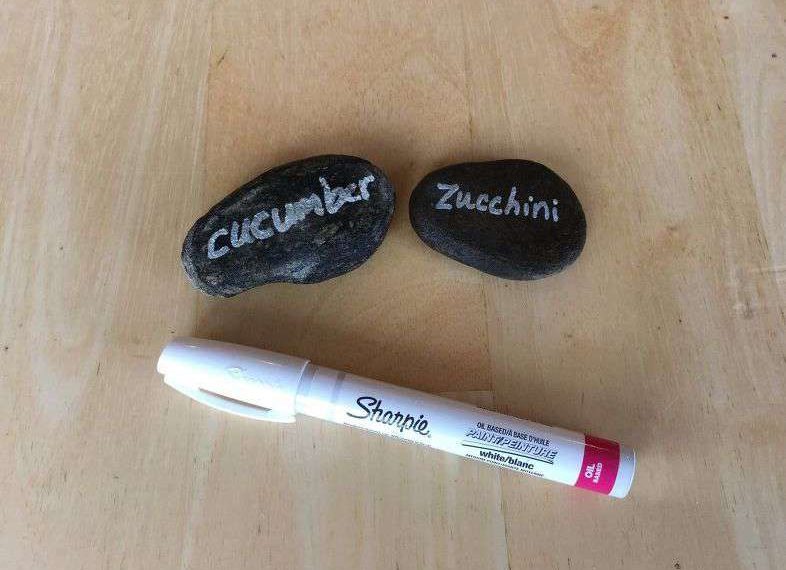
5 Ways To Make Garden Markers
Whether it is in your vegetable garden, herb garden, flower bed, or plants in pots, plant labels are a fun way to add the plant name and maybe even a picture of what you have to look forward to. They can be particularly helpful if you have planters with a wide variety of plants. How can you remember where you placed your basil, cilantro, oregano, chives and parsley?? Here are a variety of ways to make diy plant markers that are very easy and inexpensive. These also make a great gift for the gardener in your life.
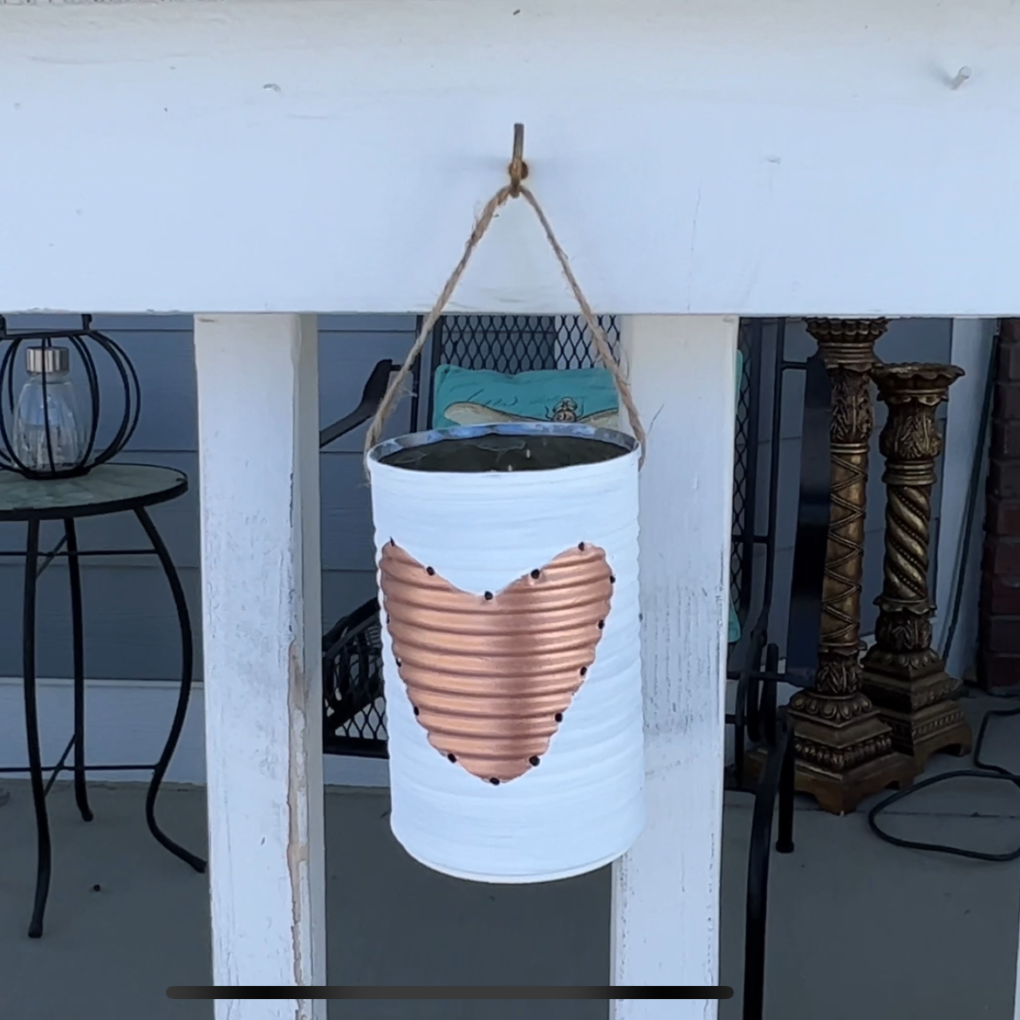
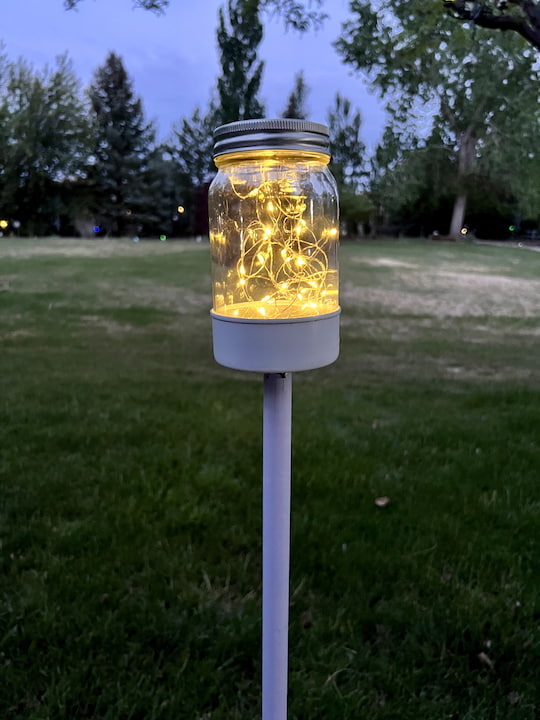
DIY Lanterns: Illuminating Homemade Garden Decor with Enchanting Glow
Illuminate your garden with a touch of homemade charm using DIY lanterns as enchanting garden decor. Unleash your creativity and explore various materials and designs to craft your own unique lanterns. From repurposing mason jars and tin cans to creating intricate paper lanterns, the possibilities are endless. Decorate your lanterns with paints, ribbons, or cut-out patterns to add a personal touch. Once completed, hang them from tree branches, place them on outdoor tables, or line your garden path with their warm glow. These DIY lanterns will not only add a cozy ambiance to your outdoor space but also serve as eye-catching focal points, turning your garden into a magical retreat after dusk.
- Easy Dollar Tree DIY Solar Lantern with Video
- Super Easy Dollar Tree Candle Holders DIY To Light Up Your Life
- Easy and Terrific DIY Punch Tin Lamps For Your Backyard

Blossoming Beauty: Unleash Your Creativity with Homemade Flower Pots
Unleash your creativity and add a personalized touch to your garden with captivating homemade flower pot creations. Transform ordinary flower pots into extraordinary works of art with a myriad of DIY techniques. Paint them in vibrant colors, apply mosaic patterns, or decoupage them with intricate designs. Explore unique materials like seashells, pebbles, or broken tiles to create stunning textures and accents. Fill your flower pots with an array of colorful blooms or lush greenery to complete the masterpiece. These homemade flower pot creations will not only bring beauty and charm to your garden but also showcase your artistic flair and love for crafting.
- Super Cute Turtle Terra Cotta Pot DIY For Your Home
- Easy and Awesome Patriotic Decorations For All Season

Illuminating Artistry: Homemade Concrete Light for Exquisite Garden Decor
Elevate the allure of your garden with unique homemade garden decor by crafting a captivating concrete light. This DIY project allows you to blend functionality with artistic expression as you create a stunning light fixture from concrete. Mold the concrete into your desired shape and incorporate intricate designs or textures to make it truly one-of-a-kind. Once cured, insert a warm LED light into the hollowed-out portion of the concrete, casting a gentle and alluring glow in your garden. The combination of industrial concrete and soft illumination will create a striking focal point, adding a modern and artistic touch to your outdoor space.
Shop any of these stores and I receive a small commission at no cost to you.
") UNIME Glow in The Dark Gard…Shop on Amazon
UNIME Glow in The Dark Gard…Shop on Amazon") Daogtc Metal Butterfly Wall…Shop on Amazon
Daogtc Metal Butterfly Wall…Shop on Amazon Solar Watering Can Lights w…Shop on AmazonShop on Amazon
") Cooo 12 Pack Gifts for Him …Shop on Amazon
Cooo 12 Pack Gifts for Him …Shop on Amazon Suncast 33 Gallon Commercia…Shop on Amazon
More Homemade garden decor ideas:
get creative with some of these garden ideas
How do you make homemade garden crafts?
Making homemade garden crafts can be a fun and creative way to add a personal touch to your outdoor space. Here are some general steps to help you get started:
- Choose a Craft Idea: Decide on the type of garden craft you want to make. It could be a decorative item, a planter, a birdhouse, or anything else that enhances your garden.
- Gather Materials: Determine the materials needed for your chosen craft project. This could include items like wood, terra cotta pots, stones, pebbles, paint, brushes, glue, and any other supplies required for your specific craft.
- Plan and Design: Sketch out or visualize your craft design. Consider the size, shape, and colors you want to incorporate. This step is especially important if you’re building or constructing something from scratch.
- Prepare the Workspace: Set up a clean and organized workspace, preferably outdoors or in a well-ventilated area. Lay down protective covering to avoid any damage or mess.
- Start Crafting: Follow these general steps based on your chosen craft idea:
- Decorative items: Use materials like stones, pebbles, seashells, or driftwood to create unique garden art. Paint or decorate them with weather-resistant paints or outdoor sealants.
- Planters: Repurpose containers such as tin cans, wooden boxes, or old boots into planters. Make sure to provide drainage holes and use appropriate soil for your plants.
- Birdhouses or Feeders: Build or repurpose materials to create birdhouses or feeders. Use sturdy materials like wood and ensure they are safe and comfortable for birds.
- Garden Signs or Markers: Make signs or markers for your plants using materials like wooden stakes, rocks, or tiles. Paint or write the names of plants or add decorative designs.
- Wind Chimes: Assemble materials like seashells, glass or metal beads, and strings to create personalized wind chimes. Experiment with different lengths and materials for varying sounds.
- Decorate and Finish: Once the basic construction is complete, add your personal touches. Paint, stencil, or add other decorative elements to make your garden craft visually appealing.
- Protect from the Elements: Apply a weather-resistant sealant or outdoor varnish to protect your garden craft from rain, sun, and other weather conditions. Follow the instructions on the product for proper application and drying time.
- Display in the Garden: Find the perfect spot in your garden to showcase your homemade craft. Consider the aesthetics, visibility, and functionality of the item within your outdoor space.
Remember, crafting is a creative process, so feel free to adapt and modify these steps based on your own ideas and available resources. Enjoy the process and have fun adding a personal touch to your garden!
Is it cheaper to build with recycled materials?
Using recycled materials in building projects can potentially be more cost-effective compared to using new materials, depending on various factors. Here are some points to consider:
- Availability: The availability of recycled materials in your area plays a crucial role. If recycled materials are abundant and easily accessible, they may be more affordable than new materials. However, if recycled options are limited or need to be sourced from a distance, transportation costs might increase overall expenses.
- Material Type: The cost savings can vary depending on the type of material. For example, salvaged wood or reclaimed bricks might be more cost-effective compared to recycled metal or specialized architectural features.
- Condition and Quality: Consider the condition and quality of recycled materials. Some materials might require additional cleaning, repairs, or modifications, which can add to the overall cost. In contrast, high-quality recycled materials in good condition may be more expensive than lower-quality options.
- Building Codes and Regulations: Ensure that the use of recycled materials complies with local building codes and regulations. Some jurisdictions might have specific requirements or restrictions, which could impact the overall cost or feasibility of using recycled materials.
- Long-Term Savings: While the upfront cost of recycled materials might be lower, it’s essential to consider the long-term savings. Recycled materials can often offer benefits such as energy efficiency, durability, and reduced environmental impact, which can result in long-term cost savings on energy bills, maintenance, and replacements.
- Design and Integration: The design and integration of recycled materials into a project can affect the overall cost. If the design requires extensive modifications or specialized techniques to incorporate recycled materials, it may increase the overall expenses.
It’s recommended to thoroughly research and compare the costs of recycled materials versus new materials for your specific project. Consider consulting with local suppliers, contractors, or architectural professionals who have experience working with recycled materials to get a better understanding of the cost implications in your region.
Find out “What Exactly Does It Mean To Repurpose Or Upcycle“, save money, and create the most amazing things.


********************************************************
Thank you for sharing at #OverTheMoon. Pinned and shared. Have a lovely week. I hope to see you at next week’s party too! Please stay safe and healthy. Come party with us at Over The Moon! Catapult your content Over The Moon! @marilyn_lesniak @EclecticRedBarn
********************************************************
Thank you so much Marilyn! See you at the next one.
I love solar lights! These are fabulous!
Thank you for sharing with Creative Compulsions!
Michelle
mybijoulifeonline.com
Thank you so much Michelle, they are so fun to make. My kids joke they need to wear sunglasses at night from all the things I create.