Super Cool and Easy DIY Dollar Tree Concrete Light
Are you looking for a concrete light? You’ll need a few items from Dollar Tree and a bag of Mortar for this easy and super cool DIY
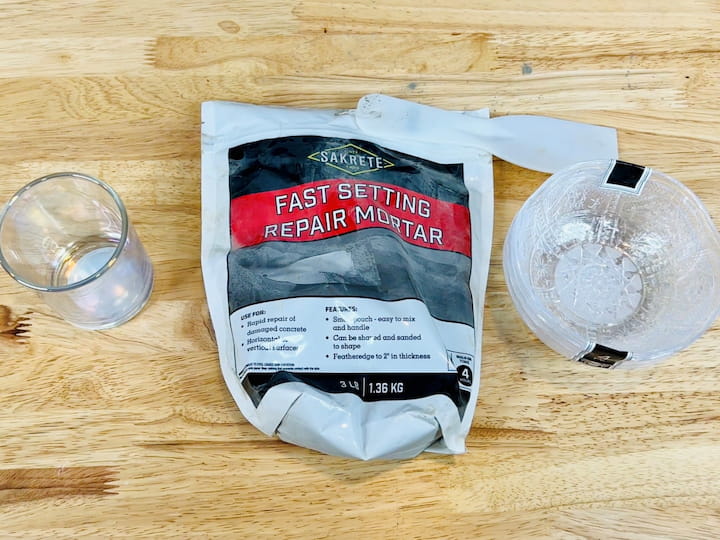
Concrete Light Materials
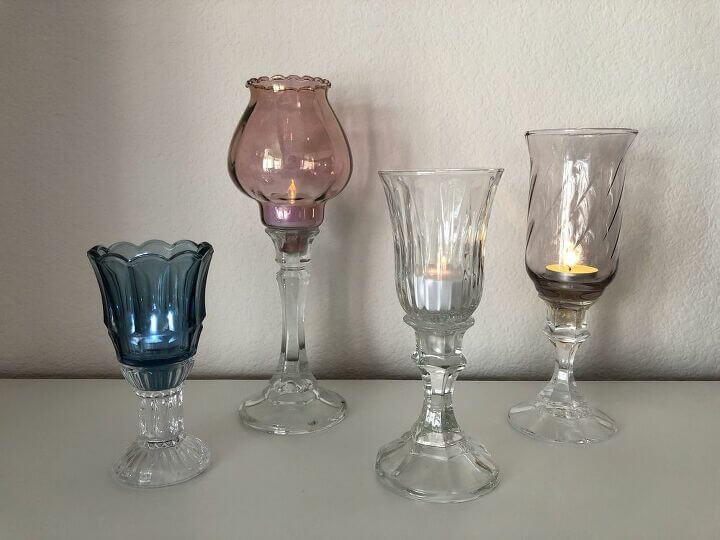
To start this project I’ll be using a candle holder from the dollar store, fast setting repair mortar, and some dollar store plastic bowls
 Quikrete 124115 FastSet Rep…Shop on Amazon
 bUCLA 50Pack Clear Plastic …Shop on Amazon
 Letine 36-Pack Votive Candl…Shop on Amazon
 Brightown 12 Pack LED Fairy…Shop on Amazon
Concrete Light Videos
Concrete Light Instructions
I’ve got a drop cloth here from the dollar store, and I’m just gonna spread it over the top of my table to protect the surface that’ll be working on.
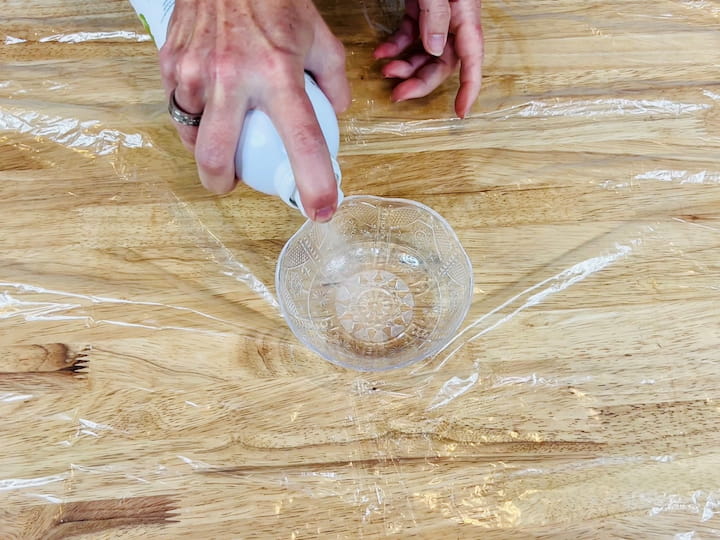
1. Prep the bowl
Now I have my dollar store bowl and I’m gonna use some good old cooking spray you could also use avocado oil or olive oil but I’m just gonna go ahead and give a nice little spray to make sure this is good and coated before moving on to the next step.

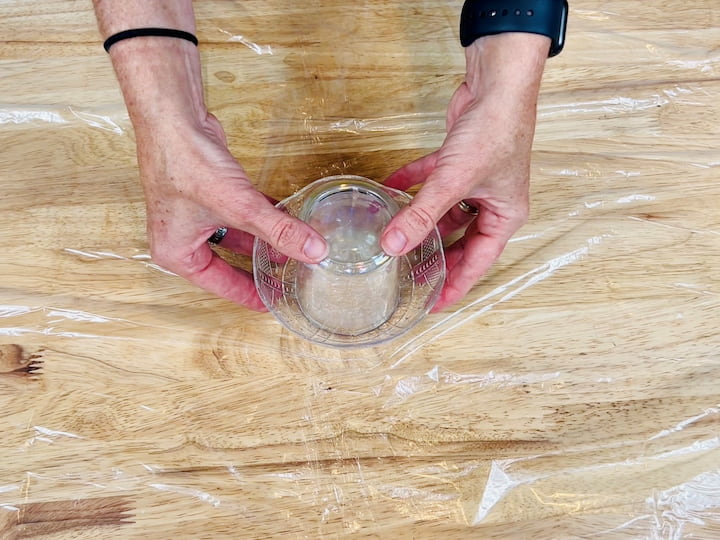
2. Place the candle holder in the bowl
The next thing I’m going to do is take my votive candle holder here and I’ve gone ahead and removed the sticker off of the bottom. It doesn’t really matter for what we’re going to do but I’m going to place the open end into the bottom of the bowl and make sure it’s nice and solid in there.
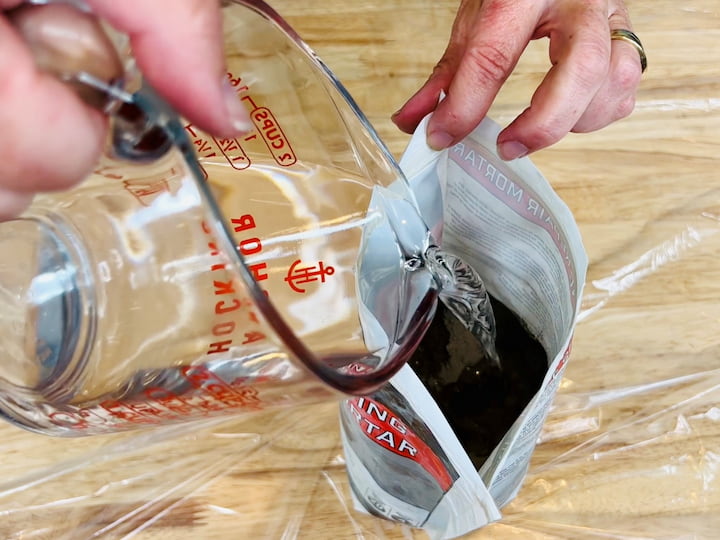
3. Mix the Mortar according to the package instructions
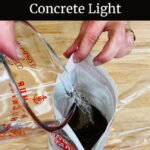
I have my fast-setting repair mortar in a three-pound bag that is a zip lock and I have 10 ounces of water according to the package instructions. I’ve gone ahead and opened the bag and I made sure to save the Ziploc. You can see the mortar that’s inside of there and we’re going to be putting the water into the bag and zip locking it closed.
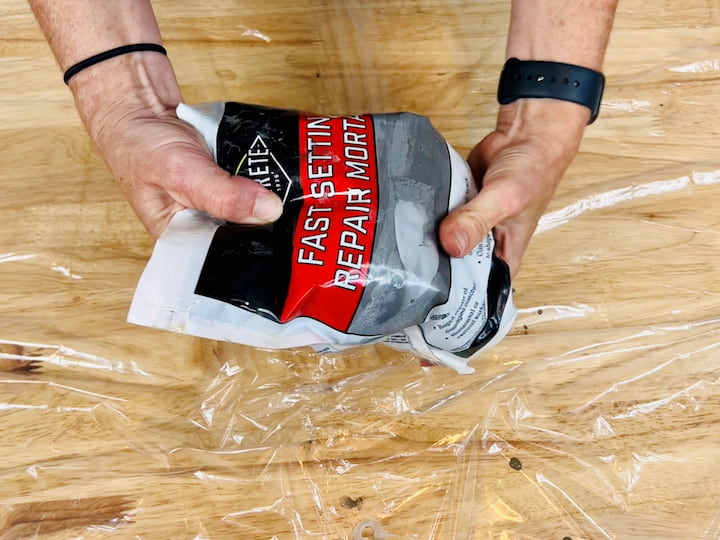
Next, I place all of the water in the bag, and then I’m going to ziplock it closed and I’m going to squeeze all the air out of the bag. Now that it’s all sealed up I start kneading the bag so I’m going to go ahead and just squeeze it like so you’re mixing all those dry and liquid ingredients. Tipping the bag to get it nice and smooth and if it feels too thick you can always add a little water but I’m going to keep doing this until the entire mixture in the bag is mixed together.
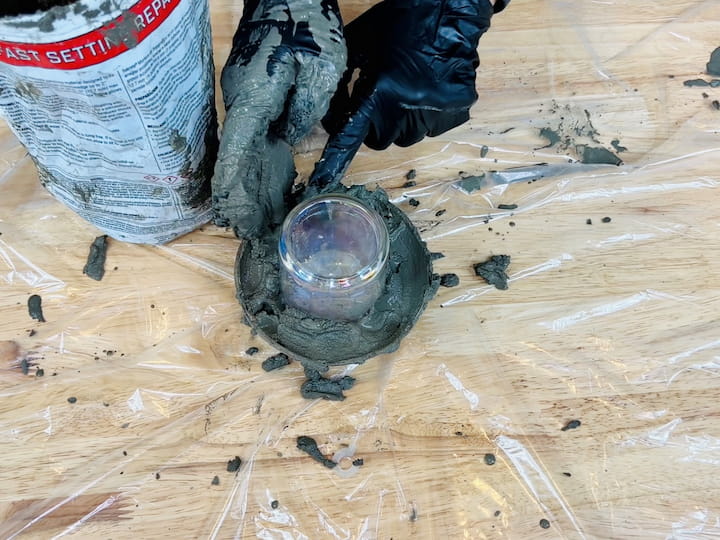
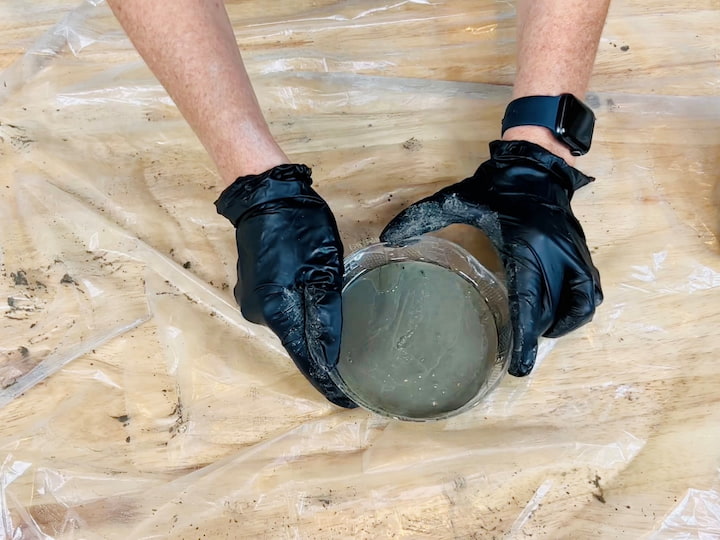
4. Place the mortar into the bowl around the candle holder
I’m going to go ahead and place it into the bowl and then once I got the texture or the amount I’m kind of looking for in there I’m gonna go ahead and give it a tap. I want to make sure that I can let all the air bubbles out I don’t want any bubbles in it and then I want it to even out in addition to that so I’m going to give it a little tap so that it starts leveling out.
I’m gonna let it dry for 24 hours before I do anything more with it. Now if you got a little mortar on your candle holder don’t worry about it you can just wipe it off with a baby wipe or wet paper towel and you can do it later as well so if you’re worried about bumping your mortar you can always wait on this step as well.
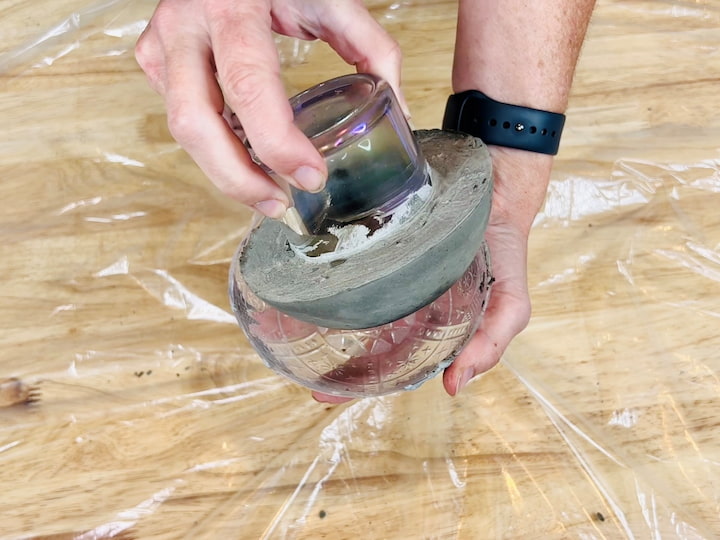
5. Remove the concrete from the bowl once cured
Now that this is set up I’m going to you can see that it changed color. I’m going to pull it out and you can see here so this is still water but what is great about this is you can trim this out if you want you can shape this if you want. We’re going to go ahead and let that cure a little bit more before we move onto the next step. in the meantime, while I’m waiting for that to dry up we’re going to clean this bowl out because we’re going to need it again
6. Clean out the bowl and spray it again
I’ve got my bowl all cleaned out I’ve got my cooking spray again. I’m going to go ahead and give it a good coating of spray we want to make sure it’s nice and coated again so that comes up nice and easily the second time. We’ll do something a little different this time.
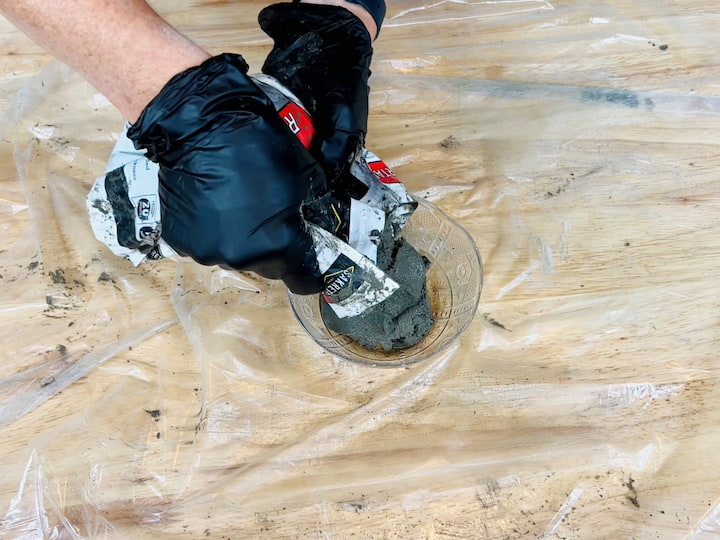
7. Mix the Mortar
Just like before I’m gonna cut the top off put the 10 ounces of water in a sealed squeeze out the air and knead the bag until it’s mixed thoroughly.
8. Place the mortar in the bowl
I’m bringing back my bowl. I’ve got my cement mortar together I’m gonna go ahead and give it a little bit more of a mix just to make sure as it comes out here and this time. I’m just gonna squeeze it directly into the bowl so you can choose as much or as little as you want, but we’re gonna go ahead and stick that in there like so and then just like before I’m gonna tap it down to get out air bubbles and get it nice and level.
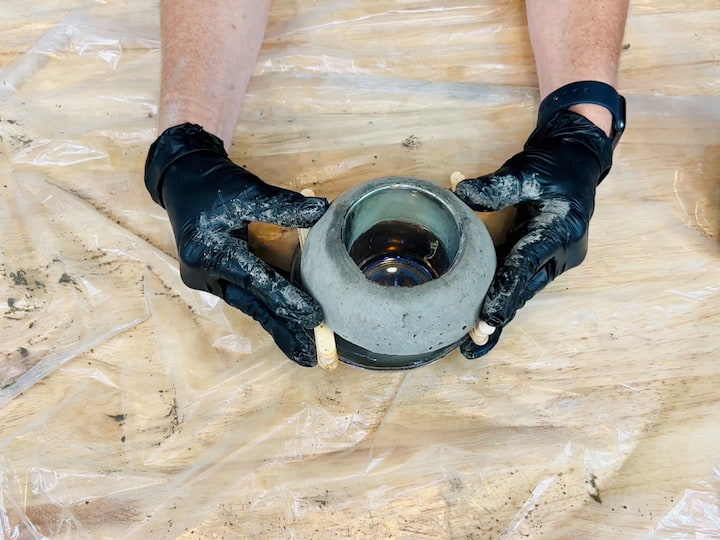
9. place the candle holder into the bowl
It’s really up to you how you want to do this next step. I’m going to be using some craft sticks, and I’m using approximately 10. You can use as many or as few, as you want I’m lining them all up side by side and then I’m just going to use some painter’s tape but you could use whatever tape you want just need them to stay together. You could also glue them together if you want I’m just going to go ahead and stick that tape on and I’m gonna do this twice.
Now I bring my sticks back and I’m going to want them to stay upright but for now, I’m going to set them aside. I’m going to place the first piece the other way but now I want to make sure that I have that gap so I’m gonna place these sticks in there to hold this pin place and then I need to center it up so that it’s nice and in the center of the bowl. Then again giving it a little tap to make sure that all the air bubbles are out and that we’re leveling and looks nice and even so I’m going to leave that now for 24 hours. I’m going to go ahead and let that dry completely before we move on to the next step
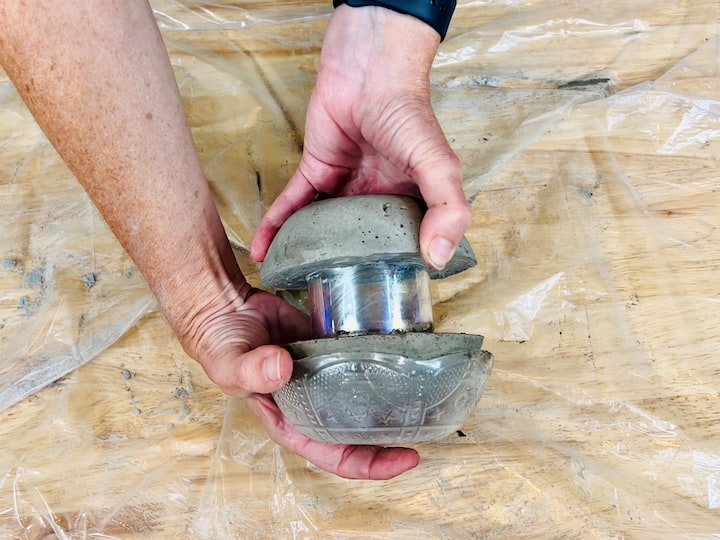
10 Remove the concrete from the bowl once cured
Now that it’s had time to cure carefully remove all my popsicle sticks and then I’m going to turn it sideways and then carefully remove the bowl. Now I need to wait until this sets and then we will move on to the next step
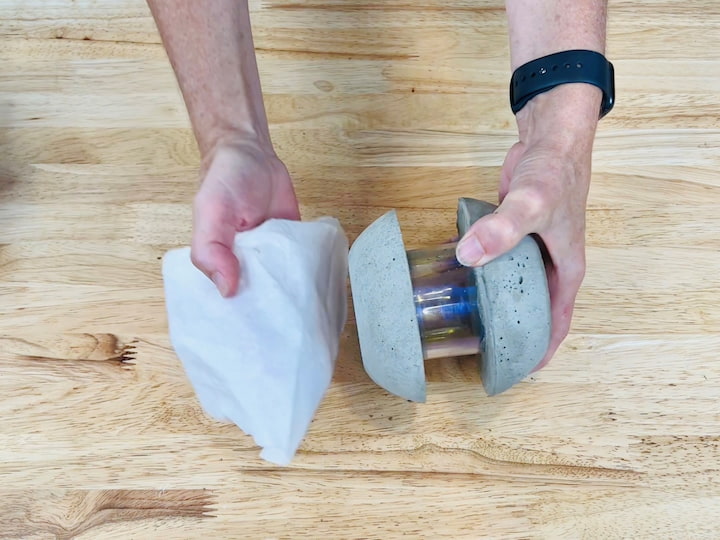
11. Clean up the glass and smooth the cement
Now that it’s dry we’re just going to clean it up a bit so I’m just going to take some baby wipes you could use a paper towel whatever you want. I’m just going to wipe this clean and wipe out the inside too you could take some Windex but we’re just gonna get off some of the extra that we don’t want there. You can scrape away at any of these little pieces that you maybe don’t want you can sand up edges super easy way to clean it up.
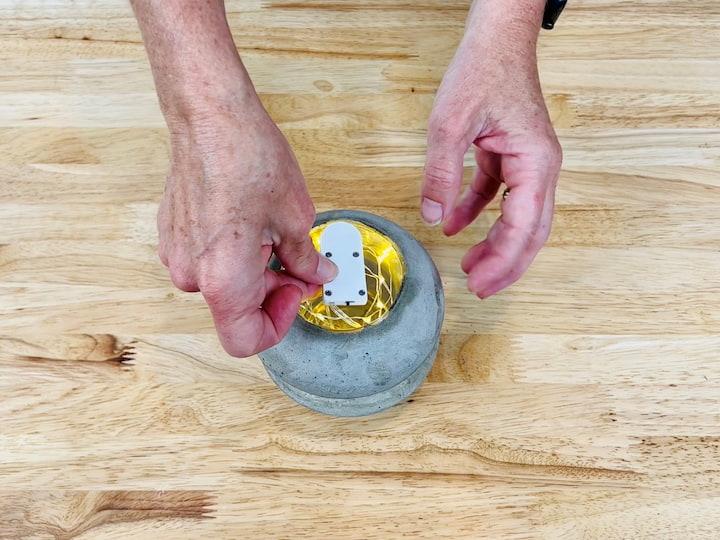
12. Add LED lights
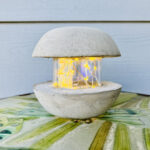
So what I’ve got now is a set of battery-led lights you could buy some that come with a remote but I’m just going to place them inside the glass and then this will set at the bottom. We’re gonna go ahead and tip it here now and you can see what this will look like and what we’re making is a supercool lamp and then we’ll tip it this direction so that it sits this way and the switch is at the bottom.
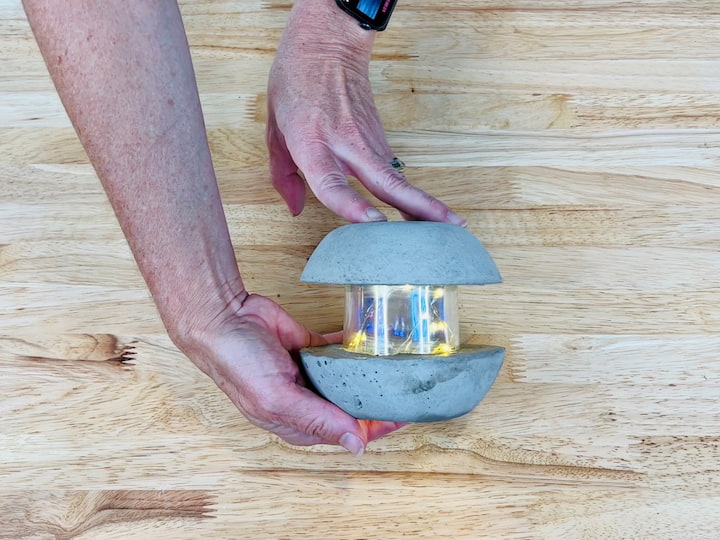
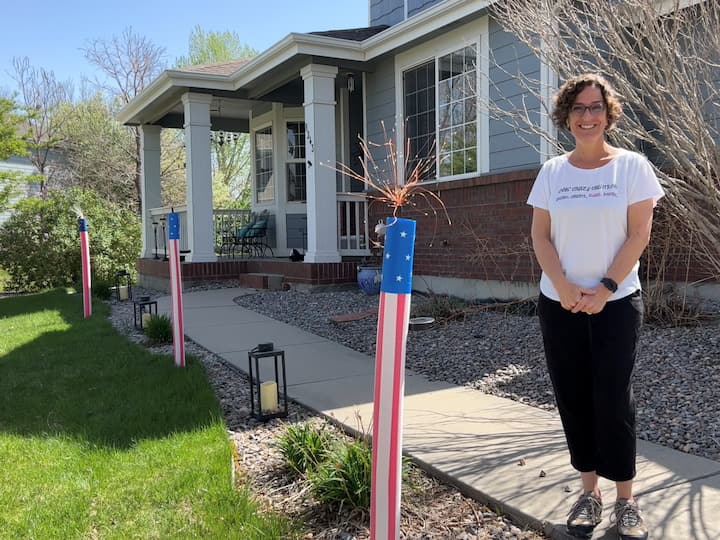
Let’s go set it up and take a look now you could put these in so many different places.
- you could put them along your railing outside as you could see we have a railing out here
- you can put them along your walkway up to your home and have a little remote that turns these on and off
- you can put them inside and your trending home a lamp somewhere inside your home

We’re going to put them outside on our front porch so that we have a fun added glow and it will hold up against the elements outside.
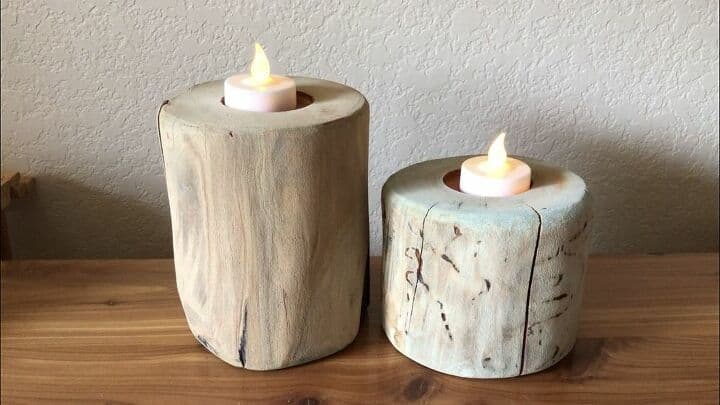
You might also be interested in some of my other outdoor decor DIYs
- Easy Dollar Tree DIY Mushroom Solar Light Decor with Video
- Super Easy Dollar Tree Candle Holders DIY To Light Up Your Life
- Super Cute Turtle Terra Cotta Pot DIY For Your Home

What can you make with concrete?
You can have so much fun creating lighting designs. Create light fixtures, make things in custom sizes, and place them as a focal point in your living room. It only takes a few simple steps to make a light source or even perhaps a dining table.
- concrete pendant lights
- concrete lamps
- concrete shade
- concrete lighting
- concrete pendant lamp
- table lamp
- mini pendant
- outdoor lighting
- concrete garden light
I hope this inspires you to create some concrete lamps of your own I’d love it if you’d subscribe to my youtube channel and my blog atchatscrazycreations.com thanks for watching and I’ll see you in my next video and don’t forget to like share and subscribe
You can see a whole collection of ideas that I’ve made with concrete in this post: The Ultimate Guide to Concrete Crafts
Super Cool and Easy DIY Dollar Tree Concrete Light Video
Shop any of these stores and I receive a small commission at no cost to you.
 SUMMIT COLLECTION Frank Llo…Shop on Amazon
 Briarwood Cement Votive Hol…Shop on Amazon
 Amazon Brand – Rivet Mid-…Shop on AmazonShop on Amazon
") Sullivans Two-Toned Grey Ce…Shop on Amazon
Sullivans Two-Toned Grey Ce…Shop on Amazon

Super Cool and Easy DIY Dollar Tree Concrete Light
Equipment
- None
Materials
- Fast Setting Repair Mortar
- Candle Holder
- Plastic Bowls
- LED lights
Instructions
- PREP THE BOWL
- PLACE THE CANDLE HOLDER IN THE BOWL
- MIX THE MORTAR ACCORDING TO THE PACKAGE INSTRUCTIONS
- PLACE THE MORTAR INTO THE BOWL AROUND THE CANDLE HOLDER
- REMOVE THE CONCRETE FROM THE BOWL ONCE CURED
- CLEAN OUT THE BOWL AND SPRAY IT AGAIN
- MIX THE MORTAR
- PLACE THE MORTAR IN THE BOWL
- PLACE THE CANDLE HOLDER INTO THE BOWL
- REMOVE THE CONCRETE FROM THE BOWL ONCE CURED
- CLEAN UP THE GLASS AND SMOOTH THE CEMENT
- ADD LED LIGHTS
Video