
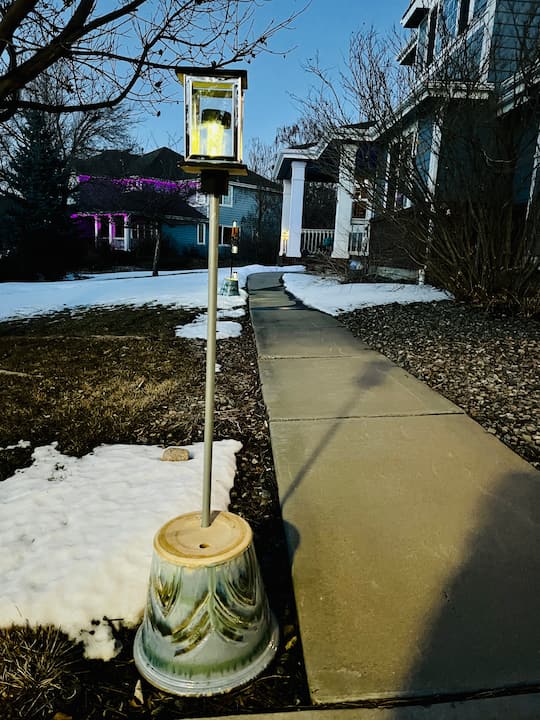
From Candle Holder to Solarabra!
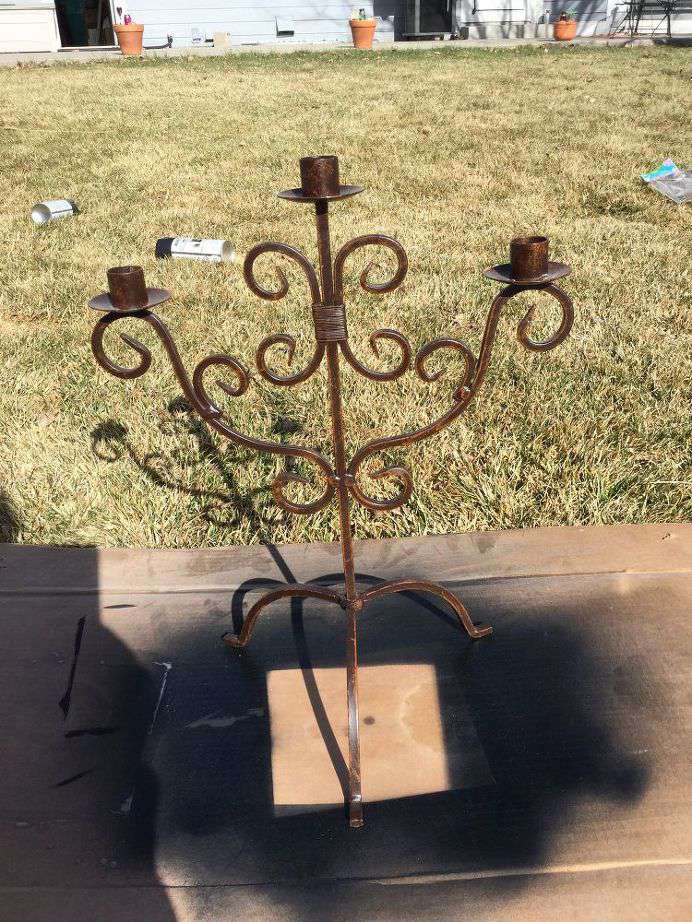
I ran across this candle holder chandelier at a thrift store. I just knew what I wanted to turn it into… a Solarabra!
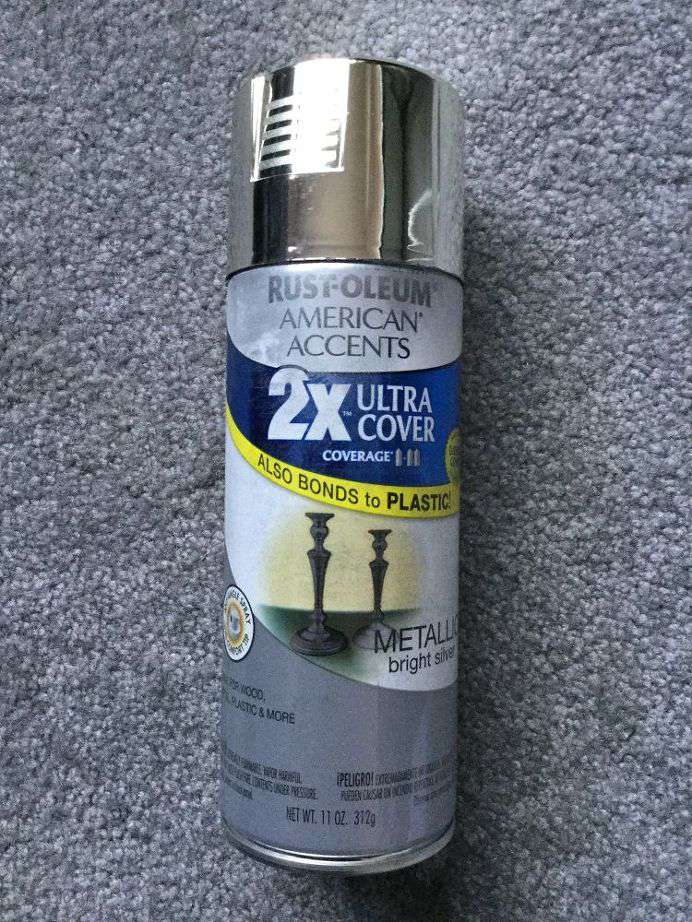
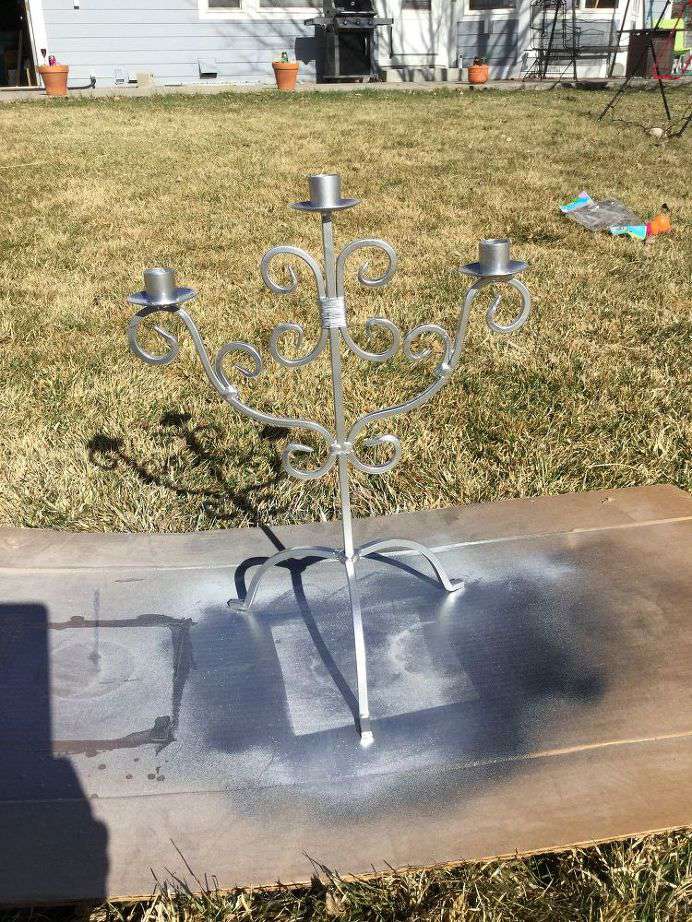
I had some Rustoleum Metallic spray from a previous project. I sprayed the whole thing with one light coat and let it dry. I sprayed it with a second coat and let it dry.
I then tipped it to spray paint the bottom and any missed spots and let it dry completely.
I put silicone in the candle holder holes.
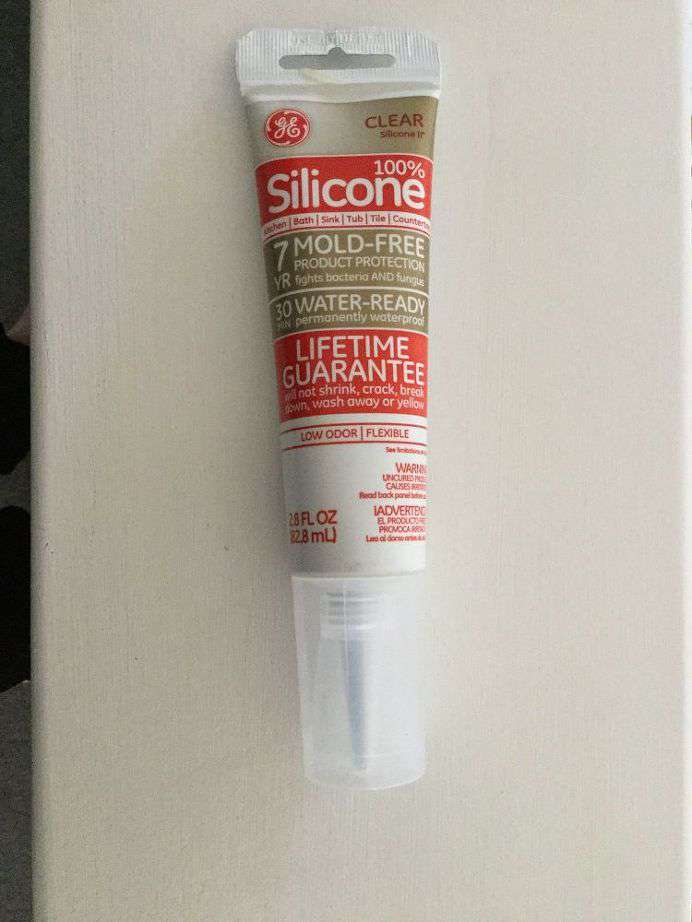
I pulled the pole base off of 3 solar lights from Walmart and stuck them into the silicone. The silicone will hold them in the place and this kind is good for outdoor use. If my solar lights go bad, I will be able to pull them out of the holder. I’ll have to clean out the old silicone (which is not super fun but doable) and then put new silicone in and add new solar lights.
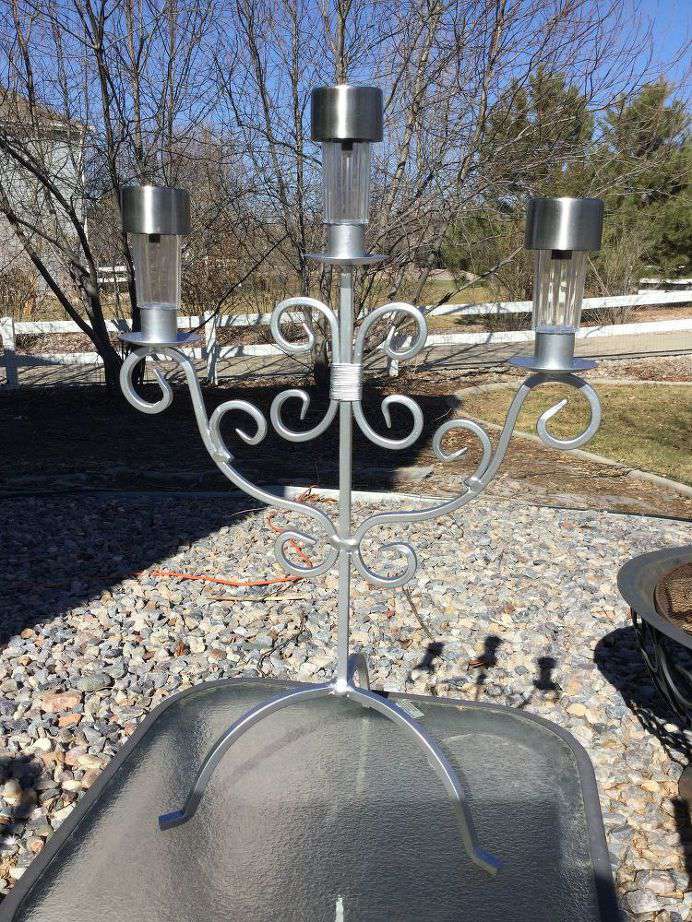
I let the silicone harden for 24 hours and then it was finished.
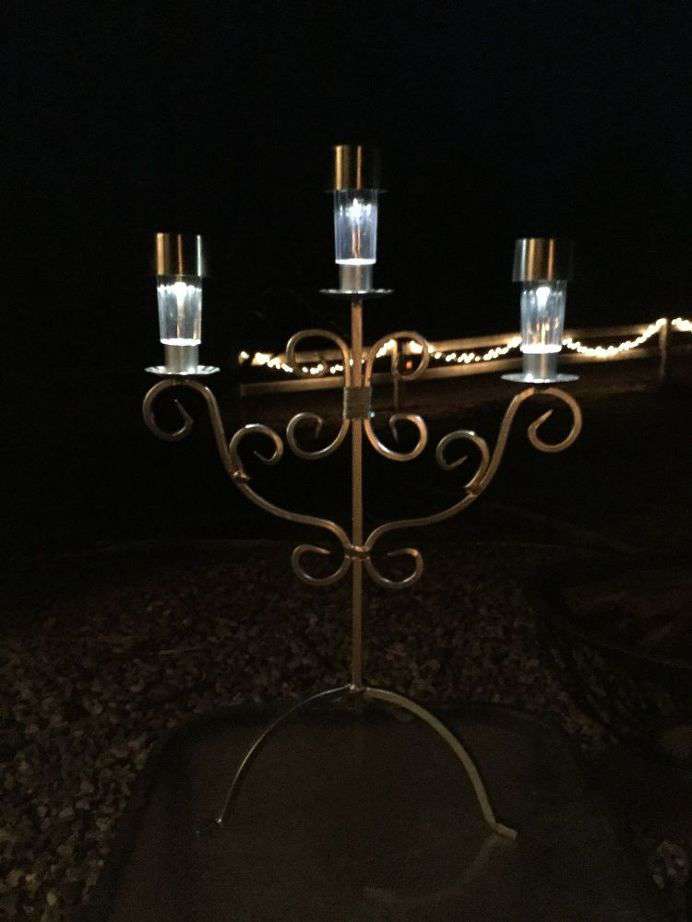
Here is the solarabra at night. I love how it turned out and how it adds to my patio.
Subscribe to my blog
and get my crazy creations delivered straight to you inbox.
Never miss a project, update, or latest news!
&
I’d love for you to visit my YouTube Channel and subscribe
Chas’ Crazy Creations YouTube
Find out “What Exactly Does It Mean To Repurpose Or Upcycle“, save money, and create the most amazing things.
As seen on Hometalk – click here to see the video!

Check out some of my other solar projects!


This is so cute, we have a few of these lights just on spikes but they look like so much more this way. This will be one of the features at Handmade Monday later on today 🙂
Thank you so very much for the feature Julie, see you later today 🙂
Very cool idea! One tip…solar powered lights are actually powered by a battery that gets recharged as the sunlight hits it. If you pop off the very top of your lights, you should find the battery compartment. When your light goes “bad” just replace the battery. No need to completely pull out the whole fixture. 🙂
Thank you so much Jill, and thanks for sharing that with everyone. When I designed these I was keeping that in mind as well as you can twist off the lid and replace it with a new Dollar Tree light if needed as well.
I love a good upcycle and especially when fun outdoor solar light is involved. It turned out great! So glad you party with us at Merry Monday Chas!
Thank you so much Shirley, thanks for stopping by and I’ll see you next week.
This is so good, I love solar and this is so clever. Very creative and looks great.
We will feature this on the next Blogger’s Pit Stop.
Kathleen
Blogger’s Pit Stop
Thank you Kathleen, and I’m so pleased you like it. I am so grateful for the feature, thank you so much at see you at the next party!
This is fantastic. I have a very tall candelabra for 1 large candle and plan to redo it like you. Thanks for the idea.
Thanks for posting at Funtastic Friday.
Thank you so much Michele! I love that you want to do this to yours too.
What a great word – Solarabra! Love this idea, Chas. It’s so pretty and would add light to the garden is in such a sustainable way. Thank you so much for sharing, and for being a part of the Hearth and Soul Link Party. Have a lovely week!
Thank you April, it is one of my favorite pieces. Thank you for always hosting a fun party and all the support.
Love it! What a pretty yard you must have a night with all of your solar lights. 🙂
Thank you Linda, and I do love it. So far the neighbors don’t seem to mind all the lights I have lol. ☺️
Hi Chas! Another cool light fixture ~ already pinned. 🙂 I keep thinking I’ll make one one of these days. Probably once we move into our next house.
Happy creating,
Barb 🙂
Thank you Barbara, and I’m sure it will be so fun to make some projects for your next home. Thanks for the Pin!
I LOVE IT.. VALUE VILLAGE IN ONTARIO CANADA IS MY GO TO STORE FOR TERRIFIC INEXPENSIVE ITEMS… NOW I WILL BE LOOKING FOR SOMETHING LIKE THIS.. I LOVE YOUR IDEAS.. SUCH A CREATIVE MIND,, KEEP THINKING, LOL
Thank you so much Gail and I love that you are a thrifty gal. I’m so excited you want to make one too.