
Pouring Teapot & Tea Cup
I originally made a pouring teapot and tea cup display for my yard. I decided to upgrade it with a challenge from Hometalk and the inspiration from a Hometalk post you can find here.
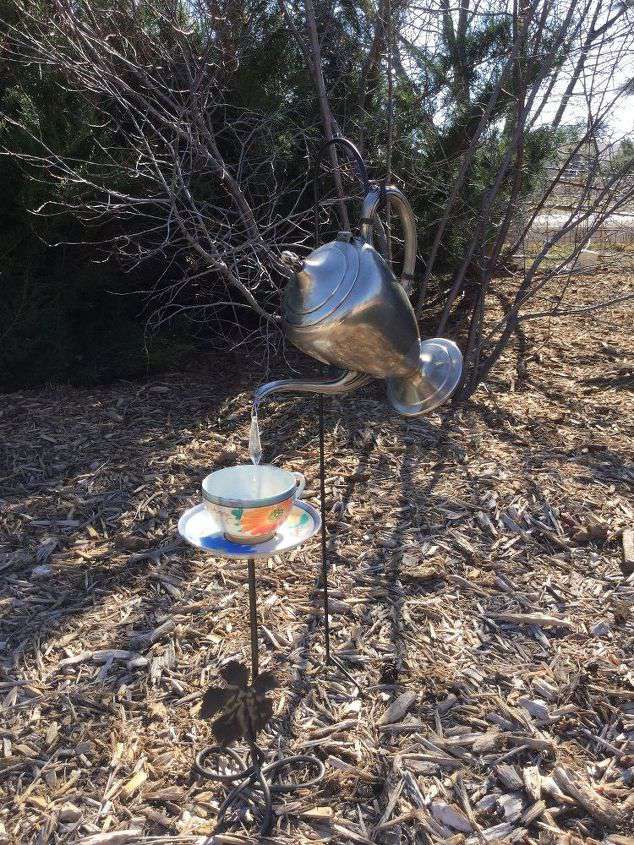
Here is the original I made and you can find the tutorial for it here
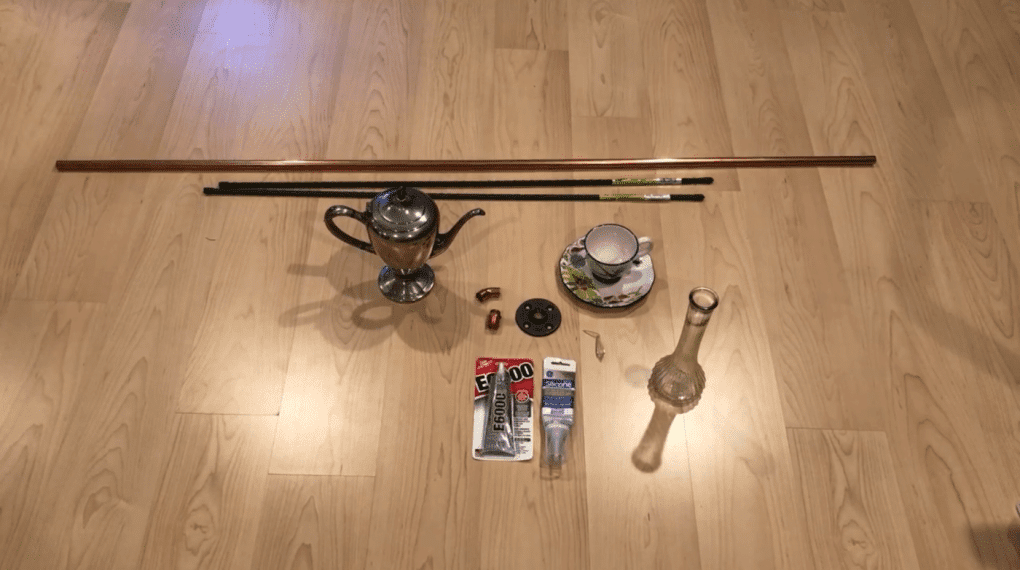
To do this project you’ll need:
Teapot, Tea Cup & Saucer, Floral Vase, E6000, Silicone, 5 Ft. 1/2 ” Copper Pipe, 2 garden stakes, 1/2″ galvanized floor flange, 1/2″ copper male adapter, 1/2″ copper elbow, crystal decoration, copper tube cutter
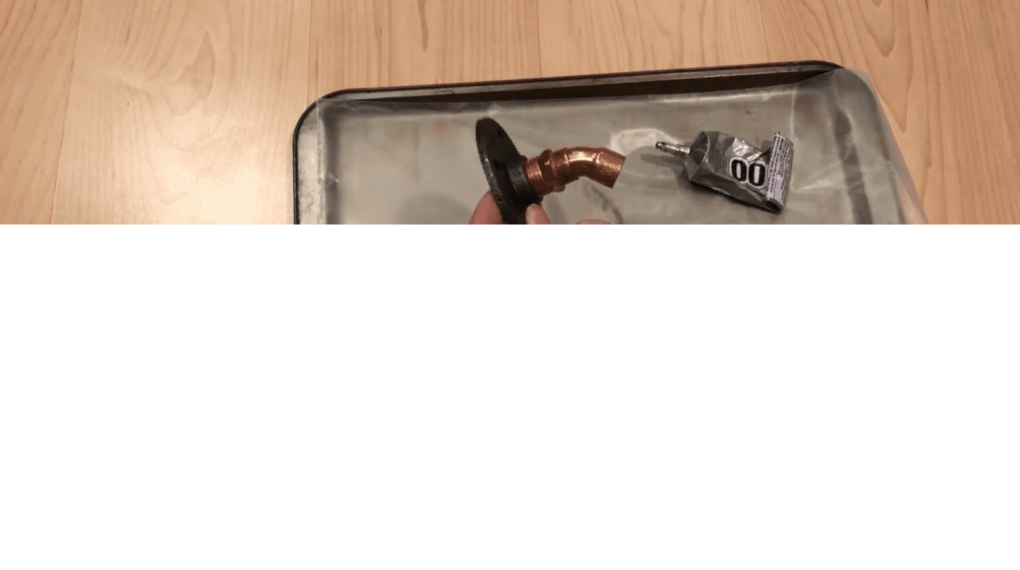
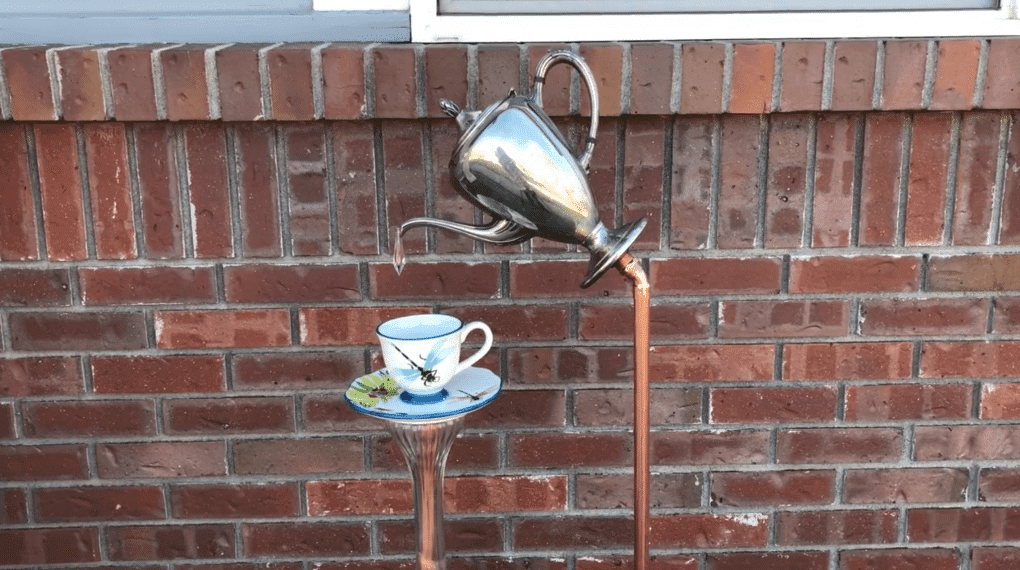
Screw the male adapter into the flange, and E6000 your elbow into the male adapter.

Use the silicone to adhere the flange onto the bottom of the teapot. Let everything dry for 24 hours.

Place silicone on the bottom of the flower vase.

Place the vase on the bottom of the saucer of the tea cup.
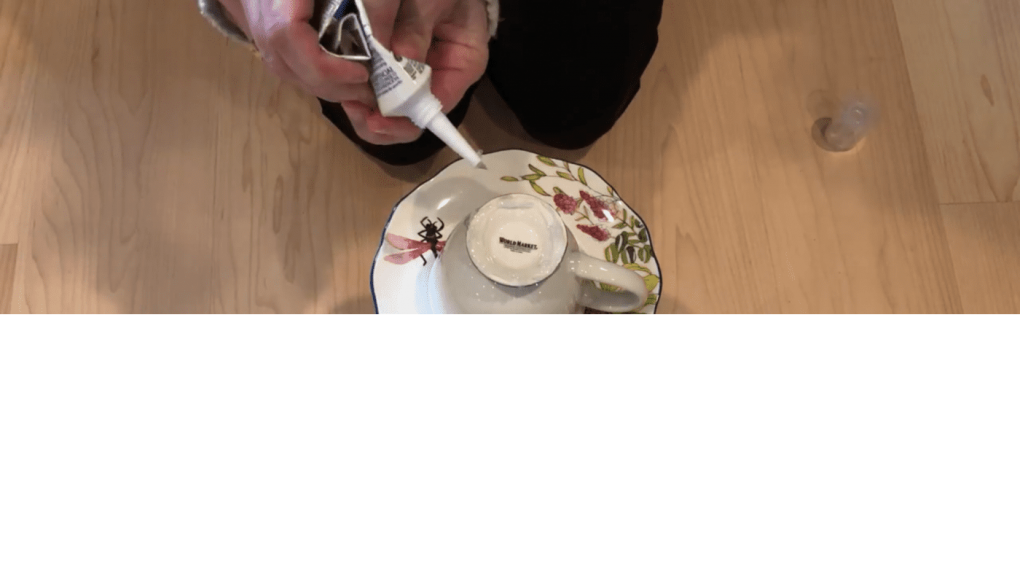
Place silicone on the bottom of the tea cup.
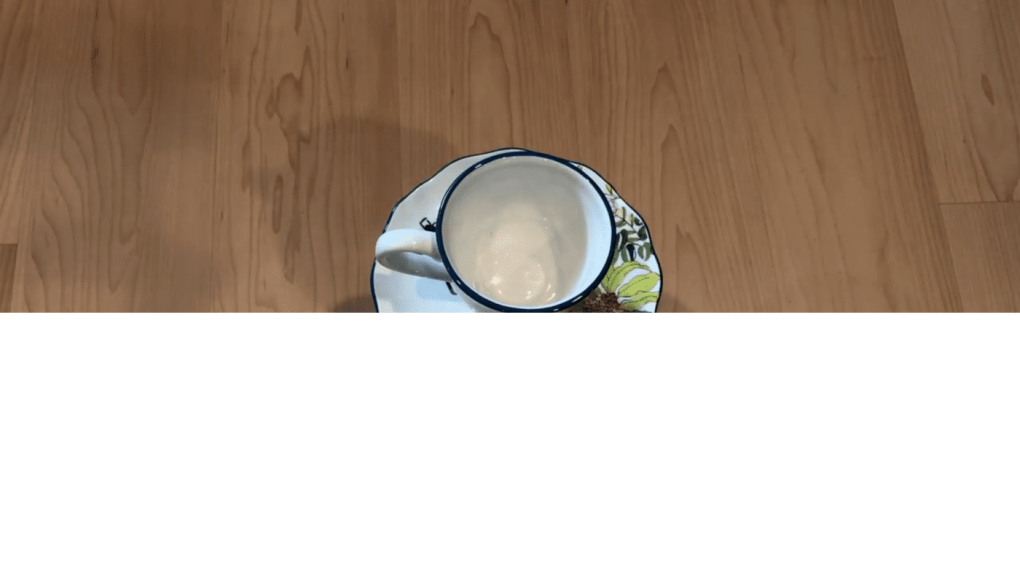
Place the tea cup on the saucer, and let the whole thing dry for 24 hours.
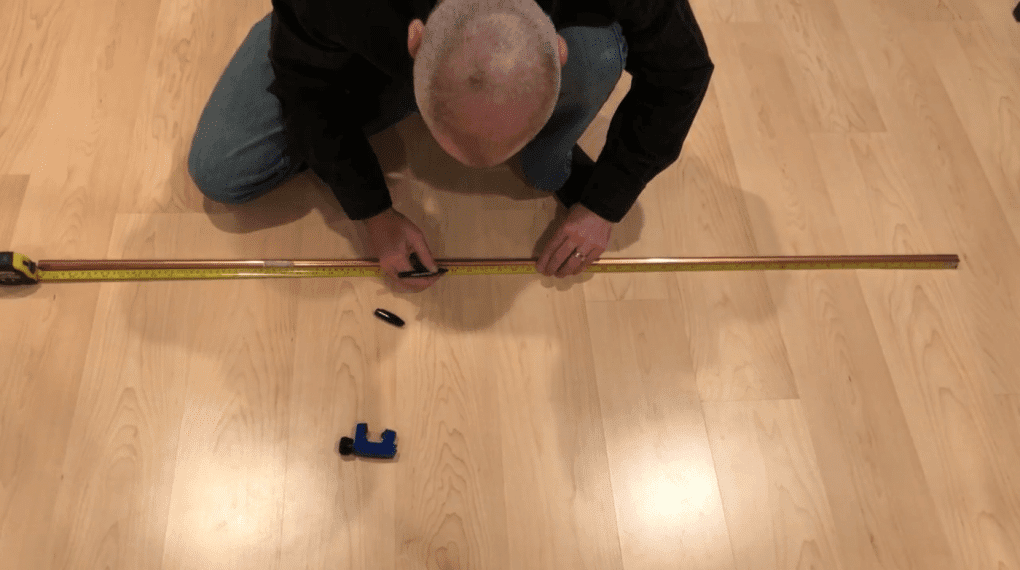
Measure your copper pipe mark with a sharpie where you would like to cut it. We cut the pipe at 34″.

We used a copper tube cutter to cut the pipe where we wanted it to be cut.
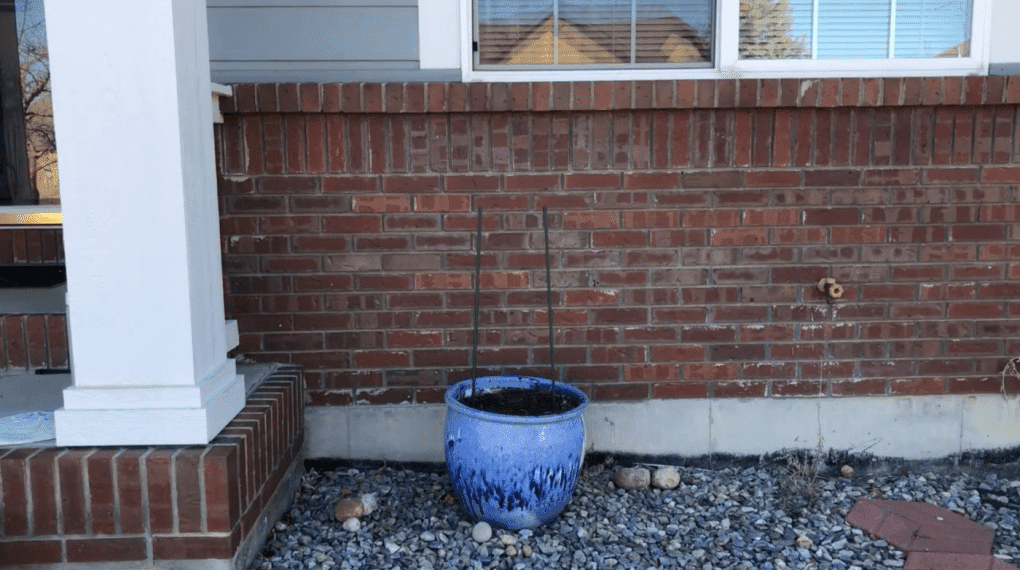
Now to put it together – place the garden stakes in the ground or in a large flower pot.
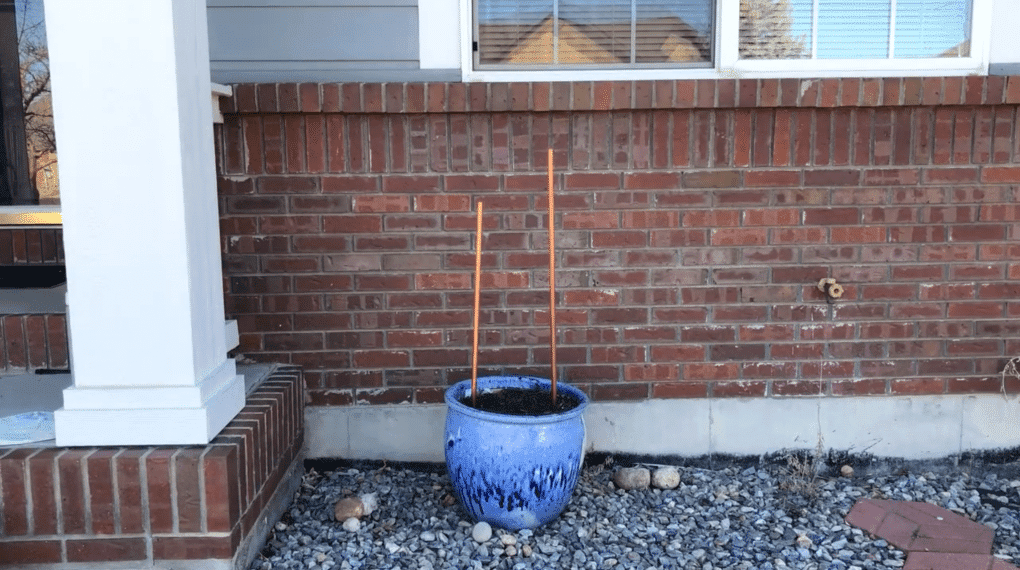
Place the copper pipe over the garden stakes.
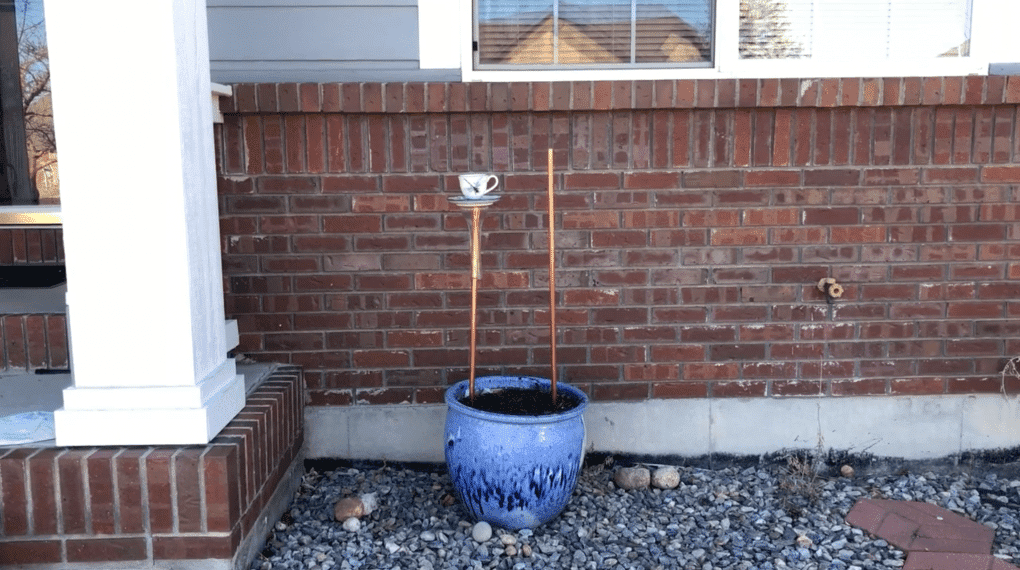
Place the teacup on one of the copper pipes.
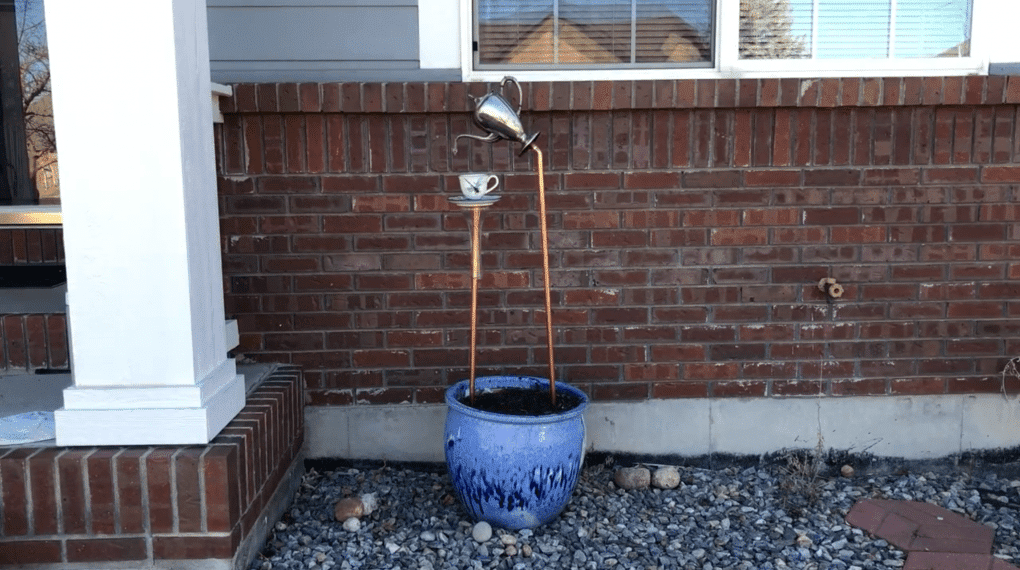
Place the teapot on the other copper pipe.
That’s it, your done 🙂
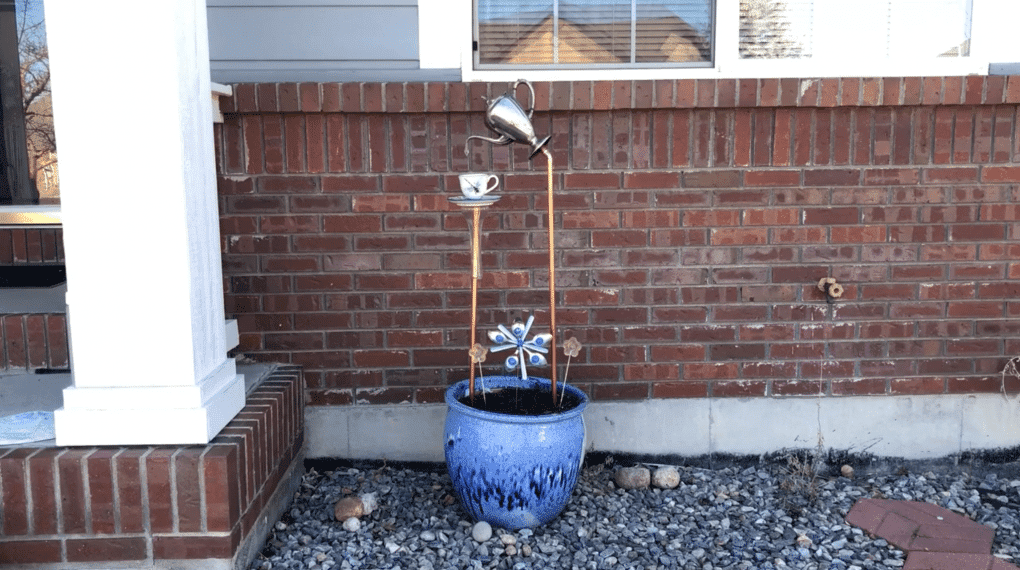
I decorated around with with some of my other crazy creations.
Subscribe to my blog
and get my crazy creations delivered straight to you inbox.
Never miss a project, update, or latest news!
&
I’d love for you to visit my YouTube Channel and subscribe
Chas’ Crazy Creations YouTube
Click the photo below to see the video…


This is such a great way to decorate in the garden. I bet your pouring teapot cup gets a lot of attention and compliments. Thank you for linking up with us at the #HomeMattersParty linky.
Thank you Nicole and I do love decorating my yard with fun things.
What a fun garden decoration! Thank you for sharing the how to’s at the Hearth and Soul Link Party. Sharing on the party’s Facebook page later today. Have a great week, Chas!
Thank you April, always look forward to your party (thanks for hosting)! Thank you for the FB share too!
How creative, I love it. I’m picturing this display surrounded by beautiful flowers this summer. Thanks for sharing on Sunday’s Best.
Thank you Rhonda, that’s exactly where mine will be too. It’s still winter here with a side of spring – lol. I got it out there to take the pictures, but am looking forward to moving it to the garden soon.
Love this project. I have some tea cups and a pot that needs some lovin.
Please stop by Thursday Favorite Things since you are being featured.
Hugs,
Bev
Thank you Beverly and thanks for letting me know I’m being featured, what an honor!
That’s fabulous, I love tea so this would be just perfect in our garden! Do you glue the crystal decoration to the tea pot or is it attached in some other way?
Thank you Julie and that is a great question! I will have to double check and add that to my instructions (thanks for letting me know). I used silicone to glue my crystal to my tea pot 🙂
Too cute! Perfect for tea lovers!
Thank you so much – you are right, perfect for us tea lovers. Looking forward to the next tea exchange, how about you!
That is just so awesome and good team work to make it happen.
Kathleen
Thank you Kathleen 🙂
That is crazy cute lady bug! I might have to try my hand at that too! So glad to find your blog at the blog party now I am following ya forEVER!
You are just so sweet Susan! Thank you so much and if you decide to give it a try – please send me pictures 🙂
What a clever idea! Love it :).
Thank you Teodora 🙂
Very clever! I love this project.
Thank you Virginia 🙂
I love the concept. Most likely I m doing something similar as we love having a tea ritual .. thanks
Thank you Andy and I’m so thrilled you want to give it a try 🙂
That is awesome!
Thanks Linda 🙂