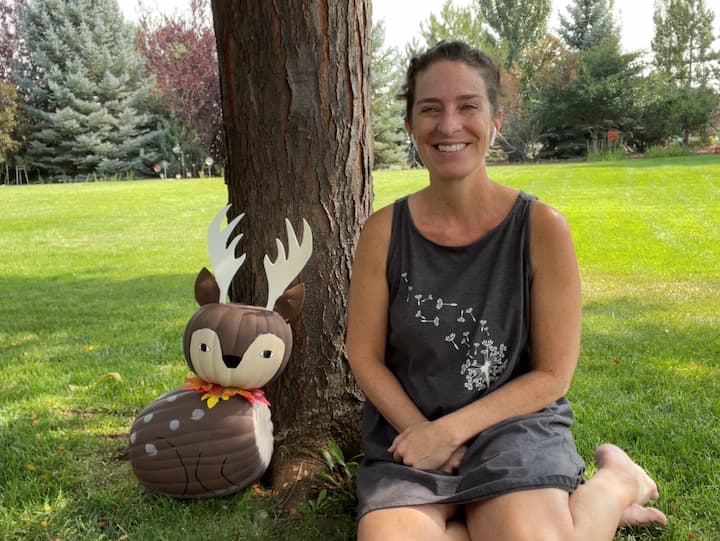
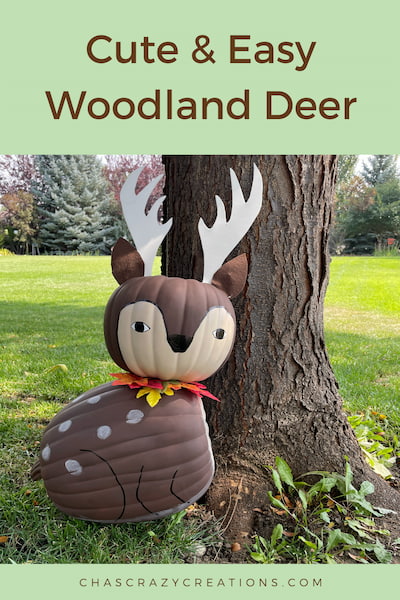
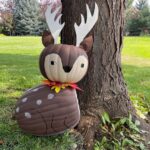
Cute and Easy Pumpkin Craft Idea Deer with Video
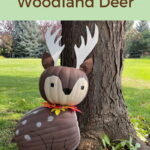
Do you want an easy pumpkin craft idea? This is one of my favorite pumpkin crafts. It is a great way to turn a foam pumpkin into a cute deer that you can keep up year-round with just a few simple changes. You can let your imagination run wild with fun ideas to turn these adorable pumpkins into other fun animals appropriate for any time of year. This is a fun craft for kids of all ages and the entire family, but keep little hands clear when using the knife, let an adult do the cutting.
materials needed for a Simple pumpkin craft deer
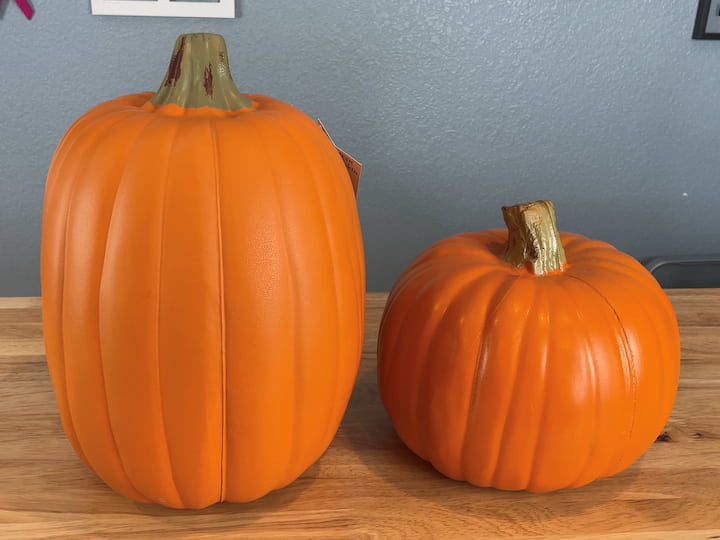
- 1 round and 1 tall pumpkin (not real pumpkins)
- Apple Barrel multisurface paint
- paint brush
- hot glue gun
- brown felt
- white craft foam
- scissors
- leaves
- permanent marker
- chalk
Pumpkin Craft Idea Video
Here are the deer craft instructions
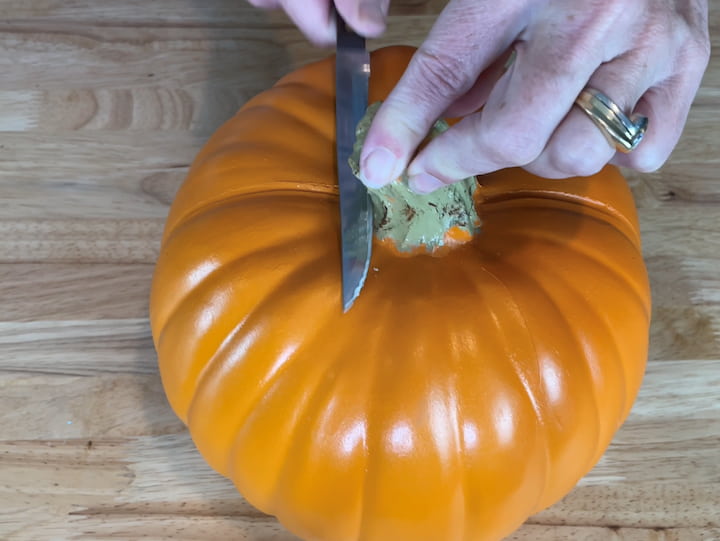
1. Cut the stem off the round pumpkin
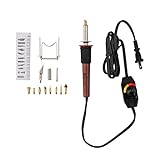
I cut the stem off of the round pumpkin. I like to use my Plaid Wood Burning Tool Kit that has a knife tool. This is the perfect way to cut through these foam pumpkins. The tool heats up and cuts through the foam like butter.
How do you cut a pumpkin for crafting?
You can use pumpkin carving tools, a serrated knife, or a wood-burning tool with a knife accessory. You might be interested in seeing my carved faux pumpkins and how I make them look more realistic.
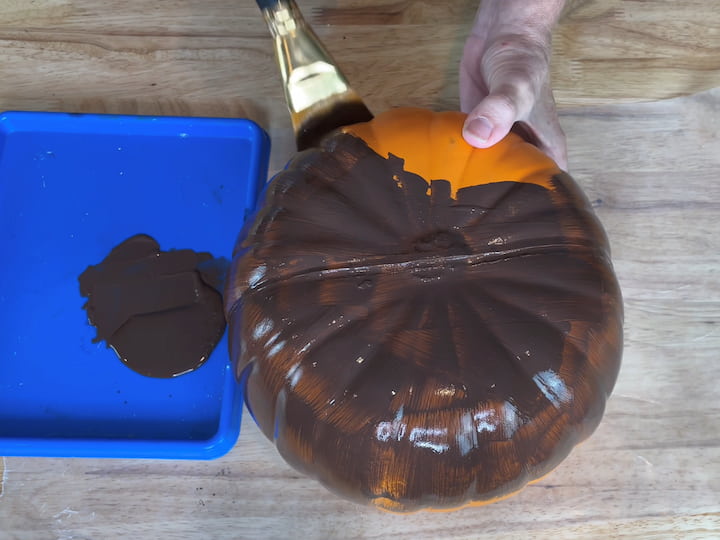
2. Paint both craft pumpkins
I used Apple Barrel Multisurface paint in the color Burnt Umber to paint both pumpkins. Each pumpkin needed 2 coats of paint and I let them dry between coats. Once they were painted with the second coat, I let them dry completely.

Can you paint craft pumpkins?
Yes, you can paint craft pumpkins. Acrylic and chalk paint works well. The only thing to consider is where you’ll be putting your pumpkin. If you’ll be keeping them inside as part of your home decor, you have a lot of flexibility on which paint you’ll be using. If you are putting your pumpkin outside, then you’ll want paint that is safe for outdoors. Check the bottle of paint for clarity on which surfaces it’s good for as well as if it can be inside or out.
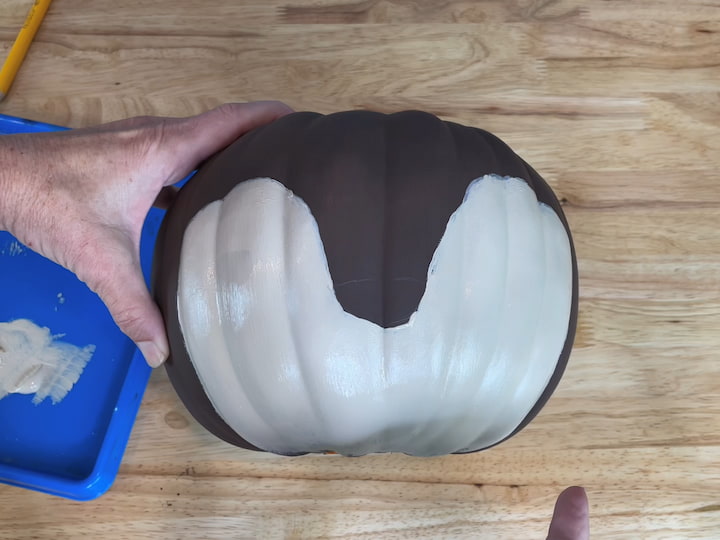
3. Paint the second layer of color on your pumpkin
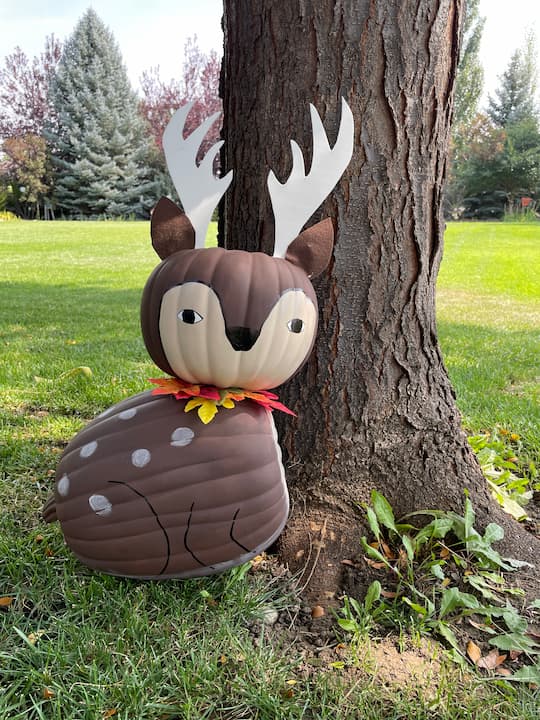
I drew on the outline of a face for my deer on the round pumpkin. I used Apple Barrel paint in the color warm buff to paint the lighter color of the face.
I added the warm buff paint to the bottom of the tall pumpkin, and this would become the chest of the deer.
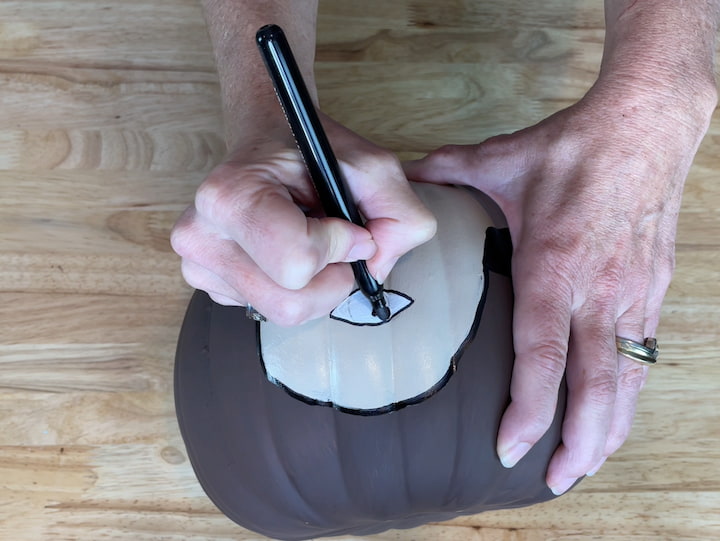
4. Draw on the face of the deer
I used a permanent marker and drew the outline of the face between the 2 colors of paint. I colored in a black nose. I painted on white eyes, and then outlined the eyes with the black permanent marker and colored in the center of the eye.
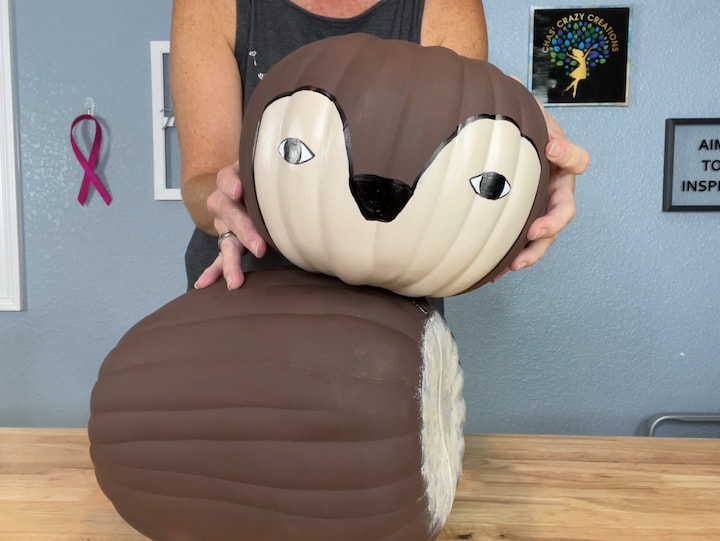
5. Hot Glue on the deer head
I used my Ryobi hot glue gun and glued the small pumpkin head onto the side of the tall pumpkin body.
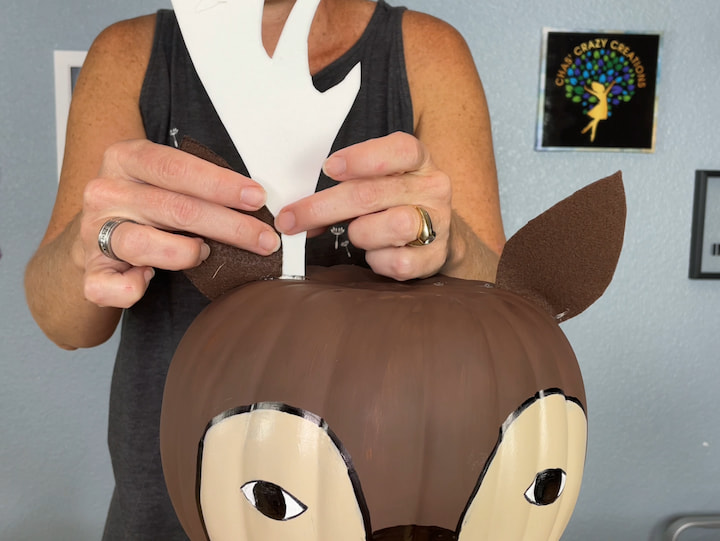
6. Hot glue on the ears and antlers
I cut 2 ears out of brown felt, and 2 antlers out of white craft foam. I hot glued the ears and antlers to the head of the deer on the round pumpkin.
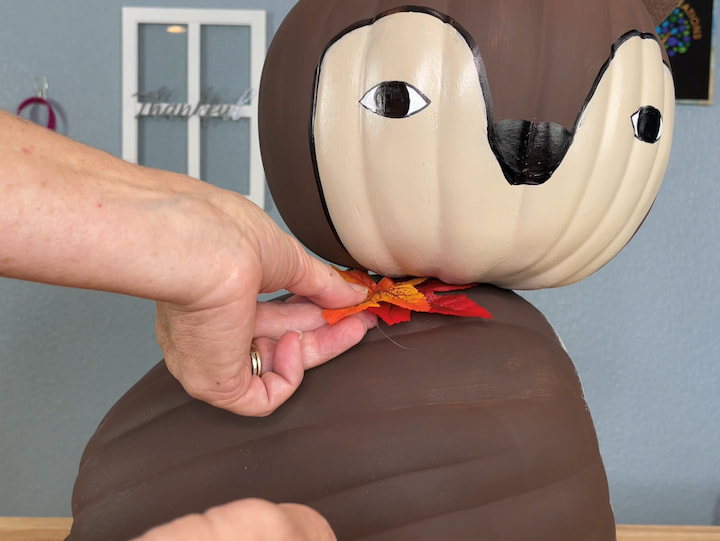
7. Add decor around the neck
I added leaves around the neck of my deer. I left them somewhat loose so that I could change it up per season. Maybe some bells for winter, flowers for spring and summer.
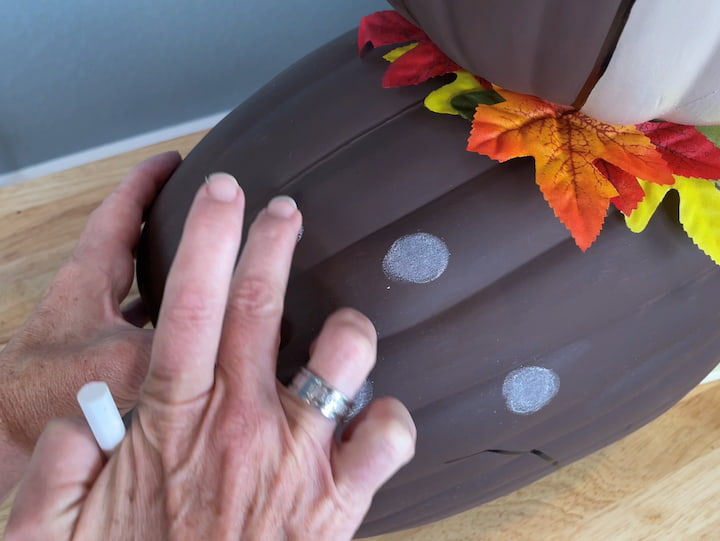
8. Add other embellishments to the body
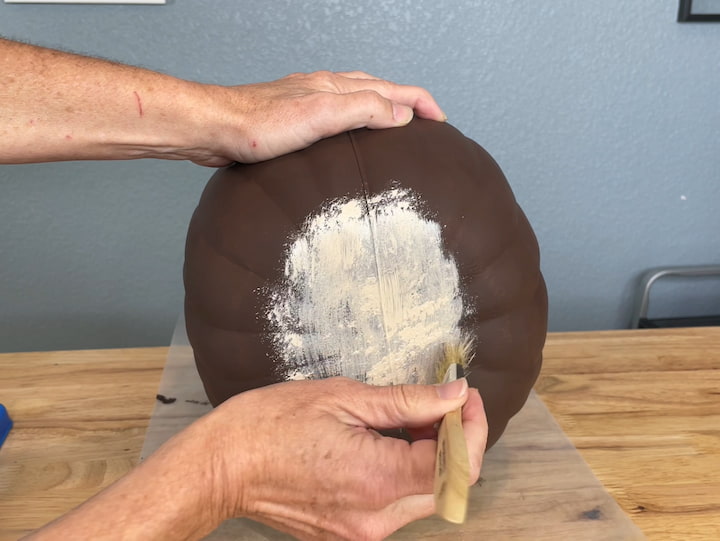
I used a permanent marker to draw on some leg structures on the tall pumpkin. I used some chalk to create some fawn dots on the back of the deer.
You can also add this to your list of Halloween crafts to go along with your other pumpkin activities. If you have arty crafty kids they could even make an entire pumpkin patch or buy foam mini pumpkins for a pumpkin theme display. This is a simple craft you can do even when it’s not pumpkin season.
What can I do with a craft pumpkin?
Here are some easy pumpkin crafts and cute pumpkin crafts. These easy crafts can be adjusted using little pumpkins, or large pumpkins.
Here are some more pumpkin craft ideas:
- tissue paper pumpkin craft
- Use paper plates to make pumpkins, whether just an orange pumpkin or a jack o lantern, this is a fun paper plate pumpkin craft. A favorite pumpkin craft idea: we used to paint a pumpkin orange and then add some glue and sprinkle the plate with pumpkin spice so it smelled like pumpkin pie
- Yarn pumpkins and these are great for older kids
- If you like Charlie Brown you can make pumpkin rocks
- Make a button pumpkin on a picture frame
- Make toilet paper roll pumpkins
- Pumpkin salt painting
- Make patchwork pumpkins with scraps of paper
Have a fun time and happy crafting!!
Learn more about “Creating Seasonal Decor for Your Home” to create seasonal decor that doesn’t cost an arm and a leg.
Check out some of my other pumpkin-related posts!
- Bud Vase Pumpkins & Ghosts!
- Easy DIY Pumpkin Hat on a Budget: 2 Options
- Pumpkin Candle Holder Upcycles
Cute and Easy Pumpkin Craft Idea Deer Video
Shop any of these stores and I receive a small commission at no cost to you.


Cute and Easy Pumpkin Craft Idea Deer with Video
Equipment
- Hot Glue Gun
Materials
- 1 round and 1 tall pumpkin
- Apple Barrel multisurface paint
- paint brush
- brown felt
- white craft foam
- scissors
- leaves
- permanent marker
- chalk
Instructions
- CUT THE STEM OFF THE ROUND PUMPKIN
- PAINT BOTH CRAFT PUMPKINS
- PAINT THE SECOND LAYER OF COLOR ON YOUR PUMPKIN
- DRAW ON THE FACE OF THE DEER
- HOT GLUE ON THE DEER HEAD
- HOT GLUE ON THE EARS AND ANTLERS
- ADD DECOR AROUND THE NECK
- ADD OTHER EMBELLISHMENTS TO THE BODY