
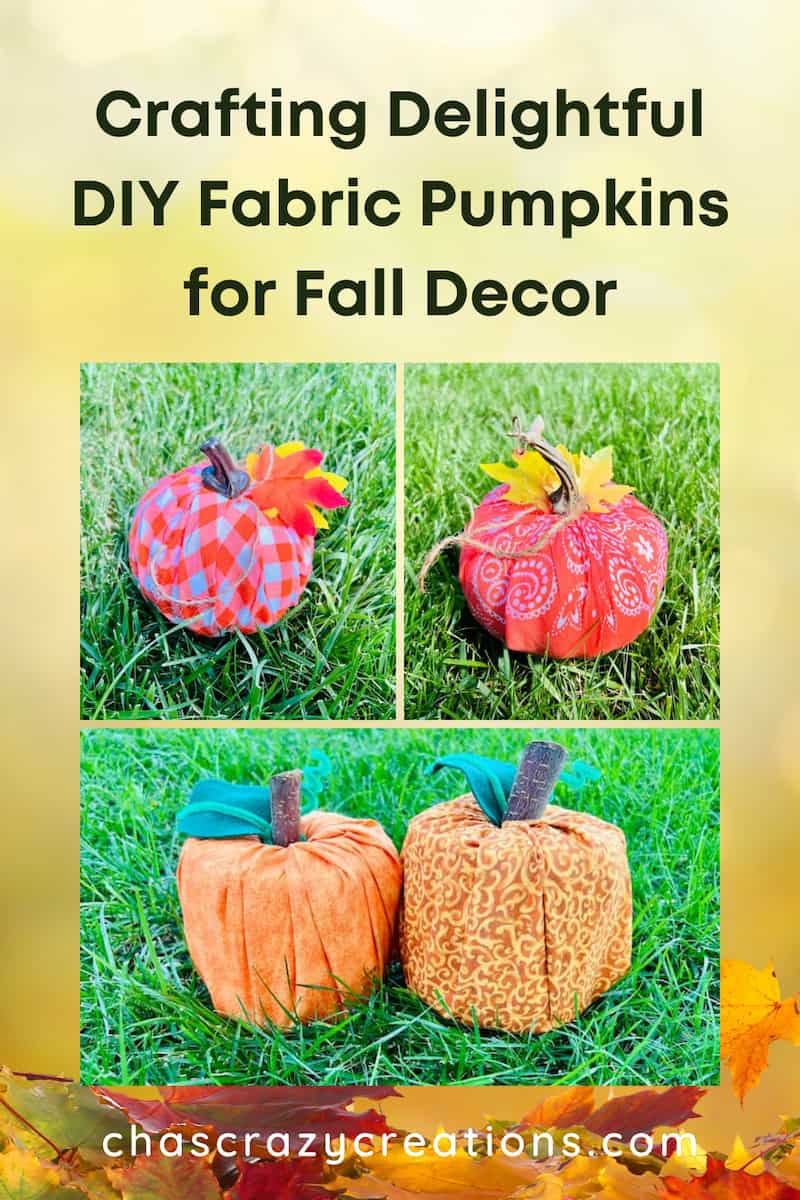
Crafting Delightful DIY Fabric Pumpkins for Fall Decor
Fall is just around the corner, and what better way to usher in the season than with some cozy and creative decorations? If you’re a fan of all things crafty, we’ve got the perfect project for you: DIY fabric pumpkins! These charming little creations are not only fun to make, but they also add a touch of autumnal flair to your home. Whether you’re an experienced crafter or a newbie looking to dive into the world of DIY, these fabric pumpkins are a fantastic choice. So, let’s roll up our sleeves, grab our materials, and get started!
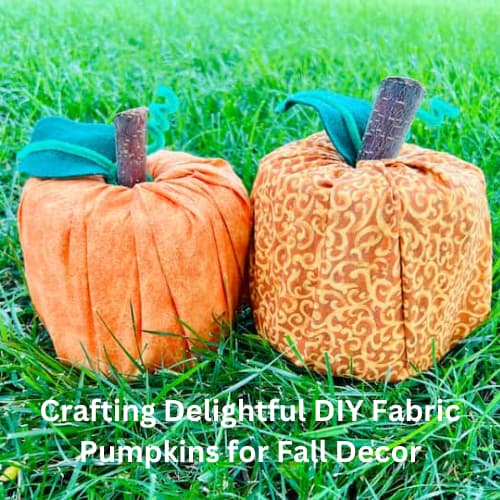
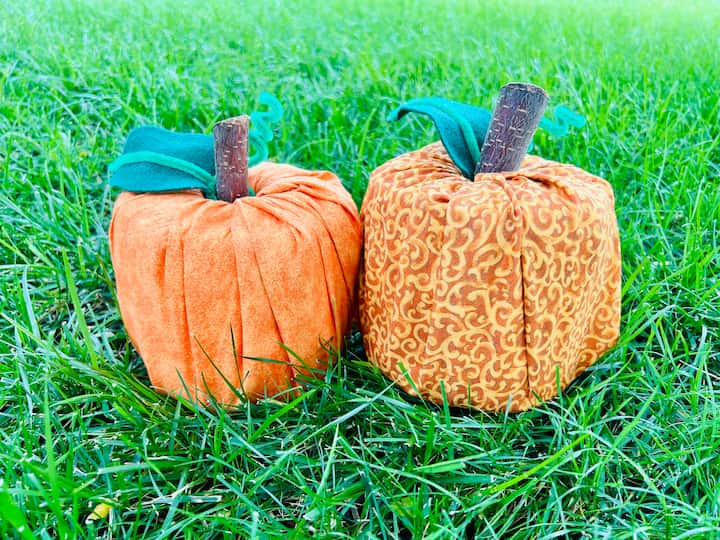
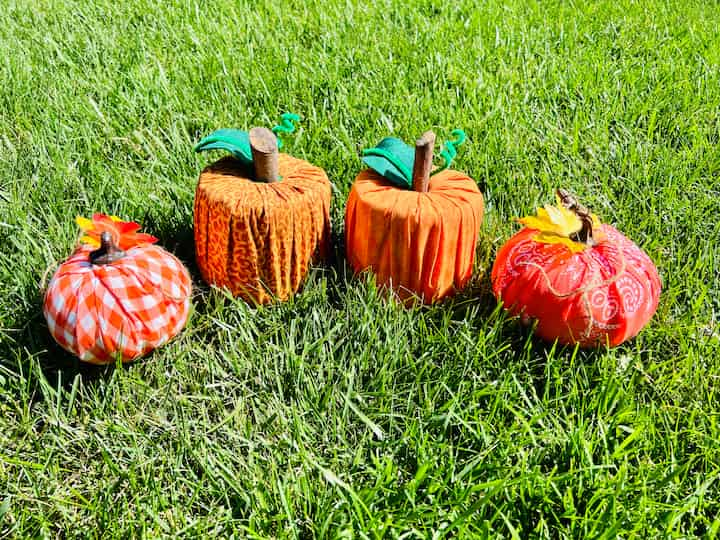
These no sew fabric pumpkins are easy for anyone including kids to make. I like decor that I can use for several months. These fabric pumpkins are the perfect fall decor from Halloween through Thanksgiving. They are a useful item (hides toilet paper), and they pack away nicely at the end of the season.
Crafting Delightful DIY Fabric Pumpkins for Fall Decor Video
DIY Fabric Pumpkins Materials You’ll Need:
- Fabric of your choice (approx. 17 inches by 22 inches)
- Foam pumpkins (or styrofoam or plastic pumpkins)
- Toilet paper roll (for the first method)
- Green felt (for leaves)
- Green pipe cleaner (for curlicue stem)
- Stick or alternative stem material (cinnamon stick, brown paper bag, etc.)
- Hot glue gun and glue sticks
- Twine
- Scissors
- Faux leaves (optional)
- Fabric ribbon (optional)
How do you make a simple fabric pumpkin?
DIY Fabric Pumpkins Instructions
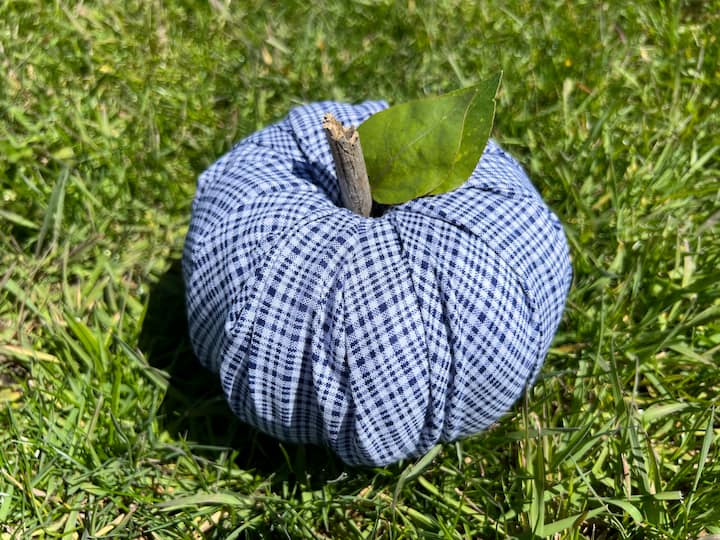
Fabric-Covered Toilet Paper Roll Pumpkin
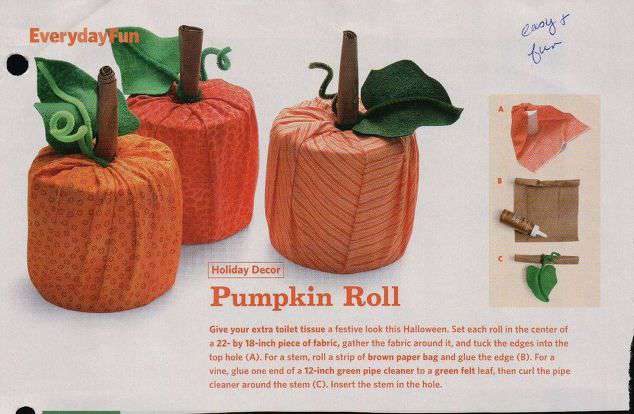
For years now I have been making these toilet paper pumpkins. I originally found the article in Disney’s Family Fun Magazine (I saved the article). I have made some moderations to mine…

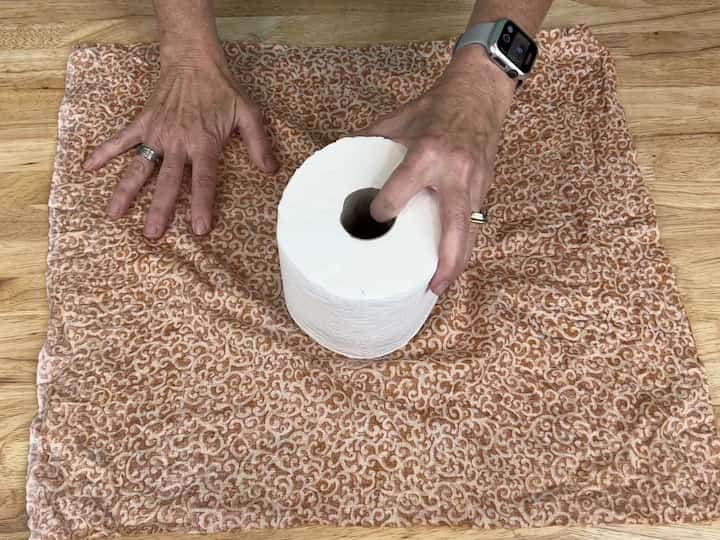
My fabric measures 17″x 22″. I just cut it, and I didn’t do anything to the ends. I have made these for over 15 years now, and I haven’t had too much unraveling happen in that time.
Put your toilet paper in the center of the fabric.
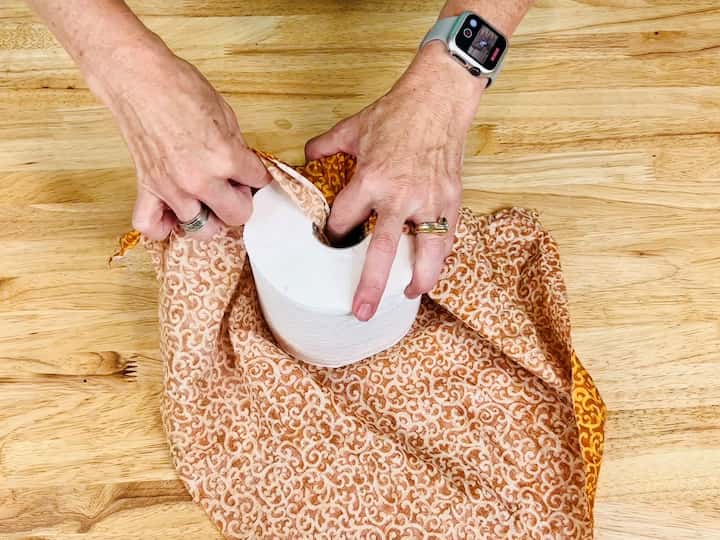
Start by tucking in a corner.
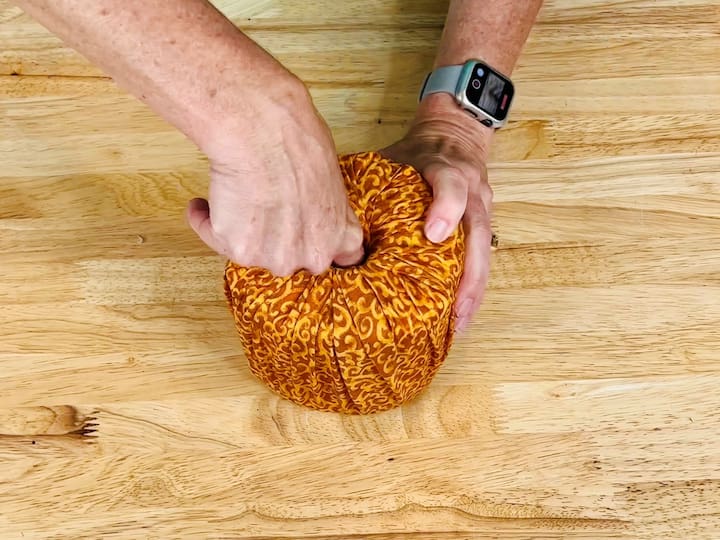
Working your way around the toilet paper, keep stuffing in the fabric creating your desired look. This forms the top of the pumpkin.
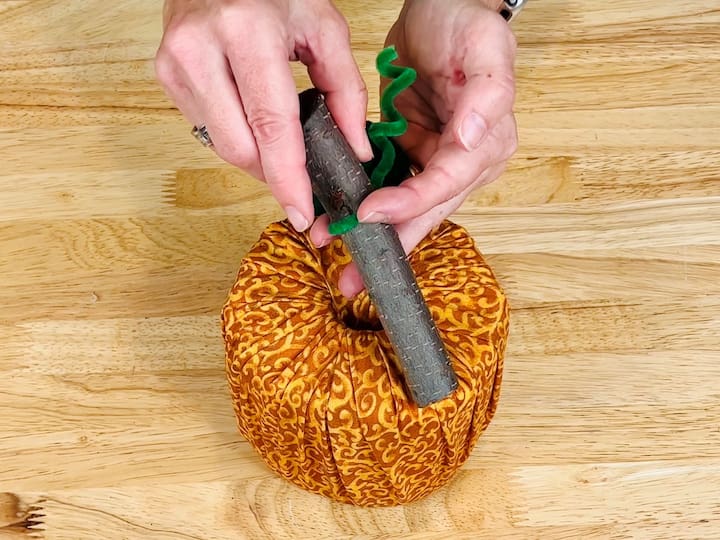
Add your stem. I used a stick/branch, but you can use a rolled up piece of brown paper bag as the original suggests.
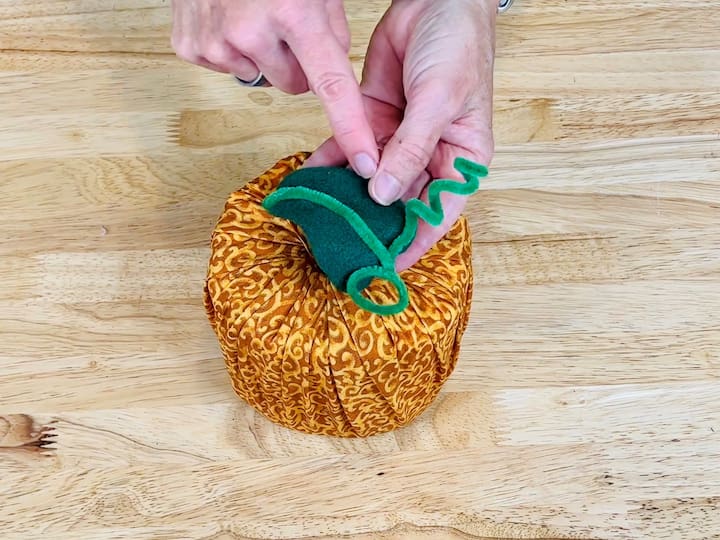
Cut a leaf shape out of the felt. Make a circle with the pipe cleaner to go around the stem. For the spiral – wrap the pipe cleaner around a pencil.
Hot glue the other half of the pipe cleaner to the front of the leaf.
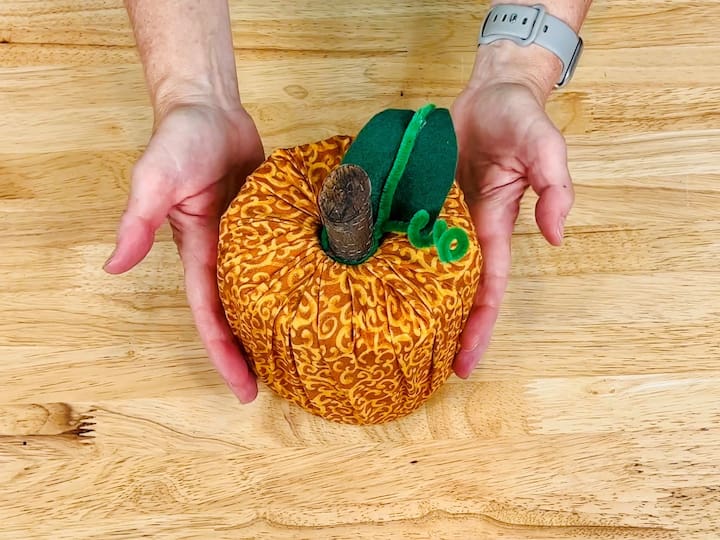
Slide the leaf onto the stem and you’re done.
When the season is over, put the toilet paper away, fold up your fabric, and put it along with your sticks and leaves into storage. That’s it. Great project for kids parties, mom’s night out, party favors, etc. If you make one I’d love to see yours!
Shop any of these stores and I receive a small commission at no cost to you.
 Cottonelle Ultra ComfortCar…Shop on Amazon
  Plain Weave Fabric by The Yard - for Sewing Fashion Apparel, Decor, & More (Orange, 1 Yard)") Cotton Polyester Broadcloth…Shop on Amazon
Cotton Polyester Broadcloth…Shop on Amazon  1X36 Oak DowelShop on Amazon
 Beistle Autumn Leaves Cutou…Shop on Amazon
Styrofoam Pumpkin with Fabric Covering
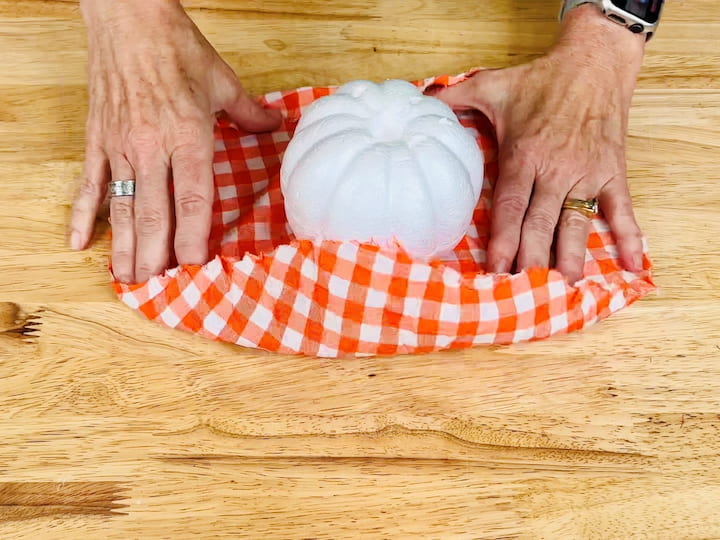
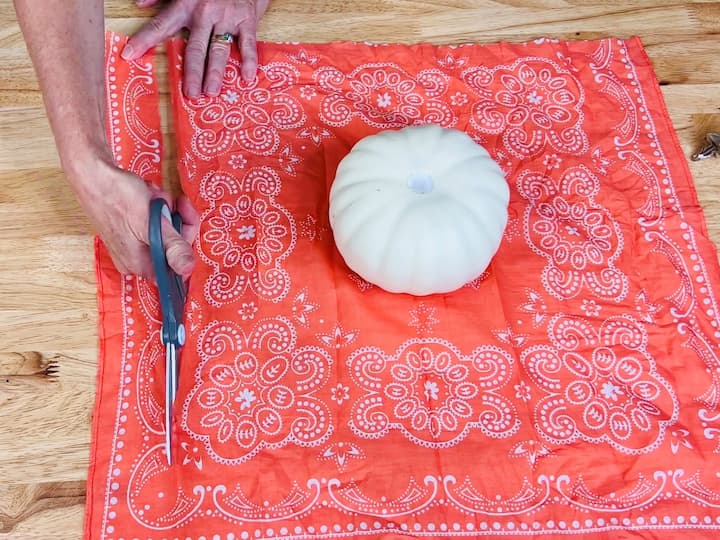
Choose a fabric that you love and cut it into a circular shape large enough to cover your styrofoam pumpkin.
Place the styrofoam pumpkin in the center of the fabric circle. Begin pulling up the fabric around the pumpkin, tucking it into the center. Continue until the entire pumpkin is covered with fabric, creating folds and gathers.
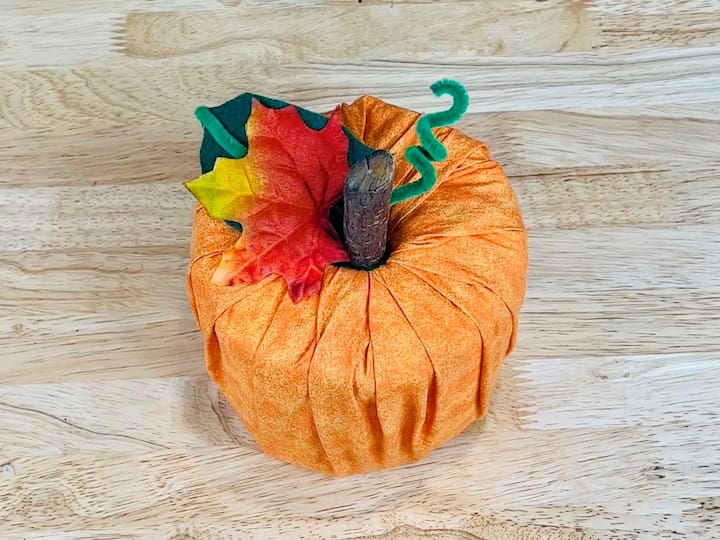
Attach the stem that comes with the pumpkin or create your own stem using a cinnamon stick, paper bag, or any other material. Use hot glue to secure it. Optionally, glue faux leaves around the stem.
Wrap twine around the stem and glue it into place to create the illusion of a vine.
Feel free to experiment with different fabrics, colors, and styles. These fabric-covered pumpkins make wonderful decorations for any room in your home.
Handkerchief and Foam Pumpkin Combo
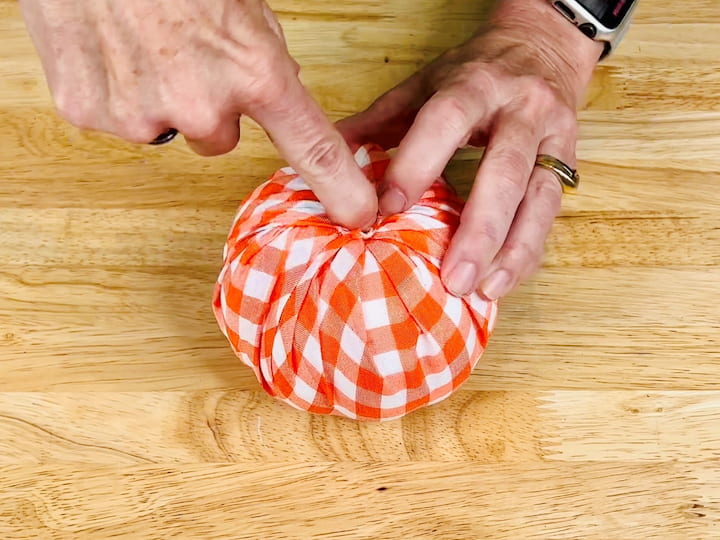
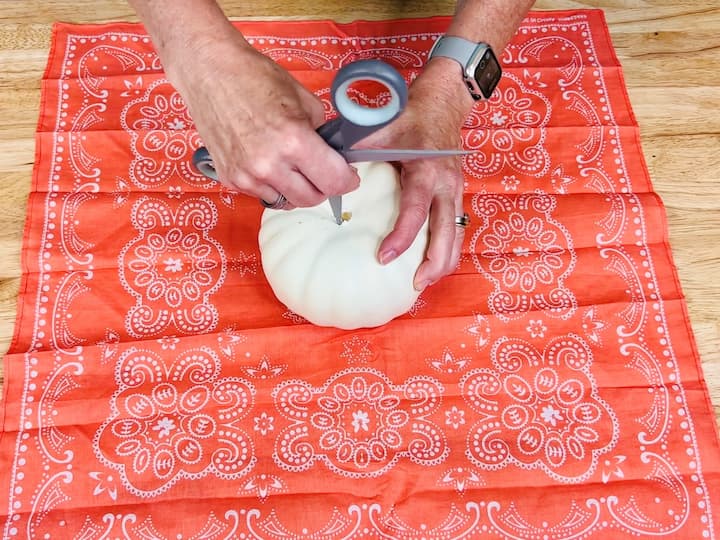
Place a foam pumpkin in the center of an open handkerchief. Remove the pumpkin’s stem.
If needed, use scissors to carve out extra space in the center of the pumpkin to accommodate the fabric.
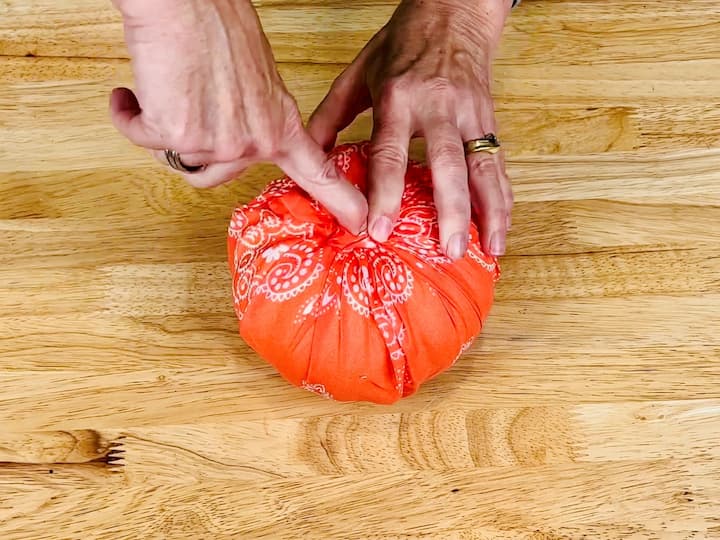
Pull the fabric up around the pumpkin, tucking it into the center. Create gathers and folds for texture.

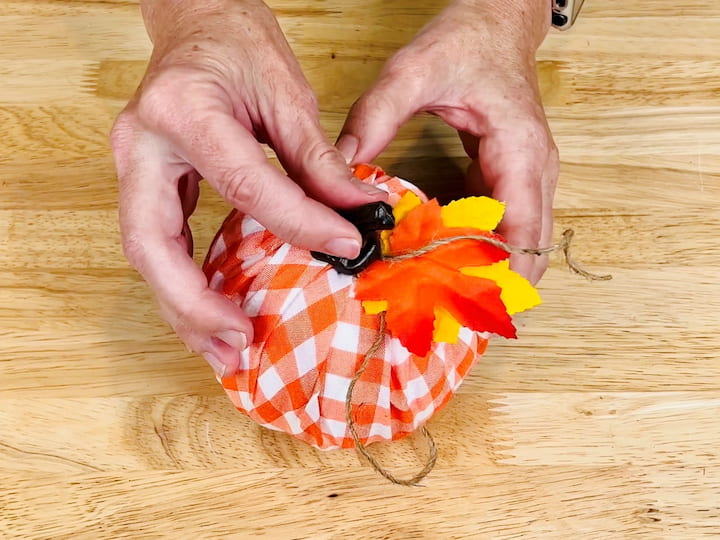
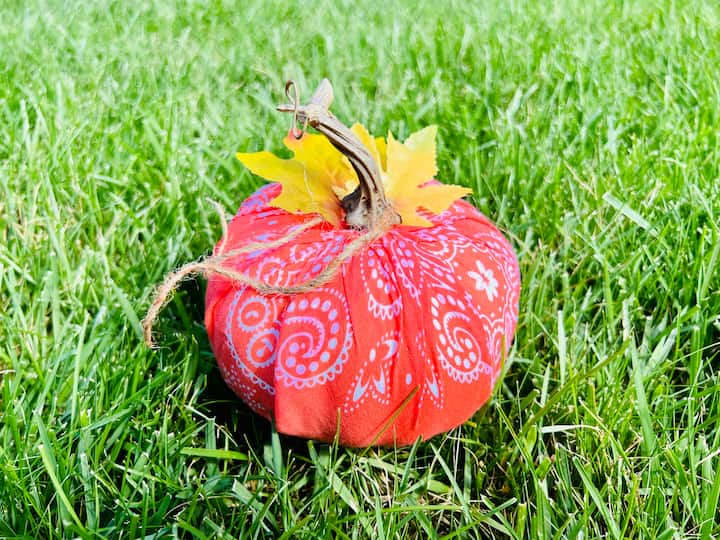
Reattach the pumpkin’s stem using hot glue. If desired, wrap twine around the stem and secure with glue. This adds an extra touch of realism.
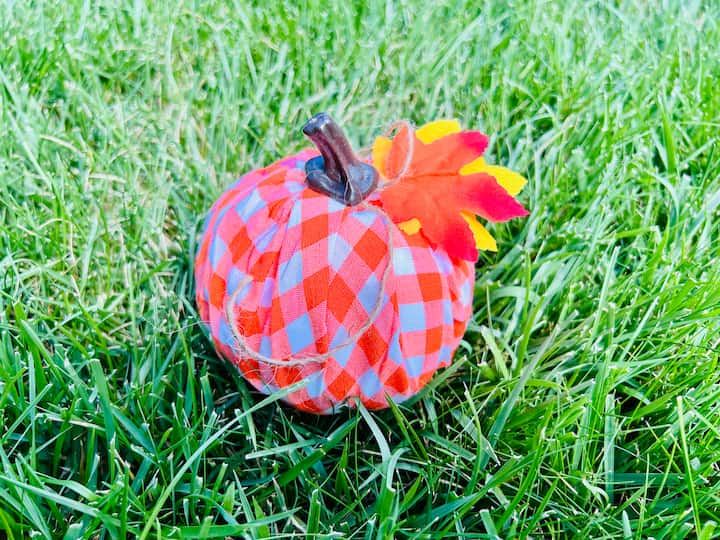
Explore various fabrics and arrangements to make each pumpkin unique.
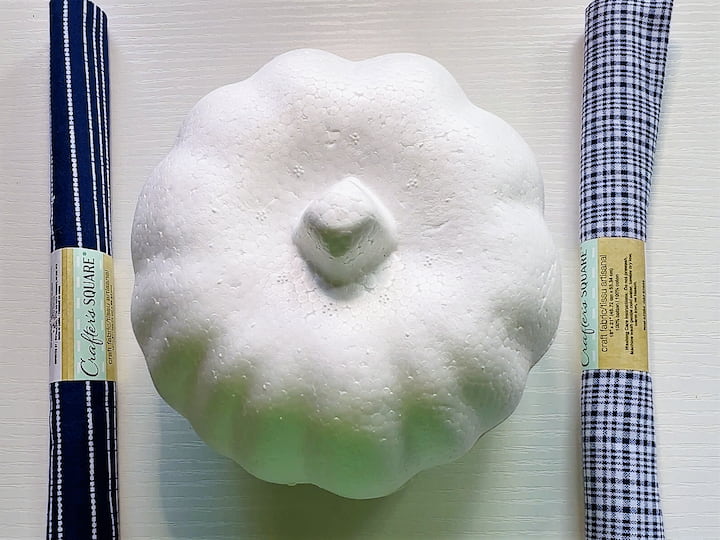
Dollar Tree Fabric-Covered Foam Pumpkin
Remove any tags or stickers from the foam pumpkin. This will give you a clean canvas to work with.
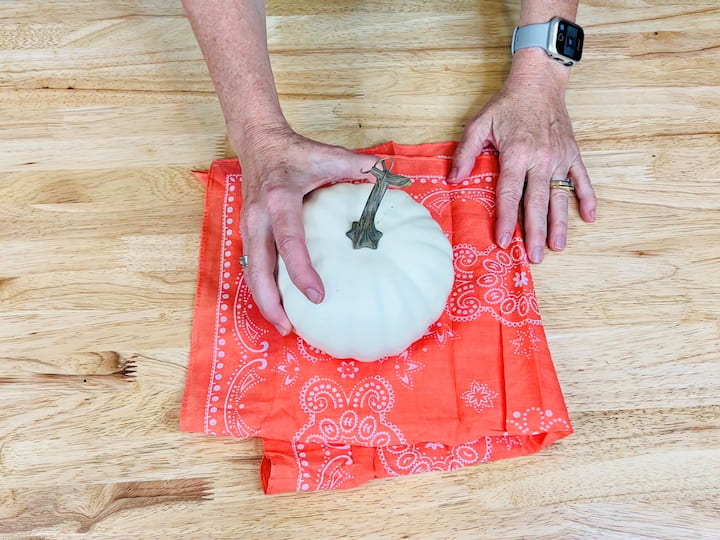
Lay out your Dollar Tree fabric and place the foam pumpkin on top. Make sure you have enough fabric to cover the pumpkin entirely.
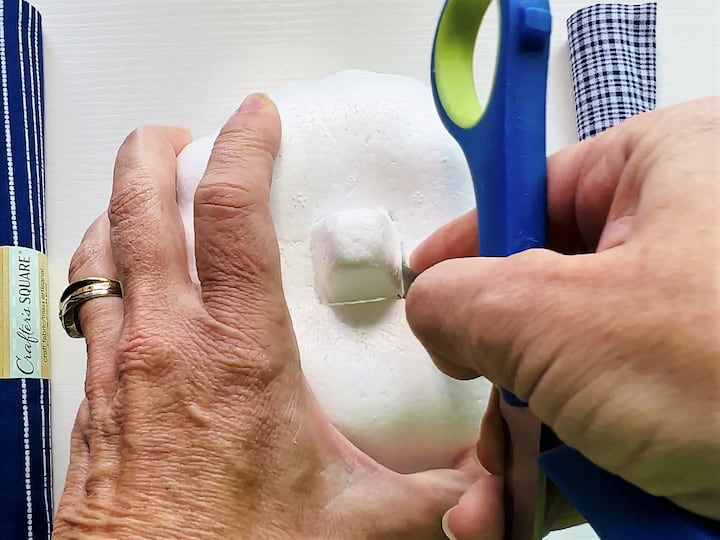
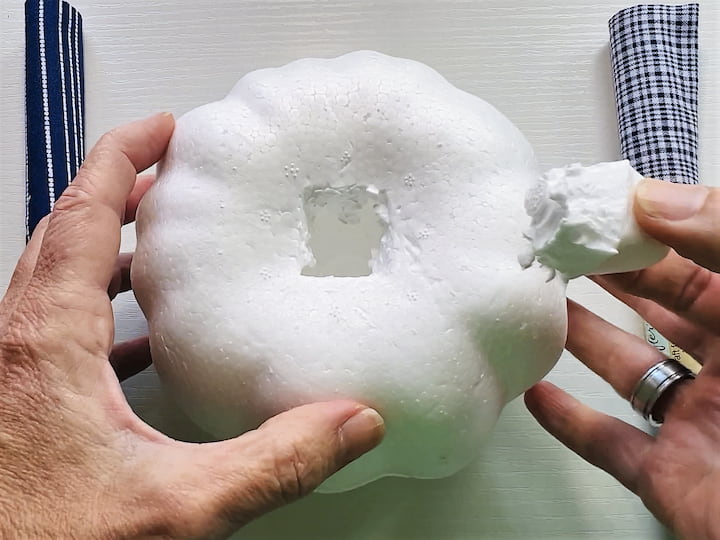
Use scissors or an Xacto knife to cut the stem out and it will reveal that the center is hollow.
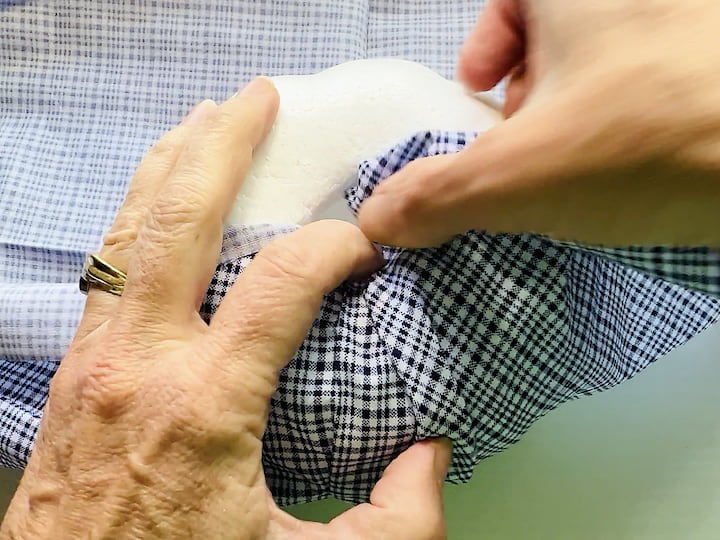
Pull the fabric up around the pumpkin, tucking it into the center. Create gathers and folds for texture.
Find a stick from your yard that suits the size of your pumpkin. Clean the stick and let it dry completely. Apply hot glue to one end of the stick and insert it into the top of the pumpkin, creating a rustic stem.
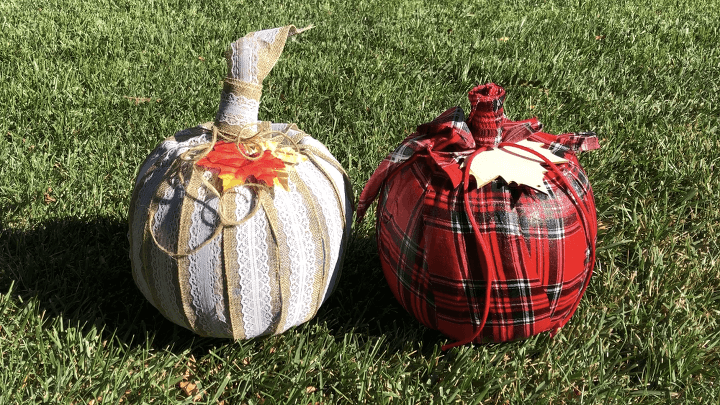
Ribbon and Flannel Fabric Pumpkins: How to make a flannel pumpkin?
- Dollar Tree Burlap Ribbon: Elevate your pumpkin by using Dollar Tree burlap ribbon. Glue it around the pumpkin bucket, overlapping both the bottom and top to create a textured look.
- Apple Display: Use fabric-covered foam pumpkins to create a charming apple display. Position them alongside real apples for a delightful fall scene.
- Rustic Stem and Leaves: Instead of using traditional stems, close the top of the pumpkin bucket with a rubber band, creating a stem. Wrap a ribbon around the stem, add twine, and hot glue on faux leaves for a rustic touch.
- Mod Podge and Fabric Combo: Experiment with Mod Podge by applying it to the pumpkin bucket and adding strips of plaid fabric. Seal the fabric with another layer of Mod Podge for durability.
You can find the full tutorials for both of these fabric pumpkins: 6 Easy and Awesome Ideas For What To Do with Plastic Pumpkins
Crafting Delightful DIY Fabric Pumpkins for Fall Decor
Check out some of my other pumpkin crafts!
- Super Easy Dollar Tree Pumpkin Crafts on a Budget
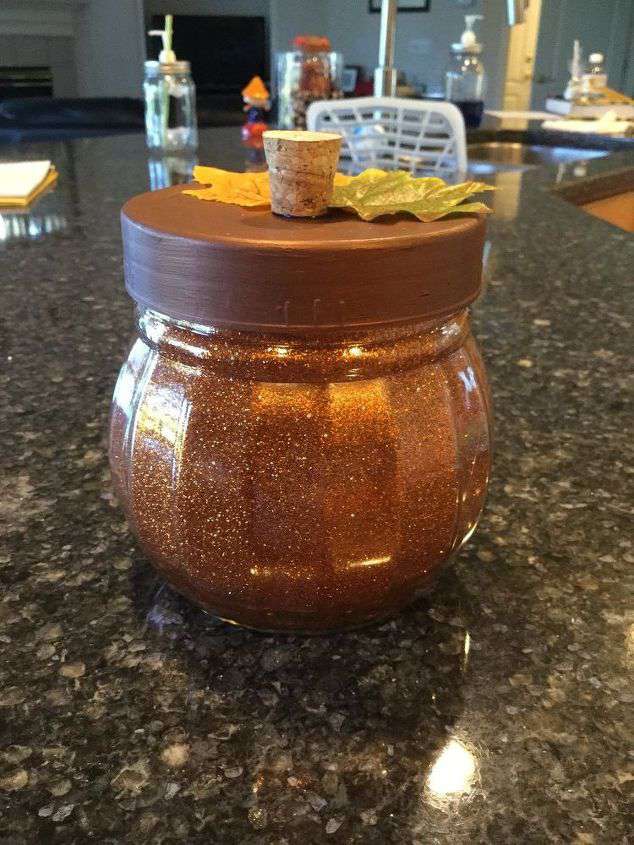
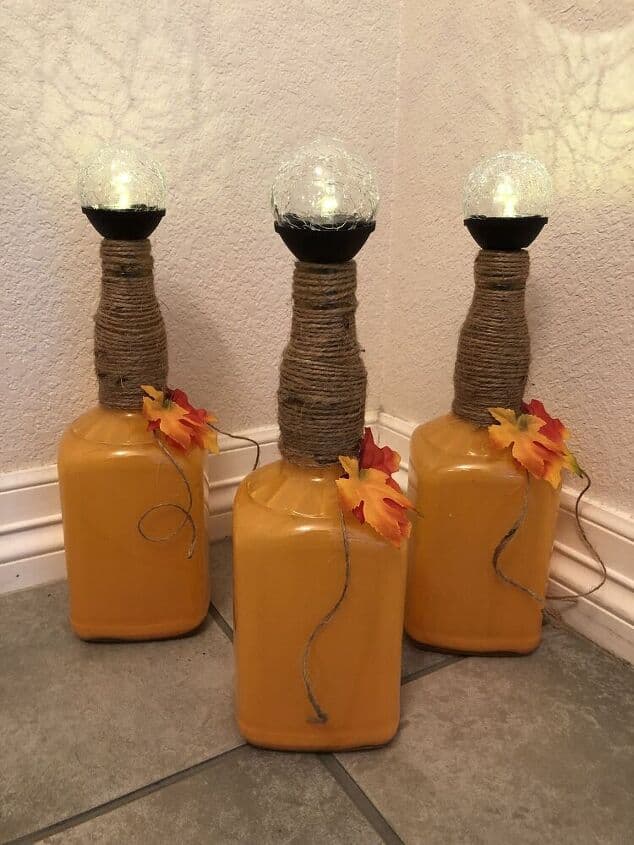
- DIY Pumpkin Decor Using A Glass Bottle
- Super Easy Glitter Pumpkin
Additional DIY Fabric Pumpkin Tips and Ideas:
- Instead of using a toilet paper roll as a base, you can experiment with different objects to create various sizes and shapes of pumpkins.
- Get creative with the stems! Try cinnamon sticks, rolled paper bags, or even real pumpkin stems.
- For a longer-lasting pumpkin, use Mod Podge to seal real leaves before attaching them as accents.
- These fabric pumpkins can be placed anywhere in your home, adding a touch of fall charm to your decor.
It depends on the size of the pumpkin, but for many of these pumpkins that I’ve created I used fabric that was 17 inches by 22 inches
 Tudomro 18 Pcs Assorted Fal…Shop on Amazon
 Winlyn Set of 16 Faux Assor…Shop on Amazon
 Ogrmar 6 Pack Velvet Artifi…Shop on Amazon
 LampLust Plush Pumpkin Deco…Shop on Amazon
Interested in sewing and more DIY fabric pumpkins?
Creating your very own fabric pumpkins doesn’t have to be intimidating. With a sewing machine or even just a needle and thread, you can make fabric pumpkins that add a charming touch to your home decor. If you’re new to sewing, fear not – making easy fabric pumpkins is a fantastic way to start your crafting journey. Begin by selecting the fabric of your choice, such as old shirts or scrap fabric. Gather your scraps and get ready to turn them into beautiful fall decorations that will impress your guests.
When sewing fabric pumpkins, remember to work with right sides together. This ensures that the seams will be hidden inside the pumpkin, resulting in a polished look. With a simple running stitch, sew along the bottom of the pumpkin using a ¼ inch seam allowance. Leave a small opening for turning the pumpkin right side out and stuffing it with cotton scraps or lightweight materials like old sweaters. Once you’re satisfied with the stuffing, carefully stitch up the opening, creating a seamless finish. Don’t forget to knot your thread securely!
For those aiming to make larger fabric pumpkins, using a ruler to measure the circumference can help you determine the appropriate size of your fabric pieces. With a ruler in hand, you can create a fabric pumpkin pattern that ensures your pumpkins turn out just the way you envision. If you’re feeling adventurous, why not experiment with different fabrics? Velvet pumpkins can add a touch of luxury to your fall decorations, while lightweight cotton is perfect for crafting small pumpkins that fit snugly in any corner of your home.
If you’re looking to add extra flair to your fabric pumpkins, consider using embroidery floss or thread to create unique designs. The art of embroidery adds a personal touch that transforms your pumpkins into one-of-a-kind pieces of art. A simple running stitch can turn a medium-sized pumpkin into a canvas for your creativity. You might even thread embroidery floss through a wine cork to make charming pumpkin stems that are both rustic and whimsical.
With the versatility of fabric and the joy of crafting, making fabric pumpkins becomes more than just a project – it’s a creative journey. From the initial fabric selection to the final stitches, every step is an opportunity to infuse your personality into your home decor. So, grab your fabric scissors, gather your scraps, and dive into a fabric pumpkin tutorial that will leave you with stunning fall decorations and a sense of accomplishment. Whether you’re an experienced seamstress or a beginner with a needle, fabric pumpkins are a delightful way to embrace the spirit of the season and make your home feel warm and inviting.
Crafting your own fabric pumpkins is a wonderful way to welcome the fall season into your home. These DIY creations not only bring warmth and coziness but also allow you to express your creativity in a festive way. Whether you opt for the toilet paper roll base, styrofoam pumpkin covering, or handkerchief method, the possibilities are endless. So, gather your materials, dive into the world of DIY, and let your imagination run wild. Happy crafting and happy fall decorating!
This will be fun.
I bought a small pumpkin from the dollar store (my favorite). I died cut smile letters to place on the front. I, also, put googly eyes above the “smile”. That pumpkin will relax on a wooden swing from a garage sale.
Love that idea, thank you for sharing.
Love these fun pumpkins! They look really easy to make, but so cute! Sharing on the Hearth and Soul Facebook page. Thank you so much for being a part of the Hearth and Soul Link Party. Hope to ‘see’ you again this week!
Thank you April, and thank you for the feature! I truly appreciate you hosting a wonderful place for all of us to share our ideas.
These really are just too cute! Your tutorial is very easy to follow. Thanks for sharing with us at Merry Monday. Can’t wait to see what you are creating next!
Thank you Shirley, looking forward to joining again 🙂
These are so cute!! 🙂
I would love for you to share this with my Facebook Group for recipes, crafts, tips, and tricks: https://www.facebook.com/groups/pluckyrecipescraftstips/
Thanks for joining Cooking and Crafting with J & J!
Thank you Jess and thanks for the invite 🙂
This is the cutest pumpkin and it looks so easy to make!
Thanks for sharing this at Cooking and Crafting with J&J.
We hope to see you again and enjoy the week.
Julie
Thank you Julie and thanks for having a place for all of us to share ideas.
I remember pulling this project out of the magazine years ago and making it also! It was a great project for when we lived in apartments and didn’t have space to store decorations off season. I totally forgot about it. I’m going to share this in my fall craft project round up later this week. Thanks for sharing at #HomeMattersParty
Oh, thank you so much for sharing it! I truly love this project for all the reasons you mentioned! Thanks for stopping by.
Very cute and I actually have that exact same fabric in my stash, purchased years and years ago! I’m going to have to dig it out and make some pumpkins 😀 Thank you for sharing at Designing You!
Thanks Trudy, I love that fabric and I’m so pleased that you want to give it a try.
What a cute way to do those extra rolls of TP.
Thank you Crystal 🙂
Oh my goodness, this is so cute! And so easy even I could do it!!!
Thank you Elizabeth and thanks for stopping by.