
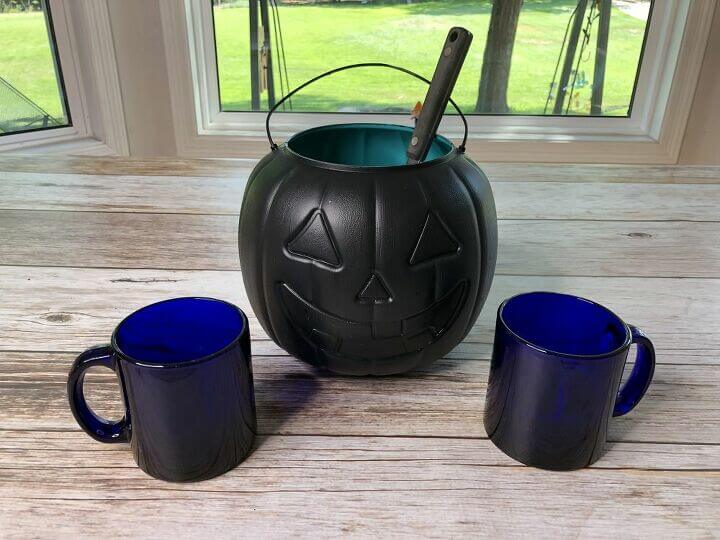
6 Easy and Awesome Ideas For What To Do with Plastic Pumpkins
Do you ever wonder what to do with plastic pumpkin buckets? Here are 6 ways I have given plastic pumpkins a makeover.
What a fun way to display artificial pumpkins. No need to use real pumpkins when you can use dollar store pumpkins from last year to create these fun DIYs. Have fun with these easy 6 plastic pumpkin bucket crafts.
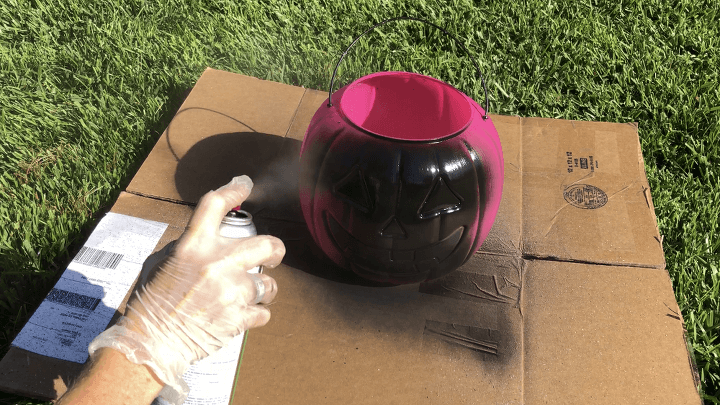
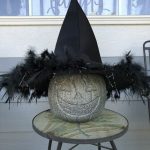
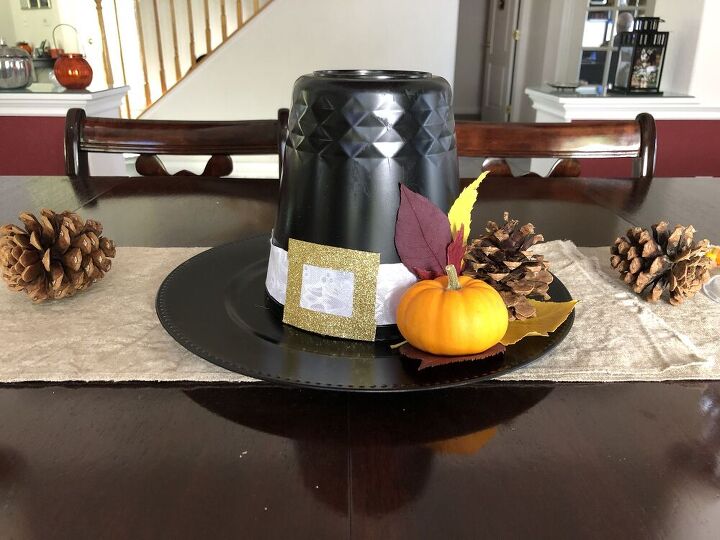
Pumpkin #1 –
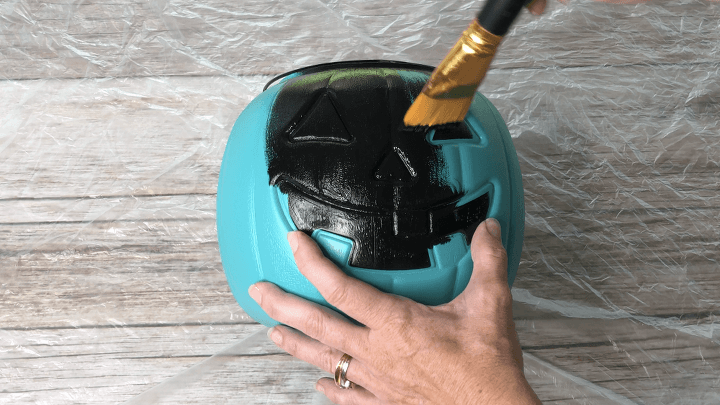
I sprayed the fake pumpkin with black spray paint and let it dry.
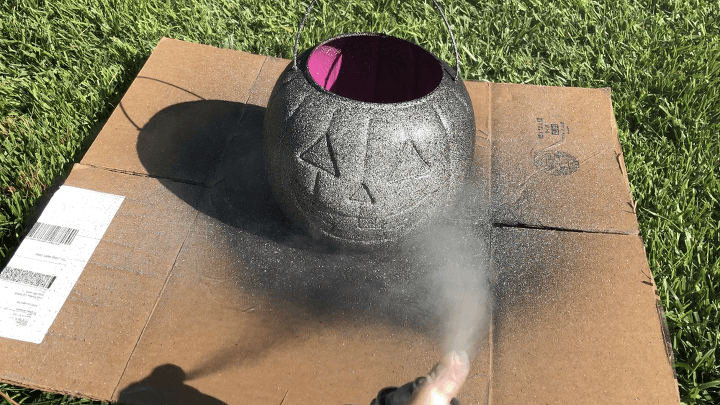
I then sprayed it with Rustoleum Stone spray paint and let that dry.
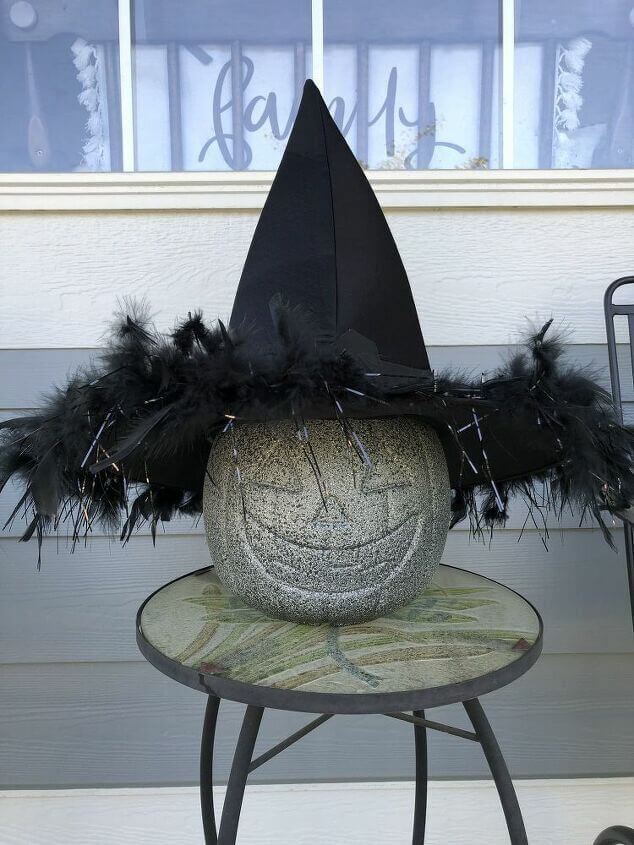
I placed a witch hat on it and put it on display. I think it looks like faux concrete.
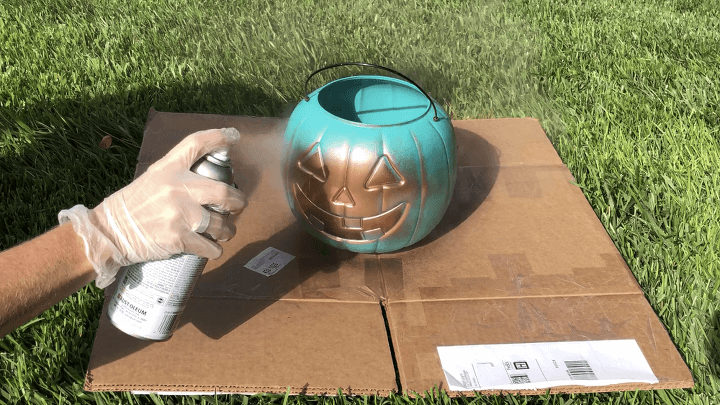
Pumpkin #2 –
I sprayed this pumpkin with Rustoleum Copper spray paint and let that dry.
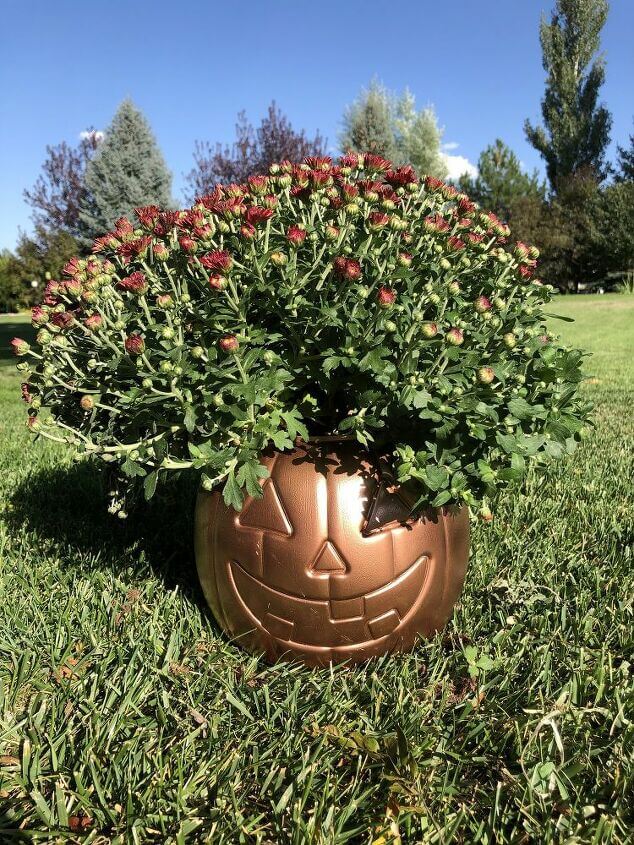
I added a mum plant inside and set him on the front porch for display.
Pumpkin #3 –
I painted this pumpkin with Folk Art acrylic paint Chalkboard paint and let it dry.
I used it to serve cold apple cider. You could use the back side of him and write words with chalk of what you’re serving.
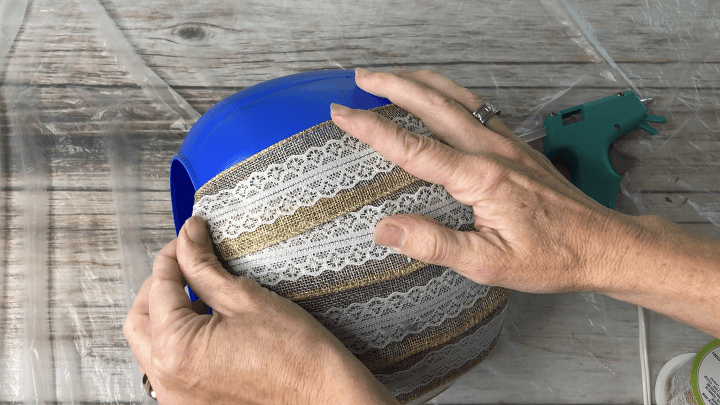
Pumpkin #4 –
I used hot glue to glue on Dollar Tree burlap ribbon on the pumpkin bucket. Gluing both the bottom and the top and overlapping the ribbon.
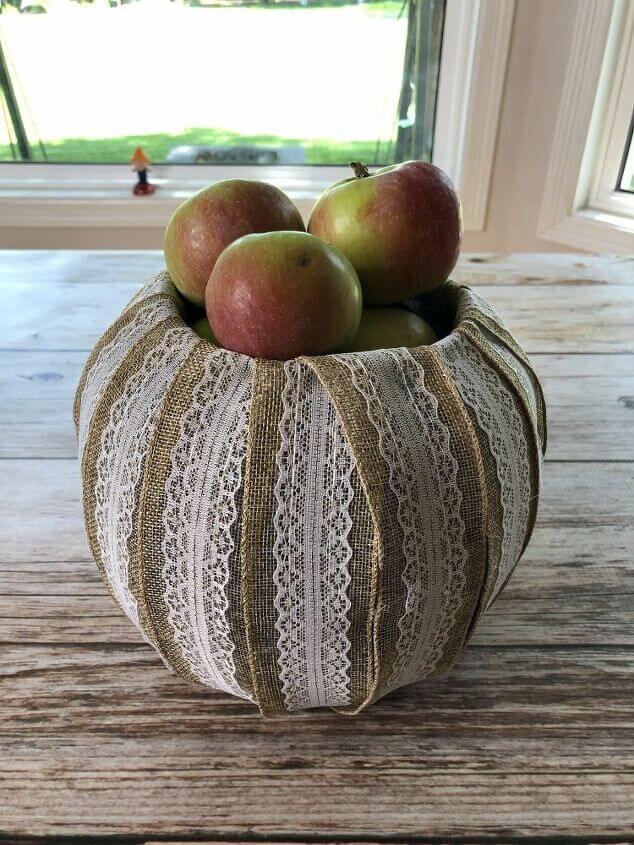
I used to to create an apple display.
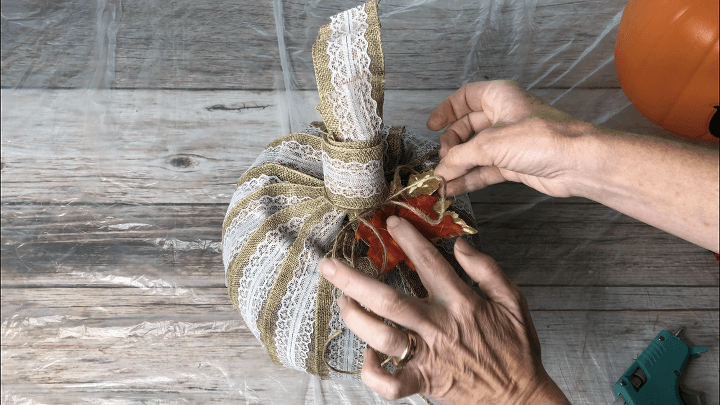
Alternatively, you could rubber band the extra ribbon on top, closing the top of the bucket and creating a stem. I also wrapped a little ribbon around the stem, added some twine, and hot glued on a couple fake leaves.
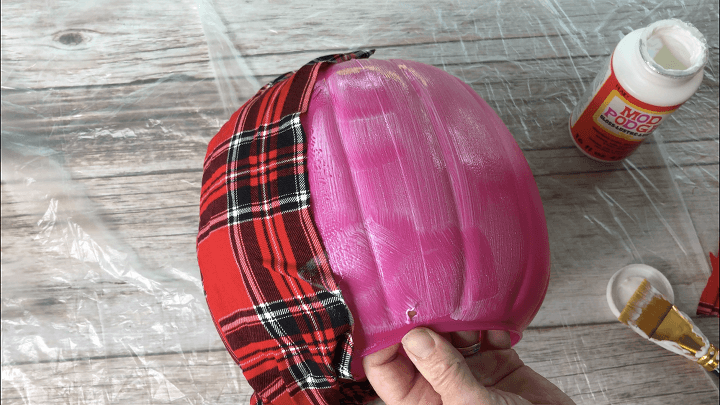
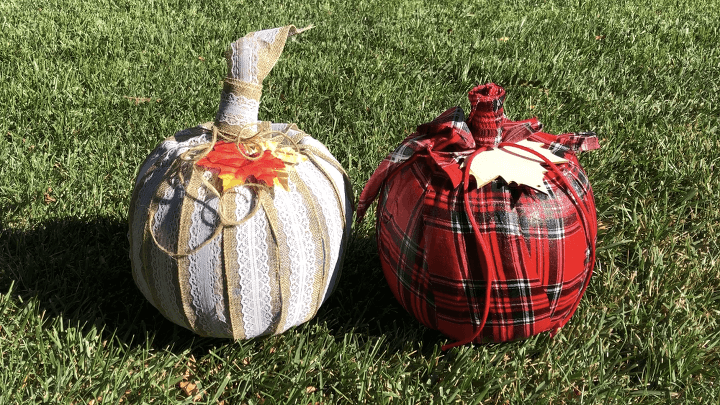
Pumpkin #5 –
I painted Mod Podge onto the bucket and added strips of plaid fabric.
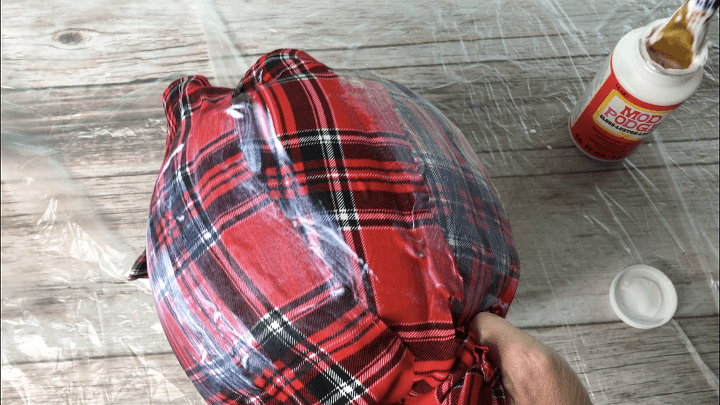
I then put another coat of Mod Podge over the top of all the fabric. I let this dry completely.
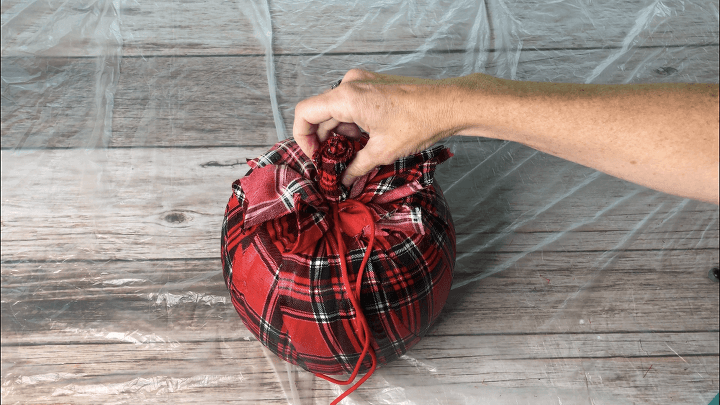
I gathered the extra fabric on top and used a rubber band to close the top, and left the excess fabric hanging loosely. I took another piece of the fabric and rolled it up and hot glued it into place as a stem. I found some red ribbon and let that dangle as the vines.
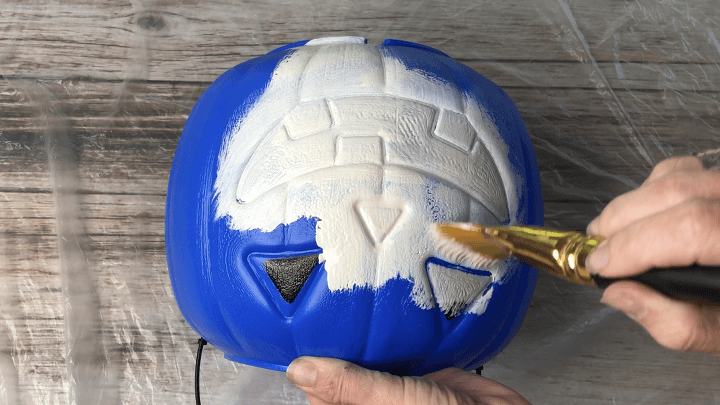
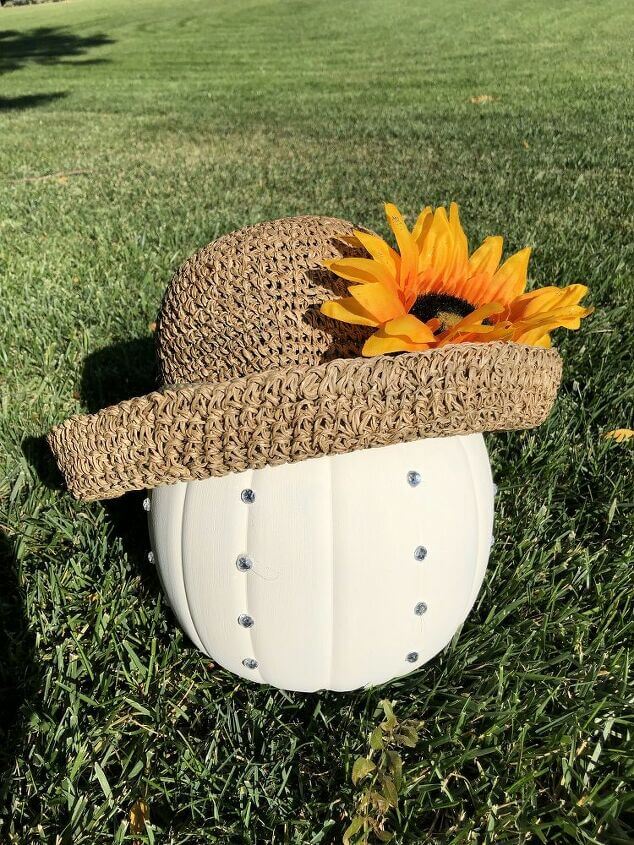
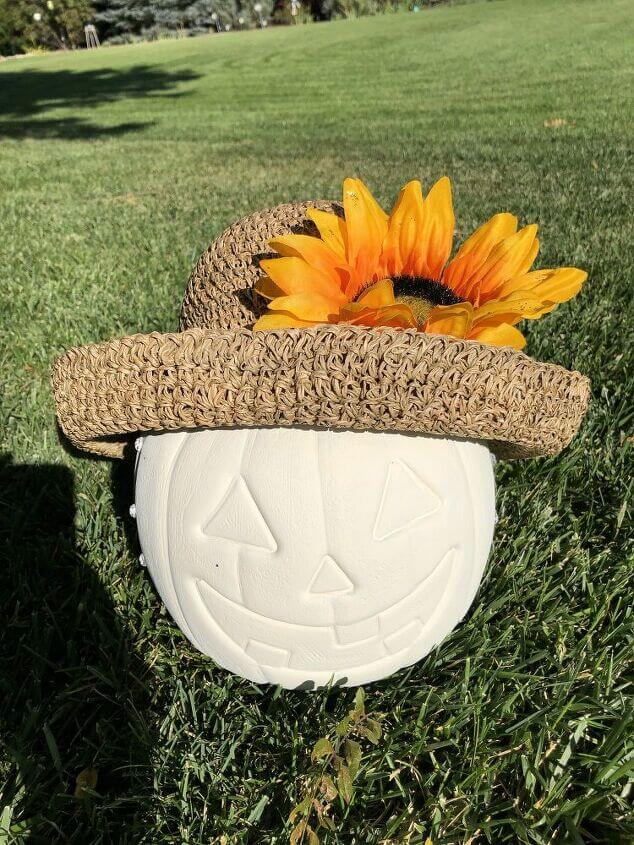
Pumpkin #6
I painted the pumpkin with Folk Art Home Decor Chalk Paint in the color Sheepskin and let dry completely. You could use white spray paint as well.
I hot glued rhinestones onto the pumpkin.
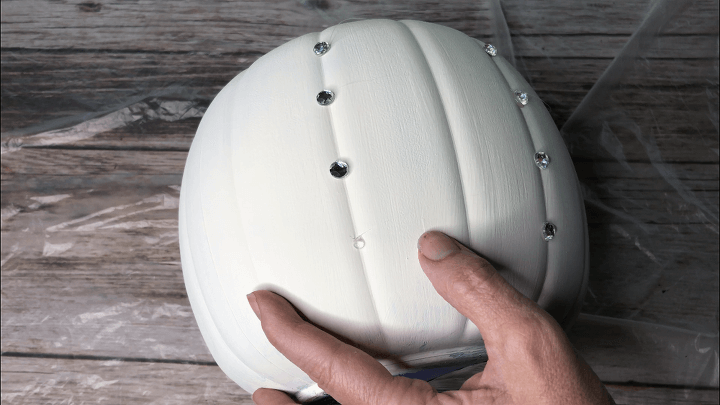
I added a hat and you can display the pumpkin rhinestone side forward or …
with the face side forward.
Learn more about “Creating Seasonal Decor for Your Home” to create seasonal decor that doesn’t cost an arm and a leg.
What To Do with Plastic Pumpkins Video
Shop any of these stores and I receive a small commission at no cost to you.
 General Foam Plastics H1020…Shop on Amazon
 Rust-Oleum 249844 Painter's…Shop on Amazon
 Rust-Oleum 7992830 Stone Cr…Shop on Amazon
 Rust-Oleum 1937830-6PK Spec…Shop on Amazon
, PROMOFAHDC") FolkArt Home Décor Chalk F…Shop on Amazon
FolkArt Home Décor Chalk F…Shop on Amazon, 2725 Black") FolkArt FA2725 Multi-Surfac…Shop on Amazon
FolkArt FA2725 Multi-Surfac…Shop on Amazon Mod Podge Matte Sealer, Glu…Shop on Amazon
 Round Crystal with Pick up Tweezer and Rhinestones Picking Pen for Crafts Nail Clothes Shoes Bags DIY Art (Clear)") 2000 Pieces Flat Back Gems …Shop on Amazon
2000 Pieces Flat Back Gems …Shop on Amazon
I love them all Chas! I think the red plaid is my favorite though. Pinned. Thank you for sharing at Charming Homes and Gardens.
Thank you so much Kim, and I love hearing what everyone’s favorite is
I love this post! And what cute and absolutely clever ideas! Great use of those plain old pumpkins! You are one of our features this week on The Simple Homestead Blog Hop! Congrats and thank you for sharing!
You are so very sweet, thank you so much Annmarie! I’m so pleased you like the post and I’ll see you at the next party.
I must admit that I have wondered what to do with Plastic Pumpkin Buckets! There are some really good ideas here. You are so creative!
Thank you Amy, It’s fun to come up with says to use things outside the box.
Chas, you are so crazy creative! My favorite is that first one with the witch hat! I don’t know how you always continue to come up with so many creative ideas!
Thank you so much Chloe, and I’ve loved learning which one is everyone’s favorite.
Chas, you are the pumpkin queen. So many great ideas and creativity.
You are just too sweet, thank you so much Carol 🙂