

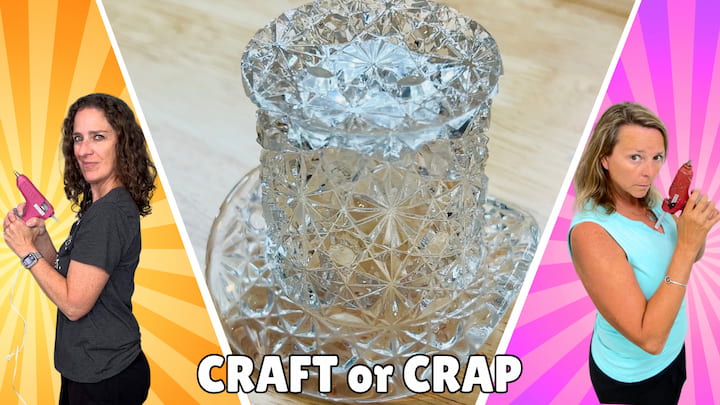
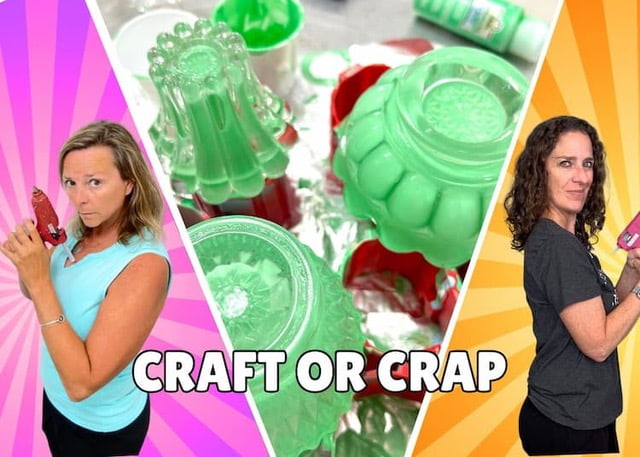
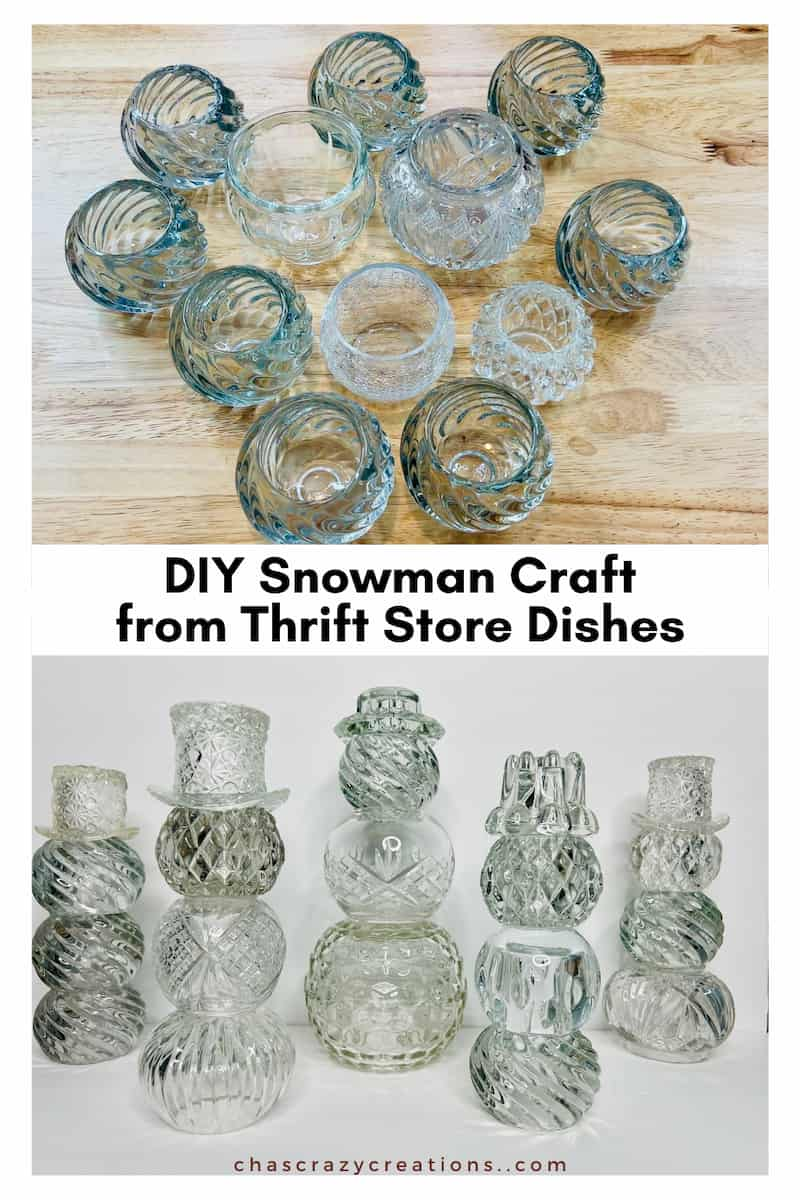
DIY Snowman Craft from Thrift Store Dishes (Craft or Crap Challenge)

Is this thrift store flip “Craft” or “Crap”? Watch me transform old glass dishes and a vintage toothpick holder into a glowing crystal snowman for this fun DIY challenge!
Quick Answer: How do you make a snowman out of glass dishes?
You can create a “crystal” snowman in 3 steps:
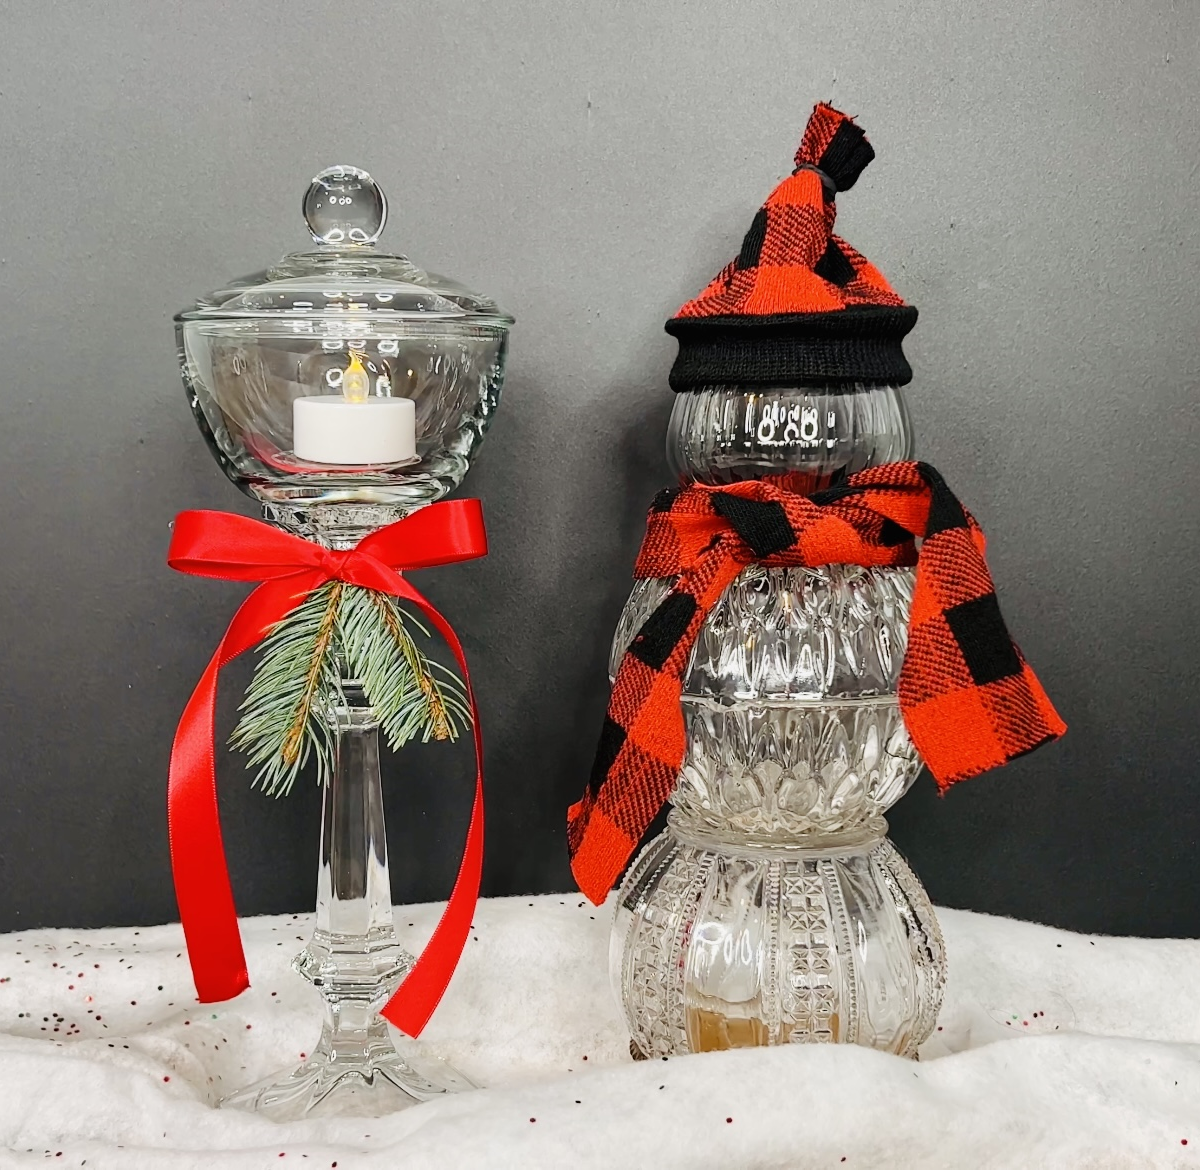
- Stack: Glue 3 glass candle holders or bowls of varying sizes together (largest on bottom, smallest on top).
- Hat: Glue a glass votive holder or vintage “glass top hat” to the very top.
- Light: Place a battery-operated tealight inside the bottom glass piece to make the snowman glow.
Easy Snowman Craft Video
Here is another craft challenge. I’m teaming up with Mona from Craft Klatch. We are doing our craft challenge called “Craft or Crap.” You decide!
Welcome to another round of the Craft or Crap Challenge! I’m teaming up with my friend Mona from Craft Klatch to see who can turn thrift store finds into the best holiday decor.
Here are the rules for this challenge:
- The craft must have a Christmas theme.
- It must include a candle holder.
- It must use something made of glass.
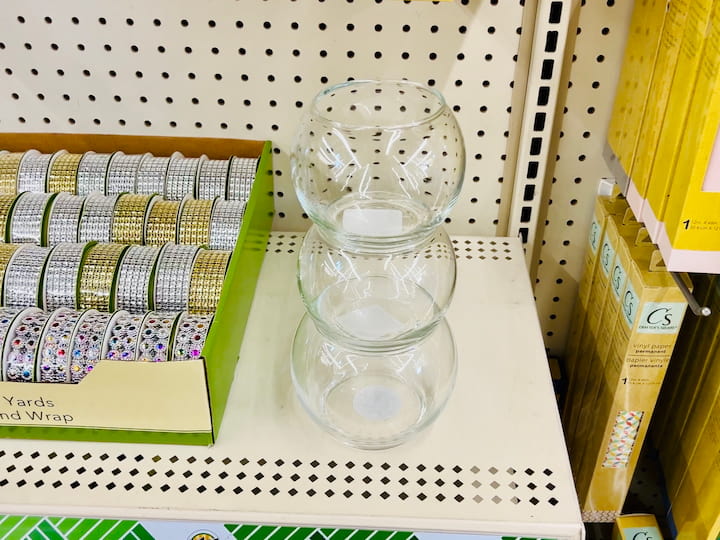
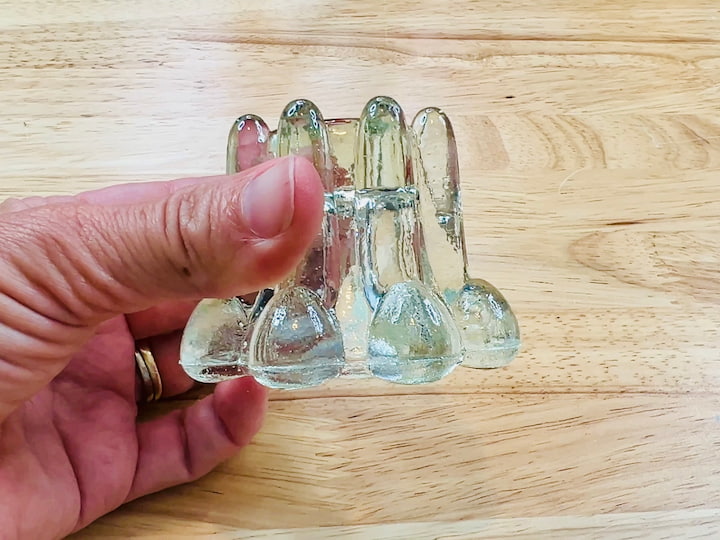
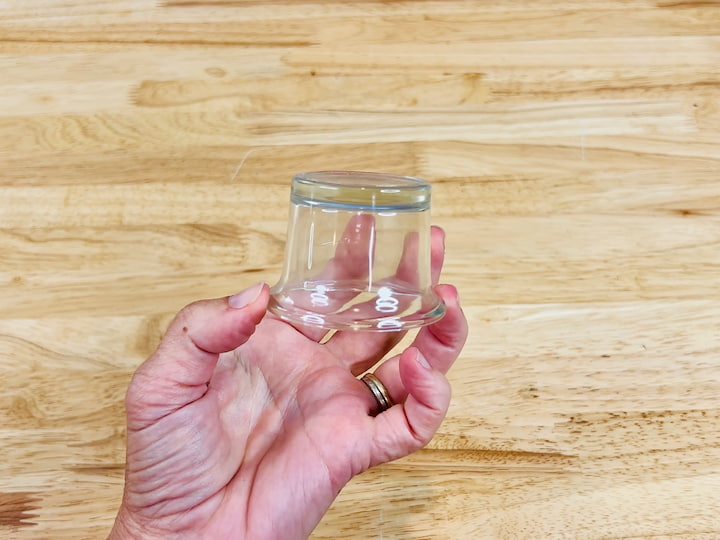
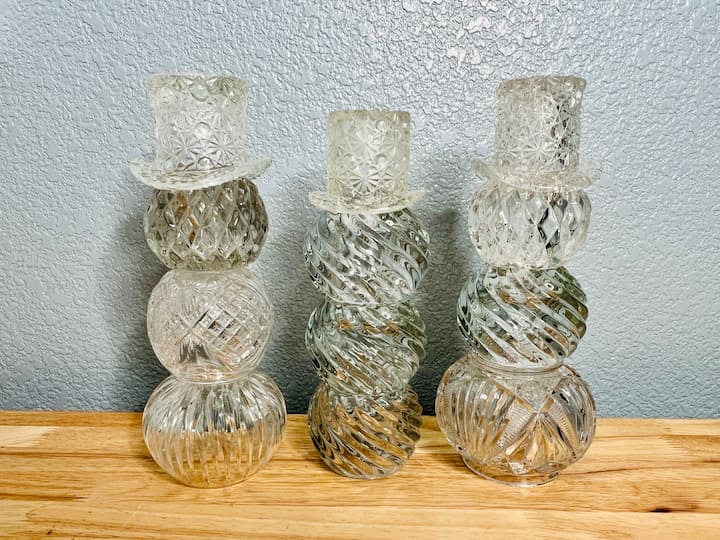
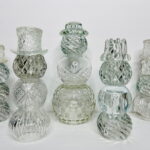
For my project, I went to the thrift store and found a treasure trove of clear glass candle holders and—best of all—a set of vintage glass top hats (which I later learned are actually toothpick holders!).
So, is this upcycled project a hit or a miss? You decide!
Materials Needed
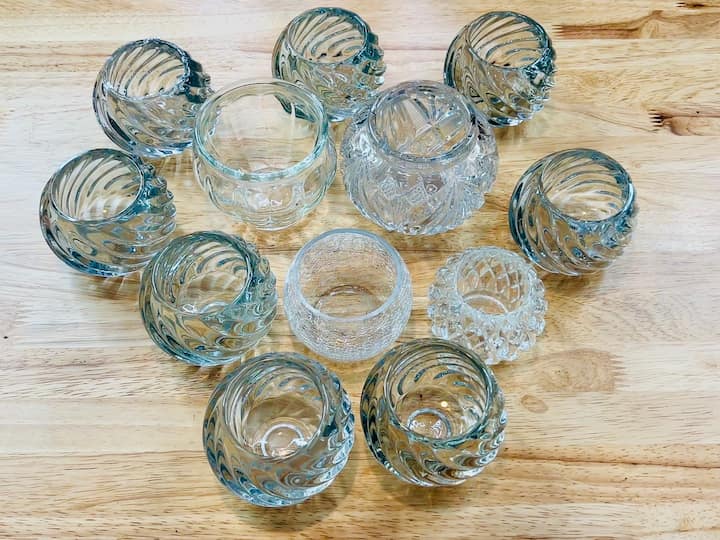
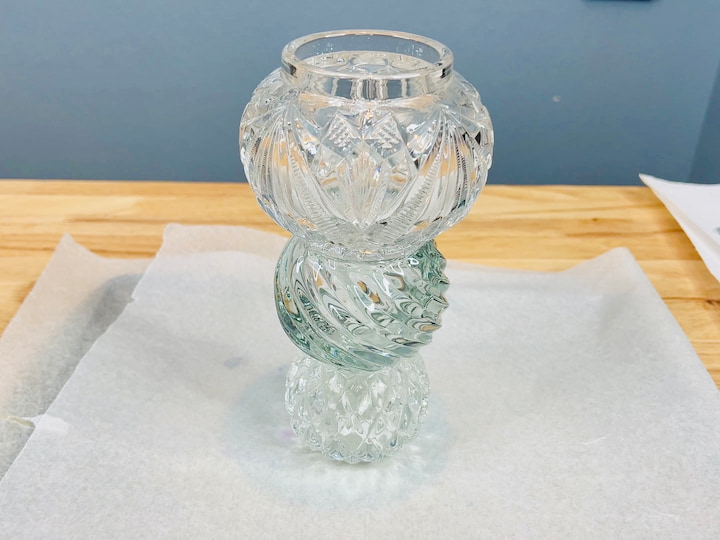
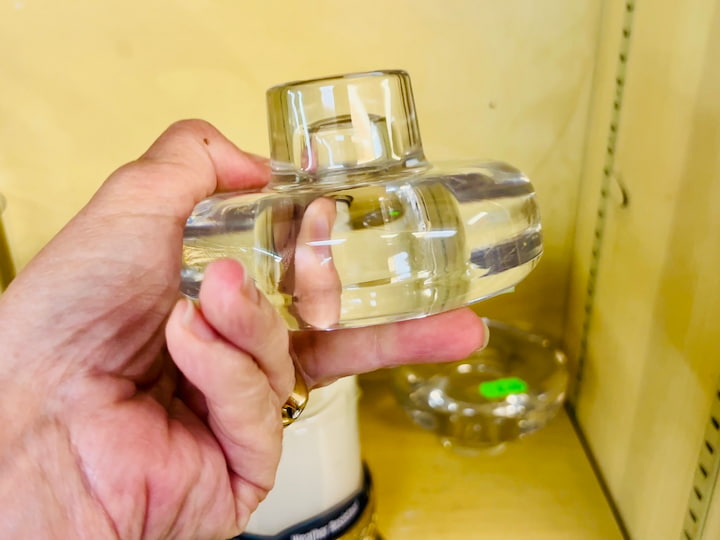
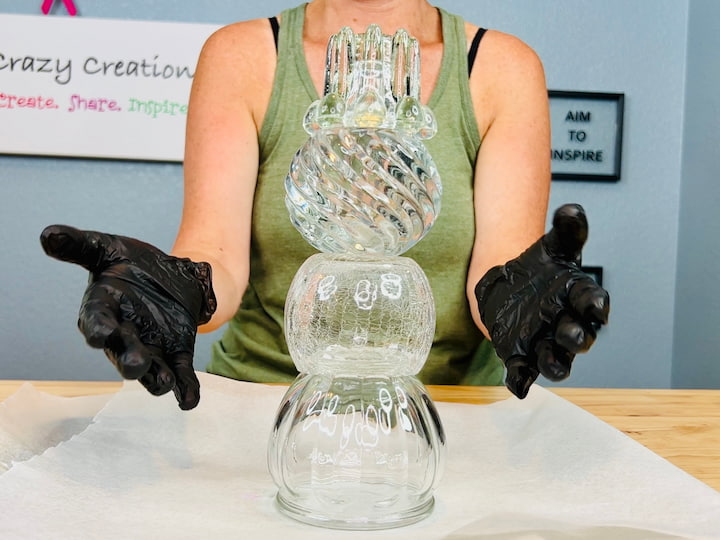
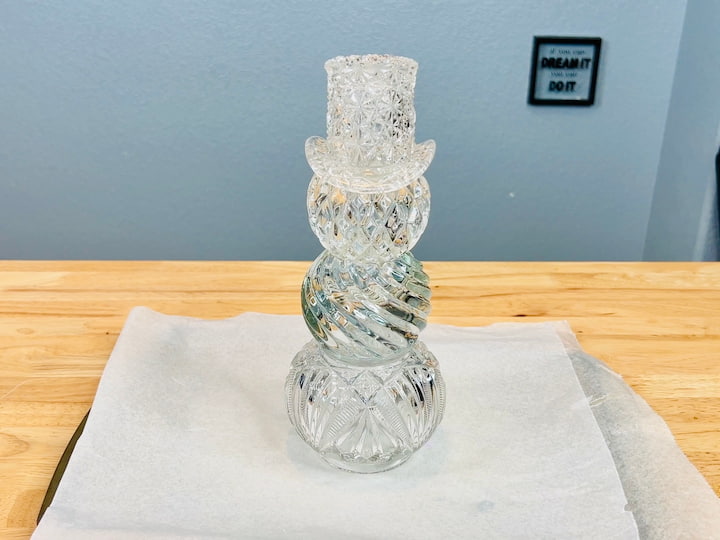
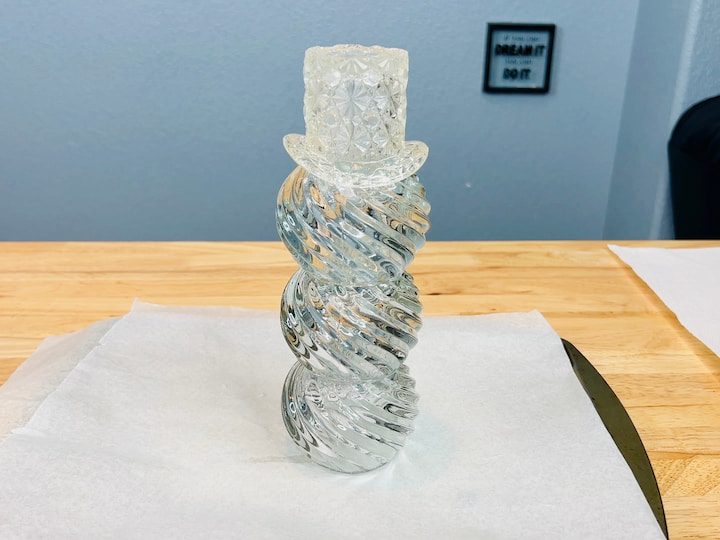
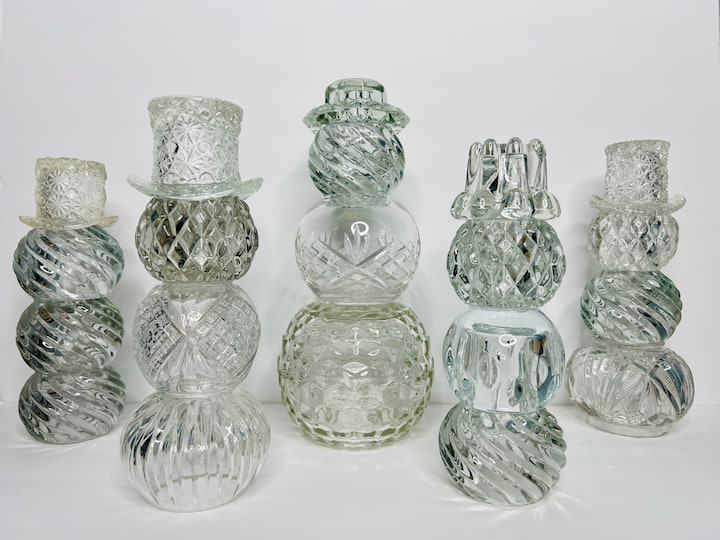
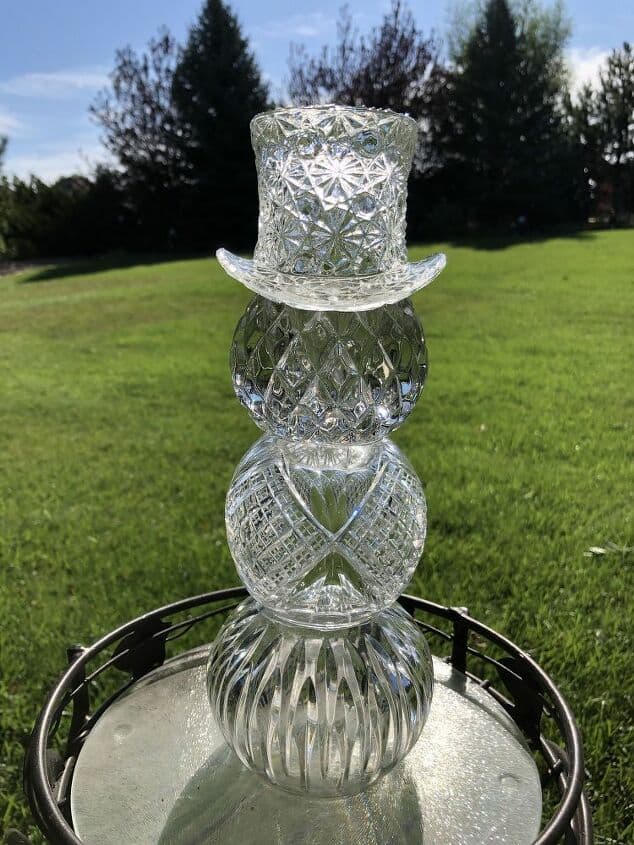
- Glass Candle Holders: I used 3 different shapes/sizes for the body.
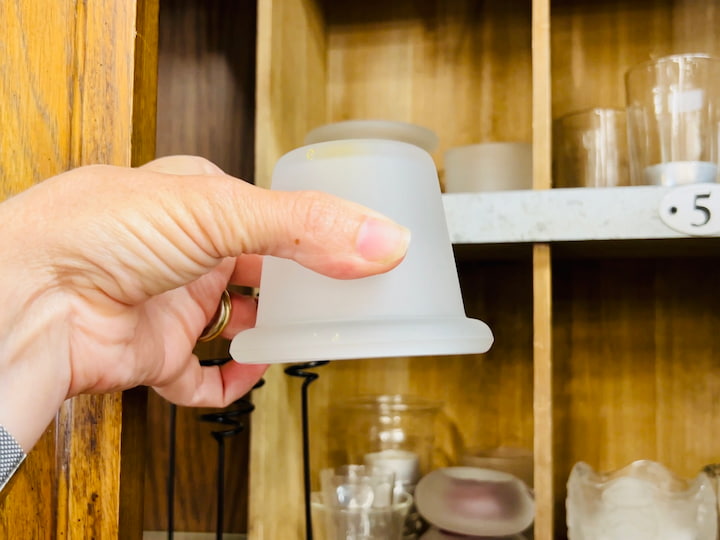
- The “Hat”: I used a vintage glass top hat (Fenton glass toothpick holder), but you can use a simple glass votive holder flipped upside down.
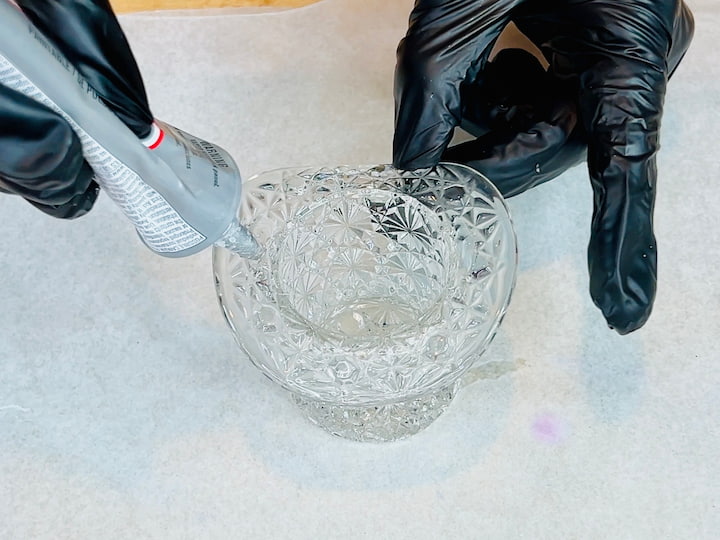
- Adhesive: E6000 Glue is essential for glass-on-glass bonding.
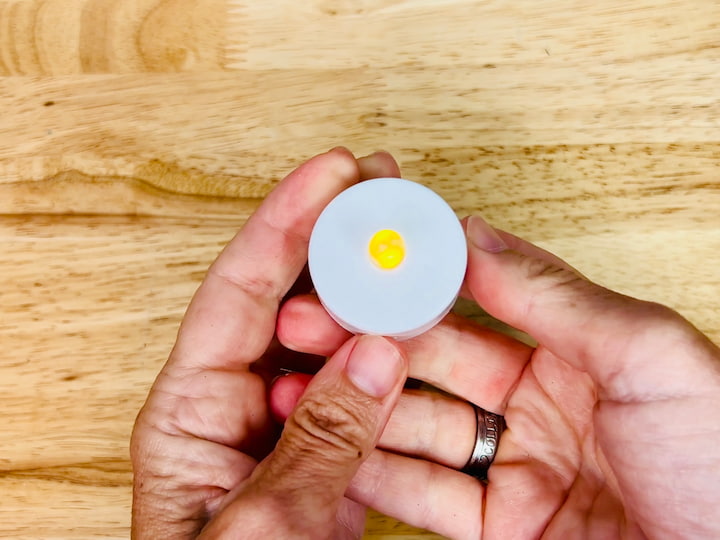
- Lighting: Battery-operated tealights (White LED or Color-Changing).Cleaner: Rubbing alcohol to prep the glass.
How to Make a Glass Snowman
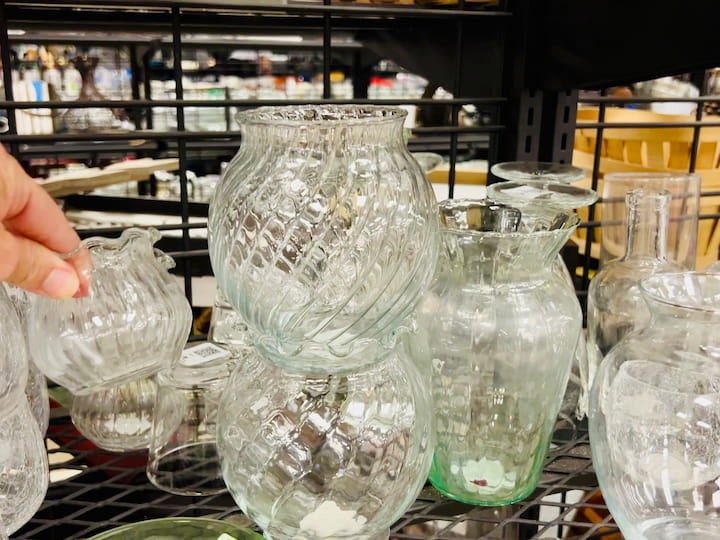
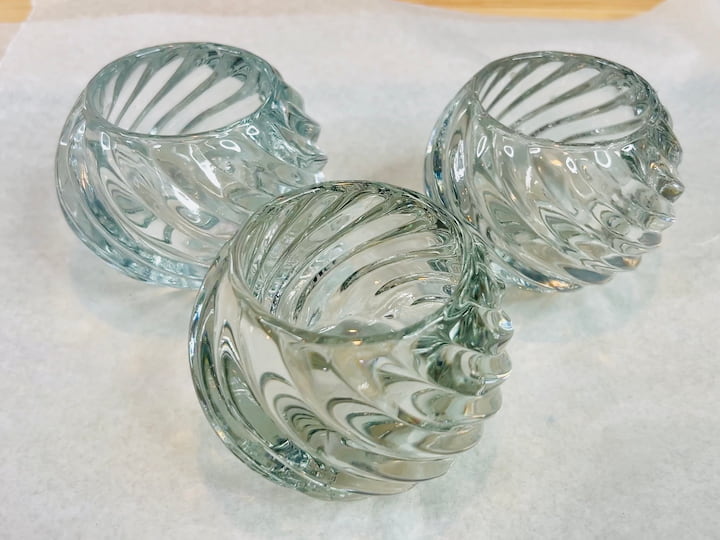
Step 1: Choose Your Glass (Thrift vs. Dollar Store)
Before you start gluing, you need to pick your glass. You can go two routes:
- The “Uniform” Look: Buy 3 identical bowls from the Dollar Tree.
- The “Scrappy” Look: Hunt for thrift store candle holders in different shapes and sizes.

My Strategy: I laid out all my glass pieces to see which ones stacked best. I ended up with enough pieces to make 5 different snowmen!
- Tip: Try stacking them upside down or right-side up to see which shape looks more like a snowman body.
Step 2: Assemble the Body

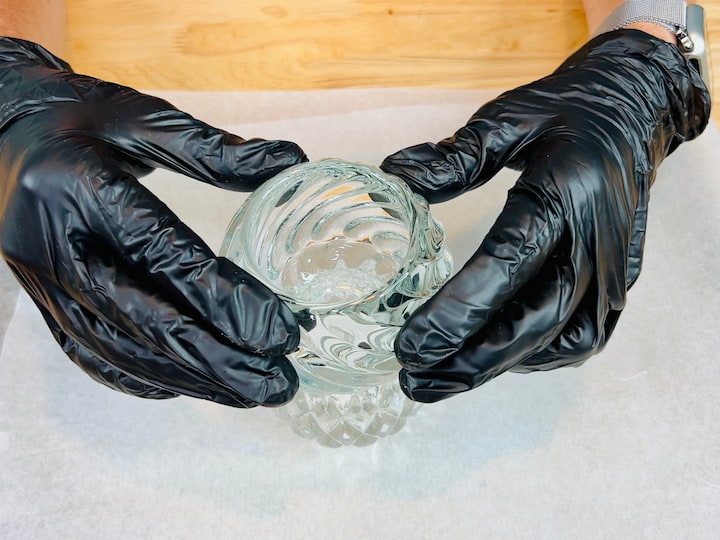
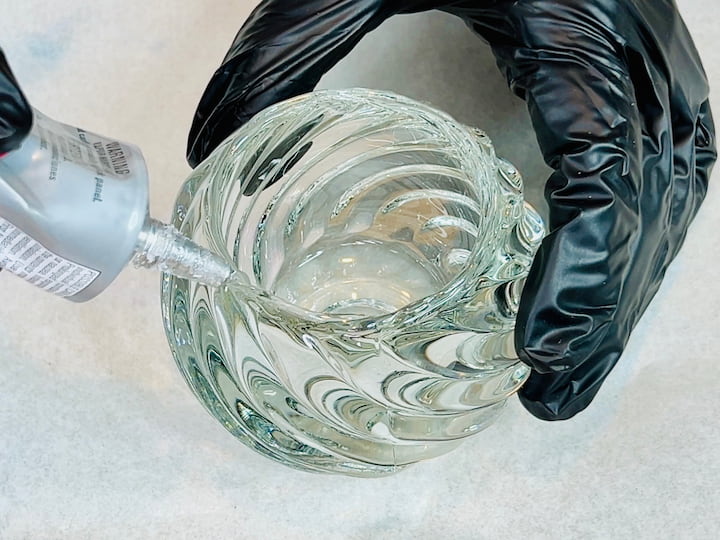
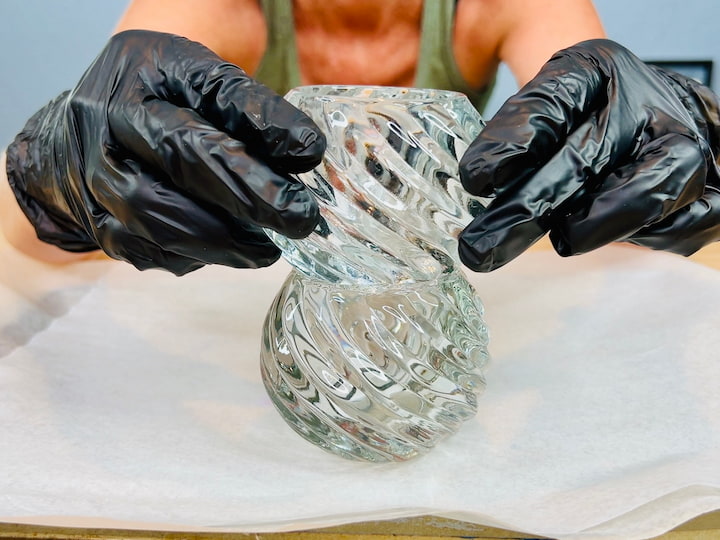
Once you have your stack picked out, it’s time to glue.
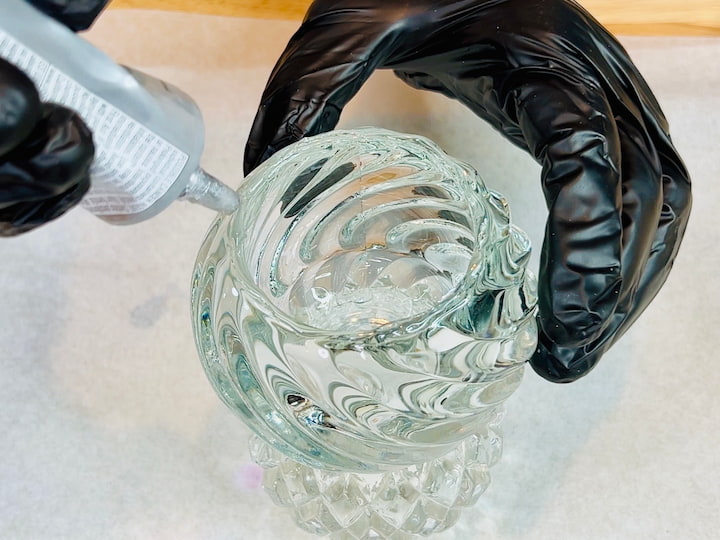
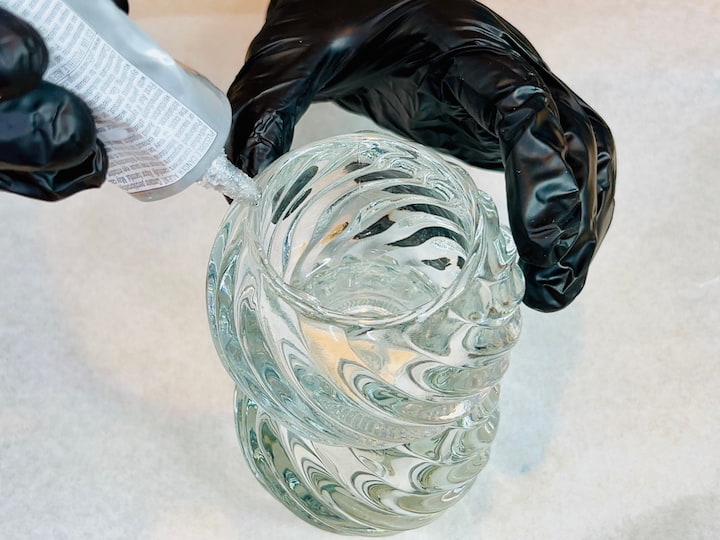
- Clean: Wipe all rims with rubbing alcohol.
- Glue: Apply E6000 to the rim of the bottom piece.
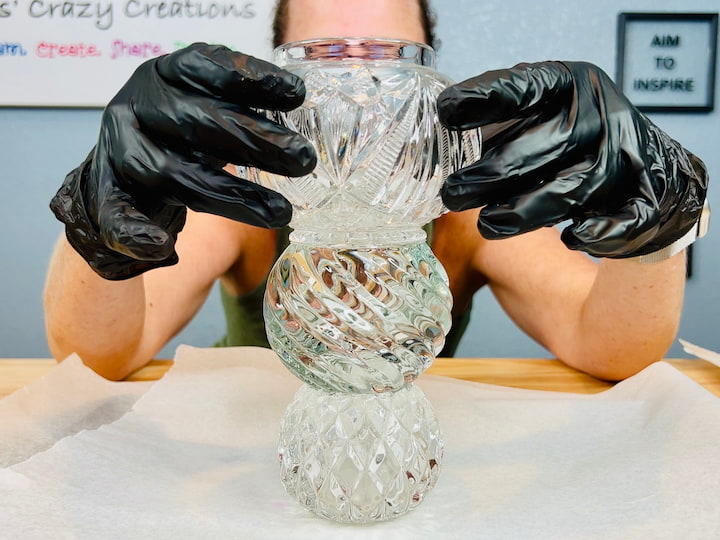
- Stack: Place the middle piece on top. Repeat for the head.
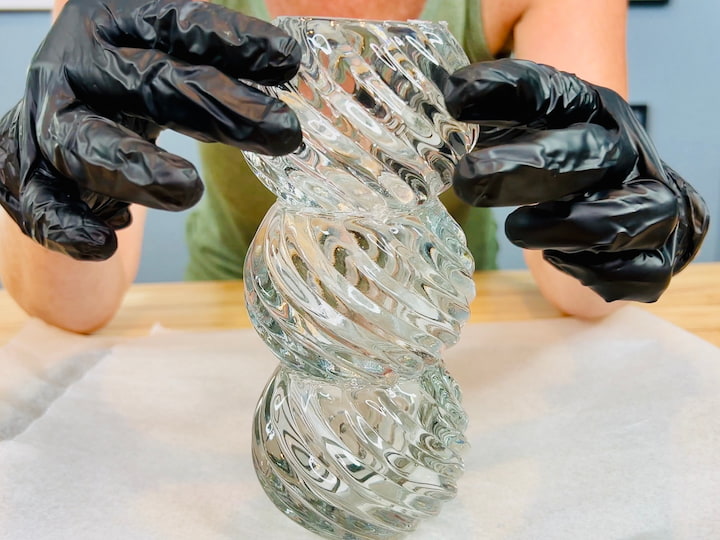
- Note: You can see in the photos how I used different shapes. Some are curvy, and some are straight pillars.
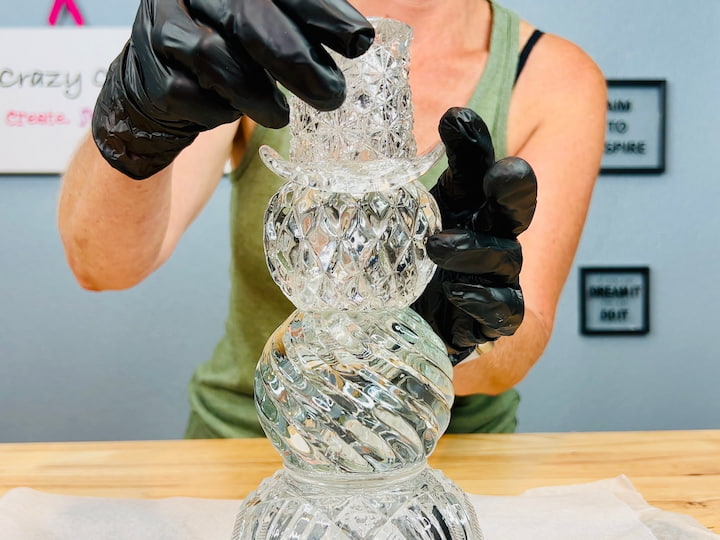
Step 3: Choose & Attach the Hat
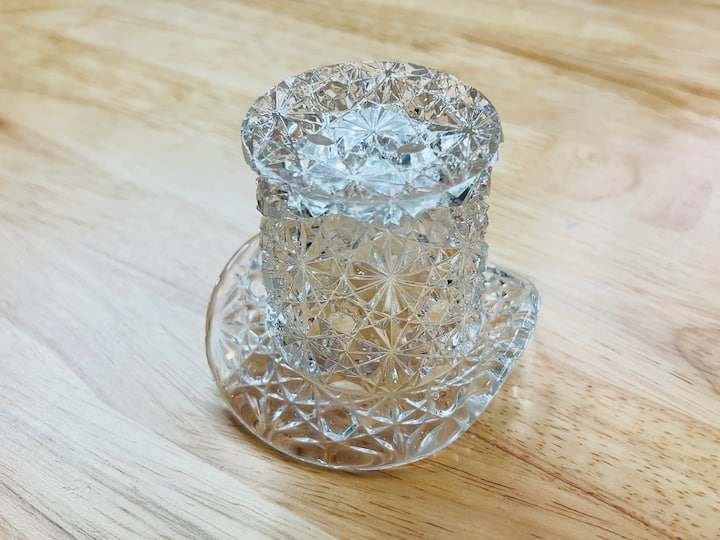
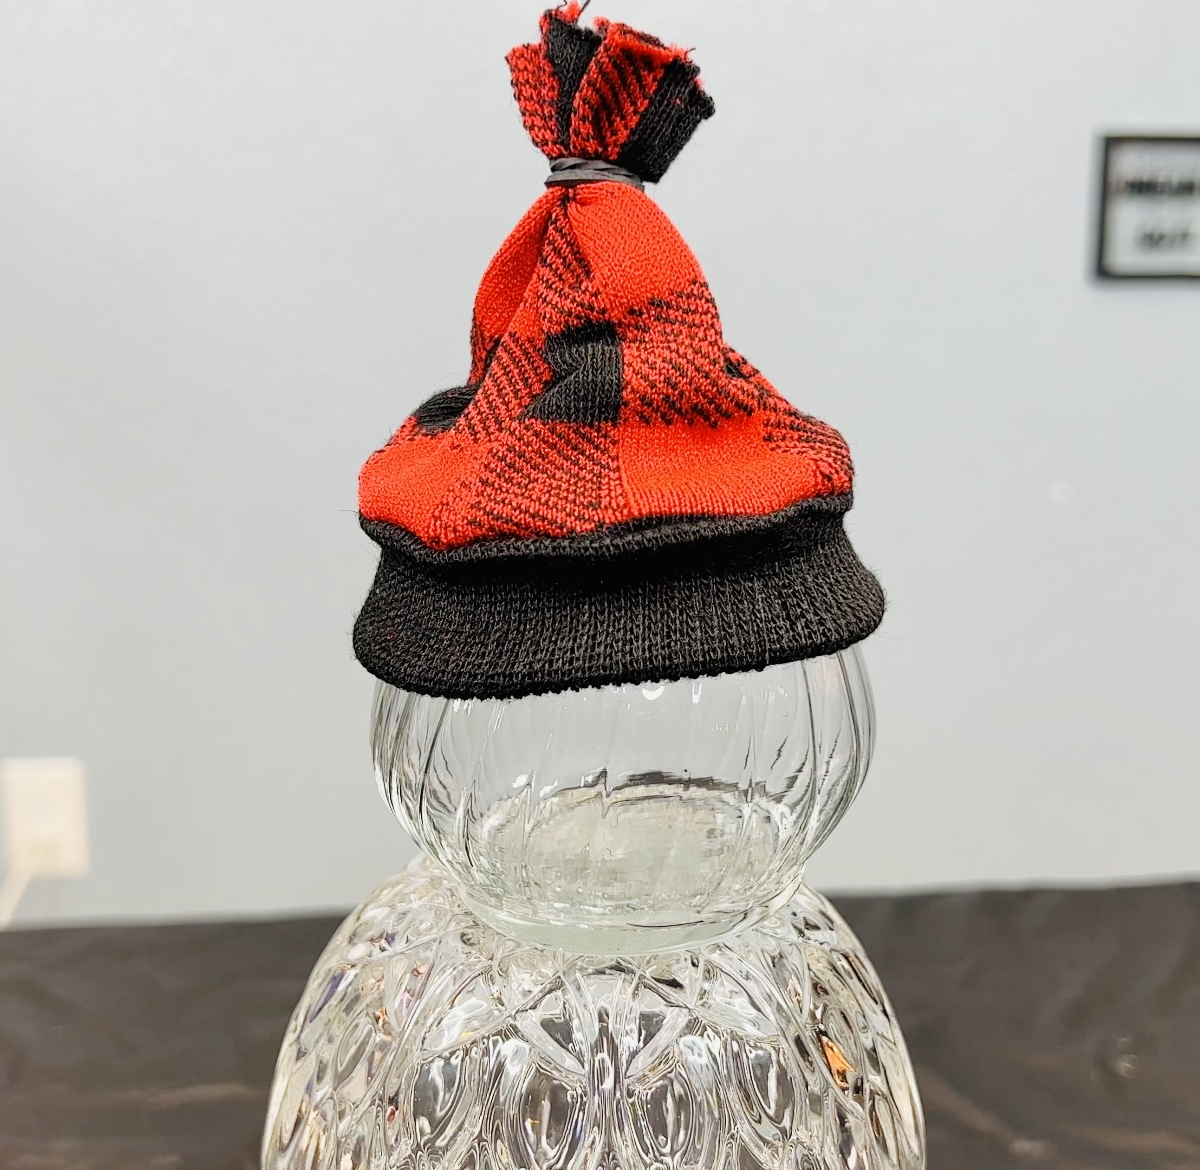
The hat is what gives the snowman his personality! I found these vintage glass top hats (actually toothpick holders!), but you have options.
Hat Ideas:
- Vintage Glass: Look for unique shapes like I did.
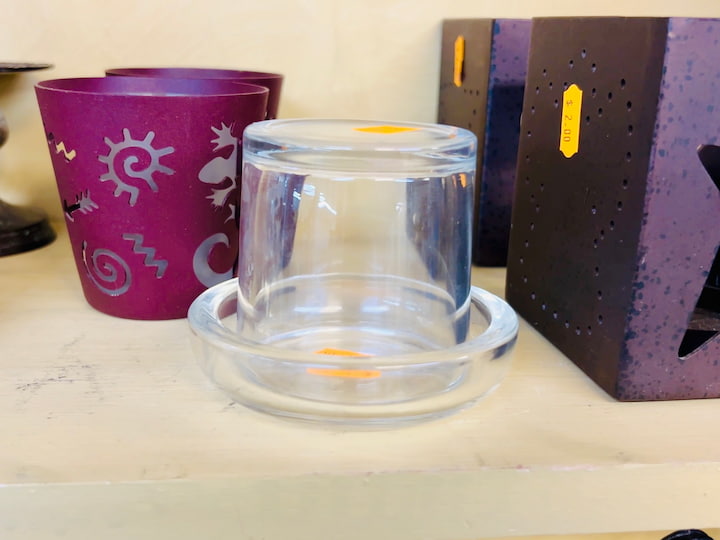
- Votive Holders: Flip a simple votive cup upside down.
- Coasters: Glue a coaster to a votive to make a brim.
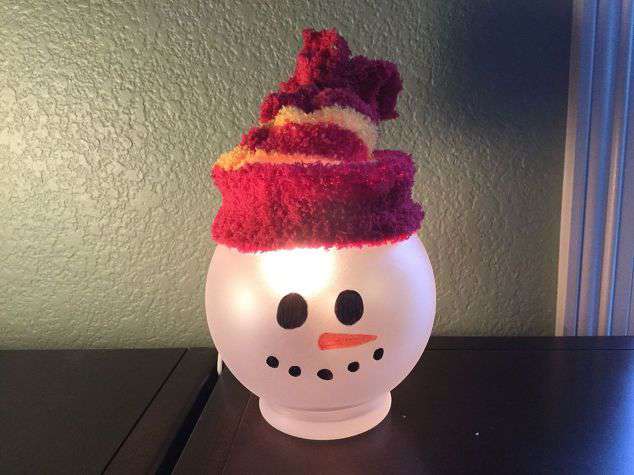
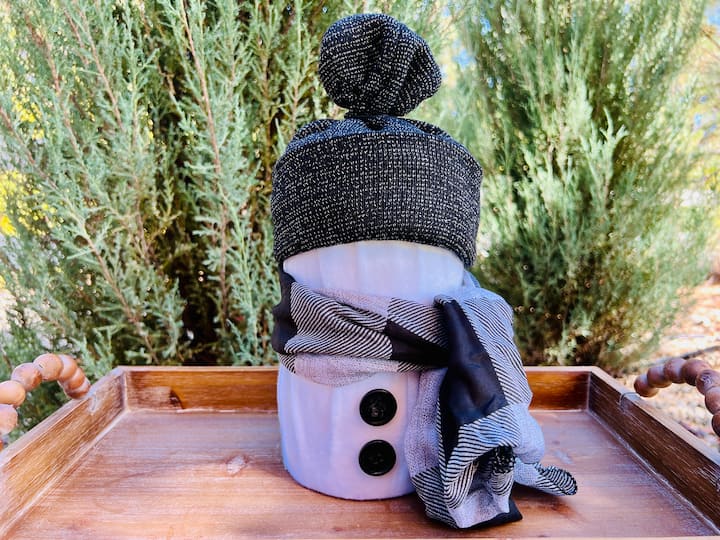
- The Stocking Cap: I made a stocking cap out of a sock.
[Mention your Old Dishes lid idea here](Insert Gallery #3 Here: Hat Options + Gluing the Hat on the Snowman) (Note: Definitely add that Stocking Hat photo to this gallery if you can! It completes the “Options” set.)
How to Attach: Just like the body, apply a ring of E6000 to the top of the snowman’s head and press the hat firmly in place.
Step 4: Let it Cure
This is the hardest part—waiting! E6000 needs at least 24 hours to fully cure.
- Don’t Touch: If you move them too soon, they will slide apart.
- Tape Trick: If your glass is slippery, use a piece of blue painter’s tape to hold the stack straight while it dries.
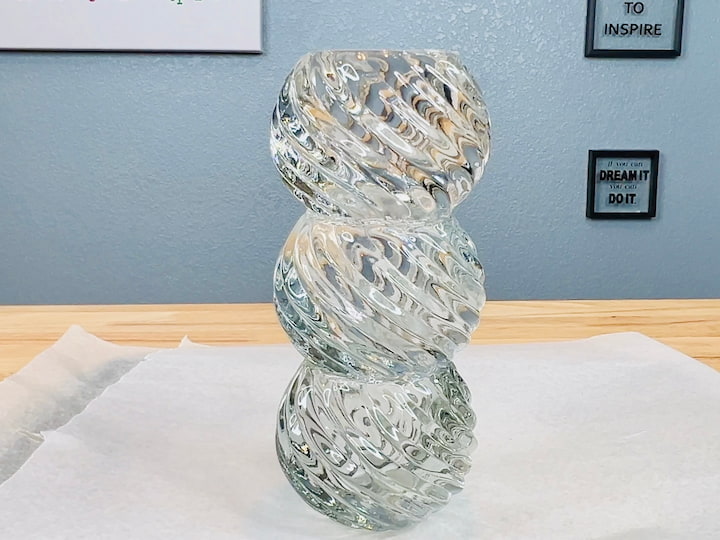
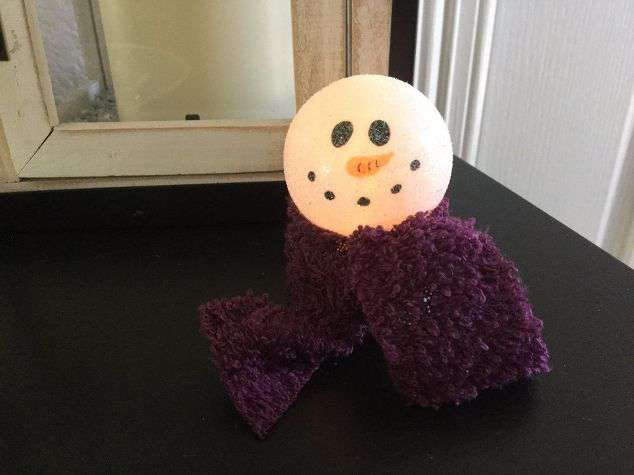
Step 5: The Reveal (Light Them Up!)
Now for the magic. Since we used clear glass, these snowmen light up beautifully!
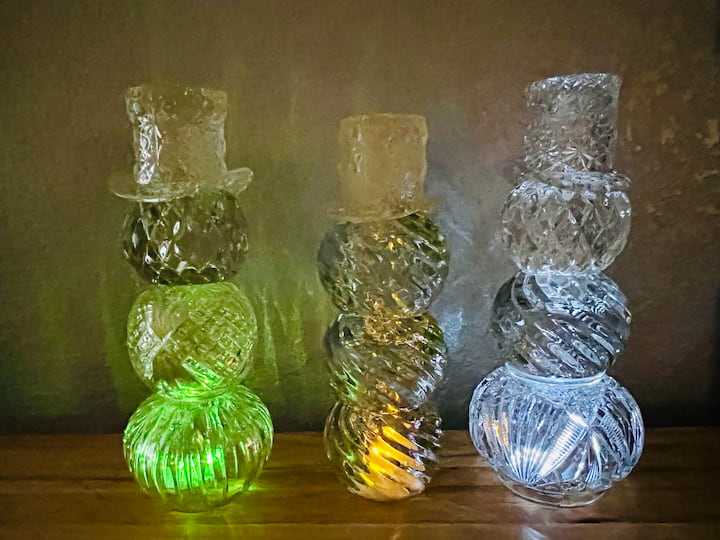
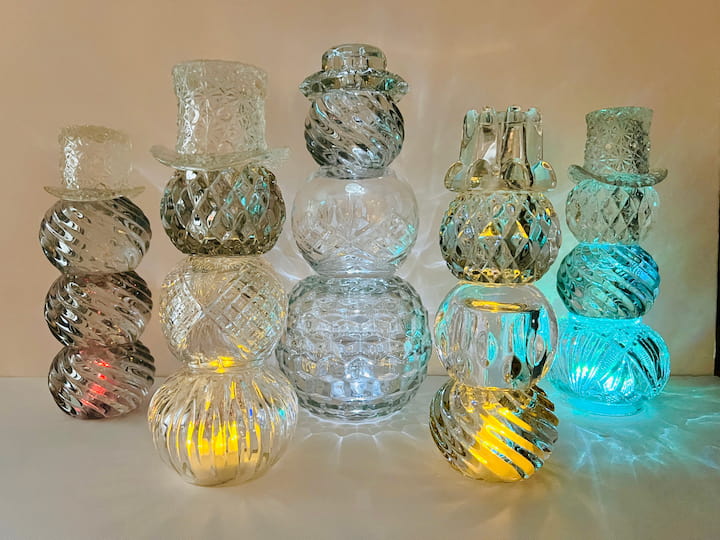
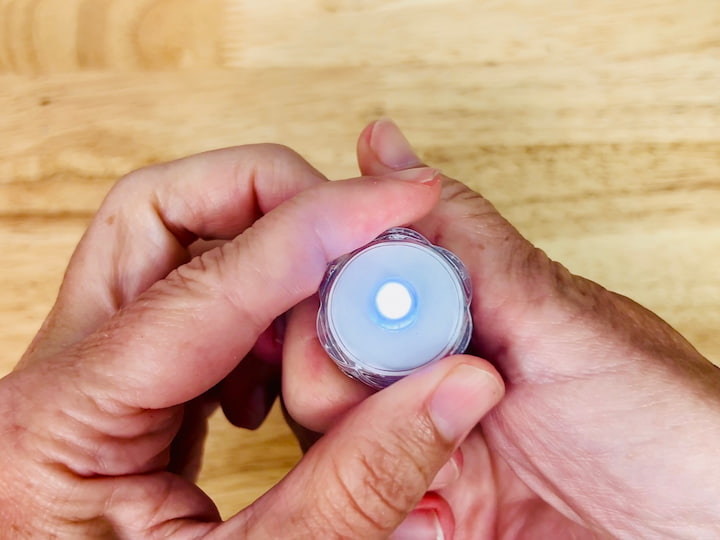
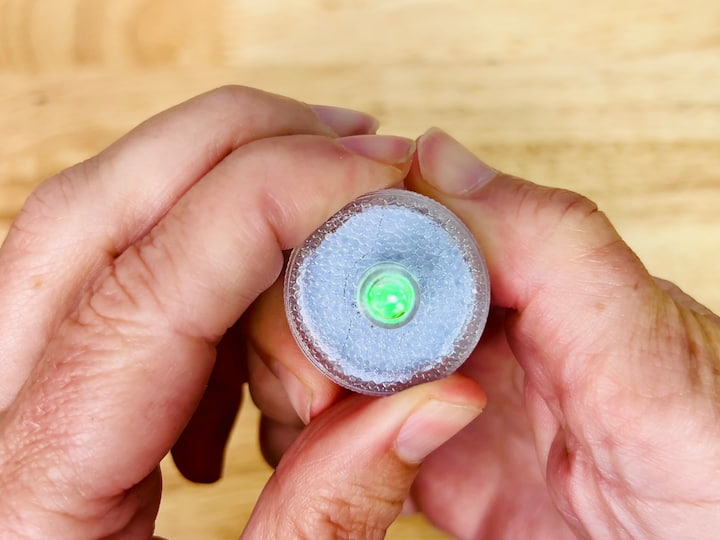
- Battery Tealights: Place one under the bottom dish.
- Color Changing Lights: These are my favorite—they make the cut glass sparkle in pinks, blues, and greens.
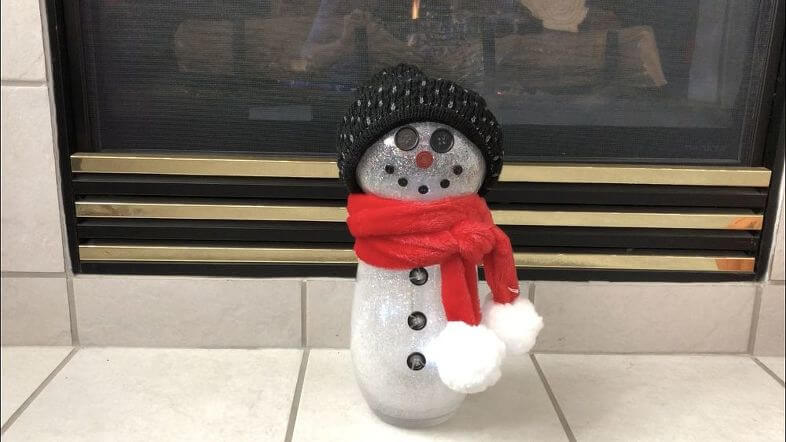
How to Accessorize Your Glass Snowman
- The Face: Glue on black buttons, beads, or pom poms for “coal” eyes. Use a small orange felt triangle or polymer clay for a carrot nose.
- The Scarf: Tie a scrap of plaid ribbon, yarn, or a strip of felt around the neck to hide the glue seam.
- The Arms: Glue brown pipe cleaners or small twigs to the sides of the middle glass piece.
- The “Melting” Look: For a fun preschool craft, have kids glue cotton balls onto black paper to make a “melting snowman” art piece to go with your glass decor.
- Mini Ornaments: If you find vintage glass salt and pepper shakers, glue them together to make tiny snowman ornaments for your tree!
Frequently Asked Questions
For this project, I highly recommend E6000. It is a strong, industrial-strength adhesive that dries clear and is waterproof. Hot glue will pop off the smooth glass surface too easily, especially if the snowman gets cold or bumped
I found mine at a thrift store! After some research, I learned they are actually vintage Fenton Glass Toothpick Holders. If you can’t find those, a simple glass votive holder or a shot glass turned upside down works perfectly as a hat
E6000 starts to get tacky in about 2 minutes, sets in 10 minutes, but takes a full 24 to 72 hours to cure completely. I recommend letting your snowman sit undisturbed for at least 24 hours before moving him.
Yes! Dollar Tree sells clear plastic bowls that look like cut glass. If you use plastic, you can use a strong plastic bonding glue or even hot glue (since plastic is porous enough for it to grab), but E6000 still works best for longevity.
Easy Snowman Craft Video
The “Craft or Crap” Verdict?
Now it’s your turn to judge. Did I pass the challenge?
Mona’s Project: Be sure to hop on over to Mona from Craft Klatch’s project to see what she created! You get to decide: is it craft or crap? We want to know what you think of both!

Join the Fun: We hope you will participate in our Craft or Crap Challenge! If you do, we’d love to see your projects.
- Share it on Instagram with the hashtag #craftorcrap and tag @craftklatch or @chascrazycreations.
- Join and share it in our [Craft or Crap Facebook Group].
More Glass Snowman Options
If you want to try different styles, check out these variations I’ve made:
- Glass Candle Holder Snowman: The original version of this project. [Glass Candle Holder Snowman]
- Frosted Snowman: Use frosted glass spray paint and add a face! See the tutorial: [Easy Snowman – Great Kids Craft Too!]
- Glitter Snowman: Coat the inside with floor cleaner and glitter for a sparkly look. See the tutorial: [How To Make A Snowman Craft]
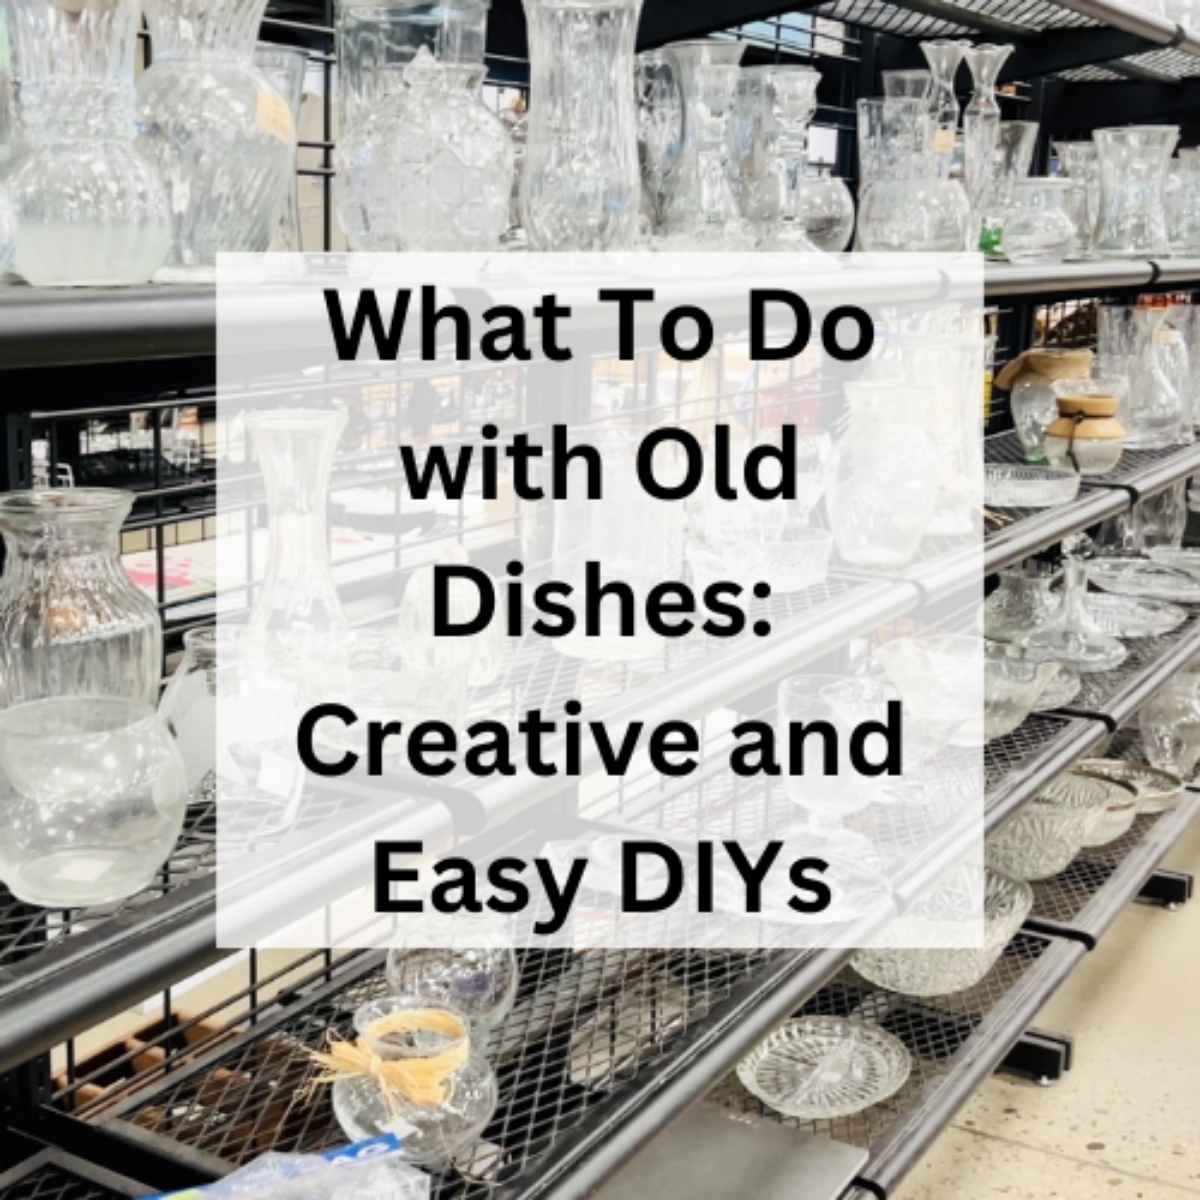
- Old Dishes Guide: Want more ideas for mismatched china? Check out my guide on [What To Do with Old Dishes].
DIY Glass Snowman
Equipment
- Rubbing Alcohol Cleaning
- Paper Towels
- Blue Painter's Tape (to hold glass in place)
Materials
- 3 Glass Candle Holders or Bowls Small, Medium, Large
- 1 Glass Votive Coaster, or Toothpick Holder (for the hat)
- E6000 Adhesive
- Battery-Operated Tealight
- Optional: Buttons Ribbon, or Twigs for decor
Instructions
- Prep: Clean all glass surfaces with rubbing alcohol to remove dust and oils.
- Base: Apply a generous ring of E6000 glue to the top rim of the largest candle holder.
- Body: Place the medium candle holder on top of the base. Repeat this step to add the smallest candle holder (the head) on top.
- Hat: Apply glue to the rim of your “hat” piece (votive or toothpick holder) and center it on the snowman’s head.
- Secure: If the glass is slippery, use strips of blue painter’s tape to hold the stack straight.
- Cure: Let the snowman sit undisturbed for 24 hours.
- Light: Place a battery-operated tealight under the base to light him up!
More Fun Snowman Craft Ideas
- Super Easy DIY Snowman Crafts You Can Make In One Day
- Snowman Craft Ideas: You Won’t Believe These Easy Dollar Tree DIYs
- Dollar Tree Snowman Wreath, 2 Awesome and Easy DIYs
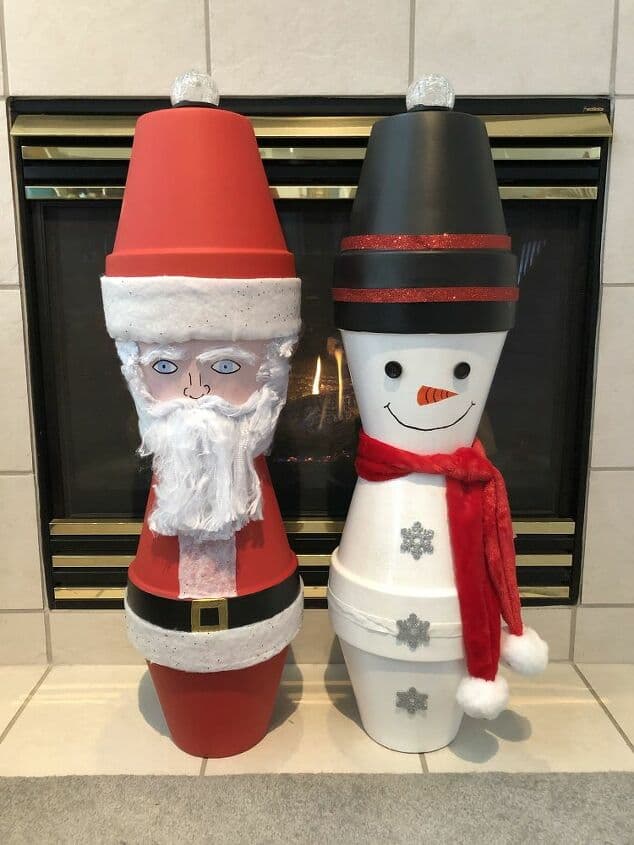
- Easy Flower Pot Snowman and Santa with Video
- Easy and Cute Mummy and Snowman Reversible Pillow Cover
- Dollar Tree Snowman Wreath, 2 Awesome and Easy DIYs
- Wooden Snowman Family
Want to see more craft or crap challenges?
- DIY Tiered Tray: Craft or Crap Challenge
- DIY Snowman Craft from Thrift Store Dishes: Craft or Crap Challenge
- Easy DIY Fall Gnome Craft: Craft or Crap Challenge
- DIY Easter Painting Ideas: Easy And Fun
- Stunning Patriotic Wreath: An Easy and Unexpected DIY
- DIY Garden Decor: Epic Yard Art Showdown
- Easy DIY Sock Snowman Craft: Winter Decor and Gift IdeaHalloween Mantel Ideas: Easy DIY Spooky Decor Practically Free!
- Easy DIY Cardboard Halloween Decorations
- Delightful Easy Flower Crafts with Video
- Super Easy DIY Dollar Tree Valentine Ideas with Video
And I hope this inspires you for repurposing and upcycling of your own for a fun winter craft.


What a wonderful project to make! I’m in the process of making a Christmas Tree out of glass bowls & plates. Thank you for sharing this snowman project. I am going to find votive cups etc to make a snowman or two!! Thanks again.
So glad you liked it Carol, and I would love to see pictures of yours when they’re done.
How can I post pictures of the Christmas tree & the Snowman that I made? I tried to past a copy of them in this reply but it would not work. I made the tree out of various dishes, the base of the tree is a candle holder, the top is the cover to a candy dish. The Snowman is 3 different candle holders, I decided to put Mod Podge on it then I sprinkled Epson salt on it, I think I’m going to go over it again so that it is covered more, the top hat is an ornament that I got at At Home Store. I’m pretty pleased with both items. Thank you for your inspiration. Carol Kalar
Hi Carol, I can’t wait to see your pictures. You can email them to me at [email protected]
How did you get the light inside? Thought you glued everything together.
The first candle holder was upside down allowing me to place a light inside.
The hats appear to be made one of the many products made by Fenton. They made vases, candy bowls, lamps… some hand painted and more ornate than others. My mom had a milk glass Fenton hat. It just sat on a shelf next to a glass shoe.
Thank you for sharing
Your hat was a toothpick holder.
Thank you for sharing
I remember my grandmother (passed in 1983 at 87) using one of these hats also using it for a toothpick holder. Hers was red graduating into orange. Lovely!
Thank you so much and thanks for sharing!
They are all great. I espically love the ones with the top hats. The color changing lights are my favorite.
Thank you so much for sharing!
I absolutely LOVE the snowman, Chas! I have never seen one of those amazing hats! Definitely a CRAFT!