
DIY Easter Painting Ideas: Easy And Fun

Are you looking for some Easter Painting Ideas? Here are some easy spring DIYs that you can make on a budget.
Spring is arriving, and that means more time spent outdoors. Sometimes, there’s no better place to be than inside with a little fun painting.

I’m teaming up with Mona from Craft Klatch for another craft challenge. We are creating Easter Painting Ideas. There were a few rules:
- Create a project for spring or Easter
- It had to be something painted
- Can use supplies you already have at home
- The last item was voted on by our followers/subscribers and they picked the item we must paint as “something that is collecting dust”.
My item collecting dust is our plastic eggs. My kids are now adults so they are just sitting there doing nothing. So here we go, we’ll get started with my first project, you can hop over to Mona’s to see hers, and I’ll have many more Easter painting ideas below as well.

Easter Painting Ideas Materials
Today we’re going to be making concrete eggs for spring, so let’s get started. Here are a few items we’ll be using. We’ll use some concrete mix, oversized plastic eggs, and paint.
- Plastic Eggs
- Concrete
- Folk Art Home Decor Chalk Paint
- Cooking Oil Spray
- Gaffers Tape
- Wood burning tool
- Paintbrush
 Prextex 3.5” Unfilled Eas…Shop on Amazon
") Sika – Sikacryl – Gray – Re…Shop on Amazon
Sika – Sikacryl – Gray – Re…Shop on Amazon") FolkArt Home Decor Ultra Ma…Shop on Amazon
FolkArt Home Decor Ultra Ma…Shop on Amazon") Chosen Foods Avocado Oil Sp…Shop on Amazon
Chosen Foods Avocado Oil Sp…Shop on Amazon Gaffer Power Proudly Made i…Shop on Amazon
 Plaid wood burning and sten…Shop on Amazon
Easter Painting Ideas Video
Easter Painting Ideas instructions
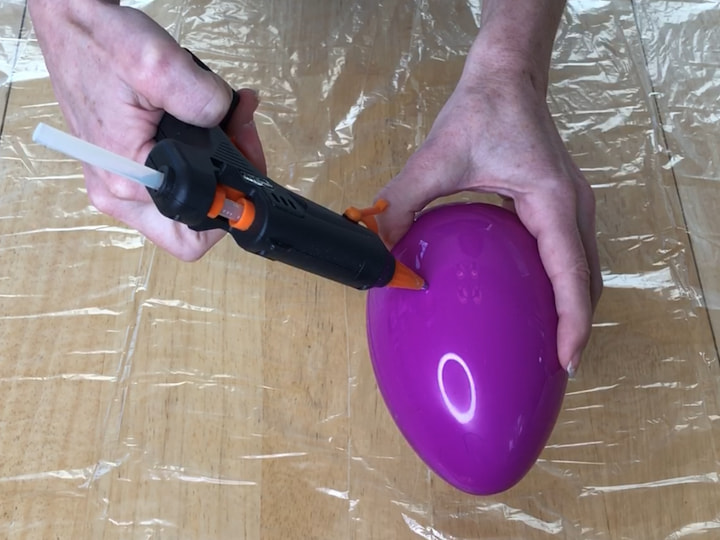
1. Prep the Plastic Eggs
Here’s one of the eggs and I’ll need to do a little prep work on all my eggs before we get started. This one has holes, so I’m going to use a hot glue gun and coat these holes with a little hot glue so that nothing runs out. So I’m just going to go ahead and close all the holes up and let that cool.
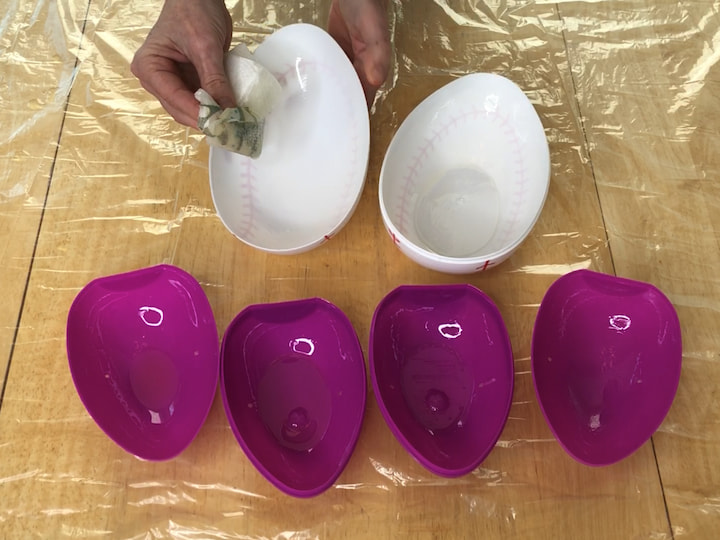
So I’ve prepped the outside of all three eggs and let’s talk about how we prep the inside. I will use some avocado oil to coat the inside of the eggs, just like you would with a muffin pan or when you’re baking any of your baked goods.
Put some oil in the egg and coat the inside so that when the concrete dries it will come out easily. You could use cooking spray if you prefer, but I’m not a chemical girl so I like using more natural products.
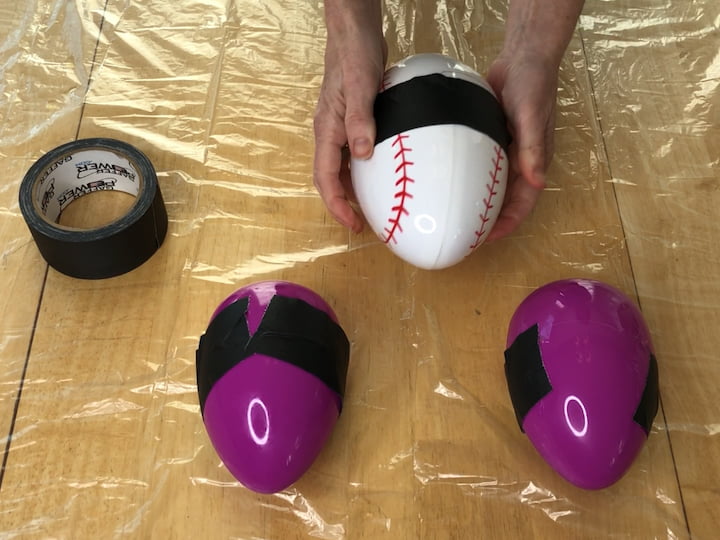
So all of these are prepped and I’m going to put them all back together. As I put this last one together let me explain that you could try to put the concrete on each side, but putting it together, in the end, would make a mess, and it can be hard to get them to put it back together.
My recommendation is that you put them all together before adding the concrete. I also like to reinforce them just a little bit more. I’m a big fan of gaffer’s tape but you could use a tape of your choice. Gaffer’s tape is a fabric tape and it adheres really nicely and when you peel it off of something it doesn’t leave the sticky residue behind. It’s really easy to tear because it’s fabric tape. so we are going to tape all of our molds just for a little extra reinforcement to make sure they don’t come apart in the process.
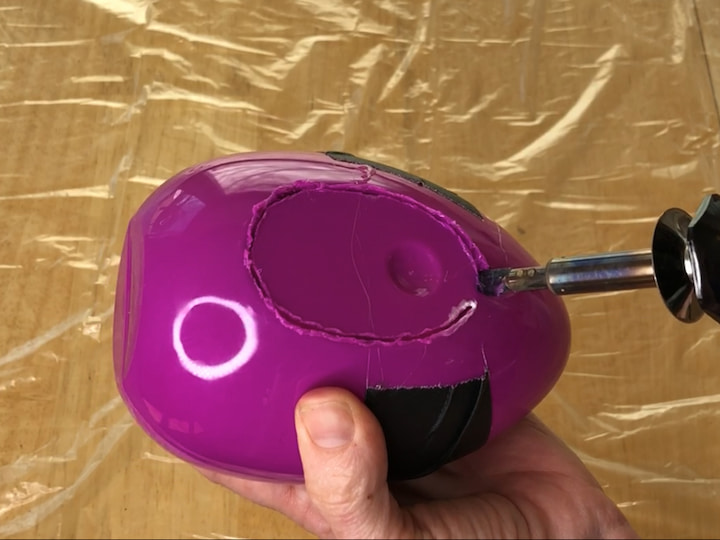
2. Make a hole in the egg
We need a way to get the concrete inside so you have a few options. You could drill a hole, but I’m going to use this really cool product from Plaid. This is called a wood-burning tool and it comes with this cool razor blade on the edge. This works great for foam pumpkins as well.
All you do is use this little razor blade and let it melt through the plastic. You can either hold it and it will slide or you can see it if you want. The choice is really yours. Take your time going around. I’m going to follow this nice little edge that is already here. Once you are finished you should be able to pop it right out. If it is a little stuck you might have missed a spot. Now your mold is ready.
I would love to know what your favorite season is, let me know in the comments. I am a big summer and fall person. I love the beauty of winter but I don’t like being cold so if I can view winter from the inside I’m a huge fan. I don’t like to be cold. I grew up in Minnesota and moved to Colorado and I think I’ve had my share of cold weather. I love spring and all the beautiful flowers that show up in the trees. That is not something I had a lot of exposure to growing up. We kind of go from winter right into summer in Minnesota but, in Colorado, we get lots of beautiful flowers.
I don’t mind a big opening because that way I can get the concrete in more easily. The opening will be at the bottom so it’s ok if it is a little rough.
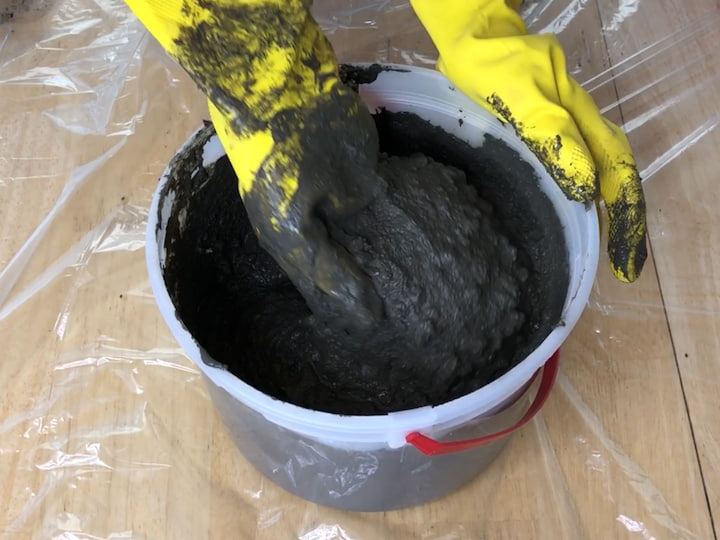
3. mix the concrete
Now it’s time to mix the concrete. I’m going to use an old ice cream bucket and because I tend to make a little bit of a mess when I’m making this I will cover my work surface.
I’m going to scoop some of the concrete into the ice cream bucket. This concrete is not very expensive which is nice and you will notice it has rocks in it, but that’s ok. You want to mix enough so that you can fill all of your molds and then just add water and start mixing. Sometimes I use a spoon or one of my gardening tools and sometimes I just like to get in there with my hands.
You are looking for a milkshake consistency so you might need to add a little more water as you stir. Keep stirring until you know it’s all mixed and then look for that consistency of a milkshake.
Have you ever made anything with concrete? If so share it in the comments I’d love to know what you’ve made.
This can be adapted to all sorts of projects.
- I have used it in light fixtures to make garden globes for my yard.
- You can use it in a plastic pumpkin in the fall to make concrete pumpkins.
- You can make outdoor lights with it
You can definitely do this for so many other projects. I just wanted to get in close here so you could see the milkshake texture. I use gloves and sometimes with my hands, I can just feel everything a little better as I mix it up.
Don’t wash any of this down your sink, make sure to clean it out outside. This is concrete after all.
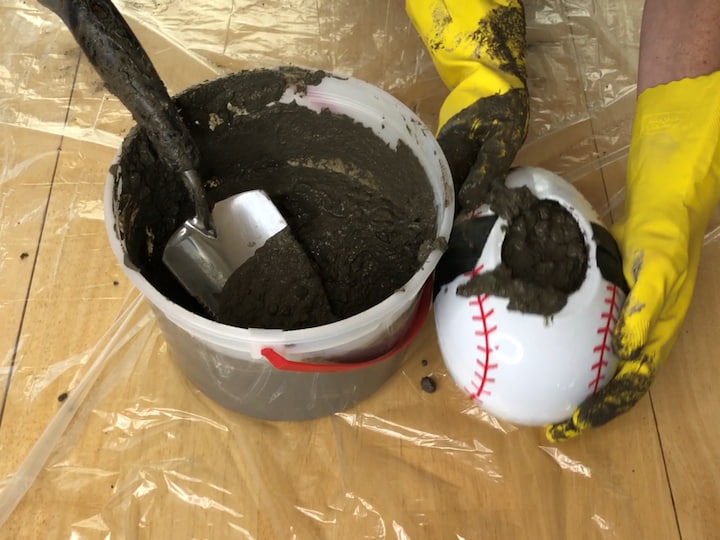
4. Put the concrete in the egg
Now I’m going to fill the molds. I am going to use my gardening tool and just scoop the concrete into the hole. You’re going to need to tap it down along the way so it levels out and this will also help reduce the number of air bubbles.
We’re just going to go ahead and scoop it in and as it gets close to the top just tap it to level things out. Now this will be the bottom of the egg, but you want it to be solid and you don’t want air bubbles you want it filled all the way to the top.
5. Let the Concrete set
Once you get all the molds full they will need to be set up. It doesn’t usually take very long, but you can let them sit overnight if you prefer.
What have you guys been working on? Has anybody been creating anything? I love to know things about you guys, either what you’re making or where you’re from. Just drop that in the comments. I love reading the comments. I’d love it if you would follow me on home talk TV.
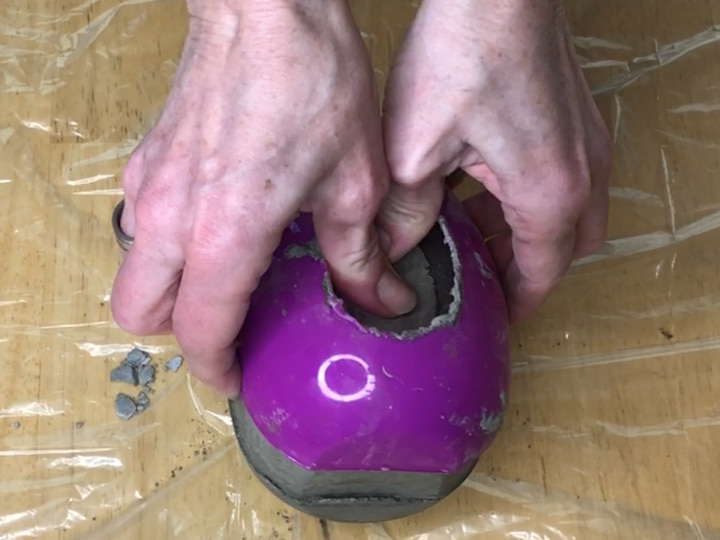
6. Remove the Concrete eggs from the plastic egg
These have sat for about two hours now and you can use a little knife to help separate your eggs. Sometimes they get a little stuck, but if you use a knife or a screwdriver you can generally get them apart.
If you can get that side to come off first, it makes it a lot easier because you can use your thumbs and push down to get the other side off. So here are all three concrete eggs! You can see that some of them are a little darker gray, but as they dry they will lighten up. What do you guys think? Tell me in the comments.
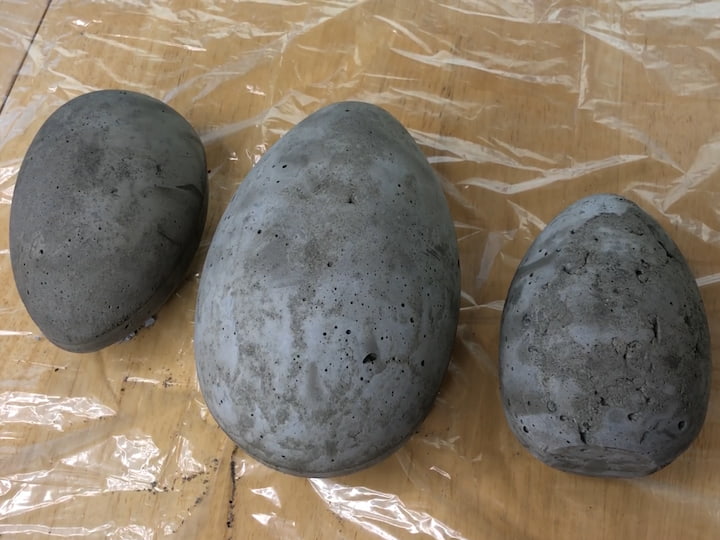
7. Let the concrete dry
These molds have a flat bottom so you can set them upright or leave them flat. So you have some choices. I had a little extra cement so I tried filling each side separately and then putting them together. When I popped it out it wasn’t filled in all the way and probably had a little bit of air. The other system worked better, but I can still use this and make it like an egg that is cracking open which would be a cool idea.
There’s a slightly raised edge where the two sides of the egg come together. You can sand this edge down to make it a little more smooth. Once you’ve got the look you want you can leave them. If you want to smooth out some of the scratches you can wet your hand and just smooth those right out. I’m going to let them dry completely before moving on to the next step.
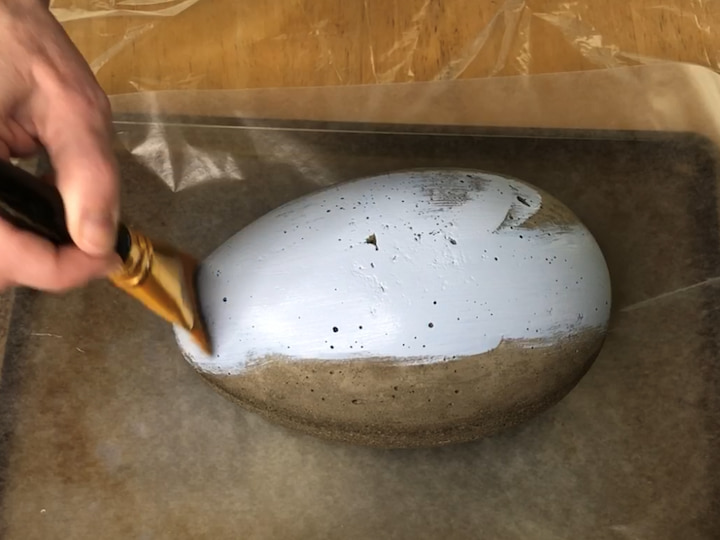
8. Paint the Concrete Egg
Now that my eggs are dry we are going to paint them. I’m going to use Folk Art Home Decor Chalk Paint in the color glacier for the big egg. When you are choosing your paint make sure it’s good for all surfaces especially if you are going to be putting them outside. You can check the label and make sure the paint is designated as multi-surface.
You can use one or two coats, it’s up to you. You can also fill in all the little bubbles if you like or you can also leave them just plain concrete. I am a seasonal decorator so I like to leave things up for a season instead of just a month or a holiday. I was contemplating adding speckles to my eggs. It already has a bit of a speckled appearance but I might add more.
Feel free to drop that in the comments, I’d love to know what you think.
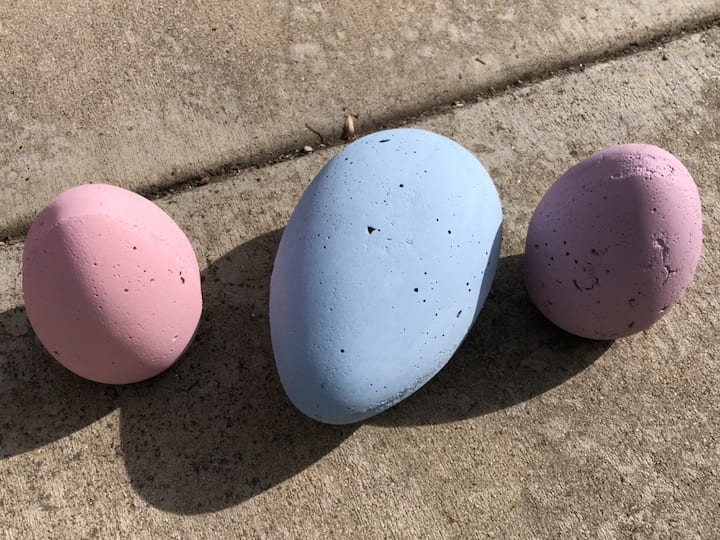
Now that the blue one is painted I’m going to do the next couple. I’m gonna use Folk Art Home Decor Chalk Paint one vintage Victorian and one lilac. Again those are in the materials links for you. Which colors would you choose? Drop that in the comments.
Now that this one’s all done I’m going to let it dry and paint the last egg in lilac with the folk art home decor chalk paint. It’s pretty much looking like one coat is going to do it for all of these so I’m just going to leave it at that.
I kind of like the imperfect look but that’s just me. I don’t know if you noticed the shirt I’m wearing, but it says perfect is boring and be imperfectly you. If you have any questions about what I’m doing today drop those in the comments. I love being available to you to answer questions if I can.
9. let the paint Dry
Once these are all painted we will let them dry completely. You can just them outside or in your garage depending on what your weather is like.
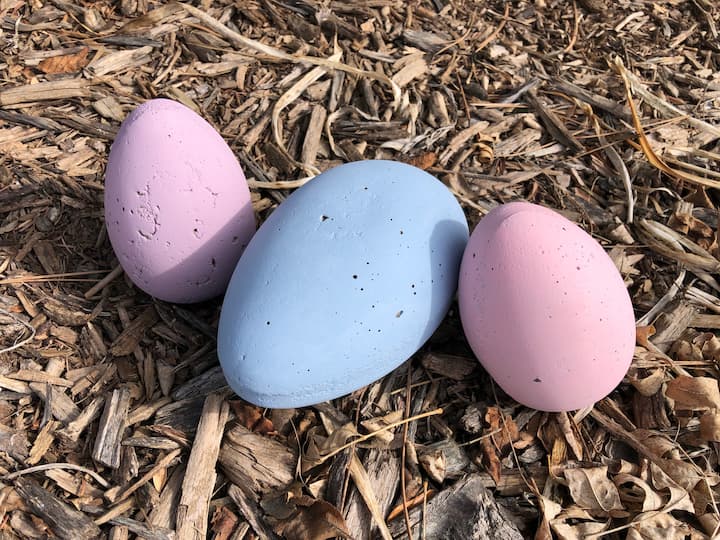
Here they are all dry and ready to go out in my yard.
You can see a whole collection of ideas that I’ve made with concrete in this post: The Ultimate Guide to Concrete Crafts
Easter Painting Ideas Video

Now, hop on over to Mona’s at Craft Klatch and see what Easter Painted Ideas she has for you!

Want to join our Easter Painting ideas challenge?
- Join our Facebook group and show us your project following the rules above:
- Tag us on Instagram and use the #craftorcrapchallenge
Here are some other great Easter decorations and painting ideas:
Have a family fun night with the kids and make Easter crafts – grab stamps, watercolors, and paper plates, and get the creative juices flowing to create some cool art projects.

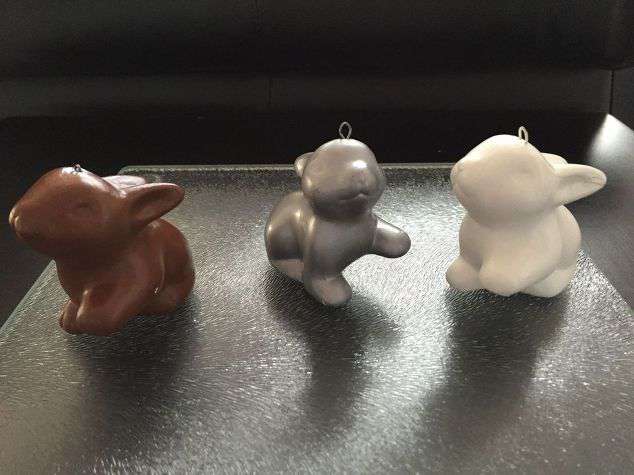
Paint thrift store bunnies with acrylic paint
- How To Paint On Ceramics, Easy and Beautiful Upcycled Thrift Store Bunny
- An Easy and Awesome Way To Paint Ceramics And Upcycle Thrift Store Decor

Make a sign with carrots for the easter bunny – Easy and Cute Easter Bunny Stop Here Sign with Video
Grab some bunnies at the dollar store and have fun easter painting – Family Fun Craft Time
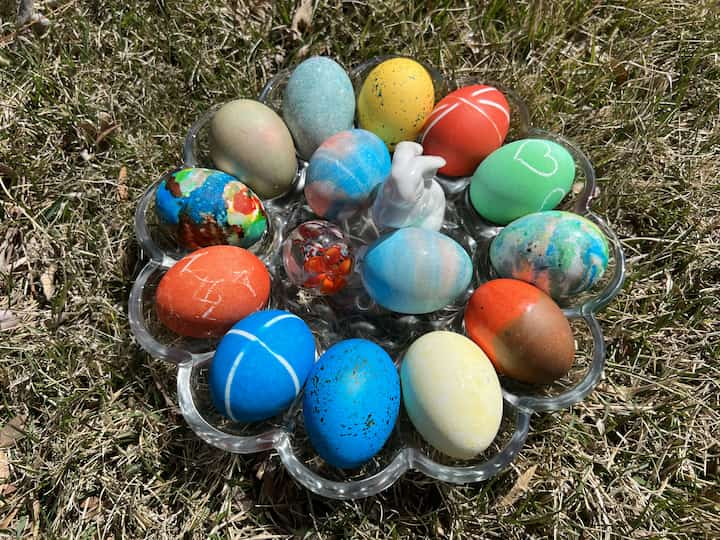
Have fun painting eggs in a unique way by rolling eggs in food color and shaving cream – How To Dye Hard Boiled Eggs 9 Ways Easily

Make a cute bunny by using a stencil, chalkboard, and white paint. How To Paint A Bunny the Easy Way with Video

Grab some Mod Podge and glitter or confetti and create some DIY Peeps and rabbits as an art activity Thrift Store Glitter Bunny Upcycle
Use paint pens and paint Easter rocks, kids love rock painting
Grab those Easter baskets and have fun during those egg hunts. We store our eggs in the egg cartons in the fridge so they stay cool and safe for eating.
I’m in Colorado and I love knowing where everyone from all over the world is watching. Please drop where you’re tuning in from in the comments.
I hope this inspires you to try some grab some paintbrushes and make some concrete eggs of your own.
I’d love it if you subscribe to my YouTube channel and my blog. Thanks for watching and I’ll see you next time.
Shop any of these stores and I receive a small commission at no cost to you.
 Orgrimmar 2 Sets Wooden Gno…Shop on Amazon
 Farmhouse Beads Long Length…Shop on Amazon
 Interchangeable Seasonal We…Shop on Amazon
 Glitzhome LED Lighted Woode…Shop on Amazon
 ONWAY Easter Pillow Covers …Shop on Amazon
 Inwnpio 5PCS Easter Decorat…Shop on Amazon

Want to see more craft or crap challenges?
- DIY Tiered Tray: Craft or Crap Challenge
- DIY Snowman Craft from Thrift Store Dishes: Craft or Crap Challenge
- Easy DIY Fall Gnome Craft: Craft or Crap Challenge
- DIY Easter Painting Ideas: Easy And Fun
- Stunning Patriotic Wreath: An Easy and Unexpected DIY
- DIY Garden Decor: Epic Yard Art Showdown
- Easy DIY Sock Snowman Craft: Winter Decor and Gift IdeaHalloween Mantel Ideas: Easy DIY Spooky Decor Practically Free!
- Easy DIY Cardboard Halloween Decorations
- Delightful Easy Flower Crafts with Video
- Super Easy DIY Dollar Tree Valentine Ideas with Video


Chas!!! I LOVE the ideas of the concrete eggs decorating the yard!!! Such a clever way to do it too! Wish I had thought of that. DEFINITELY CRAFT NOT CRAP!!!
You’re so sweet Mona, thank you and it’s so fun doing this challenge with you.