What To Do with Old Dishes: Creative and Easy DIYs

Share it with others!

Have you wondered what to do with old dishes? Here are several creative crafts made from dishes that are super easy DIYs!

This post may contain affiliate links, I earn from qualifying purchases at no extra cost to you. Click here for my disclosure policy

Have you wondered what to do with old dishes? Here are several creative crafts made from dishes that are super easy DIYs!

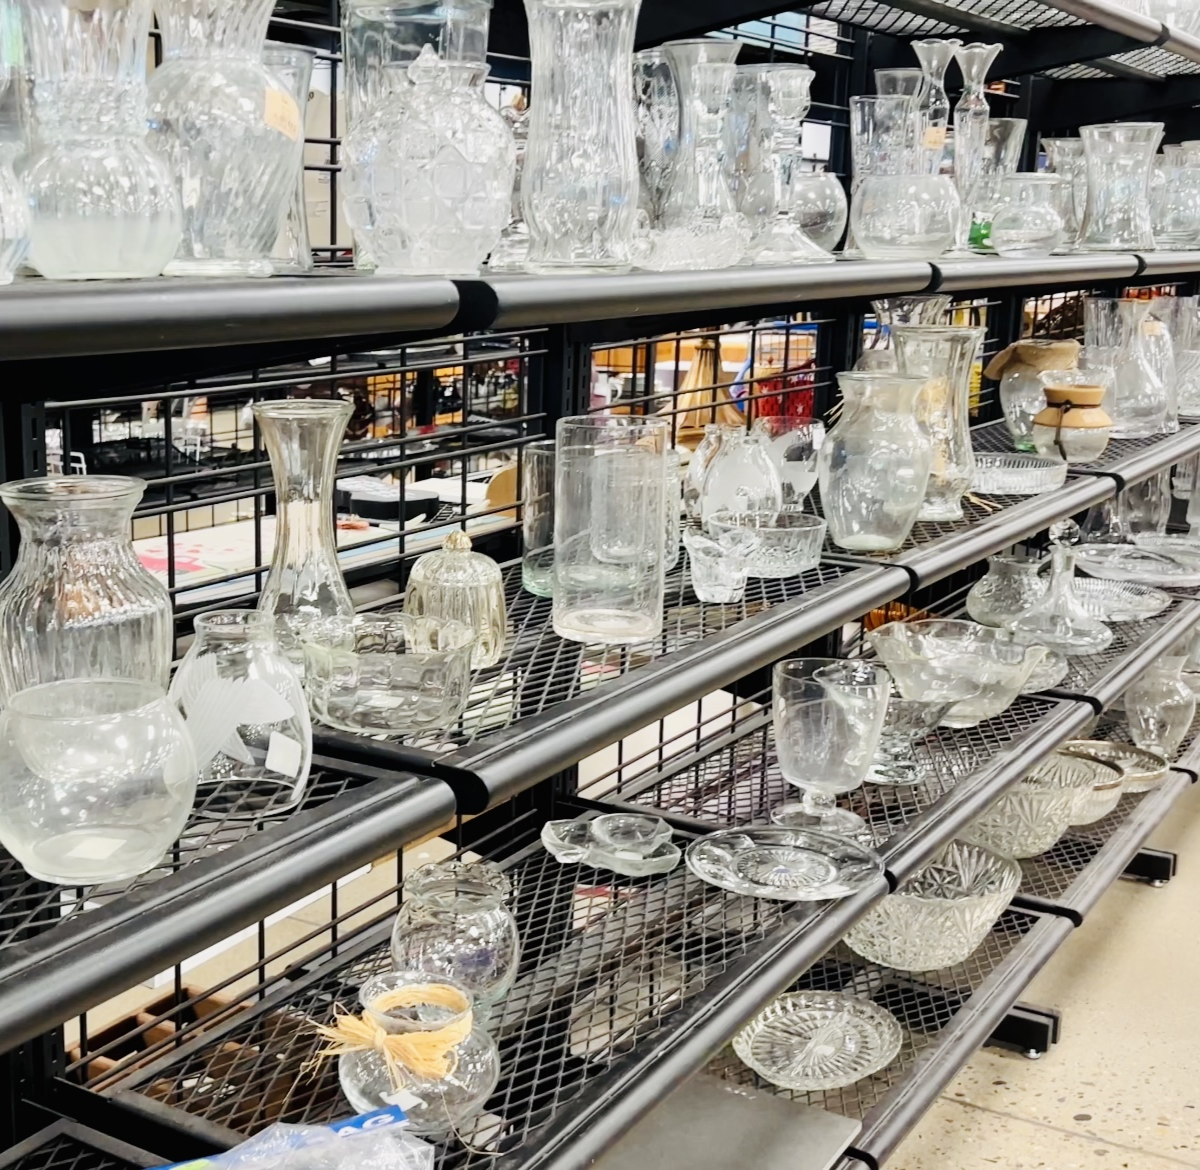
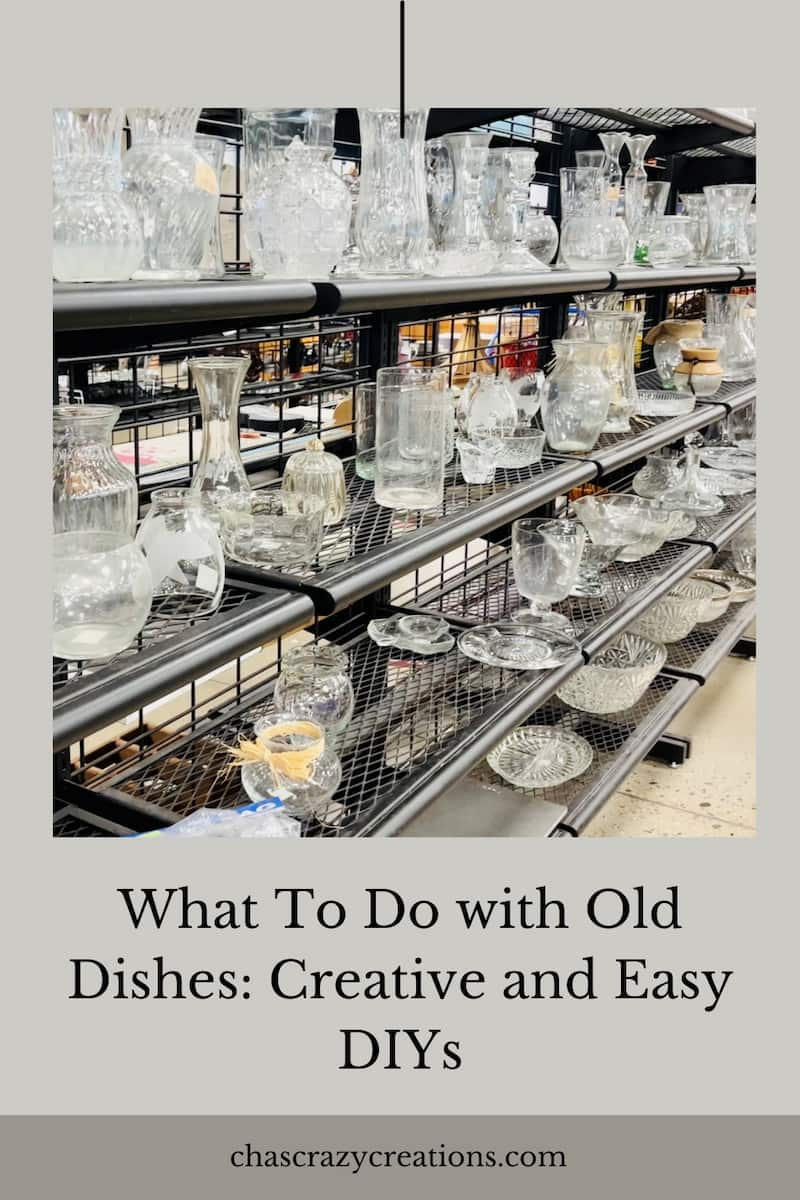
If you’ve ever found yourself at a thrift store with a stack of old dishes in front of you and wondered what to do with them, you’re in the right place. In this blog post, we’ll explore some fantastic DIY projects that breathe new life into your old dishes. These creative ideas not only help you declutter your home but also give you a chance to showcase your crafting skills. So, let’s dive in!

What To Do with Old Dishes Video

If you've ever found yourself at a thrift store with a stack of old dishes in front of you and wondered what to do with them, you're in the right place.

What do I do with my old dishes?

When it’s time to part with your old dishes, there are several responsible and sustainable options to consider. Here’s what you can do with them:

  1. Donate: If your old dishes are still in good condition and usable, consider donating them to local charities, shelters, or thrift stores. Many people in need could benefit from your contribution.
  2. Sell: You can sell your old dishes online through platforms like eBay, Craigslist, or even at a garage sale. Collectors and vintage enthusiasts might be interested in certain patterns or designs.
  3. Give to Friends or Family: Offer your old dishes to friends or family members who might be starting a new household or looking to replace their own dishes.
  4. Upcycling and Crafts: Get creative and use your old dishes for various crafting projects. You can turn them into mosaic art, plant saucers, or even jewelry. Pinterest and DIY websites are full of inspiration. You’ll see tons of options below in this blog post.
  5. Recycle: If the dishes are no longer usable and you’re not interested in repurposing them, check with your local recycling facility to see if they accept ceramics. Some facilities do, while others may not due to the glaze and other factors.
  6. Garden Decor: Chipped or broken dishes can be used as decorative elements in your garden. Create colorful borders, paths, or unique garden art with broken pieces.
  7. Kitchen Organization: Reuse old plates as organizers within your kitchen. They can be stacked to separate pans, cutting boards, or serving trays.
  8. Repurpose as Pet Dishes: If the dishes are still safe for use, they can become pet food or water bowls for your furry companions.
  9. Vintage China and Decorative Edging: For vintage china or dishes with decorative edging, cracks might seem like the end of the line. However, with a bit of creativity and some contact cement, you can seamlessly mend those cracks and have a stunning display piece.
  10. Tile Stencil: Old dishes, especially those with intricate designs, can be repurposed as a tile stencil for your DIY projects. Just trace the pattern using a permanent marker on the tiles, and voila – you have unique decorative tiles for your home decor.
  11. Glassware Hooks: Transform glass dishes or pyrex into charming hanging planters or herb gardens. Attach hooks to the rims, and you’ve got yourself a stunning herb garden that doubles as kitchen décor.
  12. Shards as Mosaic Art: Don’t toss those shattered or cracked dishes into the garbage. Instead, save the shards and repurpose them as small pieces for beautiful mosaic artwork. The combination of different colors and textures can make for a captivating work of art.
  13. Replacements and Mix-and-Match: If you’re missing a few replacements for your dinnerware set, don’t fret. Mix-and-match old china with new pieces for a unique and eclectic table setting that will leave your guests in awe.
  14. Enamel Frame: An old enamel dinner plate can be upcycled into a chic picture frame. Simply remove the top of the cup holder, and you’ve got the perfect base for framing your cherished photos or artwork.
  15. Glass Dishes as Herb Containers: Glass dishes, such as wine glasses or large dinner plates, can be used as creative herb containers. Plant some herbs in them, and watch your kitchen décor flourish with a touch of green.
  16. Brick and Dish Shelf: Want to add a unique touch to your kitchen? Combine old bricks and large dinner plates to create rustic shelving. These provide the ideal space to display your dish collection or kitchen décor items.
  17. Guest Starters: When entertaining guests, vintage china can be the ideal choice for starter courses. The delicate patterns and elegant designs can set the perfect tone for your special dinner gatherings.
  18. Glass Dish Art Frame: For a sophisticated yet simple DIY project, frame your glass dishes to create stunning artwork for your home décor. It’s a subtle and elegant way to showcase your glassware.
  19. Dispose Responsibly: As a last resort, if none of the above options are feasible, check with your local waste management service for proper disposal guidelines. In some areas, ceramics may be treated as regular household waste.

Remember that repurposing and recycling are environmentally friendly choices that help reduce waste and minimize your ecological footprint. When considering what to do with your old dishes, think creatively and sustainably to give them a second life and prevent unnecessary landfill waste.

Winter Bundle Offer
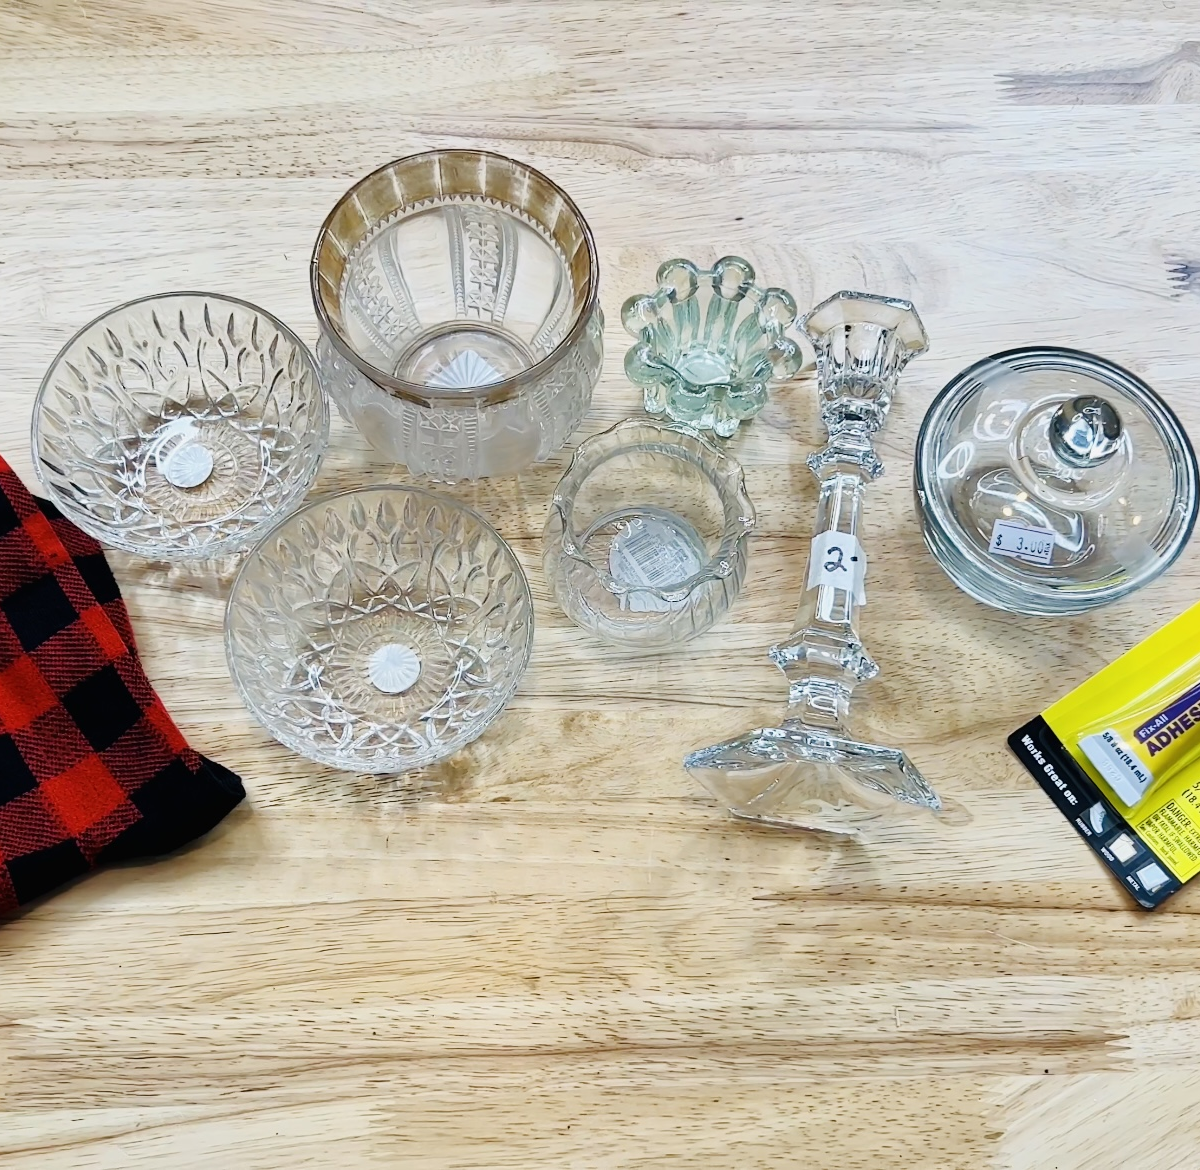
What To Do With Old Dishes Materials You'll Need

What To Do With Old Dishes Materials You’ll Need for DIYs

Before you start your creative journey, gather the following materials:

  • Various old dishes
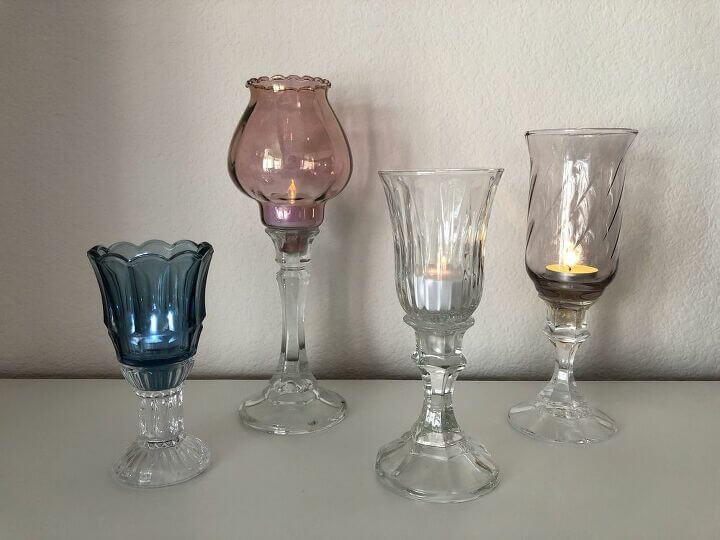
  • Candle holders
  • Super glue
  • Soapy water

What To Do with Old Dishes: DIYs

Now, let’s move on to the exciting projects.

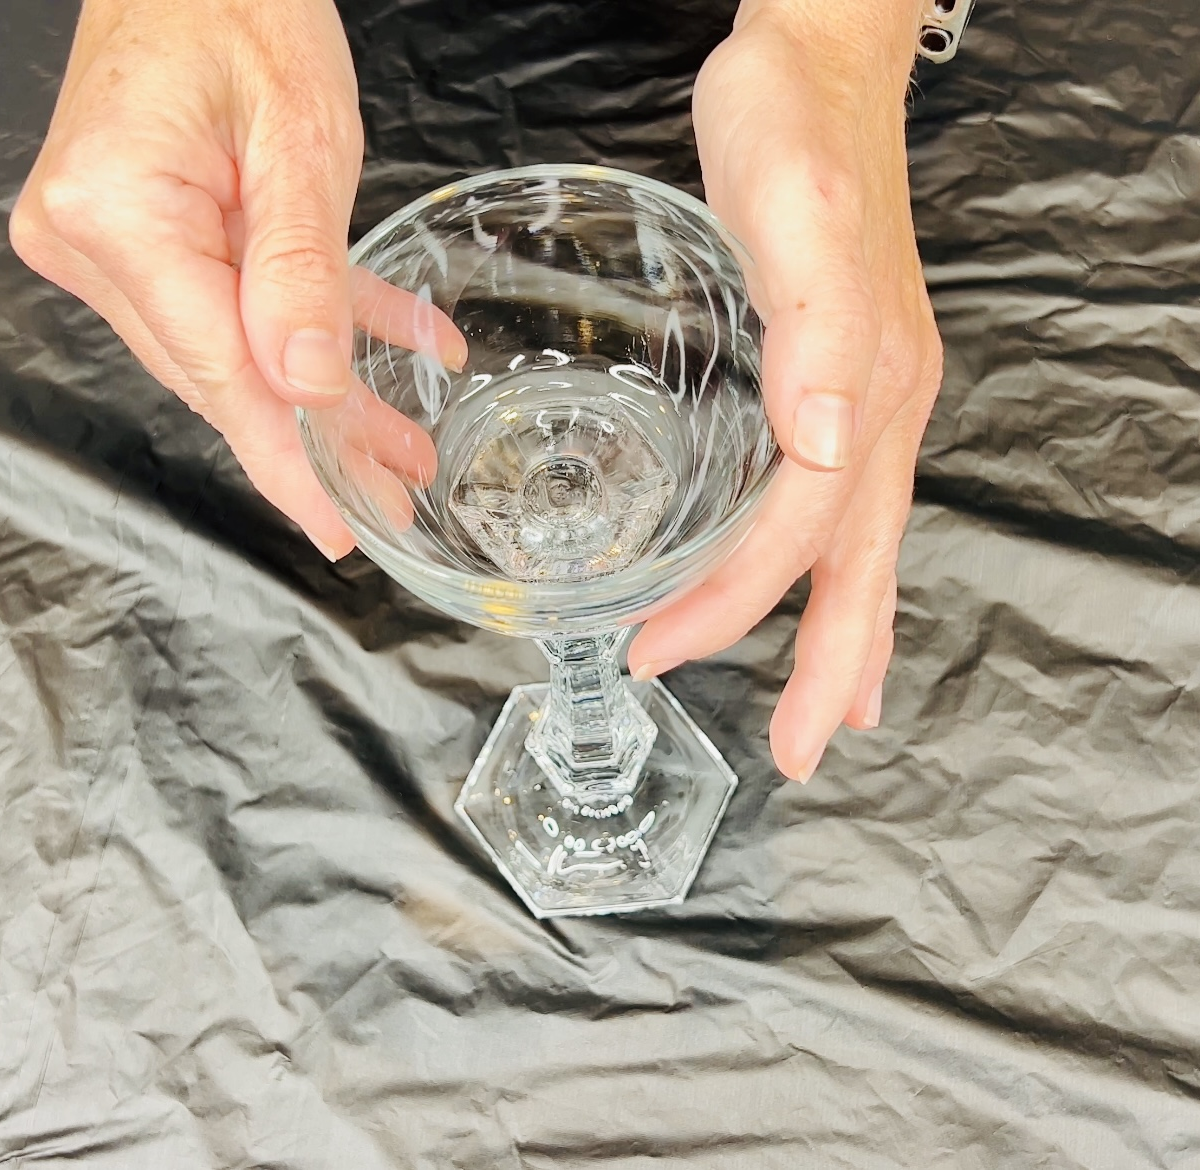
Clean the Dishes: Begin by soaking your old dishes in soapy water. This will help in removing any stickers and cleaning the glass.

Clean the Dishes: Begin by soaking your old dishes in soapy water. This will help in removing any stickers and cleaning the glass.

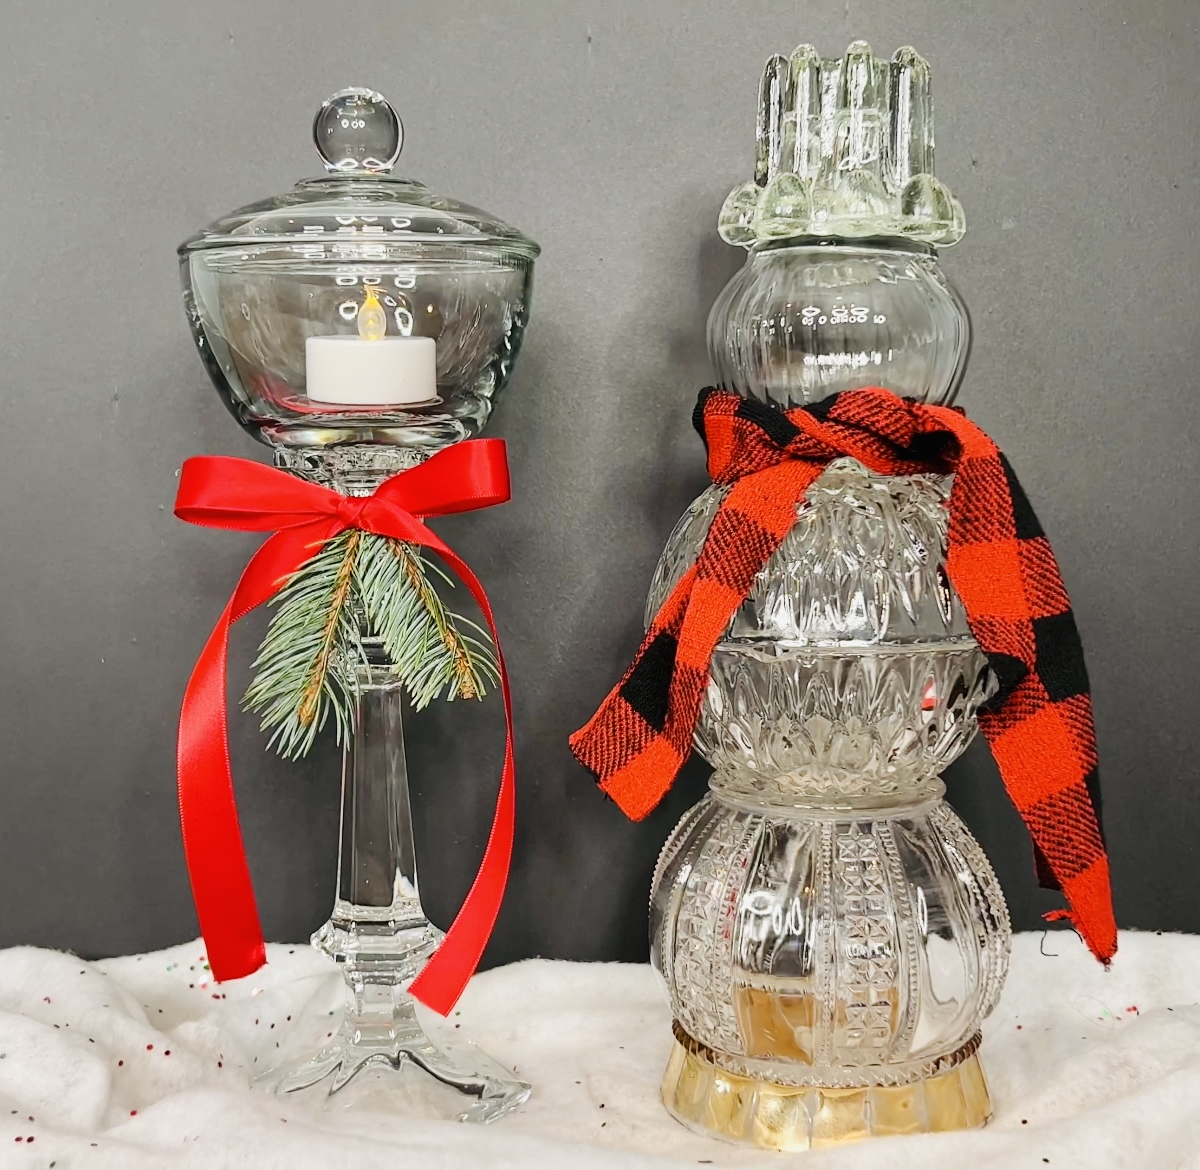
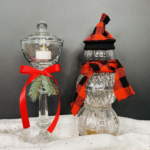
Elegant Candle Holder Turned into a fun Lamp Post

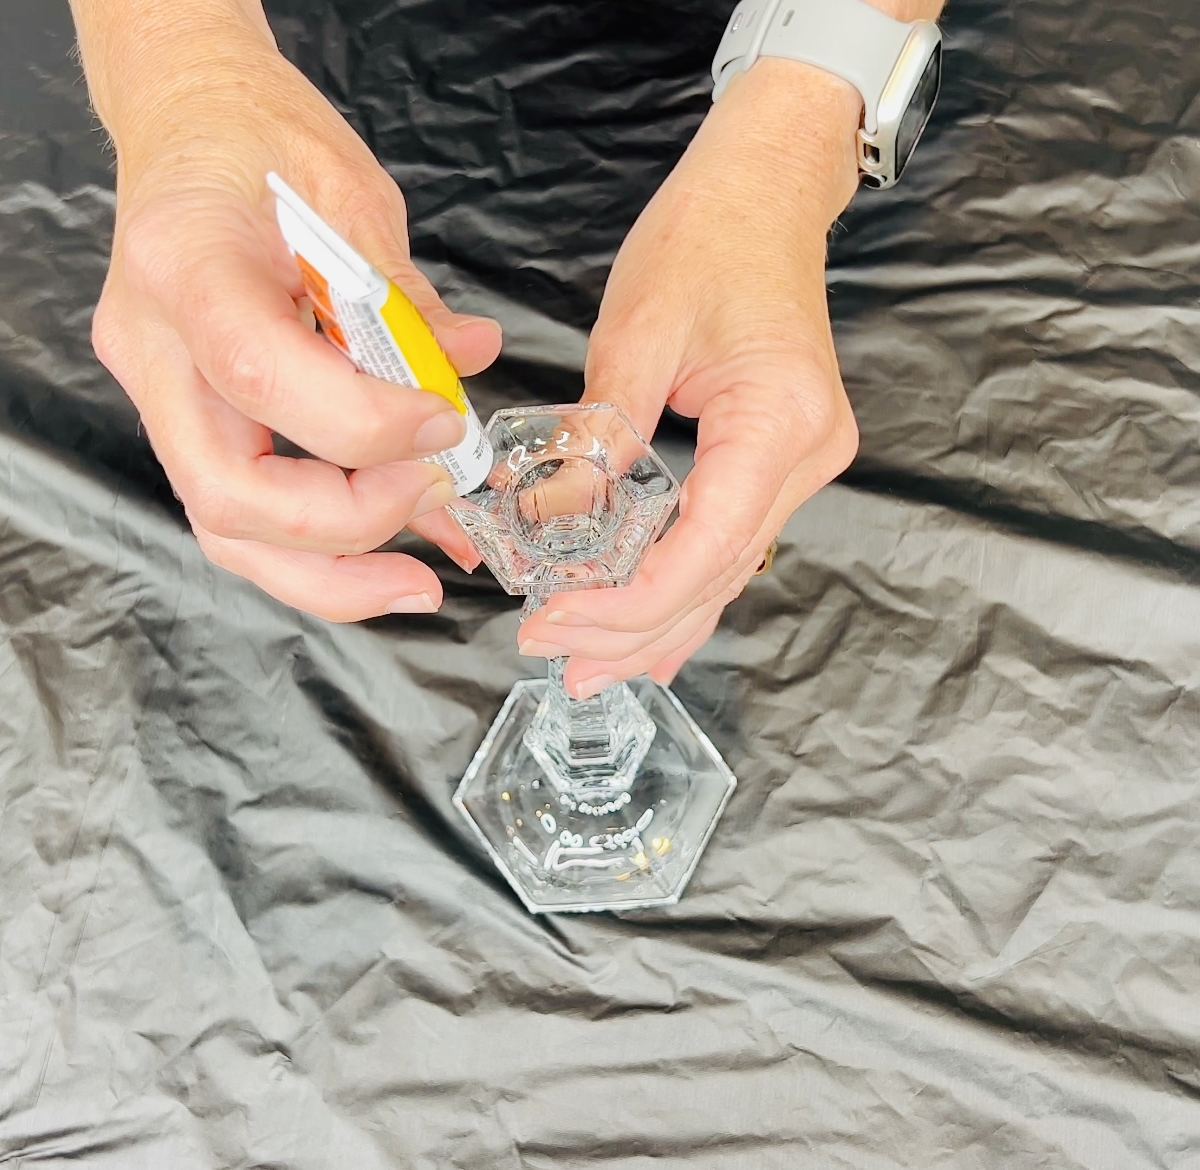
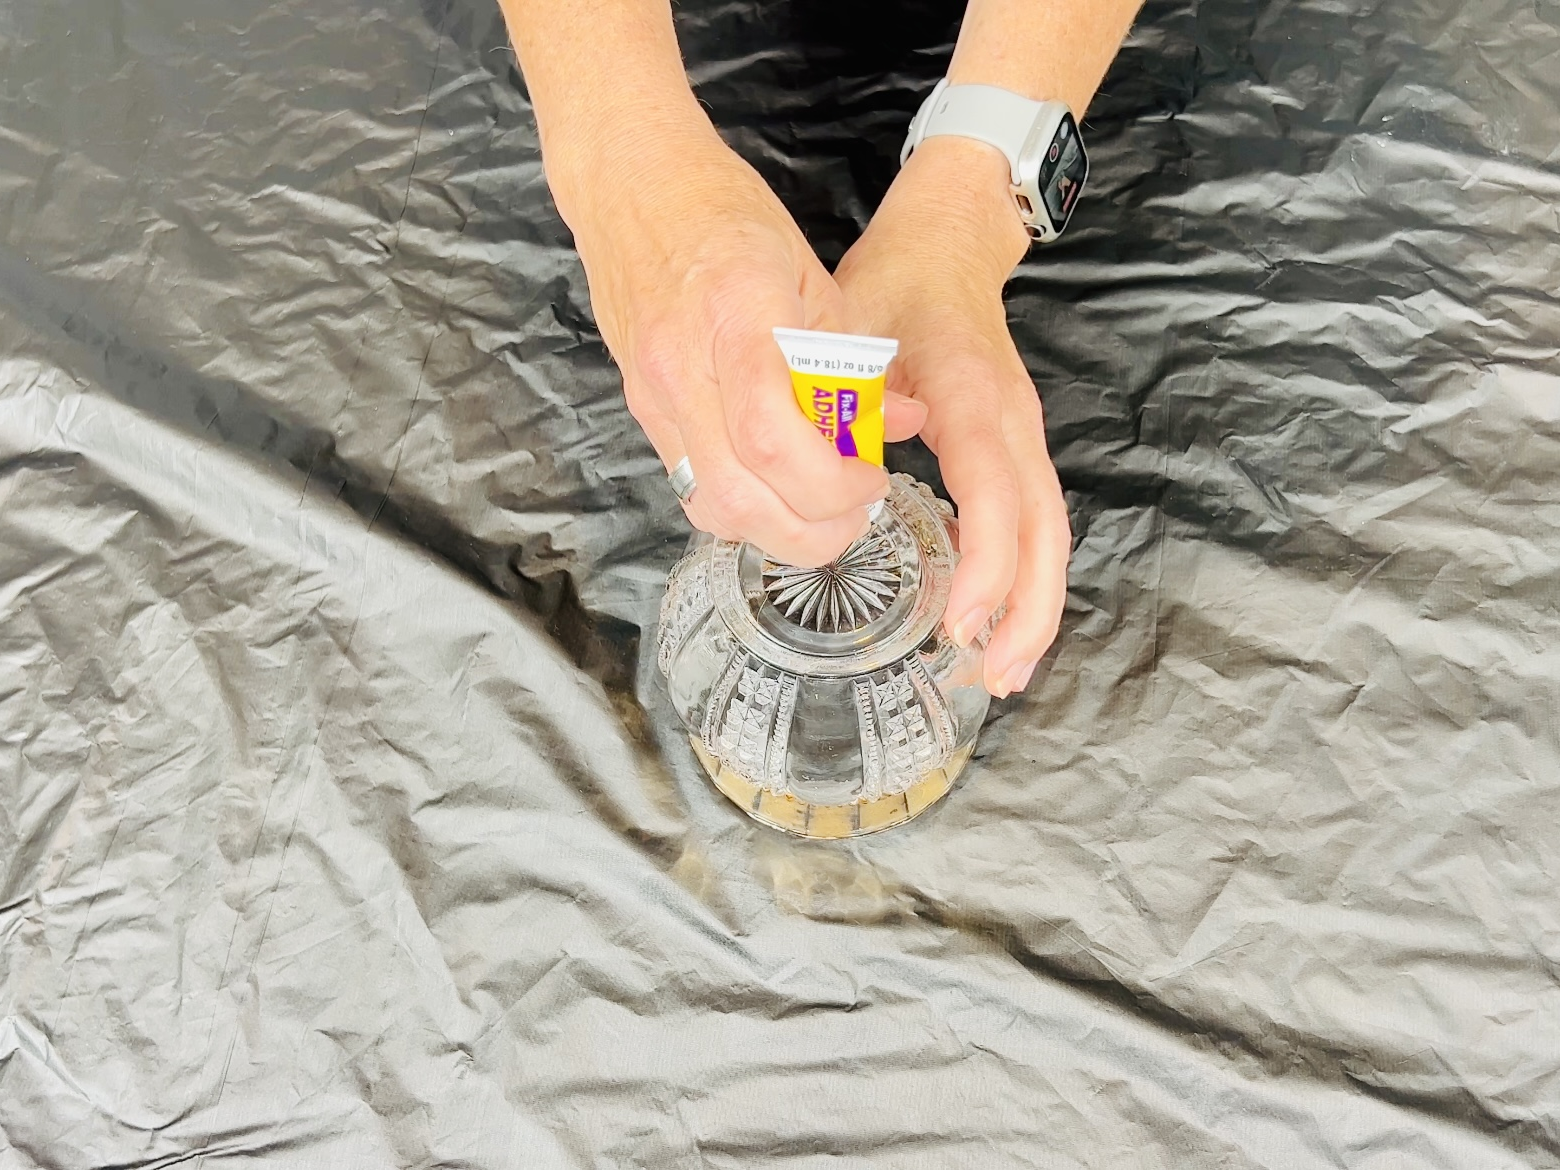
Glue the Candle Holder: Add glue to the top of a taper candle holder, and place a candy dish on top of the glue.

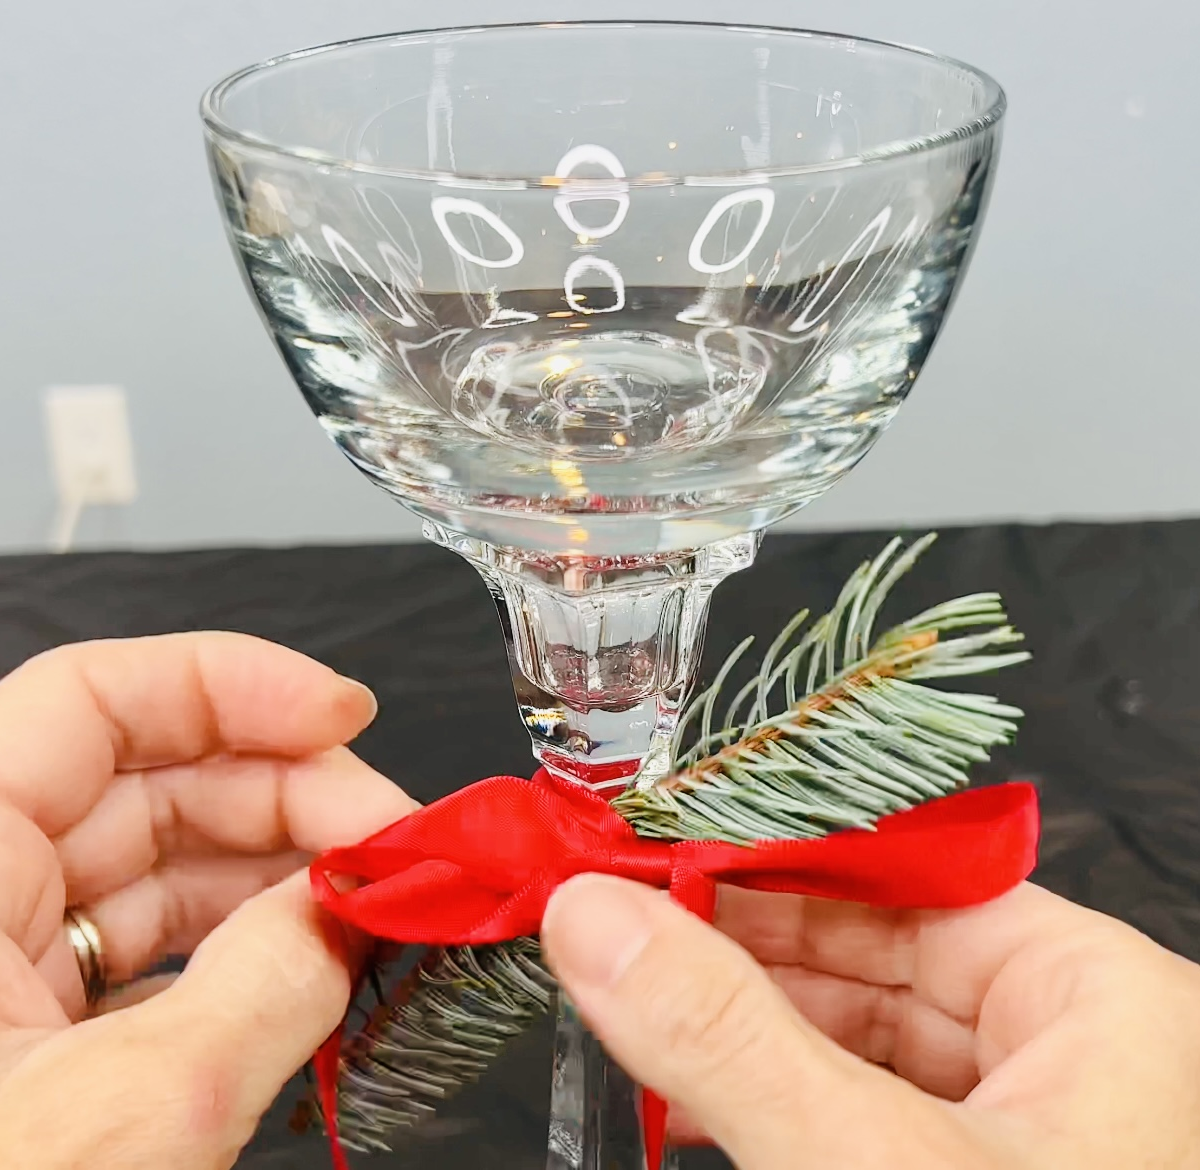
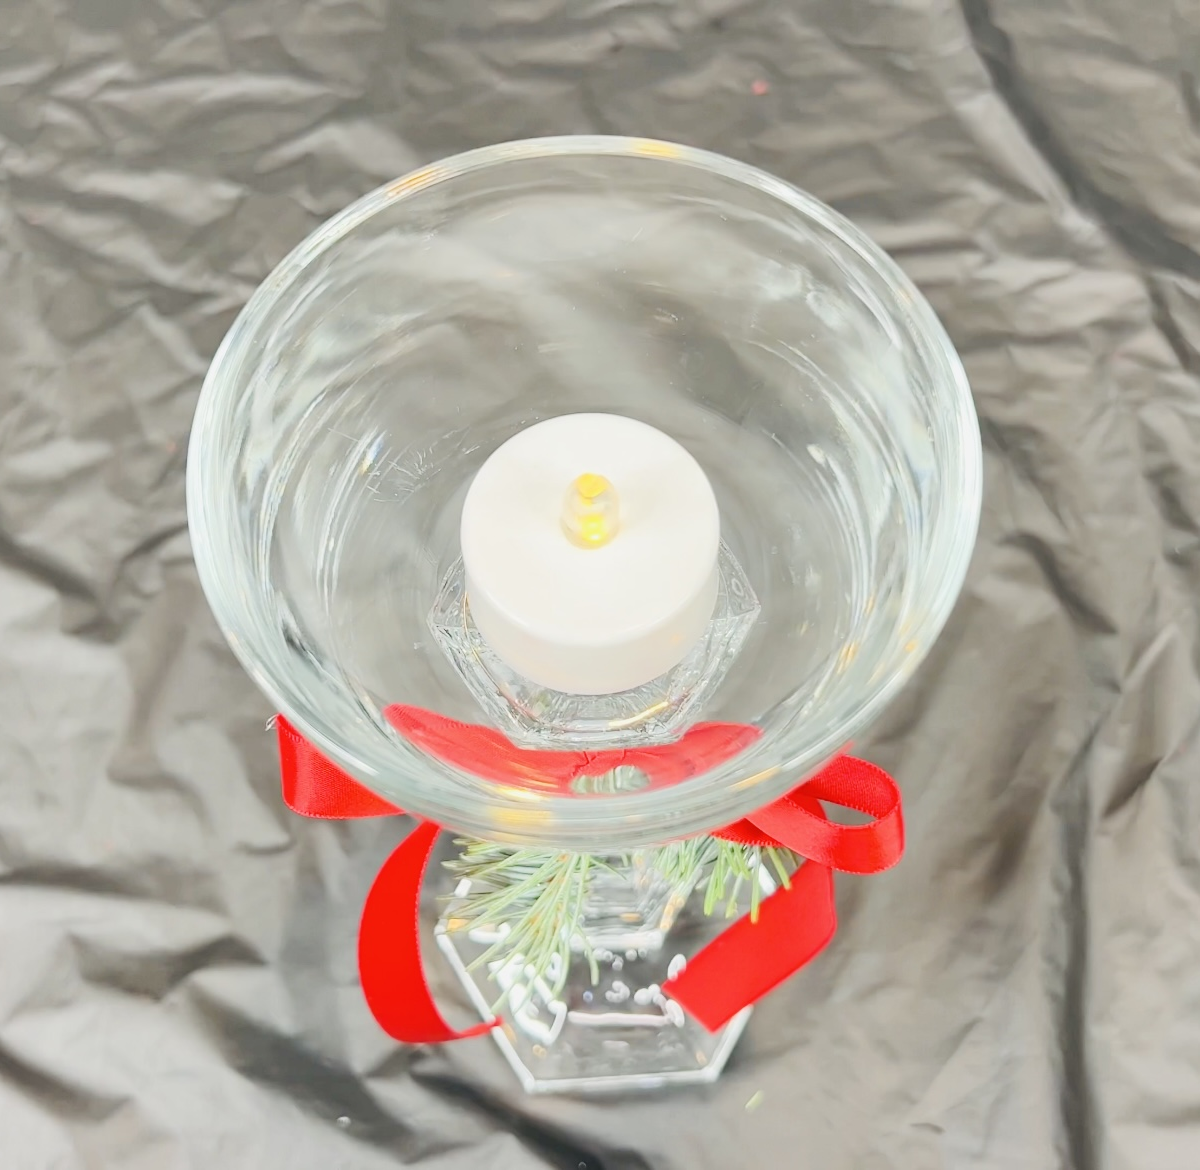
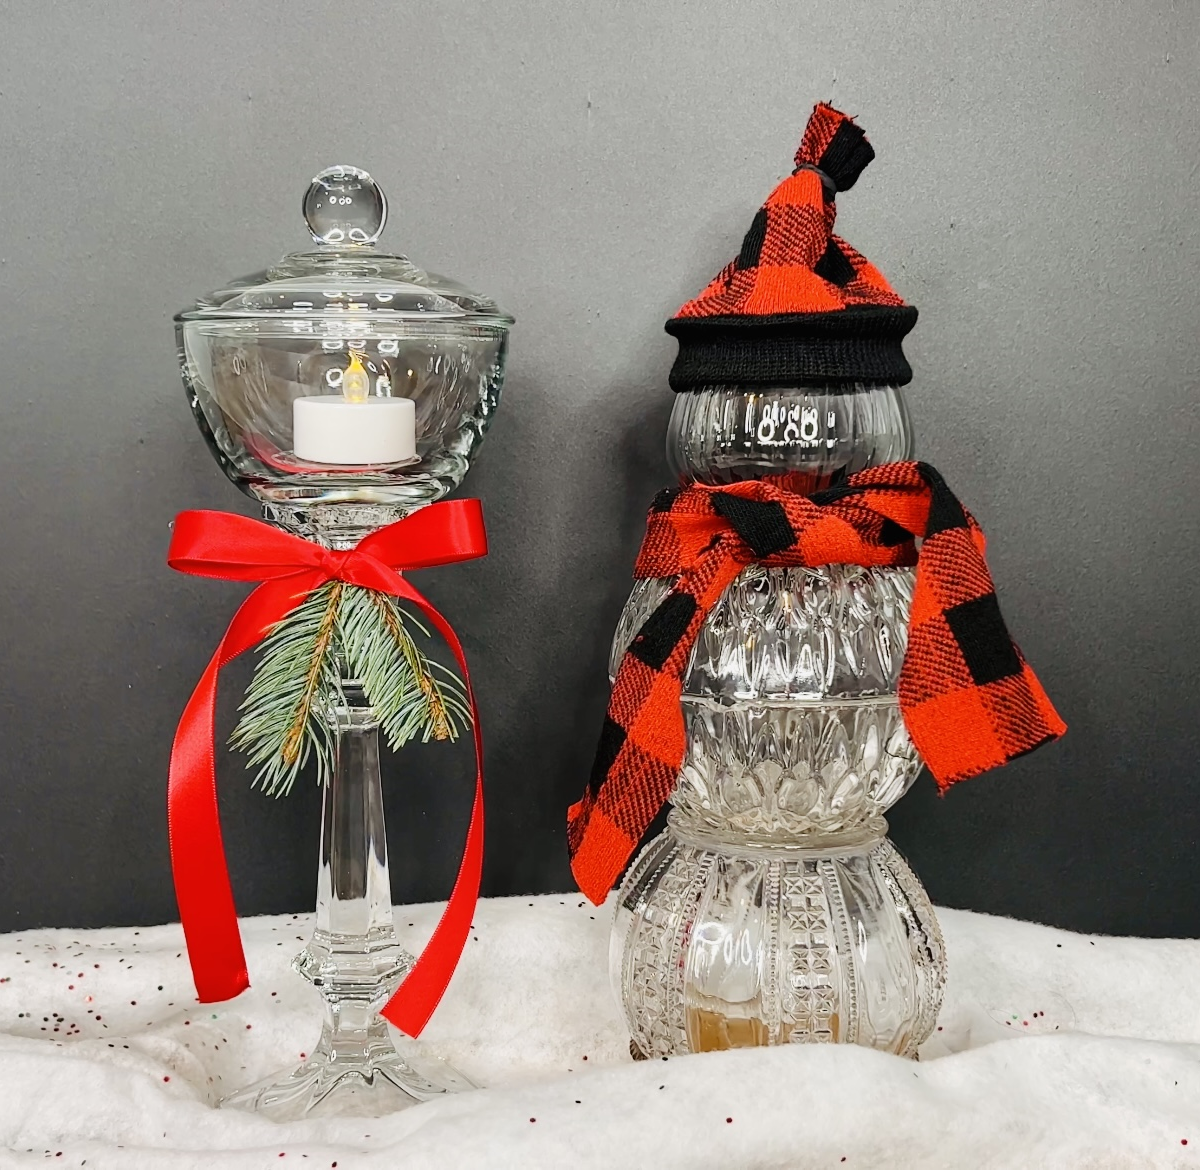
Decorate: Let it dry for 24 hours. Afterward, you can add decorative accents such as ribbon and Evergreen. This part is optional, and you can change the decorations according to the season. Fill the top with candy or place a battery-operated tealight inside.

Adorable Snowman

Stack the Dishes: Start with a round vase and place it upside down.

Stack the Dishes: Start with a round vase and place it upside down.

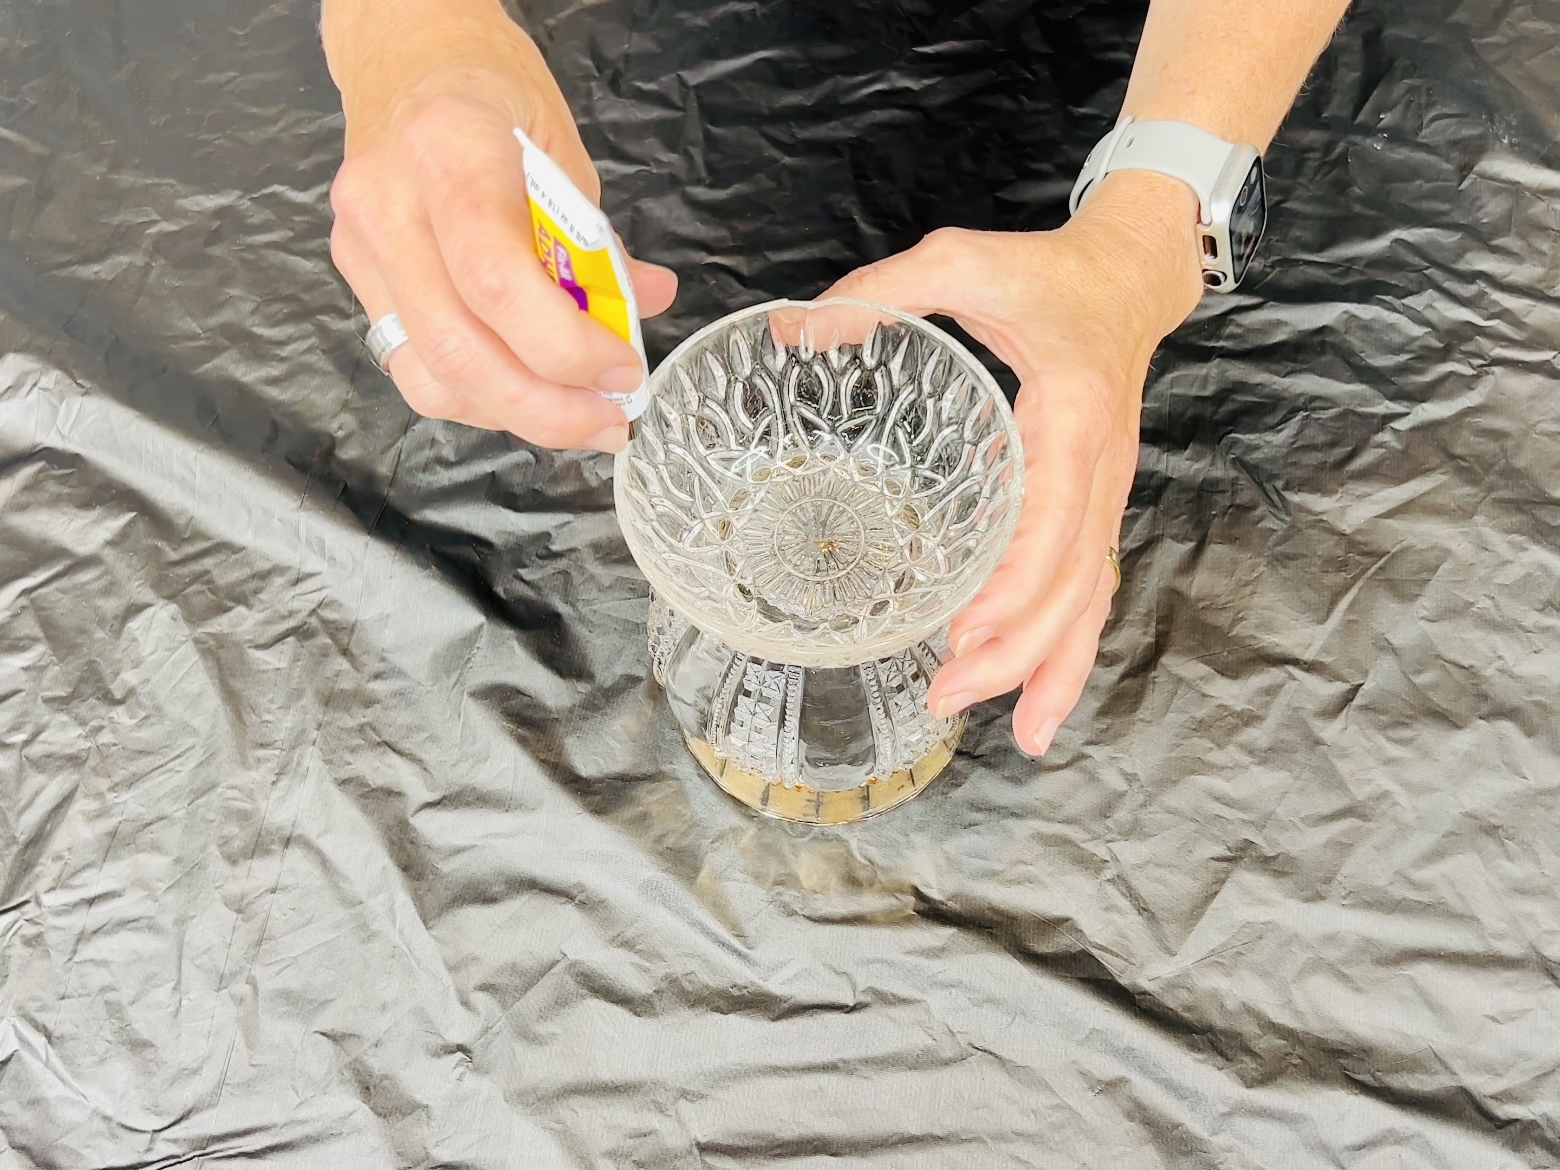
Add glue to the bottom of the vase and place a bowl on top.

Add glue to the bottom of the vase and place a bowl on top.

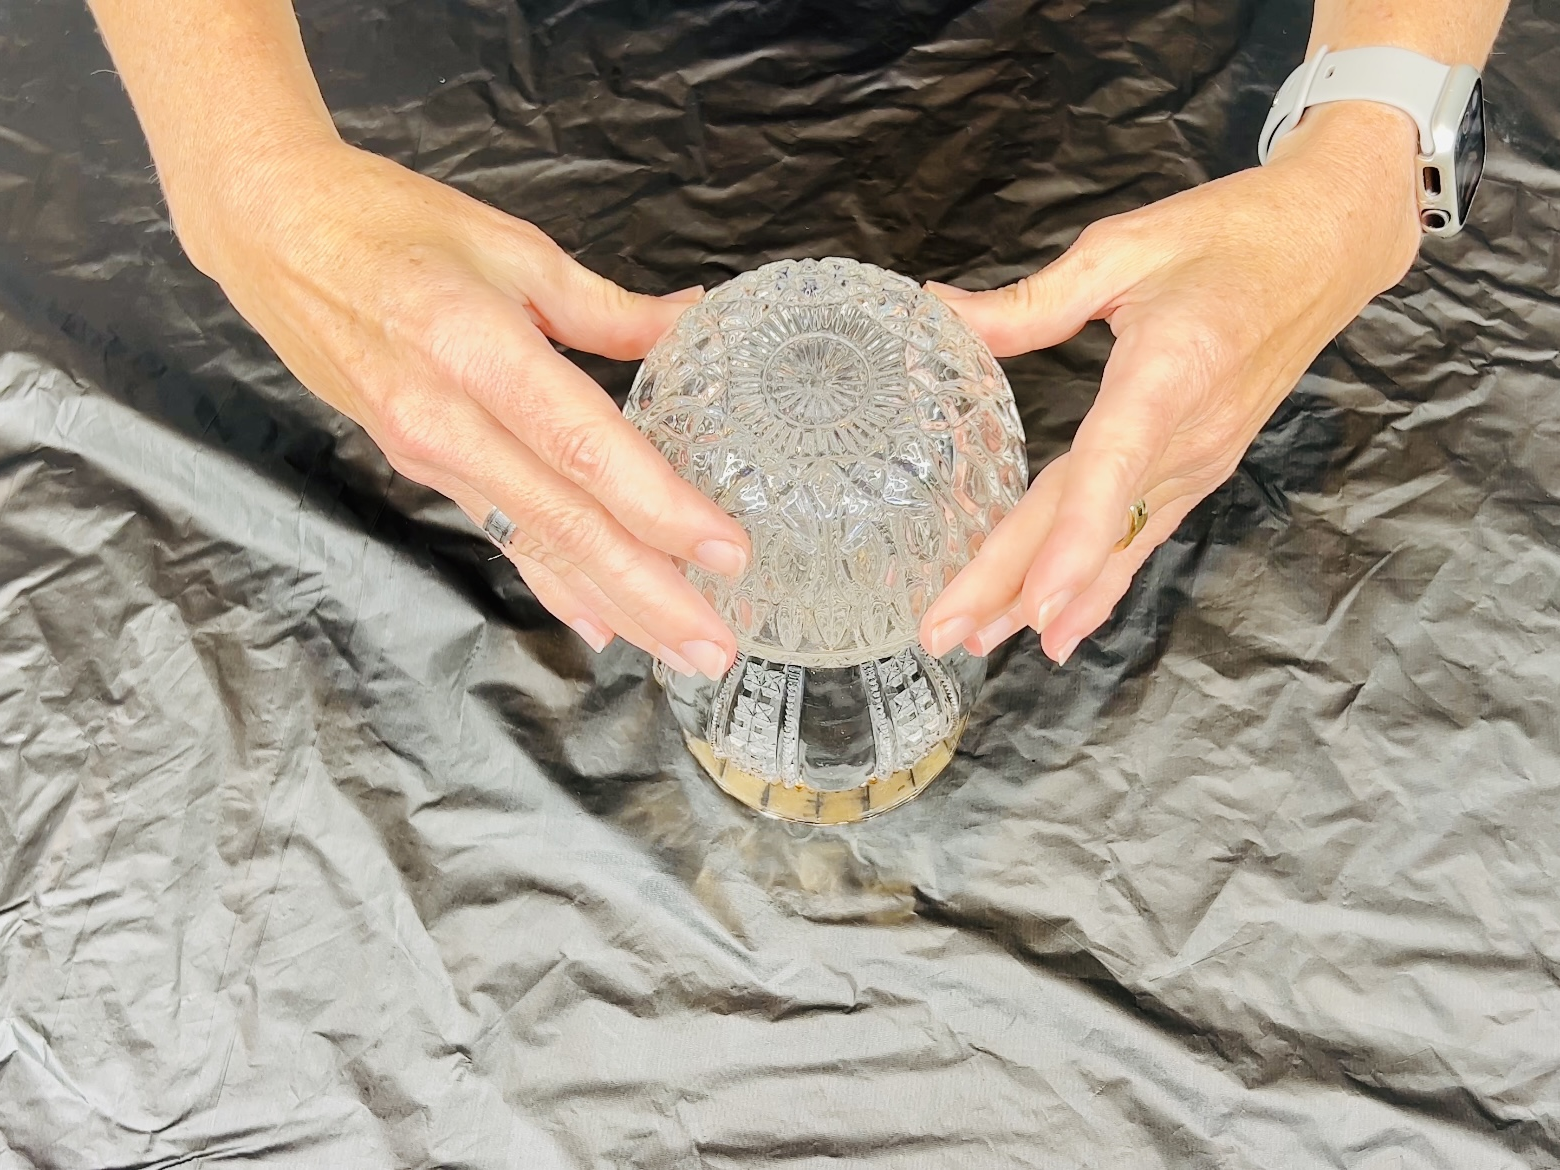
Once that dries, place glue on the edges of the bowl and take a second bowl, and place it upside down on the other bowl making a sphere.  Allow the glue to dry between each step.

Once that dries, place glue on the edges of the bowl and take a second bowl, and place it upside down on the other bowl making a sphere. Allow the glue to dry between each step.

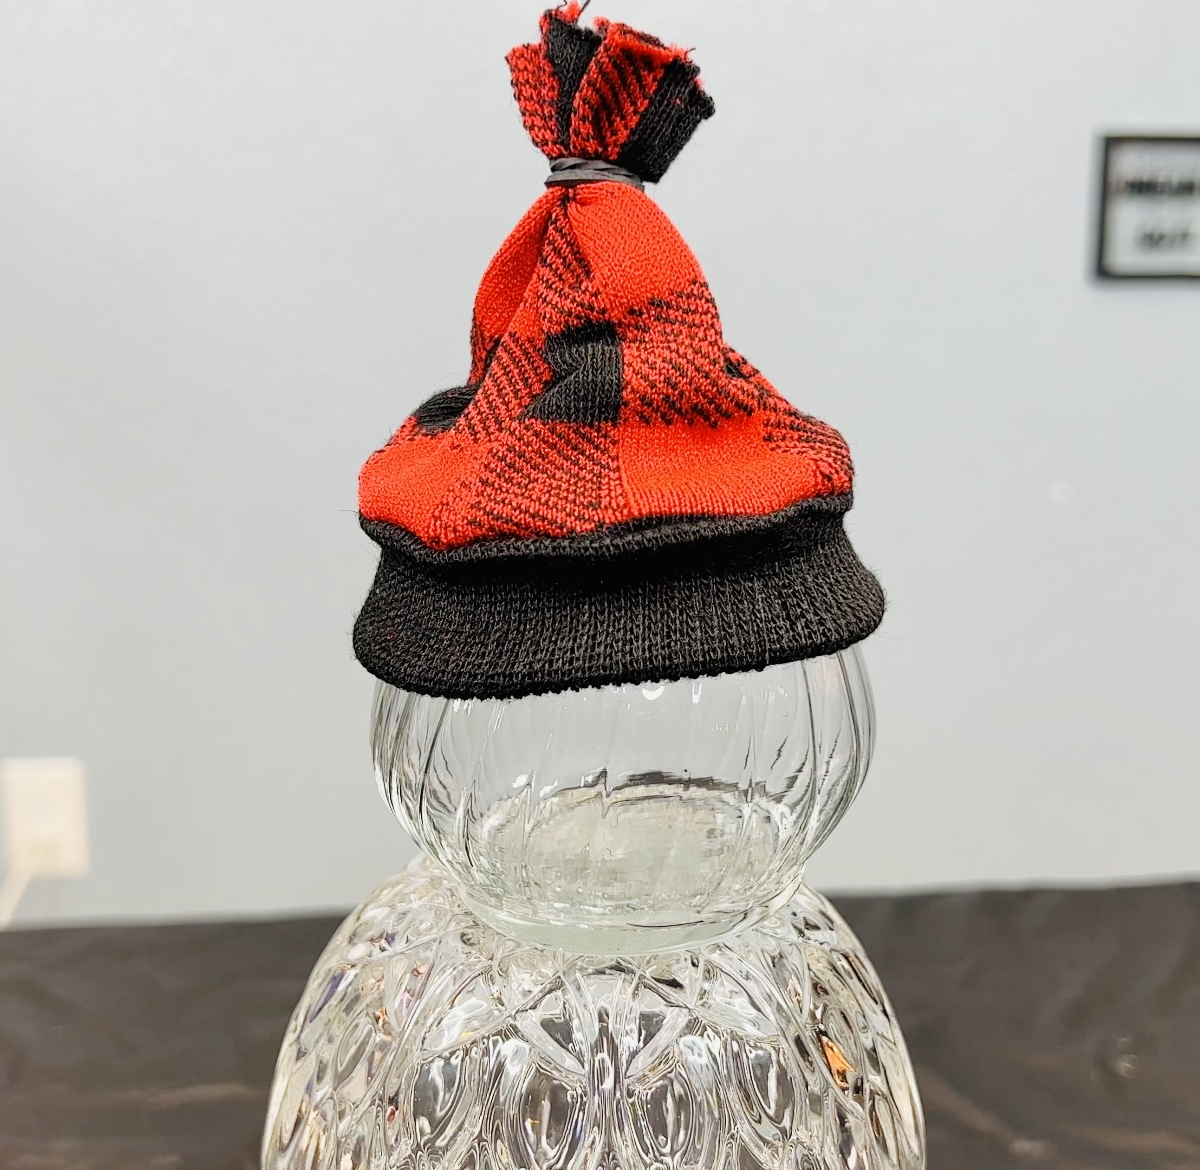
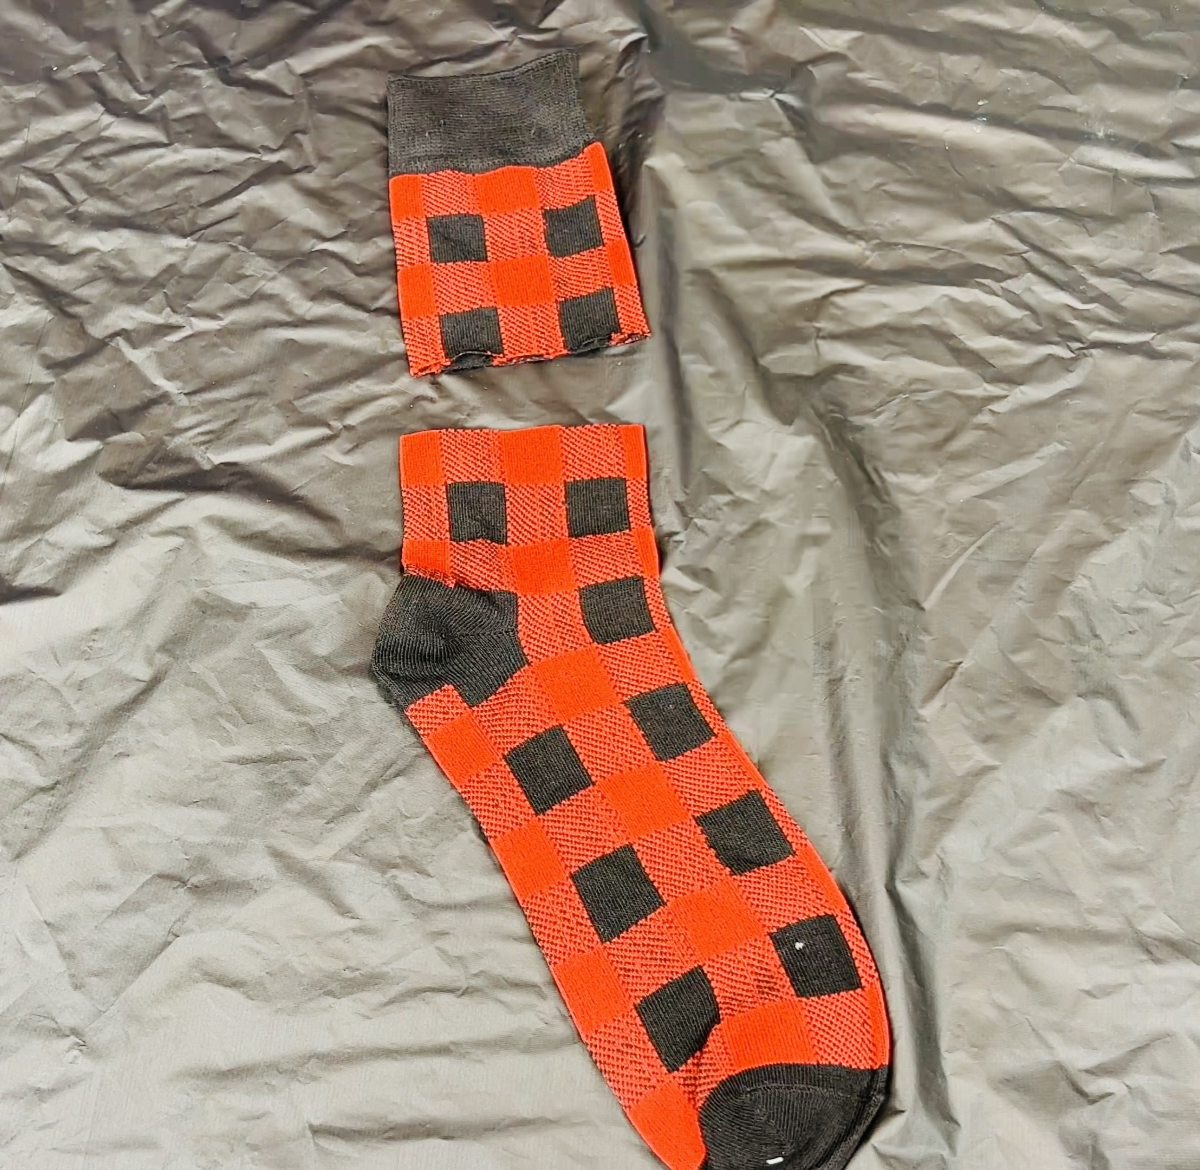
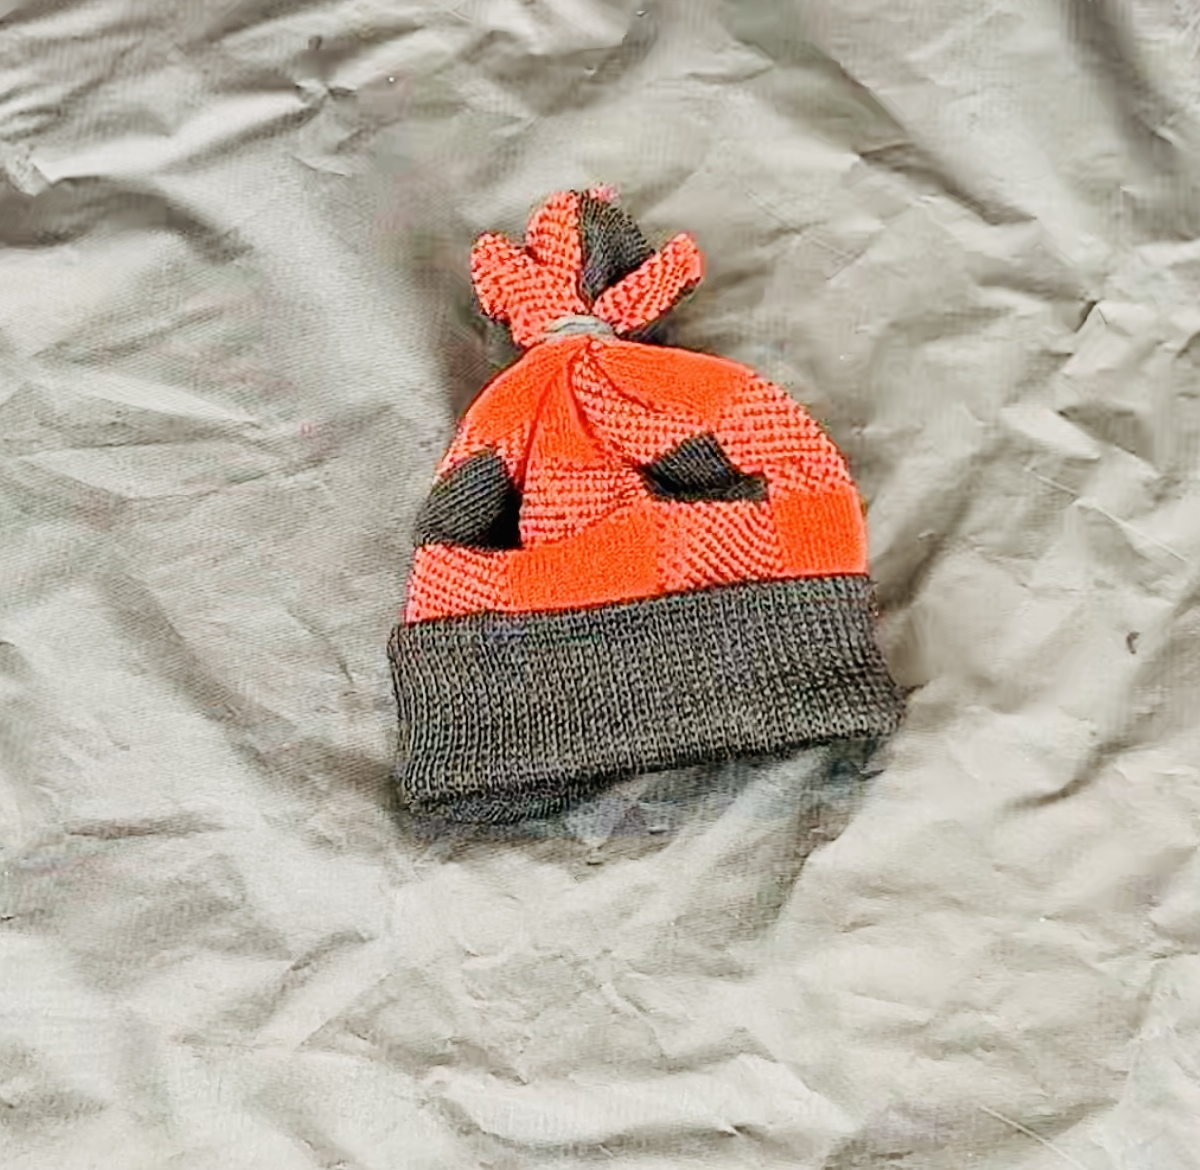
Create a Snowman Hat: Cut the top off a dollar store sock and use a rubber band to tie it around the cut part. Fold up the bottom and fluff out the top.

Option 1: Set the glass piece on top and add your sock "hat" to make it a Snowman.

Assemble the Snowman: You have two options here:

Option 1: Glue a candle holder on top and add your sock “hat” to make it a Snowman.

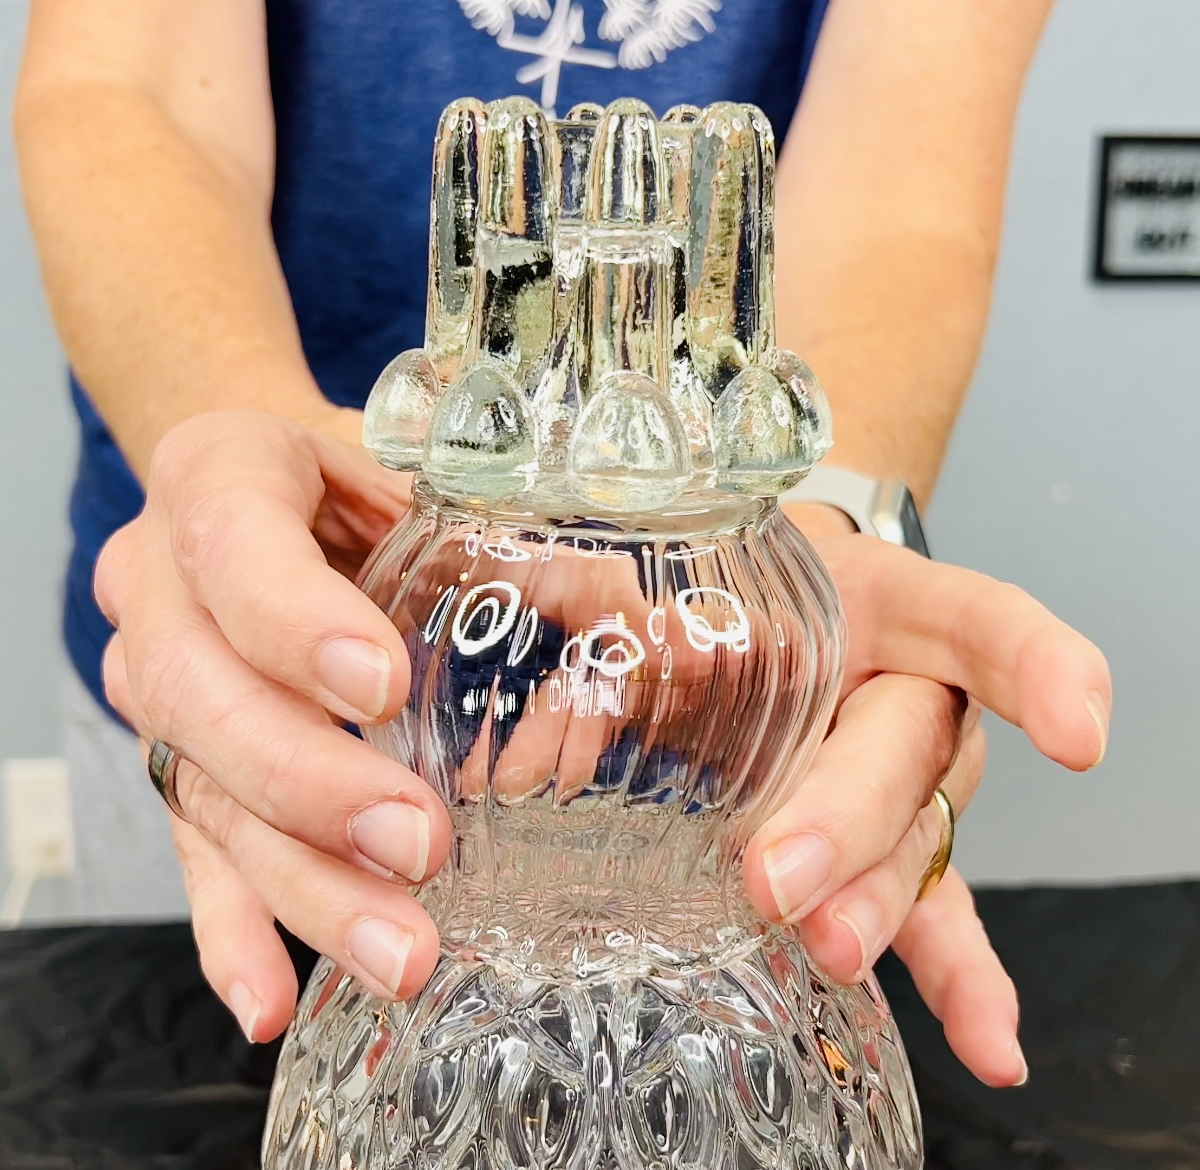
Option 2: Flip a candle holder upside down, find an additional candle holder, flip that one too, and make it the Snowman's top hat.

Option 2: Flip a candle holder upside down, find an additional candle holder, flip that one too, and make it the Snowman’s top hat.

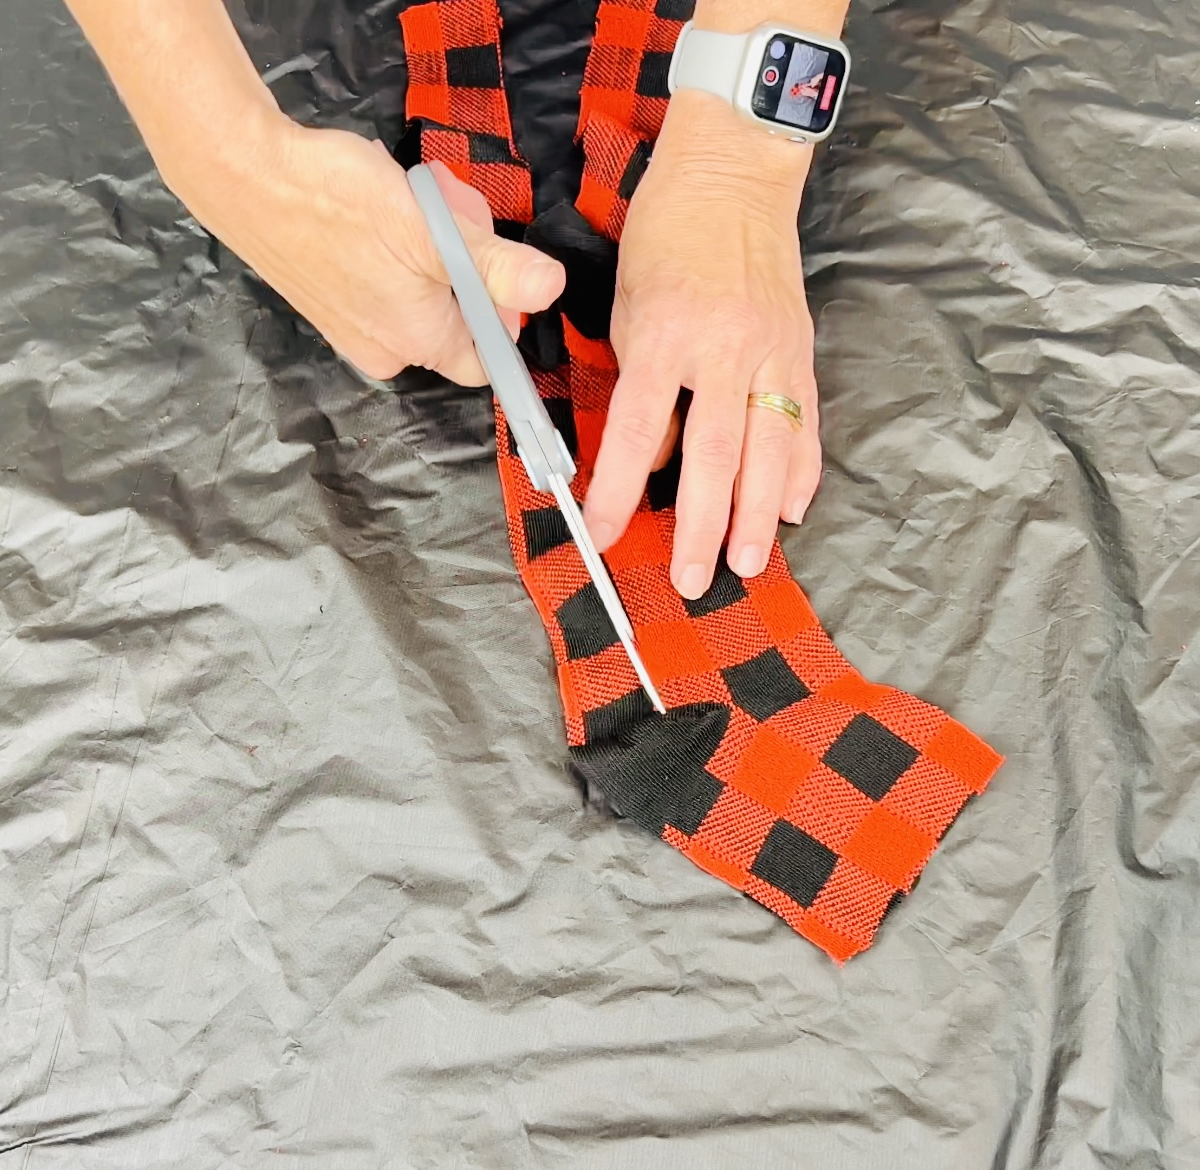
Create a Snowman Hat and scarf: Cut the top off a dollar store sock and use a rubber band to tie it around the cut part. Fold up the bottom and fluff out the top. Cut both sides of the sock to open it up, and then cut a section out to make a long strip for a scarf.

Add a Scarf: Cut both sides of the sock to open it up, and then cut a section out to make a long strip for a scarf. Take the other piece of sock, wrap it around the Snowman’s “neck,” and tie it to create a scarf.

Finalize: Once the glue has dried, your Snowman is complete. You now have two adorable Snowman options to choose from!

I let the piece dry completely and LOVE him.

Amazing Glass Snowman Third Option

I love thrift store and seeing what I can make out of things. I had found this amazing glass hat and knew I just needed to create a snowman for it.

You can find the full tutorial for this snowman at Glass Candle Holder Snowman

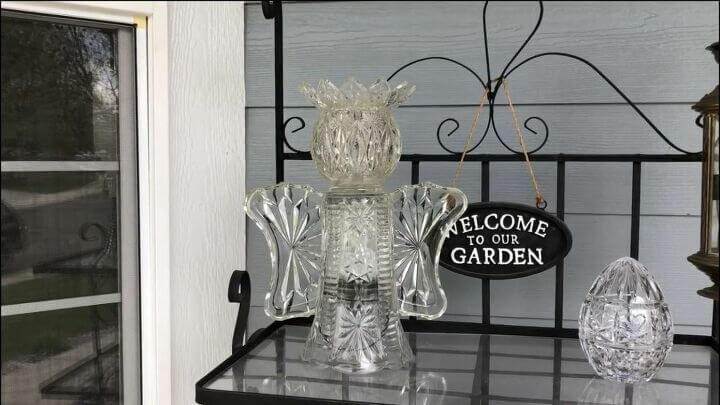
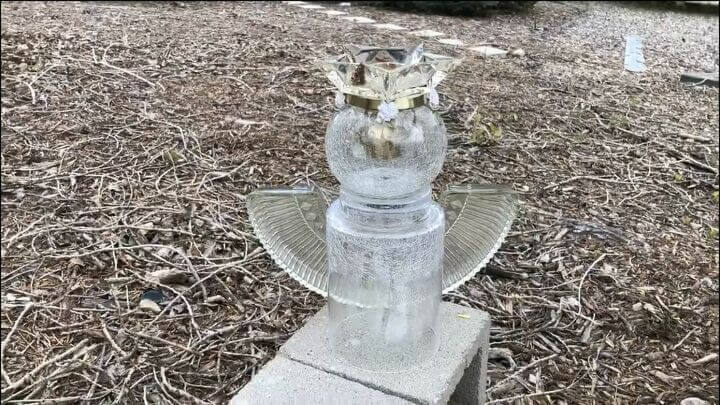
Glass Dish Angel

  1. Gather Glass Pieces: Collect a variety of glass pieces from the thrift store.
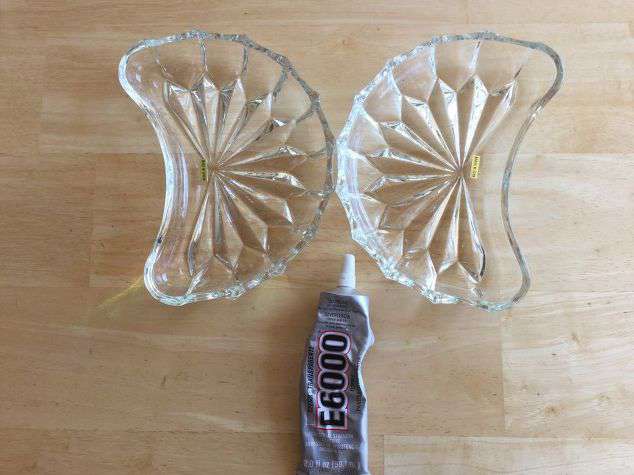
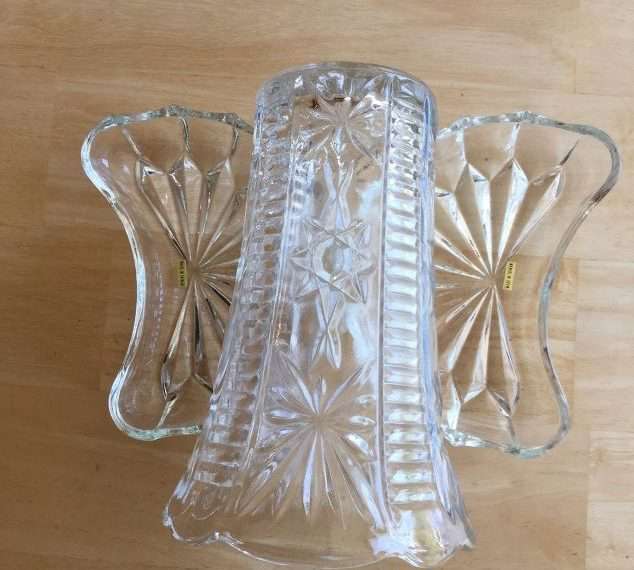
  2. Build the Angel: Glue two curved dishes together, and then glue them to the back of an upside-down vase. Add a circle on top and glue it in place. For a regal touch, attach a crown-like piece to the top.
  3. Illuminate: Your glass dish angel is ready to hold an LED candle, a solar light, or a battery-operated LED light underneath. You have a beautiful and unique decoration.

You can find the full tutorial at Easy and Fantastic Glowing Angel Craft On A Budget

What To Do with Old Dishes Video

Shop any of these stores and I receive a small commission at no cost to you.

Pfaltzgraff Trellis White 1...Shop on AmazonPfaltzgraff Chateau Cream 1...Shop on AmazonJY-Danbady Enamel Sunflower...Shop on AmazonMartha Stewart Empress Bouq...Shop on AmazonGodinger Crystal Appetizer ...Shop on Amazon

What To Do with Old Dishes: More Projects

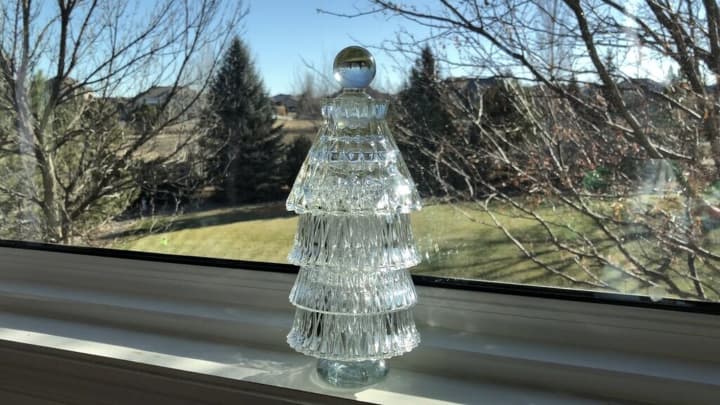
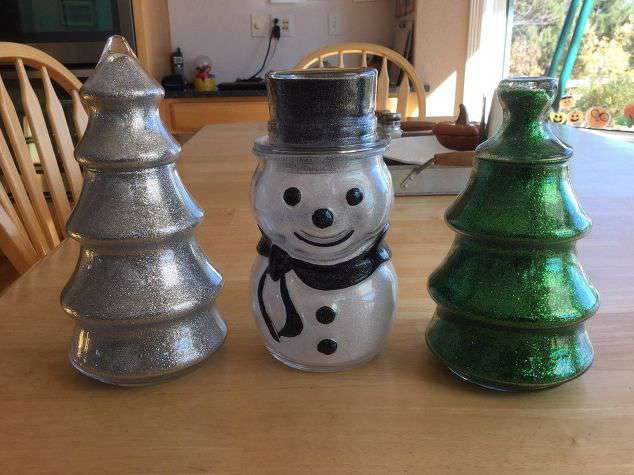
I found some candle holders at the thrift store and knew if I glued them together they'd look like a Christmas tree! I added an option for lighting as well.

I found some candle holders at the thrift store and knew if I glued them together they’d look like a Christmas tree! I added an option for lighting as well. You can find the full tutorial for this one at Glass Candle Holder Christmas Tree

Pumpkin Crafts

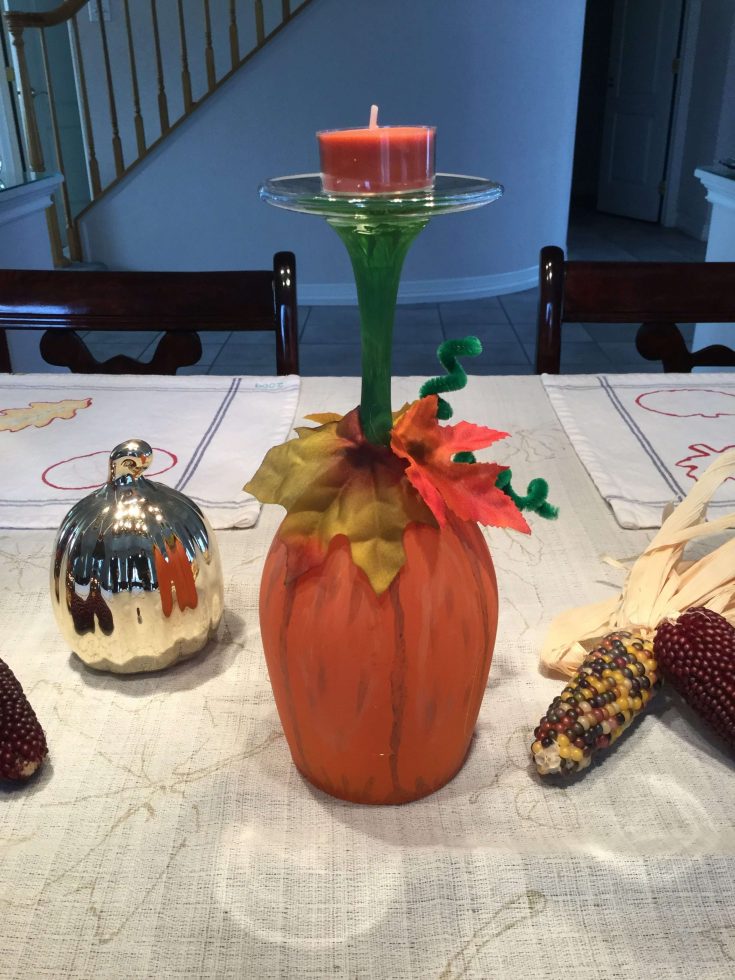
Have you seen the wine glasses turned into pumpkin candle holders?  I have and I’ve been wanting to give them a try.  I finally did it, and just in time for our Thanksgiving table!  They are really easy and inexpensive to make. You can find this tutorial at Wine Glasses to Pumpkin Candles

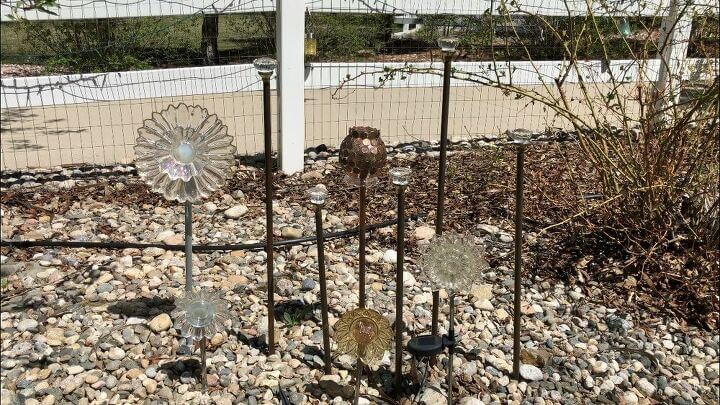
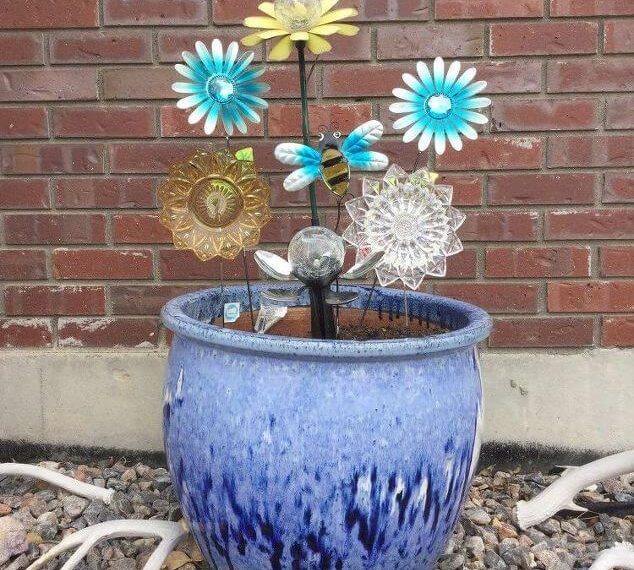
With a few dishes from the thrift store, some silicone, and a few items from the dollar store you can make these easy dish garden flowers. You can find these tutorials at:

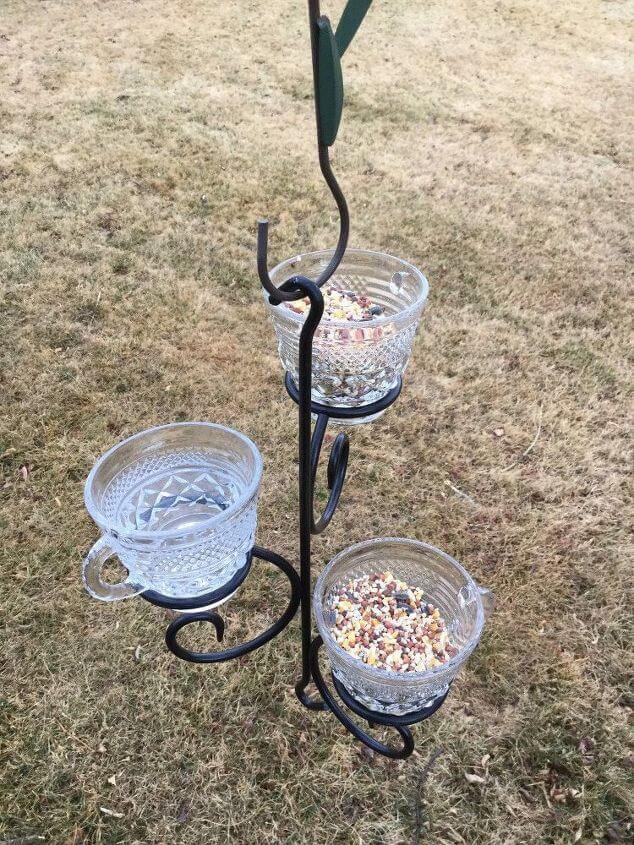
All you need are a few thrift store items to create a bird feeder, and it’s easy and inexpensive to make. Guess what? If you put this near your garden, it’ll keep the birds out of it! You can find these tutorials at

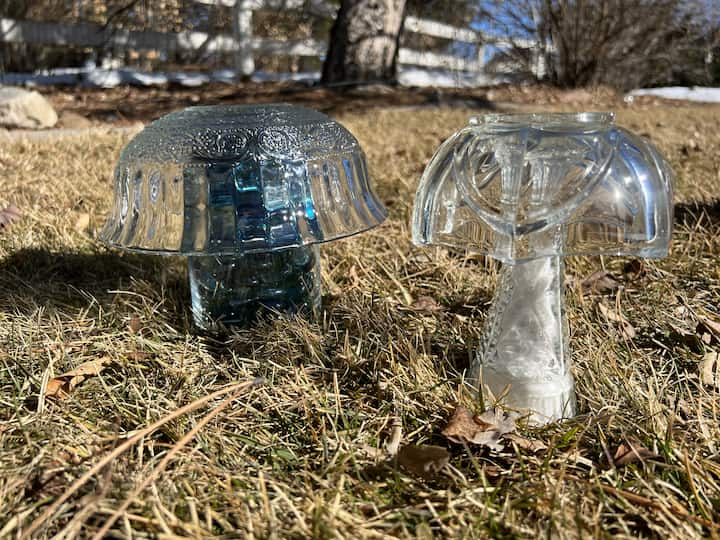
Have you ever wanted to make some DIY garden mushrooms? All you need is a few items from the thrift store and you can make some on a budget.

Have you ever wanted to make some DIY garden mushrooms? All you need is a few items from the thrift store and you can make some on a budget. You can find the full tutorial at Super Easy DIY Garden Mushrooms on a Budget with Video

Here are a few other things I’ve converted.

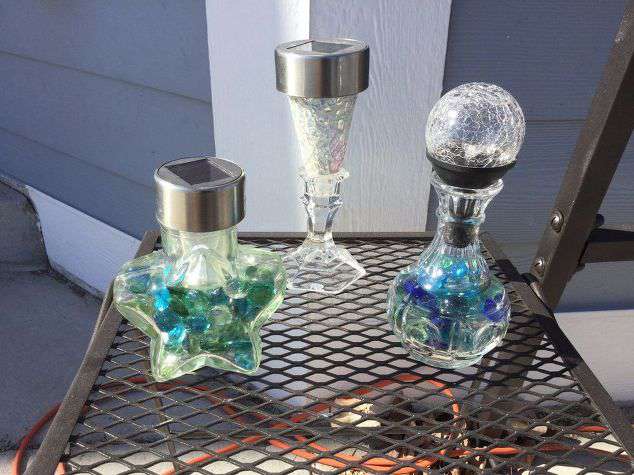
Did you know you can take a vase and turn it into a light? I’m going to show you how to make vase lights. They’re really easy, inexpensive, and it’ll add ambiance to your home/yard. You can find the full tutorial at Easy & Beautiful Vase Lights

Now they are a garden mushroom and flower.

With just a little creativity you can take items from your home or a thrift store, give them a makeover, and turn them into something beautiful. Here are some easy thrift store makeovers. You can find these tutorials at:

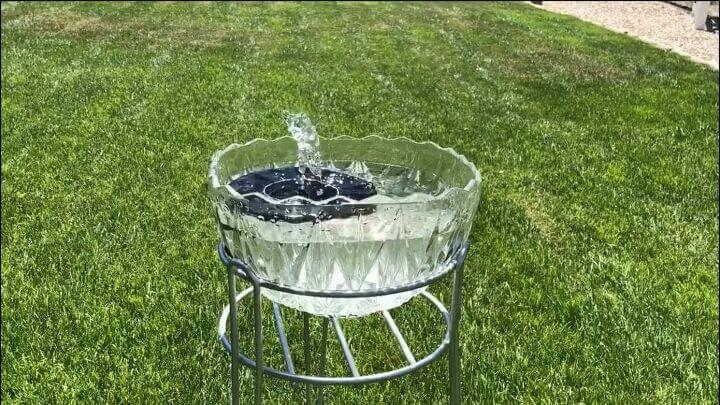
Here’s a picture of the fountain running. Be sure to refill the water as it evaporates. I also clean out the class and wash off the fountain as needed.

Do you want to dress up your yard with a fountain without breaking the bank? Learn how you can make a easy and cheap solar fountain. You can find the full tutorial at Cheap & Easy Do It Yourself Solar Fountain For Your Yard

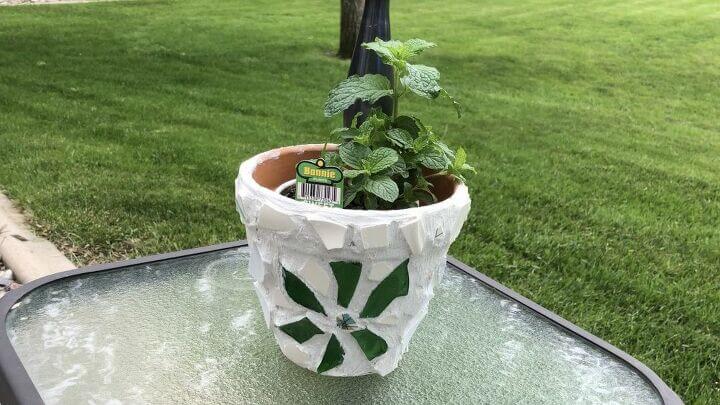
Mosaic Terra Cotta Flower Pots (8) displayed pot

I had some chipped dishes and a sparkling juice glass I wanted to recycle. I created a mosaic flower pot with the items. This was my first time creating a mosaic and using grout. You can find the full tutorial at Mosaic Terra Cotta Flower Pots

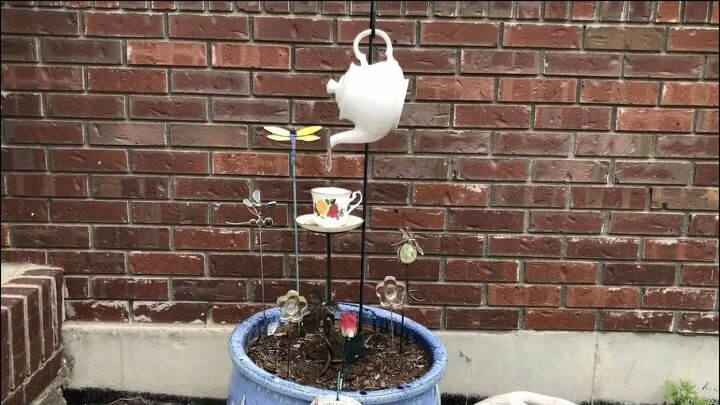
A tea pot and tea cup yard DIY decor

Who looks forward to decorating outside in the spring? I do! Here is a super easy way to get that pouring tea pot and tea cup decor for your backyard. You can find the full tutorial at Pouring Tea Pot & Tea Cup Decor

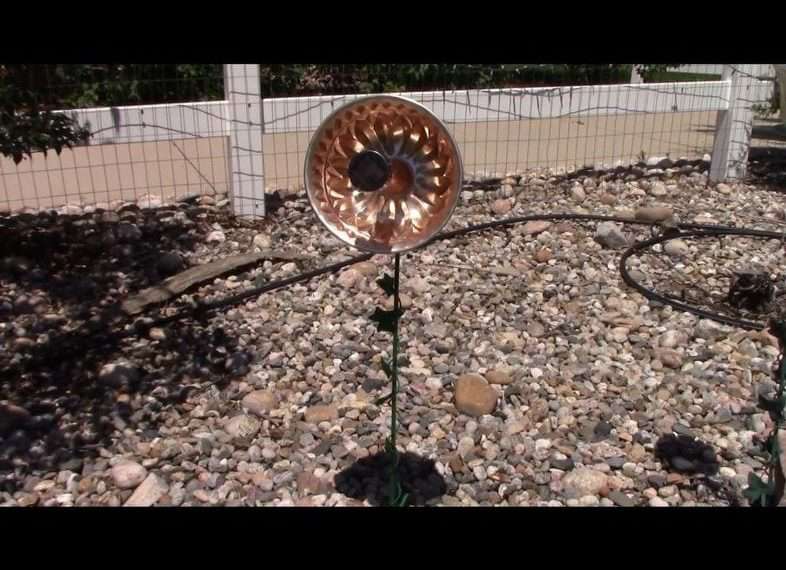
Here is my completed vintage Bundt pan solar flower.

I have had this pink vintage Bundt pan for a few years now.  I have tried doing a couple things with it but nothing has stuck – I wanted more for it.  I finally came up with something unique and special to help make it “shine”.  I turned it into a solar flower!  (Those of you who know me are saying “of course you did” – lol) You can find this tutorial at Vintage Bundt Pan to Solar Flower!

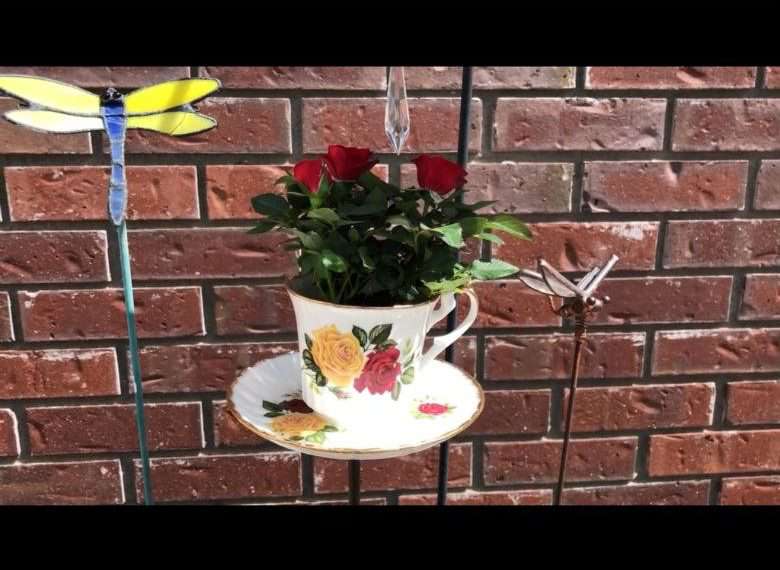
I planted a mini rose plant in this tea cup.

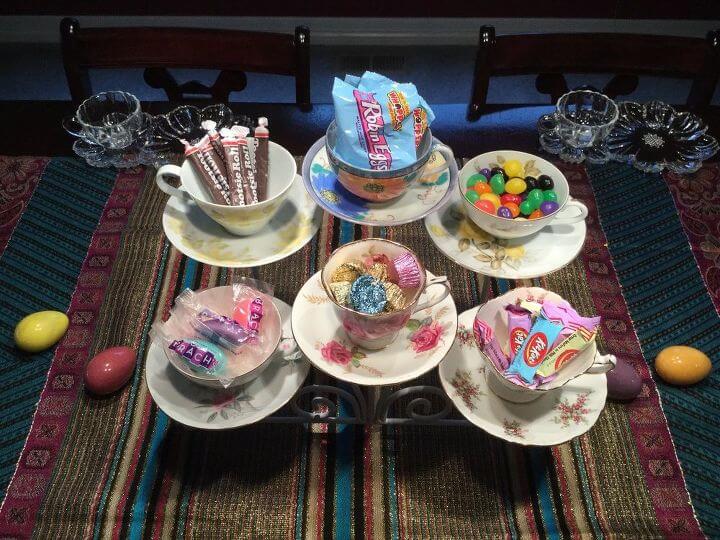
I have quite a few tea cups and I have been wanting to come up with some different ways to use them.  I have come up with 9 options of things to do with your teacups. You can find the full tutorial at 9 Things To Do With Tea Cups

I made a variety of these glass flowers just in time for spring.

I upcycled some candle holders that I found at the thrift store and turned them into glass flowers just in time for spring. You can find the full tutorial at Upcycled Thrift Store Candle Holders

I placed the lamp in my living room and use the remote to turn it on. Since the light inside is waterproof and well protected by the glass I can also place it under my covered porch to enjoy on a warm evening.

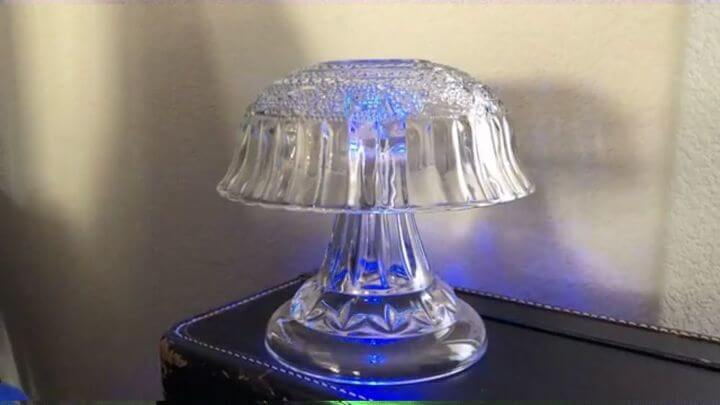
I came across a box of “free” stuff at a thrift store.  I found a beautiful broken cake stand base and knew I could turn it into a beautiful color changing lamp. You can find the full tutorial at Upcycled Broken Cake Stand to Color Changing Lamp

Here is another dish set I made and this one I used E6000 for the glue as I wanted this one to be permanent. Use them in the kitchen for serving, in your bedroom for jewelry, or in the bathroom for wash clothes, supplies, and soap. One idea with so many uses!

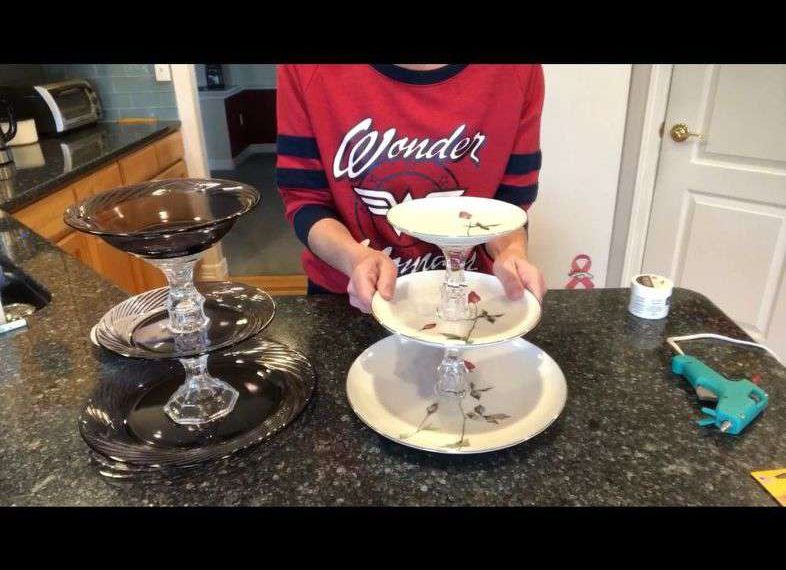
Do you have a special occasion coming or do you need something decorative to store things on in your home? A 3 tiered stand is easy and inexpensive to make, and looks beautiful! You can find the full tutorial at Easy and Beautiful DIY 3 Tiered Stand For Your Home

What To Do with Old Dishes Q & A

What can I do with chipped ceramic dishes?

Chipped ceramic dishes may no longer be suitable for serving food, but they can still find new life in various creative and practical ways. Here are some ideas for repurposing chipped ceramic dishes:

  1. Decorative Mosaic Art: Break the chipped dishes into smaller pieces and create colorful mosaic artwork for your garden, tabletops, or walls. Grout the pieces onto surfaces to make unique patterns or designs.
  2. Garden Markers: Use the chipped dishes to make garden markers for your plants. Paint or write the names of the plants on the ceramic pieces and place them in your garden.
  3. Candle Holders: Place tea lights or small candles inside chipped ceramic bowls or mugs to create unique candle holders. The chips can add character and texture.
  4. Indoor Plant Saucers: Chipped ceramic saucers can be used as decorative plant saucers to catch excess water and protect your furniture.
  5. Tabletop Decor: Arrange chipped ceramic pieces in a decorative bowl or tray to create a captivating tabletop centerpiece.
  6. Key or Coin Holders: Small chipped ceramic dishes can serve as catch-all containers for keys, loose change, or small items near your entryway.
  7. Artistic Wall Decor: Hang chipped ceramic dishes as wall decor. You can create an interesting collage or focal point in your living space.
  8. Bird Baths: Place a chipped ceramic dish on a pedestal in your garden to make a charming bird bath. Birds will appreciate it, and it adds a unique touch to your outdoor space.
  9. Potted Plant Stands: Elevate potted plants by using chipped ceramic dishes as decorative plant stands or pot risers.
  10. Homemade Coasters: Turn small chipped ceramic pieces into coasters by attaching cork or felt to the bottom to protect your surfaces.
  11. Serving Platters for Non-Food Use: Use larger chipped platters as non-food serving trays for decorative purposes, such as organizing perfumes or jewelry on a vanity.
  12. Children’s Craft Supplies: Pass the chipped dishes on to children for crafting projects. They can paint or decorate them to create their own works of art.
  13. DIY Garden Path: Crush chipped ceramic pieces and use them to create a unique and colorful garden path. Set them in concrete or gravel to form a pattern.
  14. Under Planter Decor: Place chipped ceramic pieces beneath indoor planters to add a decorative touch under the pots.
  15. Donate or Recycle: If the ceramic dishes are beyond repurposing, consider donating them to a local art center or recycling facility where they can be properly handled.

Before repurposing chipped ceramic dishes, be sure to wear safety goggles and gloves when breaking or cutting them to avoid injury from sharp edges. These ideas allow you to extend the life of your ceramics in creative ways and reduce waste.

What can I do with extra plates and bowls?

There are numerous creative and practical ways to make use of extra plates and bowls, even if they don’t match your current dinnerware. Here are some ideas:

  1. DIY Wall Art: Arrange and hang decorative plates on your wall to create unique and eye-catching wall art.
  2. Serving Platters: Use oversized plates as serving platters for appetizers, desserts, or finger foods when hosting parties.
  3. Floating Shelves: Install floating shelves in your kitchen or dining area to display your extra plates and bowls as a stylish decoration.
  4. Candle Holders: Turn bowls into charming candle holders by placing colorful candles or decorative candles inside them.
  5. Planters: Transform bowls into indoor planters for small houseplants or succulents. They can add a touch of greenery to your home decor.
  6. Jewelry or Key Holders: Use small plates to keep your jewelry or keys organized on a bedroom dresser or near your front door.
  7. Serving Bowls: If you have extra plates that can double as shallow bowls, use them for serving salads, pastas, or side dishes.
  8. Pet Food Dishes: Repurpose old plates and bowls as pet food or water dishes for your furry companions.
  9. Craft Organization: Keep your craft supplies organized by using bowls to store beads, buttons, or other small items.
  10. Garden Decor: Place bowls or plates in your garden as decorative accents, birdbaths, or even as a base for garden gnomes or sculptures.
  11. Children’s Art Supplies: Give old plates and bowls to your children to use for art projects, painting, or other creative activities.
  12. Homemade Bird Feeder: Create a DIY bird feeder by attaching a plate or bowl to a tree or post, filling it with birdseed, and watching the birds flock to your yard.
  13. Donations: If you have a surplus of plates and bowls in good condition, consider donating them to local charities or shelters where they can be put to good use.

Remember that repurposing your extra plates and bowls is not only practical but also environmentally friendly, reducing waste and giving your items a new lease on life. Get creative and discover the perfect way to integrate these extras into your daily life or home decor.

How do you display decorative plates on the wall?

Displaying decorative plates on the wall can be a beautiful and artistic way to add charm and personality to your home decor. Here’s a step-by-step guide on how to do it:

Materials You’ll Need:

  • Decorative plates
  • Plate hangers or adhesive disc hangers
  • Pencil
  • Tape measure or ruler
  • Level
  • Nails or picture hangers
  • Hammer or screwdriver (if using nails)
  • Soft cloth or paper towel

Step 1: Choose Your Location Determine where you want to display your decorative plates. It could be a focal point in your living room, dining area, hallway, or any space that needs a decorative touch.

Step 2: Select Your Plates Choose the decorative plates you want to display. They can be a mix of different sizes, colors, and designs, but make sure they complement each other visually.

Step 3: Prepare the Plates Clean the plates to remove any dust or dirt. Use a soft cloth or paper towel to gently wipe them clean. Allow them to dry completely.

Step 4: Choose Plate Hangers You have two main options for hanging decorative plates: plate hangers or adhesive disc hangers. Plate hangers are wire holders that grip the plate’s rim, while adhesive disc hangers attach to the back of the plate. Choose the method that best suits your plates and your preference.

Step 5: Position the Hangers For plate hangers:

  • Measure and mark the spot where you want to hang each plate on the wall.
  • Attach the plate hangers to the plates following the manufacturer’s instructions.
  • Ensure that the plate hangers are level and secure.

For adhesive disc hangers:

  • Carefully read and follow the manufacturer’s instructions to apply the adhesive discs to the back of the plates.

Step 6: Arrange the Plates Lay out your plates on the floor or a table to plan the arrangement. Experiment with different configurations until you’re satisfied with the display.

Step 7: Hang the Plates

  • Measure and mark the desired positions for your plates on the wall. Use a level to ensure they are straight and evenly spaced.
  • If you’re using nails, hammer them into the wall at the marked positions. If you prefer a more secure attachment, use picture hangers instead.
  • For adhesive disc hangers, carefully adhere the plates to the wall, following the manufacturer’s instructions.

Step 8: Adjust and Finalize Once the plates are on the wall, make any necessary adjustments to ensure they are level and evenly spaced. Step back and assess the overall arrangement to make sure you’re happy with the display.

Step 9: Enjoy Your Plate Display Step back and admire your decorative plate display. You’ve successfully added an artistic and eye-catching element to your home decor.

Remember that decorative plate displays can be changed or rearranged as often as you like, allowing you to refresh your decor whenever the mood strikes.

Further Reading:

Have you wondered what to do with old dishes? Here are several creative crafts made from dishes that are super easy DIYs!

These repurposing projects not only breathe new life into your old dishes but also provide you with one-of-a-kind decorative items for your home. Whether it’s a stylish candle holder, a cute Snowman, or a graceful glass dish angel, these projects allow you to let your creativity shine.

Feel free to share your thoughts in the comments section. Which project is your favorite? We’d love to hear from you!

Share it with others!

Winter Bucket List Sign Up

Similar Posts

Leave a Reply

Your email address will not be published. Required fields are marked *