
Painting Mason Jars and Distress Them Easily with Video
Are you looking for directions on painting mason jars? Have you seen those farmhouse mason jars? You can buy them online for $40 or more! Painting mason jars is easy! I’m going to show you how to paint and distress a mason or recycled jar to give them that rustic vintage look for a fraction of the cost! This is one of my favorite diy projects.
You’ll need a plain mason jar to get started and you can find old jars at a thrift store to create this project on a budget.

Painting Mason Jars Tutorial
For this project, I’m going to 5 paint mason jars. I picked a variety of sizes for what I’ll be using them for. You can also use recycled jars as well.
Painting Mason Jars Video
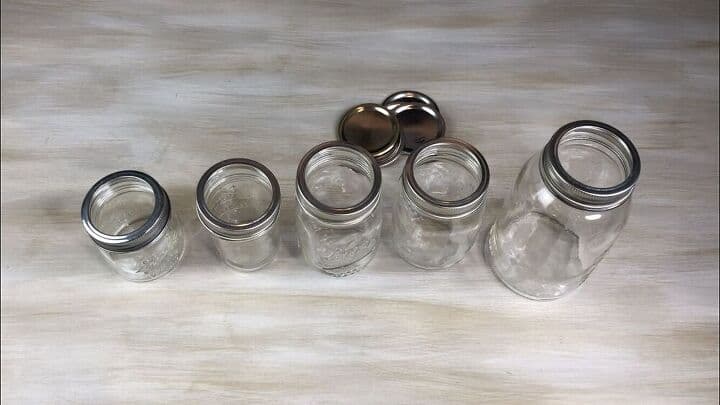
I took the center part out of each of the mason jars as I would not be needing them for this project. Keep the rim, but not the lid.
Prep the Mason Jars
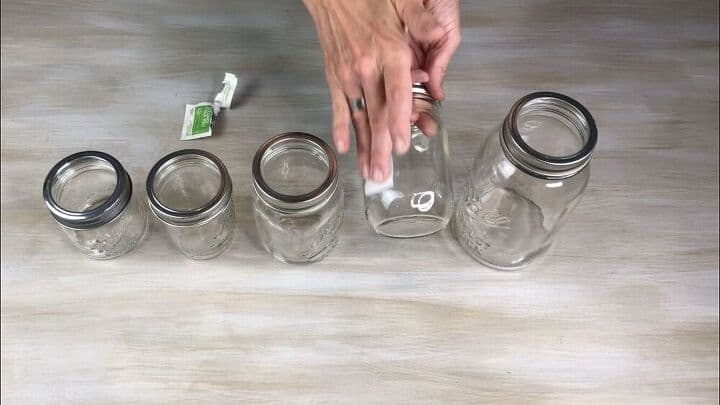
I washed all of the jars, and then I wiped them with rubbing alcohol. This will remove all of the fingerprints, oil, dirt, and other particles that might stop the paint from sticking.
Painting Mason Jars with chalk paint
You can leave the lids on or take them off, whatever is easier for you.
You can find chalk paint and acrylic paint for glass at your local craft store.
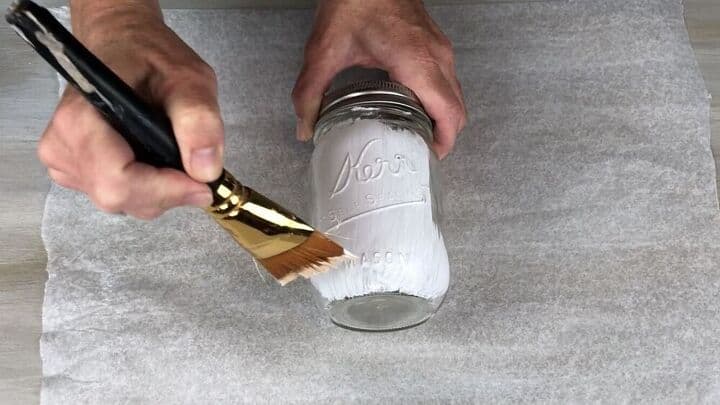
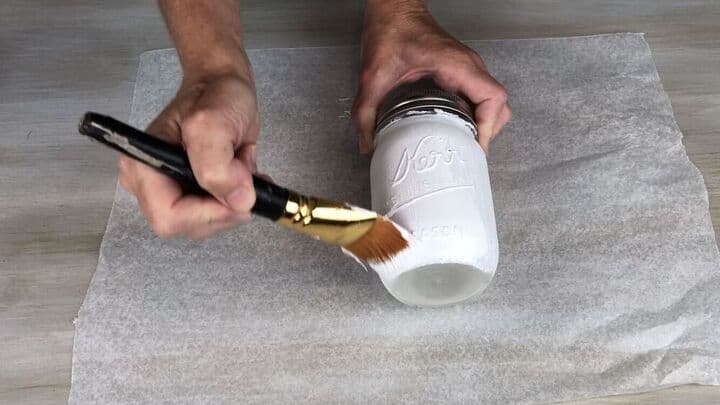
I used white Folk Art Home Decor chalk paint (and you could use any paint color you like) and painted my first layer on all of the jars. I made sure to cover the glass surface on each jar and I did paint the bottom of the jar as well. It is important to pick a paint that says it is okay for glass. If you don’t pick the right kind of paint it could peel or scratch off easily.
I used a regular paint brush but you can also use a foam brush if you prefer.
You can use acrylic craft paint that is made as glass paint as another option. I have more tips below on how to use different types of paint for glass.
You can paint the outside or inside of the jar, I chose to put the layer of paint on the outside of the jar because I will be distressing them.

After painting all 5 jars, I followed the paint instructions and let them dry for 1 hour.
How many coats of paint? You could stop with the first coat if you were happy with the results. This is great for luminaries as the paint will still be a little translucent. I wanted more of an opaque look so I gave them all a second coat of paint on glass jars.
There will be some brush strokes, and if you don’t like them you can lightly sand them down to create a smooth finish. Be careful not to sand too much or you’ll remove the paint entirely. Chalk paint tends to self-level, so it is easier to use.
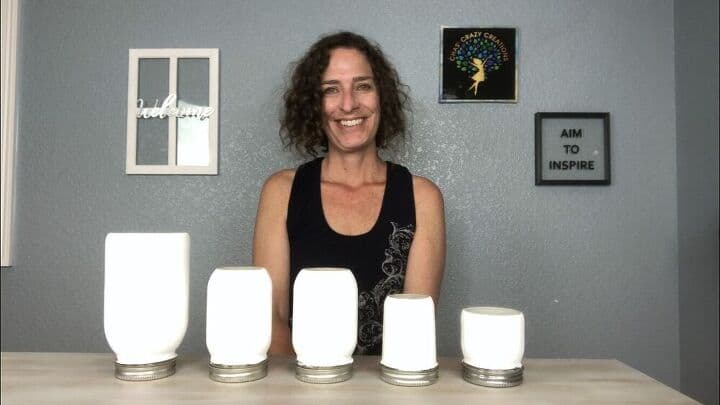
I didn’t need a third coat. I let all 5 jars air dry completely before moving on. I also followed the dry times per the package directions. Chalk paint does give a matte finish. If you decide to put a top coat on them to protect them you’ll get a smoother, gloss finish. I also love that chalk paint cleans off your hands with hot water, and you can easily clean your brushes with soapy water. This project doesn’t take much paint at all so you’ll have plenty left for the future.
Distress with Sanding Block
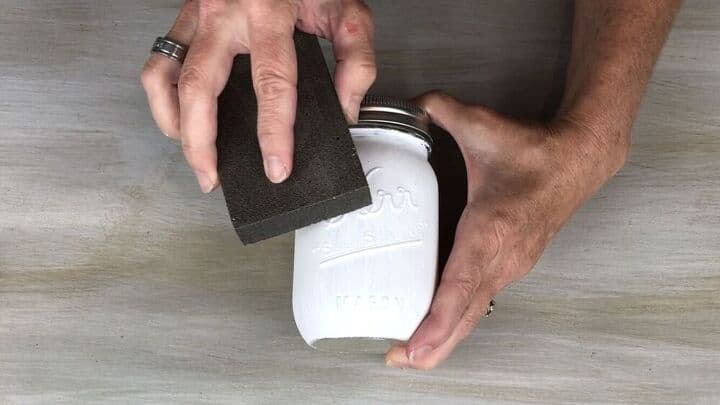
To create a distressed look, I took a sanding block and lightly rubbed it over the raised words on the jars. This removes the paint from the raised lettering. I like sanding blocks instead of grit sandpaper as it helps to sand flat and I don’t accidentally sand places where I didn’t intend.
Sanding like this is called distressing. You can distress your painted mason jars as much or as little as you want. If you make a mistake, simply paint the jar again and start over.
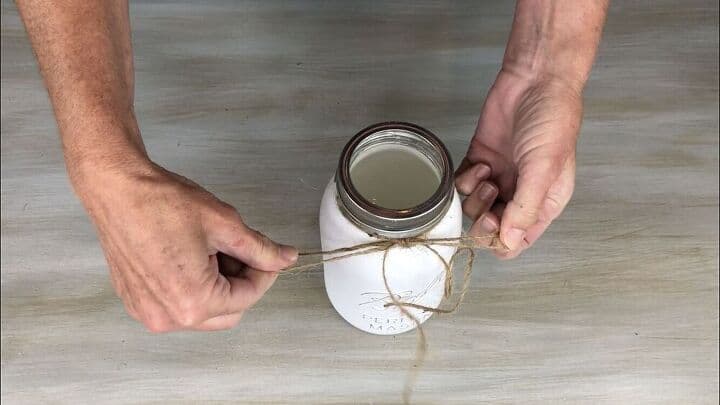
I wound a little twine and tied it off at the top of each mason jar.
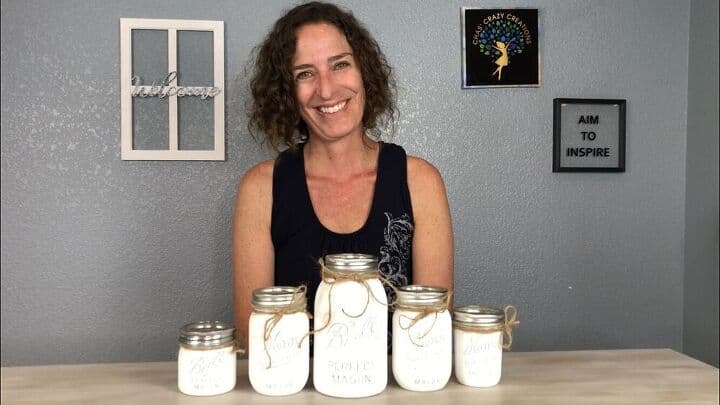
Do you see how easy painted mason jars are to make?
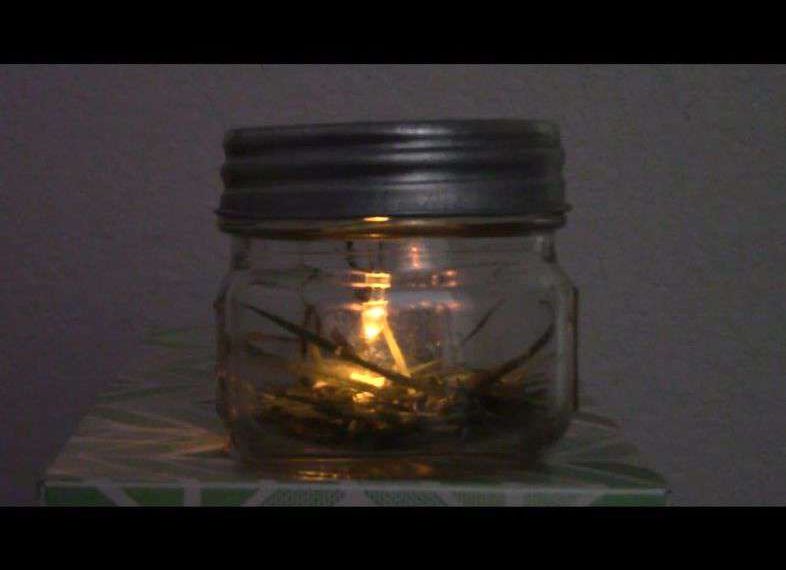
Once they’re all done, it’s time to use the jars. There are so many options! You could fill them with pens, pencils, etc and put them in your office. Set them on a lazy susan with some colored pencils, markers, and scissors for kids in the summertime. Give these away as gifts. Create luminaries for your porch or patio. Or, my favorite is to use the painted glass jar to hold fresh flowers, creating centerpieces for my dining and patio tables.
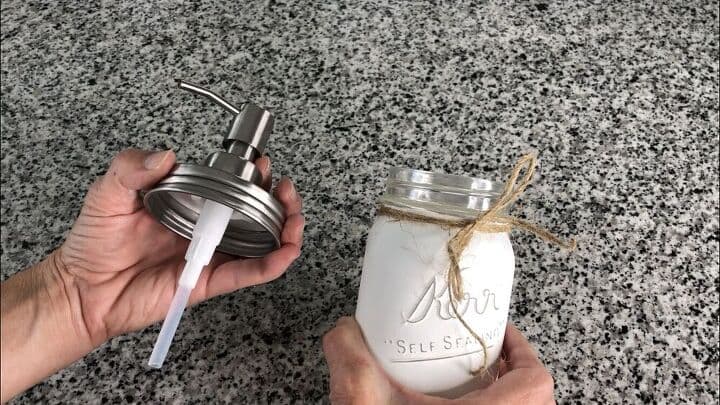
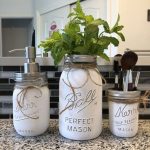
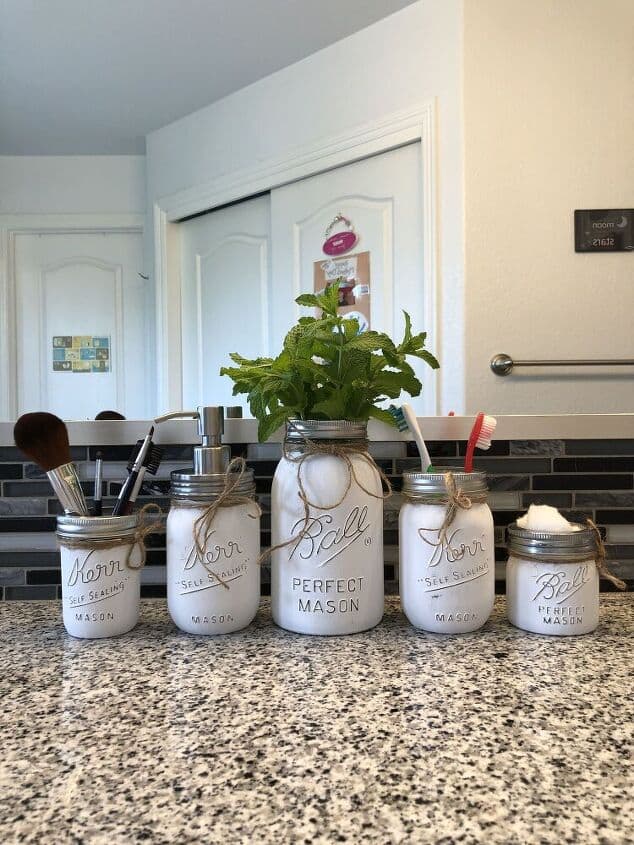
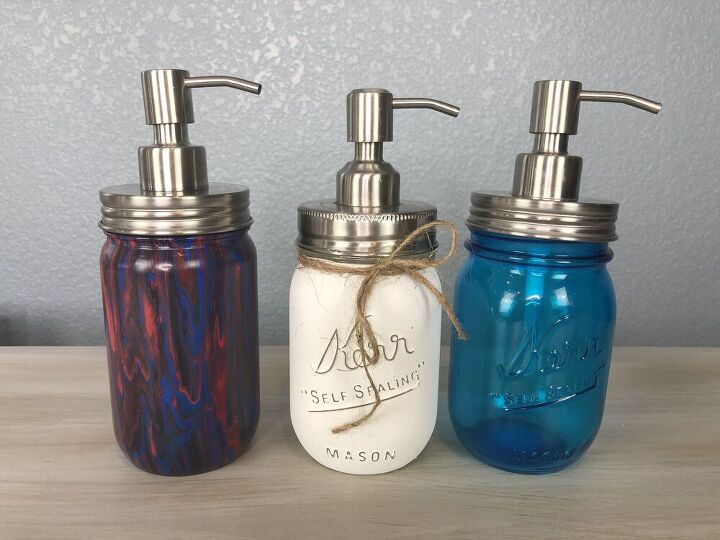
I bought a soap dispenser kit from Amazon, added soap to the mason jar, and added the pump to it.
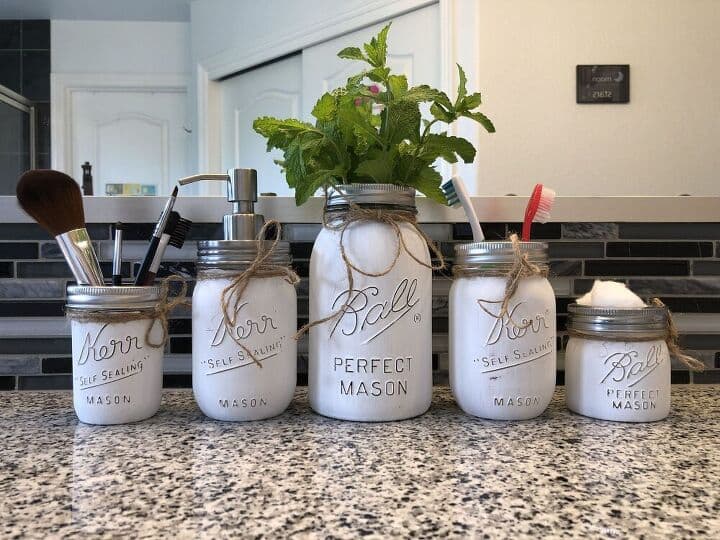
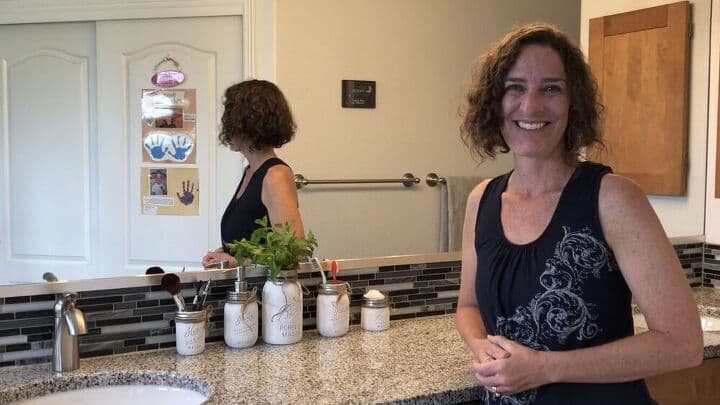
I’ll be using mine in my bathroom. I now have a set for my bathroom. I added make-up brushes, a soap dispenser, a vase, a toothbrush holder, and a cotton ball holder. I’m thrilled with how useful these farmhouse-painted and distressed mason jars will be, and at a fraction of the cost of buying them.
Do you think you’ll paint mason jars?
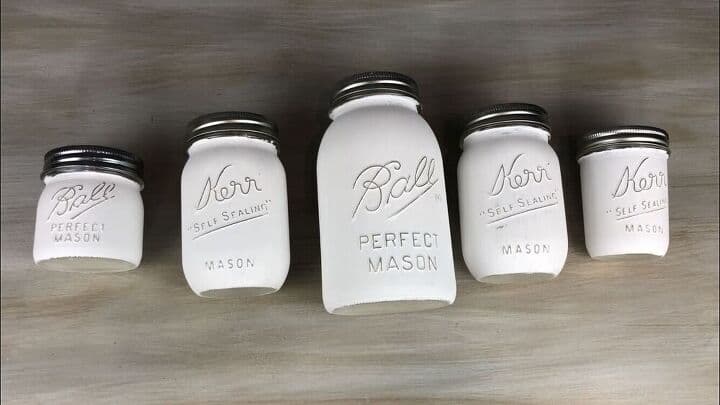
Here’s the final product.
So if you wanted to know how to paint mason jars farmhouse style, this is it!

Here’s a little closer look at the chalk paint mason jars.
This is one of the easiest ways to paint glass mason jars. They are fantastic for many occasions like:
- baby shower
- special occasions
- birthday parties
- weddings
- holidays
Types of Paint for Painting Glass Jars
I wanted to give you a few more ideas for painting mason jars. I liked the look of the distressed chalk paint. But, like I said above there are different paints you can use. Depending on the type of paint, be aware you may need sealant or a primer. Here are a few tips for painting glass jars:
- Spray paint: Make sure you select a spray paint specifically formulated to use on glass. Look for spray paint labeled with glass enamel or glass paint. Use thin coats and proper drying time. You can use a clear sealant on top for added durability.
- Metallic paint: Use metallic paint for a fun DIY project to paint inside the jar.
- Craft paint: Use a primer. To prevent chipping and peeling, use a primer first on the glass.
- Chalkboard paint: Use chalkboard paint for labels in your pantry to store cooking supplies. Chalkboard paint dries in about 30 minutes, but you may need to give the paint a few days to cure.
Will you make one of these farmhouse-style mason jars? Which paint will you use? Let me know in the comments.
Wash the jar and when it’s dry paint the mason jar with chalk paint. Let the paint dry, and add a second coat. Once the painted mason jar is completely dry, you can make a farmhouse painted mason jar by distressing it.
After your paint has dried completely, use sanding paper or a sanding block to carefully scrape the paint off of the mason jar letters and jar surface.
I like paintbrushes with a flat edge (not a chip brush), also a craft paintbrush with fine bristles.
It depends on where you are putting them and what you are doing with them. If it’ll be near water, then yes I recommend a top coat to seal them. You can use Folk Art Home Decor varnish for this or dishwasher safe Mod Podge
If you do not put a top coat on them, you can clean them with a damp rag after they have cured. If you put a varnish on them, you should be able to hand wash them.
No, you can use any paint that says it’s okay for glass. You can also use acrylic paint which is okay for glass.
Painting Mason Jars Video
Shop any of these stores and I receive a small commission at no cost to you.
, PROMOFAHDC") FolkArt Home Décor Chalk F…Shop on Amazon
FolkArt Home Décor Chalk F…Shop on Amazon Sanding Sponge, Auerllcy Co…Shop on Amazon
 Amolliar Mason Jar Liquid S…Shop on Amazon
-Foaming Soap Dispenser, Toothbrush Holder,Flower Vase,for Wedding House Decor Countertop and Vanity Organizer Bathroom Kitchen Farmhouse Décor (Brushed Nickel") Mason Jar Bathroom Set(3 …Shop on Amazon
Mason Jar Bathroom Set(3 …Shop on Amazon
You might be interested in some of my other mason jar crafts
Find out “What Exactly Does It Mean To Repurpose Or Upcycle“, save money, and create the most amazing things.
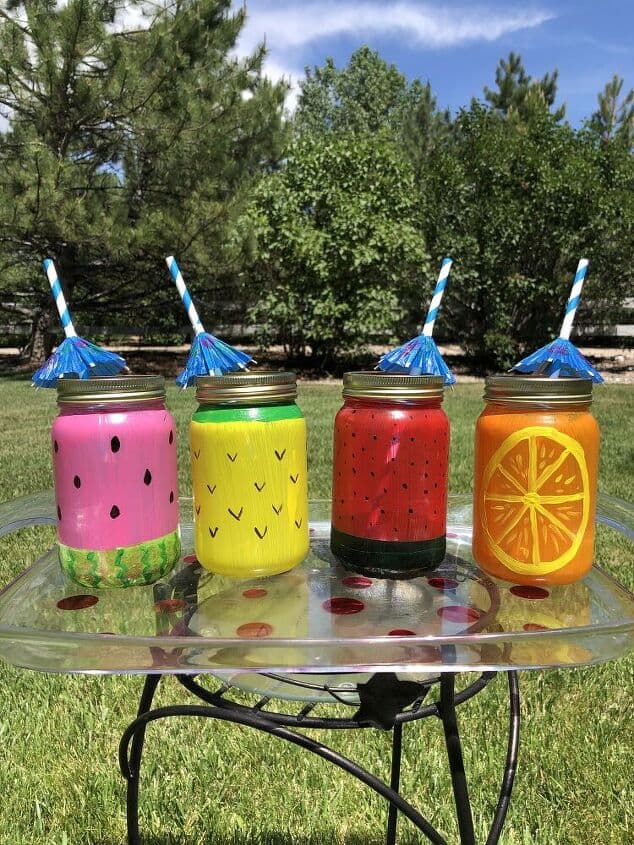
Check out some of my other mason jar creations!

Thanks for this creative DIY! For best results, wait until the paint is entirely dry before you begin scraping it off the mason jar lettering and jar surface. When it comes to paintbrushes, I like flat-edged ones (not chip brushes) and fine-bristled craft paint brushes.
These are so cute! Thank you so much! Perfect idea for bathroom items and kitchen utensils also! Thank you thank you
Thank you so much Ranea
What a fun project! And so versatile. Thank you for sharing this at Creative Compulsions!
Michelle
mybijoulifeonline.com
Thank you so much Michelle – It was something I had been wanting to try and it was so easy to do
I love mason jar projects and have a Pinterest board just to save all the projects I like. These look great and definitely better than paying full price when you can DIY them yourself so easy. Thanks for sharing them. #HomeMattersParty
Thank you so much Donna, I’m thrilled you like them and love that you have a mason jar board.