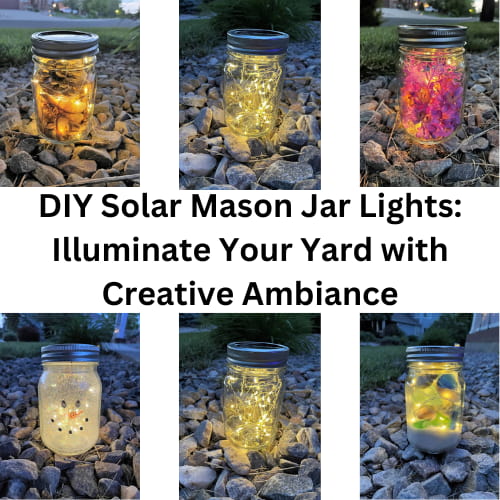
DIY Solar Mason Jar Lights: Illuminate Your Yard with Creative Ambiance

Are you looking for an enchanting and sustainable way to light up your yard or home? Look no further than these charming DIY Solar Mason Jar Lights. With just a few simple materials and a touch of creativity, you can create stunning illuminated decorations that change with the seasons. In this step-by-step guide, we’ll walk you through the process of crafting your very own solar mason jar lights. Let’s get started!
How do you make solar lights out of mason jars?
How do I make mason jar solar lights?
Materials Needed:
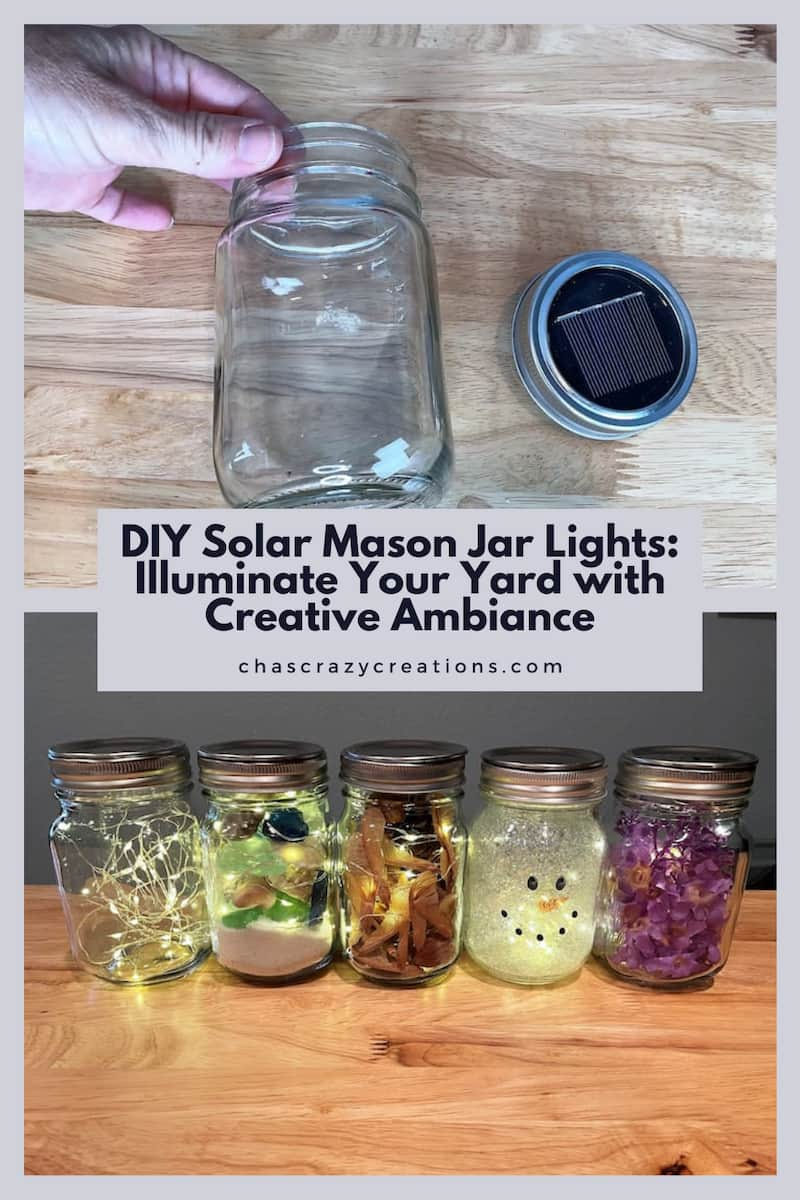
- Recycled jar or mason jar
- Solar light lids with fairy lights
- Filling materials (sand, sea glass, shells, rocks, acorns, pine cones, etc.)
- Pledge floor cleaner
- White glitter
- Sharpie markers
- Dishwasher-safe Mod Podge or outdoor acrylic paint
- Creativity and enthusiasm!
Solar Mason Jar Lights Video
Solar Mason Jar Lights
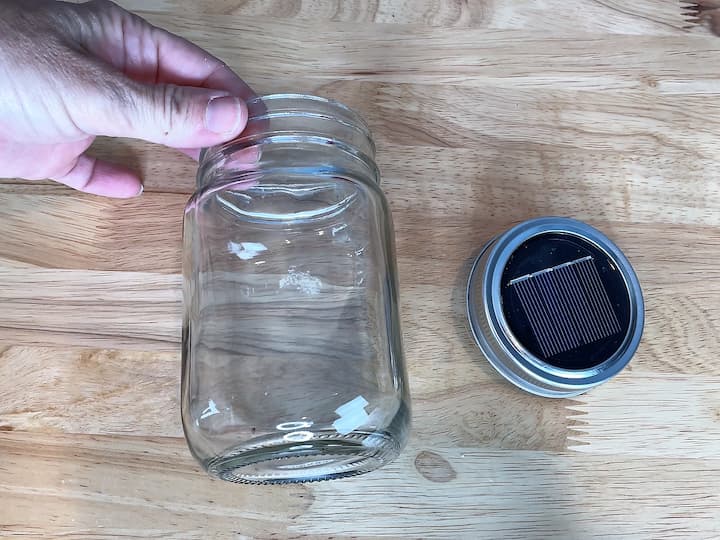
Choose Your Jar and Fillers
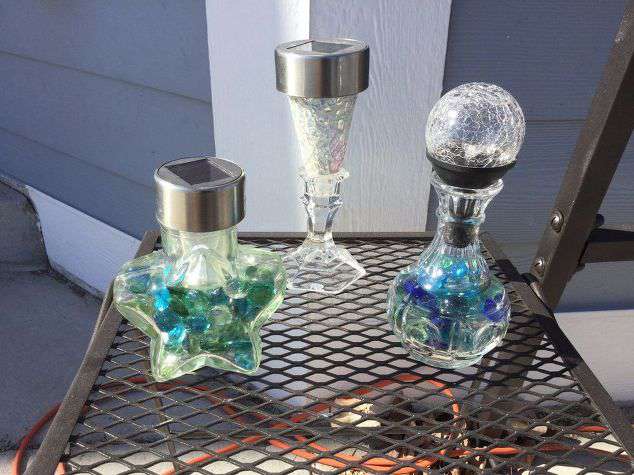
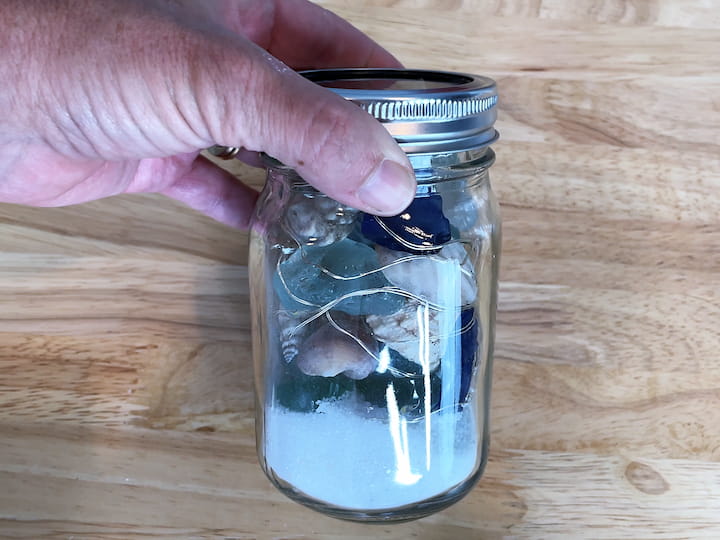
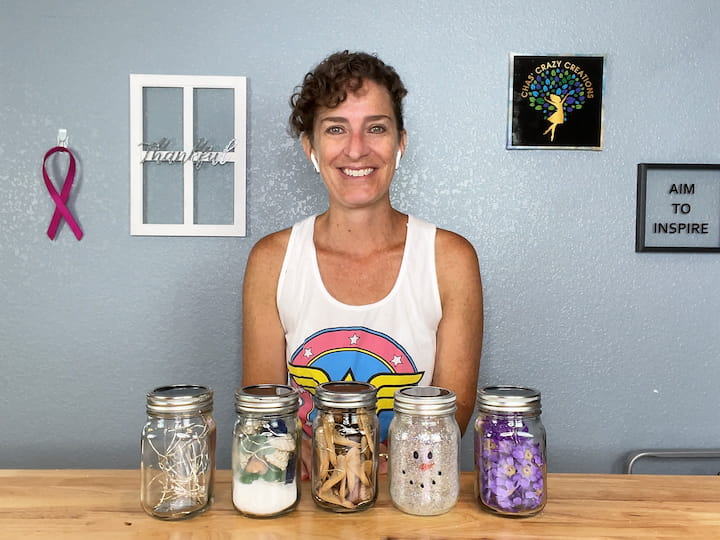
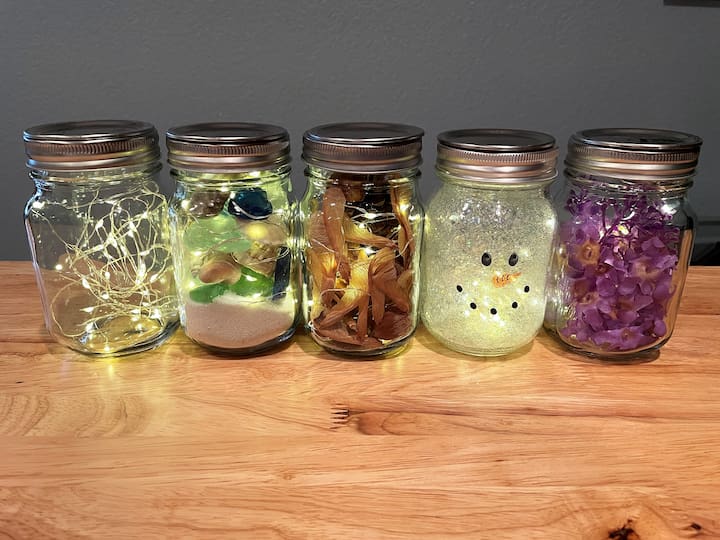
To get started, select a recycled jar or mason jar as your canvas. You can opt for various sizes depending on your preference. Gather an assortment of fillers, such as sand, sea glass, shells, acorns, and pine cones. These fillers will give your solar mason jar a distinctive look and feel. You could also opt to purchase a pretty mason jar that is already colored blue, purple, or green.
Create Your Design
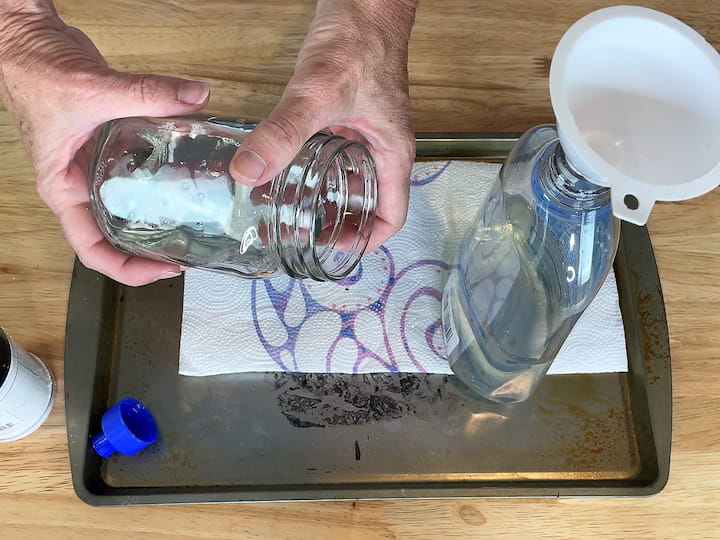
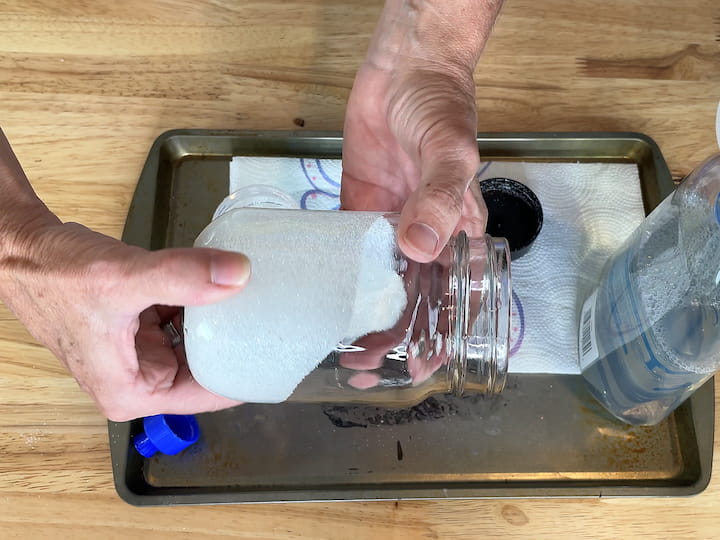
Begin by placing your chosen filler material at the bottom of the ordinary mason jar. Feel free to experiment with different layers and textures. You can use Dollar Store sand, rocks, or even sand from your favorite beach. The choice is entirely up to you. Layer the fillers as you like, building a visually appealing base.
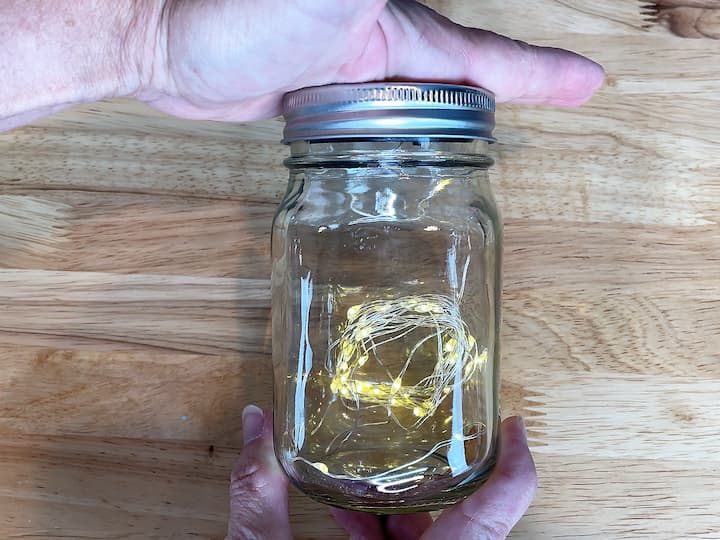
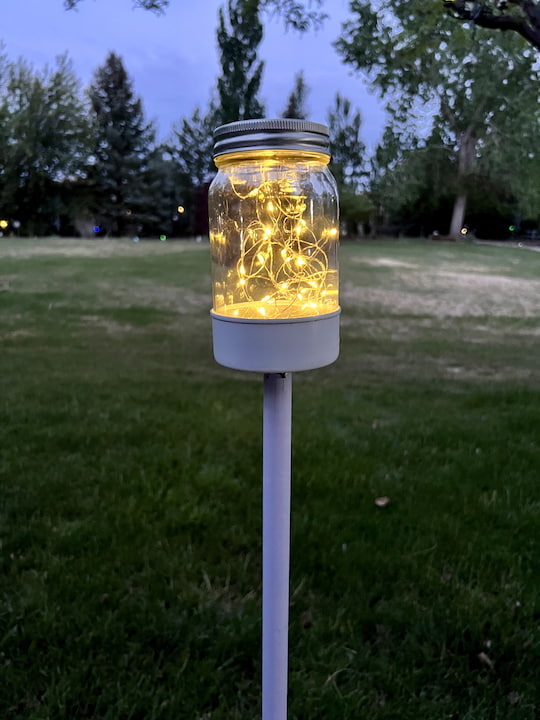
Add the Fairy Lights
Carefully insert the solar light lids with fairy lights into the jar, arranging them so they spread out towards the bottom. These fairy lights will create a mesmerizing glow that radiates through the jar.
When you make purchases of your lights for your solar lanterns, you will have the option to have them come with a handle in case you want to hang your fun mason jar. You can purchase solar lids attached to a strand of fairy lights, or string lights, or you can pull the solar lamp off of its base and stick it into the mason jar band. Just add a loop of gorilla glue or adhesive of your choice around the light and mason jar’s lid to hold it in place. You can even pick different colors for your solar lights. Anything from warm white, to cool whites, or with a remote to choose your color.
Enhance Your Design
Now it’s time to take your mason jar to the next level. Depending on the season or theme you have in mind, add additional elements to complement your design. For instance:
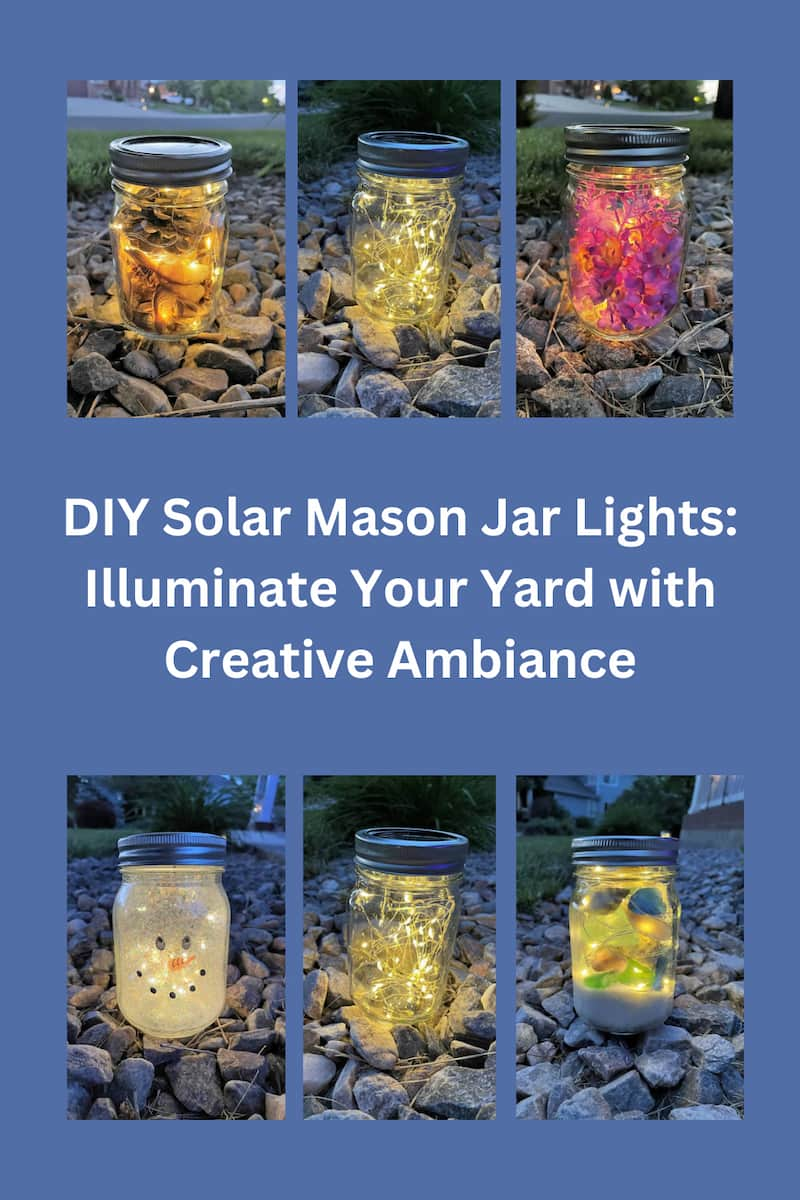
Create a Beach-Inspired Jar
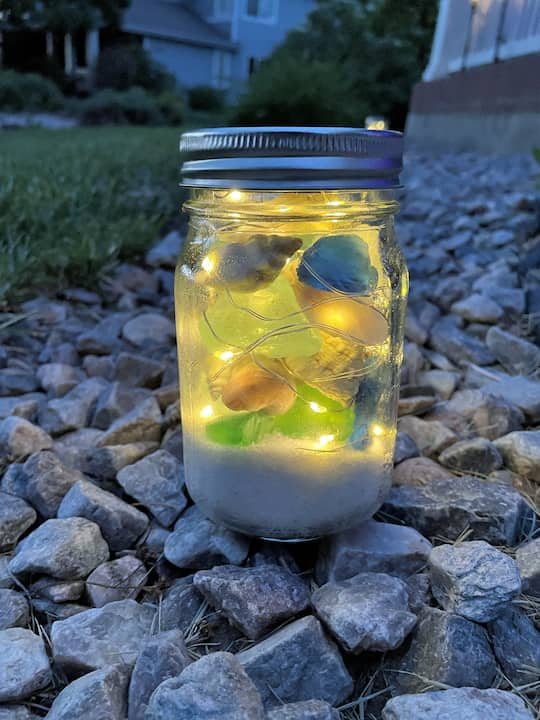
For a beachy vibe, add sea glass and shells around the sand and lights inside the jar. Alternate between layers of lights, sea glass, and shells until the jar is filled to your liking.

Craft a Spring-Themed Jar
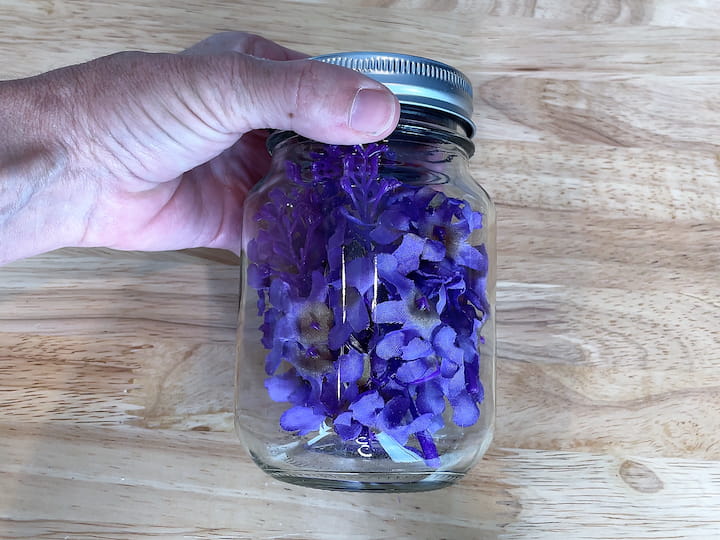
Arrange the fairy lights in the center of the jar without unwinding them too much. Add fake lilacs or other spring flowers around the lights, creating a delightful springtime decoration.
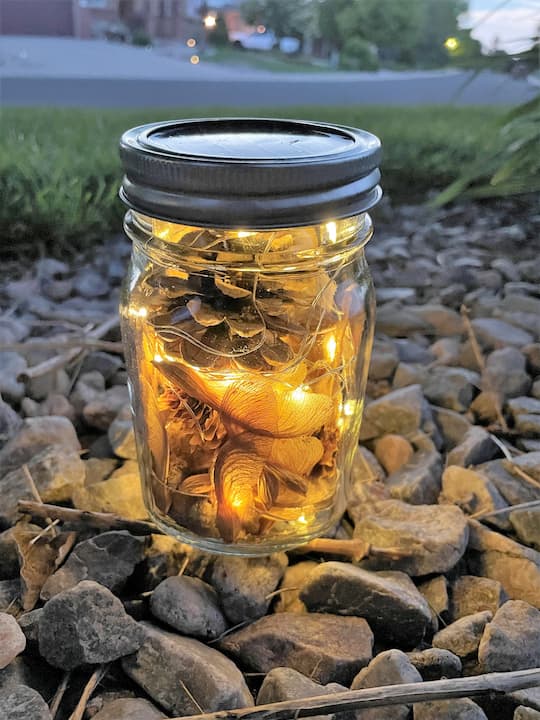
Design a Nature-Inspired Jar
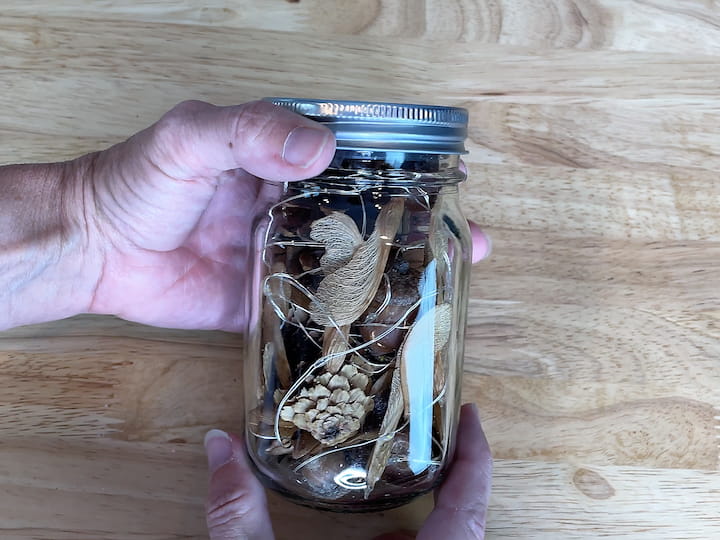
Place some of the fairy lights at the bottom of the jar. Add acorns, pine cones, and any other natural materials you like. Continue alternating between lights and filling materials until the jar is full.
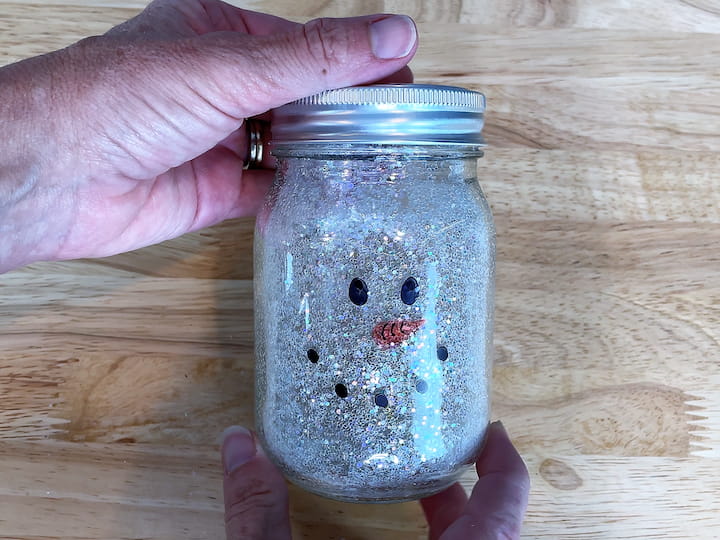
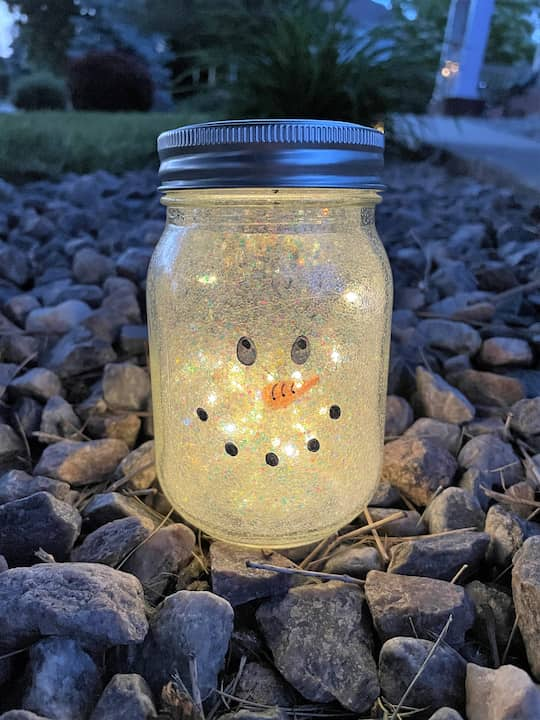
Create a Glittering Winter Jar
Create a frosty effect by swirling Pledge floor cleaner inside the jar, coating the entire surface. Add a touch of white glitter for a snowy sparkle. Once dry, draw a winter-themed face on the jar with Sharpie markers. Seal it with dishwasher safe Mod Podge or outdoor acrylic paint for durability.
Assemble Your Solar Mason Jar Lights
Once your design is complete, carefully place the lid onto the jar. Adjust the positioning of the fairy lights to achieve your desired look. Screw the lid into place securely.
Seal for Outdoor Use
If you plan to place your solar mason jar lights outdoors, ensure their longevity by coating the decorated surface with dishwasher-safe Mod Podge or outdoor acrylic paint. This step will protect your design from the elements.
Illuminate Your Nights
Find the perfect spot for your solar mason jar lights. Whether lining a pathway, decorating a garden, or gracing a tabletop, these charming creations will add a warm and inviting glow to your outdoor space.
Make sure to put your mason jar lanterns somewhere so that the solar mason jar lid gets hours of direct sunlight, and this will help your solar lights run 6-8 hours come nightfall. If your solar jar lights get indirect sunlight, they will still be a great outdoor decoration, but they will not run as long because the top of the jar built-in solar panel isn’t getting enough bright lighting.
Enjoy the Magic
As the sun sets, watch your solar mason jar lights come to life, casting a captivating glow that illuminates your surroundings. Embrace the unique ambiance they bring to your yard or home.
Solar Mason Jar Lights Video
Shop any of these stores and I receive a small commission at no cost to you.
") Dracarys 3 Pack Mason Jar S…Shop on Amazon
Dracarys 3 Pack Mason Jar S…Shop on Amazon") Ball Regular Mouth 32-Ounce…Shop on Amazon
Ball Regular Mouth 32-Ounce…Shop on Amazon Per Bottle - Pack of 2 Bottles") Pledge Multisurface Floor C…Shop on Amazon
Pledge Multisurface Floor C…Shop on Amazon LEOBRO Glitter, 32 Colors F…Shop on Amazon
 Sharpie Brush Twin Permanen…Shop on Amazon
, CS15059 Gloss, 8 Ounce") Mod Podge Dishwasher Safe W…Shop on Amazon
Mod Podge Dishwasher Safe W…Shop on Amazon

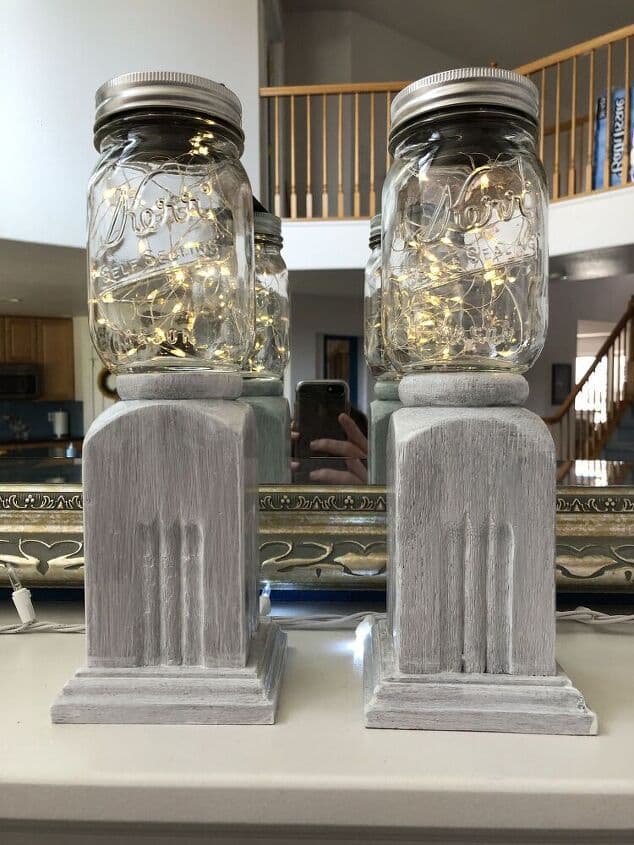
Other Mason Jar Crafts and Related Posts
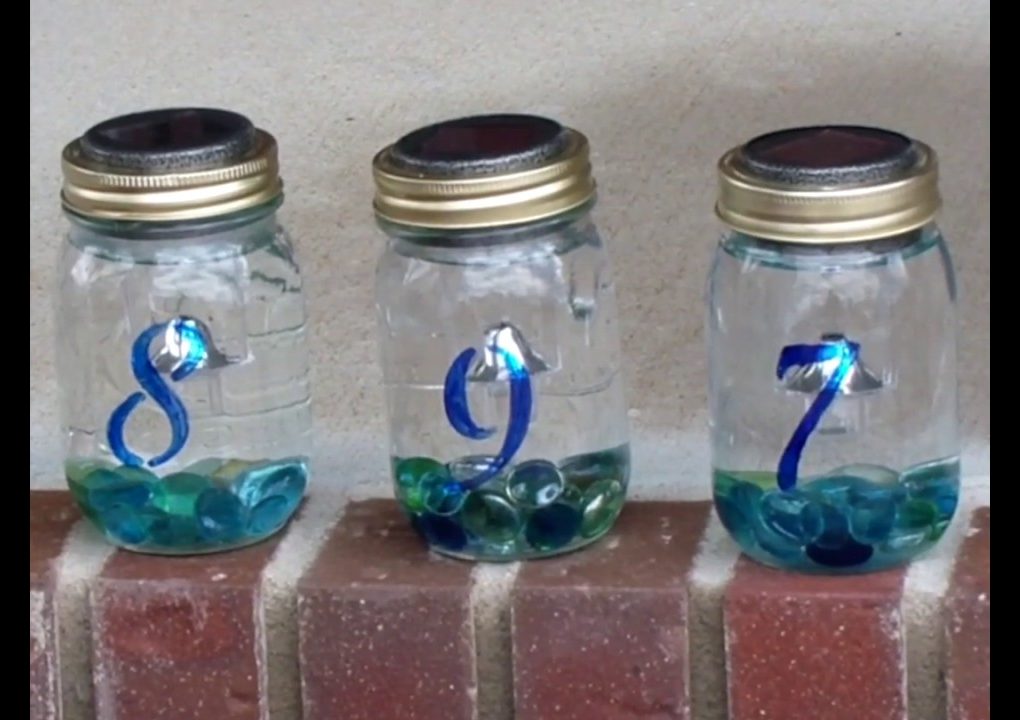
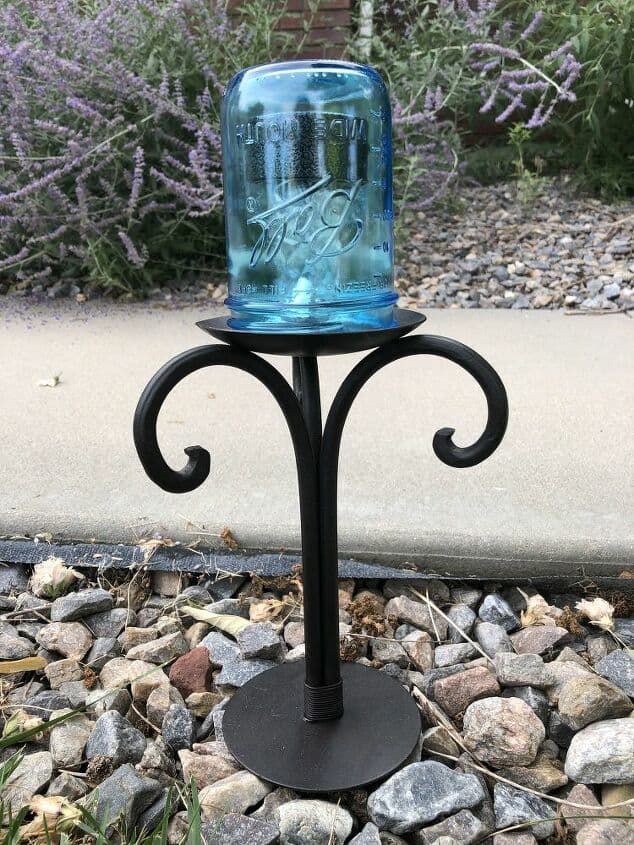
- Mason Jar Solar Light Sidewalk
- How To Make Solar Light House Numbers
- 3 Ways to Use Solar Lights Outside
- Super Easy Dollar Tree Candle Holders DIY To Light Up Your Life
- Mason Jar DIY Lights Easy and Beautiful
DIY Solar Mason Jar Lights: FAQS
How long do Mason jar lights last?
The lifespan of Mason jar lights can vary depending on several factors, including the quality of the components used, how often they are used, and the conditions in which they are placed. Generally speaking, the LED lights commonly used in Mason jar lights are known for their longevity compared to traditional incandescent bulbs.
LED lights typically have a longer lifespan and can last anywhere from 20,000 to 50,000 hours or more of use. This can translate to several years of usage under normal conditions. However, individual experiences may vary. Cheaper or lower-quality components might result in a shorter lifespan, while higher-quality components can extend the longevity of the Mason jar lights.
Keep in mind that LED lights tend to degrade over time, so even though they may not “burn out” like incandescent bulbs, their brightness and performance may diminish gradually over the course of their lifespan.
If you’re looking for Mason jar lights with a long lifespan, it’s a good idea to invest in products from reputable manufacturers and choose LED lights with a higher-rated lifespan.
Should solar lights be put away in winter?
Whether or not you should put away solar lights in the winter depends on a few factors, including the type of solar lights you have, the climate in your area, and your personal preferences. Here are some considerations to help you decide:
- Climate: If you live in an area with harsh winter conditions, including heavy snowfall or freezing temperatures, it might be a good idea to store your solar lights during the winter. Extreme weather can potentially damage the lights or their components.
- Type of Solar Lights: Some solar lights are designed to withstand winter conditions better than others. Higher-quality solar lights may have features that make them more durable in cold and wet weather.
- Battery Maintenance: Cold temperatures can affect the performance of rechargeable batteries in solar lights. Storing the lights indoors during the winter can help preserve the battery life and overall performance.
- Aesthetics: Some people prefer to remove solar lights during the winter months for aesthetic reasons. Snow and ice buildup might obscure the light’s solar panels and reduce their efficiency.
- Ease of Installation: If your solar lights are easy to install and remove, you might find it more convenient to take them down during the winter and put them back up in the spring.
- Manufacturer Recommendations: Check the manufacturer’s guidelines or recommendations for your specific solar lights. They may provide information on whether the lights should be stored during winter months.
If you decide to store your solar lights for the winter, here are some tips to follow:
- Clean the Lights: Before storing them, make sure to clean the solar panels and any other components to remove dirt, debris, and water. This will help maintain their performance when you use them again.
- Remove Batteries: If your solar lights have removable rechargeable batteries, it’s a good idea to remove the batteries before storing the lights. Store the batteries indoors in a cool, dry place.
- Storage Location: Store the lights in a dry, cool place indoors. Avoid extreme temperature fluctuations and direct sunlight, as these conditions can affect the longevity of the lights.
- Check and Charge: Periodically check the stored lights and recharge the batteries if needed to prevent over-discharge.
Ultimately, the decision to put away solar lights in the winter will depend on your specific situation and preferences. If you’re unsure, consider reaching out to the manufacturer for guidance based on the specific model of solar lights you have.
What are some uses for mason jar luminaries?
Mason jar solar lights are versatile and can be used in a variety of creative and functional ways. Here are some ideas for using mason jar solar lights:
- Outdoor Lighting: Use mason jar solar lights to add ambiance and illumination to your outdoor spaces, such as your patio, deck, garden, or walkway. Hang them from hooks, place them on tables, or line them along pathways.
- Decorative Centerpieces: Create charming centerpieces for parties, weddings, or other events by placing mason jar solar lights on tables. You can fill the jars with decorative items like pebbles, sand, or flowers to enhance the aesthetic.
- Lanterns: Hang mason jar solar lights from trees or hooks to create lanterns that can illuminate your outdoor gatherings or add a touch of magic to your backyard.
- Indoor Decor: While they are designed for outdoor use, you can also use mason jar solar lights indoors. Place them on windowsills, shelves, or mantels to add a rustic and cozy feel to your interior spaces.
- Emergency Lighting: Keep mason jar solar lights handy as emergency lighting during power outages. The solar-powered lights can provide a source of light when needed.
- Wedding Decor: Incorporate mason jar solar lights into your wedding decor. They can be used as table centerpieces, aisle markers, or even hung from trees or arches to create a magical atmosphere.
- Campsite Lighting: Take mason jar solar lights with you on camping trips to provide gentle, ambient lighting around your campsite.
- Nightlights: Place mason jar solar lights in bedrooms, bathrooms, or hallways as soft and energy-efficient nightlights.
- DIY Projects: Get creative with DIY projects such as crafting your own mason jar solar light chandelier, lanterns, or wall sconces.
- Gifts: Customize mason jar solar lights and give them as thoughtful and practical gifts for birthdays, holidays, or housewarmings.
- Glowing Pathways: Line your garden pathways or walkways with mason jar solar lights to create a warm and inviting atmosphere at night.
- Special Occasions: Use mason jar solar lights to celebrate special occasions like birthdays, anniversaries, or holidays. They can be incorporated into themed decorations and displays.
Remember to choose mason jar solar lights that are designed for outdoor use and are built to withstand the elements. You can find various styles and designs to suit your preferences and needs.
Where should I put solar-powered mason jar lights?
You can place a mason jar solar light in various locations both indoors and outdoors to add charm, ambiance, and practical lighting. Here are some suggestions:
Outdoors:
- Patio or Deck: Hang from hooks, railings, or pergolas on your patio or deck to create a cozy and inviting outdoor space.
- Garden Beds: Place among your garden plants or along garden paths to illuminate your garden at night.
- Pathways: Line your walkways or pathways with lights to provide guidance and enhance safety.
- Trees or Shrubs: Hang from tree branches or shrubs to create a whimsical and enchanting atmosphere.
- Fence Posts: Attach to your fence posts to add a touch of illumination and character to your yard.
- Outdoor Dining Area: Use to light up your outdoor dining table or picnic area.
- Stairs: Place on the steps of your outdoor staircase to help prevent trips and falls.
- Gazebo or Pergola: Hang from the roof of your gazebo or pergola to create a romantic and cozy setting.
- Poolside: Add a touch of charm to your pool area by placing lights around the pool’s perimeter.
Indoors:
- Windowsills: Place on windowsills to let in a warm, soft glow during the evening.
- Shelves: Use as decorative accents on shelves or bookcases.
- Mantel: Create a rustic and charming display by arranging on your fireplace mantel.
- Kitchen Counter: Add a cozy touch to your kitchen by placing a mason jar solar light on your counter.
- Bathroom: Use as decorative accents in your bathroom for a relaxing and spa-like atmosphere.
- Bedroom: Place on bedside tables or dressers to create soothing ambient lighting.
- Living Room: Incorporate them into your living room decor to add a touch of whimsy and charm.
- Special Events: Use as part of your decorations for parties, weddings, or other special occasions.
Remember to consider the solar panels on the lids of the mason jars. For optimal charging, place the mason jar solar lights in locations that receive sufficient sunlight during the day. The specific placement will depend on your preferences, the layout of your space, and the areas where you want to enhance lighting and ambiance.
Now you have a set of stunning solar mason jar lights that provide a warm and enchanting glow to your yard or home throughout the year. Let your creativity shine as you experiment with different decorations and themes for each season. Embrace the sustainable beauty of these lights and enjoy the soothing ambiance they bring to your outdoor space. We hope this guide has inspired you to create your very own solar mason jar lights. For more creative ideas and projects, don’t forget to subscribe to our YouTube channel and blog. Thank you for joining us on this crafting journey, and we’ll see you in our next video!