
Easy How To Paint with Chalk Paint with Video
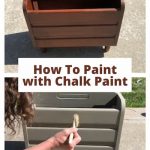
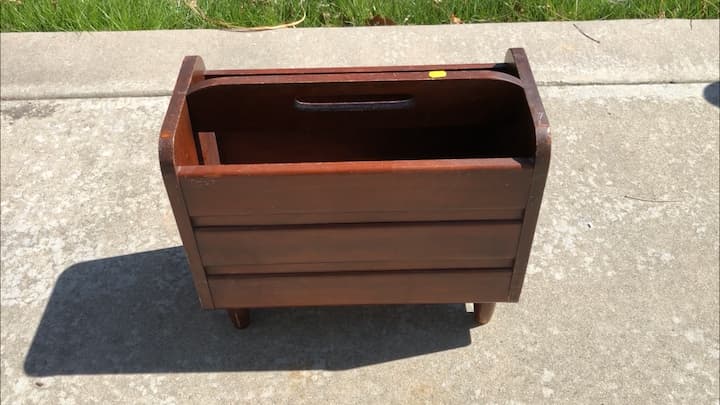
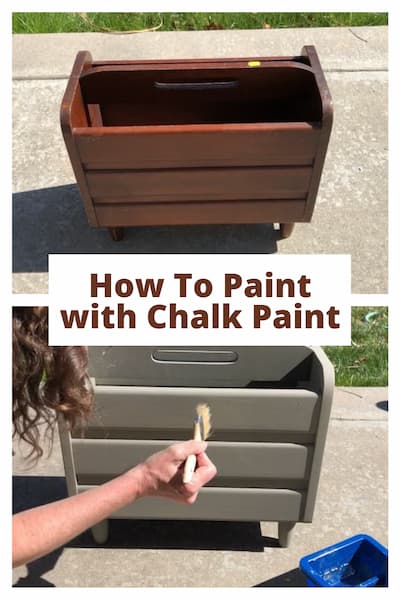
Have you wanted to know how to paint with chalk paint? I love chalk painting. It is a water-based paint with a matte finish that comes in many different colors and requires very little prep work. I found a magazine rack at a thrift store and I’m sharing an easy way to give it new life with chalk-style paint.
Materials needed
- Folk Art Home Decor Chalk Paint
- Chip Brush
- Sanding Block
- Krud Kutter
- Folk Art Home Decor Wood Tint, optional
- Stencil, optional
- Stencil Brush, optional
- Decal Sticker, optional
How To Paint with Chalk Paint Video
Here are the instructions
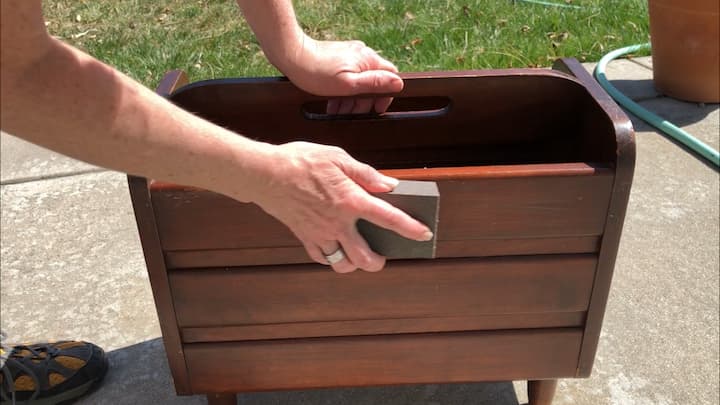
I started with a light sanding. I sanded the entire piece with a sanding block. You could also use just fine-grit sandpaper. This will get it ready for painting so the first layer of paint adheres nicely. You don’t have to sand very much.
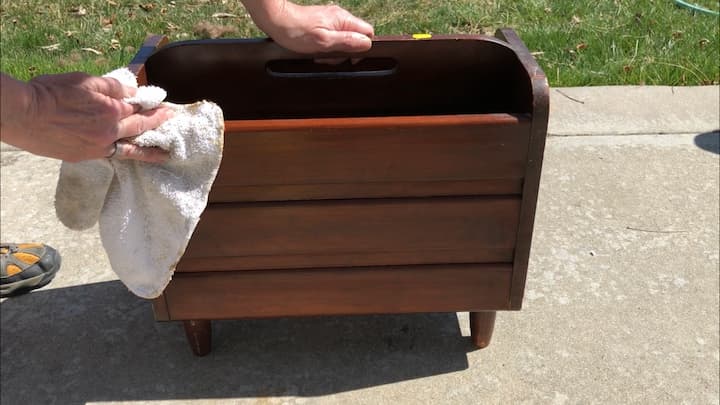
I sprayed Krud Kutter on the piece, and then wiped the entire piece of furniture with a soft cloth. This will help remove any dirt, sticky residue, and anything else you might not be able to see on the piece.
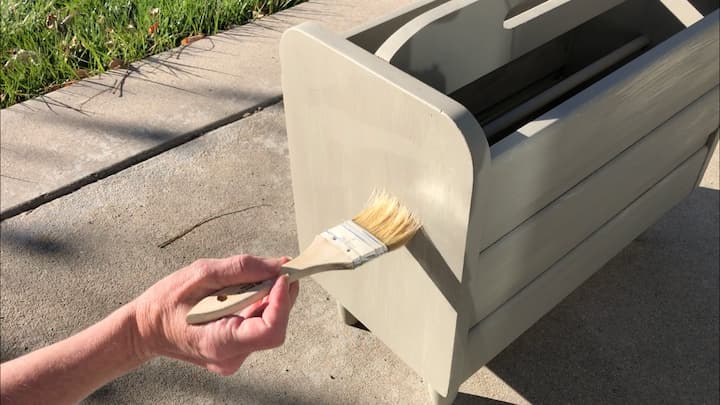
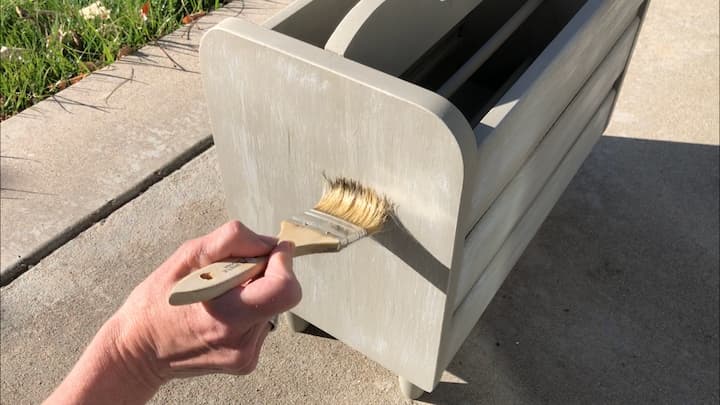
For the best results, I like to use a damp chip brush when painting with chalk paint. You do this by getting the paintbrush wet with just a little water, then drying it off as much as possible. I started painting with Folk Art Home Decor Chalk Paint in the color Castle.
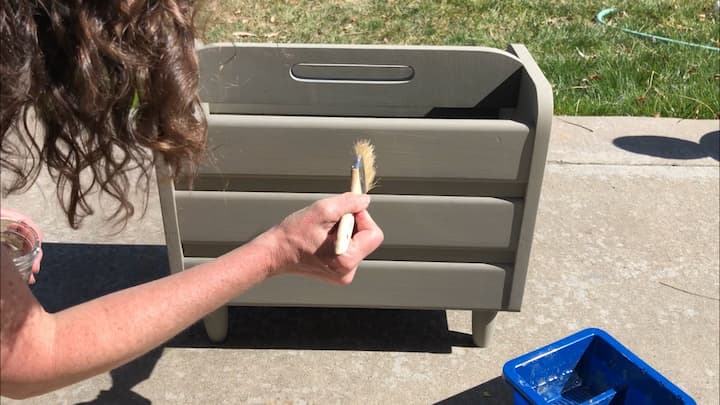
I painted the entire surface. I let the first coat dry and then looked at it to decide if it needed a second coat of paint, which it did.
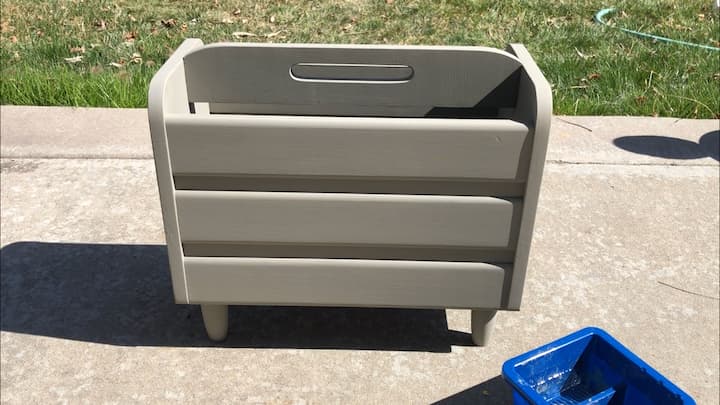
After painting the piece with the second coat of paint, I let that dry completely. Chalk paint goes on easily, self-levels, and has nice coverage. Two coats of paint are not always necessary. I could have stopped here but I decided I wanted to give this piece a vintage look with a little depth and dimension.
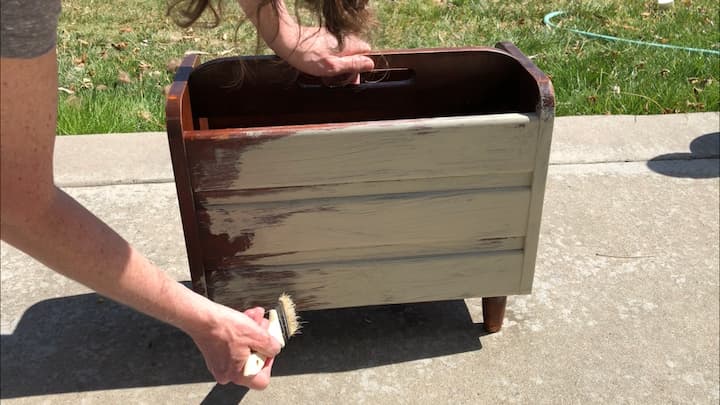
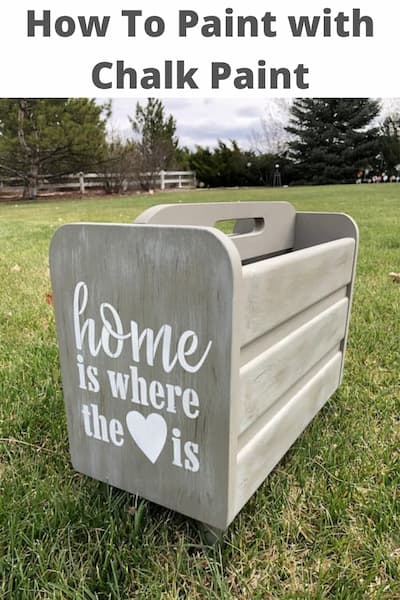
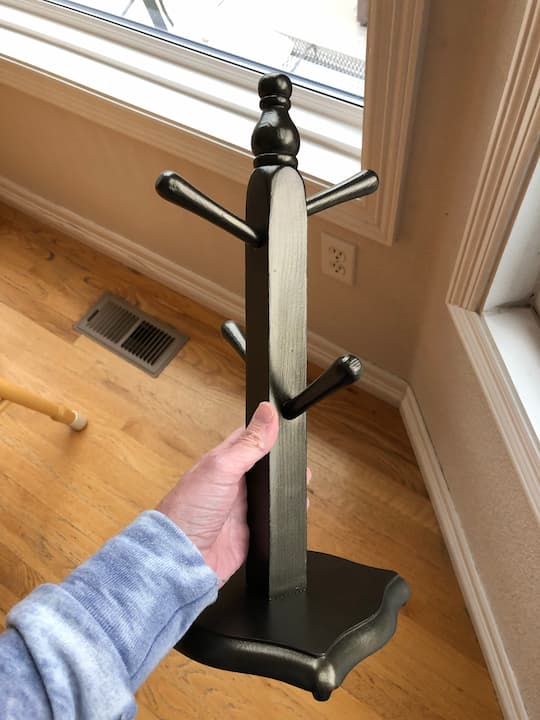
For the next step, I wanted to create a reclaimed or distressed look. I started by lightly dipping my brush in Folk Art Home Decor Wood Tint in the color gray. I dabbed the paintbrush on a paper plate so that I wouldn’t have too much paint on my brush. I lightly brushed over the Castle paint and created light white streaks all over the piece.
I let that dry, then I repeated the same process with Folk Art Home Decor Wood Tint in White, and next Walnut.
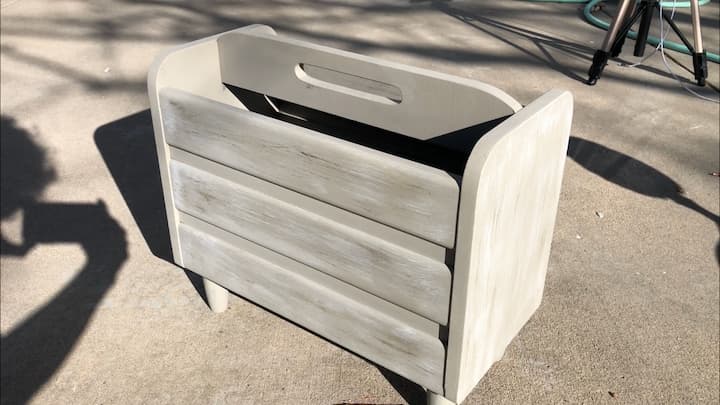
I let the entire piece dry. I could have stopped here but I wanted to give the ends a little bit of flare.
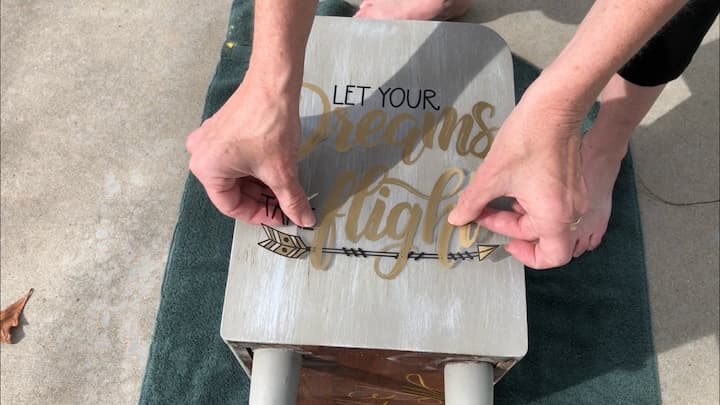
I’ll show you two options: the easy and the slightly harder version. This first version is to use a decal that I found at Dollar Tree.
These can be used on almost everything and they can also be removed easily. This makes it a temporary solution.
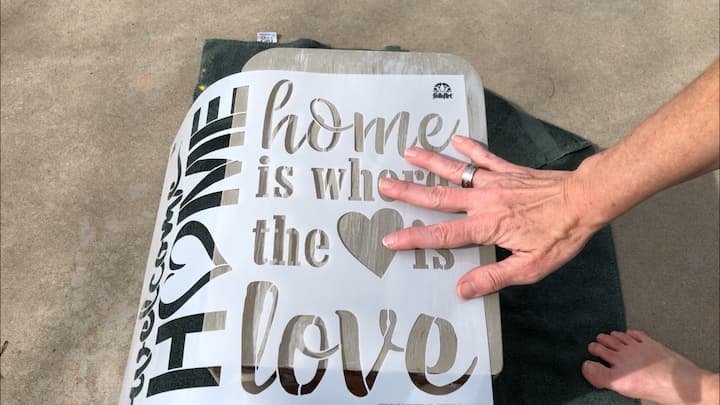
The other option is to stencil the ends. I did this by placing my Folk Art Stencil on the end. I used stencil tape to hold the stencil into place. You can also use painter’s tape
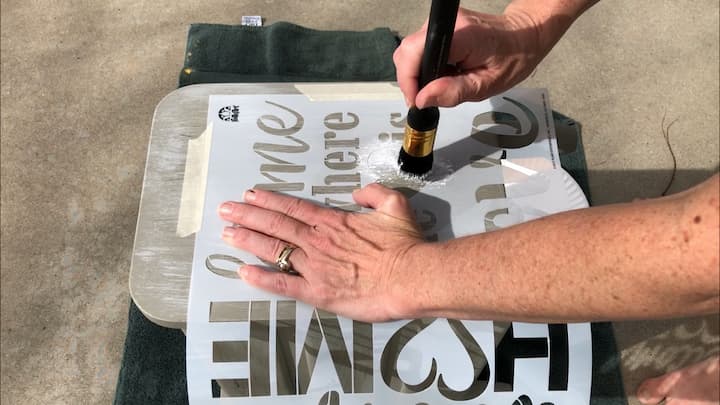
I dipped my Plaid Stencil Brush in Folk Art Home Decor Chalk Paint in the color white. I used a paper plate to offload as much paint as possible then tapped my stencil brush onto the magazine rack and stencil. I kept going until the entire stencil was painted.
You can see more about stenciling in this post, How To Stencil On Wood
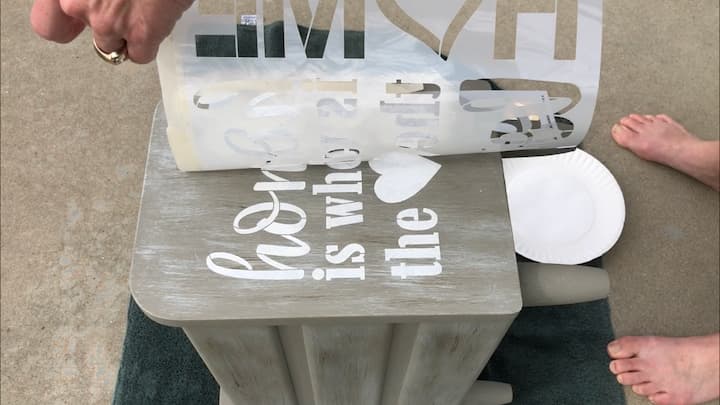
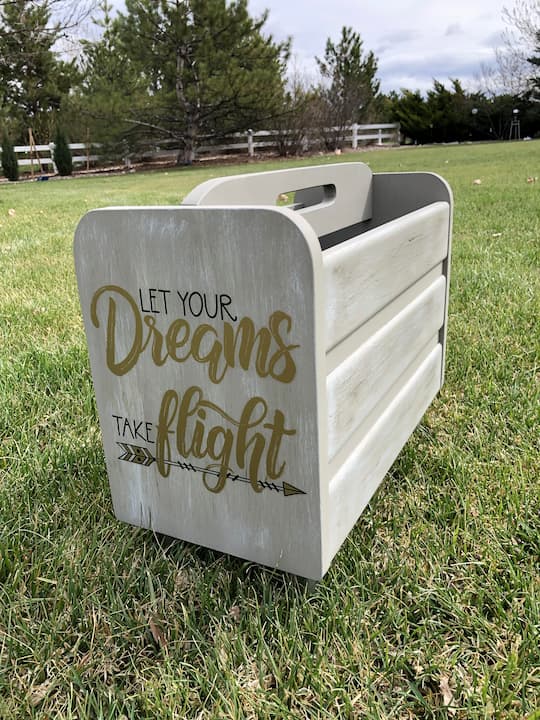
Once I was done stencil painting, I carefully removed the stencil from the wood.
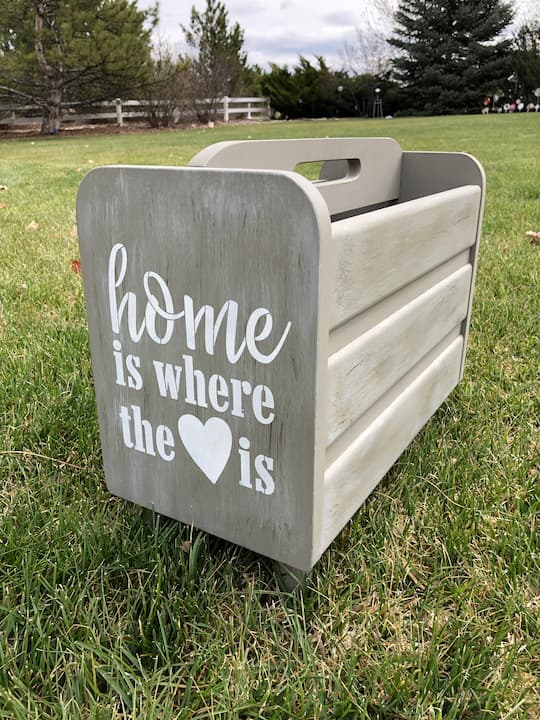
I let the stencil dry completely and my magazine rack was updated and ready for use. The great thing about chalk paint is you don’t have to seal it if you don’t want to. If it is a piece that gets heavy use you can opt for a clear coat varnish or wax finish to protect it further.
Do you have to sand before using chalk paint? It’s a good idea to lightly sand a piece before painting it. You don’t have to, but it does help the paint adhere a little better as well as ensure you start with a clean surface.
How many coats of chalk paint do you need?1-2 coats. Paint the piece and evaluate if it needs a second coat.
Is it easy to chalk-paint furniture? Yes, chalk paint is one of the easiest types of paint to work with.
How do you get rid of brush strokes in chalk paint? The best thing about chalk paint is that it is self-leveling so you don’t have to worry about brush marks as much. Using a good quality brush with thin bristles is a great way to eliminate any brush strokes on the painted surface as well.
What is the best top coat for chalk paint? You don’t have to use a top coat with this type of paint. If it’s a piece that will be used heavily like a tabletop your best option is to add extra protection with a top coat. I like Folk Art Home Decor Varnish for a nice solid finish. You can use wax, but wax needs to be reapplied every 6 months to a year.
Find out “What Exactly Does It Mean To Repurpose Or Upcycle“, save money, and create the most amazing things. Good Luck!
How To Paint With Chalk Paint Video
Shop any of these stores and I receive a small commission at no cost to you.
") FolkArt Home Decor Ultra Ma…Shop on Amazon
FolkArt Home Decor Ultra Ma…Shop on Amazon") FolkArt Home Decor Chalk Wo…Shop on Amazon
FolkArt Home Decor Chalk Wo…Shop on Amazon Contractor Pack for Paint, Stain, Glue & Epoxy") Shop on Amazon
Shop on Amazon Sanding Sponge, Auerllcy Co…Shop on Amazon
 Krud Kutter 305373 Kitchen …Shop on Amazon
 FolkArt Laser Cut Mylar Ste…Shop on Amazon
Find out “What Exactly Does It Mean To Repurpose Or Upcycle“, save money, and create the most amazing things.

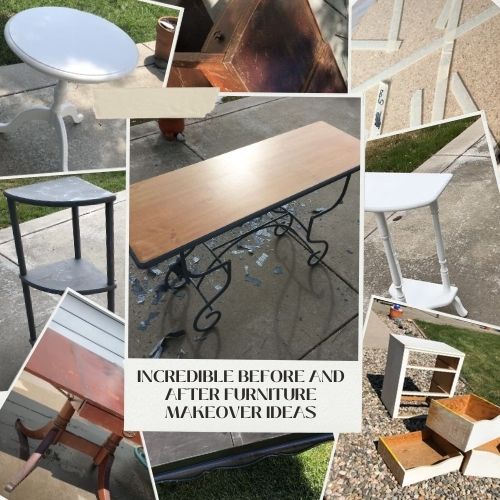
Check out some of my other chalk paint projects!


What a difference, this turned out so cute. And what a great use for a dollar store decal if you don’t feel like stenciling. Such a treat getting to know you and hop with you, thanks for hosting!
Thank you so much Allison!
Looks great, Chas! I’ve never tried using a damp brush when I chalk paint. I’ll have to try that next time. I love the way you created a weathered look with the paint. It’s just perfect! Thanks so much for a great hop!
I love how it turned out Chas. I am always blown away by how creative you are when it comes to turning an ordinary piece into something amazing!
Thank you Kim for your sweet words. Wonderful hopping with you!
Super cute, Chas! Your version is a big upgrade from how you found it!
Niky @ The House on Silverado
Thank you so much Niky, it’s amazing what paint can do. Thanks for a great hop
Awesome makeover Chas! I love seeing your posts every month its great hopping with you!
Thank you so much Tarah! So wonderful teaming up 🙂
Chas, you are such a good teacher. Great tutorial and Iike the questions answered at the end. Your magazine holder is beautiful. Thanks for all the great tips! Happy hopping with you!
Thank you so much Mary, and I love seeing what everyone does in our hop. Thanks for joining 🙂
This turned out great! You have such a good eye for how to make the most ordinary things into something new. Thanks for hosting today.
Thanks Andrea, and thanks for joining our hop. Always love seeing everyone’s take on our themes.