
How To Make Your Own DIY Coasters with Video
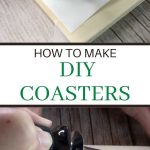
Do you want to make your own DIY coasters? I like to make gifts for all occasions and these can be useful items many people need. I have come up with 3 different sets that are easy to make.
DIY Coasters Video
DIY Coasters
DIY Wood Coasters
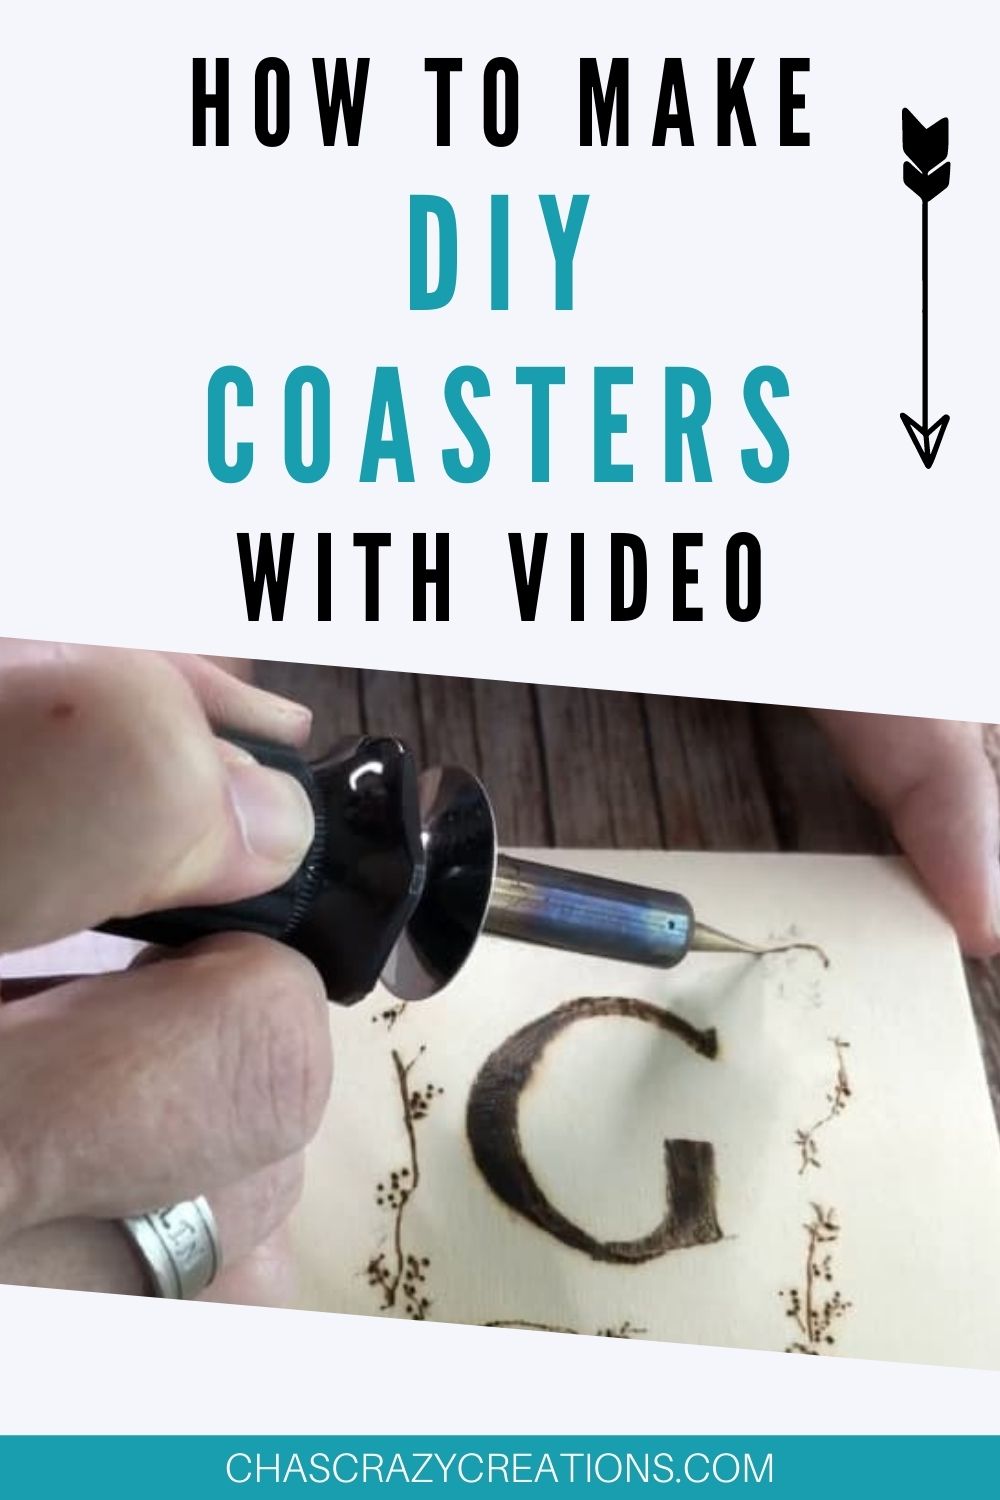
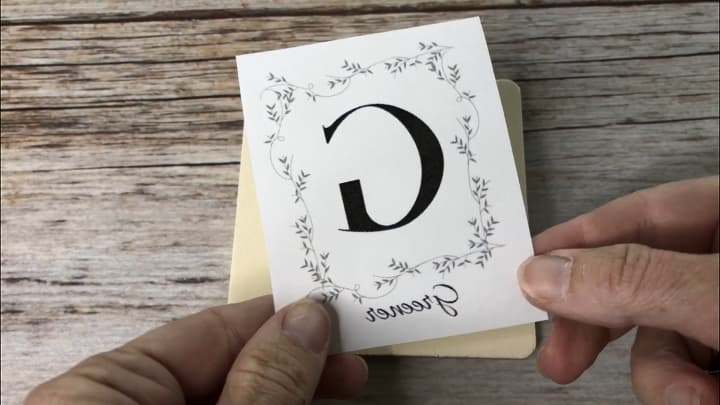
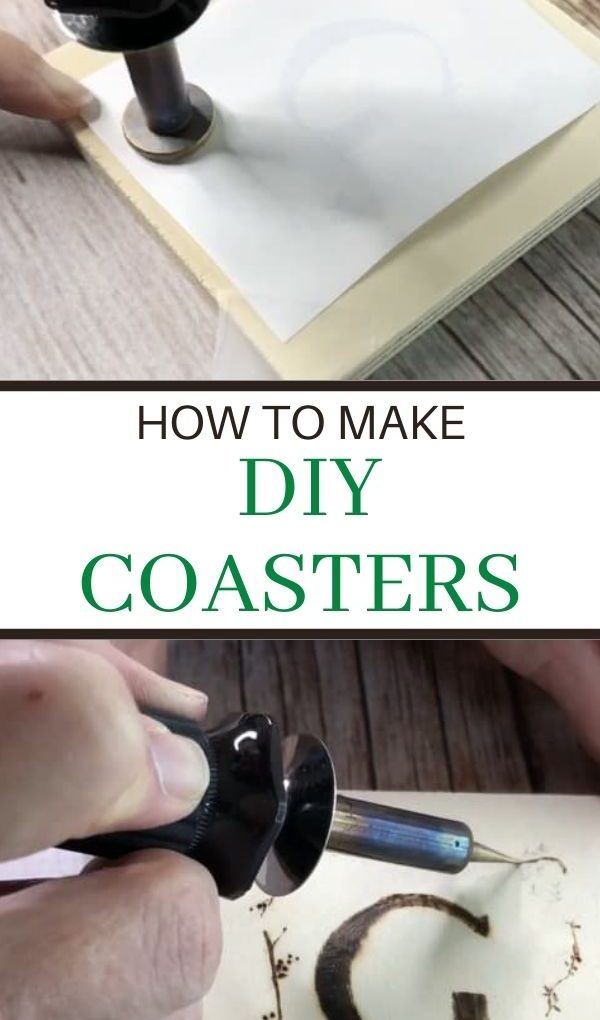
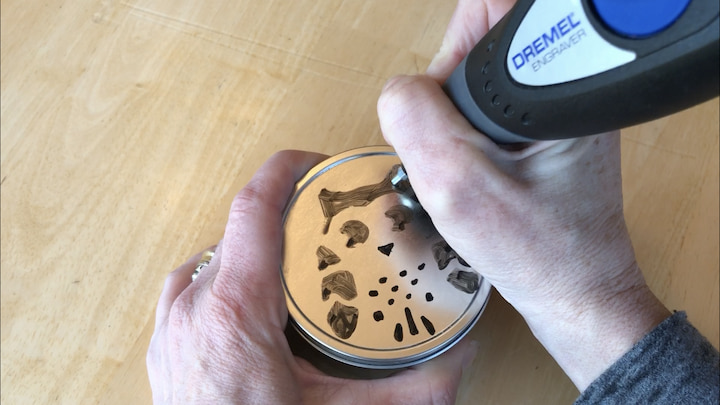
I created a design I wanted to transfer onto my wood coaster.
Tip – make sure to print the design backward so it will transfer the correct way and make sure to use a laser printer for this transfer technique.
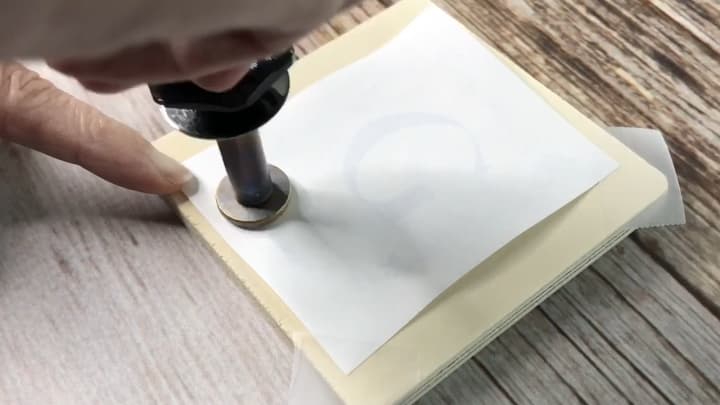
I used my Plaid Wood Burning Tool set and a package of 4 wooden coasters from Plaid. I put on the wood transfer tip on my wood burning tool and heated it up.
I placed the transfer right side down on the coaster and began ironing the back side of the transfer. This will transfer the ink from the paper onto the wood coaster.
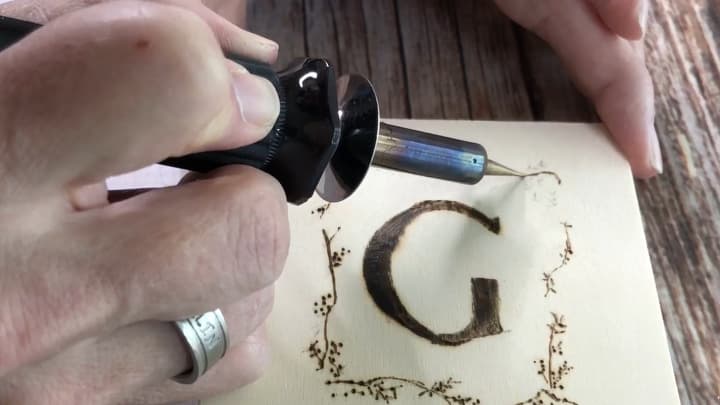
When my wood burning tool was cool enough, I changed the tips and re-heated it. I traced the transfer design with the tool.
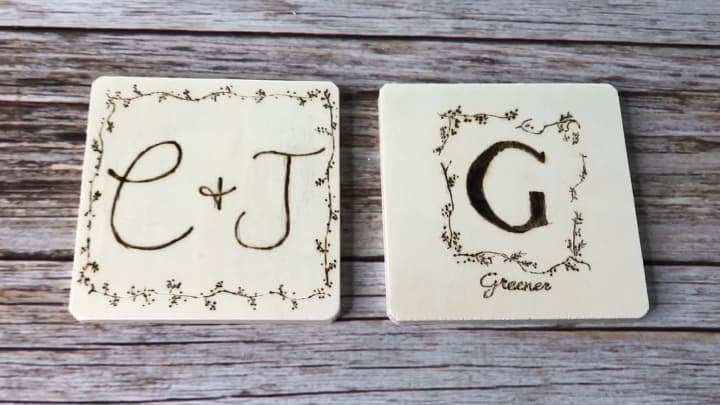
I loved how these turned out.
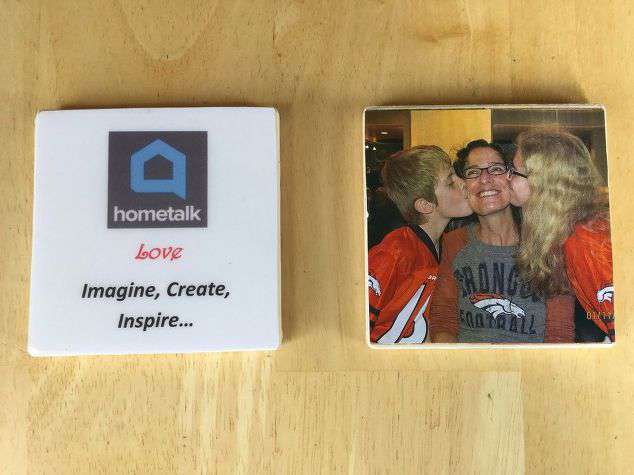
DIY Photo Coasters
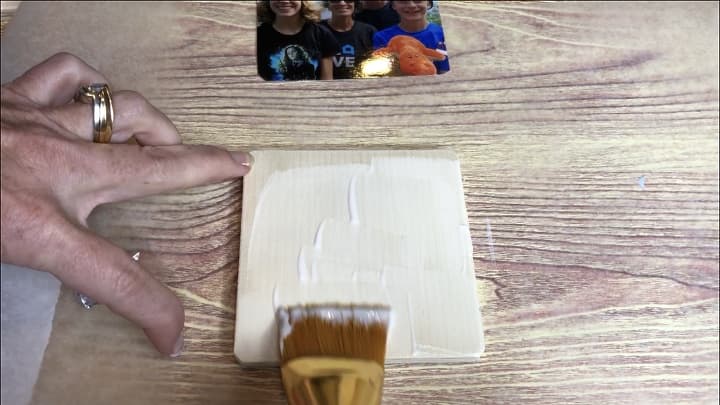
I painted on a layer of Mod Podge onto my Plaid wooden coasters. This also works with tile. I like to use dishwasher safe Mod Podge.
Watch for air bubbles, and brush strokes will show so I recommend using a fine paintbrush for the job.

I cut a photo to the size of the coaster and laid it onto the Mod Podge coated coaster. I then painted a thin coat of Mod Podge over the photo to protect it.
I followed the Mod Podge directions and completed the recommended amount of layers to seal the piece.
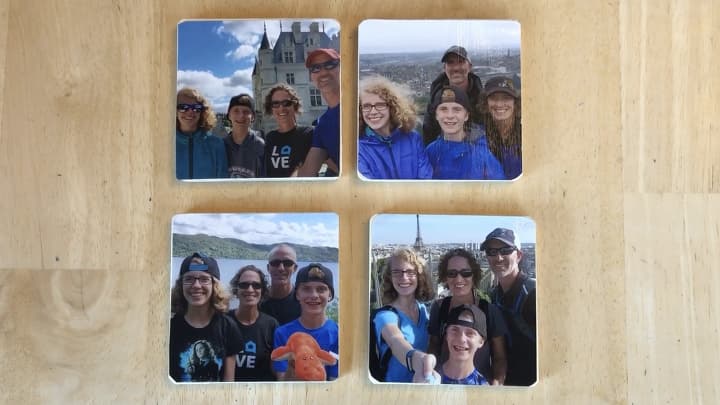
I love the bright vivid pictures, and look forward to using these.
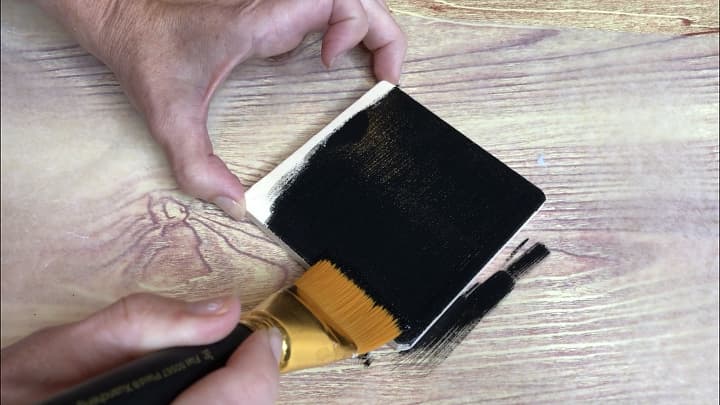
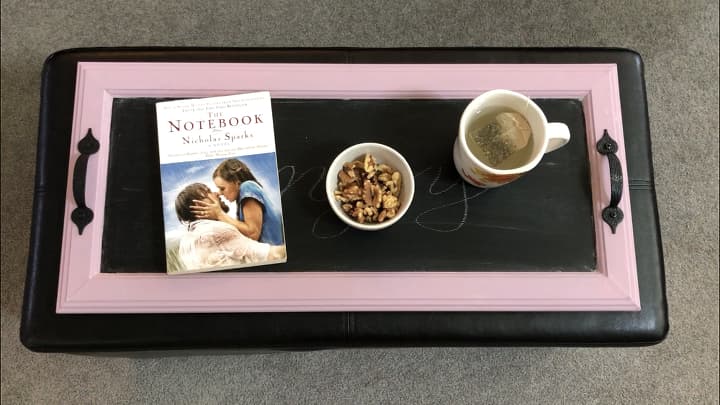
Black Chalkboard Paint Coasters
I painted Folk Art Chalkboard paint onto my Plaid Wooden Coasters and let that dry completely.
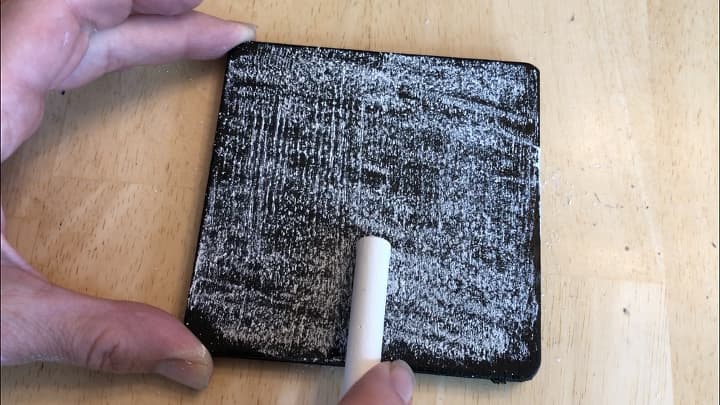
I seasoned the chalkboard paint by rubbing chalk all over it, then erasing it. This will help the words and designs not stick to the coaster and be able to erase well.
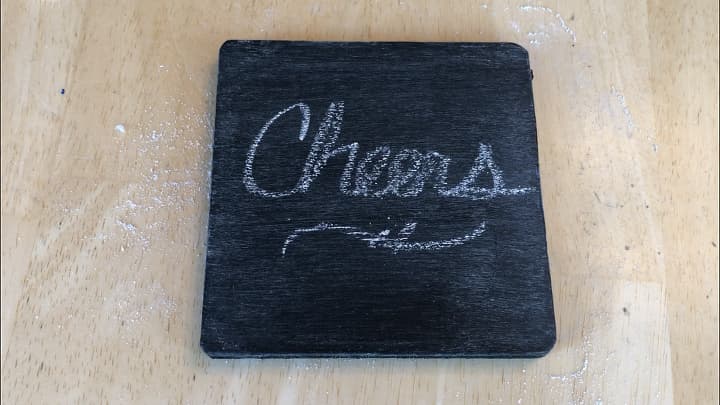
Once the chalkboard paint was seasoned, you can write messages, draw designs, or write names on the coasters. Love that they’re interchangeable.
Find out “What Exactly Does It Mean To Repurpose Or Upcycle“, save money, and create the most amazing things.
DIY Coasters Video
If you like this you might enjoy my
Shop any of these stores and I receive a small commission at no cost to you.
 Plaid wood burning and sten…Shop on Amazon
, CS25139 Gloss") Mod Podge Dishwasher Safe W…Shop on Amazon
Mod Podge Dishwasher Safe W…Shop on Amazon, 2725 Black") FolkArt FA2725 Multi-Surfac…Shop on Amazon
FolkArt FA2725 Multi-Surfac…Shop on Amazon") Wood Cutouts for Crafts, Ro…Shop on Amazon
Wood Cutouts for Crafts, Ro…Shop on Amazon
More DIY Coasters
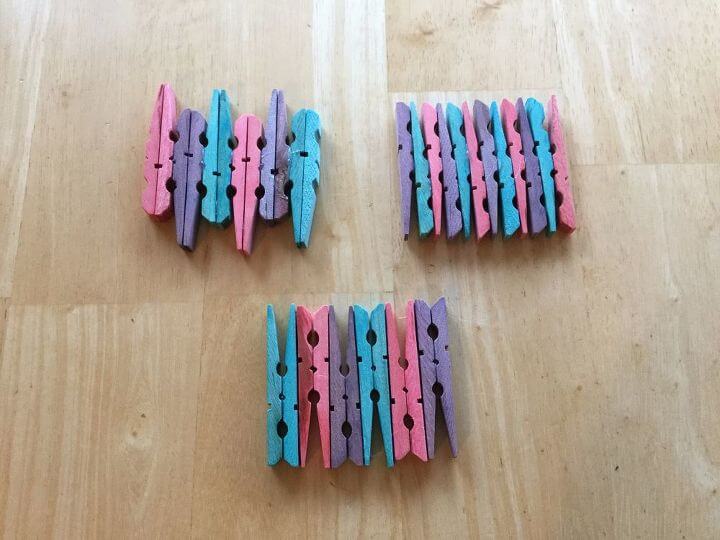
Clothespin DIY Coasters
Do you want to know how to dye clothespins? Did you know you can dye wood with food color? I tried this method out on clothespins and turned them into coasters that I gave as gifts. I’ll show you how to make Food Color Dye Clothespin Coasters You can find the full tutorial at How To Dye Clothespins Fast and Easy DIY
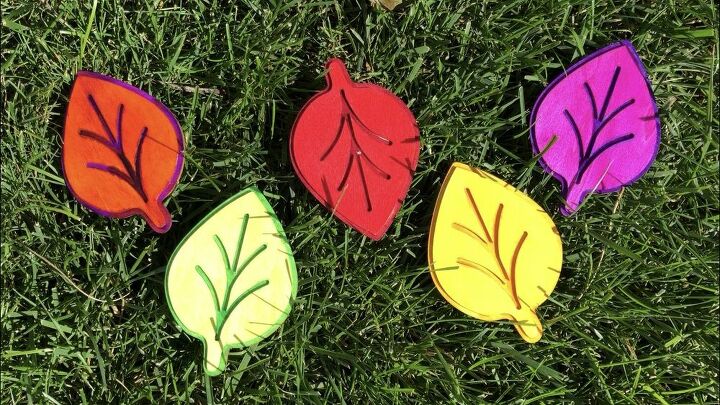
Wooden Coasters DIY
Using Plaid wooden leaves and some Folk Art Ultra Dye, I created some colorful coasters for my home this fall. You can find the full tutorial at Colorful Autumn Fall Leaves Coasters
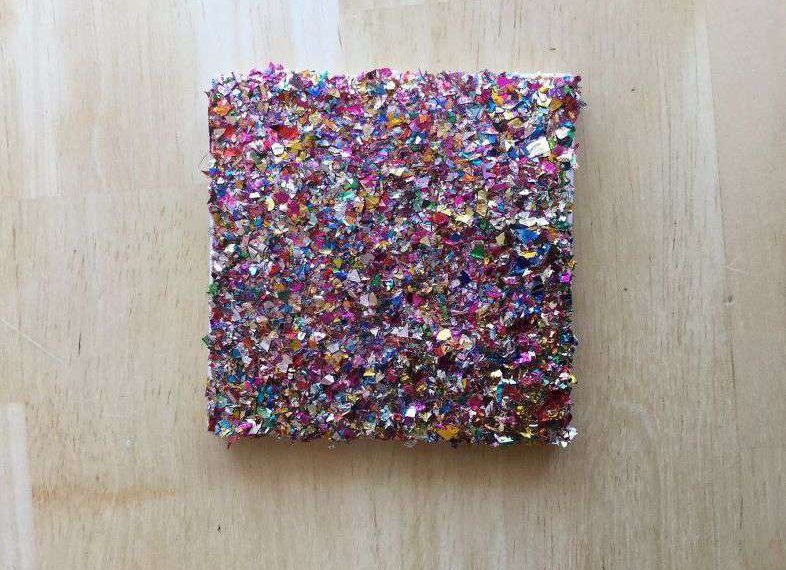
Confetti DIY Tile Coasters
Making a sparkly travel mug and coaster is easy and inexpensive. Great for gifts, party favors, or a crafting night with friends. You can find the full tutorial at Confetti Travel Mug & Coaster
Tile Coasters DIY
Are you looking for a Tile Coasters DIY? Here are a couple of ways to make tile coasters with your own designs, as well as how to seal them with acrylic sealer, Mod Podge, or Resin! You can find the full tutorial at Easy and Awesome Tile Coasters DIY
DIY Coasters Q & A
What is the best sealer for DIY Coasters? What do you use to seal homemade coasters?
The best sealer for DIY coasters depends on your specific needs and preferences, as well as the type of materials you’ve used to create your coasters. However, there are several popular sealers that are commonly used for DIY coaster projects:
- Mod Podge: Mod Podge is a versatile sealer and adhesive that works well for sealing coasters made from paper, fabric, or other porous materials. It comes in various finishes, including matte, gloss, and satin, so you can choose the look you prefer.
- Resin: Epoxy resin is an excellent choice for creating a hard, glass-like finish on your coasters. It’s durable and provides a high-gloss finish. There are two-part epoxy resin kits available that are easy to use for DIY projects.
- Polyurethane: Water-based polyurethane is a popular choice for sealing coasters made from wood, ceramic, or other hard surfaces. It provides a clear, protective finish and is available in matte, satin, or gloss finishes.
- Clear Acrylic Spray: Clear acrylic spray sealers are quick and easy to apply. They work well on various surfaces and come in matte, satin, and gloss finishes. Make sure to use this sealer in a well-ventilated area.
- Varnish: Using varnish to seal coasters is a common and effective method for protecting coaster surfaces. Apply a few thin, even coats of varnish to the coaster’s top, allowing each coat to dry completely before adding the next, to create a durable, glossy finish that safeguards against moisture, stains, and wear.
- Cork Backing: In addition to sealing the top of your coasters, you may want to consider adding cork backing to protect your furniture. Simply apply adhesive cork sheets or pre-cut cork pads to the bottom of your coasters.
When choosing a sealer, consider factors like the type of material you used for the coasters, the desired finish (matte, glossy, or satin), and the durability you need. It’s also a good idea to follow the manufacturer’s instructions for the specific sealer you choose to ensure proper application and drying times.
What material is on the bottom of a coaster?
The material on the bottom of a coaster can vary depending on the type of coaster and its purpose. Common materials used for the bottom of coasters include:
- Cork: Cork is a popular choice for coaster bottoms. It’s a natural, absorbent material that helps prevent the coaster from sliding and protects your furniture from moisture and heat.
- Rubber: Some coasters have a rubberized bottom to provide a non-slip surface and extra protection for your tabletop.
- Felt: Felt or fabric can be used on the bottom of coasters to prevent scratches on delicate surfaces and add a touch of softness.
- Corkboard: Coasters can have a layer of corkboard on the bottom, which serves a similar purpose to cork, offering anti-slip properties and protecting furniture.
- Foam: Foam or neoprene can be used for coasters that need extra cushioning, like coasters used with fragile or delicate glassware.
The choice of material for the bottom of a coaster depends on the coaster’s design, function, and the surface you intend to place it on. Cork and rubber are among the most common choices due to their ability to prevent slippage and protect furniture from moisture and heat.
What material can I use to make coasters?
You can make coasters from a wide range of materials, and your choice will depend on your creativity, the look you want to achieve, and the intended purpose of the coasters. Here are some common materials you can use to create DIY coasters:
- Ceramic or Porcelain Tiles: These are a popular choice for making durable and heat-resistant coasters. You can decorate them with paint, decoupage, or use photo transfers.
- Natural Stone: Natural stone tiles, such as travertine or slate, make elegant and rustic coasters. They can be left in their natural state or sealed with your choice of design or sealant.
- Cork Sheets: Cork sheets can be cut into coaster-sized pieces and decorated as you like. They are lightweight, absorbent, and protect your tabletop.
- Wood: Wooden coasters can be made from various types of wood, such as hardwood or plywood. You can paint, stain, or decorate them in countless ways.
- Cardstock or Paper: You can create coasters from laminated cardstock or heavy paper. These are best for decorative or temporary coasters.
- Fabric: Fabric coasters can be made by cutting and sealing fabric squares or circles and attaching them to a stiffer backing material like cork or felt.
- Resin: Epoxy resin can be used to create custom, high-gloss coasters with various designs, colors, and embedded objects.
- Acrylic or Plexiglass: These transparent materials can be cut into coaster shapes and decorated with paint, vinyl, or other artistic elements.
- Recycled Materials: Get creative and repurpose materials like old CDs, bottle caps, or Scrabble tiles to make unique and eco-friendly coasters.
- Felt: Felt can be used to create soft, fabric coasters. You can either sew them together or glue felt layers for thickness.
- Leather: Leather coasters can be both stylish and functional. You can cut, dye, and stamp leather to create customized designs.
- Concrete: Cast your own concrete coasters using molds. They can be left natural or painted with various techniques for a modern look.
When selecting a material for your coasters, consider the practical aspects, such as durability, heat resistance, and ease of cleaning, as well as the aesthetic qualities you desire. Experiment with different materials and techniques to create coasters that match your style and needs.
What can I use to make DIY Coasters?
You can make coasters from a variety of surfaces, including:
- Ceramic Tile or Porcelain Tile
- Natural Stone (Slate, Travertine)
- Wood (Hardwood, Plywood) or Wood slice coasters
- Cork Sheets
- Glass (Fused Glass or Repurposed Glass)
- Acrylic or Plexiglass
- Fabric
- Paper or Cardstock
- Resin
- Leather
- Concrete
- Felt
- Recycled Materials (CDs, Bottle Caps, Scrabble Tiles)
- Vinyl Records (for unique and retro-themed coasters)
- Clay or Polymer Clay
- Plastic or Acetate Sheets
- Old Maps or Postcards
- Agate Slices
- Sea Shells
- Coiled Rope or Twine (for rope coasters)
The choice of surface will depend on your creative vision, intended use, and the aesthetic you want to achieve for your coasters.
What are some DIY coaster ideas I can make?
- Tile Coasters: Decorate ceramic or porcelain tiles with paint, decoupage, or photos.
- Resin Coasters: Create custom coasters with epoxy resin, adding colors, dried flowers, or other decorative elements.
- Wooden Coasters: Cut and shape wooden discs or squares and decorate them with paint, wood burning, or decoupage.
- Cork Coasters: Paint or stamp cork sheets for an easy and customizable coaster option.
- Photo Coasters: Insert your favorite photos into glass or acrylic coasters for a personal touch.
- Agate Slice Coasters: Use colorful agate slices with gold edging for elegant, natural coasters.
- Concrete Coasters: Cast your own coasters using concrete and add pigments, patterns, or designs.
- Marbled Coasters: Create marble effects on ceramic tiles or wooden coasters using nail polish or paint.
- Scrabble Tile Coasters: Repurpose Scrabble tiles to spell out words or phrases on coasters.
- Pressed Flower Coasters: Preserve and display pressed flowers between glass or resin layers.
- Tin Foil Art Coasters: Use aluminum foil to make abstract or intricate designs on coasters.
- Old Maps or Postcards: Decoupage vintage maps or postcards onto wooden coasters for a travel-inspired theme.
- Stamped Leather Coasters: Cut leather into coaster shapes and stamp or emboss designs on them.
- Vinyl Record Coasters: Melt old vinyl records into coaster shapes for a retro touch.
- Sea Shell Coasters: Arrange and glue colorful sea shells onto wooden or cork bases.
- Fabric Patchwork Coasters: Create patchwork coasters by sewing or gluing fabric scraps onto a backing.
- Mosaic Coasters: Use small tiles, glass pieces, or broken ceramics to make mosaic-style coasters.
- Painted Mandala Coasters: Paint intricate mandala designs on wooden or ceramic coasters.
- Lace Coasters: Apply lace doilies to wooden or ceramic coasters and seal with a clear finish.
- Beaded Coasters: Glue beads onto coaster surfaces to make beaded patterns.
- Scrabble Tile Coasters: Glue scrabble tiles onto a surface of a tile.
- Knit, Crochet, or Macrame Coasters: Create lovely woven coaster designs.
These DIY coaster ideas offer a range of styles and materials to suit your preferences and creativity. You can personalize them for your own home or create unique gifts for friends and family.
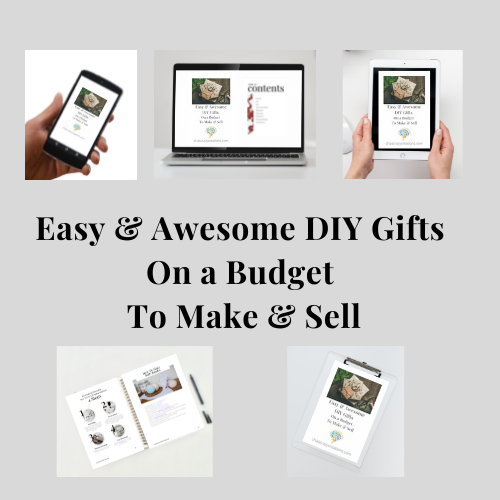
EASY & AWESOME DIY GIFTS ON A BUDGET TO MAKE AND SELL Ebook
Do you love to make gifts for friends and family members? Would you like to personalize your gifts too? This book is for you! Over 30 DIYs gifts on a budget plus extra tips, tricks, eco-friendly gift wrapping ideas, and more!
So what are you waiting for?!!! Get your copy today and start creating!
How To Make Your Own Coasters
Equipment
- Wood Burning Tool
Materials
- Wood Coasters
- Mod Podge
- Paint Brush
- Photos
Instructions
- Print the design you want to transfer backwards so it will transfer the correct way using a laser printer.
- Put on the wood transfer tip on my wood burning tool and heat it up.
- Place the transfer right side down on the coaster and began ironing the back side of the transfer.
- This will transfer the ink from the paper onto the wood coaster.
Sharing is caring…please pin for later:
Find out “What Exactly Does It Mean To Repurpose Or Upcycle“, save money, and create the most amazing things.
Check out some of my other coaster projects!
Don’t forget to link to ThriveCart – Book
These are all great ideas to do with coasters! I’m going to make some with my Cricut for a wedding gift.
Thanks Danielle, and I love that idea!
Such a cute idea Chas! I love the picture of your kids kissing your cheeks!
Thank you so much Kim, I love that one too 🙂
This would be a great gift for the grandparents from the kiddos! Thanks for sharing!
Thank you Sarah, I think it could be a great holiday tradition to make them together too.
These coasters are so cute. What a great idea. I like this for a personalized Christmas gift. Thank you for sharing.
Thank you Amy, I love the idea of them as gifts too – so fun to make them for who you’re giving them too..
Very fun and cool idea! Thank you for sharing on Creative Compulsions!
Thank you so much Michelle 🙂
Thank you for sharing at #ThursdayFavoriteThings. Pinned and shared. Have a lovely week. I hope to see you at next week’s party too! Happy Holiday!
Thank you so much for all the support Marilyn, I’ll see you at the next party – hope you’re feeling well.
My favorite coaster set is the chalkboard one! I can picture that set wrapped in some twine with chalk attached for a gift. It’s now on my list to make, so I pinned to save for later! I’m visiting from Grace at Home Link Party #360. I’m #8 in the party. 🙂
Thank you so much Allyson and love that idea. I’m thrilled you are interested in making some too. Thank you for stopping by.
Those are such cute and easy ideas! Pinned.
Thank you Joanne and thanks for the Pin
All great options! And an easy project as well. Going to stat after the start of the new year to make a slew of these for friends. My ex hubby is refreshing several spaces in his home and he certainly can use more coasters with new furniture! Thanks for such great instructions. Happy Holidays! ⛄??
Thanks so much Naomie and I’m thrilled you’re going to make some in the New Year. Happy Holidays to you my friend 🙂
These are so pretty!!
Thank you so much Michelle 🙂
neat gotta try this
Thank you so much Faith