Best Resin For Jewelry, 3 Ways To Have Fun

What is the best type of resin for jewelry? I have been working with Total Boat’s Makerpoxy and created 3 different styles that are so easy! A little bit goes a long way and you’ll be able to make several gifts for all occasions. Casting resin is a great way to use your imagination whether to make your own jewelry or any other resin project.
This post is in collaboration with Total Boat. All thoughts and opinions are my own. A big thanks to Total Boat for the Makerpoxy.
What is the best epoxy resin to use for jewelry?
I had the opportunity to work with a variety of Total Boat’s epoxy resin for various resin projects. They have several different resin kits depending on the project you’re doing. For example, I upcycled an old coffee table and used their tabletop epoxy. Their makerpoxy is amazing and allows you more work time to create the look you want with the jewelry.
What can I use to make resin jewelry?
- Total Boat Jewelry Project Kit. Here’s what’s included
- resin, hardener
- mixing tools
- powder pigment & alcohol ink
- a variety of jewelry molds
Safety Precautions and additional materials:
- Protective rubber gloves, eye protection, and clothing protection
- A work area protected by plastic sheeting or a silicone pad, to catch any overflow
- A heat gun for popping any bubbles that form in the epoxy
- (Optional) Jewelry findings and decorative items to embed in your jewelry pieces
Best Resin For Jewelry Video
How do you make epoxy resin jewelry at home? Step-by-step instructions.
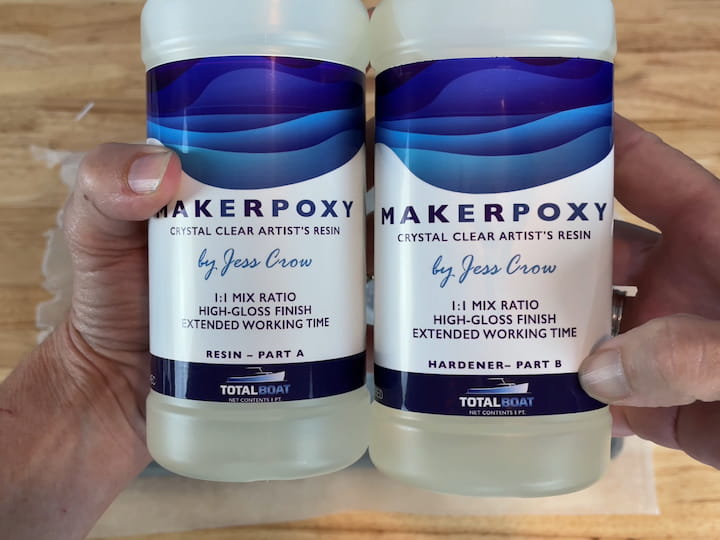
Pour equal parts of the Makerpoxy together
I used a mixing ratio of 1:1 of the 2-part epoxy resin; resin A and resin B. I mixed them in a container per the manufacturer’s instructions.
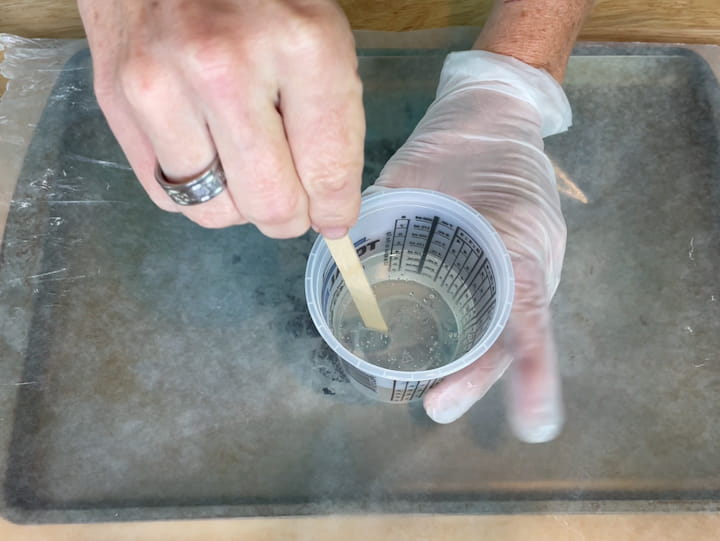
Slowly stir the 2 parts of resin together
I set a timer for 3 minutes, and I stirred the 2 parts together with a popsicle stick (any wooden stick will work). I stirred very slowly to avoid getting too many bubbles into the resin. I made sure to scrape the sides and bottom to get a nice and even mix.
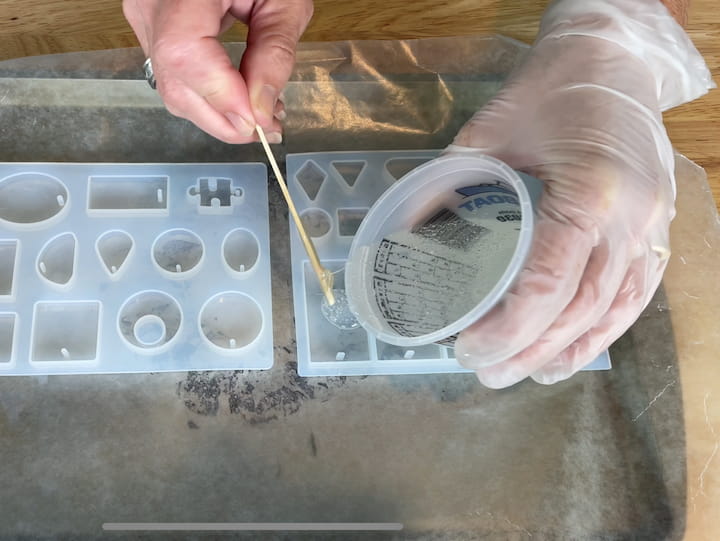
Resin Jewelry option 1 – Place an item into the resin
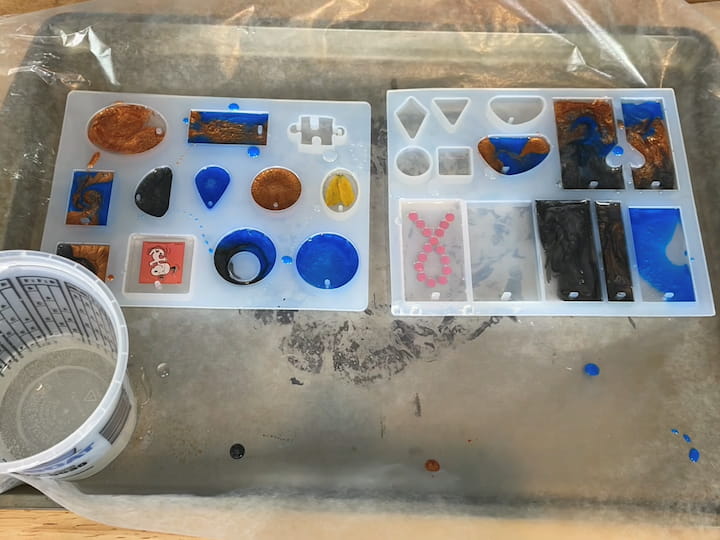
I poured the liquid resin into a suitable silicone mold in the shapes of the jewelry I wanted to make.
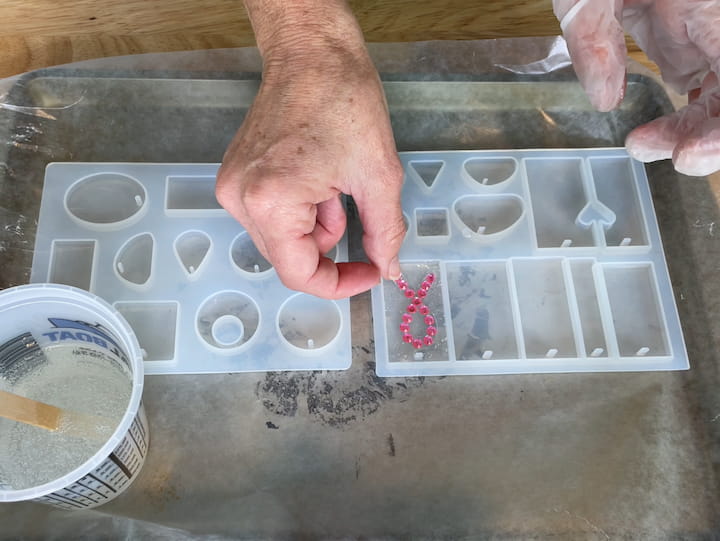
I placed a sticker into the resin, added a little more resin on top, and used the popsicle stick to move the sticker around until it was centered in the mold and completely within the resin.
Many of you know I had breast cancer, so I picked this sticker in honor of being a survivor.
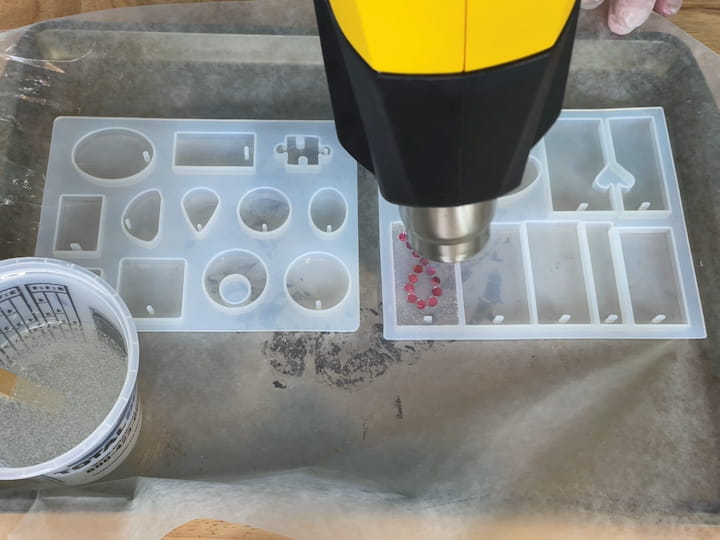
use a heat gun to pop the bubbles
For best results, you should try to eliminate as many air bubbles as possible. The best way to do this is with a heat gun. I turned on my heat gun and slowly moved it over the resin molds to pop any air bubbles that were forming.

I added a Snoopy sticker to another mold. I sealed 2 fall leaves with Mod Podge and let them dry completely. I then placed the leaves and resin in another mold. I continued to pop the bubbles.
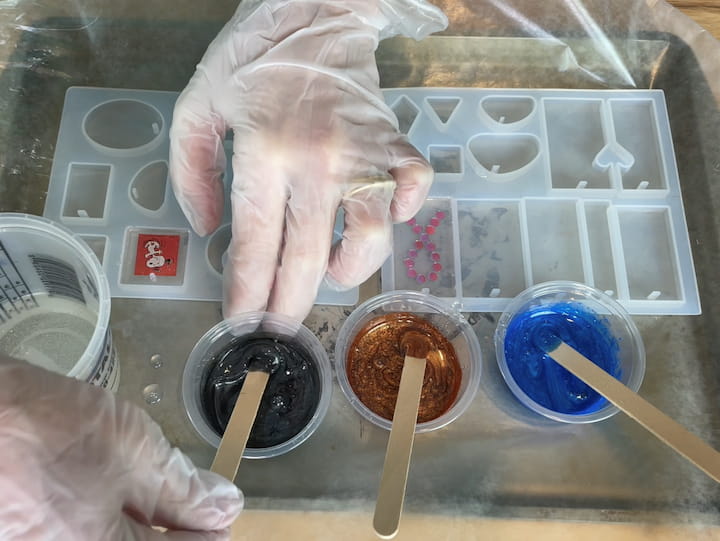
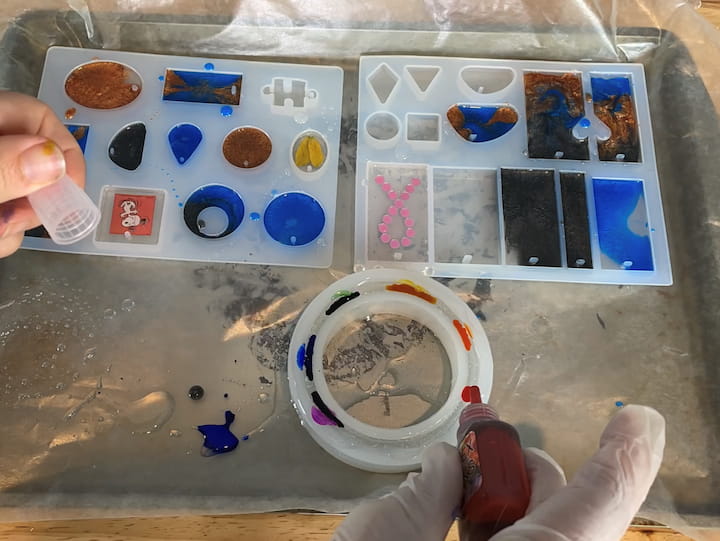
Resin Jewelry option 2 – Add Pigment to Resin
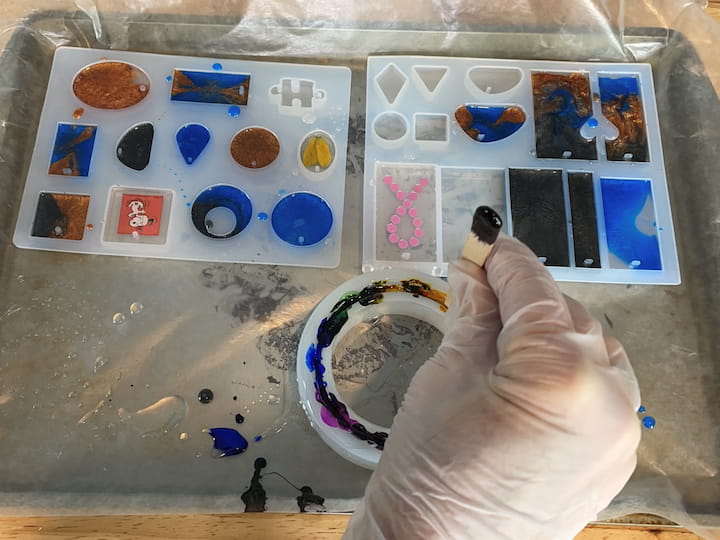
I took some of the clear resin and placed it in 3 little cups to make a wide range of resin colors. I added Black Diamond pigment to each cup. A little goes a long way, so you don’t need very much pigment. I then slowly stirred the pigment into each cup with a craft stick.
I poured the different colors into the molds. I first poured a couple with just that color. Next, I had fun with it, mixing and matching the colors together. Once I got the look I wanted, I used my heat gun to pop the bubbles.
Resin Jewelry option 3 – Add alcohol ink to Resin
I had a little clear resin left after the smaller jewelry, so I decided to make a resin bracelet. I poured the clear resin into the bracelet mold. I then added different drops of alcohol ink around the bracelet opening. You could alternatively mix separate colors like the pigment first and then apply it to the mold.
I used a popsicle stick to push the ink into the clear resin and did some swirling to mix the shades together. I did use my heat gun, but it was a little harder to see if there were bubbles in this one.
Let the resin in the jewelry molds dry for 24 hours
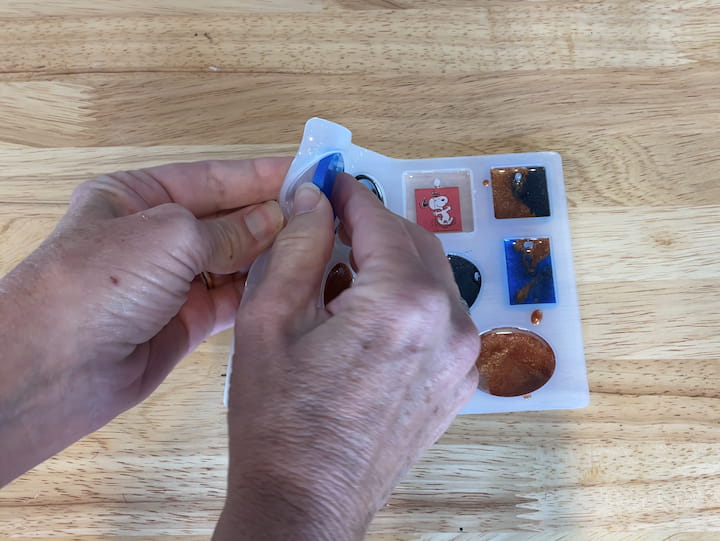
Peel the resin jewelry out of the silicone mold
The cure time is about 24hr. The next day, I peeled the epoxy jewelry out of the silicone molds. They peeled right out with ease. Any extra resin that was on the molds (like drips) peeled right off as well.
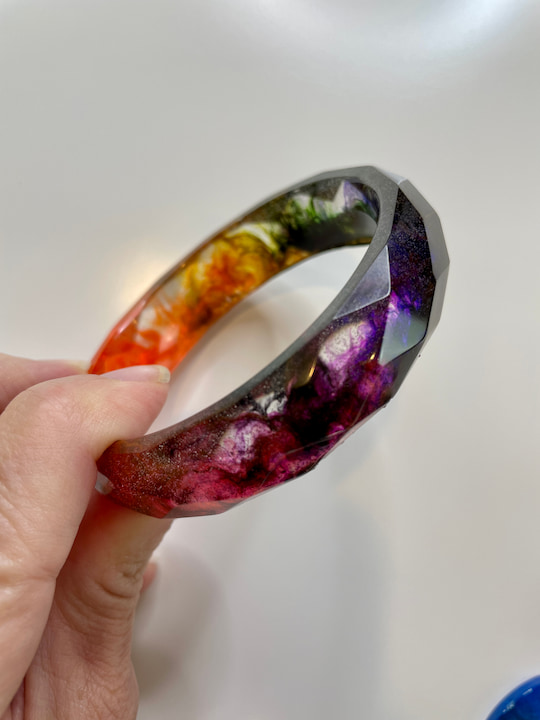
I love how it all turned out, and my bracelet was somewhat of an experiment (be sure to check out my video below to hear more about this), and I think it might be my favorite.
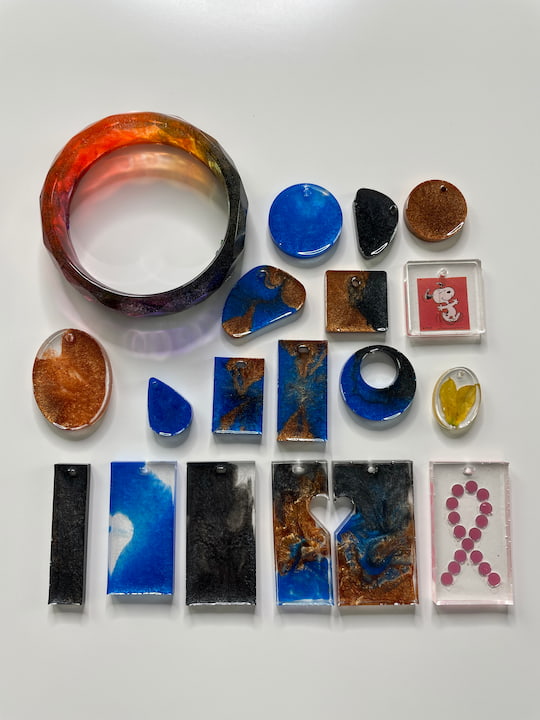
Look at all of these fun pieces! I have plenty of makerpoxy left to make even more beautiful jewelry. These would also make great keychains. . It was so much fun to work with. With a little practice, I hope to use the resin in different ways such as resin earrings or other resin crafts or resin art.
make even more. It was so much fun to work with. Besides jewelry, you could use these as keychain pulls too.
Best Resin For Jewelry, 3 Ways To Have Fun Video
Shop any of these stores and I receive a small commission at no cost to you.


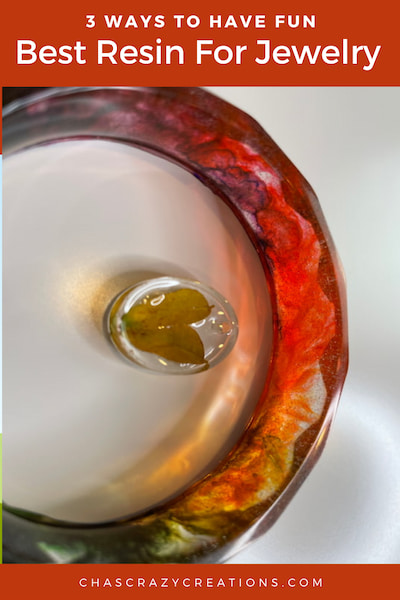
Best Resin For Jewelry, 3 Ways To Have Fun
Equipment
- Heat Gun
Materials
- Total Boat Jewelry Project Kit
- resin hardener
- mixing tools
- powder pigment & alcohol ink
- a variety of jewelry molds
- Protective gloves eye protection, and clothing protection
- A work area protected by plastic sheeting or a silicone pad to catch any overflow
- A heat gun for popping any bubbles that form in the epoxy
- Optional Jewelry findings and decorative items to embed in your jewelry pieces
Instructions
- POUR EQUAL PARTS OF THE MAKERPOXY TOGETHER
- SLOWLY STIR THE 2 PARTS OF RESIN TOGETHER
- PLACE AN ITEM INTO THE RESIN, ADD PIGMENT TO RESIN or ADD ALCOHOL INK TO RESIN
- USE A HEAT GUN TO POP THE BUBBLES
- LET THE RESIN IN THE JEWELRY MOLDS DRY FOR 24 HOURS
- PEEL THE RESIN JEWELRY OUT OF THE SILICONE MOLD
Check out some of my other jewelry-related posts!