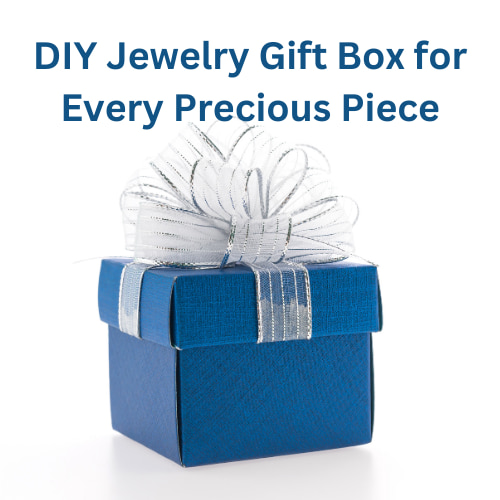
DIY Jewelry Gift Box for Every Precious Piece
Giving someone a piece of jewelry is an important moment, and the item itself is only part of the presentation process. With the right jewelry gift box, this gesture can be much more meaningful, especially if it’s one you’ve made yourself. Here are some DIY gift box projects to consider completing for all your precious jewelry pieces.
This post may contain affiliate links, I earn from qualifying purchases at no extra cost to you. Click here for my disclosure policy
DIY Jewelry Gift Box Ideas for Any Kind of Jewelry
1. Origami Magic: Crafting a Delicate Paper Jewelry Gift Box
To make your jewelry gift presentation extra special, why not create a delicate and beautiful paper origami box? Follow these simple instructions to master the art of folding and impress your loved ones with this unique touch.
- Choose quality origami or craft paper in a color scheme that complements your jewelry pieces. (example: for black-colored diamond rings, such as metallic gold, silver, or deep reds)
- Begin with two square sheets of paper, one for the base (bigger) and another slightly smaller for the lid.
- Fold each square sheet using traditional Japanese Masu box technique:
- Start by creating diagonal creases from corner to corner.
- Then fold all four edges towards the center along these creases.
- Create top flaps using the pointed ends, folding them gently over each other.
- Assemble both base and lid parts forming your finished Masu box.
- Place your stunning jewelry inside this exquisite DIY jewelry gift box, adding an element of surprise and craftsmanship that is sure to warm any heart.
2. Vintage Treasure Chest: Creating an Antique-Inspired Jewelry Box
For a charming and nostalgic touch, consider crafting a miniature vintage-inspired treasure chest to present your precious jewelry. Here are the easy steps for bringing this lovely idea to life:
- Prepare materials such as wooden pieces (miniature or cut-to-size), wood glue, hinges, latch hardware, and desired paint or varnish for finishing.
- Assemble the box by attaching pre-cut pieces together:
- Begin with securing four rectangular side panels to create the walls of your chest.
- Attach a flat base piece securely at the bottom.
- Join narrower trapezoidal end panels on both the front and back sides.
- Using glue or screws, attach small hinges to connect the back panel with an additional arched top piece for creating the lid.
- Securely fasten latch hardware on front-facing sections of the wall and chest lid.
- Once your treasure chest is built using these simple steps, add personal flourishes like painting romantic designs or aging via sanding edges gently before placing your precious jewelry inside this custom-made keepsake holder.
3. Rustic Woodland Jewelry Gift Box: A Touch of Nature
To create an enchanting woodland jewelry gift box for your precious jewelry pieces, follow these straightforward steps to connect with nature’s most authentic elements:
- Find your perfect wooden vessel:
- Visit forested areas or parks to search for fallen tree branches or driftwood pieces.
- Select one adequately sized and suitable for hollowing out without splitting.
- Carefully carve out the wood:
- Mark precise dimensions on the chosen log according to the desired fit.
- Use a rotary tool, chisels, or carving knives to shape and hollow it out gently.
- Sand down surfaces until smooth but maintain their organic texture, inside and outside alike.
- Apply a natural oil finish that seals against external influences while bringing extra richness in appearance.
- When finished crafting this rustic masterpiece, lay down soft fabric inside as bedding before securing your precious jewelry within, ready for presentation at any romantic location surrounded by breathtaking natural beauty.
Shop any of these stores and I receive a small commission at no cost to you.
 Magnasonic Ultrasonic Clean...Shop on Amazon
 PAVOI 14K Gold Plated 3mm C...Shop on Amazon
 MEVECCO Gold Layered Choker...Shop on Amazon
 EAMTI 925 Sterling Silver 1...Shop on Amazon
 PAVOI 14K Gold Plated X Rin...Shop on Amazon
 Enso Rings Stackable Beaded...Shop on Amazon
DIY Jewelry Gift Box Q & A:
How do you package jewelry as a gift?
When packaging jewelry as a gift, it’s important to create an elegant and appealing presentation. Here are some steps to package jewelry effectively:
- Gather the necessary materials: Prepare a small gift box or jewelry box, tissue paper or velvet fabric, ribbon or bow, and a gift tag or card.
- Clean the jewelry: Ensure the jewelry piece is clean and polished before packaging.
- Place the jewelry in a protective pouch or wrapping: To prevent scratches or damage, consider using a soft jewelry pouch or wrapping the piece in tissue paper.
- Select the appropriate box: Choose a box that fits the size of the jewelry comfortably. A jewelry box with a cushioned interior is ideal, as it provides additional protection.
- Arrange the jewelry in the box: Carefully place the jewelry inside the box, ensuring it is centered and secure. If there are multiple pieces, arrange them neatly and avoid tangling.
- Add decorative elements: Place a layer of tissue paper or a velvet fabric on top of the jewelry to enhance the presentation. This adds a touch of luxury and protects the jewelry further.
- Close the box: Gently close the jewelry box, ensuring it is secure and the lid is properly aligned.
- Tie a ribbon or attach a bow: To add a decorative touch, tie a ribbon around the box or attach a bow on top. Choose a ribbon color that complements the jewelry or fits the occasion.
- Attach a gift tag or card: Write a personalized message on a gift tag or card and attach it to the package. This adds a personal touch and makes the gift more meaningful.
- Inspect the package: Before presenting the gift, double-check the box to ensure everything is secure and well-presented. Make any necessary adjustments to ensure a polished appearance.
- Consider a gift bag or wrapping paper: If you prefer an alternative to a box, you can place the jewelry package in a gift bag or wrap it in decorative wrapping paper. This provides another layer of surprise and makes the gift more visually appealing.
Remember, the packaging should reflect the recipient’s taste and the occasion. Customizing the presentation adds a thoughtful touch and enhances the overall gift-giving experience.
Are you supposed to keep jewelry boxes?
Whether or not to keep jewelry boxes depends on personal preference and the value you place on the box itself. Here are some factors to consider:
- Sentimental value: If the jewelry box holds sentimental value for you, such as being a gift from a loved one or having special memories associated with it, you may choose to keep it for sentimental reasons.
- Organization and storage: Jewelry boxes can serve as practical storage solutions to keep your jewelry organized and protected. They provide compartments and padding to prevent tangling, scratches, and damage to your jewelry pieces.
- Travel convenience: Keeping jewelry boxes can be beneficial when traveling. They provide a secure and compact way to transport your jewelry, ensuring it stays organized and protected during your trips.
- Resale or gifting: If you plan to sell or gift the jewelry in the future, having the original box can enhance the presentation and potentially increase the perceived value. Some buyers or recipients appreciate receiving jewelry in its original packaging.
However, there are situations where keeping jewelry boxes may not be necessary:
- Space constraints: If you have limited storage space or an excessive number of jewelry boxes, it may be impractical to keep all of them. In such cases, you might choose to keep only the boxes with the highest sentimental or practical value.
- Alternative storage options: If you have alternative storage solutions that adequately protect and organize your jewelry, such as a jewelry organizer, drawer inserts, or a safe, you may not need to keep the original boxes.
- Minimalism or decluttering: If you adopt a minimalist lifestyle or prefer to declutter, you might opt to discard or repurpose jewelry boxes to reduce unnecessary belongings.
Ultimately, the decision to keep jewelry boxes is subjective and depends on your personal preferences, sentimental attachment, storage needs, and lifestyle choices. Consider the factors mentioned above and choose what aligns with your preferences and circumstances.
What can I do with jewelry gift boxes?
There are several creative and practical ways you can repurpose or use jewelry gift boxes. Here are some ideas:
- Jewelry storage: The most obvious use for jewelry gift boxes is to repurpose them for storing your jewelry collection. The boxes usually have compartments and padding designed to keep your jewelry organized, preventing tangling and damage.
- Gift giving: If you have multiple jewelry gift boxes, you can reuse them for future gift-giving occasions. Simply remove any existing jewelry, clean the box, and use it to present a new piece of jewelry to someone special. It adds an elegant touch to the gift presentation.
- Craft supplies organization: Jewelry gift boxes can be repurposed to store small craft supplies like beads, buttons, threads, or needles. The compartments and sections of the box can help keep your supplies neatly organized and easily accessible.
- Home decor: Consider incorporating jewelry gift boxes into your home decor. Arrange them on a vanity table or dresser as decorative storage for small trinkets, hair accessories, or even as a display for tiny succulents or other decorative items.
- Travel organization: When you’re on the go, use jewelry gift boxes to keep your jewelry organized and protected during travel. They can prevent tangles and ensure that your jewelry pieces stay secure and separate.
- Memory keepsakes: If you have sentimental jewelry pieces that you no longer wear but want to keep as mementos, place them in a jewelry gift box along with any related keepsakes or photographs. This way, you can store and preserve the memories associated with the jewelry.
- Donation or resale: If you have jewelry gift boxes that are in good condition and you no longer need them, consider donating them to charities or local thrift stores. Alternatively, if you plan to sell jewelry, having the original boxes can enhance the presentation and potentially increase the perceived value.
Remember, these are just a few ideas to get you started. Feel free to get creative and explore other ways to repurpose or use jewelry gift boxes based on your personal preferences and needs.
DIY Jewelry Gift Box Conclusion
With these DIY jewelry gift boxes, you can add a personal touch to your jewelry presentations. They are perfect for birthdays, anniversaries, or any special celebration. Plus, by creating your own jewelry gift boxes, you can ensure they match the taste and style of the recipient.
Whether you choose the delicate origami box, the vintage treasure chest, or the rustic woodland box, you’ll find a wide selection of materials, colors, and designs to suit your needs. These DIY jewelry gift boxes not only provide a stunning presentation for your jewelry but also serve as a jewelry display and a keepsake box.
Additionally, creating your own jewelry gift boxes allows you to customize the size, ensuring a perfect fit for your precious gems. You can even make multiple small gift boxes to hold a collection of jewelry pieces, such as necklaces, bracelets, and pendants.
Remember, these DIY jewelry gift boxes offer the best value for your effort, allowing you to showcase your creativity while saving on the cost of store-bought options. So, unleash your creativity and make your jewelry gifts truly special with these DIY jewelry gift boxes. Enjoy the pride that comes with crafting high-quality, personalized packaging for your precious jewelry pieces. And don’t forget to stamp your unique touch on each box, whether it’s a custom design, a handmade label, or a special message.
With a variety of sizes, materials, and different colors to choose from, you can create a stunning presentation for every type of jewelry. From necklaces to bracelets, pendants to rings, these DIY jewelry gift boxes are perfect for any occasion.
Remember, the joy of giving goes beyond the piece of jewelry itself. It’s the thought, effort, and care that you put into every aspect, from choosing the perfect jewelry to creating a beautiful gift box. So, get started on your DIY journey and make your jewelry gifts truly unforgettable.
Before you begin, make sure to gather all the necessary materials, such as fabrics, jewelry cleaners, and high-quality cardboard or paper for your jewelry boxes. You can even consider adding lotions or other small surprises inside the box for an extra touch of luxury.
And don’t forget, if you have made-to-order items or new arrivals, including them in a beautifully crafted jewelry gift box adds a touch of elegance to your customers’ unboxing experience. It’s a great way to showcase your products and make a lasting impression.
In conclusion, DIY jewelry gift boxes provide a fantastic opportunity to showcase your creativity and make your jewelry gifts even more special. They offer a wide selection of customization options, from materials to sizes and colors, ensuring a perfect fit for every occasion. So, get crafting and create stunning jewelry gift boxes that reflect your unique style and make your gift-giving moments truly memorable.
Check out some of my other jewelry posts!


