Easy DIY Indoor Fire Pit and Fire Bowl with Video
How do you make an indoor fire pit or fire bowl? I’m going to share how to make a few and they can be used inside or outside. It can safely put off heat, add ambiance, is great for survival emergencies like power outages, and is inexpensive to make.
Indoor Fire Pit
Run to the dollar store grab a few items and we’re gonna make an awesome project that lights on fire, let’s get started.
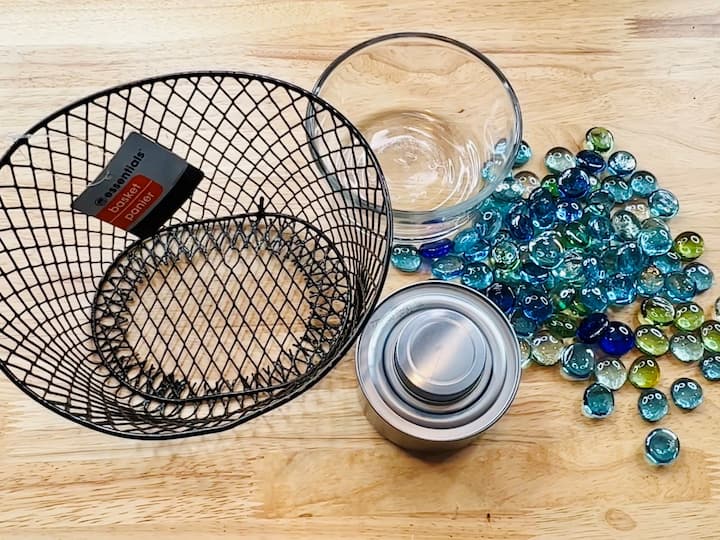
Indoor Fire Pit: Smore Kit
Materials Needed:
For this project you’re going to need some Dollar Store rocks, a Sterno can, a basket of your choice, and then a glass container of your choice as well.
 Small Metal Rectangular, Ov...Shop on Amazon
 Anchor Hocking 26 Piece Gla...Shop on Amazon
 Sterno S'mores Heat Ethanol...Shop on Amazon
 FUTUREPLUSX 0.97 pounds, Fl...Shop on Amazon
 VEHHE Candle Lighter, Elect...Shop on Amazon
Indoor Fire Pit Video
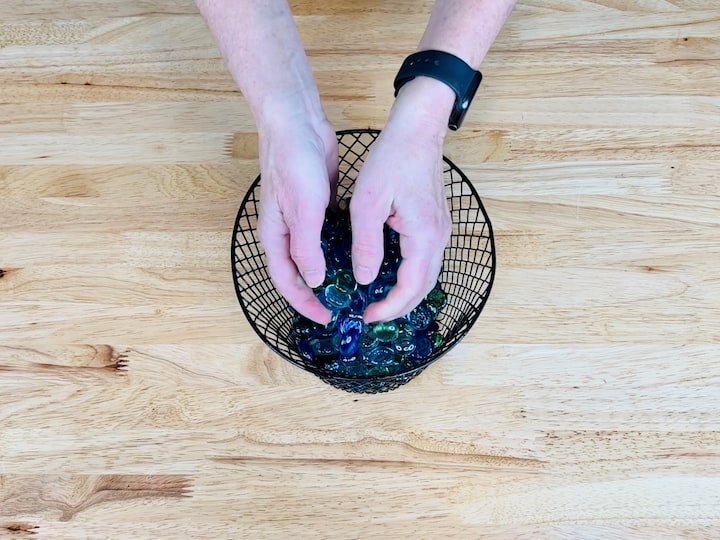
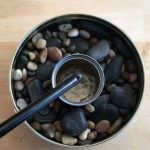
To start this project you’re going to place a large sum of the rocks at the bottom of the wired basket.
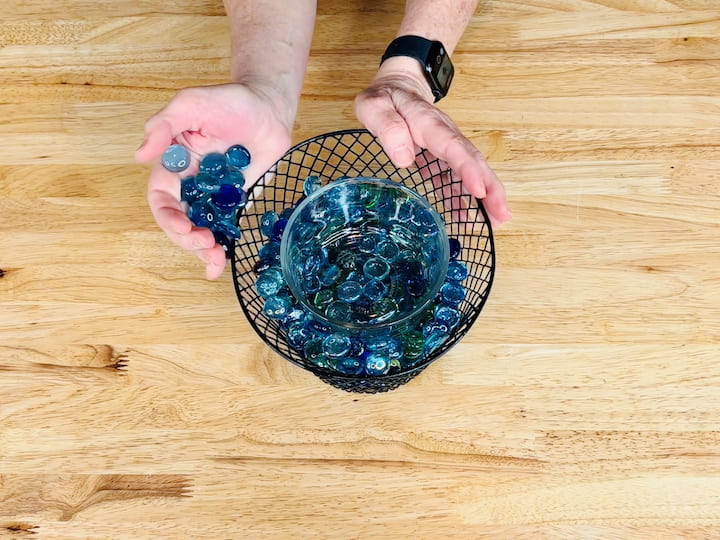
Once you get enough of those in you’re going to place the glass container on the top and at the center of those rocks. I’m going to continue taking the rocks and placing them around the glass container until I reach the top of the glass container.
Now you can use any rocks you want from the dollar store. You could also choose a different outside basket and use sand if you choose. The center glass jar is a glass jar that has a lid with it and I got that at the dollar store as well. Once that is complete I’m going to place a Sterno can in the center and then I’m going to remove the lid.
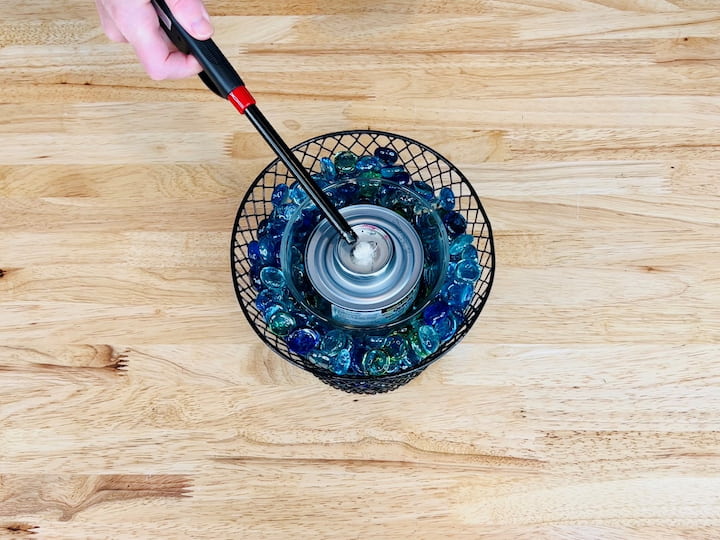
I’ll take a clicky lighter and light the Sterno can so that a flame is present. It puts off a flame but you can’t easily see it unless it’s dark.
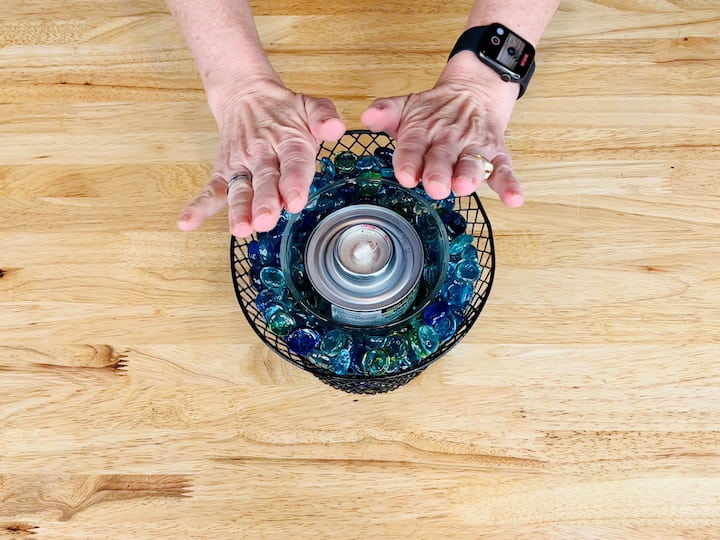
This is a great emergency heat source it, can be used inside or out.
Now for some added fun I’m grabbing some graham crackers and splitting them in half. I’m also going to add a piece of chocolate to one of them and then I’m going to set this aside.
I’m going to add a wooden skewer to a marshmallow. You could use the metal skewers from the dollar store both come from the dollar store and I’m going to go ahead and toast my marshmallow.
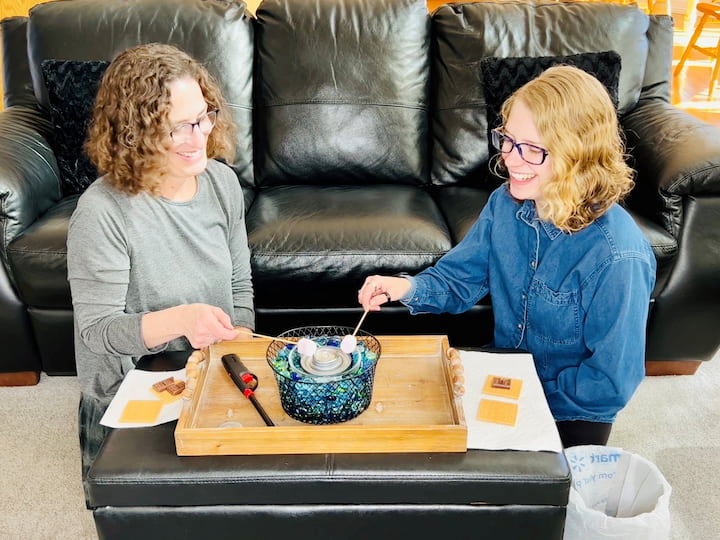
You can look for Sterno cans that are made for s’mores and for food. Once my marshmallow is toasted all you have to do is place the lid right back on top of the Sterno can and it puts the flame out.
I’m going to move that aside and now’s time to put my s’more together simply putting the graham cracker on and pulling off the marshmallow.
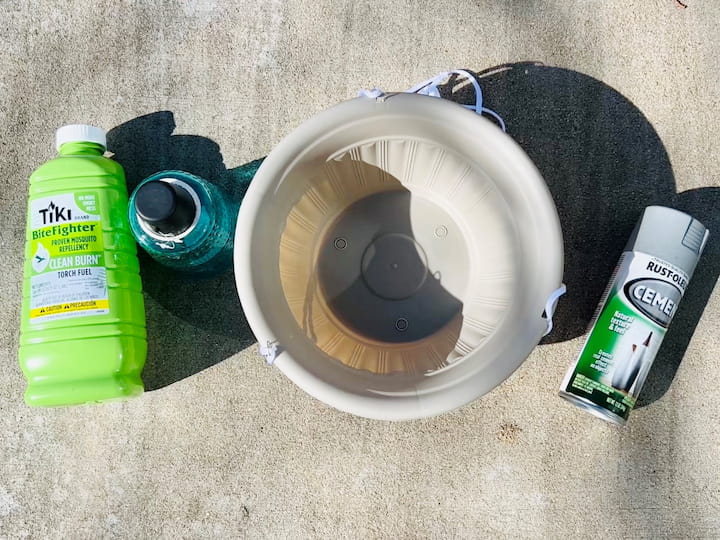
Outdoor Fire Pit – Best for bug-repellant outdoors
Here’s a step-by-step tutorial for creating a DIY fire pit using a hanging flower basket from Dollar Tree!
Materials:
- Hanging flower basket from Dollar Tree
- Tiki fuel and tiki lamp
- Rust-Oleum cement spray paint
- Gravel or decorative rocks
- Bigger rocks or glass rocks
- Lighter
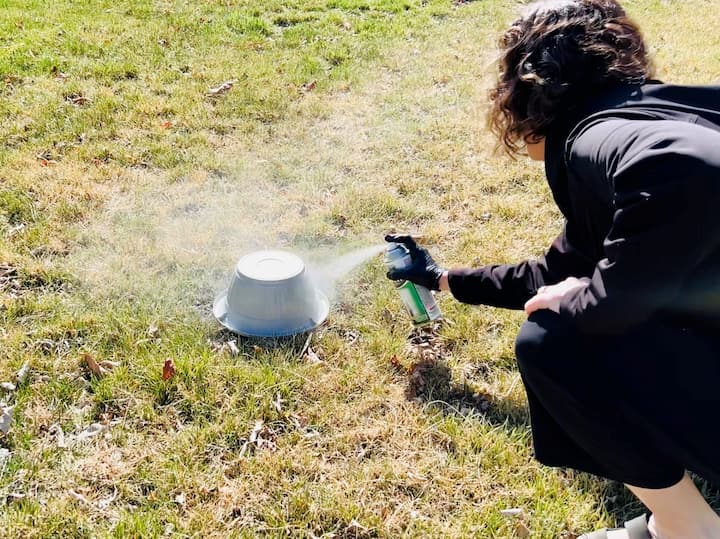
The first step is to remove all the string from the hanging flower planter. You could leave the planner as it is, but for this project, we will be using Rust-Oleum cement spray paint to give it a unique look. Paint the entire flower pot and let it dry completely before moving on.
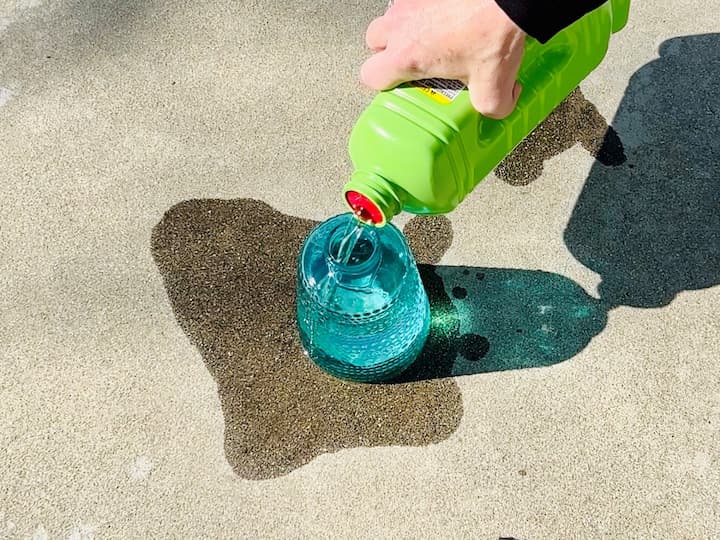
The next step is to grab a Tiki torch lamp and fill it with bug-repellent Tiki torch fluid.
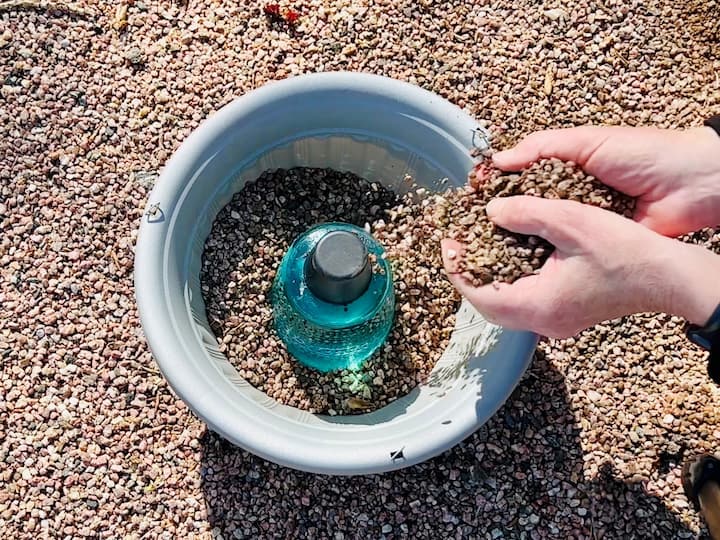
Once the planter is dry, place the Tiki torch in the center of the flower planter. Then, grab some gravel from your kid’s playground and place it all around the entire Tiki torch until you fill it all the way up to the top. You could stop here if you wanted, but we will be adding a little more to it.
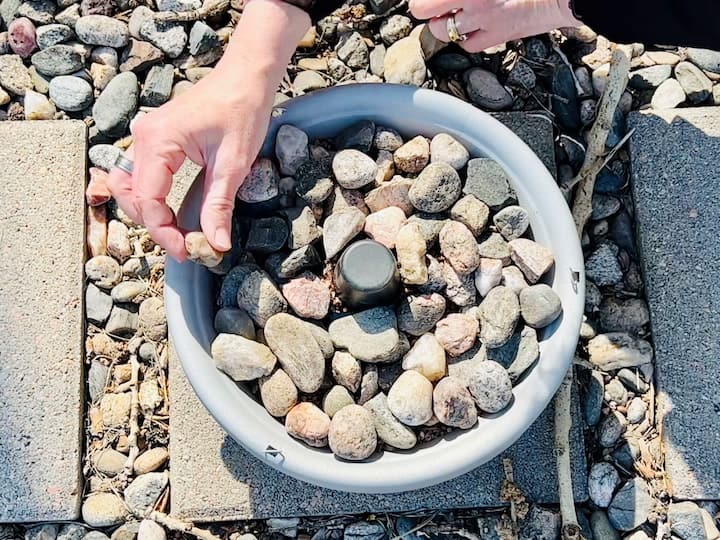
For example, you could add bigger rocks to the top and keep placing them around until you get the desired look that you are going for. You could alternatively use glass rock, crushed glass, anything that you like, or decorative Dollar Store rocks; it’s really your choice on how you want this little DIY fireplace to be.
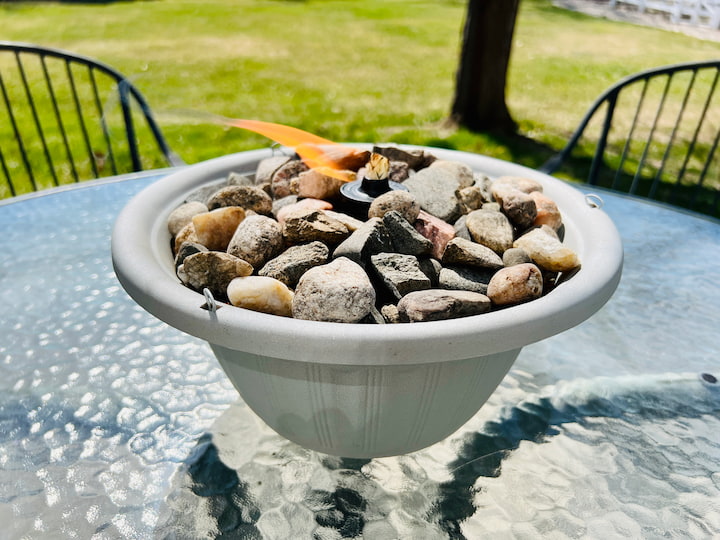
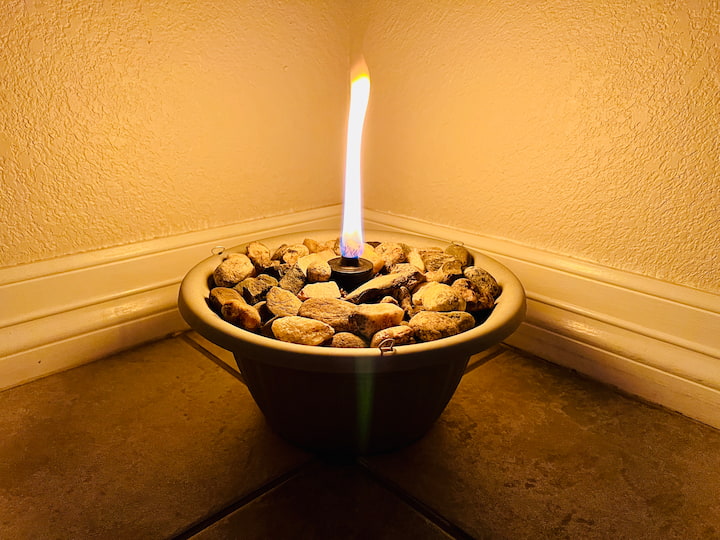
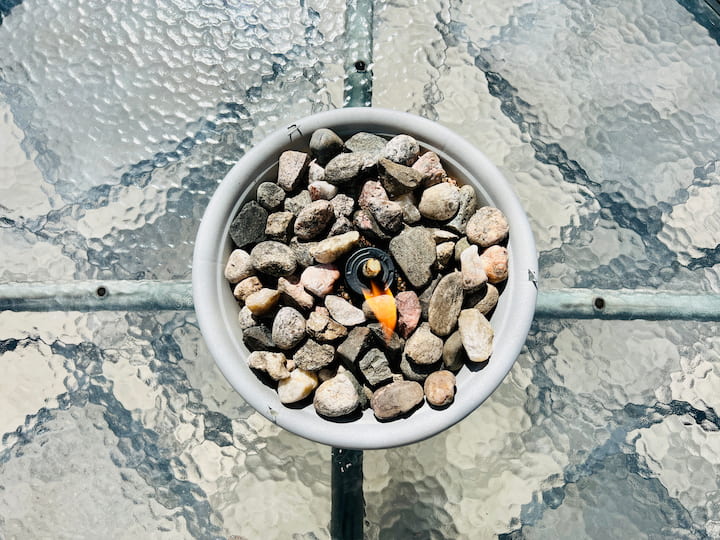

That’s all there is to it, and then you can place it on your table outside. To use it, simply remove the cap, grab a clicky lighter, and light your Tiki torch. Choose a clean-burning fuel that will also repel bugs while you’re hanging out outside together. If you’re looking for alternative clean-burning fuel solutions, you can also use rubbing alcohol.
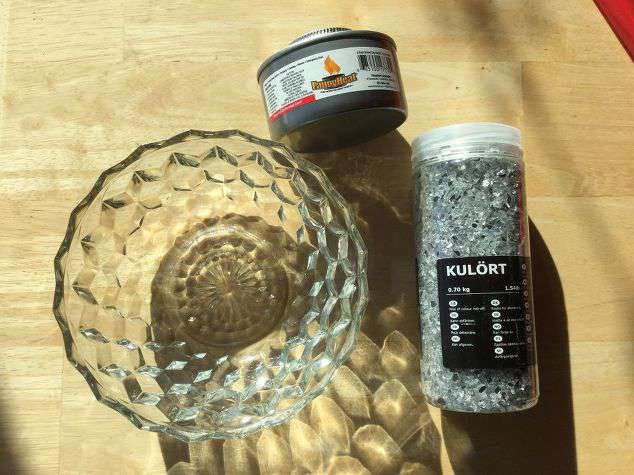
DIY Fire Bowl: More for Decoration & Ambiance Best Suited For Indoors
You’ll need the following
- A bowl of your choice
- Decorative rock, sand, etc. (I used crushed mirror glass from IKEA)
- A Sterno can (Dollar Tree)
- A lighter
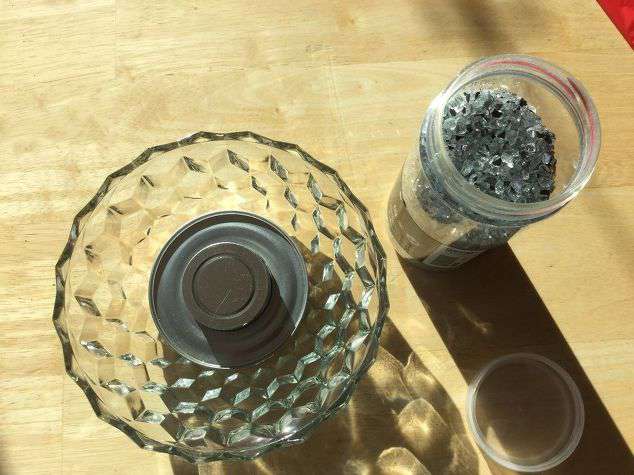
Place the Sterno can in the bowl
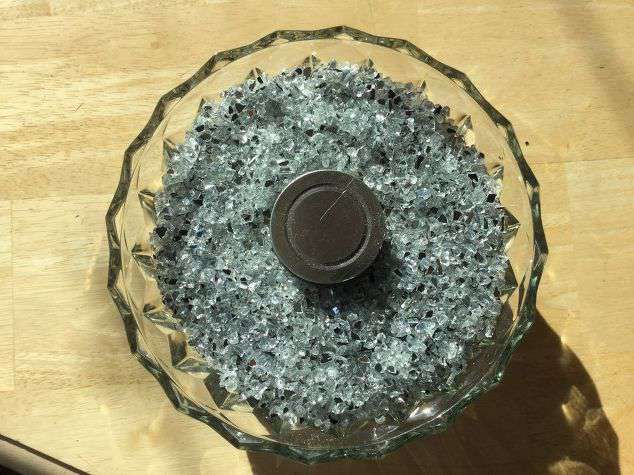
Put your decorative rock around the Sterno can. I left the lid on to make sure I didn’t get any near the wick.
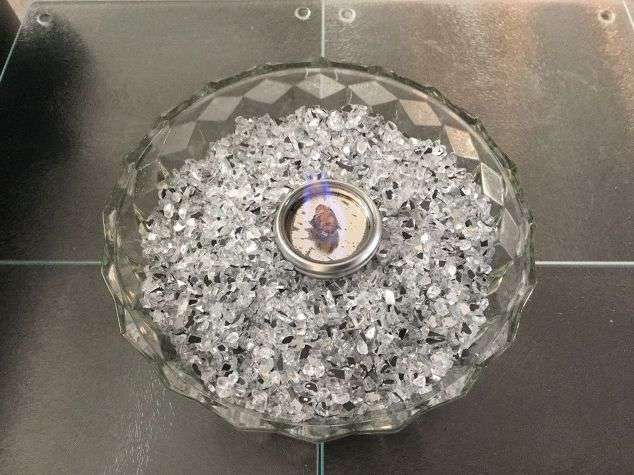
Remove the lid and set it aside, you’ll need it to put out the flame. Light the flame.
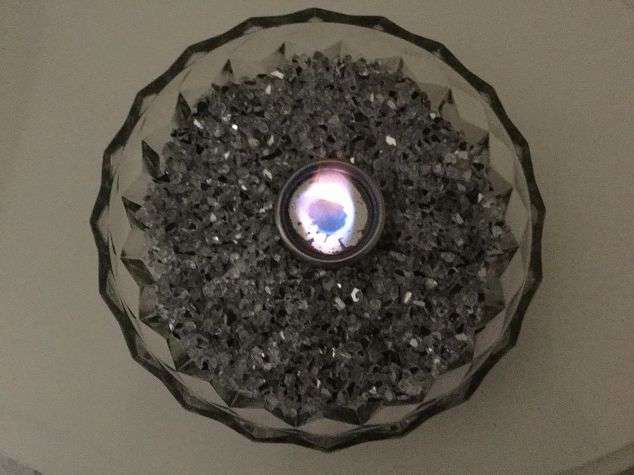
This simple fire bowl only costs a few dollars to make! This is great to have around in case of emergencies. If your power goes out you can use it to cook. (They make cooking sternos) Here is a video of both fire bowls and some extras – continue on for Firebowl #2…
Indoor/Outdoor Fire Bowl – great for emergency warmth!
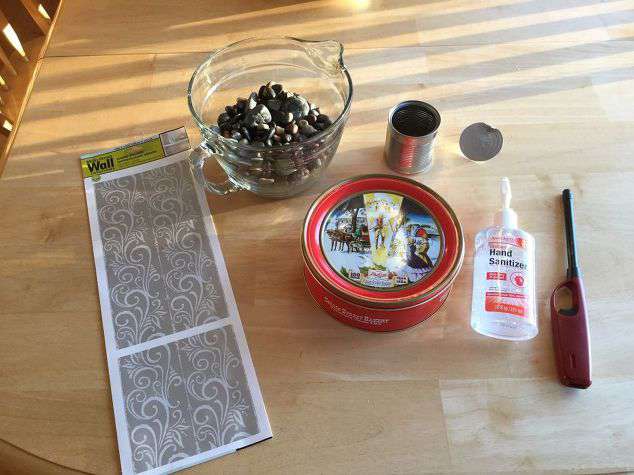
You will need the following:
- A cookie tin (or another container of your choice)
- An empty can
- Rocks or sand
- Wall Sticker, ribbon, or paint
- Hand Sanitizer
- Lighter
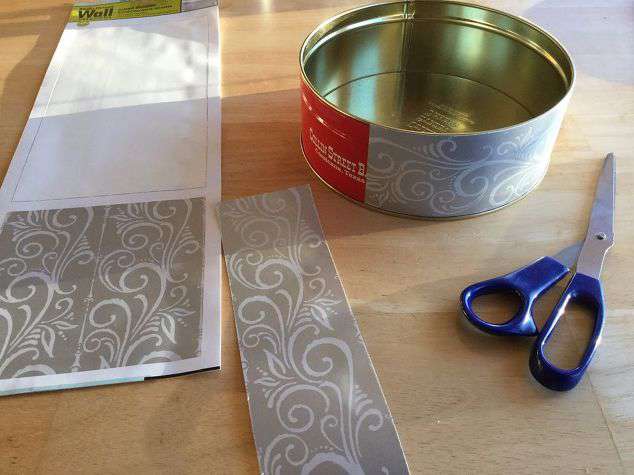
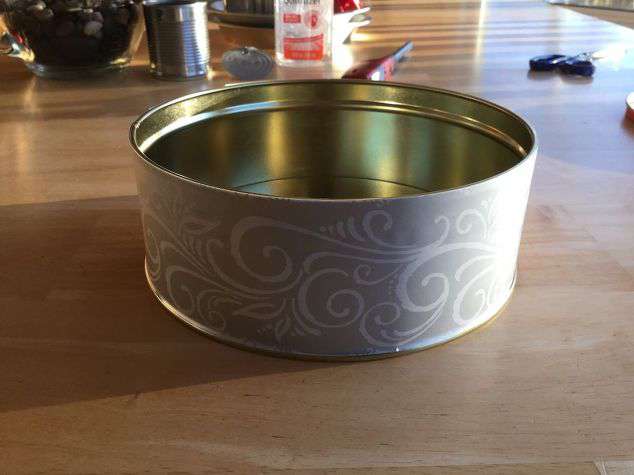
Use the wall sticker (mine came from Dollar Tree) to decorate the outside of the cookie tin. You could also glue on ribbon, or simply paint it.
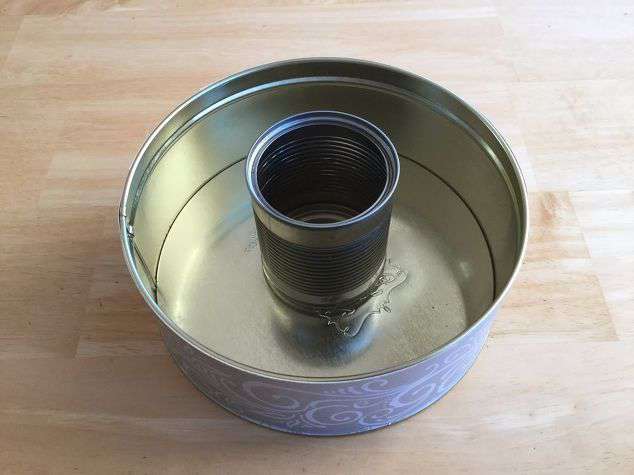
Place an empty washed out can in the center of the cookie tin.
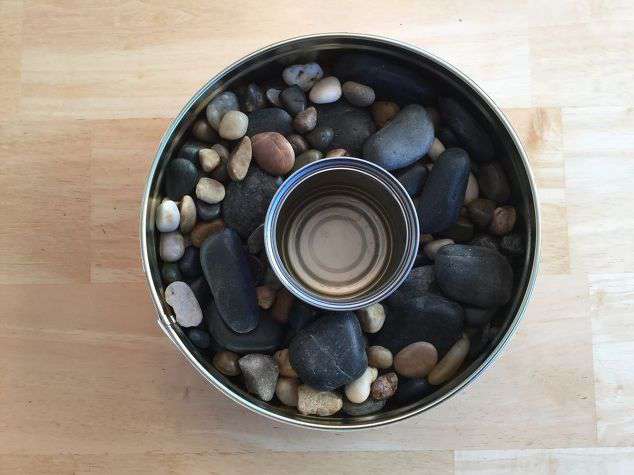
Add rocks around the tin can. You could use sand, or another decorative item of your choice.
Put the hand sanitizer in the tin can.
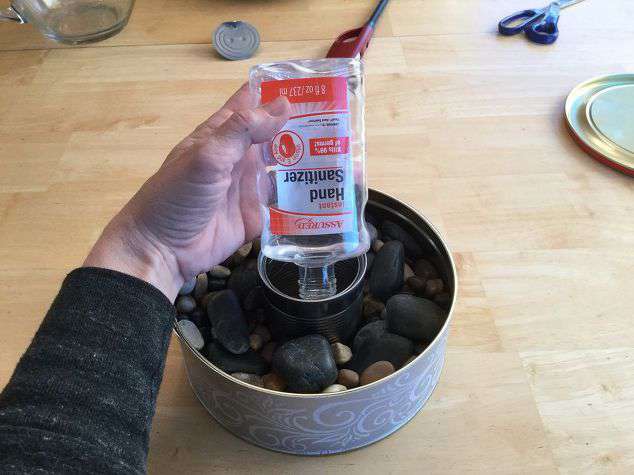
To protect your surface – I would suggest placing on a trivet, pot holder, etc.
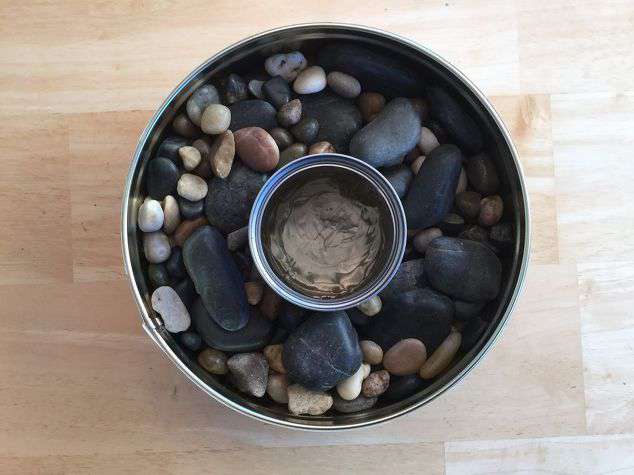
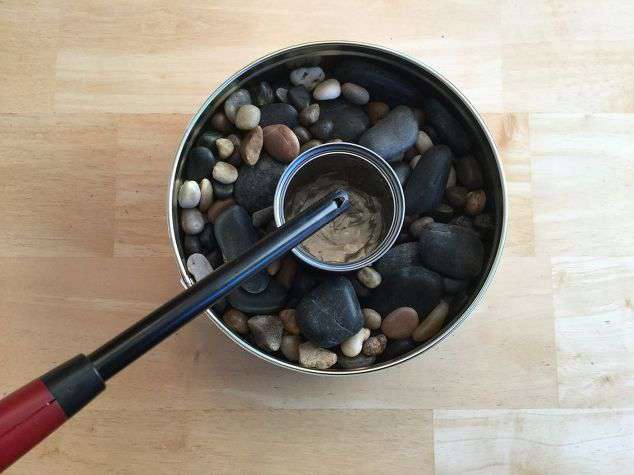
Light the hand sanitizer. The alcohol content in the hand sanitizer is what will burn and alcohol is a clean burning fuel.
If using inside, be sure to crack a window for oxygen flow. Never leave a lit flame unattended.
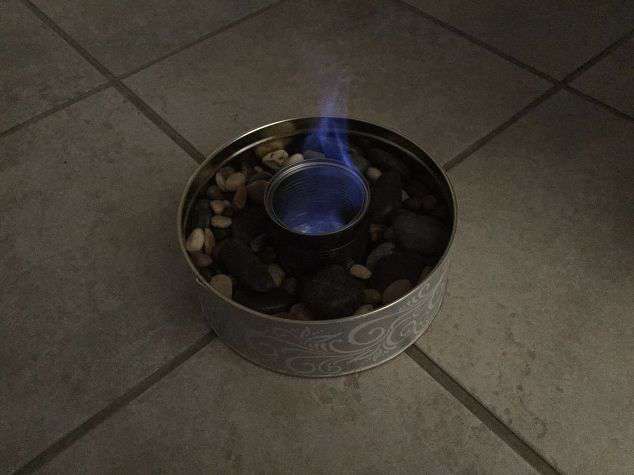
This is great to have around in case of emergencies.
To put the fire out – simply save the can lid to snuff it, or you can lay a damp washcloth or towel over it.
DIY fire bowl Video
Shop any of these stores and I receive a small commission at no cost to you.
 Best Choice Products Hex-Sh...Shop on Amazon
  Sterno S'mores Heat Ethanol...Shop on Amazon
  Jtshy Marshmallow Roasting ...Shop on Amazon
  American Fireglass 1/4” F...Shop on Amazon
  Elegance Hammered 6-Inch St...Shop on Amazon
Always make sure to have proper ventilation when having a warm fire in an enclosed area.
Other fuel types include:
- gel fuel
- isopropyl alcohol
- ethanol
Are you ready to sit around your new warm fireplace and have a social gathering point? These can be used outside on a patio, or other outdoor space. The great thing about these is there is no smoke, soot, ash, chimney, flue, or mess to clean up. You don’t need a window, but again good airflow is important when burning inside. These are portable too, so grab it and take it with you to set the mood when you lounge at a friend’s house for the festivities. It makes a fantastic centerpiece on that dining room table too.
You might be interested in seeing my stainless steel tabletop fire pit – Fondue Pot to Table Top Solar Fountain & Fire Pit
I hope this inspires you to make a cosy DIY fire bowl of your own I’d love it if you’d subscribe to my YouTube channel and my blog. Thanks for watching and I’ll see you in my next video and don’t forget to like share and subscribe.
Find out “What Exactly Does It Mean To Repurpose Or Upcycle“, save money, and create the most amazing things.


********************************************************
Thank you for sharing at #OverTheMoon. Pinned and shared. Have a lovely week. I hope to see you at next week’s party too! Please stay safe and healthy. Come party with us at Over The Moon! Catapult your content Over The Moon! @marilyn_lesniak @EclecticRedBarn
********************************************************
Thank you Marilyn, and I have you had a great weekend.
So clever! Would have never thought about using the hand sanitizer for this purpose.
Thank you Kim, yes the alcohol is the fuel and it’s great for emergencies too 🙂
What a great idea. I loved how simple it was to make from watching your video. The hand sanitizer was also a great idea. Thank you for sharing.
Thanks you Amy, I’m so glad you think so. As winter comes, I know not everyone has a fireplace and might want something, and they’re really great in case of an emergency.
Clever, this is worth knowing for an emergency situation. Thanks.
Thank you Julie and I love that it’s good for emergencies too. We once lost heat in our house in the middle of winter and I loaded us up with blankets but really wished I would have had this ready back then.
I would never have thought about using hand sanitizer, but what a great thing to know! Thank you so much for sharing this on Party in Your PJ’s. I’m anxious for summer to try the outdoor one!
Thank you Teresa, and I am so ready for summer to use mine too 🙂
To snuff out the flame, use the cookie tin lid, or make a fitted lid from aluminum foil, slide down over top of can, and done.
Thank you for that tip.
What a cool idea. I also love the crushed mirror glass, I have not heard of that before.
Sharing your post.
Kathleen
Blogger’s Pit Stop
Thank you Kathleen and thank you very much for the share 🙂
Thank you for the clever idea! I love that this is great for emergencies! I have pinned this, so I have it saved!
Thank you Natalie and thank you so much for the Pin 🙂
Oh love this idea! I always have leftover tins after Christmas. What a fantastic idea. pinned! Saw your post at the bloggers pit stop. Pinned:)
Thank you Kathleen and thank you for the Pin 🙂
How clever! I would never have thought of hand sanitizer! Thanks so much for sharing! – Bloggers Pitstop
Thank you Denise 🙂
Barbara McGurn ; Hi Chas I just ordered my items from Amazon. I’ll go to a store called savers for the glass bowls. I can’t wait to make 4 of these
Thank you hon
Happy Easter to you and your family🙏🏽
Yay! I’m so excited you’re going to make some of these. Thanks so much for sharing 🙂
Hand sanitizer?! Wow! Who knew? I’ve never seen fire bowls. These are great ideas. Happy New Year Chas! xo Deborah
Hi Deborah! Thank you and it’s not only great for ambiance but good for emergency heating too. Happy New Year to you and I’m glad you’re feeling better. Hugs my friend 🙂
cool
Thank you