

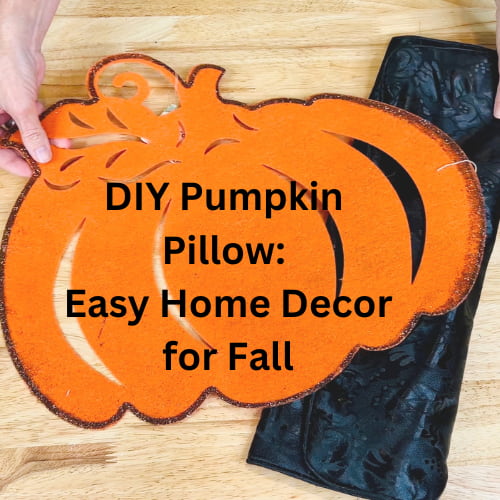
DIY Pumpkin Pillow: Easy Home Decor for Fall
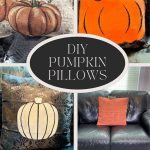
Fall is just around the corner, and what better way to celebrate the season than by adding some festive DIY decor to your home? In this blog post, we’ll guide you through creating a charming DIY pumpkin pillow (or 2, or 3….) that will spruce up your living space with a touch of autumn magic. These DIY pumpkin pillows are not only adorable but also incredibly simple to make. Let’s dive into the creative process step by step.
How to make a pumpkin pillow?
How do you make a no sew pumpkin pillow?
DIY Pumpkin Pillow Materials List:
- Pillowcases from Dollar Tree
- Placemats
- Adhesive-backed cork
- Adhesive-backed felt
- Fabric markers, or Fabric paint
- Fabric Mod Podge
- Wax paper
- Pillow insert or stuffing
- Hot glue gun (for alternative method)
- Hook and loop adhesive fastener (optional, for interchangeable pillows)
DIY Pumpkin Pillow Video:

DIY Pumpkin Pillow Instructions:
Interchangeable Placemat No Sew Pillow
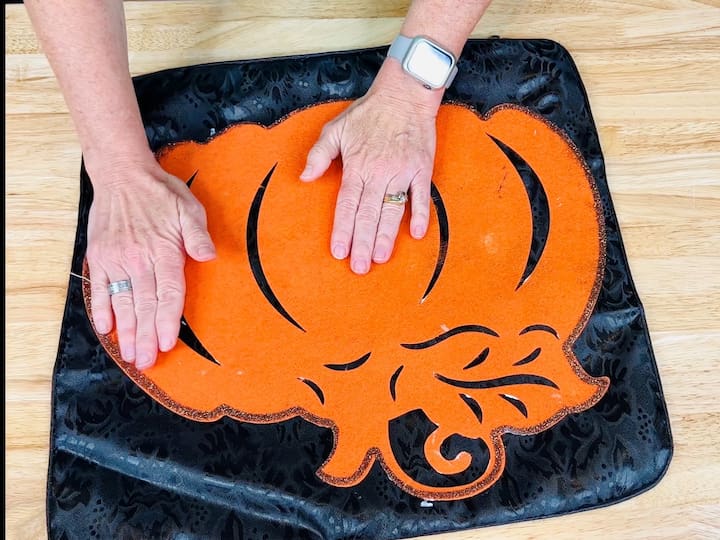
I was on one of my trips to the dollar store when I found some super cute placemats. Inspiration struck – easy no sew fall pillows! This DIY pumpkin pillow can be made without a sewing machine, no need to stitch seams.
I found these placemats at the dollar store. I grabbed 2 of them and brought them home.
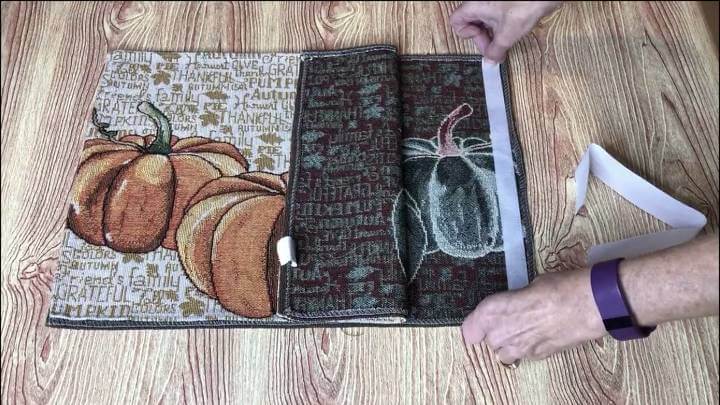
I put the placemats together with the right sides facing out. On one of the sides I put self adhesive hook and loop fastener, and I pressed the placemats together.
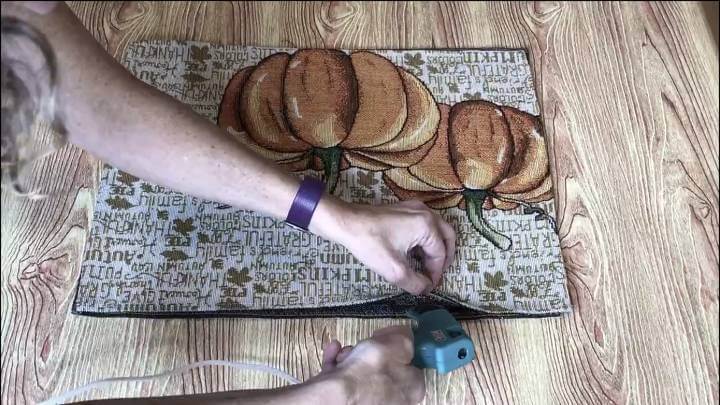
I used my hot glue gun and hot glued the other 3 open sides together.
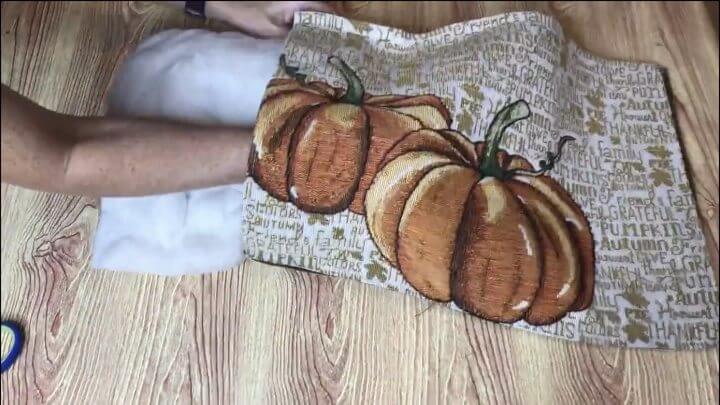
I had an old pillow that was falling apart, you could use a pillow insert, stuffing from an old stuffed animal like a teddy bear, or poly-fil. I took the stuffing out of that and used 1/2 of it to stuff inside hook and loop fastener side of the placemats to create the pillow. You can also stuff them with fiber fill.
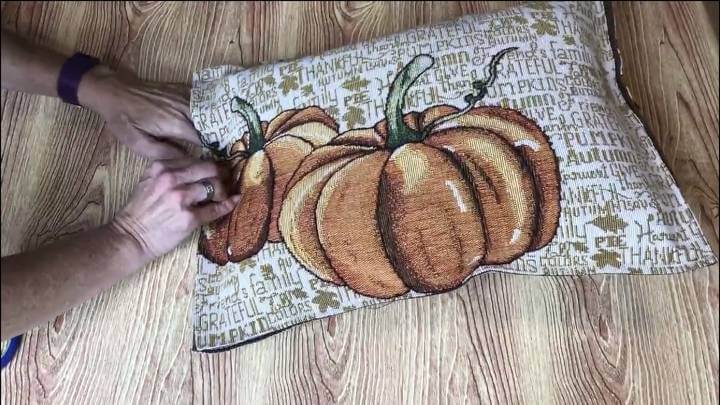
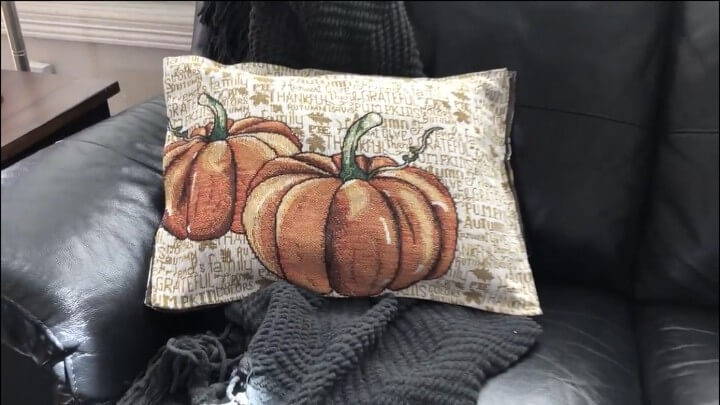
I pressed the hook and loop fastener back together and the pillow was finished.
What I love about this project is that you could create these for every season. You can remove the stuffing from one pillow and put it in the new one. This will also make storing the pillow covers super easy as they’ll be flat.
DIY Pumpkin Pillow Video
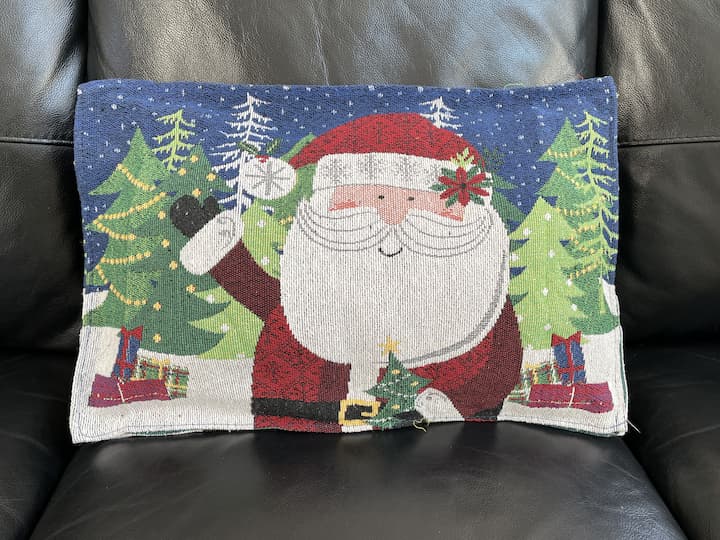
Now it’s time to get ready for the next holiday. I ran to the dollar store and grabbed a few Christmas place mats and repeated this same process. They turned out so cute!
Shop any of these stores and I receive a small commission at no cost to you.
 4TH Emotion Fall Pumpkin Tr...Shop on Amazon
 AENEY Fall Decor Pillow Cov...Shop on Amazon
 4TH Emotion Fall Thanksgivi...Shop on Amazon
 LITVACK Happy Fall Yall Pil...Shop on Amazon
 4TH Emotion Happy Fall Pump...Shop on Amazon
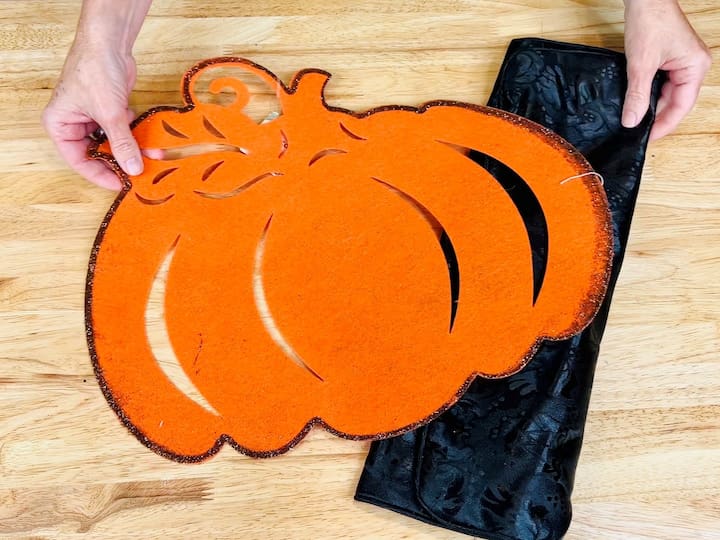
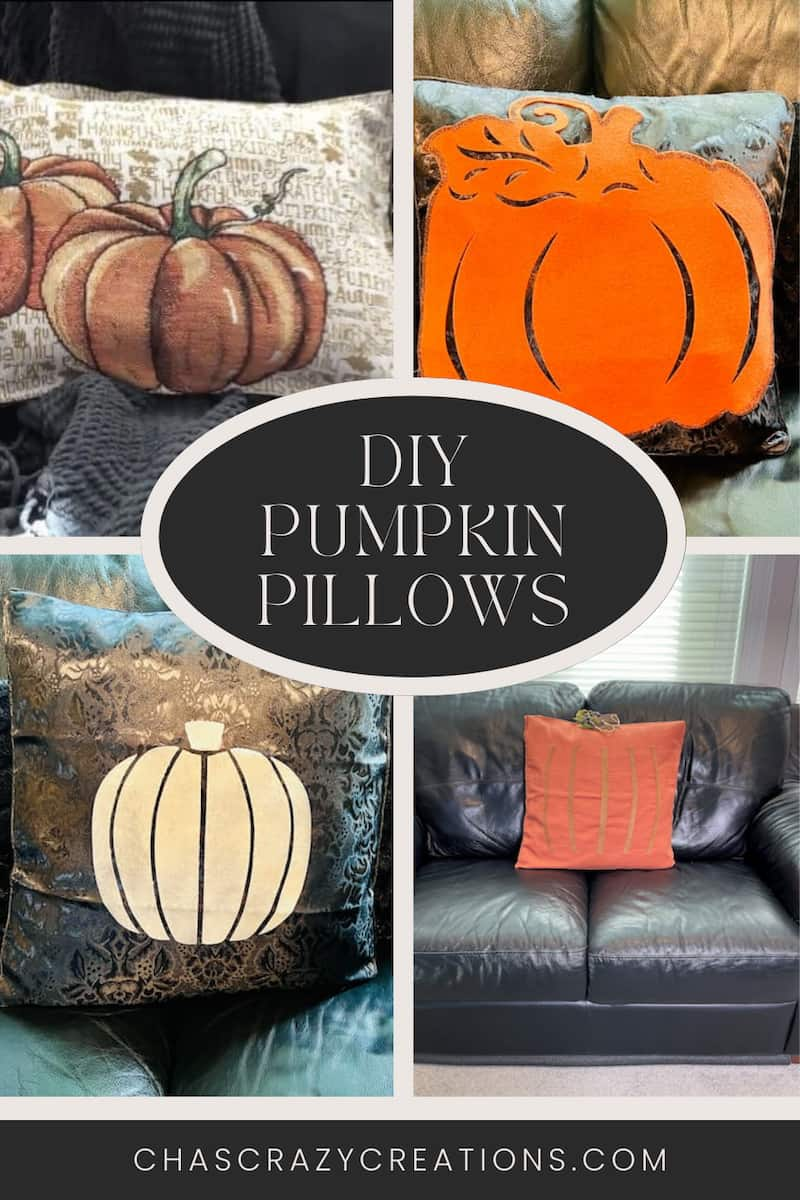
Pumpkin Pillow with Felt
Select a felt pumpkin placemat or a similar design of your choice to place on top of the pillowcase or pillow cover. Open the Dollar Tree pillowcase and place wax paper inside to prevent sticking.
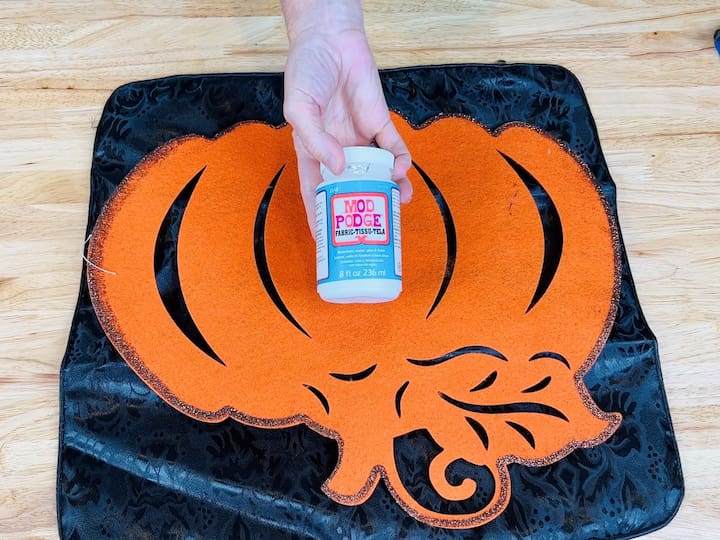
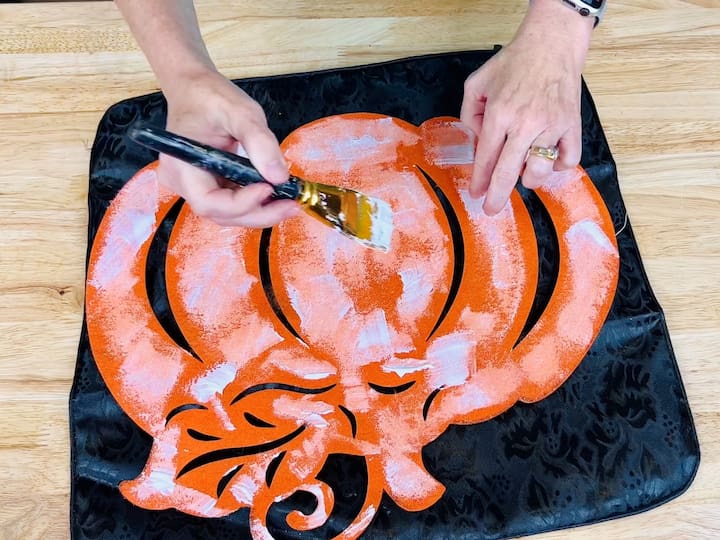
Flip the pumpkin over and use the back side. Dip a paintbrush into fabric Mod Podge and apply a generous coat to the back of the felt pumpkin, ensuring complete coverage.
Press the coated felt pumpkin onto the pillowcase firmly, making sure it adheres well.
Allow the Mod Podge to dry completely before moving on to the next step.

Once dry, remove the wax paper, insert the pillow form, and zip the pillowcase closed.
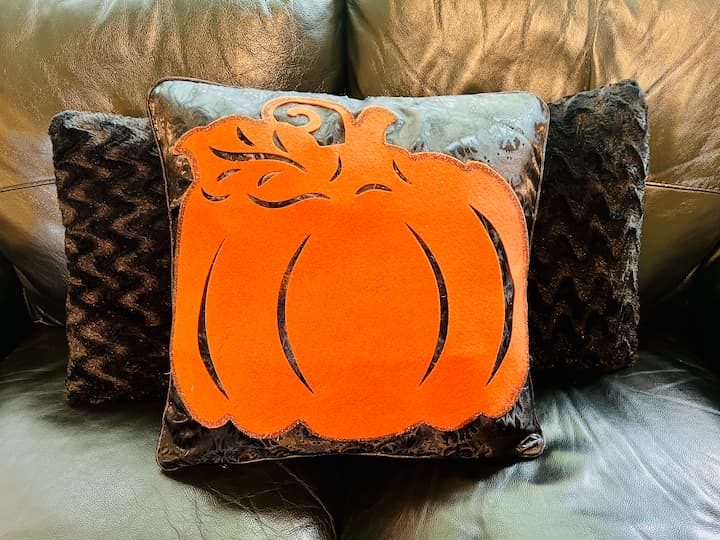
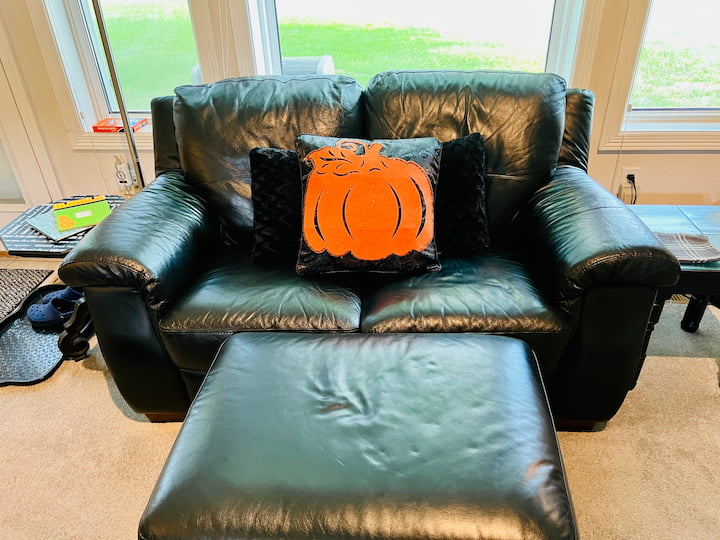
I just love how this easy DIY pumpkin pilllow turned out. I love that I’ll be able to remove the insert and create a different version for the next season, and this one will store easily by laying flat in my storage box.
Stenciled Pumpkin Pillow:
For this project I used a pillow cover, stencil, and paint. Such an easy DIY pumpkin pillow!
- Place a stencil of your choice on the pillowcase. Use stencil tape to secure it in place.
- Dip a stencil brush into white chalk paint and gently pounce the paint onto the pumpkin design. Be careful not to saturate the fabric.
- Carefully remove the stencil and allow the paint to dry completely.
- Once the paint is dry, insert the pillow form into the pillowcase.
You can find the full tutorial for this pillow as well as several others at: Pillow Crafts: DIY Projects for Home Decor and Gifts
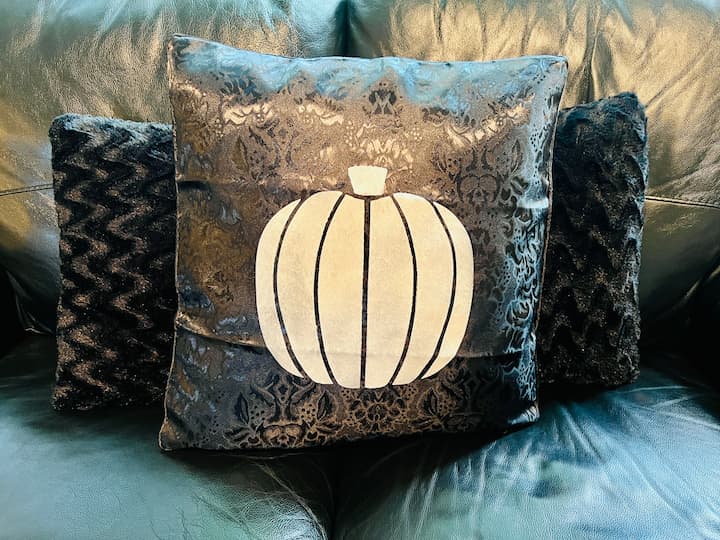
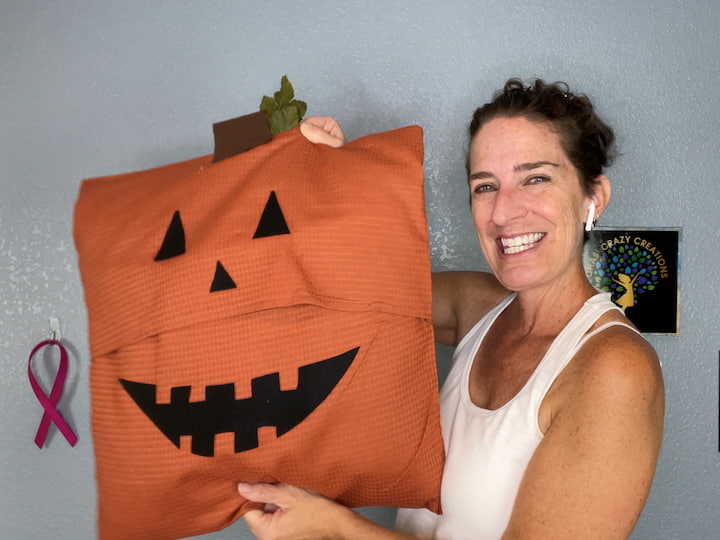
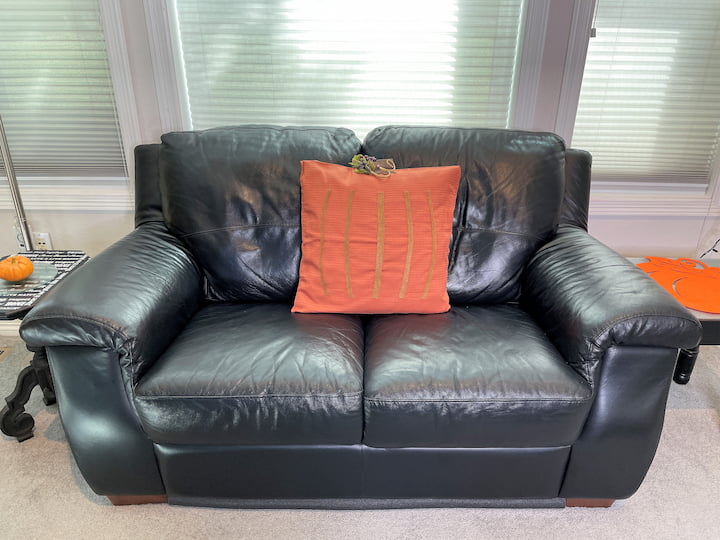
Two-Sided Pumpkin Pillow:
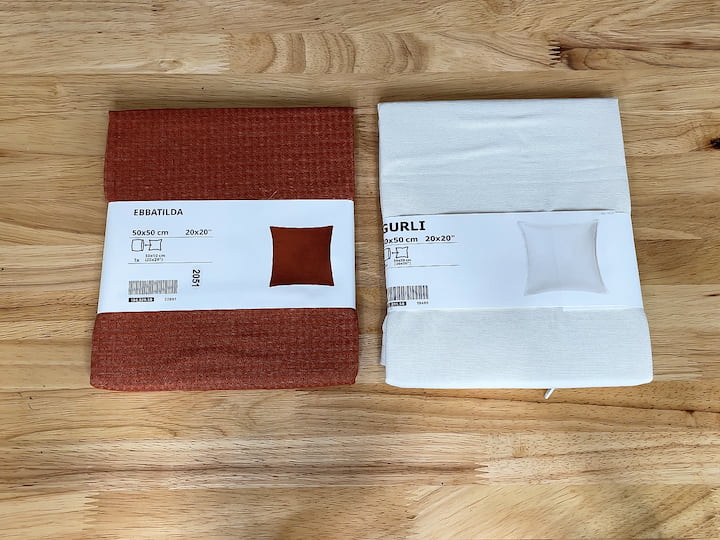
Start by selecting a 20×20 pillowcase cover. These covers can be easily swapped out for different seasons, making this a versatile and space-saving project. If your pillowcase covers have a zipper at the bottom, that’s ideal. However, if they have an envelope opening like in this tutorial, don’t worry – we can still work with it. You can also use some orange fabric if you prefer to make your own pillow cover.
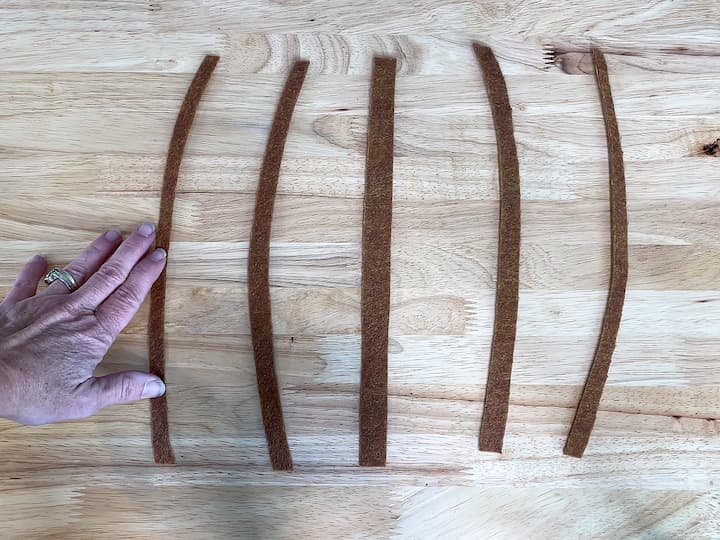
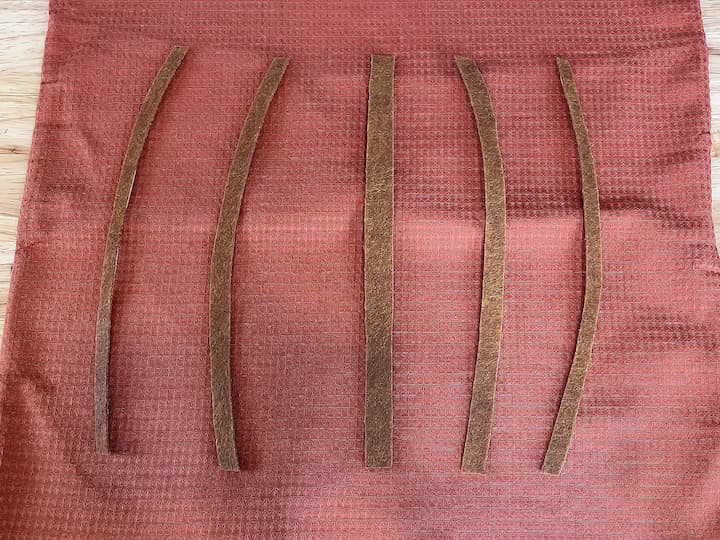
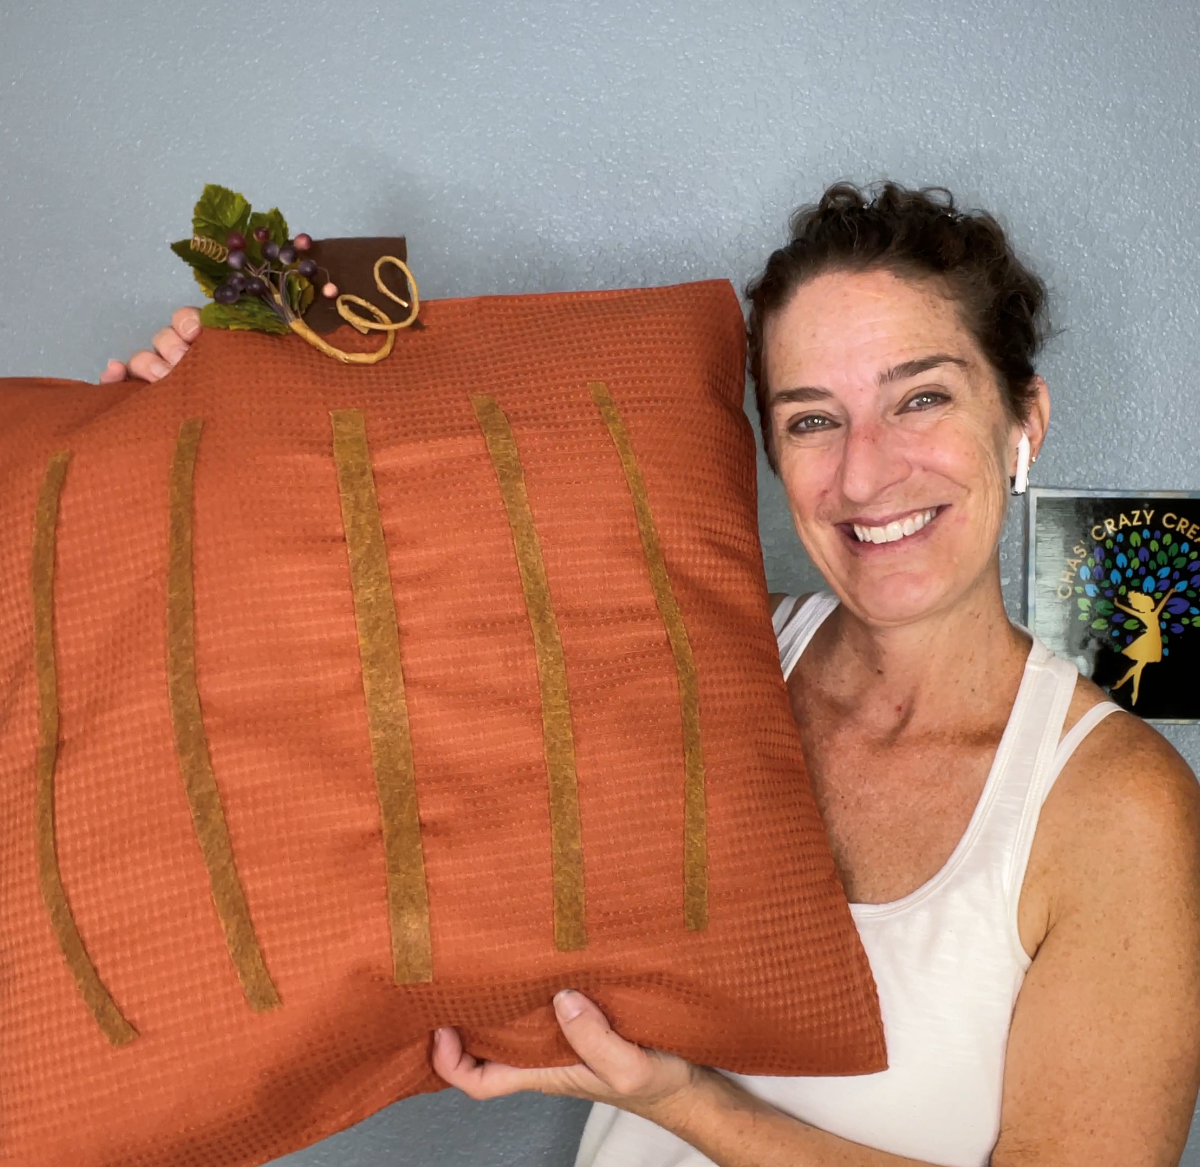
For the pumpkin side of the pillow, you’ll need to add lines to mimic the segments of a pumpkin. There are several ways to achieve this:
- Adhesive Cork or Yarn: Apply adhesive cork strips or yarn (or jute twine) to create the pumpkin lines. Adhesive cork can be cut into strips and easily stuck onto the fabric. Yarn can be hot glued to create a similar effect.
- Stick-on Felt or Fabric Markers: Alternatively, use stick-on felt strips or fabric markers to draw the lines directly onto the fabric.
Choose the method that suits your preference and apply the lines on one side of the pillowcase cover.
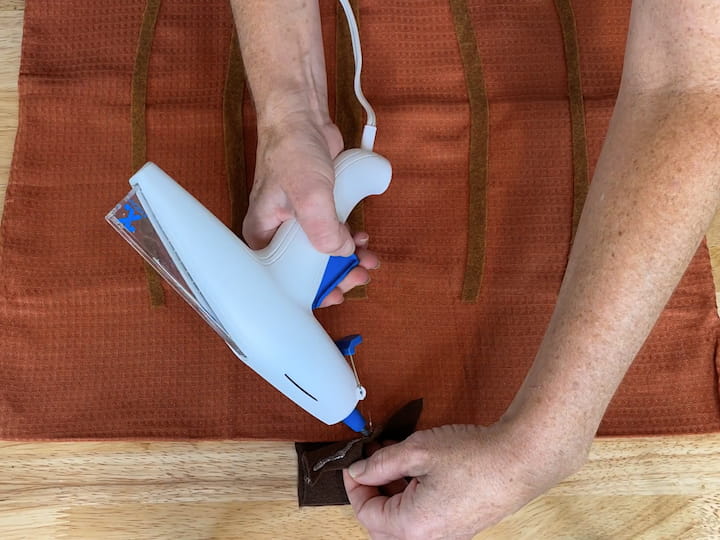
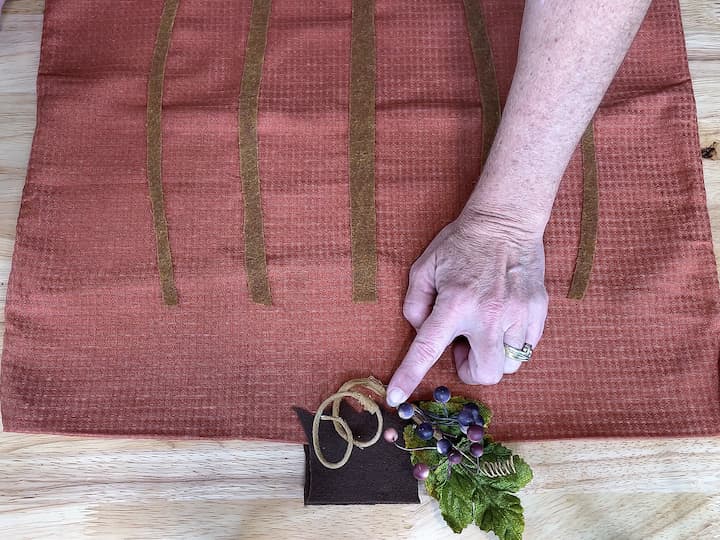
Cut two stem shapes out of adhesive back felt with scissors. Position one stem on each side of the top of the pumpkin lines. Use a hot glue gun to secure them in place, both on the front and back sides of the cover. This adds a three-dimensional element to your pumpkin design.
Take a napkin ring to the pumpkin stem and carefully separate its decorative elements. Choose the ones that best fit your design – for example, apples, pears, leaves, and berries. Attach these elements to the end of the stem using hot glue.
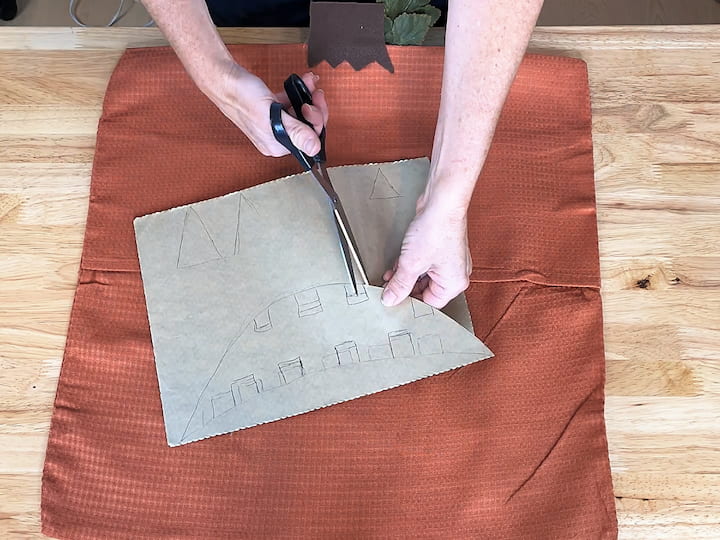
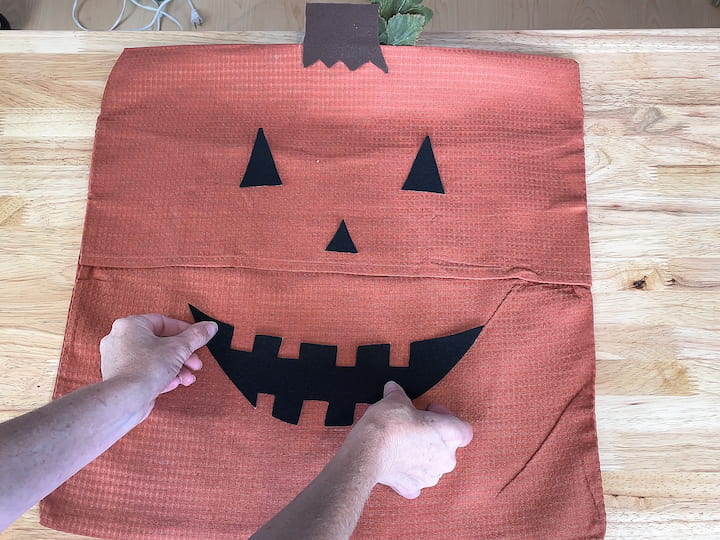
On the reverse side of the pillow, which is meant for Halloween, you’ll add a jack-o’-lantern face. Use black sticky backed felt to cut out the eyes, nose, and mouth of the jack-o’-lantern. Arrange the pieces to create a spooky face, and then stick them onto the fabric.
Insert a 20×20 inch pillow form into the completed pillowcase cover. If your cover has a zipper, this step will be a breeze. If you have an envelope opening, carefully slip the pillow form inside.
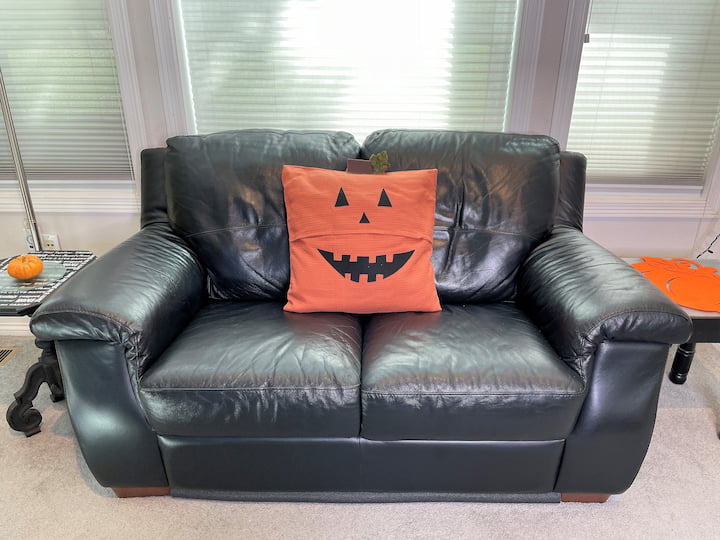
Now you have a versatile pumpkin pillow with two charming sides – one for fall and one for Halloween! Simply flip the pillow to change the look. When the season changes, remove the pillow form and store the pillowcase covers flat in a bin for easy storage.
DIY Pumpkin Pillow Video
This DIY pumpkin pillow is a fantastic way to add a touch of festive spirit to your home decor while also being practical and space-conscious. Have fun crafting and enjoy the seasonal transformation of your space!

Check out some of my other fall decor!
- 25 Super Amazing Pumpkin Crafts To Make and Sell
- Super Easy Dollar Tree Pumpkin Crafts on a Budget
- Pillow Crafts: DIY Projects for Home Decor and Gifts
- Easy and Cute Mummy and Snowman Reversible Pillow Cover
These DIY pumpkin pillows offer a delightful way to infuse your home with the spirit of fall. Whether you prefer a felt pumpkin, a stenciled design, an interchangeable placemat pillow, or a two-sided masterpiece, these projects are both fun and budget-friendly. Get creative, express your personal style, and enjoy the cozy ambiance these charming pillows bring to your living space. Feel free to customize the designs, colors, and techniques to make these pumpkin pillows uniquely yours. Happy crafting!

Hi Chas! I featured your fun post today on Farm Fresh Tuesdays! I love the cute pillow and how easy it is to create…thanks so much for sharing with us! I hope to see you again on the hop 🙂
Thank you so much Lisa and thanks for the feature. I’ll see you at the next party.
What a great idea! They turned out so cute.
Thank you Amy, I am thrilled with how easy they’ll be to pack away when the season is done too.
You always have such clever ideas! Thanks so much for sharing your talent with us at the Creative Muster. Looking forward to seeing what you’ll be sharing next week. Pinning!
Robin?
Thank you so much Robin for your kind words and thanks for the Pin!
Those placemats are perfect for a no-sew pillow! It looks like a rich tapestry! Perfect for the fall season, Chas!
Thank you so much Julie. I couldn’t help myself and I’ve made a few more 🙂
Very fun! I’ll be featuring this post at TTA tomorrow! Thank you!
Thank you so much Julie for the feature, I’m honored. See you at the next party.
Very cool idea! Being able to store a “pillow” flat is huge.
Thank you Michelle, I’m so glad you think so too 🙂
Thank you for sharing at #ThursdayFavoriteThings. Pinned and shared. Have a lovely week. I hope to see you at next week’s party too!
Thank you so much Marilyn, see you at the next one 🙂
Those are so cute! What a great idea. Thanks for sharing with us at Encouraging Hearts and home. Pinned.
Thank you so much and thanks for the Pin, I appreciate it.
HI! I LOVE THIS PILLOW IDEA! My question is: is there a specific type of glue and or glue gun I should use? Thanks!!
Thank you Christine and I’m thrilled you love this project. I just used regular glue sticks from Dollar Tree and my cool glue gun from Hobby Lobby. Nothing special 🙂
What a great idea for placemats and an old pillow. I missed those placemats at the dollar store, those are cute. Love it!
Thank you Jenny and if you still want to find some – check out Family Dollar (Dollar Tree owns them) and I saw them there as well.
What a great find! I love this project. So simple and inexpensive. 😀
Thank you so much Michelle 🙂
The pillow turned out great! I love all of your fall diy’s and decor! Stopping over from Tamar’s hop. I’m going to go look for something I can link up here too. I love thrifting!
Thank you so much Heather, and thanks for stopping by. Can’t wait to see what you’ve been up to.