
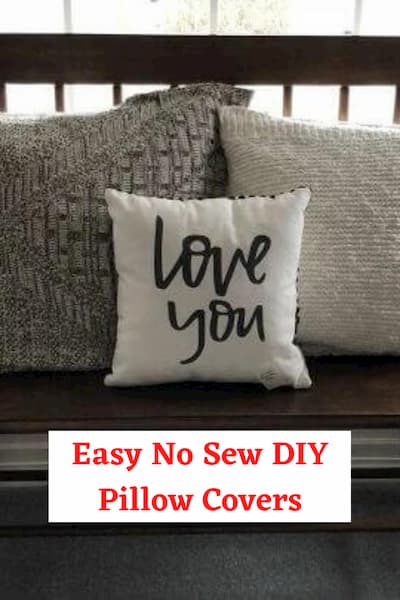
How To Make Pillow Covers: Easy and Awesome No Sew DIY

Are you wondering how to make pillow covers? My husband wasn’t ready to part with this sweater but knew he wouldn’t wear it anymore. I turned it into no sew DIY homemade pillow covers for our home. If you’re a beginner, you’ll love turning a sweater into throw pillows.
If you don’t want the no sew tutorial option you could easily use a sewing machine or you could hand stitch the sweater with a needle and thread to make a sew pillow cover.
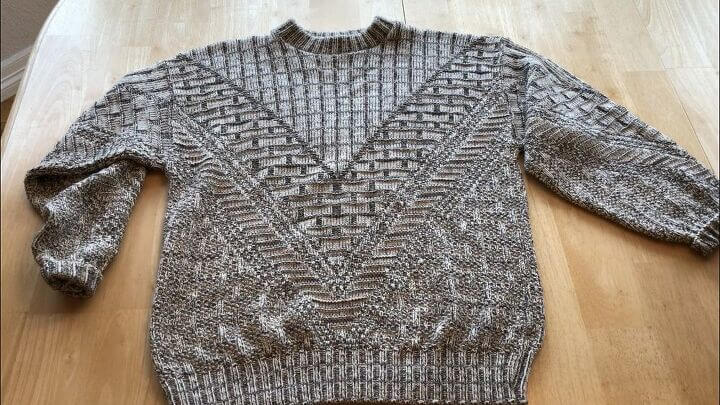
This is the original sweater, it was a gift to my husband from his grandma. He wasn’t wearing it anymore but didn’t want to part with it since it was a memory he had with her. I asked him if he’d be okay with me turning it into a pillow so it could be loved again. He agreed.
This new pillow cover I’m making has easy steps to follow and is an inexpensive way to make these luxurious pillows that cost so much more in the store. I like the sweater because it adds some texture to the pillow, but you could make it out of so many more fabric choices. I’ll show you several more after the first tutorial. So let’s dive into how to make some throw pillow covers in this pillow cover tutorial!
How To Make Pillow Covers: Easy and Awesome No Sew DIY Video
How To Make Pillow Covers: Easy and Awesome No Sew DIY Instructions
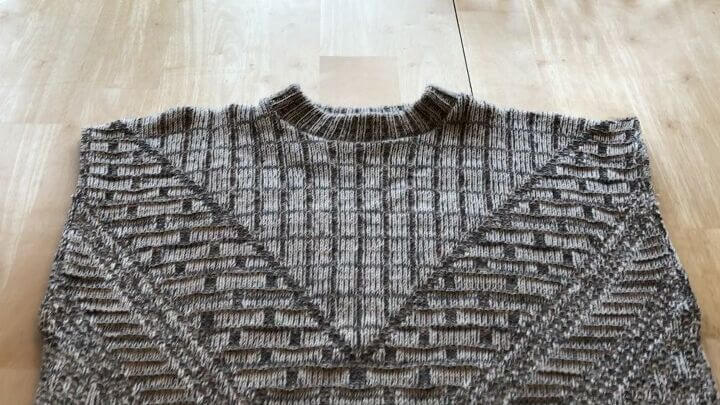
I started by cutting off the sleeves with a scissors.
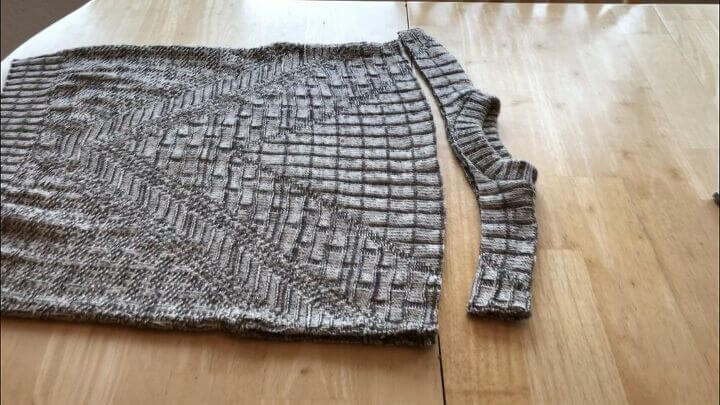
I then cut off the top of the sweater using the lines that were there to guide me.
I hot glued the sleeve openings together. (You could alternatively sew this project if you like.)
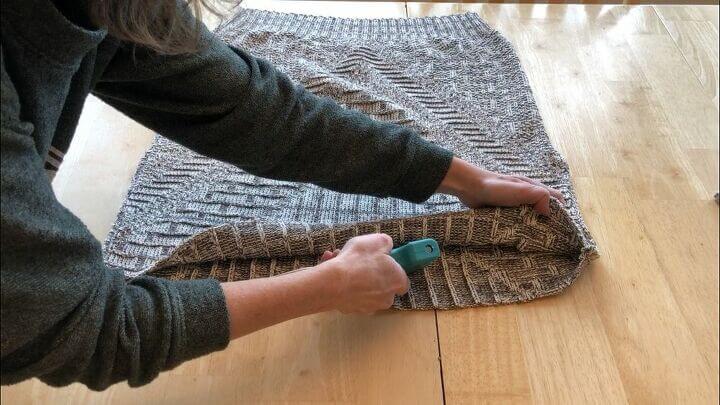
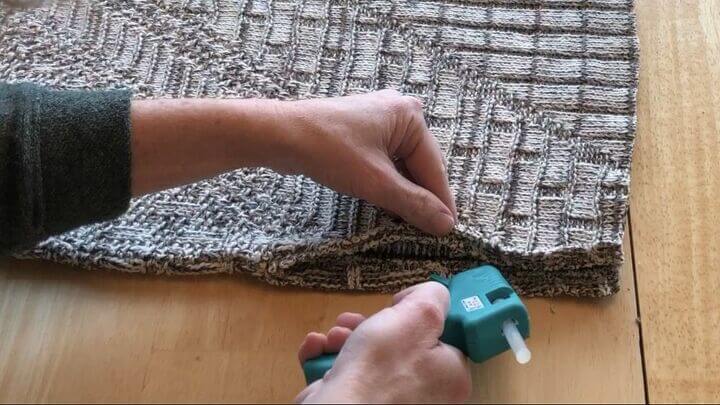
I hot glued the top of the sweater a few inches in as I wanted to have a flap to match the bottom of the sweater. I also dabbed hot glue on the very inside of the top edges to prevent fraying.
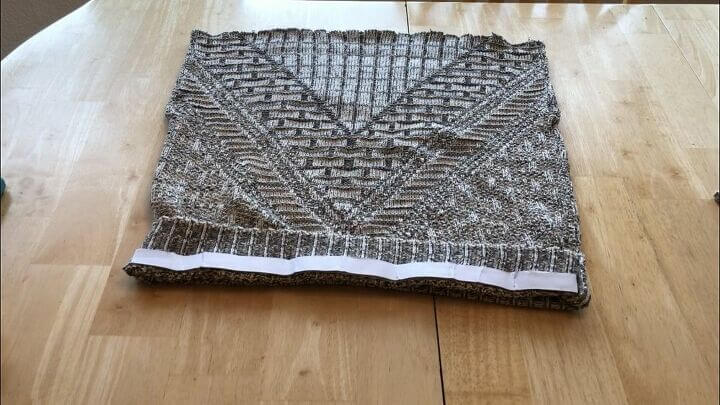
On the bottom of the sweater I measured self-adhesive hook and loop fastener.
By creating an opening like this, I would be able to wash the pillow and pillowcase.
If you’d rather you could either sew in a zipper or hot glue the zipper to the bottom instead.
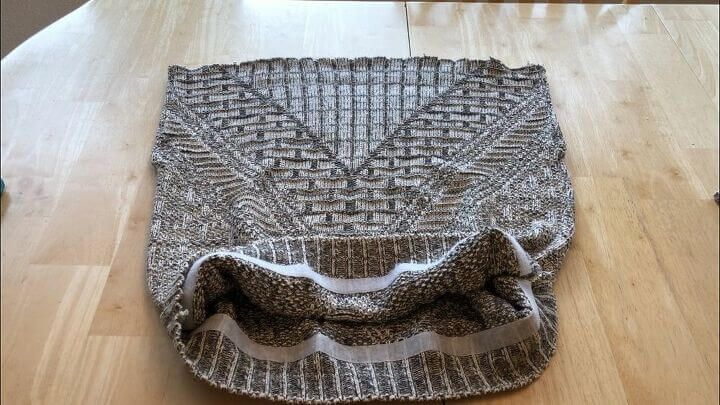
I placed the self-adhesive hook and loop fastener inside the bottom of the sweater. I did this about as far in as I had on the top creating a flap on both sides so the top and bottom would match.
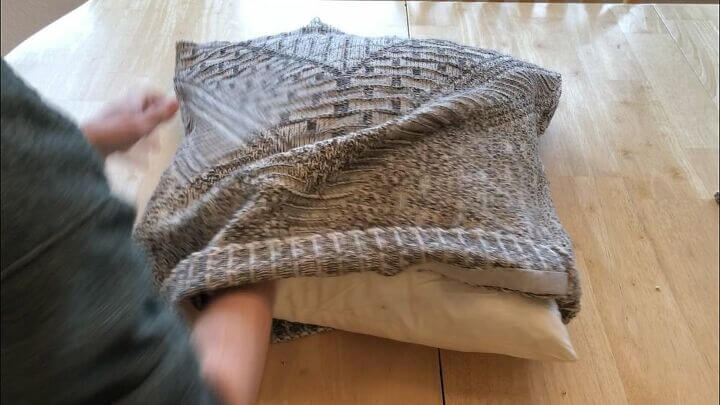
I stuffed my pillow form inside the sweater, made sure it was in the center of the pillow, and pressed the hook and loop fastener closed.
If you don’t have a pillow insert, you could fill it with fleece, polyfil, etc.

Here’s the completed pillow.
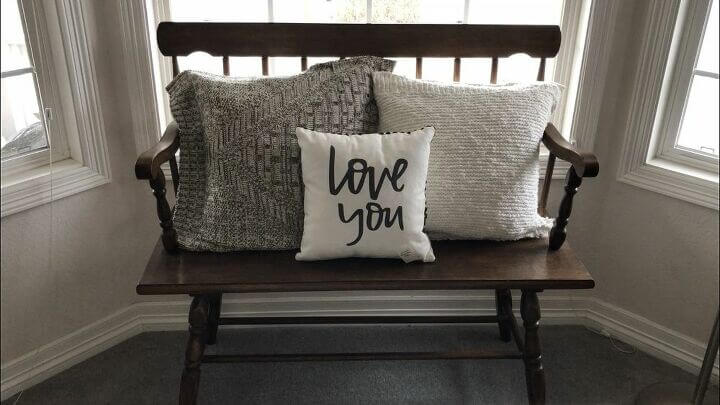
Here it is in our living room. My husband is happy to see this sweater every day, and my kids love laying on it which also makes him happy as well.
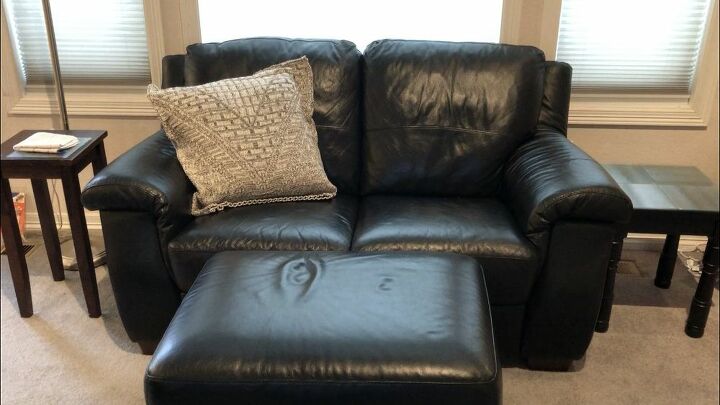
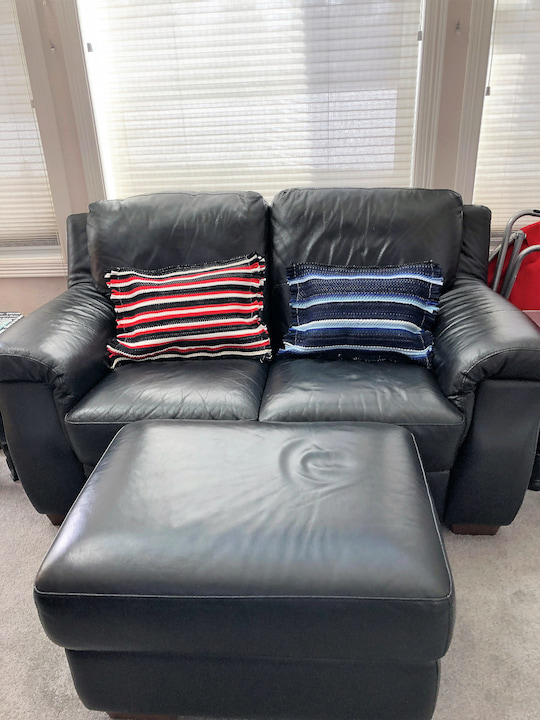
Here it is on our sofa or couch in our family room.
How To Make Pillow Covers: Easy and Awesome No Sew DIY Video
Find out “What Exactly Does It Mean To Repurpose Or Upcycle“, save money, and create the most amazing things.
If you like this post you might enjoy – 5 Things From 1 Thrift Store Sweater!
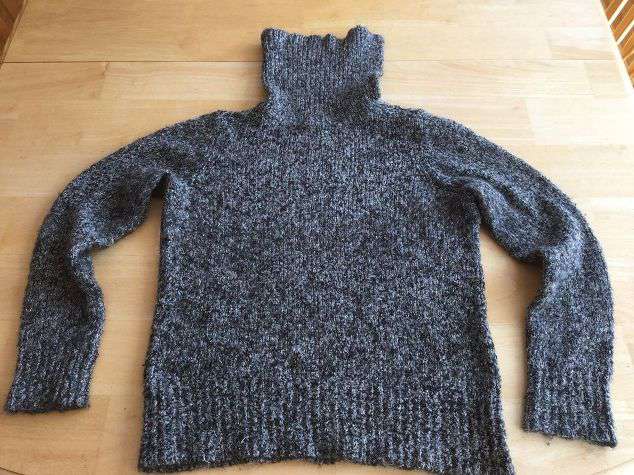
My husband wasn’t ready to part with this sweater but knew he wouldn’t wear it anymore. I turned it into a no sew DIY pillow cover for our home.
Shop any of these stores and I receive a small commission at no cost to you.
)") DOKOT Decorative Knit Throw…Shop on Amazon
DOKOT Decorative Knit Throw…Shop on Amazon Beckham Hotel Collection Be…Shop on Amazon
 MIULEE Velvet Throw Pillow …Shop on AmazonShop on Amazon
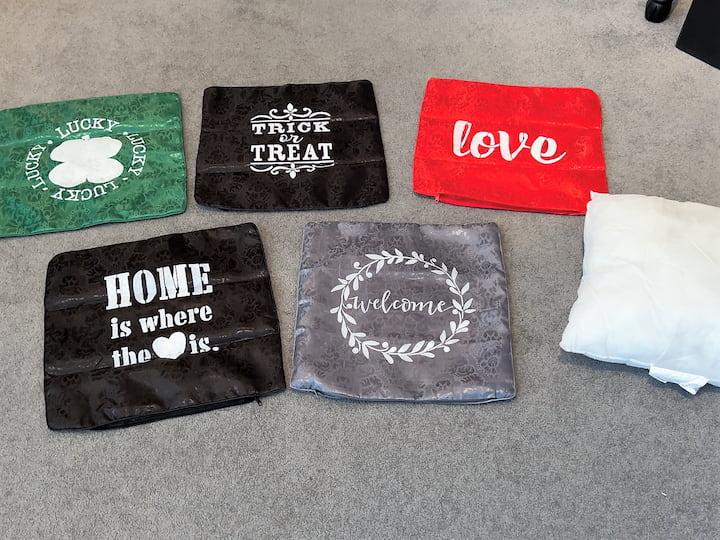
How To Make Pillow Covers: Even More DIY Pillowcases for you!

No Sew Outdoor Pillows With Journal/Pen Pockets
I’m so excited to share with you my repurposed shower curtain & jeans into no sew outdoor pillows with a journal and pen pockets! This easy upcycled project is perfect for any age and makes a great gift idea! You can find this tutorial at No Sew Outdoor Pillows With Journal/Pen Pockets
Pillow Crafts: DIY Projects for Home Decor and Gifts
Just wait till you see all the projects we’re making today! In this blog post, I’ll show you some fun and creative pillow crafts that you can easily make at home. Whether you’re looking to add a splash of color to your living room or create personalized gifts for your loved ones, these DIY pillow projects are perfect for unleashing your creativity. Let’s dive in! You can find these tutorials at Pillow Crafts: DIY Projects for Home Decor and Gifts
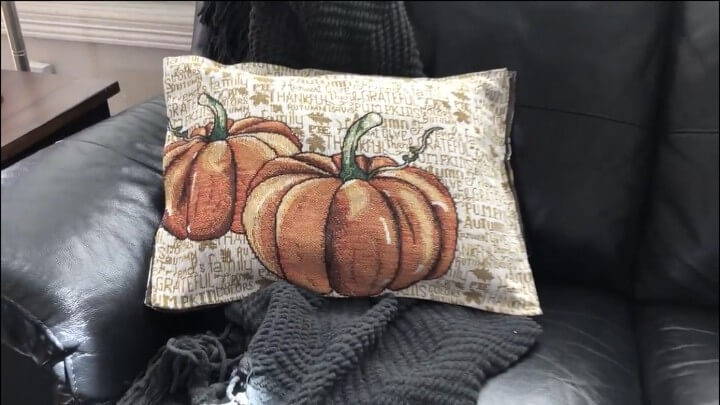
DIY Pumpkin Pillow: Easy Home Decor for Fall
Fall is just around the corner, and what better way to celebrate the season than by adding some festive DIY decor to your home? In this blog post, we’ll guide you through creating a charming DIY pumpkin pillow (or 2, or 3….) that will spruce up your living space with a touch of autumn magic. These DIY pumpkin pillows are not only adorable but also incredibly simple to make. Let’s dive into the creative process step by step. You can find these tutorials at DIY Pumpkin Pillow: Easy Home Decor for Fall
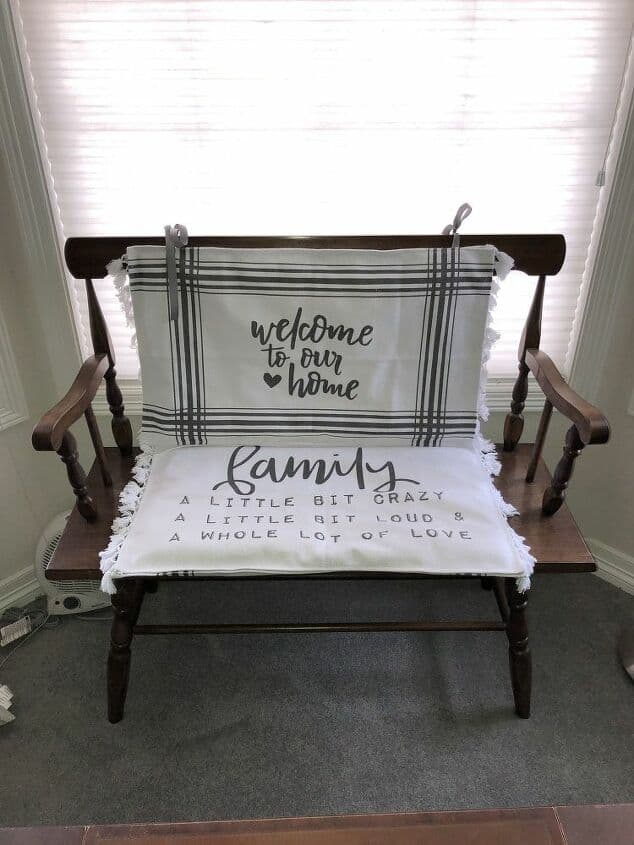
Easy DIY Chair Cushions Sew and No Sew Options with video
Are you looking for some DIY chair cushions? or How to make cushion covers? I have this old farmhouse bench I love but it’s a little hard to sit on. Using rugs from the Target Dollar Spot, I was able to turn them into pillows or cushions. You can find the full tutorial at Easy DIY Chair Cushions Sew and No Sew Options with video
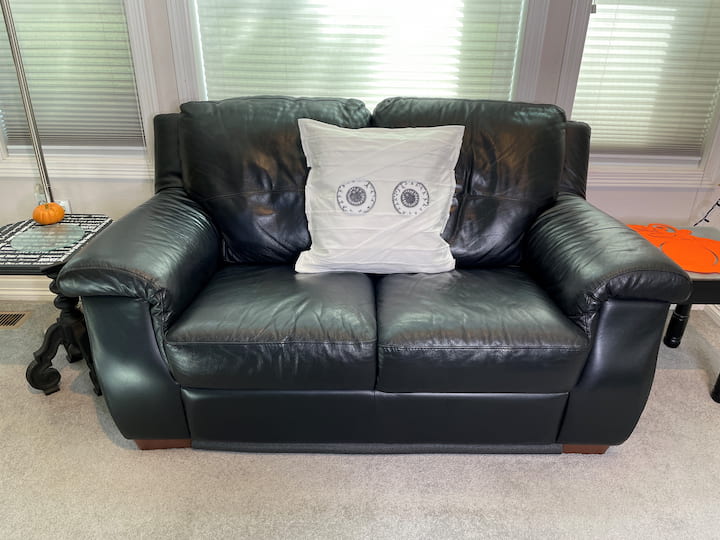
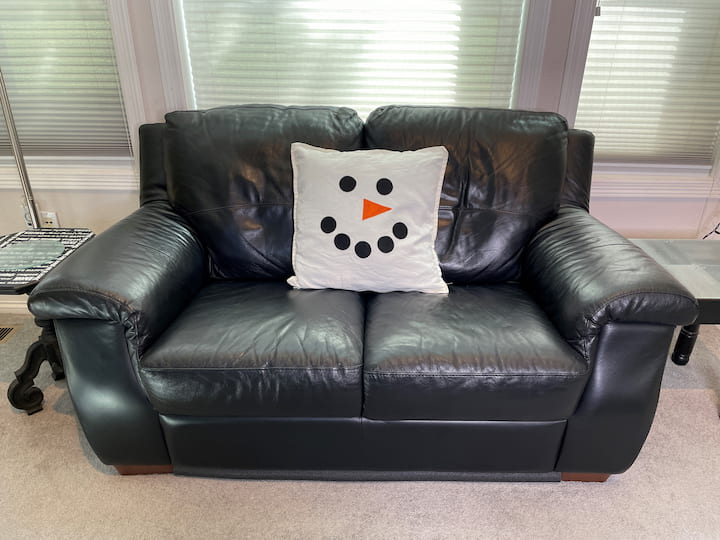
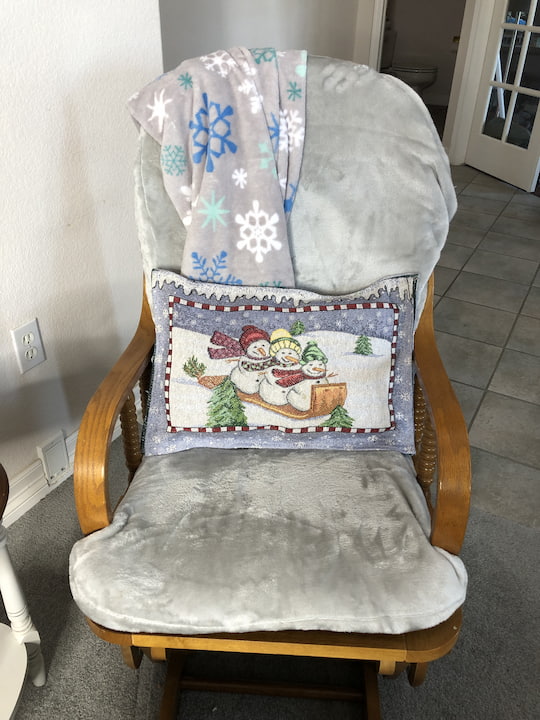
Easy and Cute Mummy and Snowman Reversible Pillow Cover
Today I am going to show you a great way to make a simple Halloween decoration that can be used for more than just one holiday. created an inexpensive, cute mummy on one side of a pillow cover and a snowman on the other side. It’s the perfect way to change your decor for the season at no extra cost and it packs away easily too! You can find the full tutorial at Easy and Cute Mummy and Snowman Reversible Pillow Cover
How To Make Pillow Covers: Easy and Awesome No Sew DIY Q & A
Making cushion covers is a fun and creative DIY project. Here’s a basic guide on how to make simple square cushion covers. You can adjust the measurements and techniques based on your specific cushion size and style preferences.
Materials:
Fabric of your choice
Sewing machine or needle and thread
Scissors
Measuring tape
Pins
Cushion insert
Steps:
1. Measure your cushion:
Measure the width and length of your cushion. Add 1 inch (2.5 cm) to each measurement for seam allowances.
2. Cut the fabric:
Cut two fabric pieces according to the measurements obtained in step 1. These will be the front and back panels of your cushion cover.
3. Pin the fabric:
Place the two fabric pieces together with the right sides facing each other. Pin the edges to secure them in place.
4. Sew the edges:
Using a sewing machine or hand-sewing, stitch around three sides of the fabric, leaving one side open. Use a 1/2-inch (1.25 cm) seam allowance. This open side will be used to insert the cushion.
5. Trim corners:
Trim the corners diagonally to reduce bulk when you turn the cover right side out. Be careful not to cut into the stitches.
6. Turn it right side out:
Reach inside the cover and turn it right side out through the open side. Use a pencil or a pointed object to gently push out the corners.
7. Insert the cushion:
Insert the cushion into the cover through the open side. Make sure the cushion is positioned properly and fills the corners of the cover.
8. Hand-sew or machine-sew the open side:
Fold in the edges of the open side and either hand-sew or machine-sew it closed. You can use a slip stitch or a straight stitch for this step.
9. Finishing touches:
Press the cushion cover with an iron to smooth out any wrinkles and give it a neat appearance.
Feel free to customize your cushion covers by adding embellishments, using different fabrics, or experimenting with closures like zippers or buttons. Once you get the hang of making basic cushion covers, you can explore more advanced techniques and designs.
If you don’t have a sewing machine, you can still make a pillowcase using hand-sewing techniques. Here’s a simple method for crafting a basic pillowcase without the need for a sewing machine:
Materials:
Fabric of your choice (about 1.5 to 2 yards, depending on pillow size)
Scissors
Measuring tape
Straight pins
Needle and thread
Steps:
1. Measure and cut the fabric:
Measure your pillow dimensions and add 1 inch (2.5 cm) to the width and 6 inches (15 cm) to the length for seam allowances and folding.
Cut the fabric according to the measurements.
2. Fold the fabric:
Place the fabric wrong side up on a flat surface.
Fold one short edge of the fabric over by about 1/4 inch (0.6 cm) and press it with your fingers.
3. Fold and pin the fabric:
Fold the same edge over again, this time about 1 inch (2.5 cm), and pin it in place.
Repeat this process on the other short edge of the fabric.
4. Hand-sew the hems:
Thread your needle and knot the end.
Starting at one corner, sew along the folded edge using a basic running stitch. Keep your stitches close together and secure the fabric in place.
Continue sewing until you reach the end, then tie a knot to secure the thread.
5. Create the main pillowcase:
Place the fabric right side up with the hemmed edges at the top and bottom.
Fold the fabric in half lengthwise, right sides together, aligning the raw edges.
Pin the open sides together.
6. Sew the side seams:
Thread your needle, and starting at the top, sew down the open side using a running stitch. Ensure your stitches are close together for a secure seam.
Repeat on the other side.
7. Finish the seams:
Trim any excess fabric from the side seams, leaving about 1/4 inch (0.6 cm) for seam allowance.
To prevent fraying, you can either zigzag stitch along the raw edges or apply a small amount of fabric glue.
8. Turn it right side out:
Turn the pillowcase right side out through the open end.
9. Insert the pillow:
Slide your pillow into the pillowcase, making sure it fills the corners.
10. Hand-sew the open end:
Fold in the raw edges of the open end and hand-sew it closed using a running stitch. Tie a knot to secure the thread.
That’s it! You’ve made a pillowcase without a sewing machine. This method is simple and allows you to create custom pillowcases with a personal touch.
Wrapping fabric around a pillow is a simple way to create a decorative cover without sewing. This method is commonly known as a “no-sew pillow cover”, or sometimes an envelope pillow. Here’s a step-by-step guide:
Materials:
Fabric of your choice (large enough to wrap around the pillow)
Pillow insert
Scissors
Fabric glue or fusible bonding web (optional)
Steps:
1. Measure and Cut:
Measure the dimensions of your pillow, including its width, length, and thickness.
Cut the fabric to be large enough to wrap around the pillow with some overlap.
2. Place the Fabric:
Lay the fabric on a flat surface with the wrong side facing up.
3. Position the Pillow:
Place the pillow in the center of the fabric, aligning it with one edge.
4. Fold and Overlap:
Fold the fabric over the pillow, covering one side completely. If the fabric is larger than the pillow, you’ll have an overlap on one side.
5. Secure with Glue or Fusible Bonding Web (Optional):
If you want a more secure and permanent hold, you can use fabric glue or fusible bonding web along the edges of the fabric to seal it in place.
Follow the instructions on the glue or bonding web packaging for the best results.
6. Fold and Secure the Other Side:
Fold the fabric over the opposite side, creating a neat and snug cover for the pillow.
Again, you can use fabric glue or bonding web along the edges to secure this side.
7. Trim Excess Fabric (Optional):
If there is excess fabric, you can trim it for a cleaner finish. Leave a little extra for a decorative fringe if desired.
8. Let it Dry (If Using Glue):
If you’ve used fabric glue, allow the pillow cover to dry completely before handling or using.
9. Adjust and Display:
Adjust the fabric as needed to ensure a tight and neat fit.
Display your wrapped pillow on a couch, bed, or chair to add a decorative touch to your space.
This method is quick and doesn’t require any sewing. It’s great for temporary or decorative pillow covers. Keep in mind that if you want a more durable and washable option, sewing a traditional pillowcase may be a better choice.
To make a pillowcase for a 20×20 inch pillow, you’ll need to consider the fabric requirements for both the front and back panels of the pillowcase. Here’s a general guideline:
Front and Back Panels:
The fabric for each panel should be at least the size of the pillow plus seam allowances. For a 20×20 inch pillow, you’ll add seam allowances to both dimensions.
Add 1 inch (2.5 cm) to both the width and length for seam allowances. This means each panel should be 21×21 inches.
Calculations:
Each panel requires 21×21 inches of fabric.
Multiply this by 2 (for the front and back panels).
Total Fabric Needed:
21 inches (width) x 21 inches (length) x 2 panels = 882 square inches
Yardage Calculation:
Convert square inches to square yards (1 yard = 36 inches).
882 square inches / 1296 square inches (1 square yard) = approximately 0.68 square yards.
So, you’ll need approximately 0.68 square yards of fabric for the front and back panels of a 20×20 inch pillowcase. When purchasing fabric, it’s a good idea to round up to ensure you have enough for any pattern matching or cutting variations.
To determine the amount of fabric needed for a 12×12 inch pillow, you’ll need to consider the dimensions of the fabric panels and account for seam allowances. Here’s a general guideline:
Front and Back Panels:
The fabric for each panel should be at least the size of the pillow plus seam allowances. For a 12×12 inch pillow, add seam allowances to both dimensions.
Add 1 inch (2.5 cm) to both the width and length for seam allowances. This means each panel should be 13×13 inches.
Calculations:
Each panel requires 13×13 inches of fabric.
Multiply this by 2 (for the front and back panels).
Total Fabric Needed:
13 inches (width) x 13 inches (length) x 2 panels = 338 square inches
Yardage Calculation:
Convert square inches to square yards (1 yard = 36 inches).
338 square inches / 1296 square inches (1 square yard) = approximately 0.26 square yards.
So, you’ll need approximately 0.26 square yards of fabric for the front and back panels of a 12×12 inch pillow. When purchasing fabric, it’s a good idea to round up to ensure you have enough for any pattern matching or cutting variations.
Are you ready to make a new throw pillow and then place these cute pillows somewhere in your home? I like to make these pillow cases seasonally too, and you just trade them out.


What fun Chas – saving his sweater is the sweetest thing! You’re so creative! I’m going to keep this in mind for when I start cleaning out my closet! Thanks for even more inspiration! Pinned.
What a great idea to use your husbands sweater and make a really nice pillow out of it. Thanks for sharing at Cooking and Crafting with J&J!
Thank you so much Julie. We are enjoying it so much more now and he’s thrilled to see it every day. Thanks for stopping by.
I have a huge pile of clothes to get rid of. Now I’m thinking I’ll go back through them and see what I can use for pillows! ❤️?
Thanks for the idea!!! ?
Thank you Jen, and I love that you are thinking about making some pillows too. They’re fun and I think make my house feel cozy during the cold winter months 🙂
It turned out great! I love a good new sew project. I also love pillows, so this is right up my alley. Thanks so much for sharing at Sweet Inspiration.
Thank you Amy, I’m so glad you like it. Thanks for a great link party
Saw you on Bloggers Pit Stop. What a great idea for recycling those old sweaters. My DH will NOT wear a sweater but has plenty. I now know what I will be doing with them 😉
Thank you so much for stopping by and I’m so excited that you might give this a try too 🙂
Using hot glue is smart, can they be washed? Found you on Simple Homestead Blog Hop.
Hi Candy – great question. I have washed mine on a delicate/hand wash cycle and then air dried them.
Great idea for folks who don’t sew. You could still make your own pillows from old sweaters. I love a DIY up-cycle project! Have a great week, Kippi #kippiathome
Thank you so much Kippi! I actually didn’t learn how to sew until much later in life (my husband taught me when his grandma gave me a sewing machine – lol). I have learned to use a hot glue gun for so many projects. We always keep one on hand and ready at our dance productions 🙂
Such a great idea for all the sweaters we don’t wear anymore and taking closet space because they are in good condition and we say we will still let thecwear them but never do. Let the pillows hunt begin.
Thank you so much Mihaela, you are so right. We’d much rather enjoy them than keep them in the dark 🙂
I am from Portsmouth in the UK originally but i have been living in Canada about 30-40 minutes west of Ottawa Ontario, Canada
Thank you so much for sharing Tracy. I was fortunate to do some traveling in the UK a couple years ago and loved it there. I have only been to Canada briefly and hope to travel and see more someday.
hey pretty cool chas ask your husband first before stealing it
Thanks Faith, and I did – he was totally fine with it. He loves it even more now because we use it all the time.