
Complete Kitchen Deep Cleaning Guide: Step-by-Step Tutorial

Learn how to give your kitchen a thorough deep clean with our step-by-step tutorial. From top to bottom, we cover everything from dusting high areas to disinfecting appliances and floors. Transform your kitchen into a sparkling, organized space with these expert cleaning tips.
Do you hate harsh cleaning chemicals? Maybe it’s after the holidays, the guests are gone. This is a good time to give your kitchen a good deep cleaning. This can be a daunting task. In this tutorial I will give you a step-by-step guide showing you how to achieve a clean kitchen using natural products. When it comes to all-natural cleaning supplies, white vinegar is a good all-purpose cleaner, and baking soda can be used as a gentle cleanser. I will show you some easy steps and kitchen cleaning tips to add to your cleaning routine so you can get through all your deep cleaning tasks in record time. Let’s get started!

Complete Kitchen Deep Cleaning Guide: Step-by-Step Tutorial Video

How do you clean a kitchen step by step? What order should I clean the kitchen? What is the best way to deep clean a kitchen?
Kitchen Deep Cleaning Tutorial
Introduction: You’ve been putting off cleaning your kitchen, but I’m here to show you how easy it is to give it a deep clean. We’ll start by working from top to bottom, systematically cleaning each area. Let’s get started!
Materials You’ll Need:
- Duster with extension rod
- Murphy’s Oil Soap
- Clean washcloths
- Dawn dish soap
- Warm water
- Microfiber cleaning cloths
- Lemon juice
- Vinegar
- Magic eraser (optional)
- Baking soda (for oven cleaning)
- Cooktop cleaner (if needed)
- Scrub pad
- Vacuum cleaner
- Steam mop (or regular mop)
- Paper towels
- Dishwashing gloves (optional)
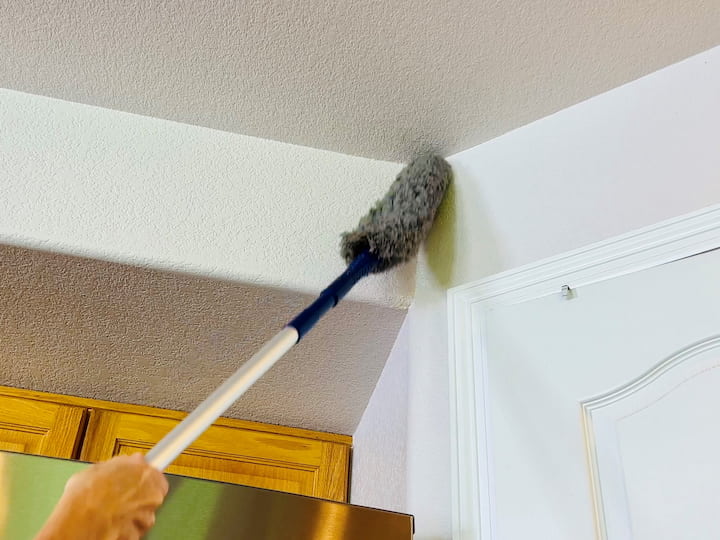

Dusting High Areas
- Ensure you have your duster with the extension rod ready for use. Make sure the extension rod has the appropriate cleaning device attached, such as a brush or duster head.
- Start by examining your kitchen for high edges, creases, and crevices where dust, cobwebs, and debris tend to accumulate. These areas often include the tops of windows, corners of cabinets, and spaces between appliances.
- Extend the rod of your duster to the desired length. If needed, use a step stool to safely access high areas. Gently run the duster along the edges, corners, and crevices you identified. The duster’s bristles will capture dust and debris.
- Move around the kitchen systematically, using the extension rod and duster to clean one area at a time. Focus on the upper edges and corners, ensuring you reach every nook and cranny.
- If your extension rod comes with multiple cleaning attachments, feel free to switch to a different attachment if it’s better suited for a specific area. For example, a brush attachment might be more effective for grooves and tight spaces.
- Pay close attention to removing cobwebs, as they can gather in corners and higher areas. The duster’s bristles will catch and remove these webs effectively.
- As you work your way around the kitchen, ensure you’ve covered all the edges, windows, and crevices. Take your time and be thorough.
- After dusting, take a quick look around to make sure you haven’t missed any areas. If you spot any remaining debris, use the duster or an appropriate attachment to remove it.
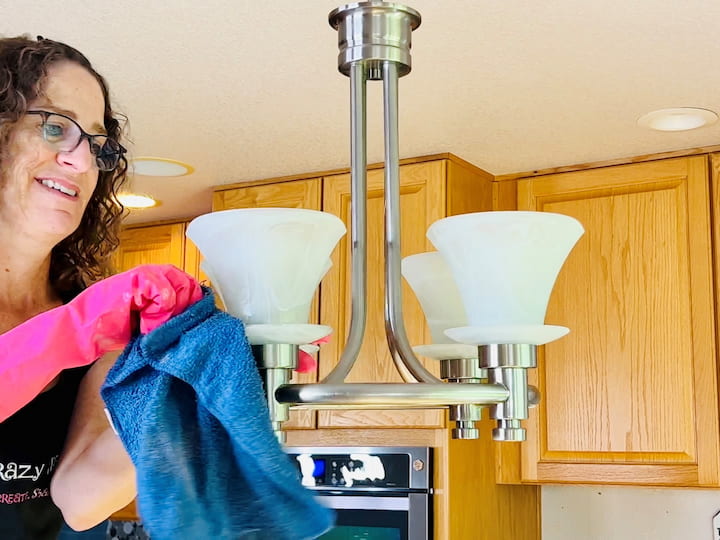
Clean Light Fixtures
- Start by preparing a solution of soapy water. Add a small amount of mild dish soap to water, creating a gentle cleaning solution.
- Before you begin cleaning, ensure that the light fixtures are turned off. This is for safety reasons and also allows the fixtures to cool down if they’ve been in use.
- Dip a cleaning cloth or sponge into the soapy water solution. Gently wring out any excess water to prevent dripping. Use the damp cloth to wipe down the entire light fixture, including the glass components and light bulbs.
- Pay special attention to the glass parts of the fixture. Wipe them thoroughly to remove dust, dirt, and any residue. Similarly, clean the light bulbs, taking care not to wet the electrical components.
- If your light fixture is easily detachable, consider removing it for a more thorough cleaning. Carefully disconnect the fixture according to the manufacturer’s instructions. This will allow you to clean each component separately.
- For fixtures that can be disassembled, wash each piece using the soapy water solution. Gently clean the glass, frame, and other parts. After cleaning, make sure the components are completely dry before reassembling.
- Once all the components are clean and dry, reassemble the light fixture carefully. Make sure all parts are securely in place. If needed, use a screwdriver to tighten any screws.
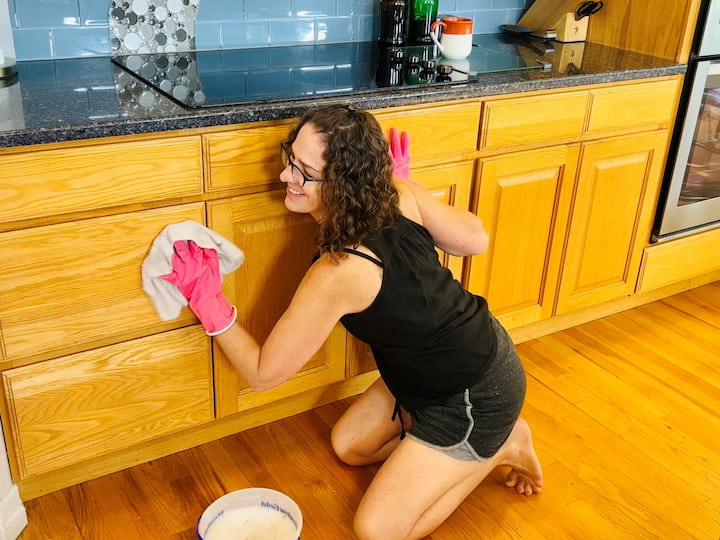
How do you get grease and grime off wood cabinets?
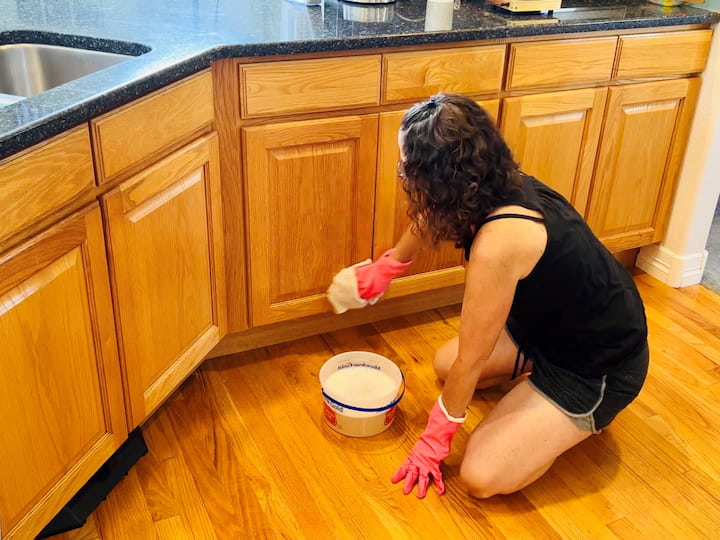
Cleaning Wooden Surfaces
- Begin by preparing your cleaning solution. In a bucket, combine about a quarter cup of Murphy’s Oil Soap with one gallon of water. This mixture will provide effective cleaning and conditioning for your wooden surfaces.
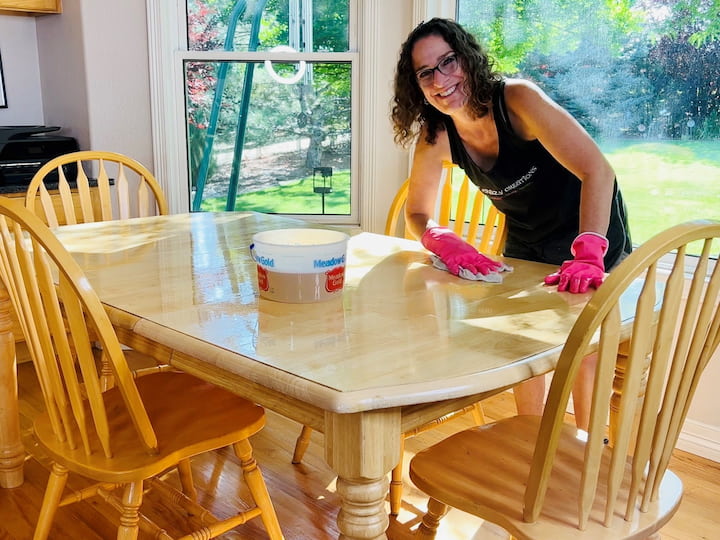
- Dampen a clean washcloth with the Murphy’s Oil Soap mixture. Gently wring out any excess liquid. Use the damp cloth to wipe down your wood kitchen table. This will remove dust, grime, and restore the wood’s natural luster. Wipe in the direction of the wood grain for the best results.
- Continue using the same Murphy’s Oil Soap mixture to clean your kitchen cabinets. Start from the top of the cabinets and work your way down. Pay extra attention to creases, crevices, and areas that are frequently touched with dirty hands. The soap will effectively remove grease buildup and dirt, leaving your cabinets refreshed.
- Wooden surfaces in the kitchen often accumulate grease particles from cooking. Murphy’s Oil Soap is specially designed to cut through this greasy mess and restore the wood’s natural shine.
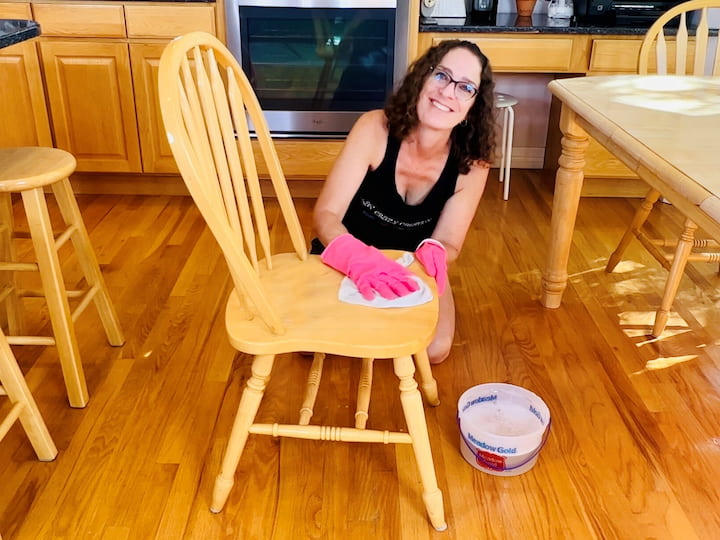
- Extend the use of the Murphy’s Oil Soap mixture to clean your chairs and stools as well. Wipe down these wooden surfaces with the damp washcloth. This will remove dirt, grime, and any stains that have accumulated over time.
- Murphy’s Oil Soap is known for its natural formula (98% natural), making it a safe and effective choice for cleaning and conditioning wooden surfaces. Its gentle yet powerful action is perfect for maintaining the integrity of your wood.
I love cleaning mine with Murphy’s Oil Soap. I have a step by step tutorial dedicated just to cabinets and you can read it: Best Way To Clean Kitchen Cabinets: Quick and Easy

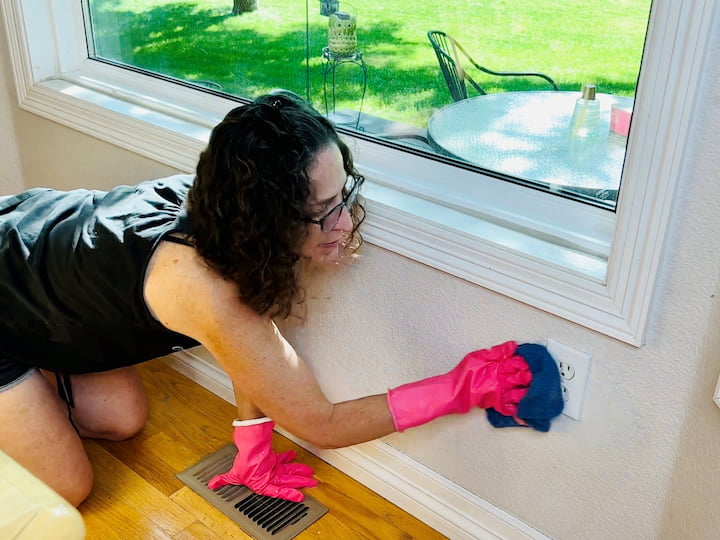
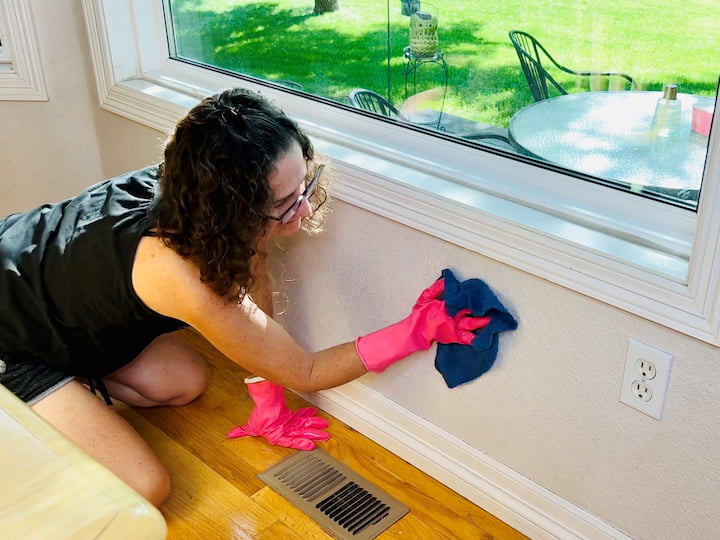
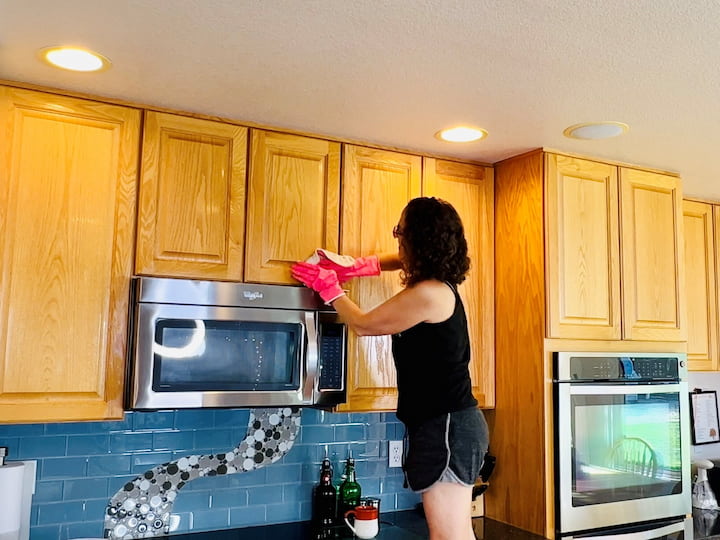
Wiping Walls and Fixtures
- Start by preparing your cleaning solution. In a bucket, add approximately a tablespoon of Dawn dish soap (or Castile soap) and fill it with warm water. This mixture will provide an effective yet gentle solution for cleaning various surfaces in your home.
- Make sure you have a clean washcloth or rag ready for use. The absorbent nature of a washcloth makes it ideal for wiping down surfaces.
- Dip the washcloth into the dish soap solution, allowing it to become damp. Start your cleaning process from the top of the room and work your way downward. This prevents any drips or streaks from forming on areas you’ve already cleaned.
- Wipe down moldings around windows, doors, and any other areas in your home. Be sure to catch the top ledge of your pantry door if you have one. The soapy solution will help remove dust and grime.
- Continue using the damp washcloth to wipe down your walls from top to bottom. The solution will effectively lift dirt and stains, leaving your walls looking fresh.
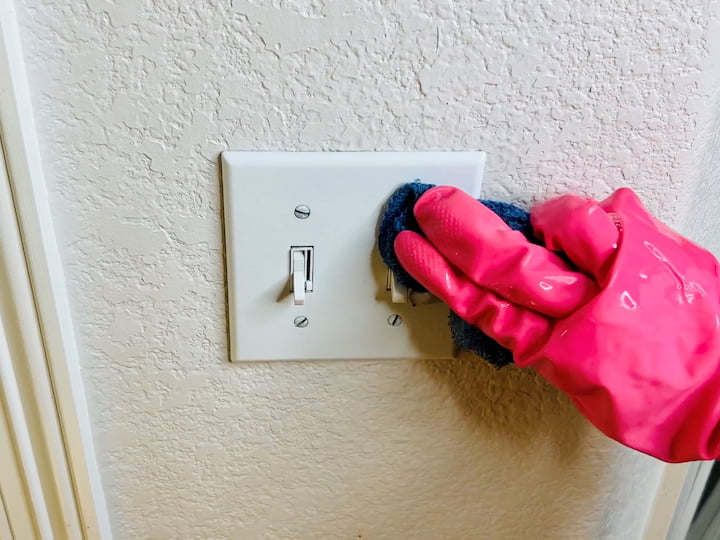
- As you work your way down, don’t forget to clean light switches and electrical outlets. These are often touched and can accumulate dirt over time. Use the damp washcloth to gently wipe them clean.
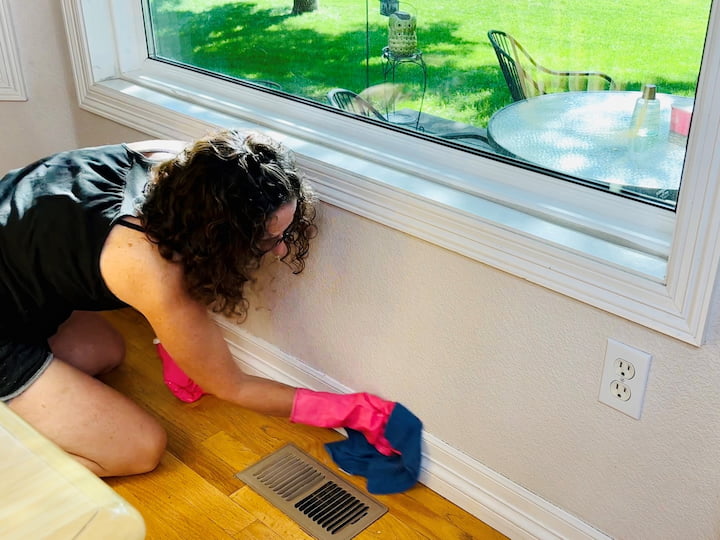
- Finally, finish by cleaning your baseboards. These areas can gather dust and debris, so the dish soap solution will help to remove these particles and leave your baseboards looking tidy.
- Incorporate this cleaning routine into your schedule to keep your home looking its best. Regular maintenance prevents dirt and grime from building up and makes your cleaning sessions easier over time.
- If you prefer a natural cleaning option, you can use Castile soap in place of Dawn dish soap. Castile soap is gentle and plant-based, making it a great eco-friendly alternative for cleaning.

Cleaning Windows
- Wipe Down the Win Begin by wiping down all of your windows using the dampened microfiber cloth. The microfiber material is effective at capturing dirt and grime, ensuring a thorough clean. Work from top to bottom and left to right to ensure you cover the entire surface.
- Once you’ve finished wiping down all of your windows with the first cloth, it’s time to switch to the second microfiber cloth.
- Take the second microfiber cloth and use it to dry the windows you’ve just cleaned. The microfiber material will absorb the moisture and any remaining dirt, leaving your windows streak-free and sparkling.
You can find my full tutorial here: Easy and Awesome Eco Friendly Mirror and Window Cleaning Here is a link to the cleaning cloths I use: Moja Works Microfiber Glass Cleaning Cloths and you can find them on Amazon here

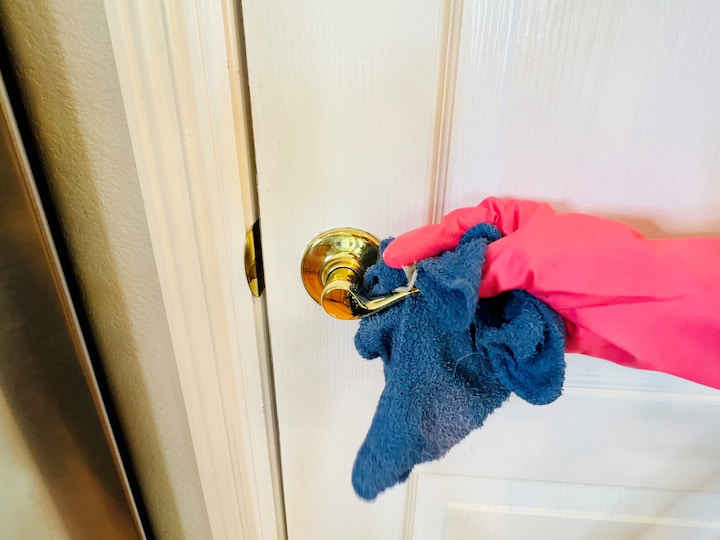
Clean the Pantry Door and Handles
- Take a moment to assess the condition of your pantry door. If it’s visibly dirty, greasy, or has handprints, it’s time for a clean. Prepare a bucket of soapy water if necessary, using a mild dish soap.
- If your pantry door needs a refresh, prepare a bucket of soapy water. Make sure the water is not too sudsy, as excess soap residue can leave streaks.
- Dip a cleaning cloth or sponge into the soapy water. Start by wiping down the pantry door from top to bottom. Pay attention to the molding, edges, and corners where greasy debris tends to accumulate.
- While cleaning the door, focus on the door handle as well. Wipe around the handle to remove any handprints or smudges. Ensure the handle is thoroughly cleaned.
- After cleaning the handle, use a disinfectant spray to thoroughly disinfect it. This step is especially important, given that the door handle is frequently touched.
- If you come across stubborn spots or particularly sticky residue, consider using a magic eraser. Gently buff the stubborn area using the magic eraser until the spot is gone. Be cautious not to use excessive force that could damage the door’s finish.

Cleaning Appliances
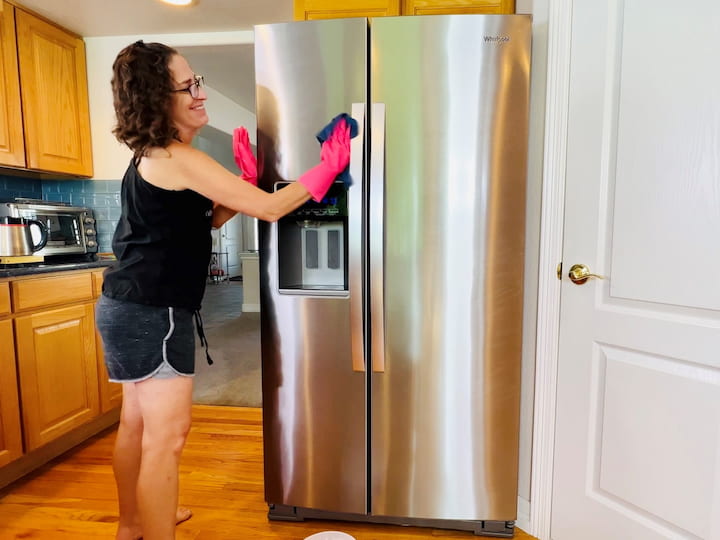
- Cleaning the Refrigerator Begin by wiping down your refrigerator. Clean the handles thoroughly, as they are frequently touched. Wipe all surfaces from top to bottom and on all sides. Don’t forget the top, as it tends to collect dust.
- Dishwasher Care Move on to the dishwasher. Clean the front and inside of the dishwasher. Use a disinfectant to sanitize the handles and keypad.
- Microwave Cleaning For the microwave, mix one tablespoon of lemon juice and about one cup of vinegar in a microwave-safe bowl. Microwave the mixture for about five minutes. The steam will loosen grease and grime. Afterward, wipe down the inside of the microwave and wash any removable components.
Additional information for those who have stainless steel appliances.
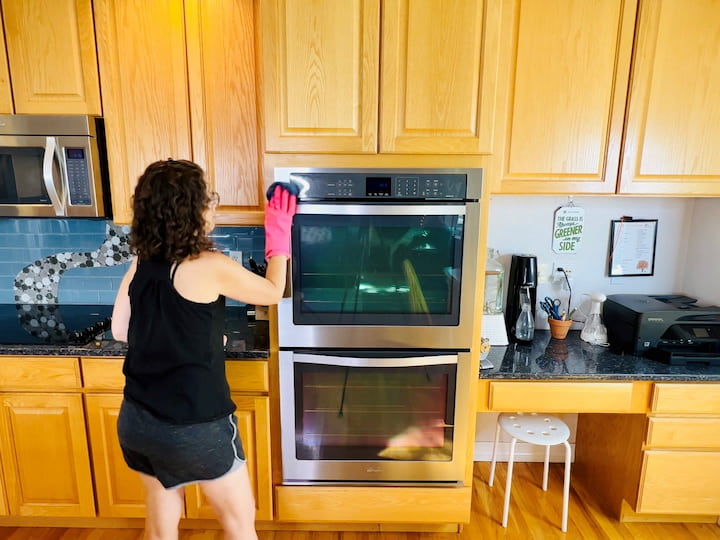
- Oven Exterior Cleaning Wipe down the outside of your oven from top to bottom. Pay attention to the keypad, handles, and all external surfaces.
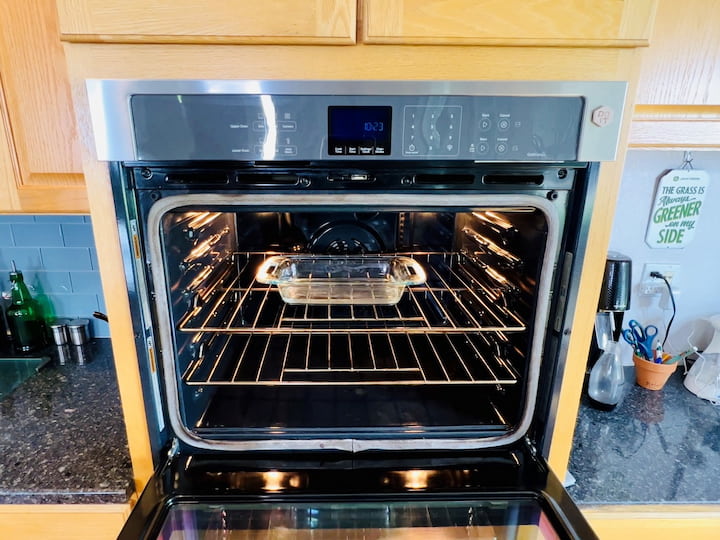
- Self-Cleaning Oven If you have a self-cleaning oven, run the self-cleaning cycle. Remember to remove the oven racks before starting the cycle.
- Steam Cleaning for Non-Self-Cleaning Ovens For non-self-cleaning ovens, add a pan of water and turn the oven on for about 30 minutes. The steam will help loosen debris for easier cleaning.
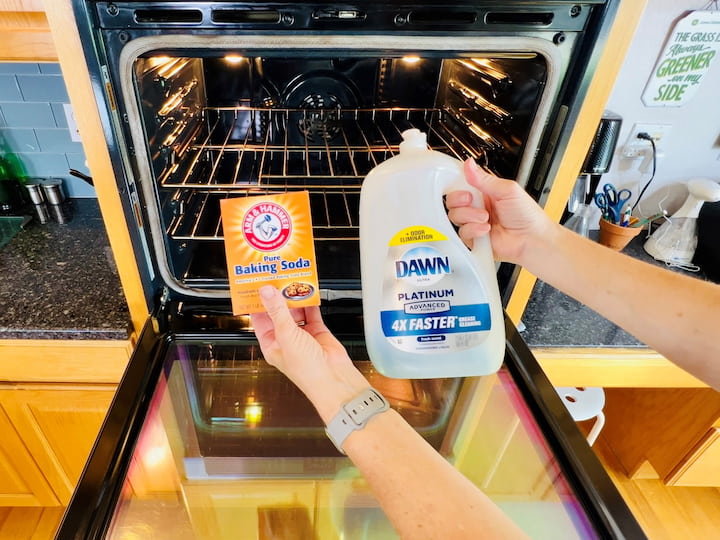
- Baking Soda and Dish Soap Method Alternatively, make a paste using Dawn dish soap and baking soda. Apply this paste to the interior glass and surfaces of the oven. Allow it to sit for a while to break down grease and grime, then wipe clean.
Clean the oven racks and oven window, you’ll see those tutorials down below.
Deep Cleaning the Refrigerator
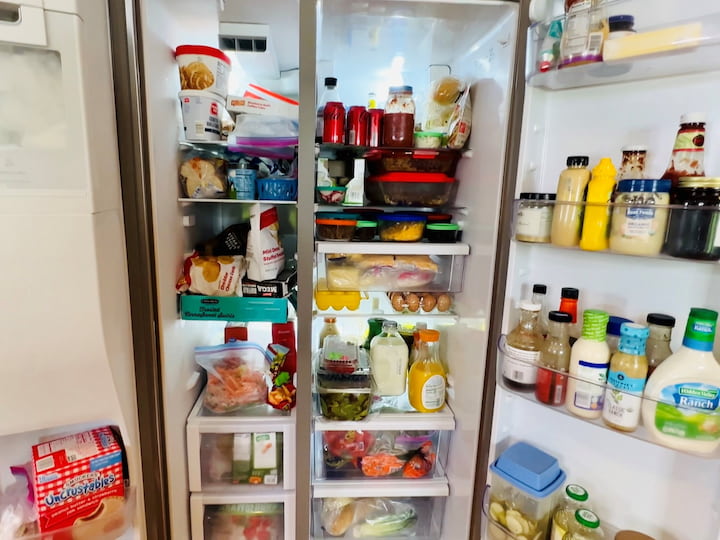
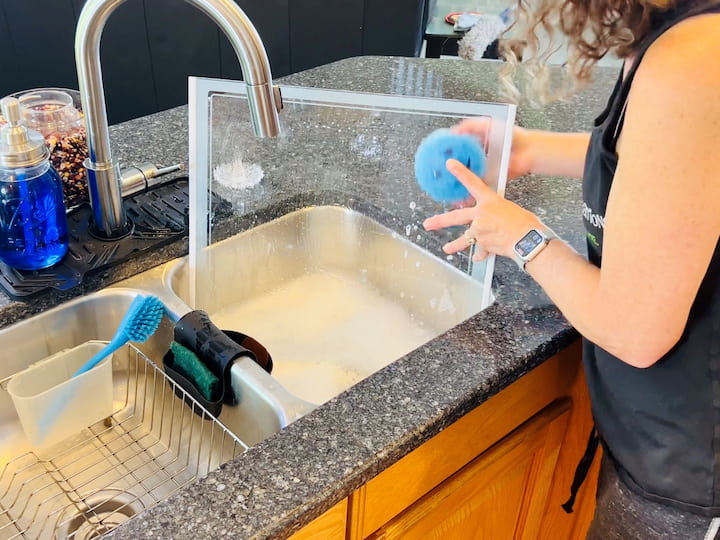
- Begin by removing all items from your refrigerator and freezer. Take them out one at a time, inspecting each item. Discard anything that’s expired or no longer suitable for consumption.
- Fill your sink or basin with water and add a small amount of dish soap. Remove all drawers and shelves from your refrigerator. Place them in the soapy water to soak. Scrub them clean with a cloth or sponge, then rinse them thoroughly. Dry each piece before returning them to their respective spots.
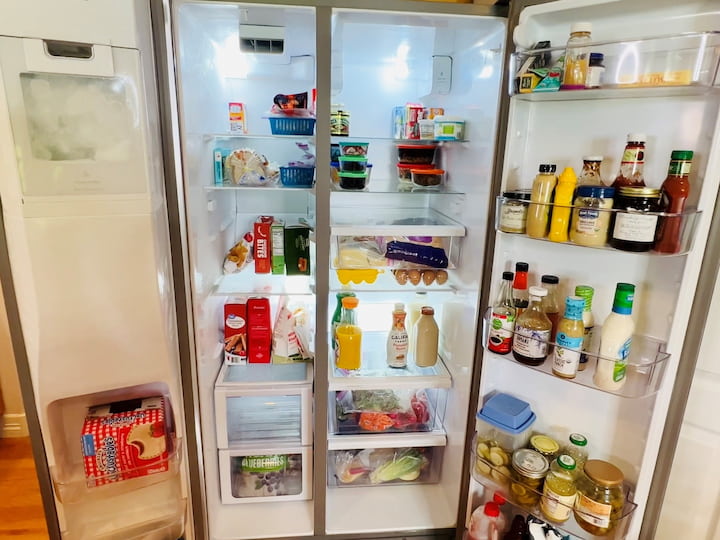
- While putting the drawers and shelves back, take the opportunity to organize the items. Group similar items together to create an organized layout that makes it easy to find what you need.
- As you put items back, only return the ones you intend to keep. Organize items by type and size to maximize space. This is a great time to get rid of clutter and items you rarely use.
- With the interior empty, use a cleaning cloth or sponge to wipe down all the walls, corners, and surfaces of both the refrigerator and freezer compartments. Make sure to remove any spills or residues.
- Don’t forget the freezer side! Apply the same process: remove items, clean shelves and drawers, organize items, and wipe down all surfaces.
- After cleaning and organizing, step back and appreciate the transformation. A clutter-free and clean refrigerator and freezer make a big difference.
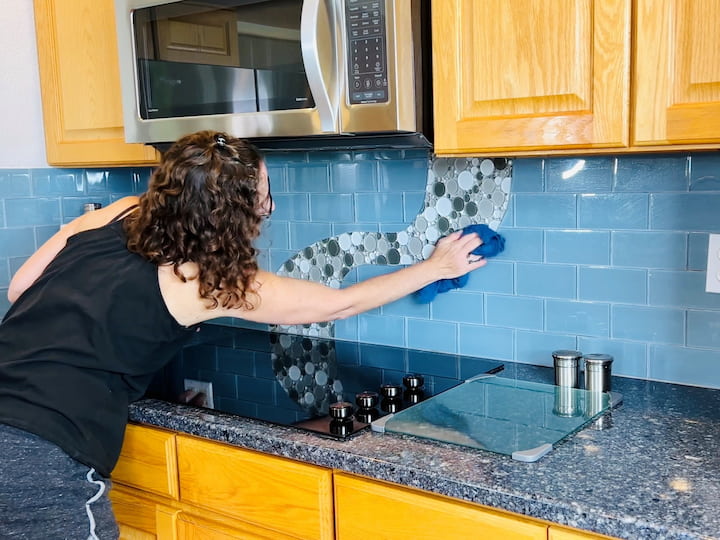
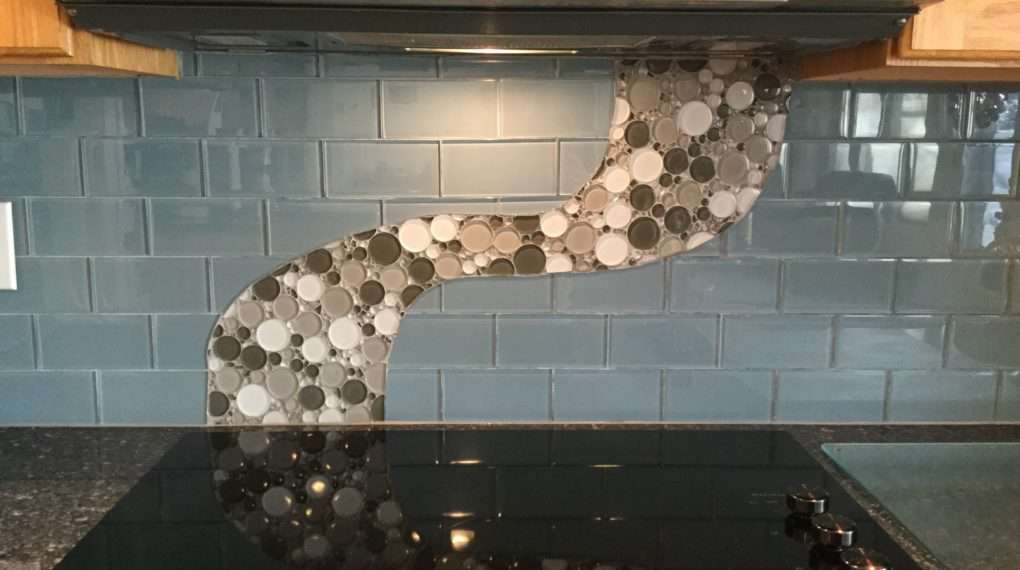
Clean the Backsplash
- Before you start, make sure you have a new rag or microfiber cloth and a solution of clean soapy water ready. Fill a bucket or container with water and add a small amount of mild dish soap to create the soapy solution.
- Ensure that the electrical outlets are properly covered to prevent any water from seeping in. Safety should always be a priority when cleaning around electrical fixtures.
- Dip the new rag or microfiber cloth into the soapy water solution. Wring out any excess water to avoid dripping. Start wiping down the backsplash from the top, working your way down. Pay special attention to areas near the stove where grease tends to accumulate.
- As you clean the backsplash, gently wipe down the outlets embedded in the wall. Be cautious around these areas to avoid water getting into the electrical components.
- Periodically rinse the rag in clean water and wring it out to remove accumulated dirt and soap residue. This will help prevent streaks when drying.
- Once you’ve thoroughly wiped down the entire backsplash, use a dry section of the rag or a separate dry cloth to buff the surface. This step will remove any remaining moisture and bring out the shine in your backsplash.
- Inspect the backsplash for any streaks or water spots. If you notice any, simply dampen a corner of the cloth with clean water, wring it out well, and gently wipe away the streaks.
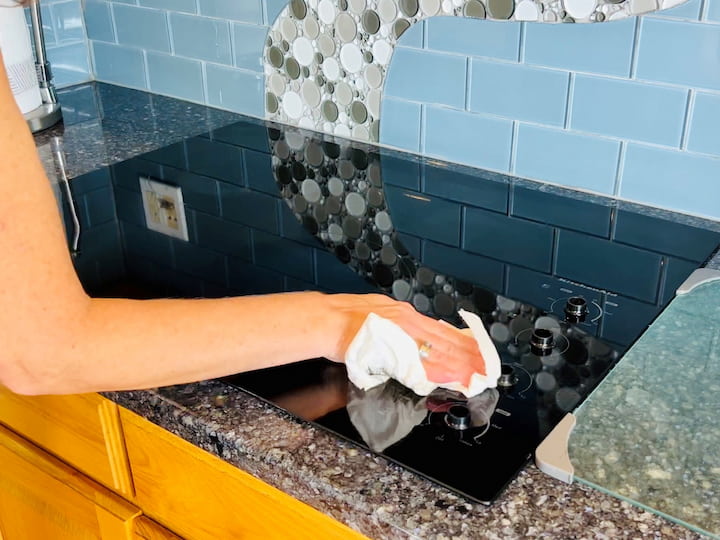
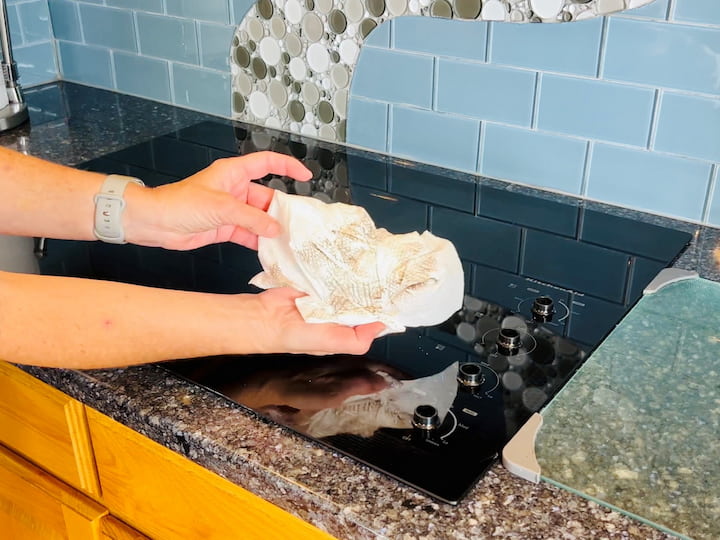
Stovetop Cleaning
- Ensure the stove is turned off and has cooled down before starting the cleaning process. Safety first!
- Using a clean paper towel or cloth dampened with soapy water, wipe down the stovetop surface. Remove any loose debris, grease, or spills.
- If your stove has removable knobs, take them off and wash them separately using warm soapy water. This will help eliminate built-up grime and ensure thorough cleaning.
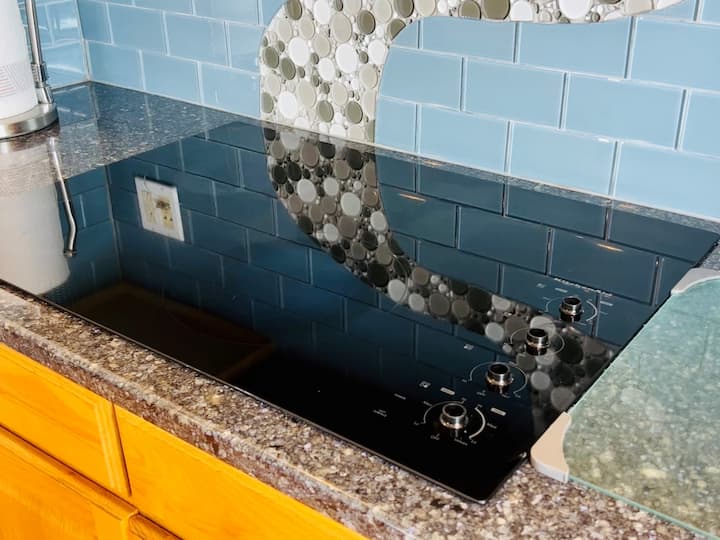
- Inspect your stovetop for any areas with cooked-on grease or stubborn grime that regular wiping couldn’t remove.
- For tough spots, apply a suitable cooktop cleaner according to the manufacturer’s instructions. Squirt the cleaner directly onto the problem areas.
- Use a paper towel to spread the cooktop cleaner over the affected areas. This helps to loosen and break down the cooked-on debris.
- If your stovetop surface is glass, use a Scotch scrubber that is safe for glass surfaces. Gently scrub the affected spots to remove burnt-on residue from food. Be cautious not to scratch the surface; gentle pressure is key.
- Take a clean paper towel and wipe off the cooktop cleaner along with the loosened debris. Make sure to remove all traces of the cleaner to prevent streaks and spots.
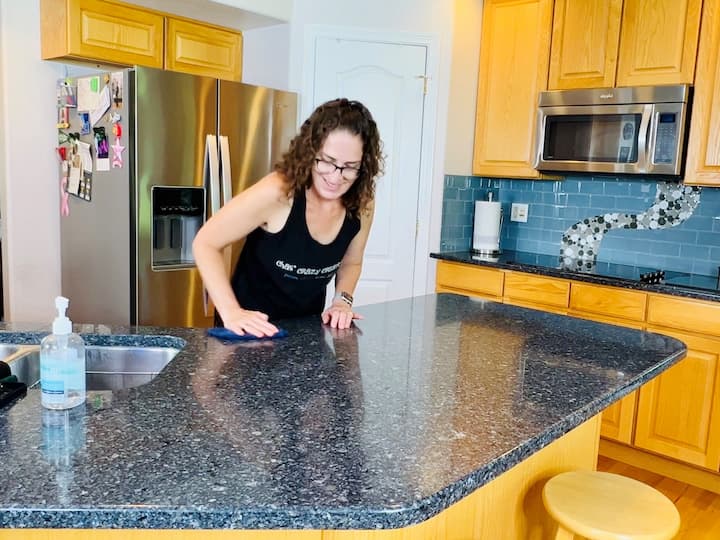
Countertop Cleaning
- Before you begin cleaning, remove any items, utensils, or appliances from your counters. This provides you with a clear surface to work on.
- Take a rag or microfiber cloth and use it to wipe away crumbs and any greasy spots on the counters. Start from one end and work your way across. This initial step helps to eliminate loose debris.
- Separate your cleaning rags into two groups. One group will be used for wiping up crumbs and greasy spots (you can wash these later), and the other group will be for the main cleaning process.
- Fill a container or bucket with water and add a small amount of mild dish soap. Mix it gently to create a soapy solution.
- Dip a clean rag into the soapy water solution, making sure it’s damp but not soaking wet. Wring out any excess water. Begin wiping down the counters with the damp rag. Start from one end and work systematically across the entire counter space.
- As you wipe down the counters, make sure to use even strokes. This helps to prevent streaks from forming. The combination of clean soapy water and the rag will effectively remove grease and grime.
- If the rag becomes dirty or too soapy, rinse it in clean water and wring it out well before continuing. This prevents spreading dirt around and ensures a consistent clean.
- Repeat the process for all the counters in your kitchen, ensuring that each one receives the same attention and care.
- Once you’ve finished wiping down all the counters, collect the rags that were used for crumbs and greasy spots. Place them in a laundry basket or hamper to be washed later.
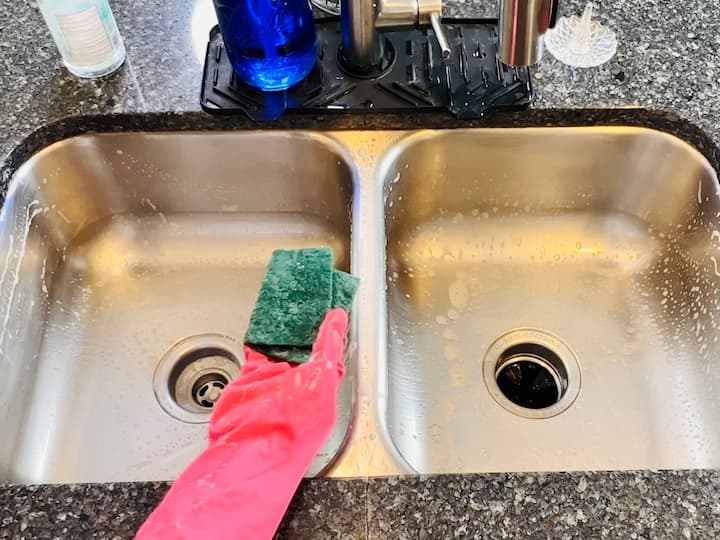
Step 8: Sink Disinfection
- You have a few options to clean your sink. You can use baking soda, dish soap, or a combination of both for thorough cleaning and disinfection.
- If you’re starting with baking soda, sprinkle a generous amount directly into the sink. Use a scrub pad or sponge to vigorously scrub the sink’s surface. Baking soda’s abrasiveness helps remove debris and stains. After scrubbing, rinse the sink thoroughly to remove the baking soda residue.
- For disinfection, sprinkle a small amount of dish soap into the sink. Scrub the sink using a scrub pad or sponge, focusing on areas that require disinfection. Dish soap has antibacterial properties that help kill germs. Rinse the sink thoroughly to remove any soap residue.
- To tackle both cleaning and disinfection, mix baking soda and dish soap together to form a paste. Apply this mixture to the sink’s surface and scrub using a scrub pad or sponge. The combination of the two ingredients helps break down grease and grime while disinfecting the sink. Rinse the sink thoroughly after scrubbing.
- During the cleaning process, pay special attention to removing crumbs and greasy chunks that may have accumulated in the sink. Baking soda’s abrasive action and dish soap’s degreasing properties work together to combat these issues.
- While cleaning the sink, don’t neglect the sink handles and faucet. These areas are frequently touched and should also be sanitized. Use a cloth with a small amount of dish soap (like Dawn) to wipe down the handles and faucet, then rinse them thoroughly.
- After cleaning and disinfecting, thoroughly rinse the sink with water. Make sure no cleaning agents or residue remain in the sink.
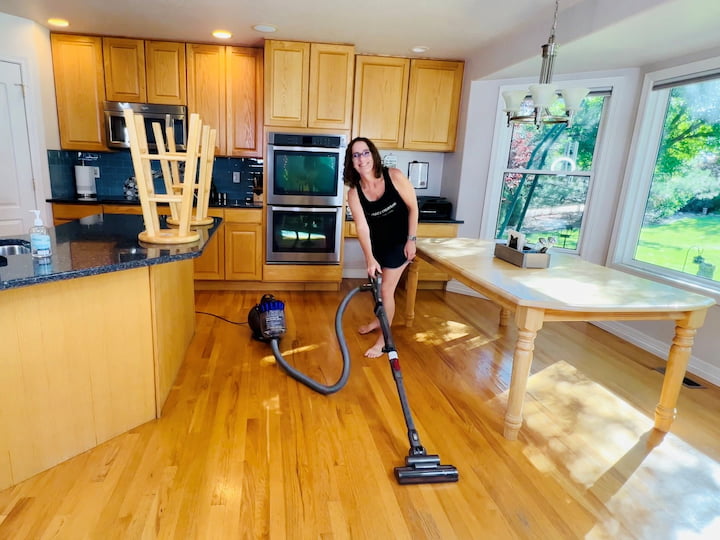
Step 9: Floor Cleaning
- Before you begin, ensure that all items, chairs, and obstacles are moved off the kitchen floor. This will give you a clear and unobstructed area to clean.
- Vacuuming is the first step to remove loose dirt, crumbs, and debris. Start from one end of the room and work your way towards the exit. Vacuum the entire floor thoroughly, including corners and edges.
- As you noticed during the cleaning process, dust and debris tend to settle on the floor. That’s why it’s recommended to clean the floors last. This way, any particles that fell while cleaning other surfaces are captured during the final floor cleaning.
- Pay attention to corners, baseboards, and areas around appliances. If your vacuum has attachments, use them to reach tight spaces and edges effectively.
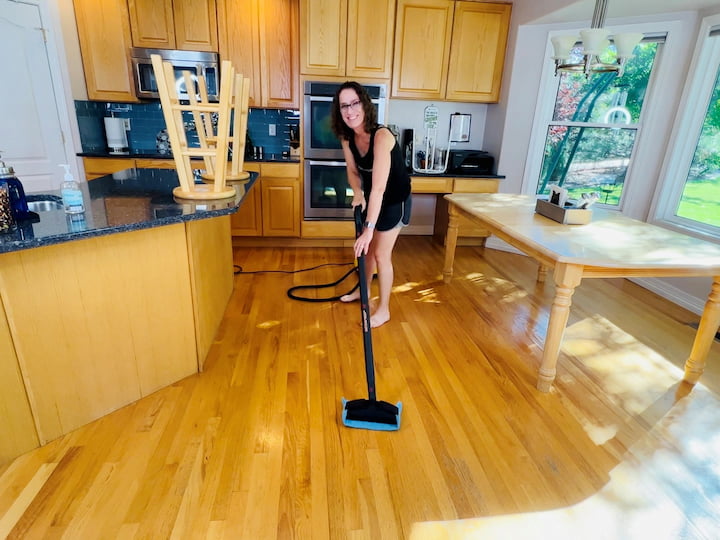
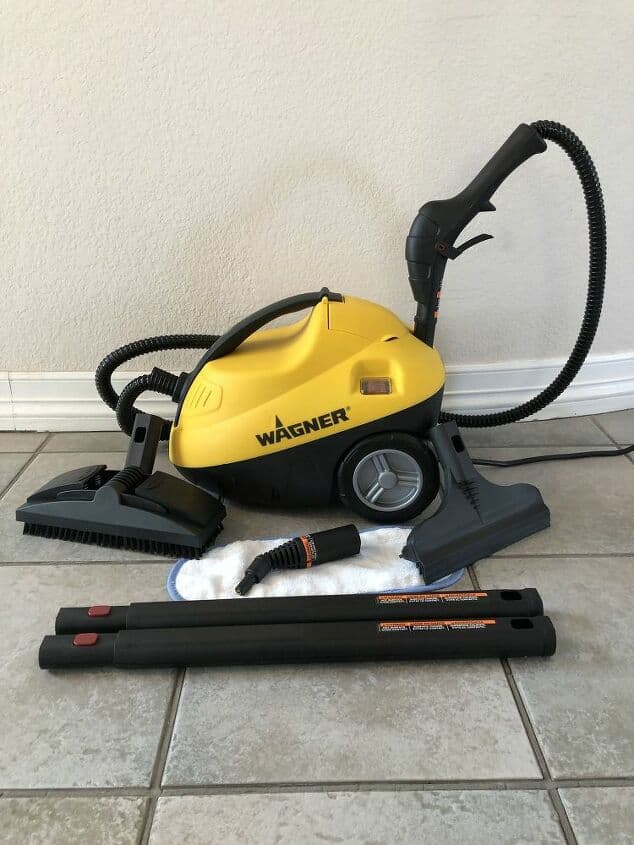
- Once the floor is vacuumed, you’re ready to proceed with mopping. If your kitchen floor is compatible with water and steam, using a steam cleaner or steam mop is an excellent choice for both cleaning and disinfection.
- If you’re using a steam cleaner or steam mop, fill it with water according to the manufacturer’s instructions. Plug it in and wait for it to heat up and produce steam. Start mopping from one end of the room, working your way toward the exit.
- Move the steam mop slowly and evenly across the floor. The heat from the steam will help break down dirt and sanitize the surface. Pay extra attention to high-traffic areas and spots that may need more thorough cleaning.
- Steam is effective in disinfecting surfaces, which is particularly important for kitchen floors where spills and foot traffic can introduce germs. The high temperature of the steam helps kill bacteria and other pathogens.
- After steam mopping, take a quick look around to ensure you’ve covered the entire floor. If you encounter any stubborn spots, you can use a clean cloth to gently wipe them away.
- Allow the floor to air dry. The heat from the steam will help expedite the drying process.
Step 10: Finishing Touches
- Consider additional cleaning tasks like cleaning the garbage disposal, ceiling fan, blinds, and curtains.
- Clean out appliances like the toaster oven and coffee maker.
- Organize your pantry if desired.


Congratulations! Your kitchen is now sparkling clean from top to bottom. Regular deep cleaning like this will help maintain a fresh and hygienic kitchen environment. Remember, a clean kitchen is a happy and healthy kitchen!
Complete Kitchen Deep Cleaning Guide: Step-by-Step Tutorial Video
How To Deep Clean A Kitchen – more options
Do you want to know how to deep clean a kitchen? You can clean your kitchen with just a few products and it won’t break the bank.
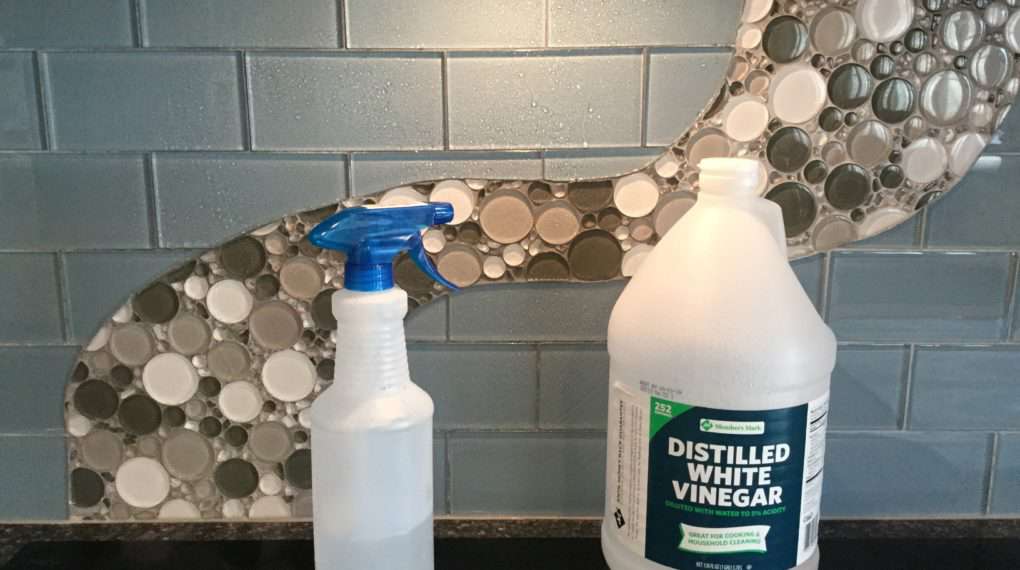
How To Clean the Kitchen backsplash and tile with vinegar:
- You’ll need a clean washcloth, vinegar, and a spray bottle
- You can dilute it if you want, but don’t need to.
- The acidity of the vinegar will cut the grease and will be disinfecting your backsplash.
- Spray your backsplash with the vinegar and wipe it down with a clean washcloth (it’s important that it is clean or you will get streaks).
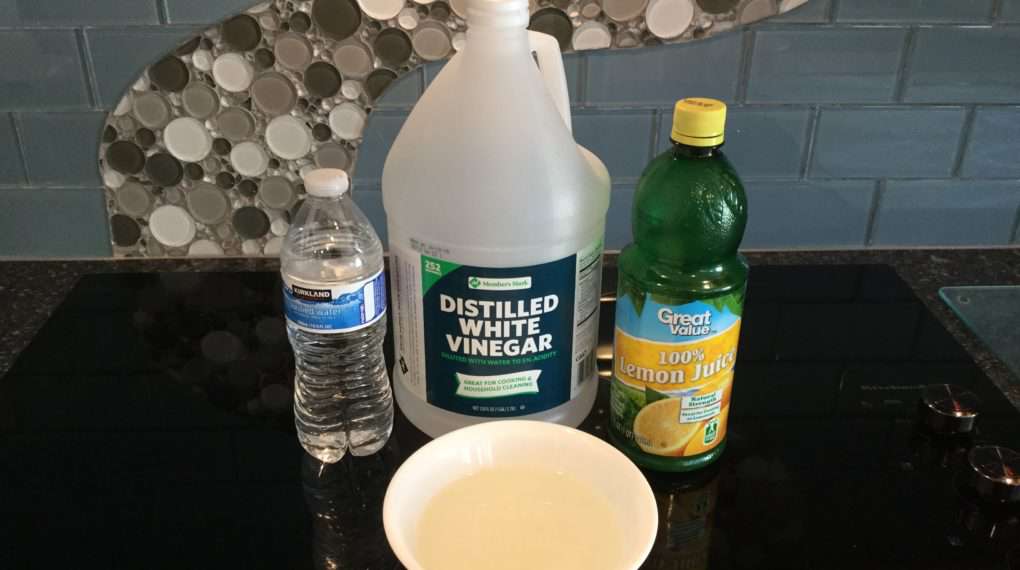
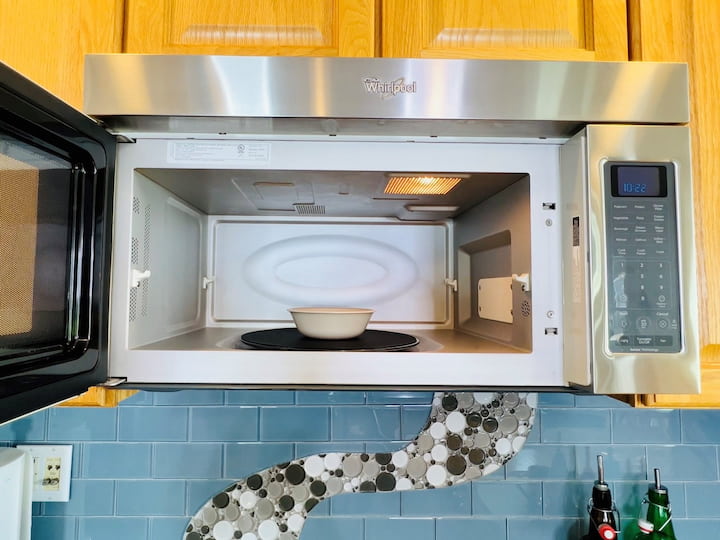
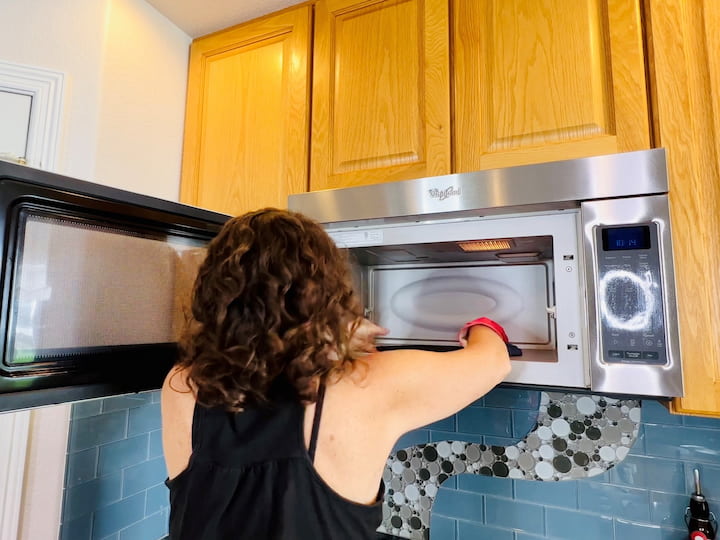
How To Clean Your Kitchen Microwave
- You’ll need a bowl, lemon juice, vinegar, and water
- Pour 1 cup vinegar & 1 cup water in a bowl.
- Add 2 TBSP lemon juice. The acidity again is the cleaning agent in this mixture.
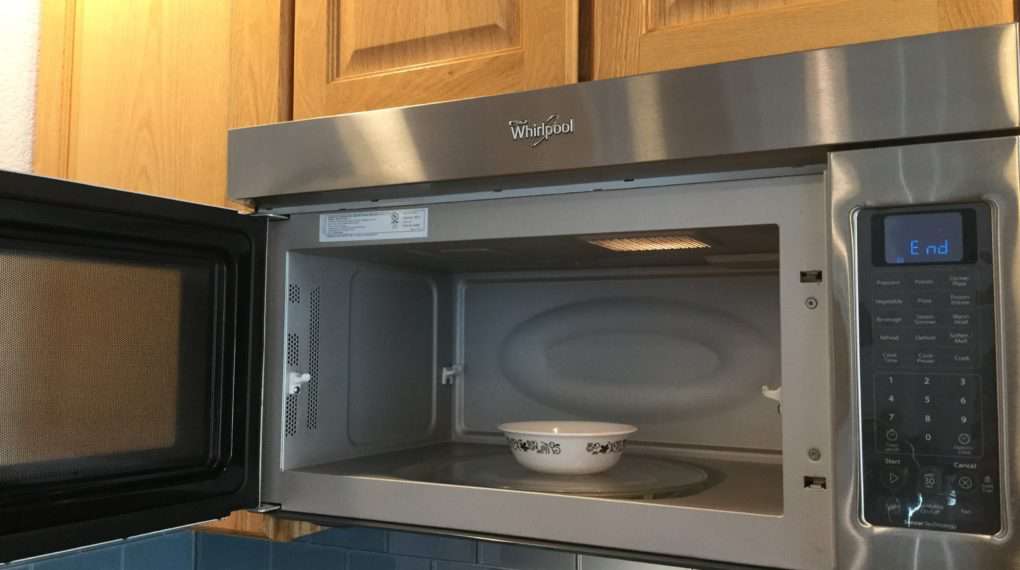
- Place the bowl in the microwave cook for approximately 7-10 minutes (depends on strength of microwave).
- When the timer is done, your microwave should be all steamy inside.
- Use a clean washcloth and wipe out the entire microwave both inside and outside.
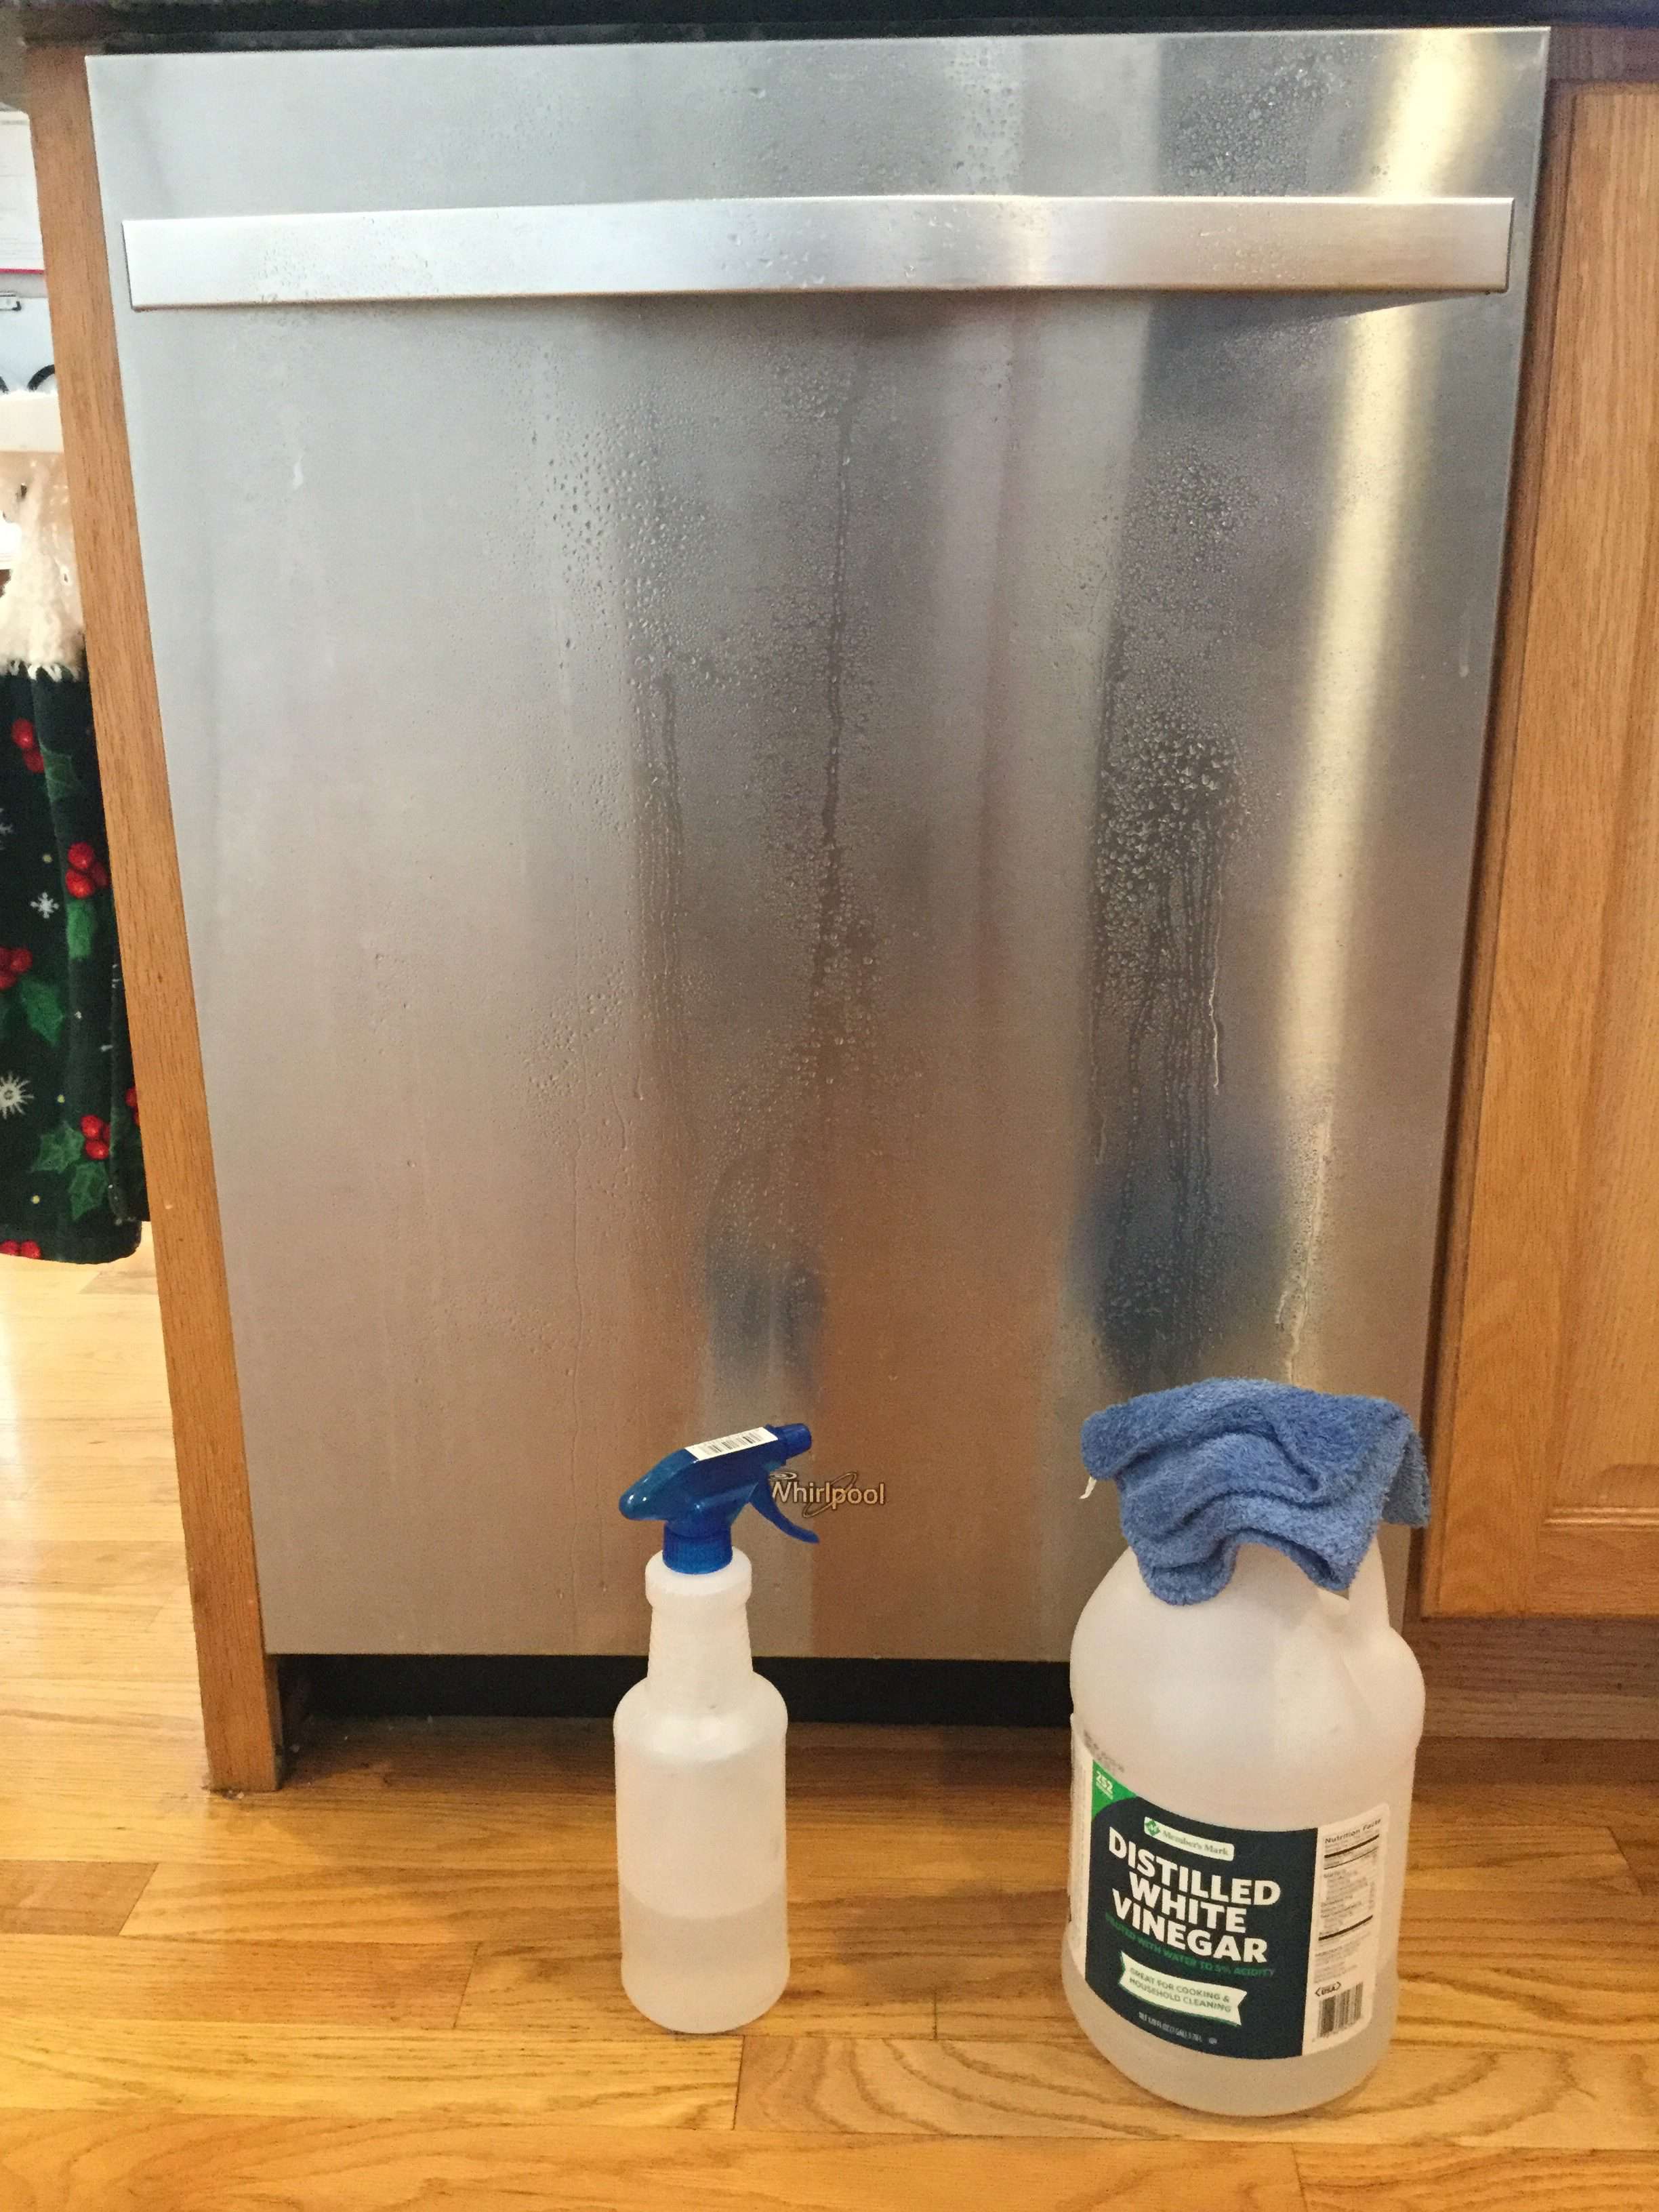
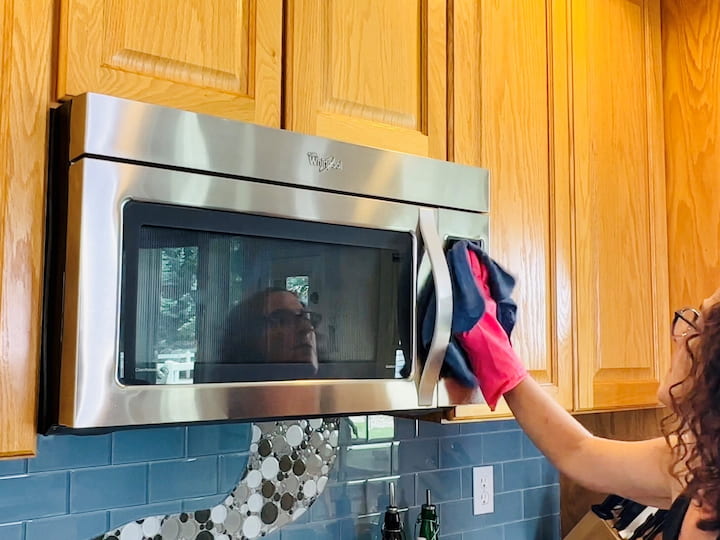
How to clean the exterior of kitchen appliances
You have 2 options here – Vinegar or Dish Soap (like Castile or Dawn).
- To use the Vinegar – spray it onto the appliance, and wipe it off with a clean cloth. Again the acidity is what is cleaning the greasy finger marks and gunk.
- To use Dish Soap – make a sink of hot soapy water. Using a clean washcloth wipe off your appliance. Dish soap is a base and cuts through grease and gunk.
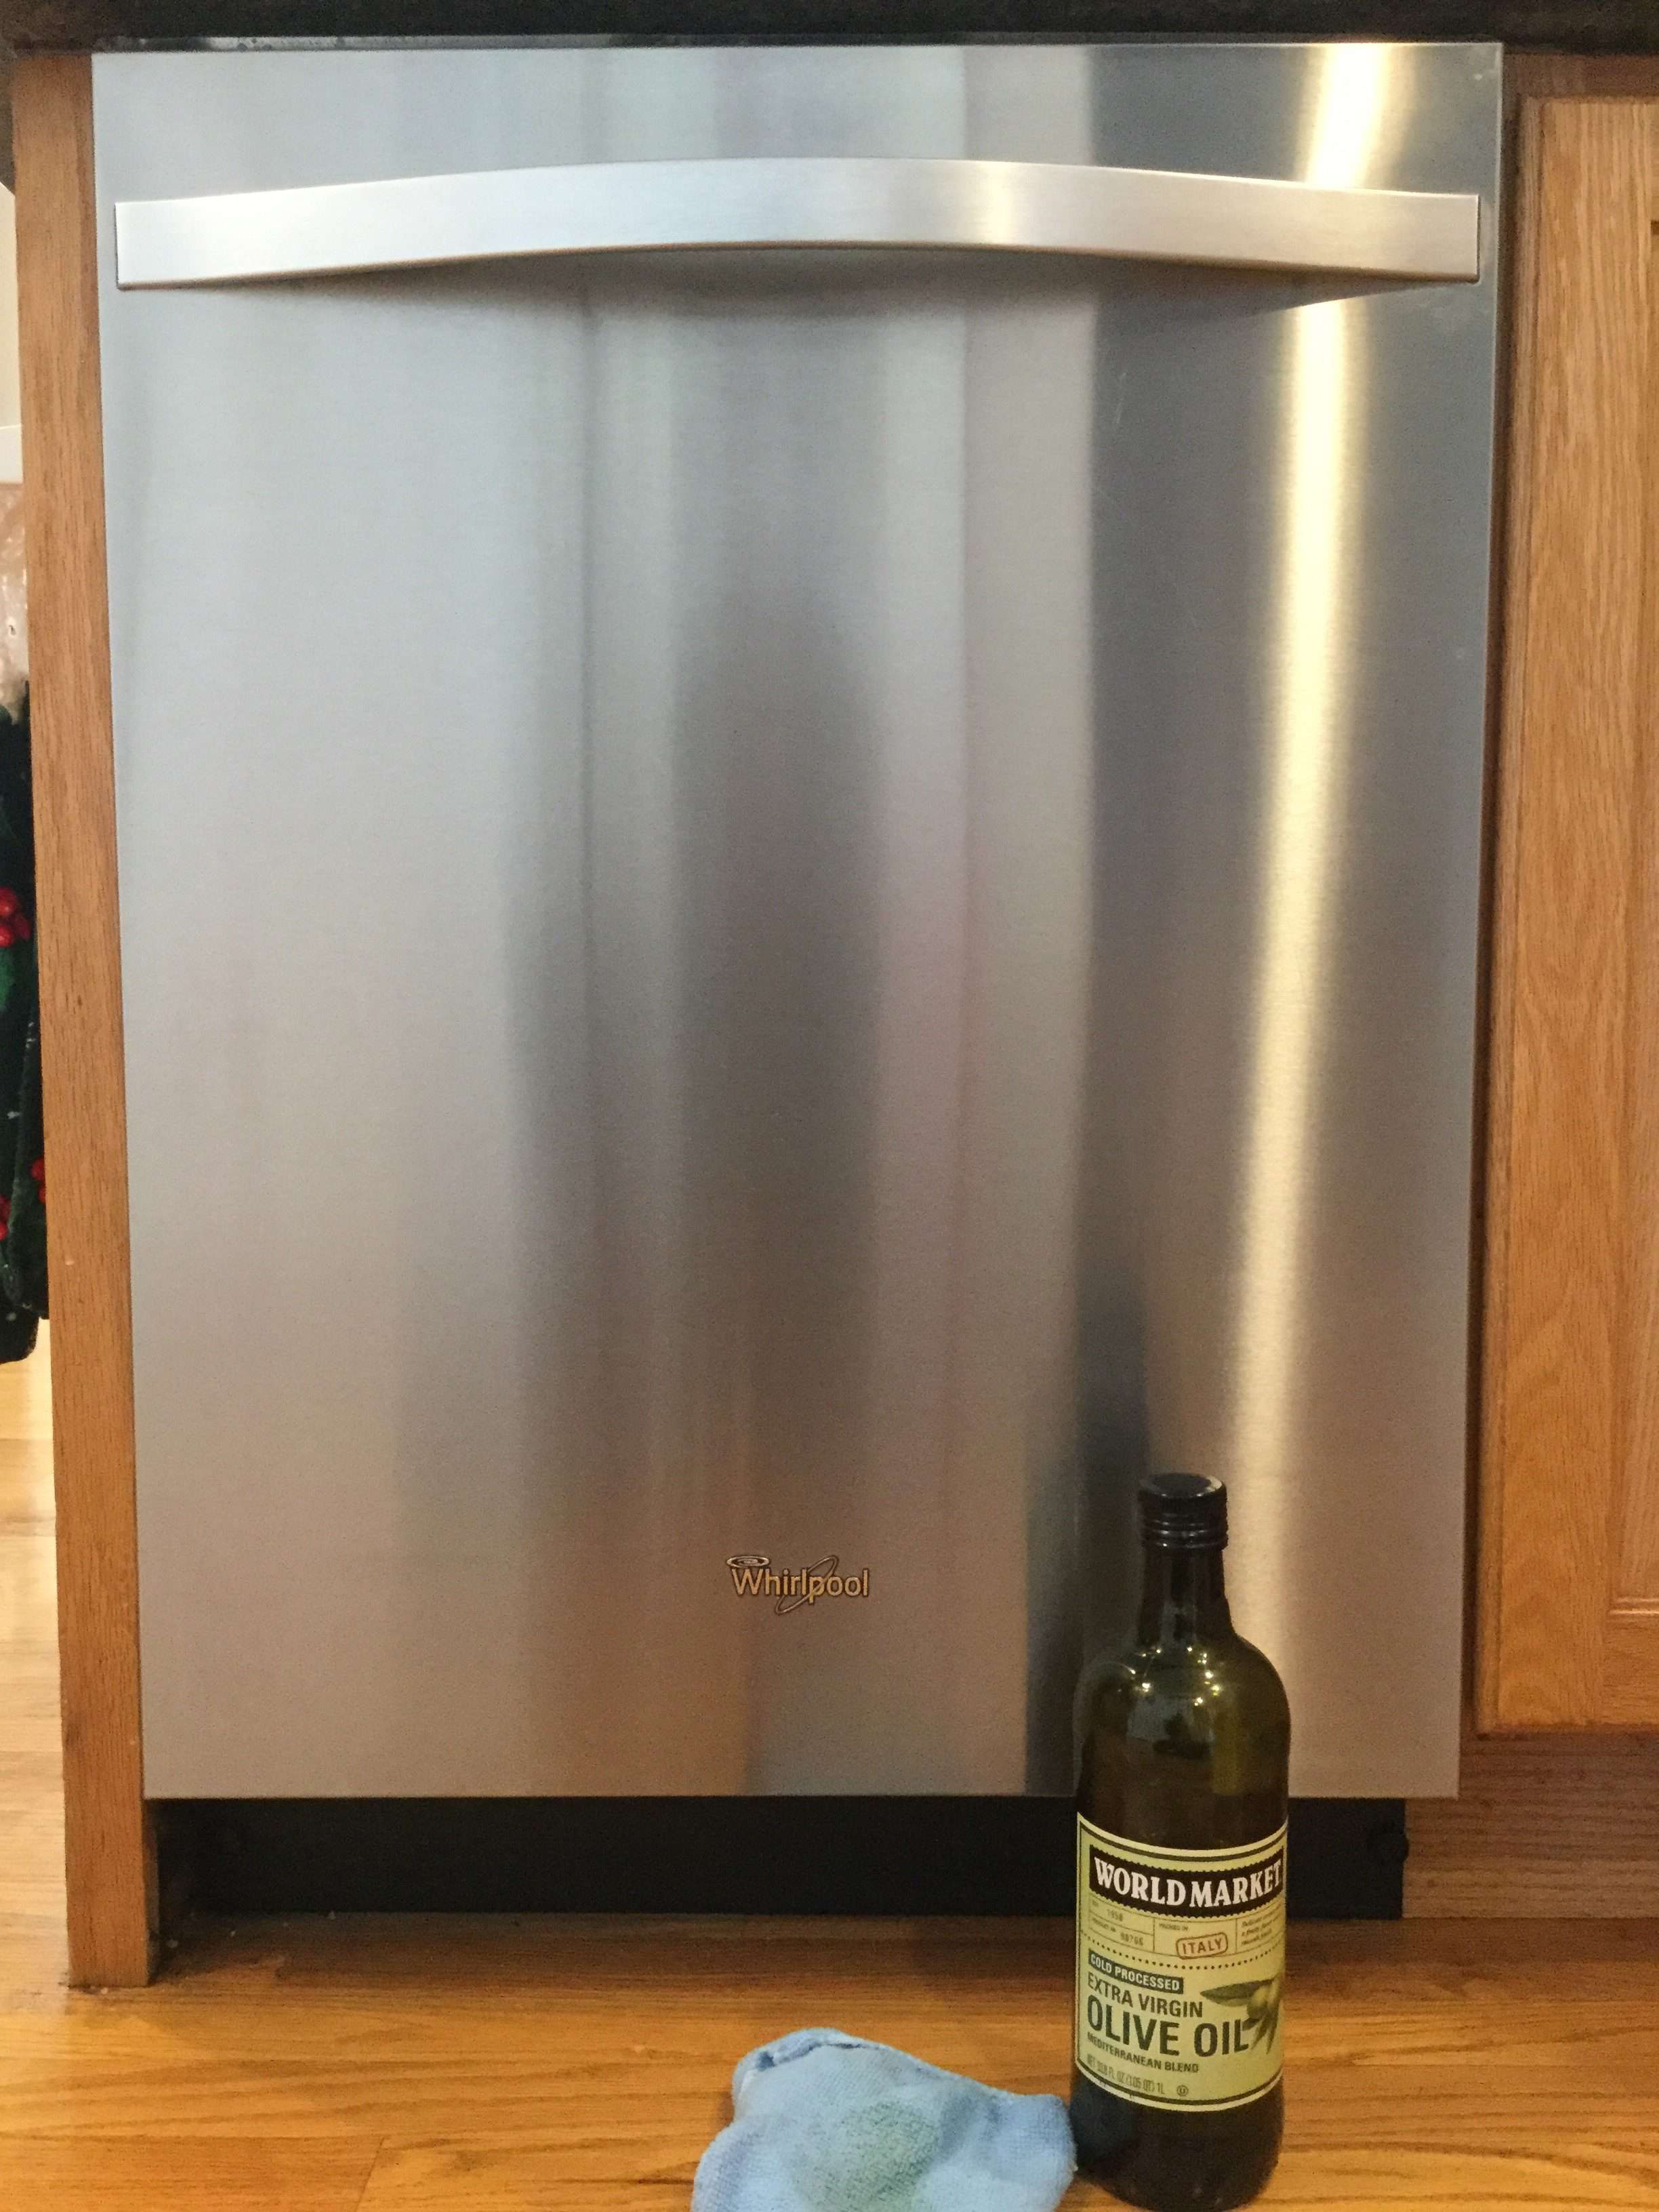
*If you have stainless steel appliances (like this dishwasher) – when cleaning with the vinegar or dish soap wipe with the grain.
Stainless Steel is dry and needs to be moisturized. Using olive oil on a clean microfiber cloth, wipe with the grain of the stainless steel on your appliances after you clean them. Additional information for those who have stainless steel appliances.
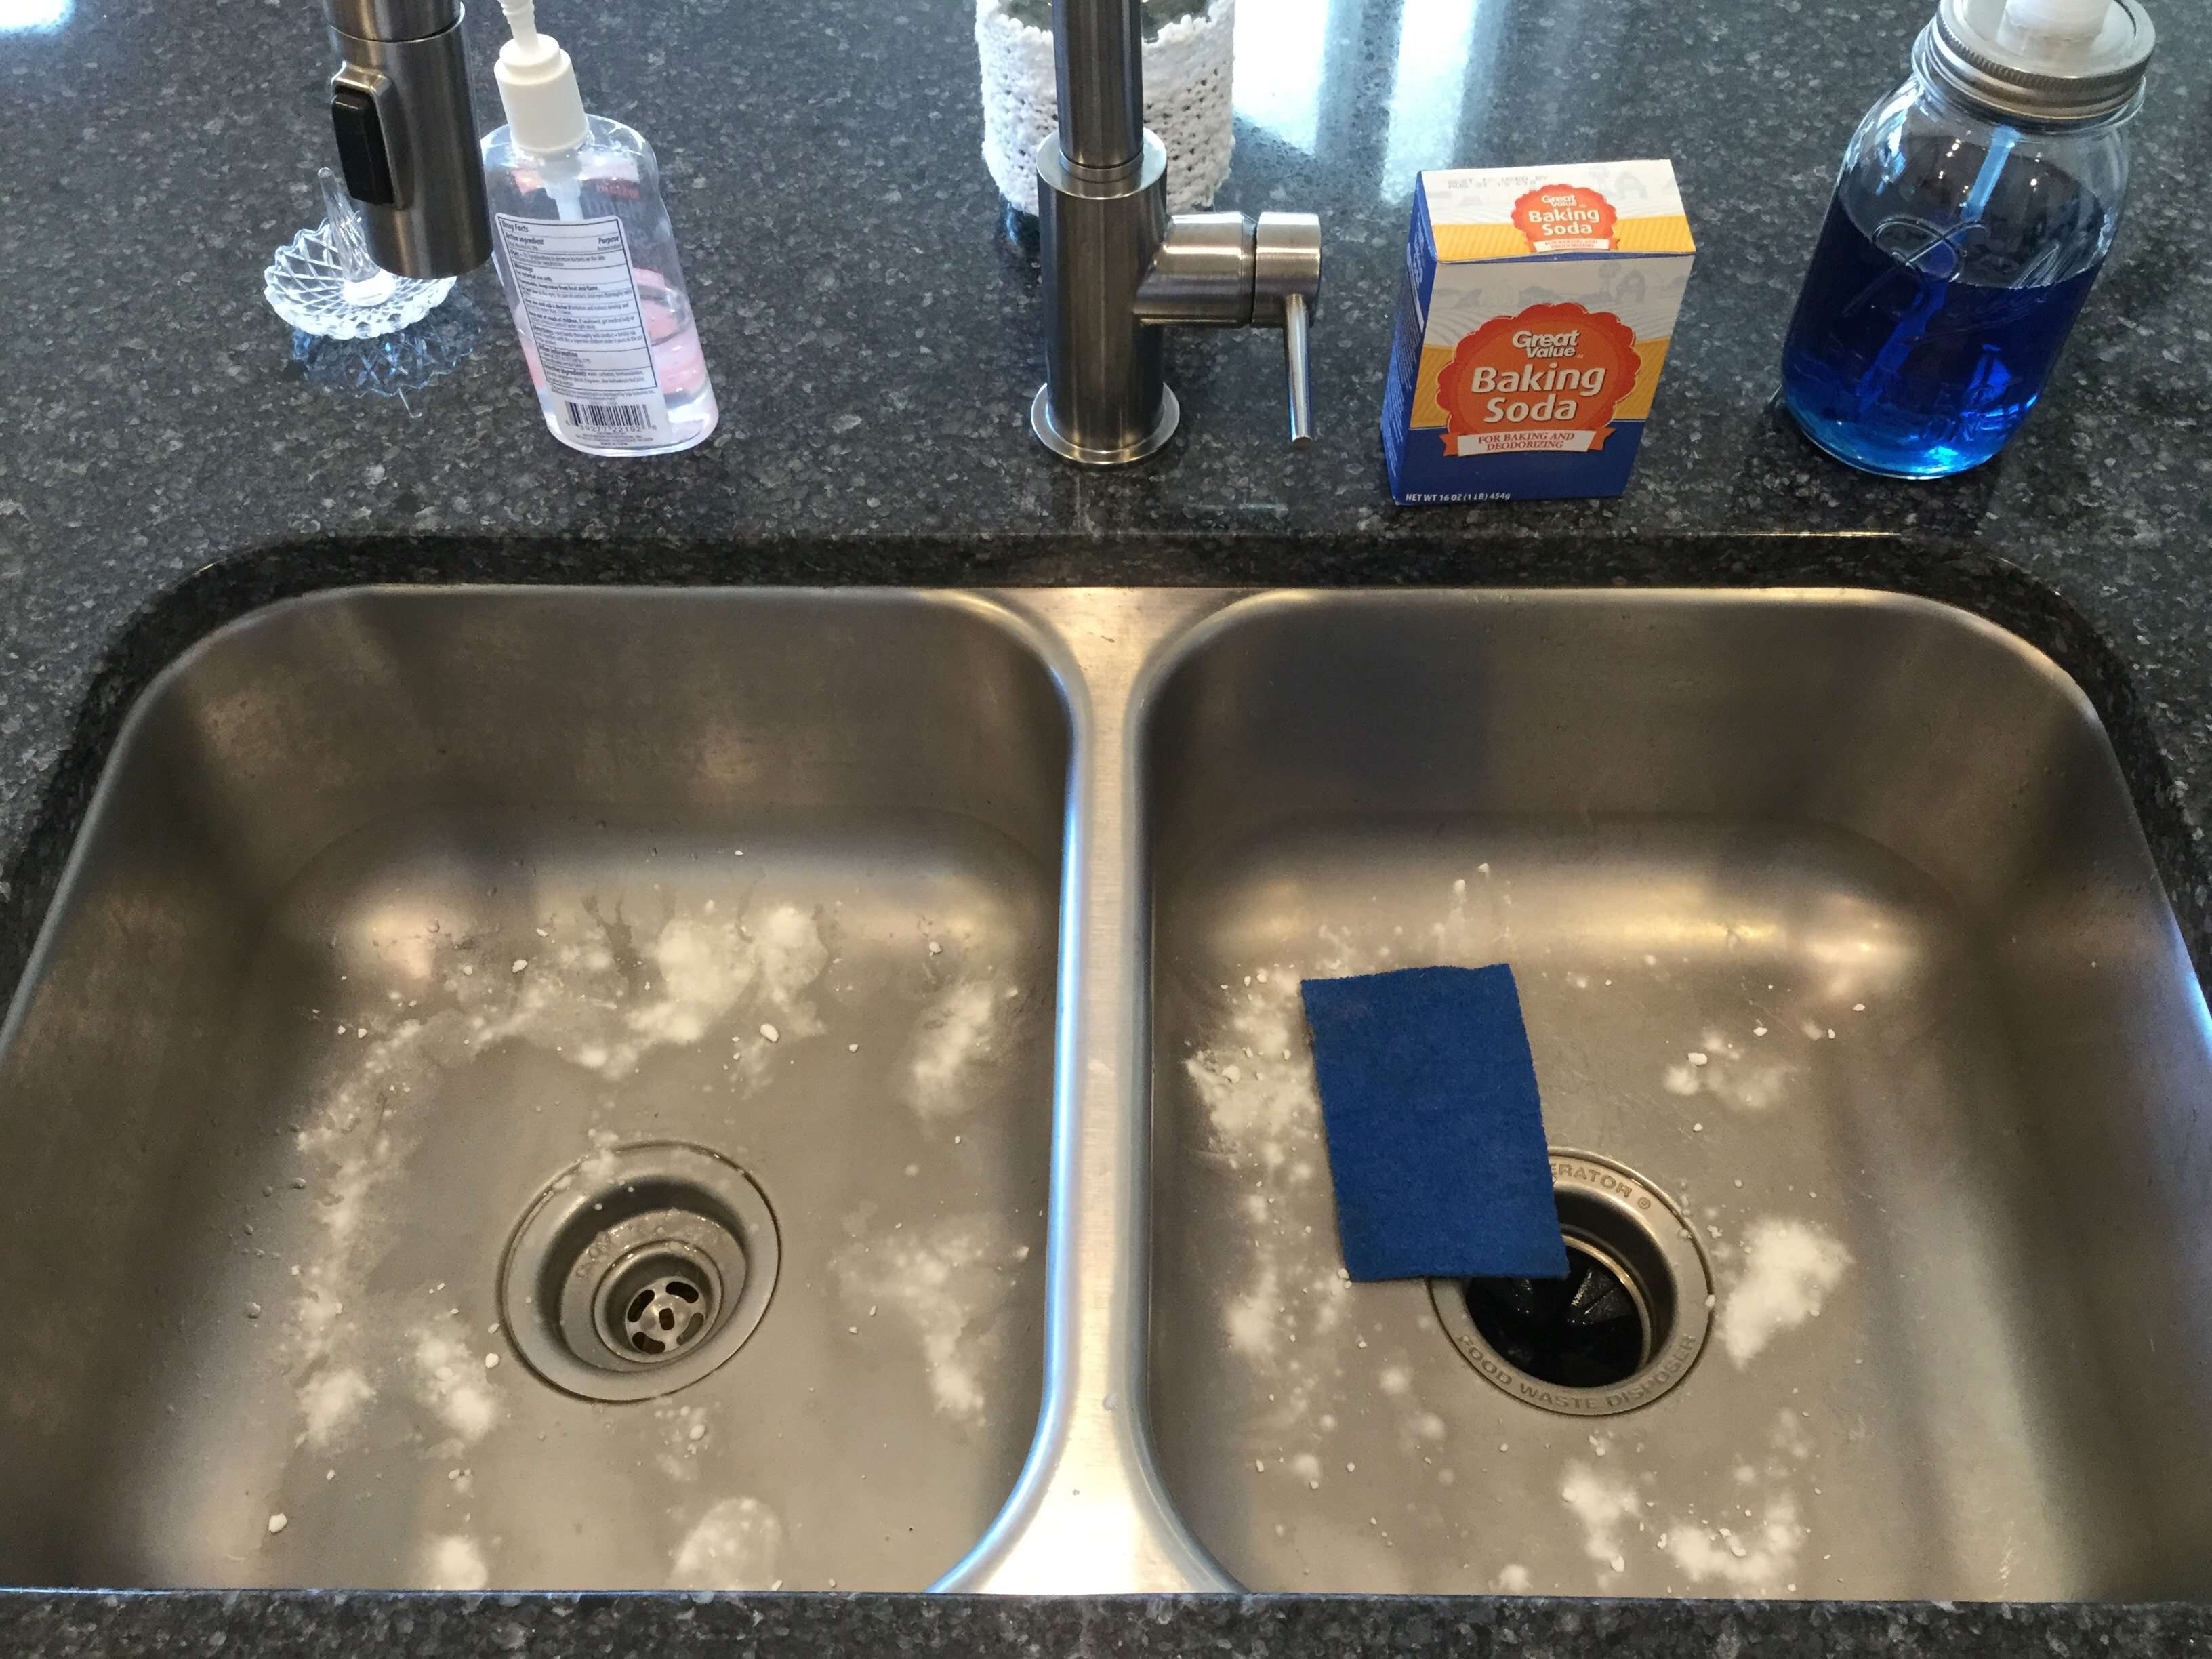
How To Clean Your Kitchen sink
- Sprinkle with baking soda, scrub it clean, and rinse.
- Whether you have one of those Copper Farmhouse Sinks or a ceramic sink, sprinkle with baking soda, scrub it clean, and rinse.
- Baking soda is a base that cuts through grease & dirt.

You can also use baking soda to scrub your refrigerator handles clean, as well as your pantry door & handle clean.
*Baking soda is abrasive so do not use on anything you don’t want to scratch (like stainless steel)
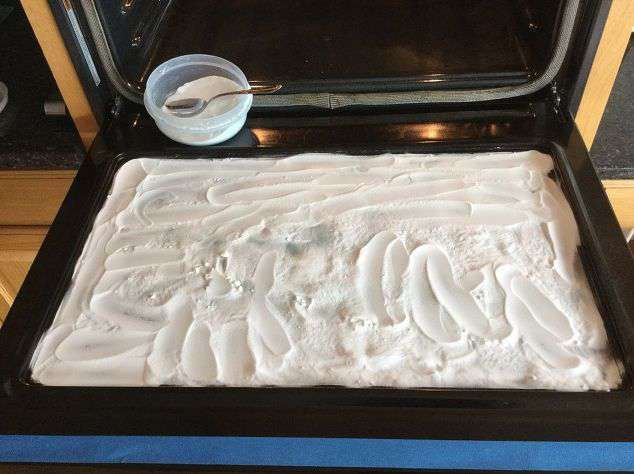
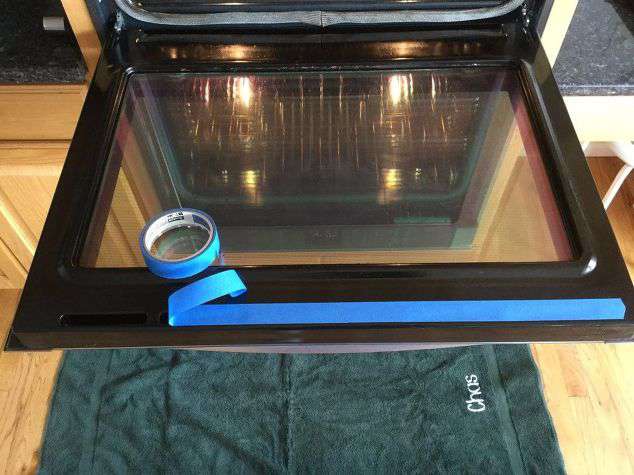
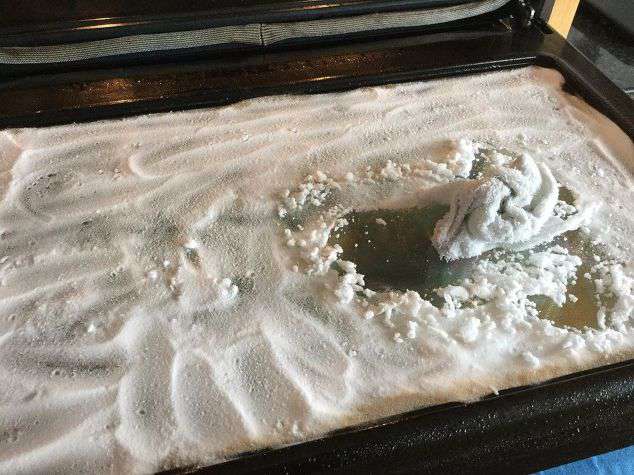
How to clean your kitchen oven window
- If you have a vent be sure to cover it with painters tape to prevent things from falling in between your oven windows.
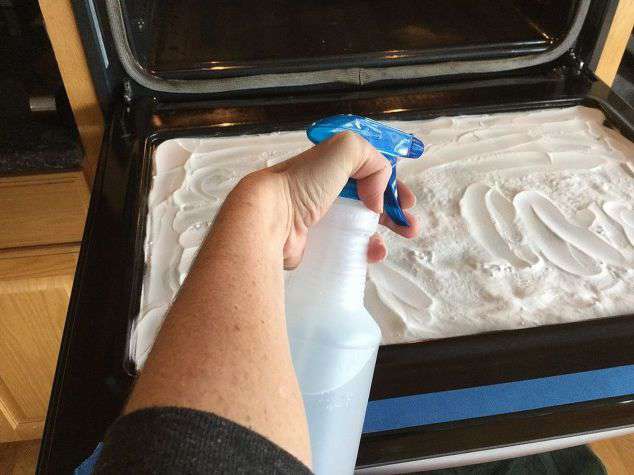
- Sprinkle your oven window with baking soda (this was a picture from my first time doing this and you do not need this much baking soda – lol).
- Spray with a little water to dampen your baking soda (you want to make a paste)
- Using a clean damp washcloth or rag – start scrubbing.
- You can do this on the entire oven and oven window.
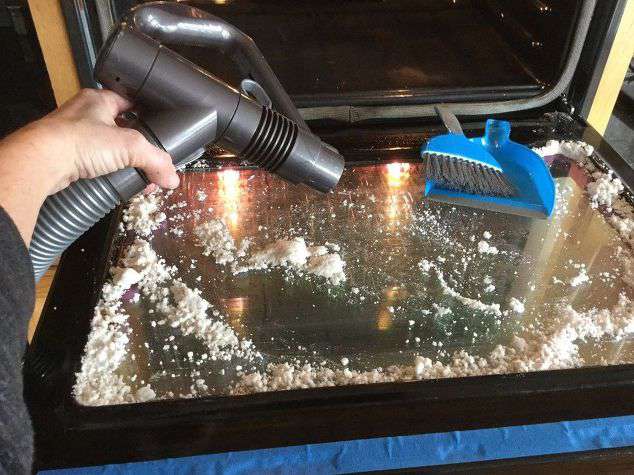
- Once you are done scrubbing, use a shop vac or broom to clean up the dirty baking soda mixture, and rinse with clean water and a clean washcloth until all the baking soda is gone and your oven is clean.
You can see my full tutorial & video on oven window cleaning here (and you can clean the entire oven with this method).
*Extra tip – if you’re having a hard time cutting through the grease in your oven, make a paste of dish soap and baking soda and then scrub.
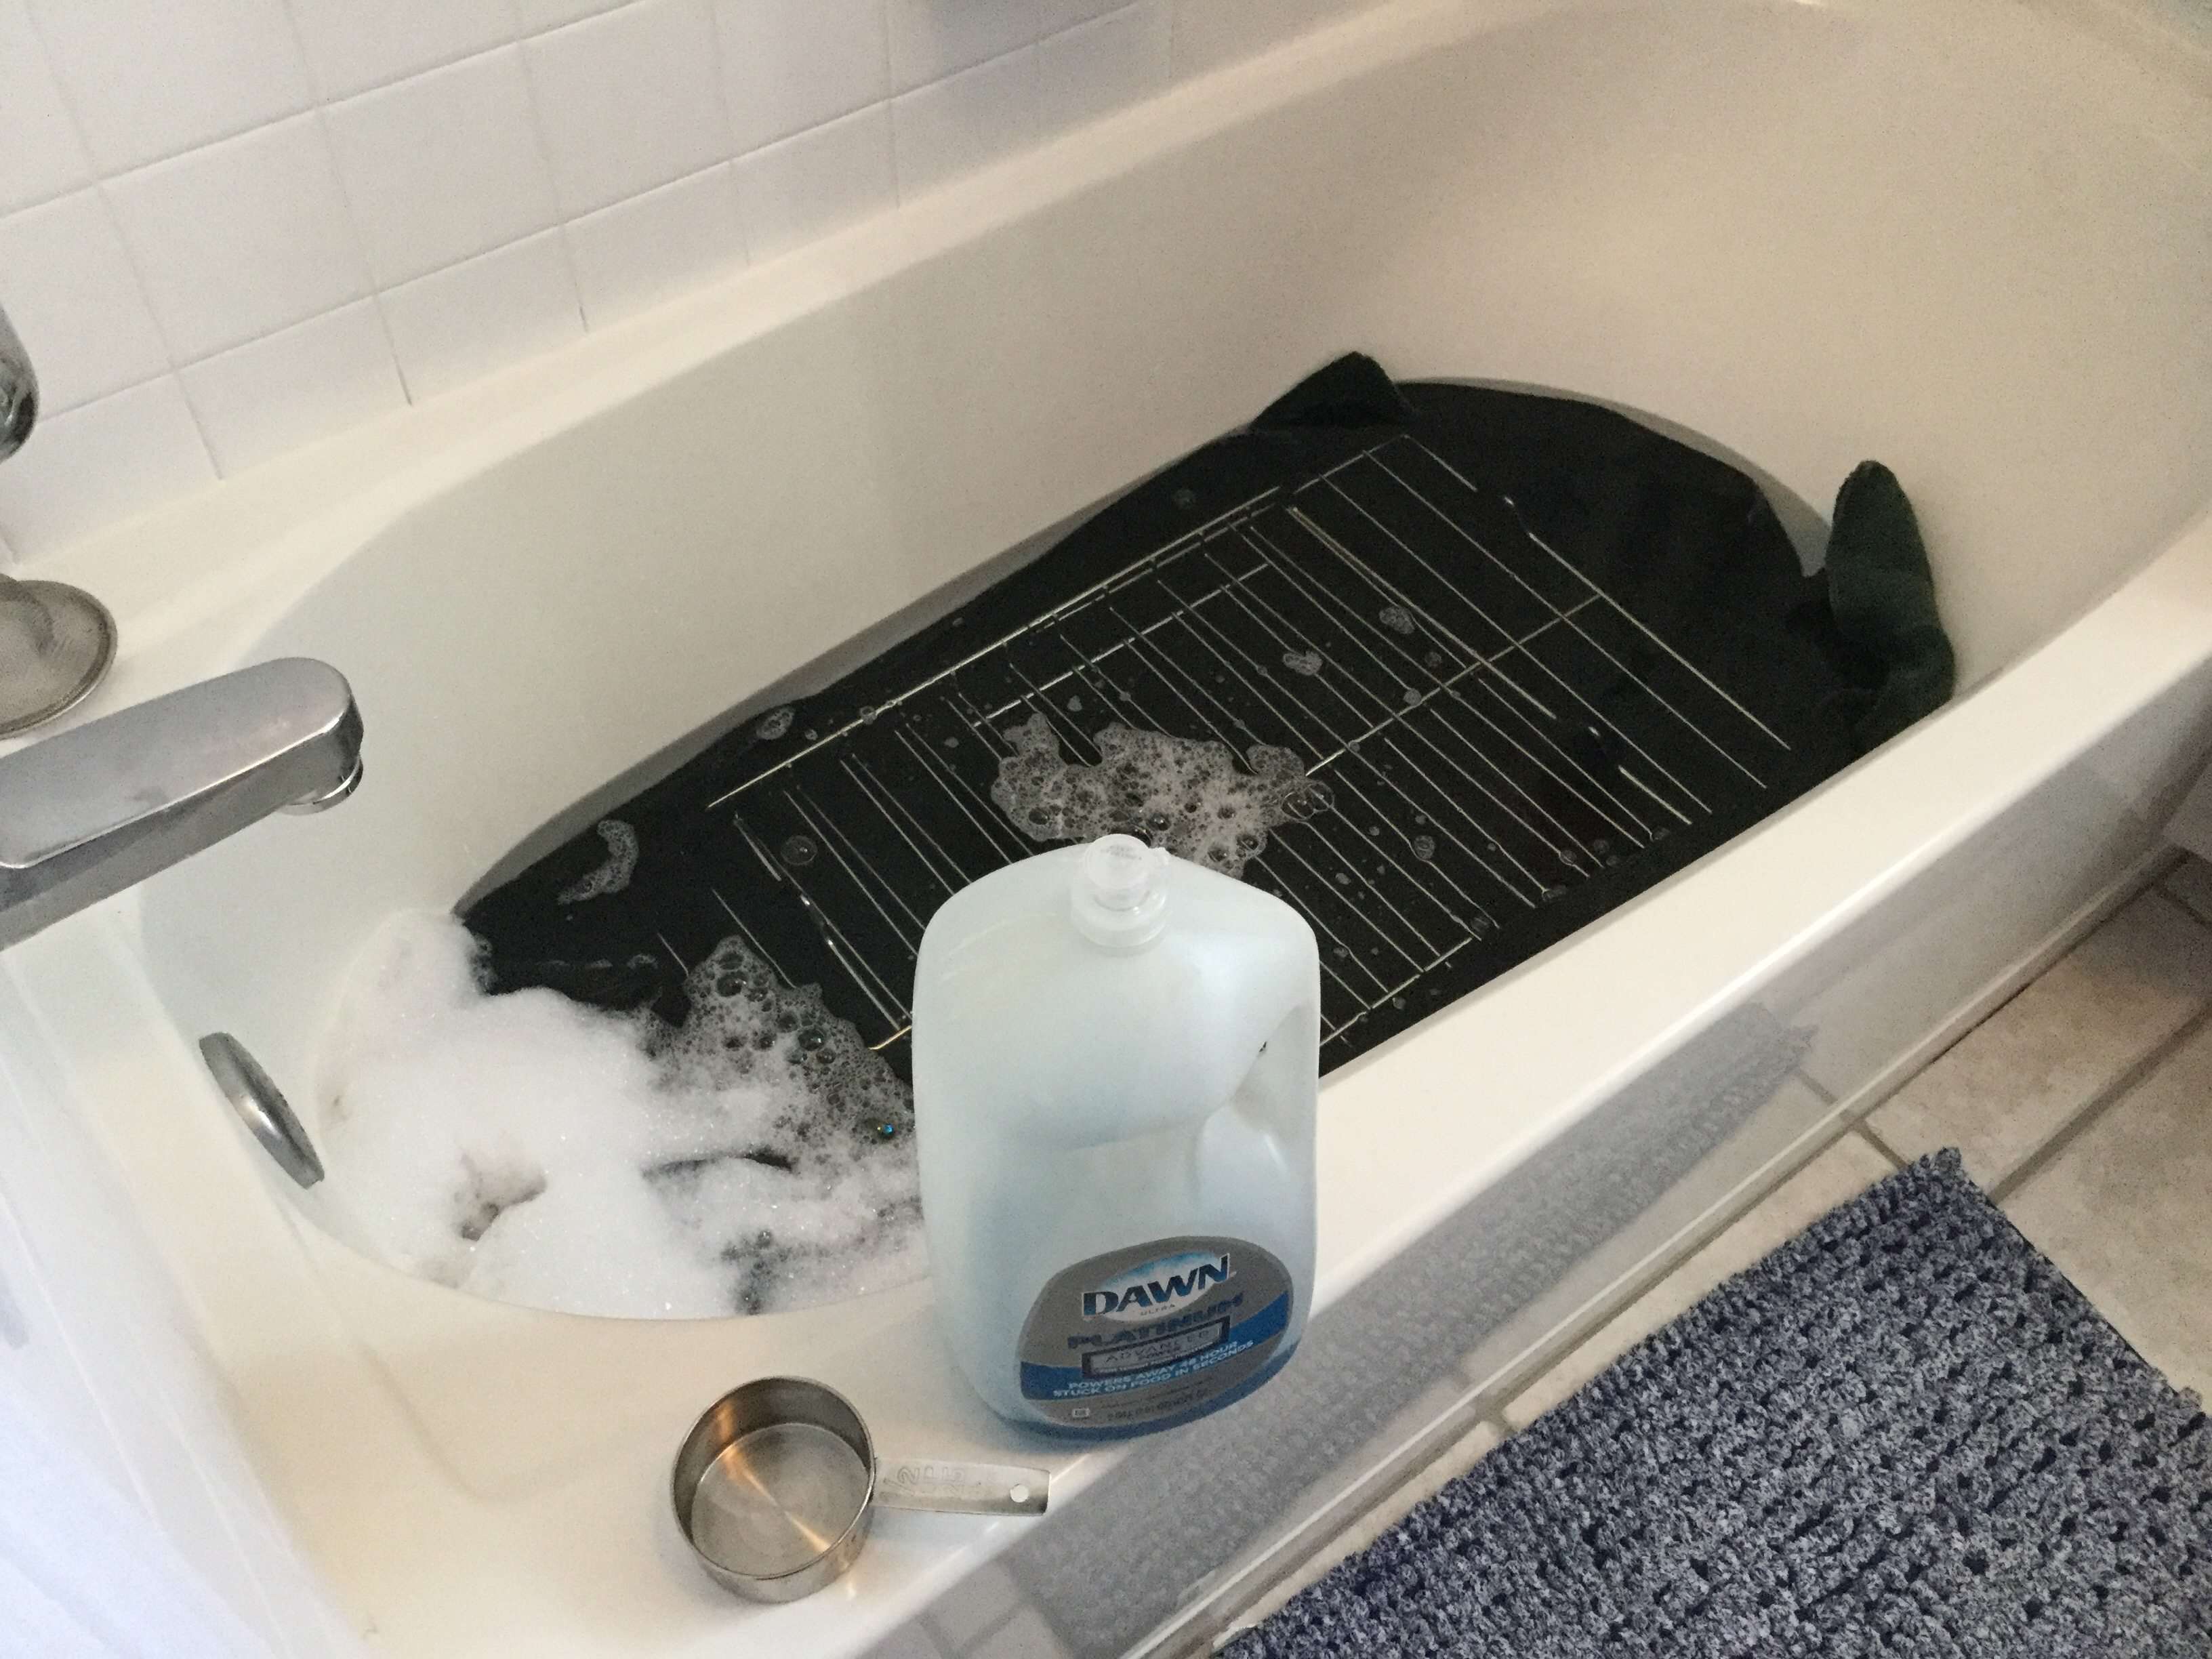
How to clean your kitchen oven racks
- Place a towel in the bottom of your bathtub to protect your tub.
- Lay your oven racks on top of the towel.
- Add 1/2 cup dish soap (like Castile or Dawn) and fill the tub with hot water just until it covers the oven racks.
- Let them soak for 8 hours to get in all the nooks and crannies.
- The dish soap is cutting through all that grease.
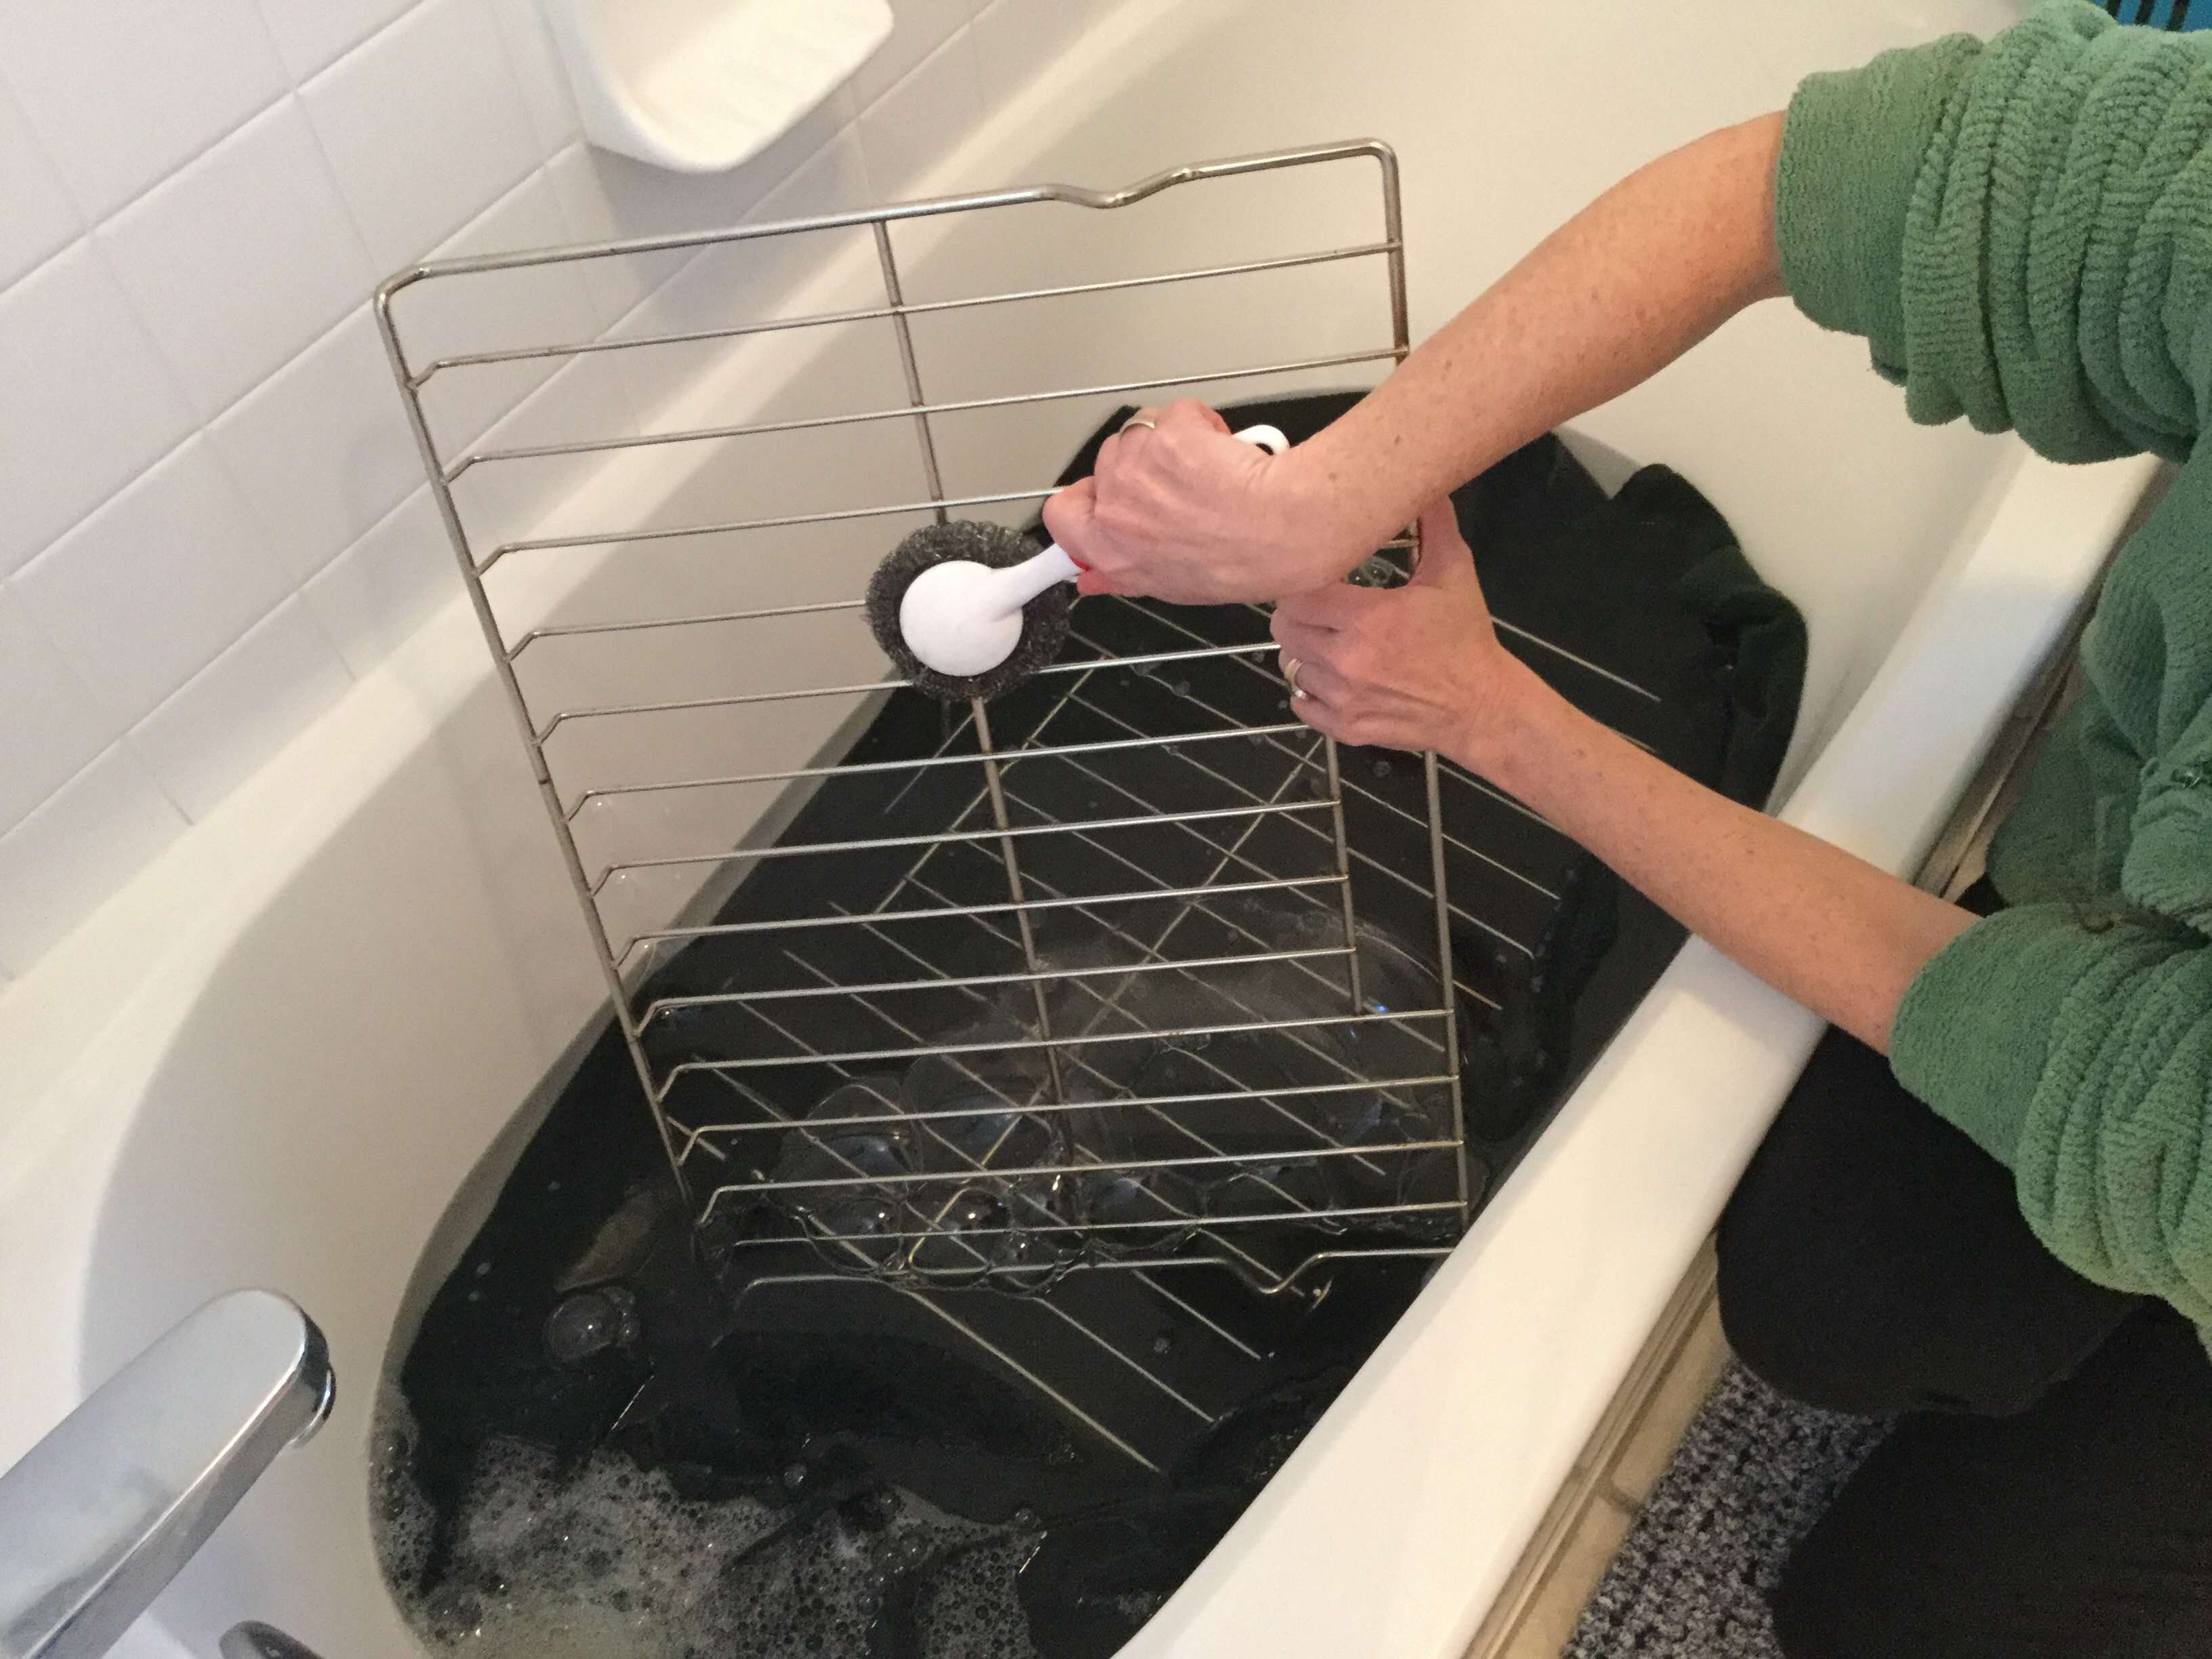
After they have soaked, scrub with a piece of tin foil, a scrub pad, or an old toothbrush, and the grease should just wipe right off.
Drain the water, rinse, and put it back in your oven.
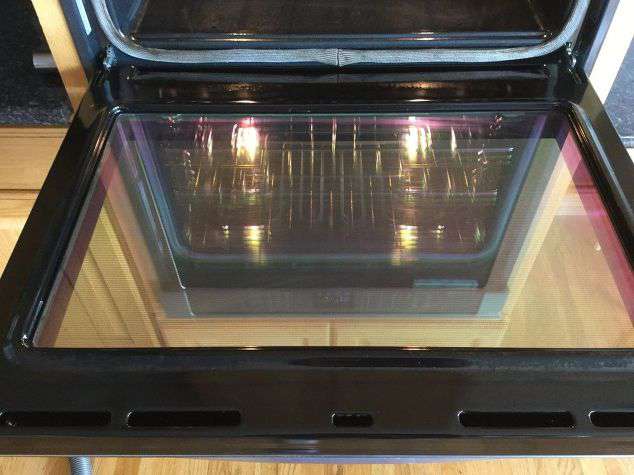
They’ll look brand new!
Learn more about “Why to Deep Clean and Organize Your Home” to save money, function better, and keep your sanity.
How To Clean Your Kitchen With Natural Products Video
Other things to consider when deep cleaning a kitchen:
- stovetops
- light fixtures
- ceiling fan
- kitchen floor
- garbage disposal
- dirty dishes
- kitchen cabinets and cabinet doors
- kitchen table
- kitchen walls
- switch plates
- stove top
- garbage cans
- clean windowsills and windows
- kitchen drawers
- blinds and curtains
- trash can
- coffee maker and remove stubborn stains
- sweep or vacuum, dust, and mop your hardwood floors

Organic Cleaning – DIY Recipes and Tips To Clean the Chemical-Free and Natural Way
When cleaning your home there are amazing ways to be efficient with your time as well as minimize the chemicals in your home. In this book, you’ll learn what natural and organic products to use, the recipes to create, how to use the cleaners in your home, tips, and tricks, and how inexpensive it is to clean naturally. So what are you waiting for? Start cleaning organically and naturally today!
Shop any of these stores and I receive a small commission at no cost to you.
") Arm & Hammer Baking Soda-4L…Shop on Amazon
Arm & Hammer Baking Soda-4L…Shop on Amazon  Premium Selection Extra Vir…Shop on Amazon
  Amazon Basics Fast Drying C…Shop on Amazon
  Dawn Soap, Blue, 21.6 Fl Oz…Shop on Amazon
Check out some of my other kitchen cleaning posts!
- How To Clean Oven Glass Window, It’s So Easy!
- How To Clean Copper Pans Using All Natural Ingredients Easily
- Best Way To Clean Kitchen Cabinets: Quick and Easy
- Easy and Amazing Homemade Cleaner for Stainless Steel Appliances with Video
How To Deep Clean A Kitchen Q & A
What order should I clean the kitchen?
The order in which you clean your kitchen can vary based on personal preferences and the specific tasks that need to be completed. However, here’s another suggested order that you can follow for a thorough kitchen cleaning:
- Clear Clutter: Before you start cleaning, remove any clutter from countertops, tables, and other surfaces. Put away items that don’t belong in the kitchen and organize the remaining items.
- Dishes and Dishwasher: Start by clearing any dirty dishes from the sink and countertops. Load dirty dishes into the dishwasher or wash them by hand.
- Wipe Countertops and Surfaces: Wipe down countertops, tables, and other surfaces with a damp cloth or a mild cleaning solution. Be sure to clean and disinfect these surfaces, especially those that come into direct contact with food.
- Microwave and Appliances: Clean the microwave both inside and out. Then, move on to cleaning other appliances such as the stovetop, oven, toaster, coffee maker, and any other small appliances you have in your kitchen.
- Sink and Faucet: Scrub the sink and faucet using an appropriate cleaning agent. Make sure to remove any food debris, stains, and mineral deposits.
- Refrigerator and Freezer: Clean out and organize the refrigerator and freezer. Check for expired or spoiled items and dispose of them. Wipe down shelves and drawers. If necessary, vacuum or brush the coils at the back of the fridge to improve its efficiency.
- Cabinets and Drawers: Wipe down the exterior of cabinets and drawers. If you have time and the need, consider organizing the contents of your cabinets and drawers as well.
- Floor: Sweep or vacuum the kitchen floor to remove crumbs and dirt. Depending on the type of flooring, you might also mop it with a suitable cleaning solution.
- Trash and Recycling: Empty the trash and recycling bins. Replace liners as needed.
- Finishing Touches: Put away any cleaning supplies and return items to their designated places. Consider adding fresh liners to drawers and shelves.
Remember, this order is just a guideline, and you can adjust it based on your preferences and the specific needs of your kitchen. It’s also a good idea to regularly clean as you go while cooking to minimize the need for a deep cleaning session.

What is the fastest way to deep clean a kitchen?
Deep cleaning a kitchen efficiently requires focus and a systematic approach. Here’s a streamlined process to help you deep clean your kitchen as quickly as possible:
Materials Needed:
- All-purpose cleaner or kitchen cleaner
- Degreasing cleaner (if needed)
- Microfiber cloths or paper towels
- Scrub brushes or scouring pads
- Baking soda (for tough stains)
- Vacuum cleaner or broom
- Mop or steam mop (depending on floor type)
- Trash bags
- Gloves (optional)
- Timer or clock (to track time)
Step-by-Step Guide:
- Declutter Quickly: Before you start cleaning, quickly clear countertops and surfaces of any clutter, dishes, or items that don’t belong in the kitchen. Place items where they belong or in a designated sorting area.
- Start with High Surfaces: Dust and wipe down high surfaces such as shelves, upper cabinets, and light fixtures. Use a microfiber cloth to quickly remove dust and cobwebs.
- Appliances: Wipe down appliances using an all-purpose cleaner or kitchen cleaner. Pay extra attention to the stovetop, microwave, and any areas with grease buildup. If necessary, use a degreasing cleaner for stubborn grime.
- Countertops and Sink: Spray and wipe down countertops and the sink. Use a scrub brush or scouring pad to tackle any tough stains or residue. For the sink, consider using baking soda to help remove stains.
- Cabinets and Drawers: Quickly wipe down the exterior of cabinets and drawers. Focus on handles and knobs where dirt tends to accumulate.
- Refrigerator and Freezer: Wipe down the interior and exterior of the fridge and freezer. Toss expired items and wipe down shelves and drawers. Avoid a deep clean of the fridge’s coils in this quick session.
- Floor: Sweep or vacuum the floor to remove loose dirt and debris. If you have time, quickly mop the floor using a suitable cleaner and method for your flooring type.
- Trash and Recycling: Empty the trash and recycling bins. Replace liners if needed.
- Finishing Touches: Return items to their designated places. Wipe down any remaining surfaces and touch up spots you might have missed.
- Quick Check: Take a few moments to step back and do a quick scan of the kitchen. Address any noticeable areas that need additional attention.
Time Management: To make the process efficient, set a timer for each step. Aim for 10-15 minutes per task, depending on the size of your kitchen. Having a time limit can help you stay focused and prevent spending too much time on any one task.
Remember, this quick deep cleaning is meant to give your kitchen a refreshed look and feel. For a more thorough deep clean, you’ll need to allocate more time to each task and tackle additional areas, such as cleaning the oven, scrubbing grout, and thoroughly cleaning the refrigerator coils.

What should be included in a deep cleaning checklist?
Here’s a detailed deep cleaning checklist specifically for a kitchen:
Appliances:
- Oven:
- Remove oven racks and trays.
- Clean inside the oven using an oven cleaner or a mixture of baking soda and water.
- Wipe down oven door and exterior.
- Microwave:
- Clean the interior, including the turntable and walls.
- Wipe down the exterior.
- Refrigerator:
- Empty the fridge and freezer. Dispose of expired items.
- Remove shelves and drawers for cleaning.
- Clean inside the fridge using a mixture of water and mild detergent.
- Wipe down the exterior.
- Dishwasher:
- Clean the filter and drain.
- Wipe down the interior.
- Run a cycle with a dishwasher cleaner or vinegar to remove buildup.
- Small Appliances:
- Clean and descale coffee maker, kettle, toaster, and other appliances.
Cabinets and Countertops:
- Cabinets:
- Empty cabinets and drawers. Sort and declutter.
- Wipe down the interior and exterior of cabinets and drawers.
- Clean handles and knobs.
- Countertops:
- Remove all items from countertops.
- Clean and disinfect countertops using a suitable cleaner.
Sink:
- Sink and Faucet:
- Clean and disinfect the sink and faucet.
- Remove mineral deposits from the faucet if needed.
- Drain and Garbage Disposal:
- Clean and deodorize the drain and garbage disposal using a mixture of baking soda and vinegar.
Cooking Area:
- Stovetop and Rangehood:
- Remove burners and knobs.
- Clean and scrub stovetop using appropriate cleaner.
- Clean and degrease rangehood and its filter.
- Backsplash:
- Clean the backsplash area, removing any grease or food splatters.
Floor:
- Flooring:
- Sweep or vacuum the floor to remove crumbs and debris.
- Mop the floor using a suitable floor cleaner.
Additional Tasks:
- Pantry:
- Empty shelves, wipe down surfaces, and check for expired items.
- Organize items before placing them back.
- Trash and Recycling:
- Clean and disinfect trash cans and recycling bins.
- Light Fixtures:
- Dust and clean light fixtures and bulbs.
- Windows:
- Clean windows and window sills in the kitchen.
- Ventilation:
- Clean or replace rangehood filters if necessary.
Remember to use appropriate cleaning products for different surfaces and to follow manufacturer guidelines for appliance cleaning. A deep clean might also be a good time to perform any maintenance or repairs that are needed in the kitchen.
What should you use to deep clean a kitchen?
To deep clean a kitchen effectively, you’ll need a variety of cleaning supplies and tools to tackle different surfaces and areas. Here’s a list of items you might need:
General Supplies:
- Rubber Gloves: To protect your hands while working with cleaning agents.
- Cleaning Cloths and Sponges: Microfiber cloths work well for most surfaces. Have separate cloths for different areas to prevent cross-contamination.
- Scrub Brushes: Different sizes for scrubbing stubborn grime from various surfaces.
- Broom and Dustpan/Vacuum: For cleaning the floor and removing debris.
- Mop and Bucket: For mopping the floor.
Cleaning Agents:
- All-Purpose Cleaner: For general cleaning of countertops, sinks, and other surfaces.
- Degreaser: To tackle greasy surfaces around the stove and rangehood.
- Glass Cleaner: For cleaning windows, mirrors, and glass surfaces.
- Oven Cleaner: Specifically for deep cleaning ovens.
- Baking Soda: A versatile cleaner and mild abrasive.
- Vinegar: Effective for descaling and removing stains.
- Lemon: For natural freshness and cleaning power.
- Dish Soap: For general cleaning and degreasing.
- Disinfecting Wipes or Spray: For sanitizing high-touch surfaces.
Specialized Cleaning:
- Stainless Steel Cleaner: For stainless steel appliances and surfaces.
- Wood Cleaner: If you have wooden cabinets or furniture.
- Tile and Grout Cleaner: For tile backsplashes and grout lines.
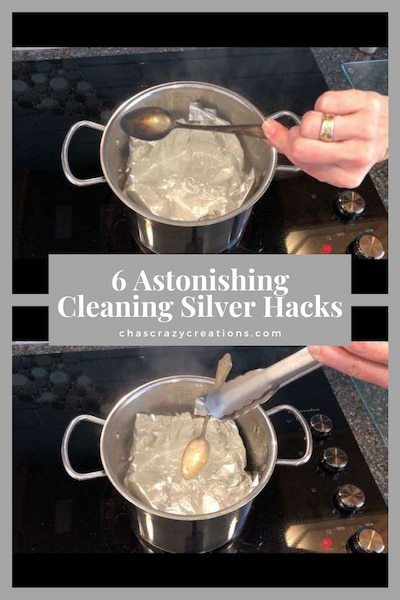
- Silver Polish: If you have silverware or decorative items.
Optional:
- Steam Cleaner: Can help remove stubborn dirt and sanitize surfaces without chemicals.
- Trash Bags: For decluttering and disposing of expired food.
- Toothbrush: Useful for cleaning tight corners and small areas.
- Bucket of Warm Water: To dilute cleaning solutions and rinse cloths.
Safety Precautions:
- Ventilation: Make sure the kitchen is well-ventilated while using cleaning agents.
- Read Labels: Follow product instructions and safety guidelines.
- Test Surfaces: Test any new cleaner on a small, inconspicuous area before using it widely.
- Protective Gear: Wear gloves and eye protection as needed.
Remember that different surfaces may require specific cleaning agents, so always check manufacturer recommendations. It’s also a good idea to declutter before deep cleaning so that you can access all areas easily.


Chas, as I am scrubbing the guest cottage kitchen, all your tips are so helpful!! Thank you for sharing.
You are so sweet Mary, thank you my friend 🙂
********************************************************
Thank you so much for sharing at #OverTheMoon. Pinned and shared. Have a lovely week. I hope to see you at next week’s party too! Please stay safe and healthy. Come party with us at Over The Moon! Catapult your content Over The Moon! @marilyn_lesniak @EclecticRedBarn
********************************************************
I just want to take a minute to say you are amazing!
You are so very sweet Kristin, thank you and you just made my day!
I’m with you on going the natural route for cleaning. Lots of great tips here, some I’m already doing and others I’ll be adding to our routine. Thanks 🙂
Thanks Marie, I’m so glad you are doing this too. I was doing this already before my breast cancer diagnosis, but not it’s even more important.
For icky freezers, say sugary mess from berry juice, vinegar wasn’t working– the water content of vinegar froze. So, I got the bright idea to use something that wouldn’t freeze & also would sanitize…. Plain, cheap, clear vodka! Worked like a charm. I use cheap clear vodka where vinegar shouldn’t be used, including unsealed light colored wood; darker woods get cheap whiskey.
Thank you so much for sharing that tip!
Thanks first of all for the motivation to start this much needed project. Second of all is my lack of mobility. I have just decided to break it up to a shelf at a time, then outsides,etc. I know it won’t be quick but it will get done. Thanks again.
PS I think you should mention about not getting viniger on granite countertops, which will itch it. ?
Thank you so much Cindy and I think that is fantastic to go a little bit a time and pace yourself. Great idea on the granite counter tip 🙂
Love your cleaning tips, after 66 years I thought I knew them all !!
I am so bummed that Hometalk has discontinued their Live videos, i really looked forward to those. Had no idea they were discontinued and wondered why i wasn’t getting any, now I know thanks to you. I will subscribe so i can watch your videos. Thanks.
Thank you Diena and you can find most of my videos on my Facebook page. Once they are done I’m trying to post them on my website as well.
I always do my fridge like that, a big bowl of hot soapy water but I’ve always struggled with the oven window. I’m pinning so I can try this method out – thanks.
Thank you Julie, I love that you clean your fridge the same and I hope this oven window tutorial will help you as it has me. Thank you so much for the Pin 🙂
Great tips! Thanks for sharing at Party in Your Pjs!
Thank you Donna 🙂
Wonderful ideas. I am a huge fan of natural cleaning products I have to try the microwave trick.
Thank you Elise, and I hope you like the microwave cleaning. It makes it so easy 🙂
Back to basics without the chemicals. I’m going to have to switch over. Thanks for sharing.
Thank you Linda and I’m glad there are some things here you want to give a try 🙂
Great tips! For the microwave, though, I think that’s more acid, more total liquid, and more time than you really need. I use about 1/3 cup each water and vinegar, without lemon juice, and it works very well. After wiping out the microwave, you can use the leftover hot vinegar water to clean other things!
Thank you Becca, and thank you for sharing your tips.
I love this! So motivated to go clean everything!
Thank you Michele and I love that you are motivated by my post! I’ll be here to cheer you on!
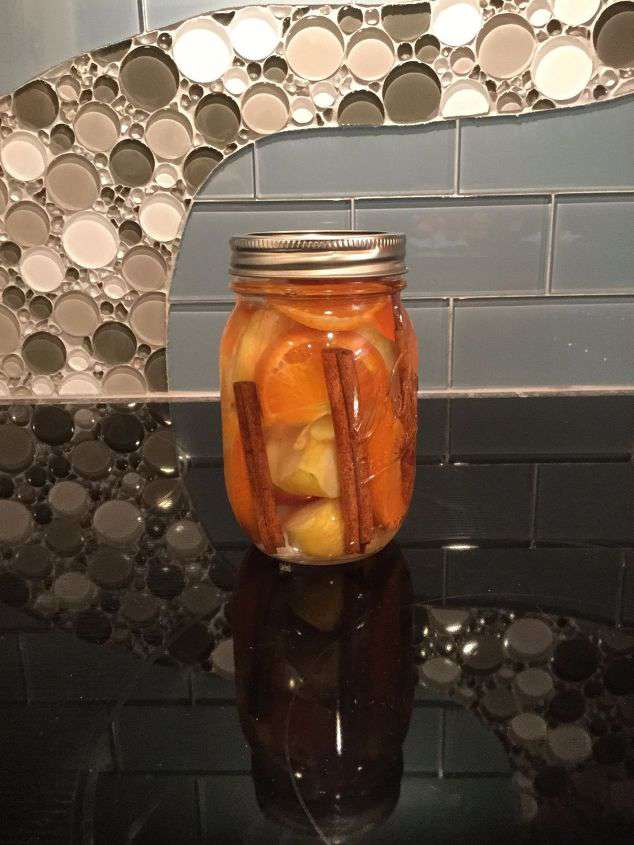
Okay so how do you get over the vinegar smell — I know it’s a cheap and efficient way to clean (and natural) but ugh, the smell….
The smell doesn’t bother me, but you can add orange peels to your vinegar and let it soak a few days and that will make the smell better. 🙂
Thanks Chas for putting a bunch of these in one place. I’m in purge mode right now so when I reach my kitchen I’ll have it all in one place. In the last year or so I’ve been switching to using more & more natural products, so your advice hit home with me. We do use vinegar water on our countertop in the kitchen, but it’s vinyl and the point is to keep it disinfected. I know it can’t be used on all countertops though. BTW, I love your backsplash! Very unique!
Thank you Linda, I’m so glad this might be helpful for you 🙂 Thanks on the back splash. We were thinking of bubbles and steam coming out of a pot when we designed it. We didn’t install it though, hired someone for that – too afraid I’d mess up something so important 🙂
I love your design and they did a great job! You are so creative. 🙂