Easy and Spooky DIY Wood Halloween Decorations with Video

Are you looking for DIY wood Halloween Decorations? With just a few items you can create some super easy decor on a budget.
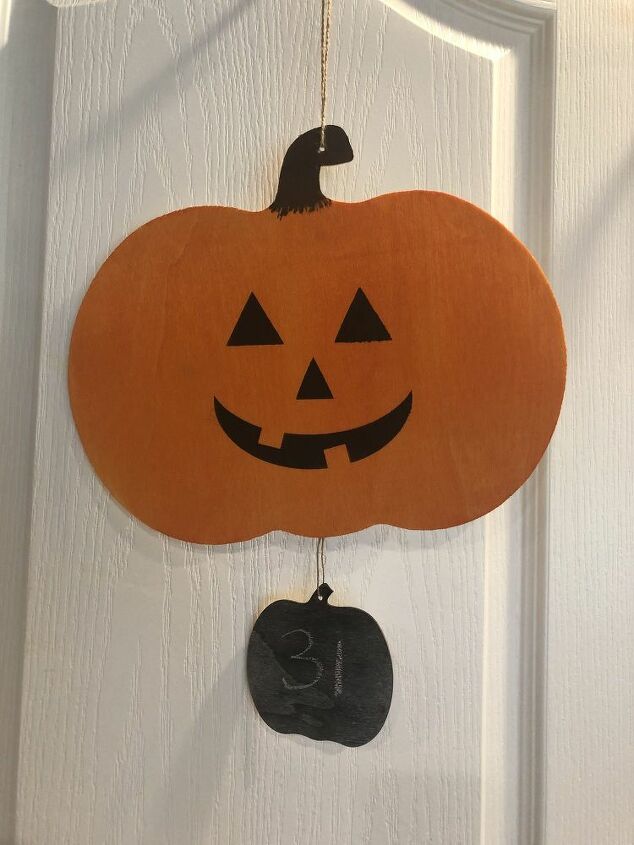
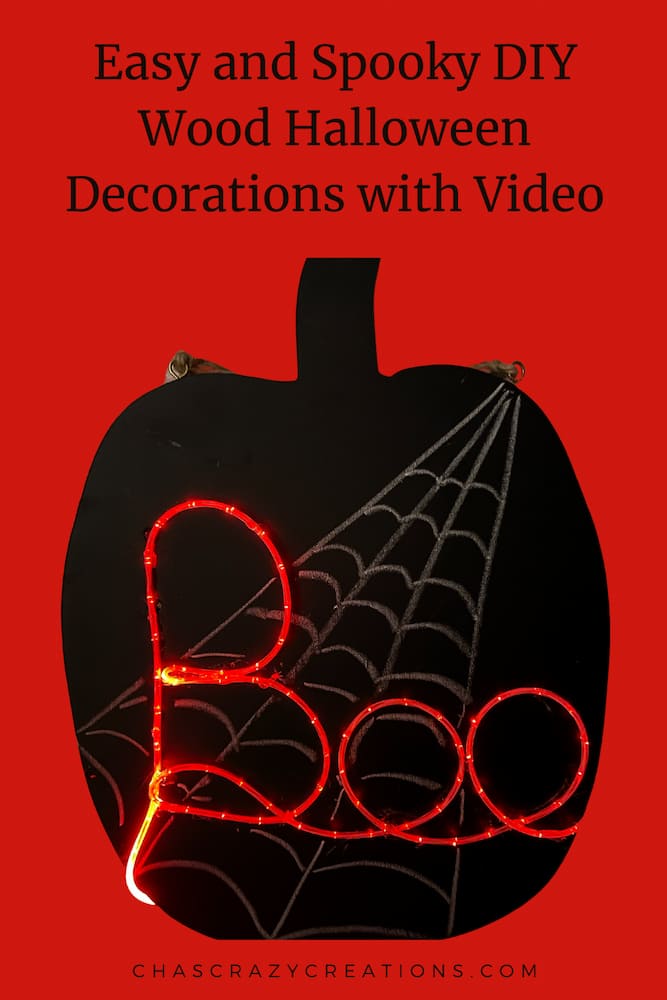
Today we are going to work on some easy DIY Halloween decorations. I have so much fun coming up with creative ideas this time of year. This is a simple project to add to your Halloween display for a haunted house, Halloween party or other Halloween celebrations. I’m going to show you an easy way to make Halloween signs you can hang on your front door or front porch to greet your guests during this spooky season. This is a fun way to get in the Halloween spirit.
DIY Wood Halloween Decorations Materials
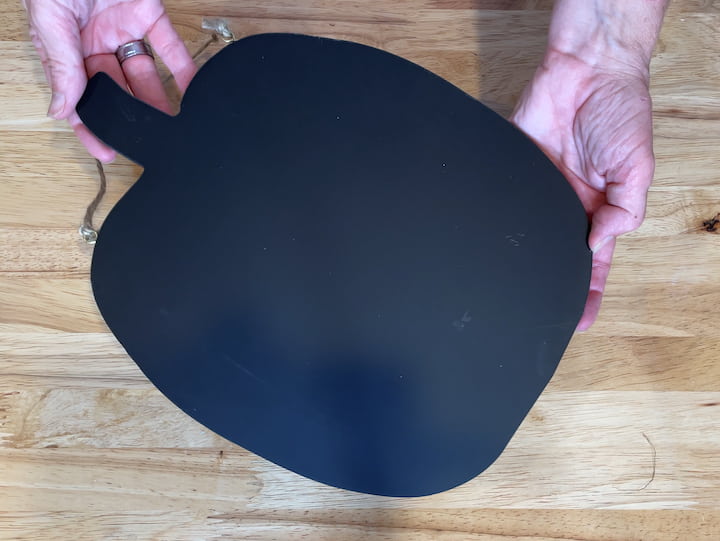
To start this project I found a pumpkin shape chalkboard at the Target dollar spot. It has wood on the back and a chalkboard on the front. I’m sure you could find something similar at craft stores. I will be using the chalkboard side for this project. I also found these fiber optic orange lights at Dollar Tree that I’ll be using to form the letters on my sign.
 WILLBOND 6 Pcs Large Size W…Shop on Amazon
, 2725 Black") FolkArt FA2725 Multi-Surfac…Shop on Amazon
FolkArt FA2725 Multi-Surfac…Shop on Amazon Crayola Chalk 12ctShop on Amazon
") JIGUOOR EL Wire Battery Pac…Shop on Amazon
JIGUOOR EL Wire Battery Pac…Shop on Amazon - Dual Temp, Precision Nozzle, and Easy Squeeze Trigger") Gorilla Mini Hot Glue Gun K…Shop on Amazon
Gorilla Mini Hot Glue Gun K…Shop on Amazon
DIY Wood Halloween Decorations Video
How to make quick Halloween decorations?
DIY Wood Halloween Decorations instructions
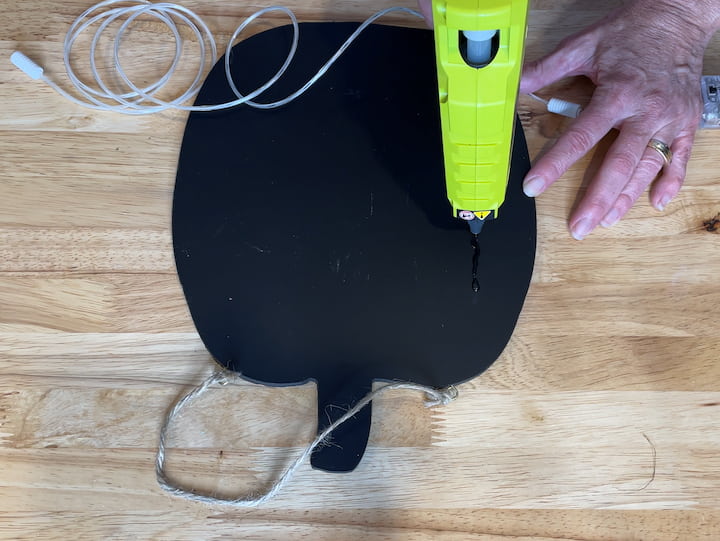
1. Add Hot Glue and lights to the wood Pumpkin
I’m going to want to hide the battery pack on the back so that it’s hidden. I don’t want to be able to see these parts or the other end. I’m going to use my hot glue gun and make a line straight down with glue and then place my lights into the glue. I’m going to wait for those to cool before I continue.

About halfway down I’m going to put a little dot of glue and loop the lights around and stick them in the glue. I will wait for it to cool.
Next, I’m going to make a second loop. I want to add another glue dot down at the bottom and stick that wire into the glue. I’m going to wait for that to cool as well.
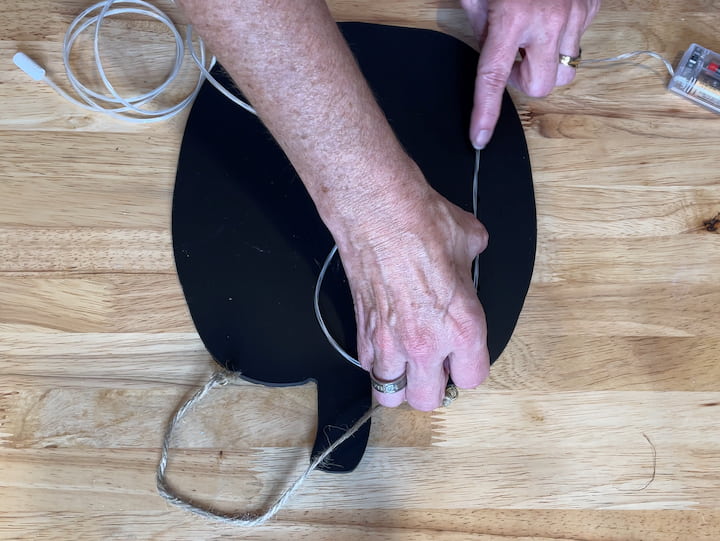
Now I add a little hot glue right in here and I pinch these wires together, so this forms the letter B. I held it a little bit longer to cool. Next, I’m going to go back down to this one and start bending this wire back. If you want you can make it a little more loopy, which I’ll probably do to make it look a little more fun. We’re going to continue on and make the next letter.

I’ve made two loops to form our “O’s” and I’m gonna hot glue the corners down to hold them in place by just adding a couple of little dabs of hot glue and then putting my loops into place. Then I’ll hold those in place until I get them all set the way I want. I could have centered this up a little bit better but, it’s a little hard to work with as you’re going.
I’m pretty pleased overall with how the letters turned out. These wires are going to tuck behind on the back, but now we get to have fun with the rest of it.
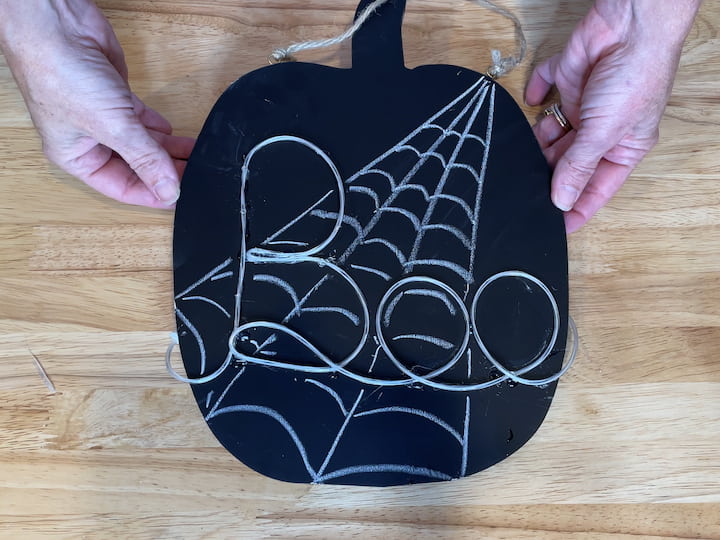
2. Use chalk to draw a design around the lights
The easiest way to embellish your sign is with chalk. I’m going to use a piece of chalk to make two eyes so that they’re maybe looking. (you can see this step in the video) You wouldn’t have to do this step if you didn’t want to, you could just leave it the way it is but, I thought if I made some eyes that could be a little fun. You could also draw googly eyes. You can use your finger to kind of swirl and soften them.
Next, I’m going to use my chalk to make cobwebs, you just can kind of make your cobwebs go across like so.
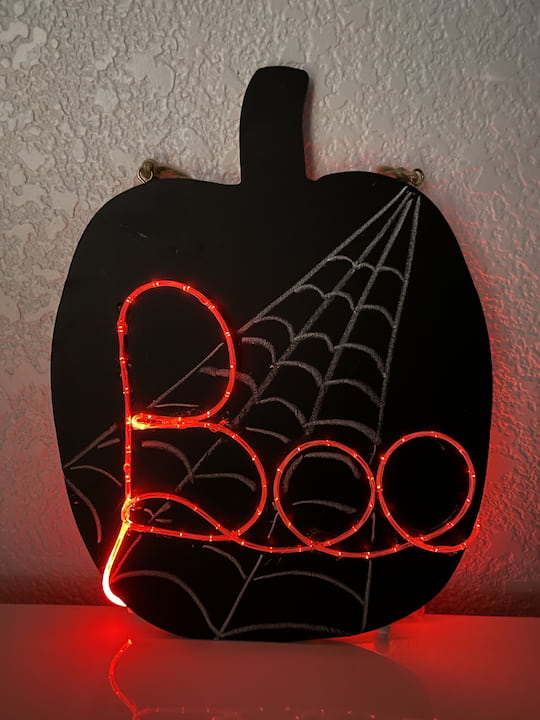
Now that it’s done let’s go check it out in the dark.
Other types of wood you can use for this easy DIY project and wood craft:
- old fences
- pallet wood
- blank wooden pumpkins or wood pumpkins
- scrap wood
- Dollar Tree wooden boards
- old wood
- wood pallets
- reclaimed wood
- wooden blocks
- hardware store scrap wood
You can use chalkboard paint acrylic paint, and besides black paint, you can also use other colors like white paint.
DIY Wood Halloween Decorations Video
Shop any of these stores and I receive a small commission at no cost to you.
 Coogam 60PCS Halloween Bats…Shop on Amazon
") ORIENTAL CHERRY Halloween D…Shop on Amazon
ORIENTAL CHERRY Halloween D…Shop on Amazon DAZONGE Halloween Decoratio…Shop on Amazon
 Halloween Party Decorations…Shop on Amazon
 OCATO 200" Halloween Spider…Shop on Amazon
Check out some of my other Halloween decor!
- Easy and Awesome DIY Dollar Tree Halloween Decor with Video
- Easy and Spooky DIY Dollar Tree Halloween Decorations on a Budget
- Turn a Old Lamp Into Halloween Fun!
DIY Wood Halloween Decorations Q & A
What do you put outside on Halloween?
Creating DIY wood Halloween decorations for your outdoor display can be a fun and creative project. Here are some ideas for DIY wood Halloween decorations you can put outside:
- Wooden Pumpkins (Jack-o-lanterns): Cut wooden boards into pumpkin shapes, paint them orange, and add facial features with black paint. You can also attach real or artificial stems for a more authentic look.
- Ghost Yard Signs: Cut out ghost shapes from plywood and paint them white. Add spooky faces with black paint and secure them to stakes to place in your yard.
- Witch’s Broom: Make a rustic witch’s broom by attaching a bundle of sticks to a wooden handle. Hang it on your front door or porch for a witchy touch.
- Cemetery Signs: Create wooden signs with humorous or spooky epitaphs to mimic tombstones. Add a weathered look with gray paint and place them around your yard.
- Coffin: Construct a simple wooden coffin and paint it to look aged. Place it in your yard, and you can even add a skeleton prop to make it more eerie.
- Haunted House Facade: Build a wooden facade that resembles a haunted house or a spooky mansion. You can paint it and add faux windows, shutters, and other details for a haunted house effect.
- Bats: Cut bat shapes out of plywood, paint them black, and attach them to stakes or hang them from trees for a bat-filled atmosphere.
- Wooden Black Cats: Create silhouette-style black cat cutouts from wood and place them strategically around your yard. You can even add glowing eyes with LED lights.
- Cauldron: Craft a wooden cauldron and paint it black. You can place a faux fire or fog machine inside for an eerie effect.
- Haunted Tree: If you have a tree in your yard, transform it into a haunted tree by attaching wooden branches and painting them black or gray. Hang ghost decorations from the branches.
- Spooky Signs: Make wooden signs with spooky phrases or directions, such as “Beware,” “Enter if You Dare,” or “Witch’s Brew,” and place them around your yard or on your front door.
- Halloween Lanterns: Create wooden lanterns with spooky cutout designs and place battery-operated candles inside for a haunting glow.
- Zombie Hands: Craft zombie hands reaching up from the ground using wood and paint them to look decayed. Position them as if they are emerging from a makeshift grave.
- Halloween Welcome Sign: Build a wooden welcome sign with Halloween-themed decorations and place it at your front door.
- Grim Reaper: Create a silhouette of the Grim Reaper with a wooden frame and black fabric or paint.
Remember to use weather-resistant paints and finishes for outdoor durability, and consider sealing your wooden decorations to protect them from the elements. Additionally, make sure to anchor or secure your decorations properly to prevent them from falling over or getting blown away by the wind.
I have several outdoor Halloween decorations that I’ve made and you can see the full tutorial at Easy and Fun DIY Halloween Yard Decorations on a Budget
How to decorate for Halloween outside on a budget?
Other cheap Halloween decorations include:
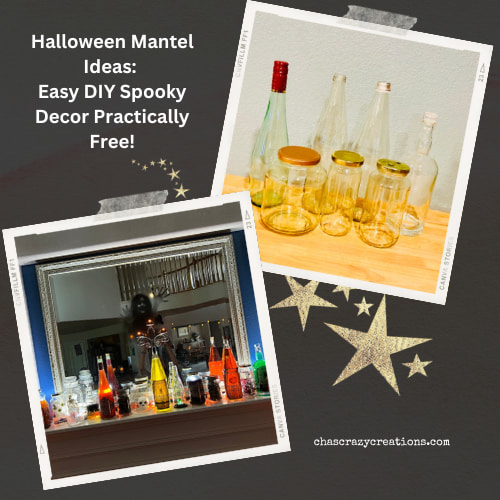
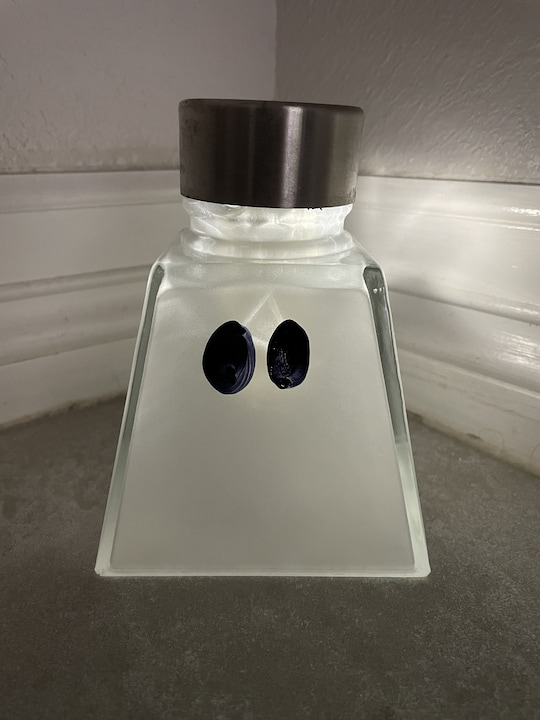
- glass jars for luminaries
- dollar store scary Halloween decorations
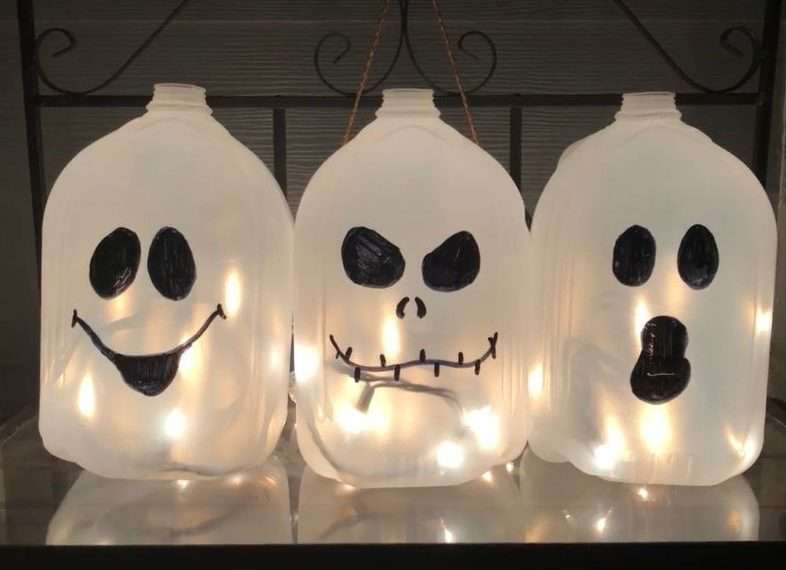
- plastic bottles to make ghosts and pumpkins
- white paper to draw ghosts
- witch hats
- dollar store Halloween yard decorations
- dollar store seasonal wreaths
- pick up inexpensive items at the thrift store
- plastic skulls
- black cats
More DIY Wood Halloween Decoration Ideas:
1. Crafting DIY Wood Halloween Decorations for Spooktacular Outdoor Fun
When Halloween comes around, there’s no better way to set the stage for a fantastic celebration than by crafting your own DIY wood Halloween decorations. Whether your goal is to create a festive atmosphere for kids, impress trick-or-treaters, or simply indulge in some creative Halloween crafting, these wooden wonders offer endless possibilities.
2. Candy Corn Garland: A Whimsical Touch to Your Wooden Fence
Channeling the iconic candy corn colors – vibrant orange, yellow, and white – can add a delightful twist to your outdoor decor. Consider crafting a candy corn-themed garland to drape gracefully along your wooden fence. A skillful application of orange paint can transform your fence into an eye-catching centerpiece, capturing the essence of Halloween and drawing in the attention of passersby, both young and old.
3. Craft a Spooky Wooden Graveyard: Paying Homage to Halloween Classics
Embrace Halloween traditions by crafting a spooky wooden graveyard scene. With tombstones bearing humorous or eerie epitaphs and skeletal hands emerging from the earth, you can create a playful homage to classic Halloween monsters like Frankenstein and other ghoulish creatures. Repurposing old wooden pallets to construct a creepy coffin serves as a chilling centerpiece within your graveyard, while stump pumpkins, whether carved or painted with grinning jack-o’-lantern faces, complete the eerie tableau.
4. The Allure of Skeletal Hands: An Eerie Addition to Your Decor
Skeletal hands can add a unique and spine-tingling element to your Halloween decorations. Craft these bony appendages from wood or even repurpose old wine bottles for an unconventional twist. Attach them securely to wooden stumps or fence posts to create the illusion of skeletal hands rising from the ground. Painted black and adorned with eerie ribbons, these skeletal hands become an attention-grabbing focal point of your outdoor display.
5. “BOO” Sign Wreath: Simple, Yet Spooky Door Decor
For a quick and effective Halloween door decoration, create a “BOO” sign using wooden letters. A coat of vibrant orange paint, combined with faux leather and spooky ribbons, transforms this simple project into an eye-catching wreath. Hang it on your door to provide the perfect, spine-tingling welcome to your Halloween festivities.
6. The Eccentric Wooden Monster: A Conversation-Starting Centerpiece
Step outside the box with an eccentric wooden monster centerpiece. Fashion this unique art piece using discarded materials such as beer caps and nails. The unexpected combination of elements, when brought together with a dash of orange paint, results in a surprising masterpiece that captures the essence of Halloween. Place it amidst your other Halloween crafts, and watch as it becomes a captivating conversation starter at your Halloween gathering.
Incorporating these DIY wood Halloween decorations into your outdoor space is sure to enchant kids and thrill trick-or-treaters, creating an atmosphere that embodies the true spirit of Halloween. Whether you’re crafting a candy corn garland for your fence or constructing a spooky graveyard tableau, these creative projects will elevate your Halloween celebrations to a whole new level of spooktacular fun.
I hope this inspires you to make some chalkboard creations of your own. I’d love it if you’d subscribe to my YouTube channel and my blog. Thanks for watching and I’ll see you in my next video and don’t forget to like, share and subscribe.