
Easy and Unique DIY Wooden Christmas Tree with Video

Are you looking for a DIY wooden Christmas tree? Here is a super simple idea that won’t break the bank and it’s reversible!
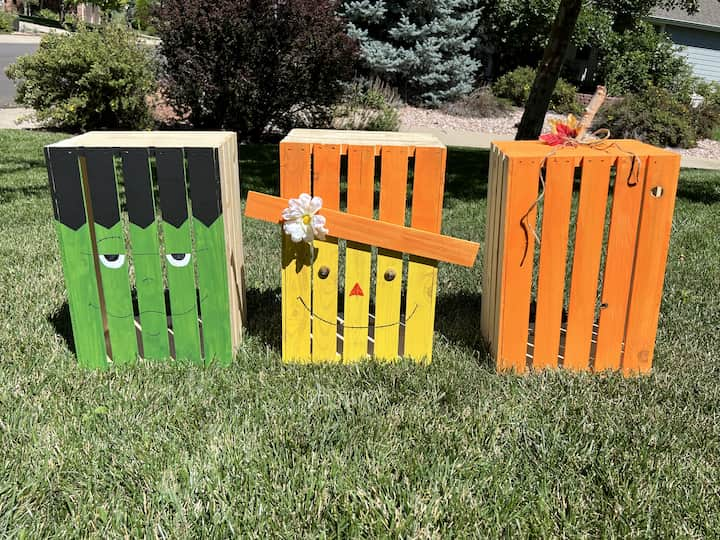
You might remember that I did these Halloween decorations in the fall, made from pallet wood boxes.

Now we’re going to turn them around and use the inside to make Christmas decorations. Today we will be making a DIY Christmas tree and the best part is no power tools are required! This is a great way to use the same materials to create holiday decor that you use can use as outdoor decorations for more than one holiday season.
DIY Wooden Christmas TreeMaterials
- 3 wood crates
- Apple Barrel Kelly Green Paint
- Folk Art Home Decor Chalk Paint
- Painter’s Tape
- LED lights
- Bulbs
- Faux presents
+") TOMENGBEIAABBCC Yeegfey 12….Shop on Amazon
TOMENGBEIAABBCC Yeegfey 12….Shop on Amazon, 21136 Kelly Green") Apple Barrel Acrylic Paint …Shop on Amazon
Apple Barrel Acrylic Paint …Shop on Amazon, PROMOFAHDC") FolkArt Home Décor Chalk F…Shop on Amazon
FolkArt Home Décor Chalk F…Shop on Amazon 4-Pack, 240460") Duck Clean Release Blue Pai…Shop on Amazon
Duck Clean Release Blue Pai…Shop on Amazon ANJAYLIA LED Fairy String L…Shop on Amazon
") MOONET 24pcs 2.36in Christm…Shop on Amazon
MOONET 24pcs 2.36in Christm…Shop on Amazon 111111 Mini Christmas Woode…Shop on Amazon
DIY Wooden Christmas Tree Video
DIY Wooden Christmas Tree instructions
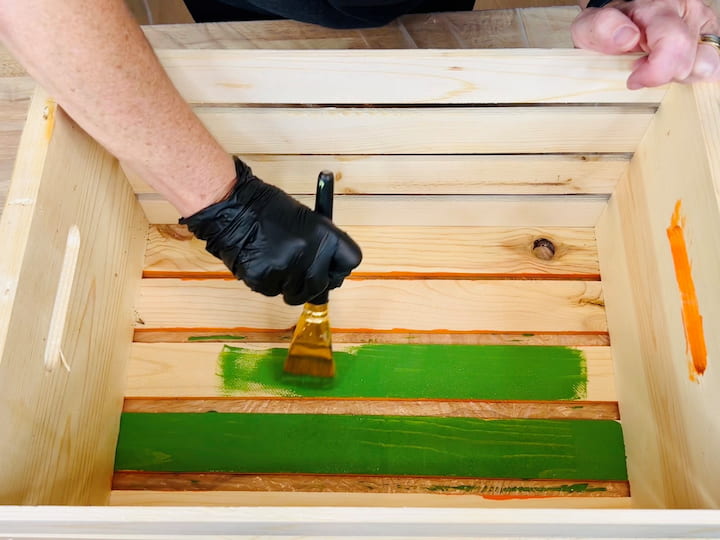
1. Paint the inside of the crates Green
I’m placing a drop cloth from the dollar store over my workbench to protect it.

I’ll be using Apple Barrel kelly green paint for this simple wooden Christmas tree. You can find this paint at any local craft store. The first thing I’m going to do is paint the bottom of the inside of each of the crates. I will paint all three of them with green paint and then let that dry. You can paint as much or as little of the crates as you want. I’m just going to be painting the bottom slats, but you could also paint the inside sides and edges. Once all three are done I’m going to let them dry completely.
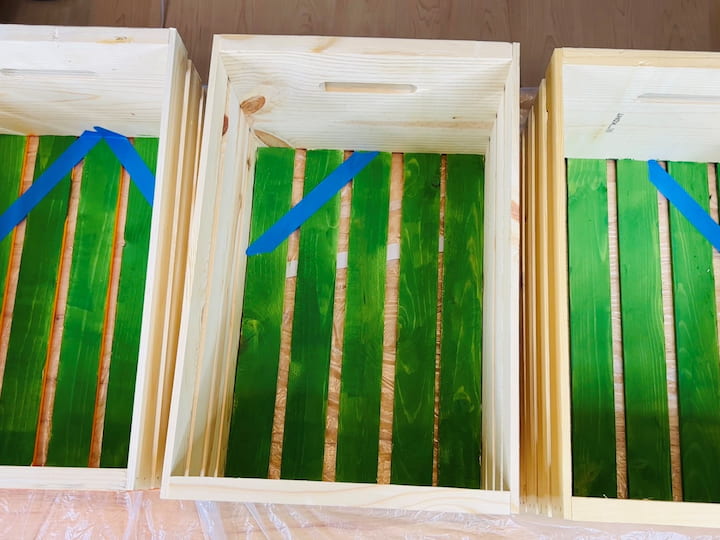
2. Add painter’s tape on the green paint
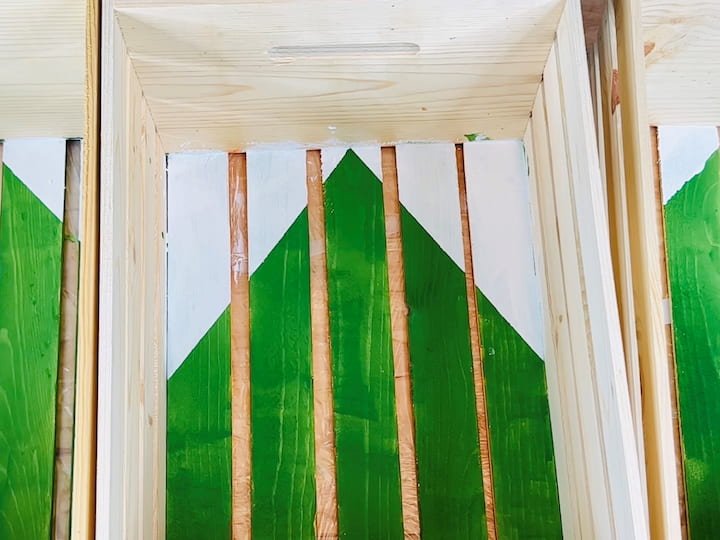
I’ve added blue painter’s tape to the corners of two of the crates and for the last crate, I made a peek at the top to create a Christmas tree shape.
3. Paint the corners inside the tape with white paint.
Next, I’ll be using folk art home decor chalk paint in the color white. I’m going to be painting the corners with this paint, from the painter’s tape to the edge of the box.
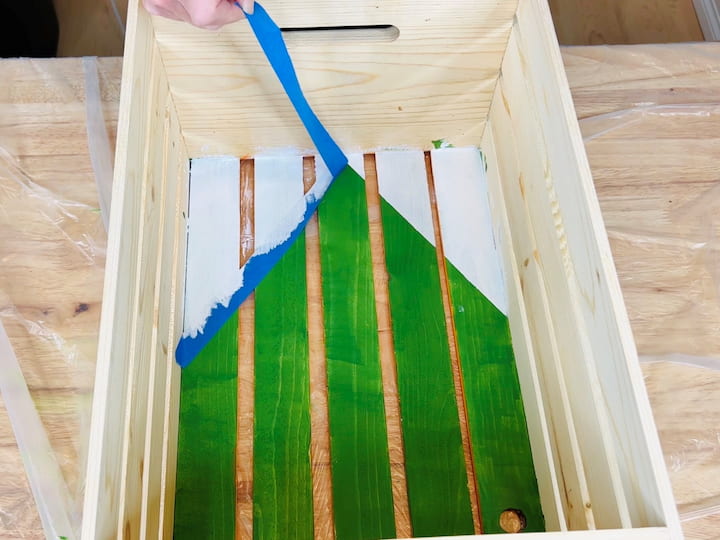
As I finish the white paint with each crate I will be pulling the painter’s tape off. Pulling the tape up while the paint is still wet is essential. If you wait until the paint is dry, the paint will stick to the tape when you remove it.
Now I’m going to let all of these crates dry completely before I can move on to the next step.
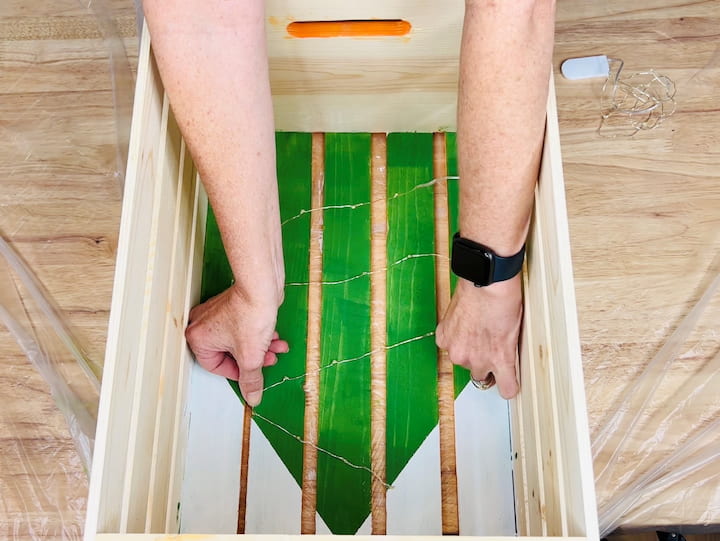
4. Hot glue On LED lights
I’ve got three battery-operated LED string lights that I’ll be working with. First I started by mapping out where I wanted the LED lights to go and how long the strand was to make sure I didn’t run out of room. I placed a dab of hot glue at the top point and then added the lights in a zig-zag pattern from the top to the bottom of the crate. I repeated this process for each of the crates.
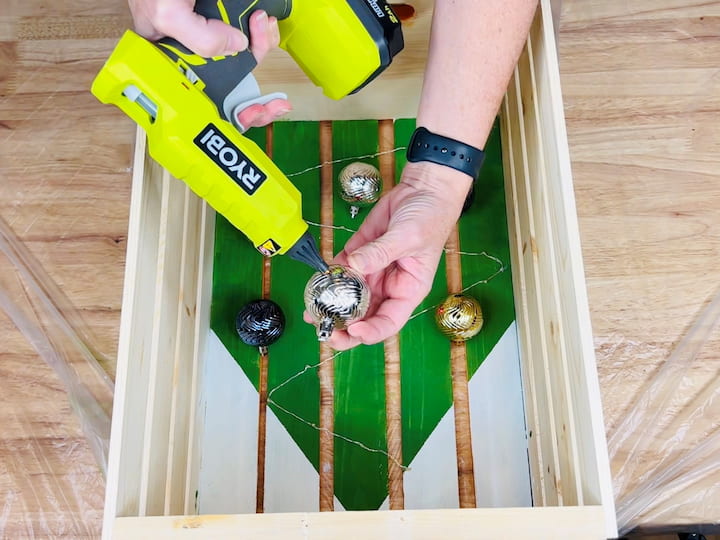
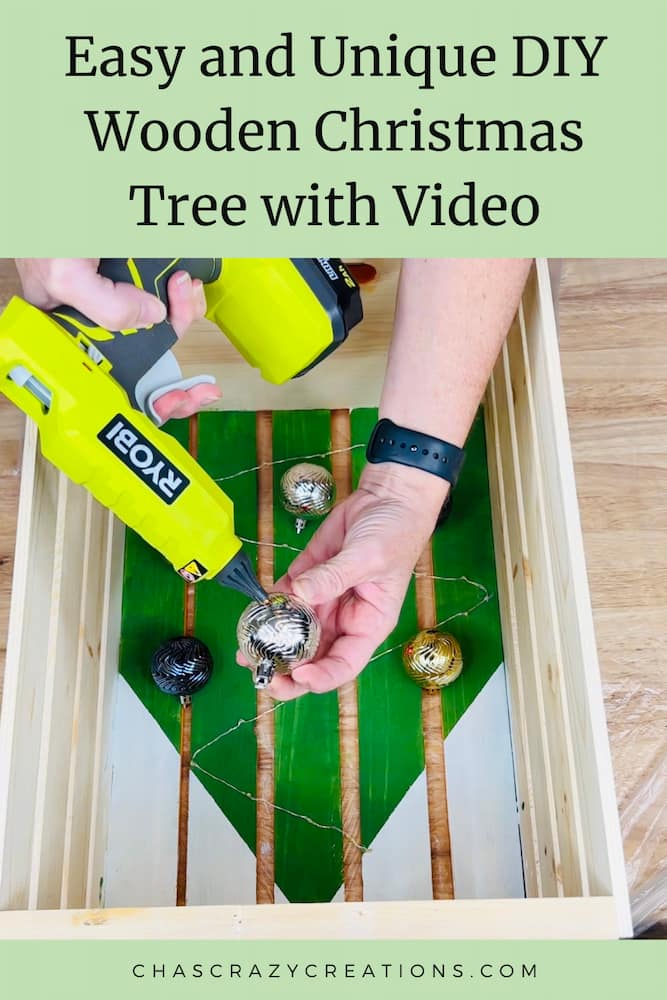
5. Hot glue on the bulbs or ornaments
Next, I used plastic Christmas ornaments from the dollar store and I placed them onto each one of the crates, just like decorating a tree. I just kind of played with them until I got the look that I wanted. Once I had those all in place I used my industrial hot glue gun, which has a stronger adhesive than regular cool glue guns, and I hot glued each of the bulbs into place. You could get creative with your wooden Christmas tree decor and add your own twist. Maybe by adding pine cones or perhaps a star on the top of the tree.
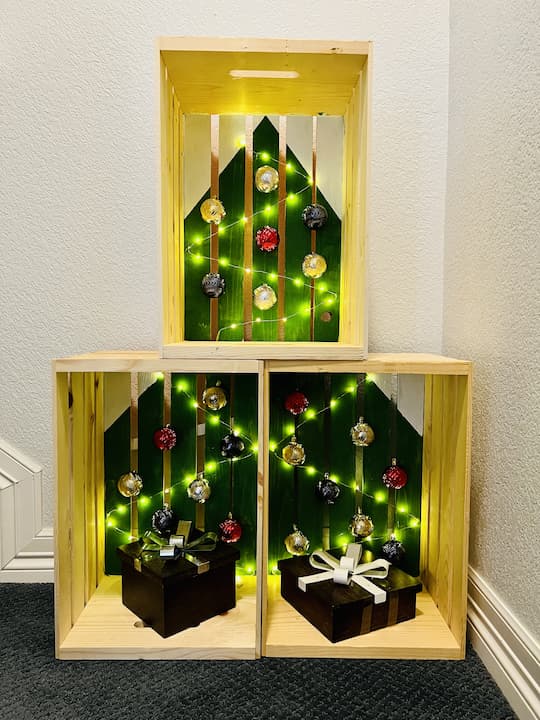
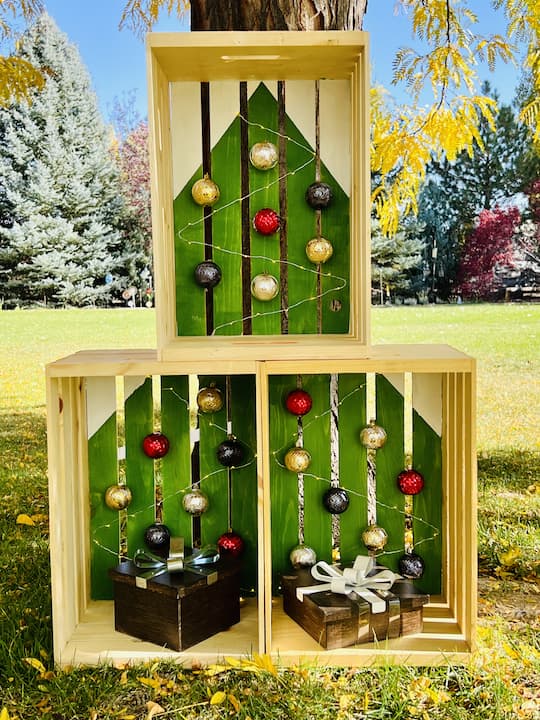
6. Turn on the lights and stack the crates
Turn All the Lights On and stack the crates in the shape of an actual Christmas tree.
I’ve added some faux gift boxes to the bottom. You could wrap your own DIY Christmas gifts, but these happen to be little wood boxes that I already had. This set of three crates can be my fall decor and my Christmas decor.
I hope this inspires you to create a wood tree of your own. I’d love it if you’d subscribe to my YouTube channel and my blog

Thanks for watching this full tutorial and I’ll see you in my next video and don’t forget to like, share and subscribe
Check out some of my other Christmas posts!
- 6 Amazing & Easy DIY Outdoor Christmas Decorations
- Easy and Cute Dollar Tree DIY Gnome Christmas Tree
- 5 Beautiful Dollar Tree Christmas Crafts For Under $1
DIY Wooden Christmas Tree Video
Shop any of these stores and I receive a small commission at no cost to you.
 GOOSH Lighted Christmas Sno…Shop on Amazon
 SMIRLY Charcuterie Large Ba…Shop on Amazon
 Interchangeable Seasonal We…Shop on Amazon
 AOGU 48 Inch Faux Fur Chris…Shop on Amazon
 Christmas Decorations Chris…Shop on Amazon
") The Children's Place Baby F…Shop on Amazon
The Children's Place Baby F…Shop on Amazon
What other wood Christmas decor and DIY projects can you make?
- You could make a pallet Christmas tree
- You could use some wood planks and wood glue or wood screws to make your own wooden Christmas tree.
- You could make tree bases with some scrap wood, a circular saw, and a nail gun for the bottom of the tree.
- If you feel comfortable with a saw, you could make a tree cutout and make a DIY wood Christmas tree mason jar sconce out of scrap pieces of wood.
- You can make wooden blocks
- Make a wood snowman with wood scraps

Easy and Unique DIY Wooden Christmas Tree with Video
Equipment
- Hot Glue Gun
Materials
- 3 wood crates
- Apple Barrel Kelly Green Paint
- Folk Art Home Decor Chalk Paint
- Painter’s Tape
- LED lights
- Bulbs
- Faux presents
Instructions
- PAINT THE INSIDE OF THE CRATES GREEN
- ADD PAINTER’S TAPE ON THE GREEN PAINT
- PAINT THE CORNERS INSIDE THE TAPE WITH WHITE PAINT.
- HOT GLUE ON LED LIGHTS
- HOT GLUE ON THE BULBS OR ORNAMENTS
- TURN ON THE LIGHTS AND STACK THE CRATES
Video


Wow -that’s amazing! You always think of fabulous things I’d never dream of! What a wonderful holiday craft. I could see this becoming a tradition! Thanks again for the excellent ideas!
Thank you so much Barbara
wow so cool
Thank you Faith