
DIY CRAFT IDEAS TO MAKE AND SELL
Do you like to make your own gifts? Would you like to make a little money on the side? I’m hosting another Hometalk TV episode and this time I’m creating DIY craft ideas to make and sell.
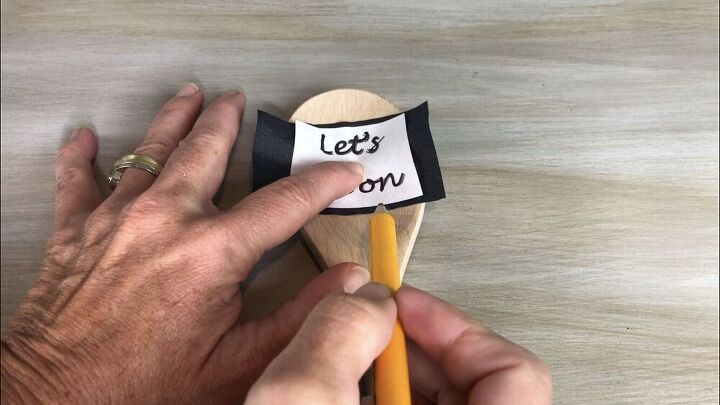
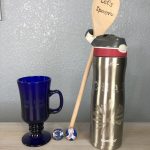
Wood Burned Spoon
I purchased a wood spoon from Walmart.
I cut a square of carbon paper and placed it on the spoon with the carbon side down.
I printed out the woods “Let’s Spoon” onto a piece of paper and placed that onto the carbon paper. I then used a pencil and traced the words.
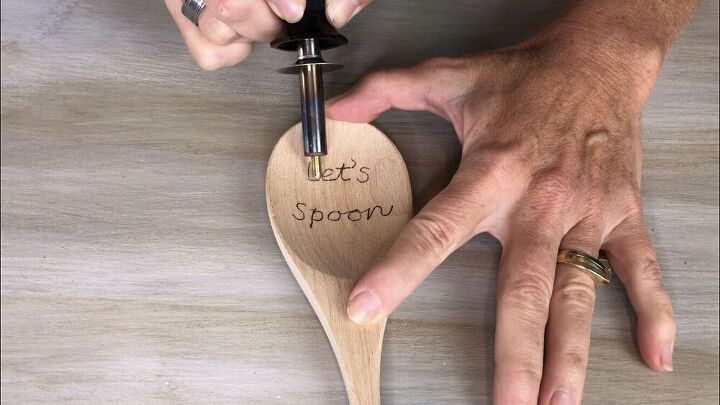
The carbon left the words onto the spoon.
I then warmed up my wood burning tool, and I traced the carbon letters with the wood burning tool.
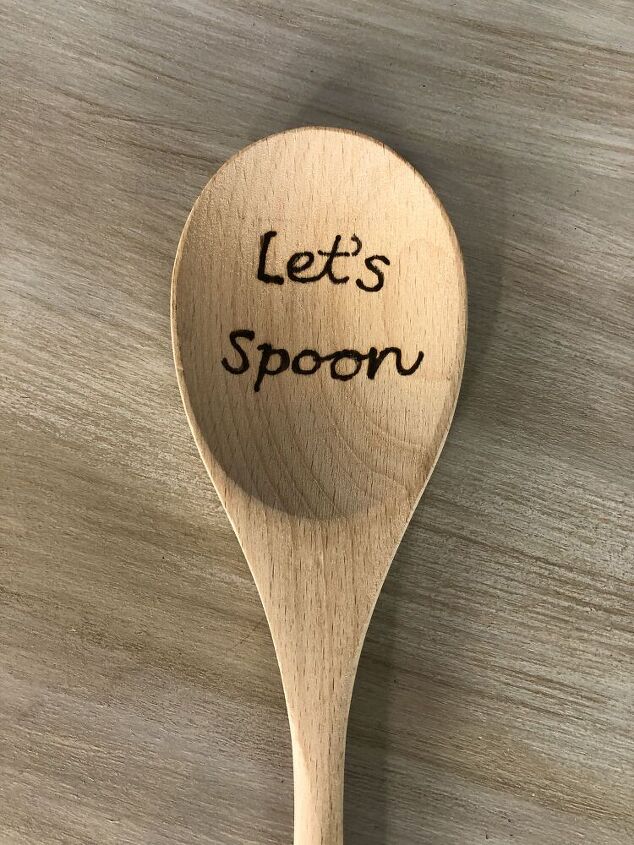
You could easily decorate the handle, write other creative sayings, draw pictures, etc.
See more wood burning ideas here
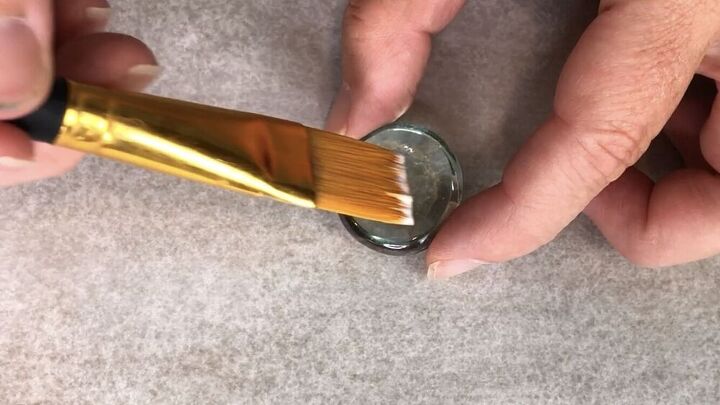
DIY Magnets
Using clear flat glass rocks from Dollar Tree, I painted Mod Podge onto the back of the flat rock.
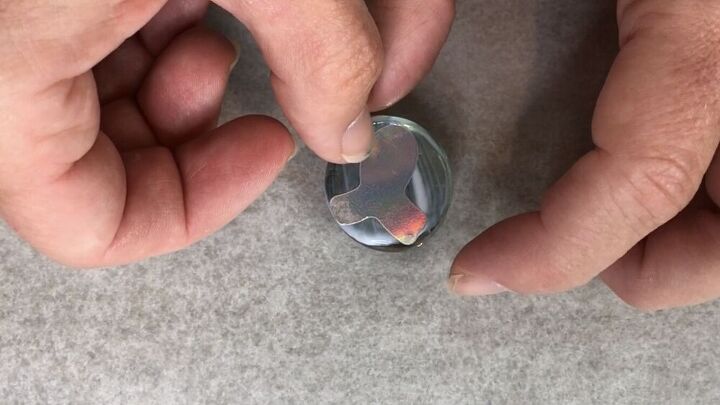
I then placed a sticker face down onto the Mod Podge.
You could easily use other items like napkin, paper, wrapping paper, photos, etc.
I then placed another layer of Mod Podge over the top to seal it.
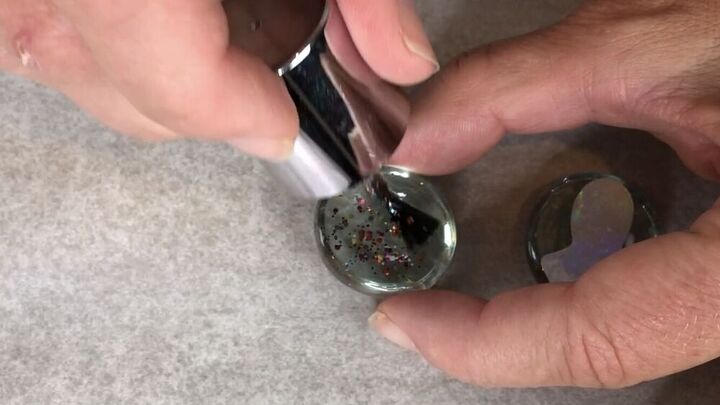
While that was drying I painted on some glitter nail polish on a second rock.
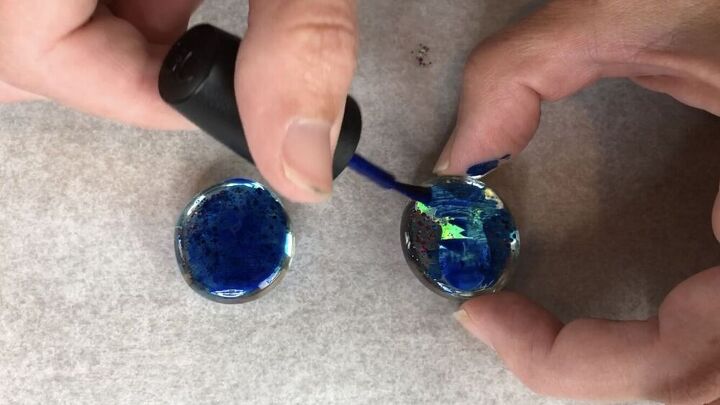
Once both were dry, I painted on a layer of solid nail polish on top to create a solid background. You could easily use acrylic paint as well.
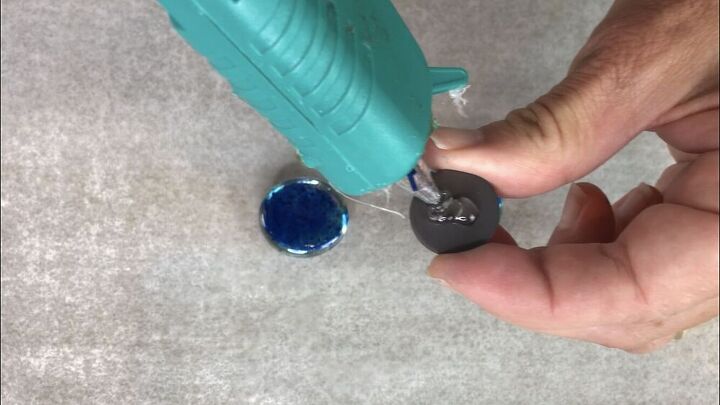
Once they were dry, I hot glued magnets onto the back of the rocks.
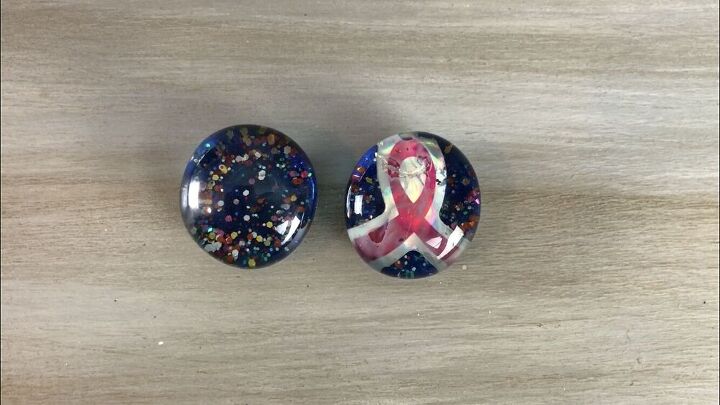
There are so many possibilities for this little project and they can be personalized so easily.
If you want to see more of options for these you can check out this post –
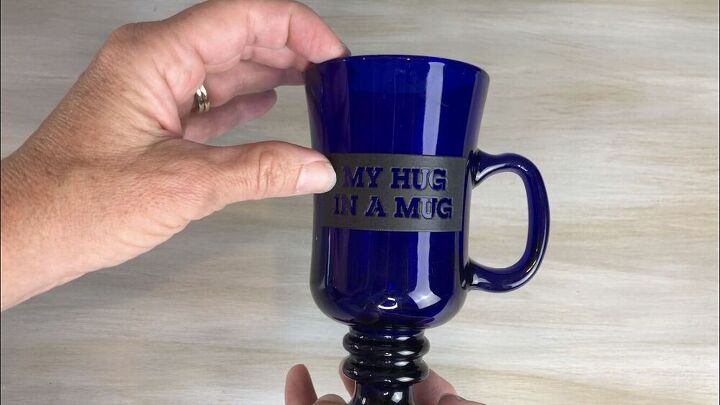
Etched Glass
I placed an adhesive stencil onto a glass mug.
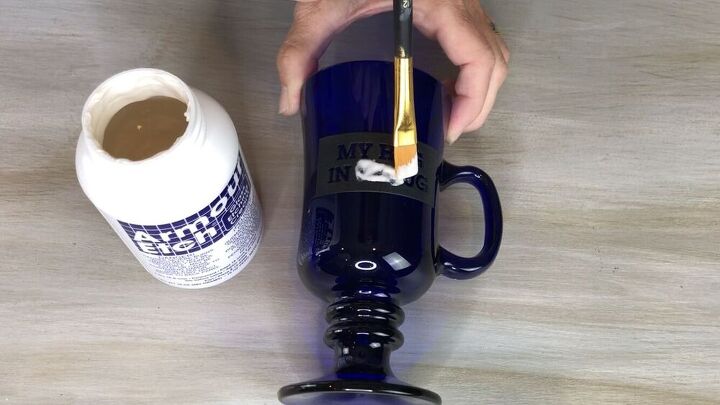
I painted Armour Etch (etching cream) onto the stencil.
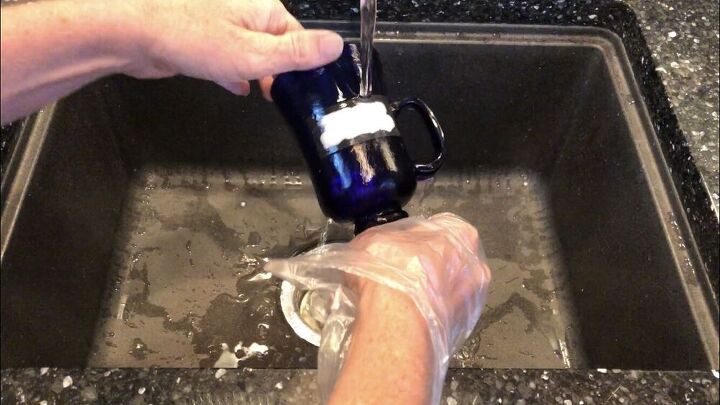
I let it sit for 10 minutes and then rinsed the etching cream off.
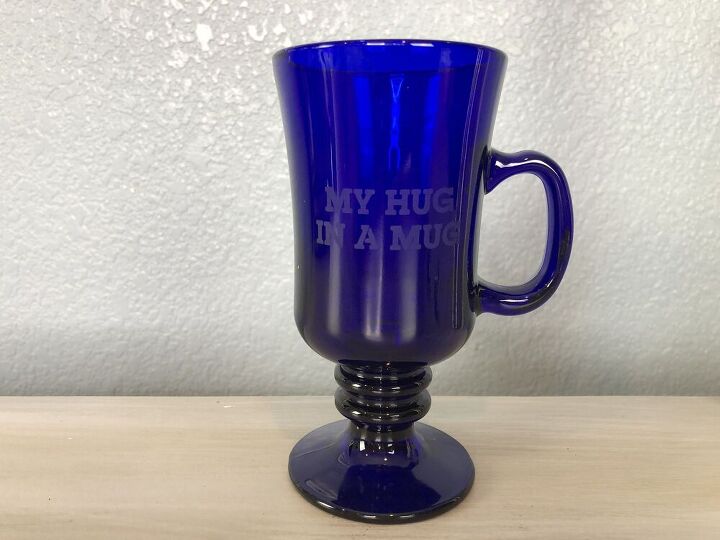
You can do this with anything that’s glass, and the possibilities are endless – candle holders, mirrors, picture frames, recycled jars and bottles…
Want to see more etched glass options click on these…
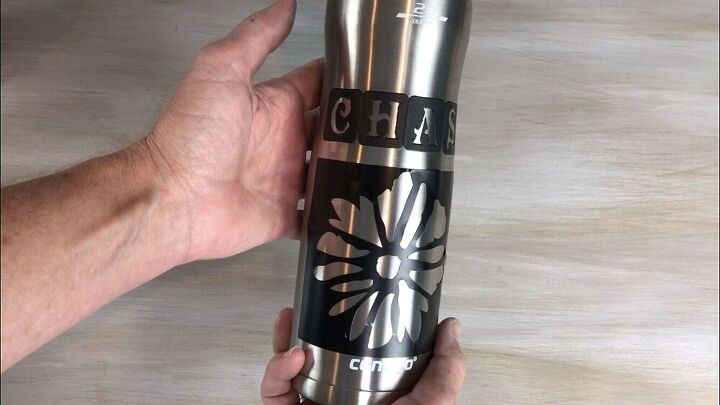
Engraving Stainless
I placed an adhesive stencil onto a stainless steel water bottle.
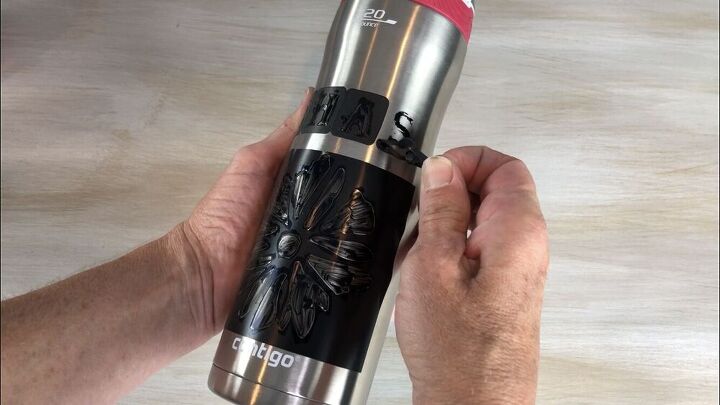
I colored the stencil in with a dry erase marker and peeled the stencil off.
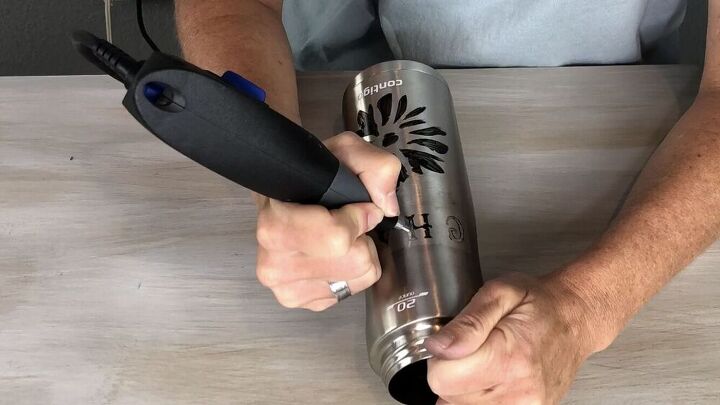
I used my Dremmel Engraver and engraved over the dry erase maker.
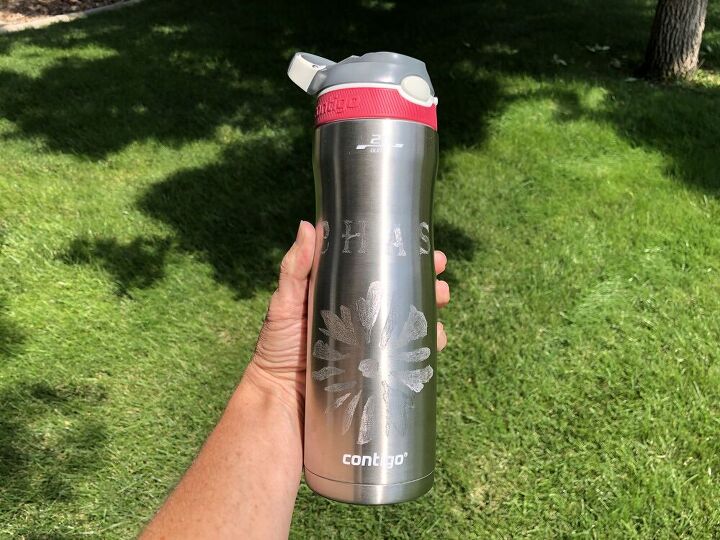
This is great for personalizing, and can be done on stainless coffee mugs and water bottles.

DIY CRAFT IDEAS TO MAKE AND SELL VIDEO
Shop any of these stores and I receive a small commission at no cost to you.
Click on the images to shop for the items on this post

EASY & AWESOME DIY GIFTS ON A BUDGET TO MAKE AND SELL Ebook
Do you love to make gifts for friends and family members? Would you like to personalize your gifts too? This book is for you! Over 30 DIYs gifts on a budget plus extra tips, tricks, eco-friendly gift wrapping ideas, and more!
So what are you waiting for?!!! Get your copy today and start creating!
Find out “What Exactly Does It Mean To Repurpose Or Upcycle“, save money, and create the most amazing things.
Don’t forget to link to ThriveCart – Book

I still love the spoons!
********************************************************
Thank you for sharing at #OverTheMoon. Pinned and shared. Have a lovely week. I hope to see you at next week’s party too! Please stay safe and healthy. Come party with us at Over The Moon! Catapult your content Over The Moon! @marilyn_lesniak @EclecticRedBarn
********************************************************
Thank you so much Marilyn (I’m partial to them too)
Wonderful projects! I think my favorite is the “Let’s spoon”. -Marci @ Stone Cottage Adventures
Thank you so much Marci, I thought that one was fun too 🙂 I have given that as a gift to many people. They all seem to like it too.
Such great ideas and great post idea!! Thanks for sharing at Charming Homes & Gardens!
Thank you so much Kristin and thanks for a great party.
Great creative ideas–on a budget, too! Win-win! I love making theme baskets and these ideas could be worked right in!
Thank you so much Kathy, I am so happy that you like the projects and LOVE that you make themed baskets.
Great craft ideas to make and sell. That wooden spoon is so funny and cute. These all look great!
Thank you so much Jenny and I am so glad you like the saying on the spoon. I thought it was funny too 🙂
You came up with a great variety of ideas and techniques to upgrade dollar store items!
Thank you so much Allyson, with the holidays coming up fast, I thought it would be great to get some easy DIY’s out there for gift ideas.
What a lot of fun ideas. I love personalised gifts so these ideas are fabulous.
Thank you so much Julie, I’m so glad you like making gifts too!
These are all super creative ideas! Love the magnets!
What a great way to make extra money!
Happy day!
karianne
Thank you so much KariAnne! They’re so great for the holidays coming up too, whether it’s to sell or make as gifts!
This is top-notch. I have to voice my passion for your kindness giving support to those people that should have guidance on this important matter.
Thank you so much
These are all such fabulous ideas! The only one I haven’t tried yet is engraving stainless. Pinned.
Thank you Joanne and that engraver is so great. Not only can you personalize on stainless, but you can engrave things like my kid’s calculators with their names for school. Then with so many kids having the same kind, they know exactly which one is theirs.
I love these ideas, Chas. I haven’t used etching cream, but it’s been on my to do list for a long time. I need to try it.
Thank you so much Beverly! I love that stuff so much – so great for so many projects.
Great ideas on updating those dollar store items, Chas!
Thank you so much Gail
You are so creative! Lots of good ideas here.
Thank you so much Carol for the kind words and I’m s glad you like it.