
How To Etch Glass – It’s So Easy!
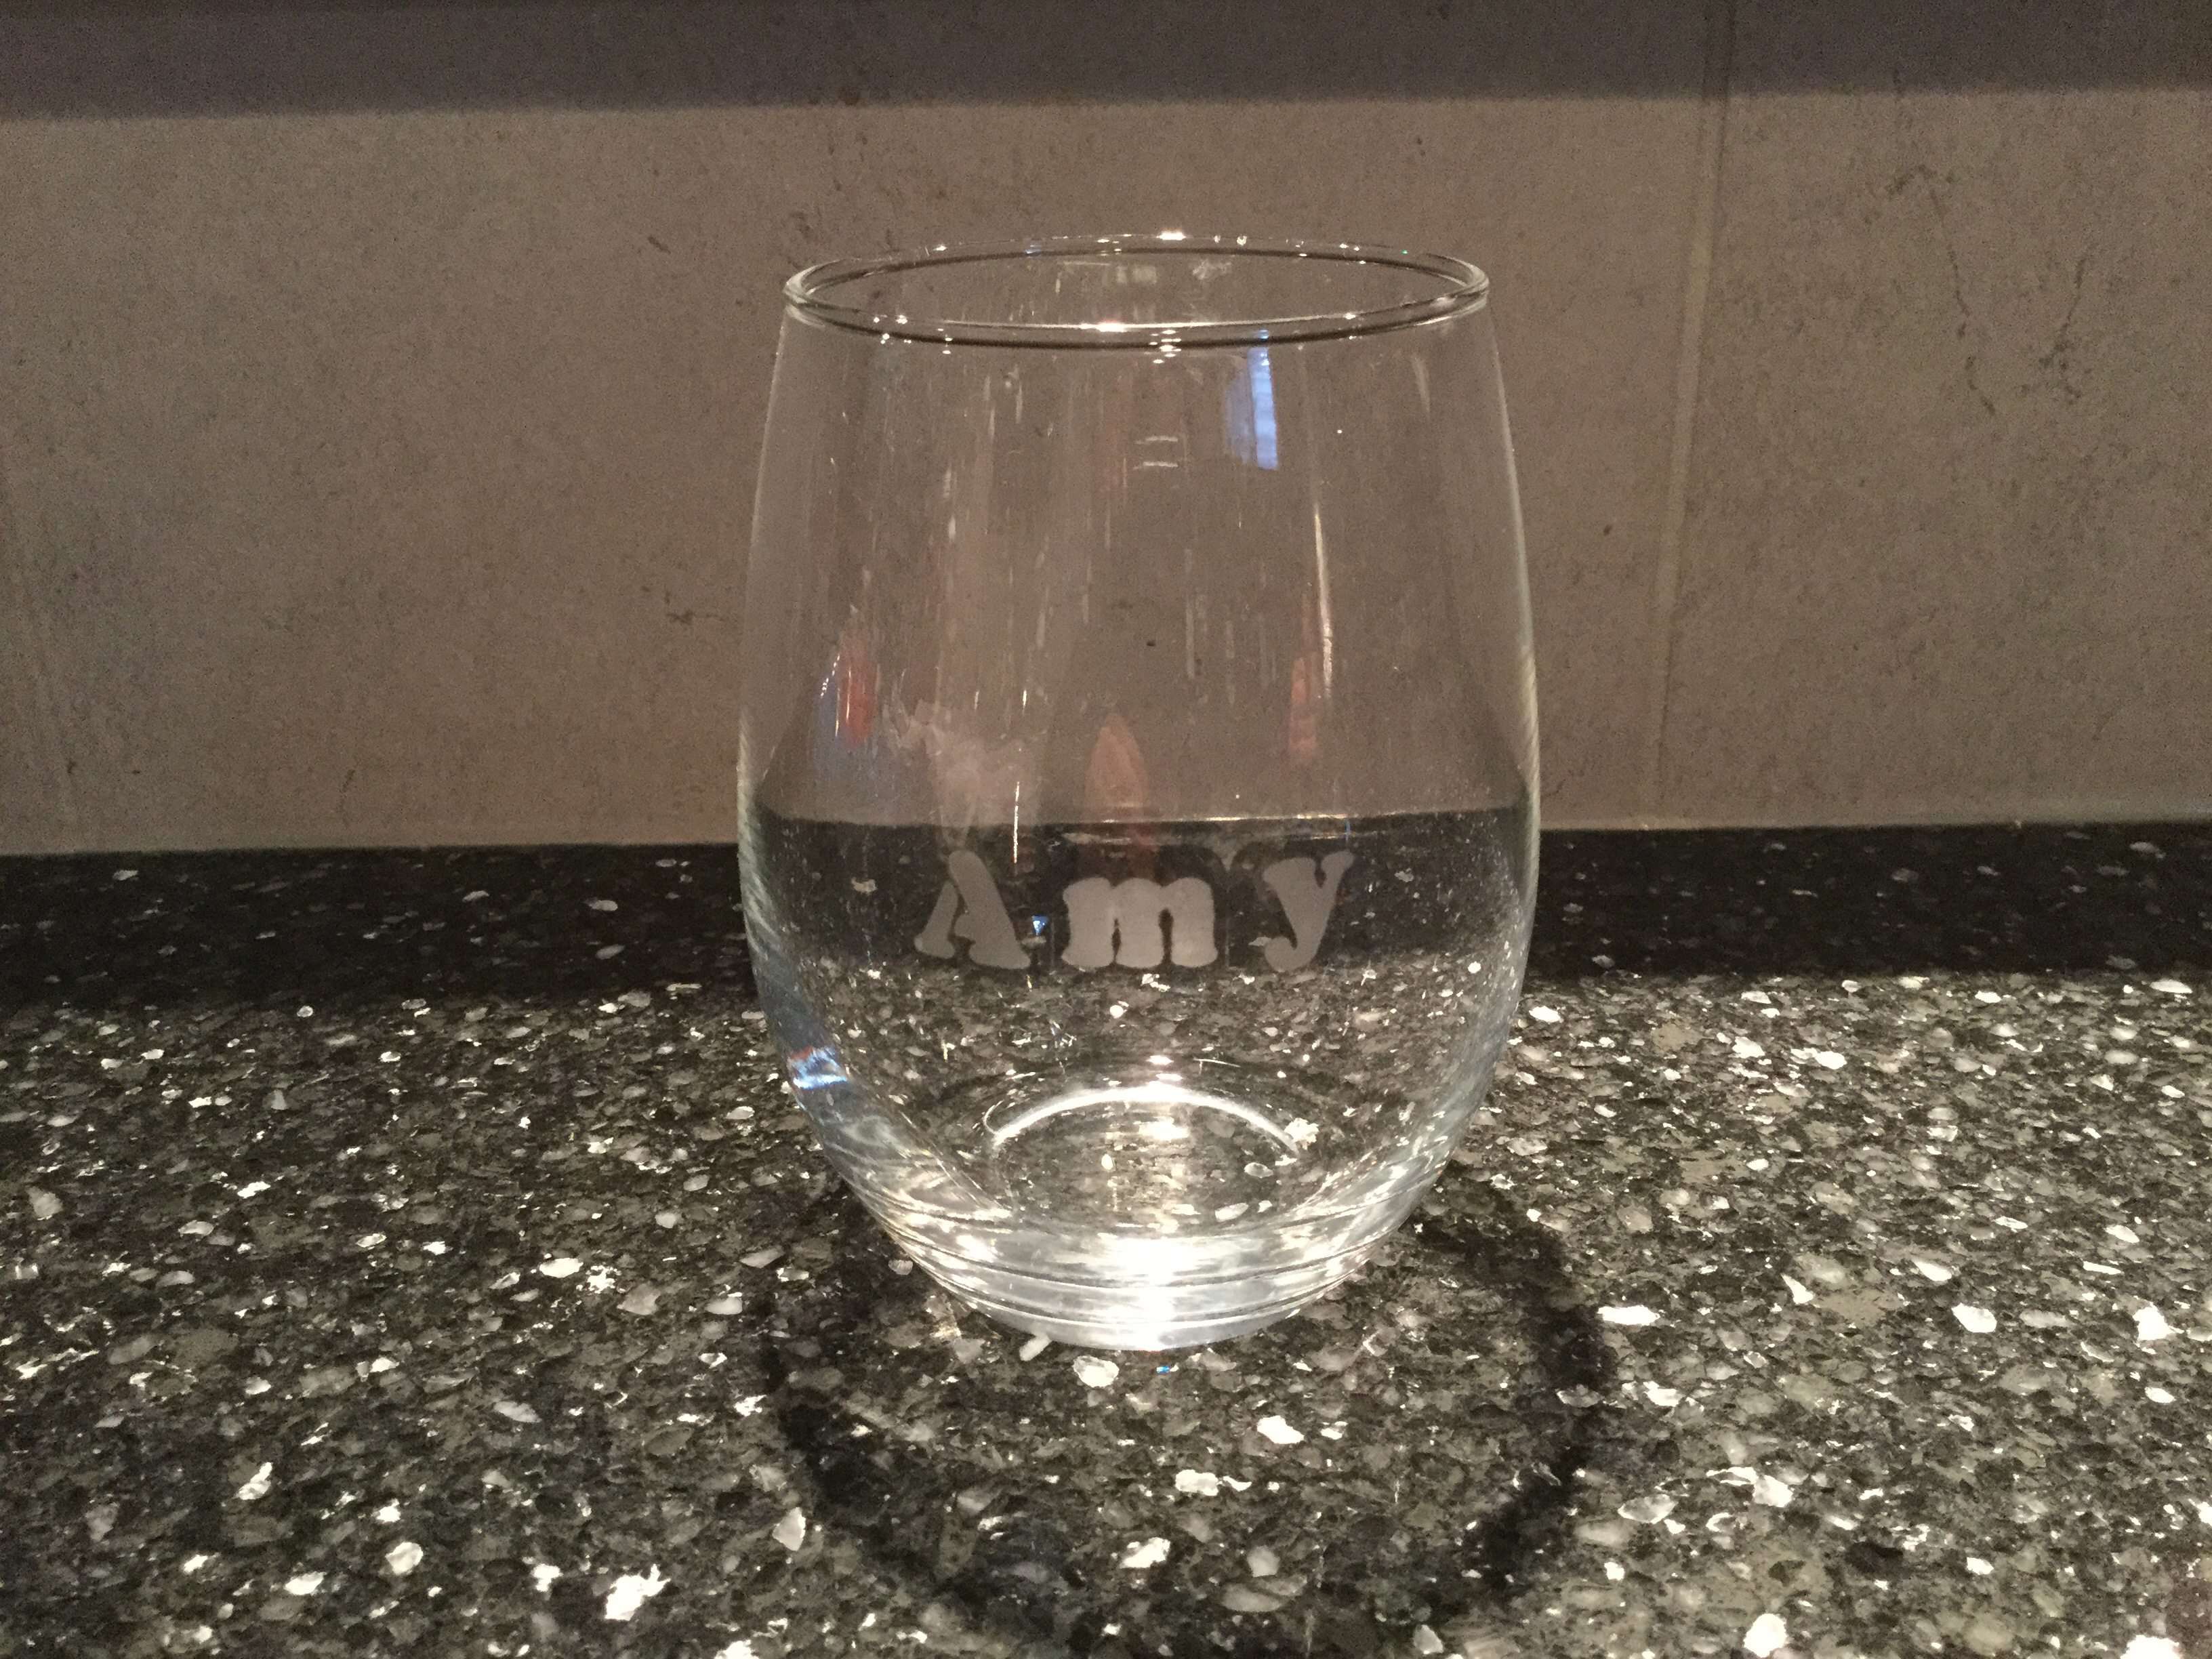
Today I’m going to show you how easy it can be to etch glass! Great for all kinds of personalized gifts! You can etch glassware for birthdays, weddings, anniversaries and really any occasion. Once you get started, you’ll want to try even more.
How To Etch Glass Video
How To Etch Glass Materials
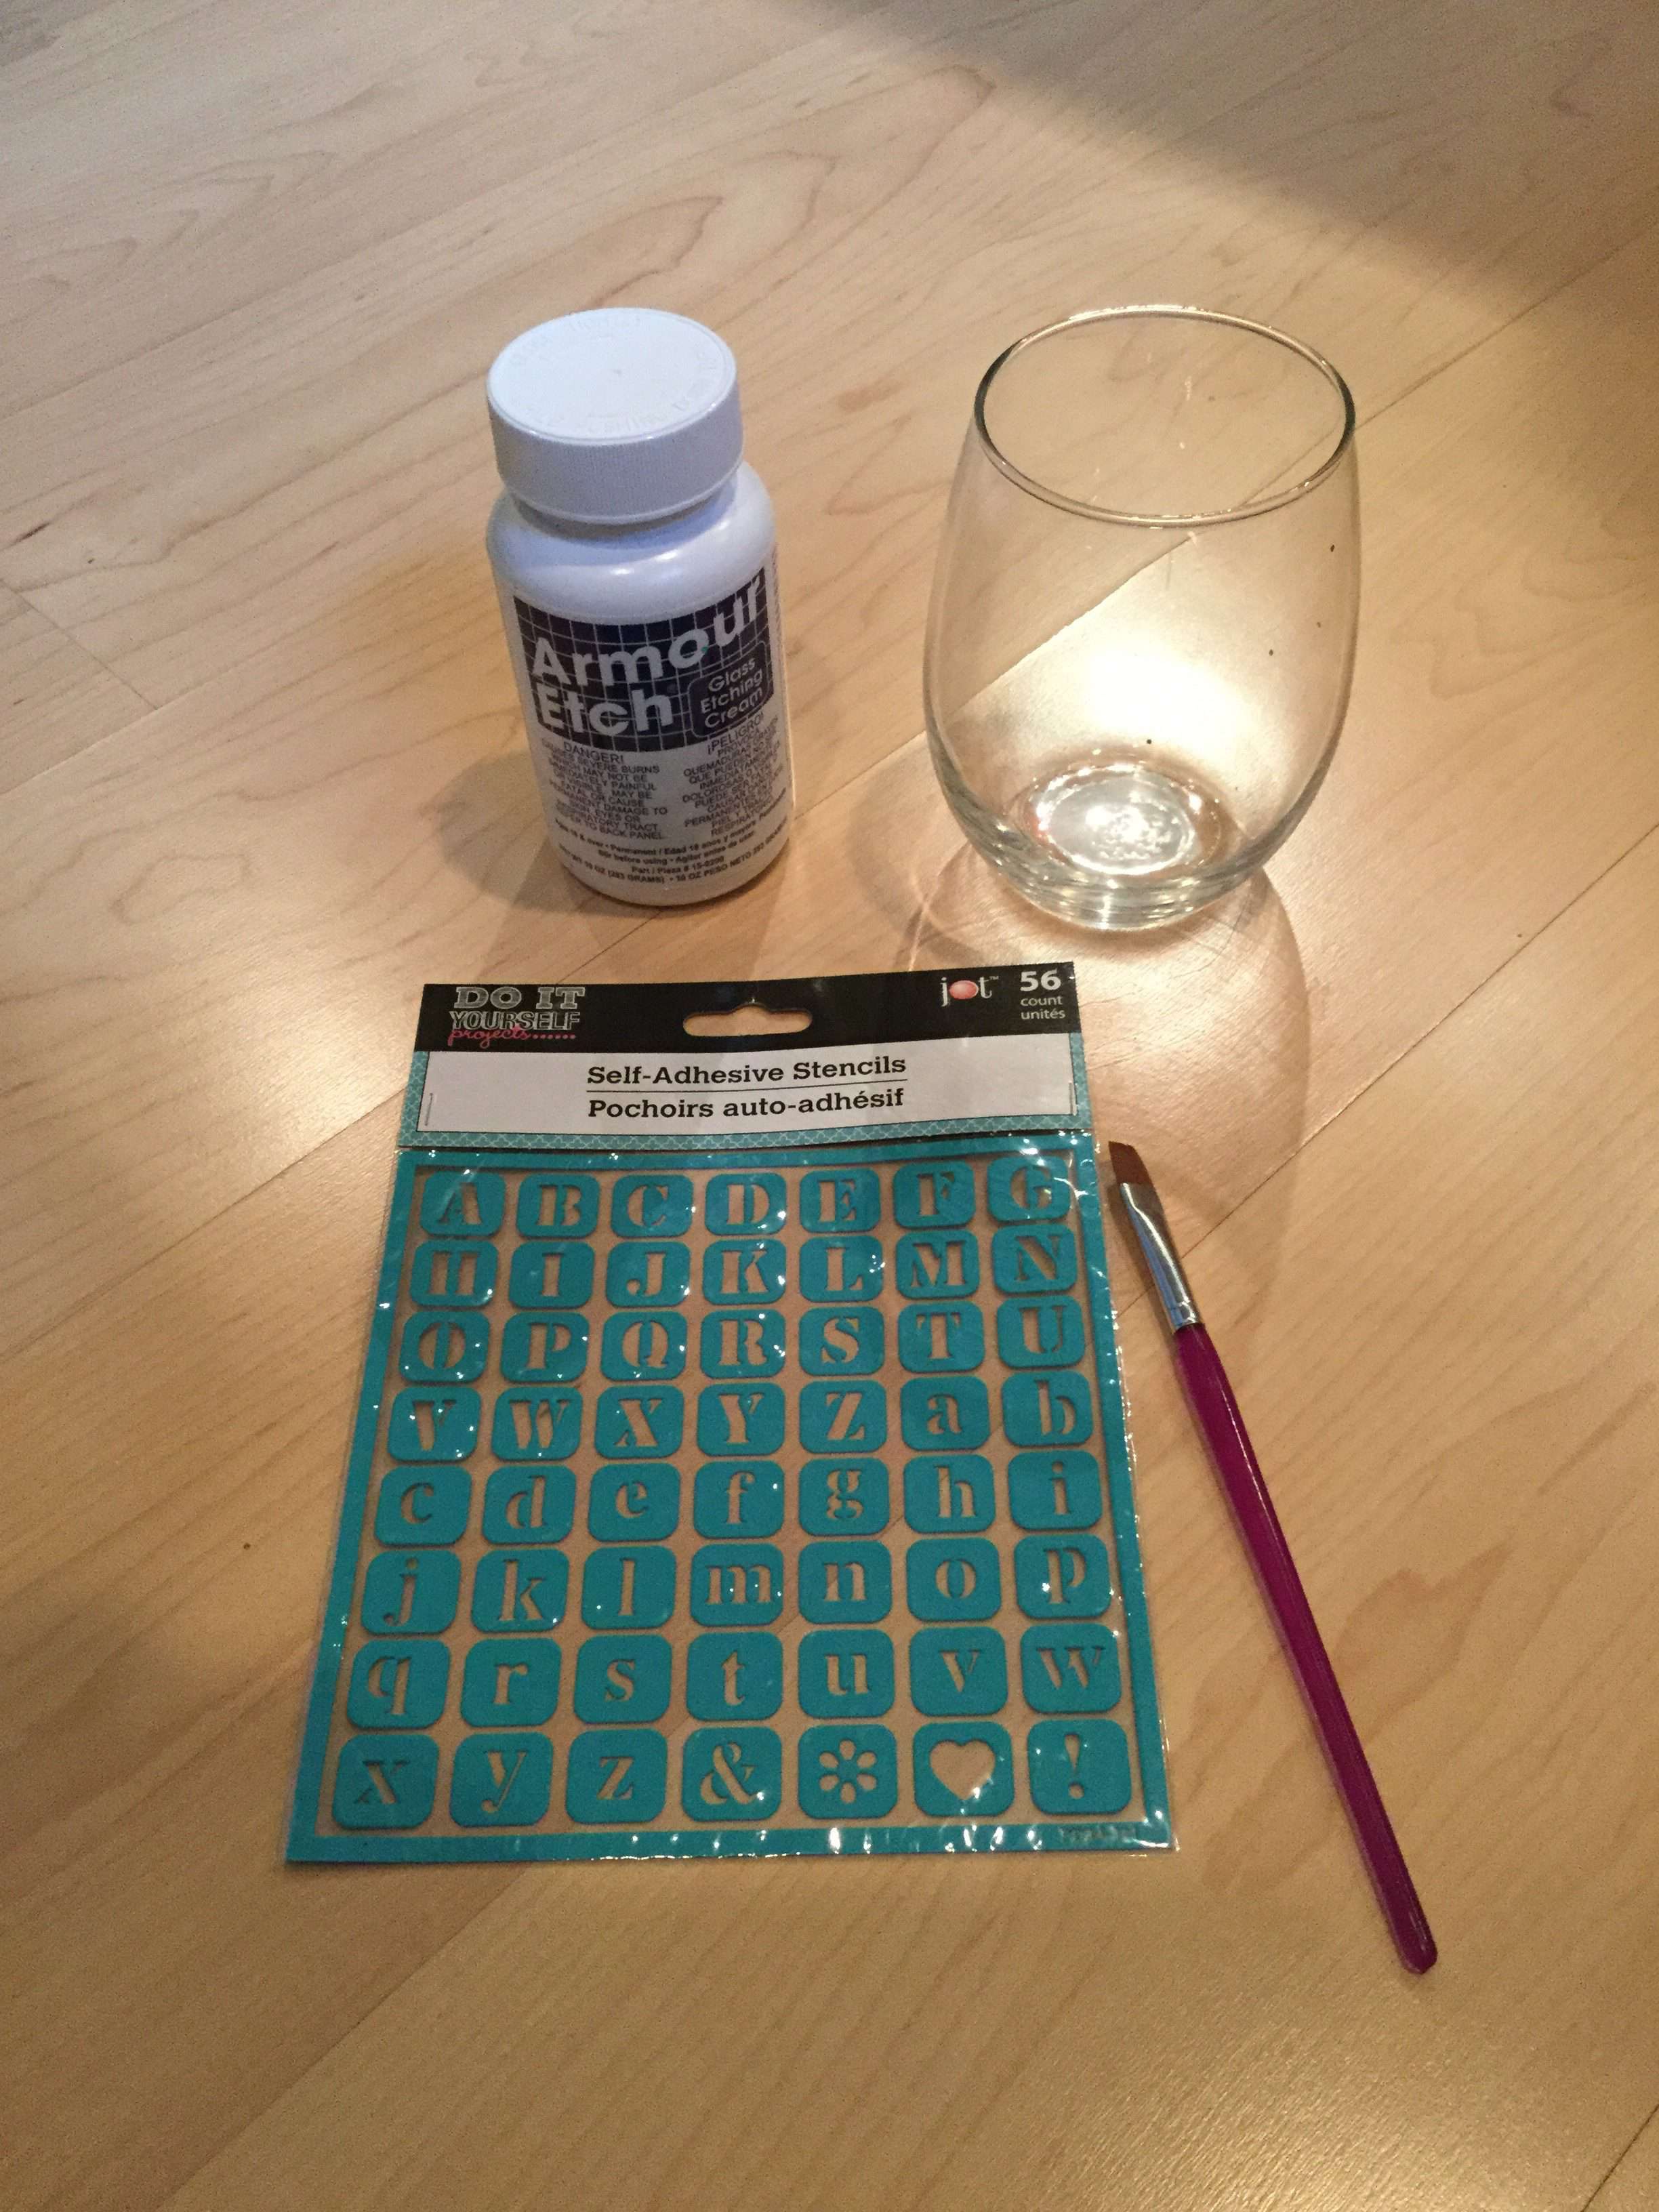
What supplies do I need to etch glass?
You can find these products at craft stores or online.
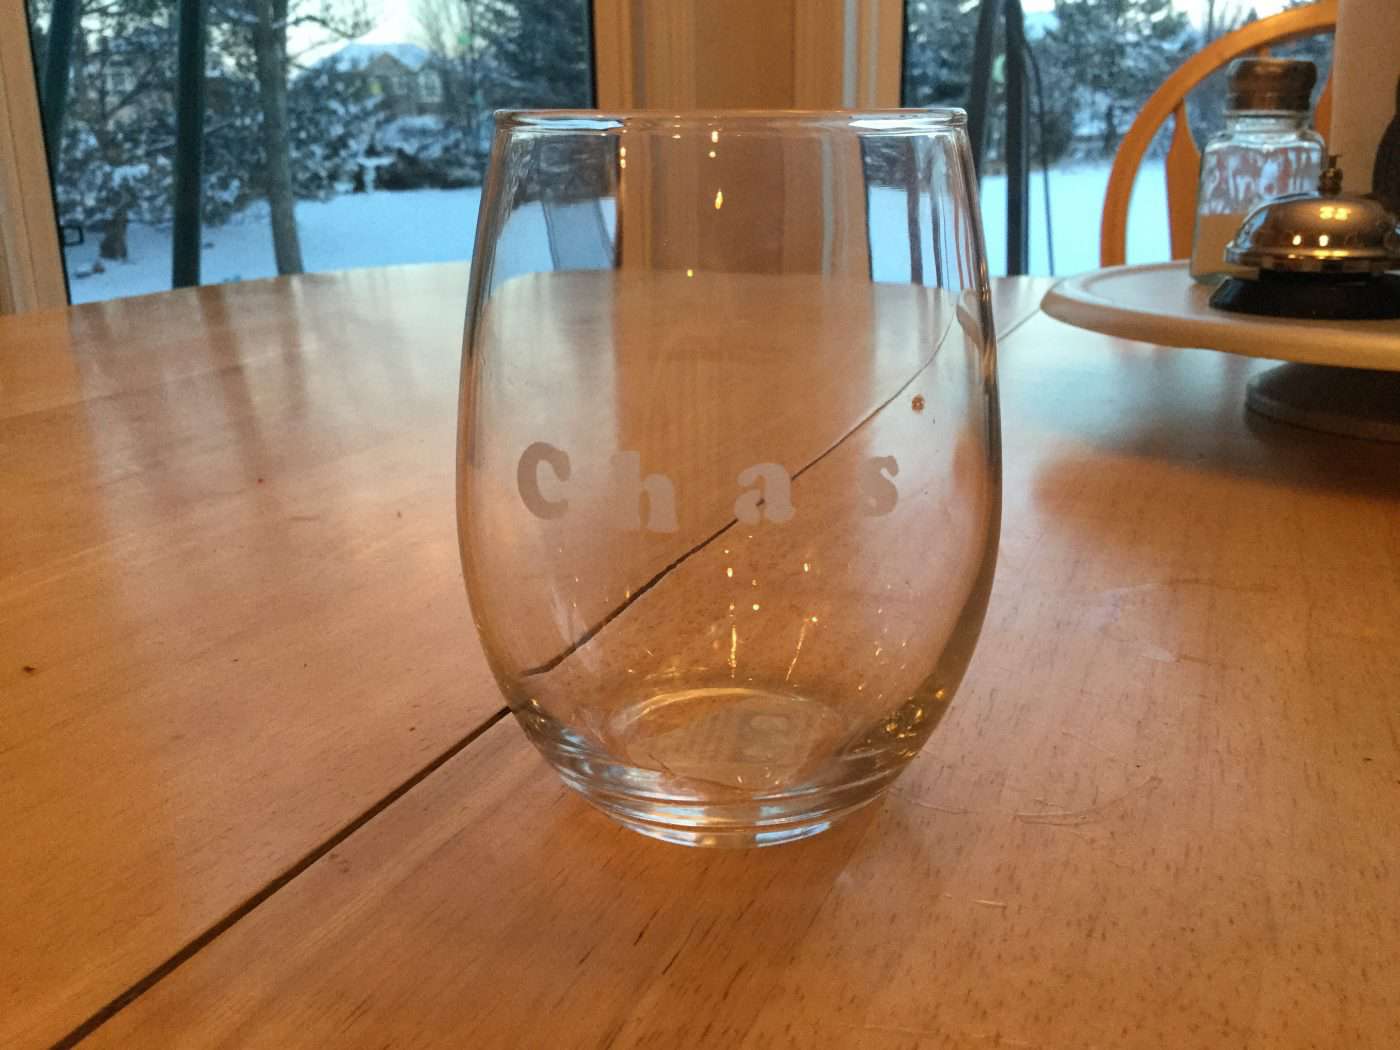
- An item of your choice to etch (in this demo I’ll be etching a wine glass, you can watch my video below for more etching ideas)
- Armour Etching Cream
- Self Adhesive Stencils
- Paint Brush
Can you etch glass yourself?
Yes, you can etch glass yourself with the right tools and materials. Glass etching is a creative and satisfying craft that allows you to personalize glass items with custom designs or patterns. Whether you’re looking to create decorative glassware, add privacy to windows, or enhance mirrors, DIY glass etching is a versatile and accessible technique. With proper safety precautions and a bit of practice, you can achieve beautiful and permanent etched designs on glass surfaces.
How To Etch Glass Instructions (Step-by-Step Tutorial)
Clean your glass with glass cleaners or I like to use rubbing alcohol.

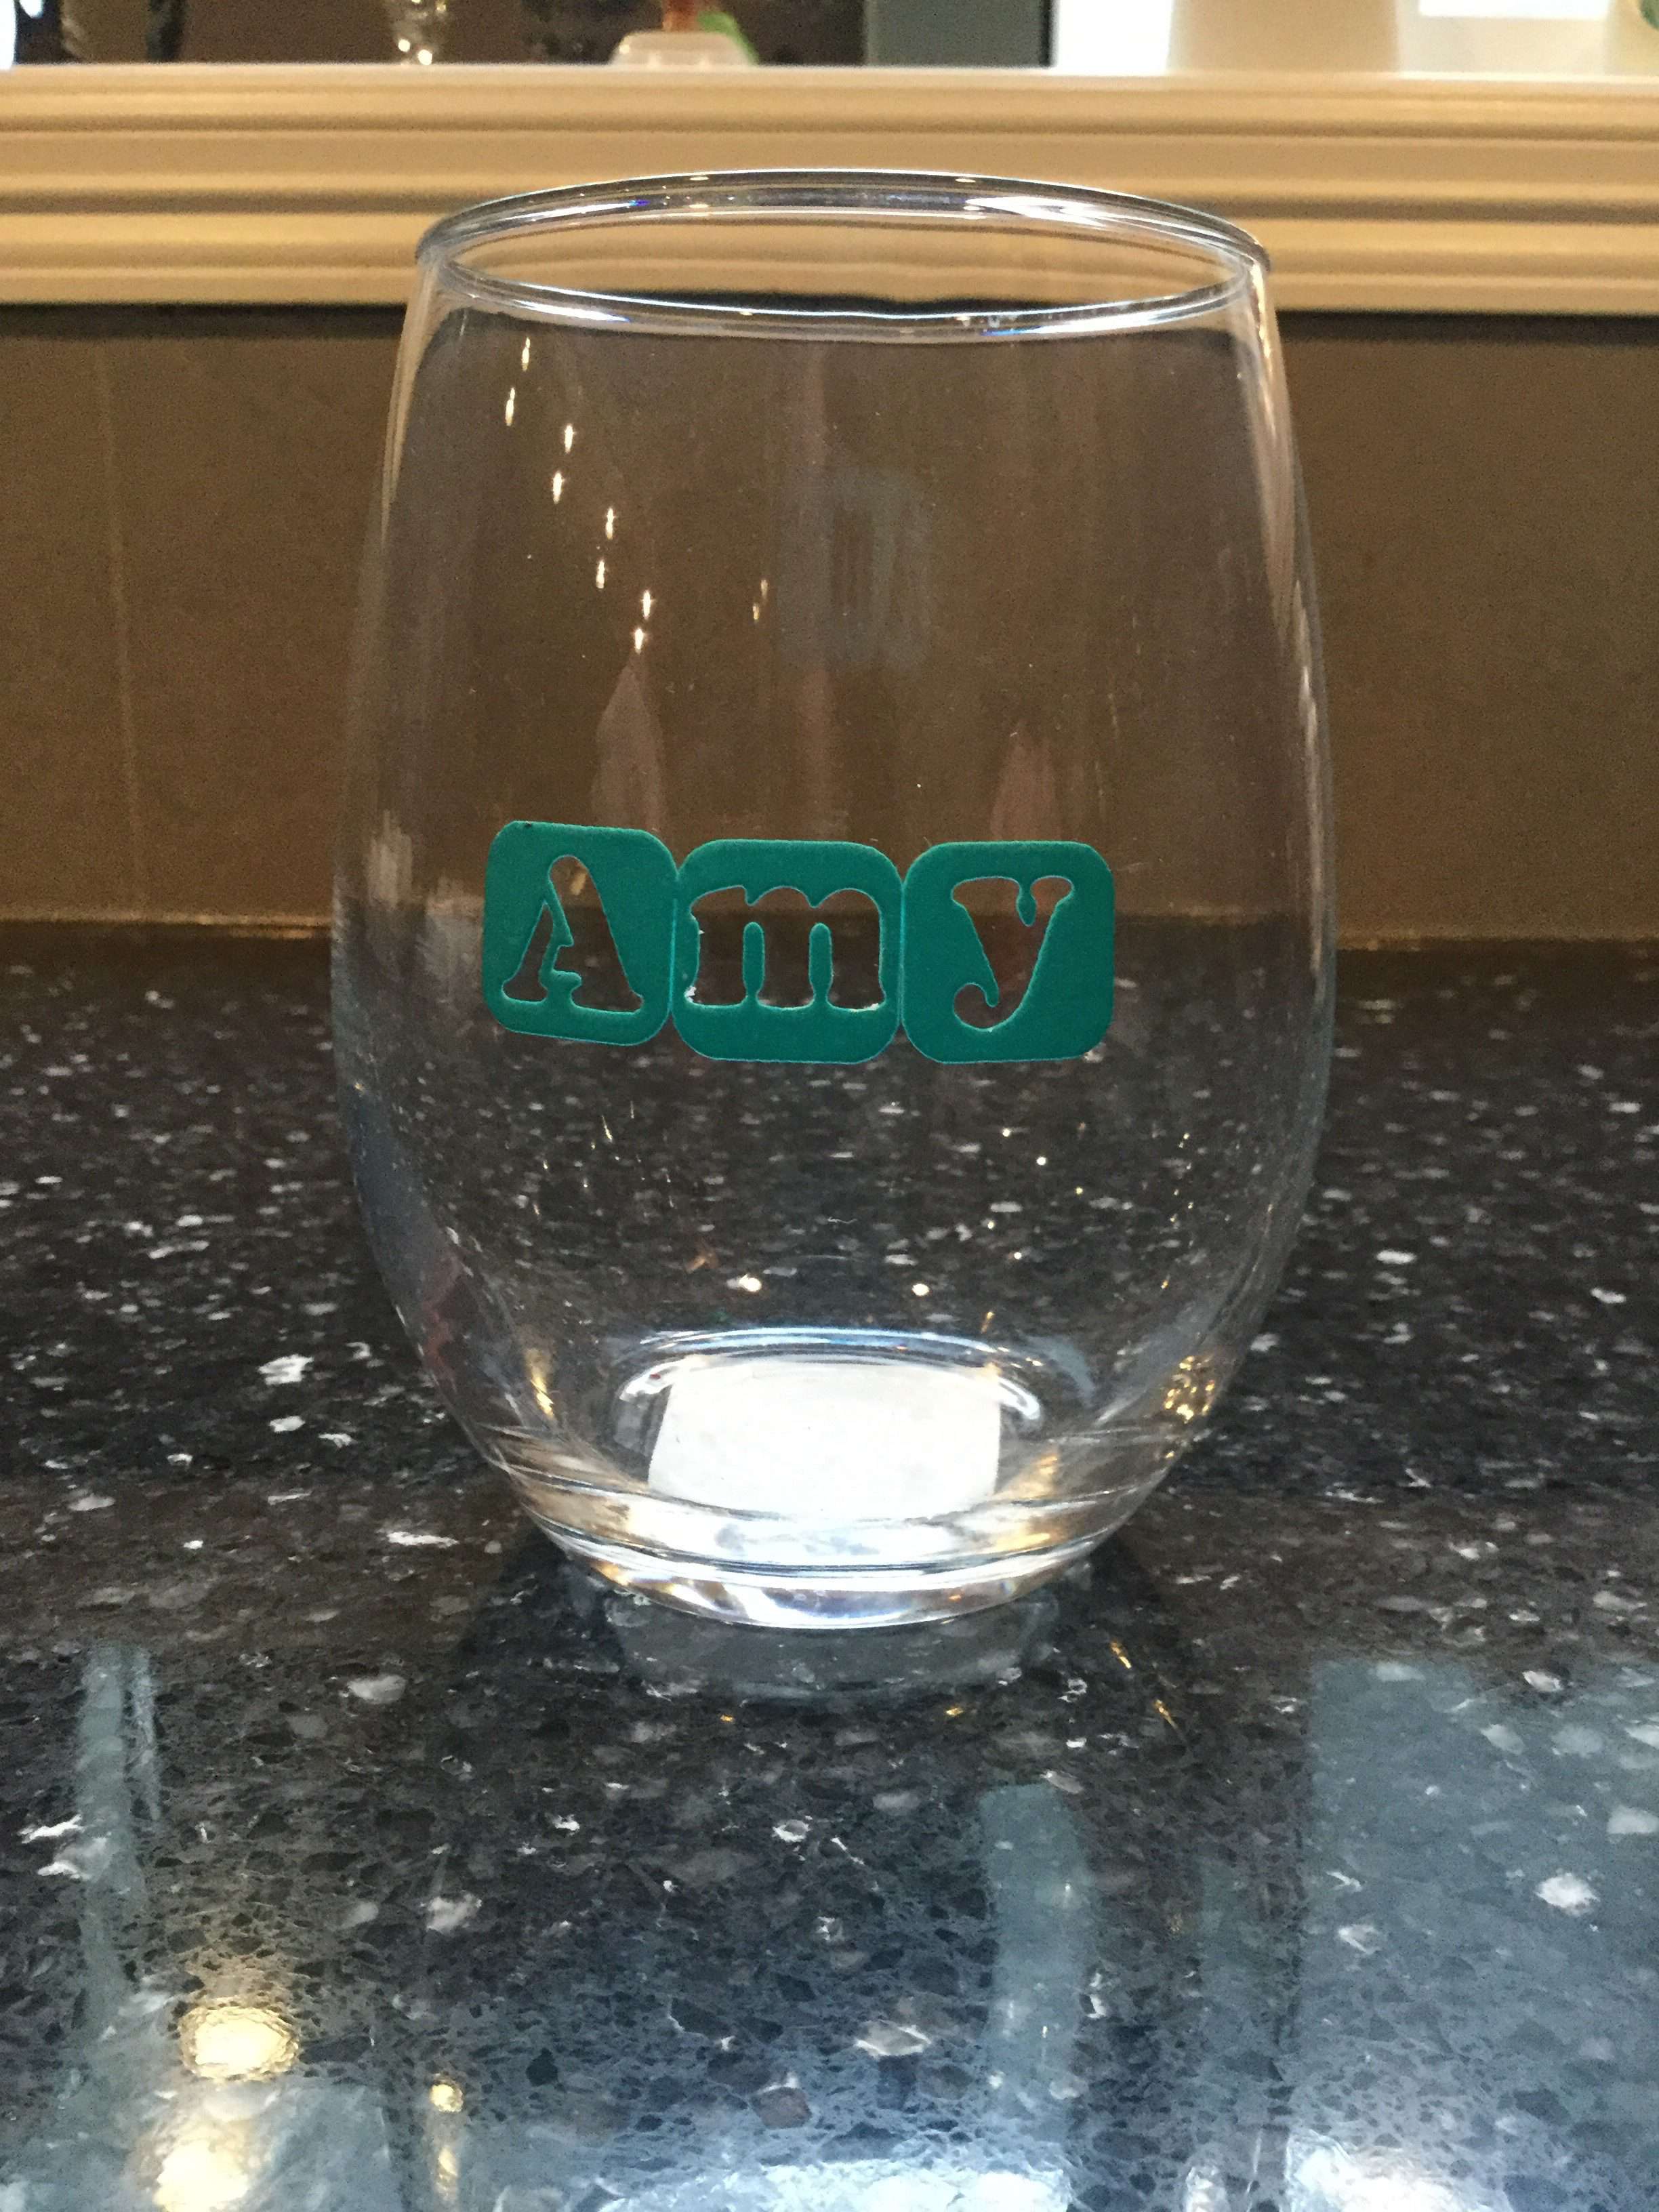
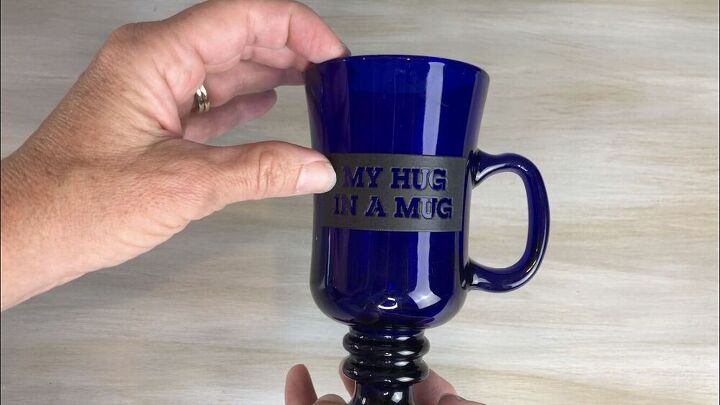
Place the adhesive stencils onto your glass surface. Make sure there are no air bubbles to prevent bleeding of the etching cream under your stencil.
If you’d prefer to do your own design you can tape off sections of glass with painter’s tape, masking tape, transfer tape, etc.
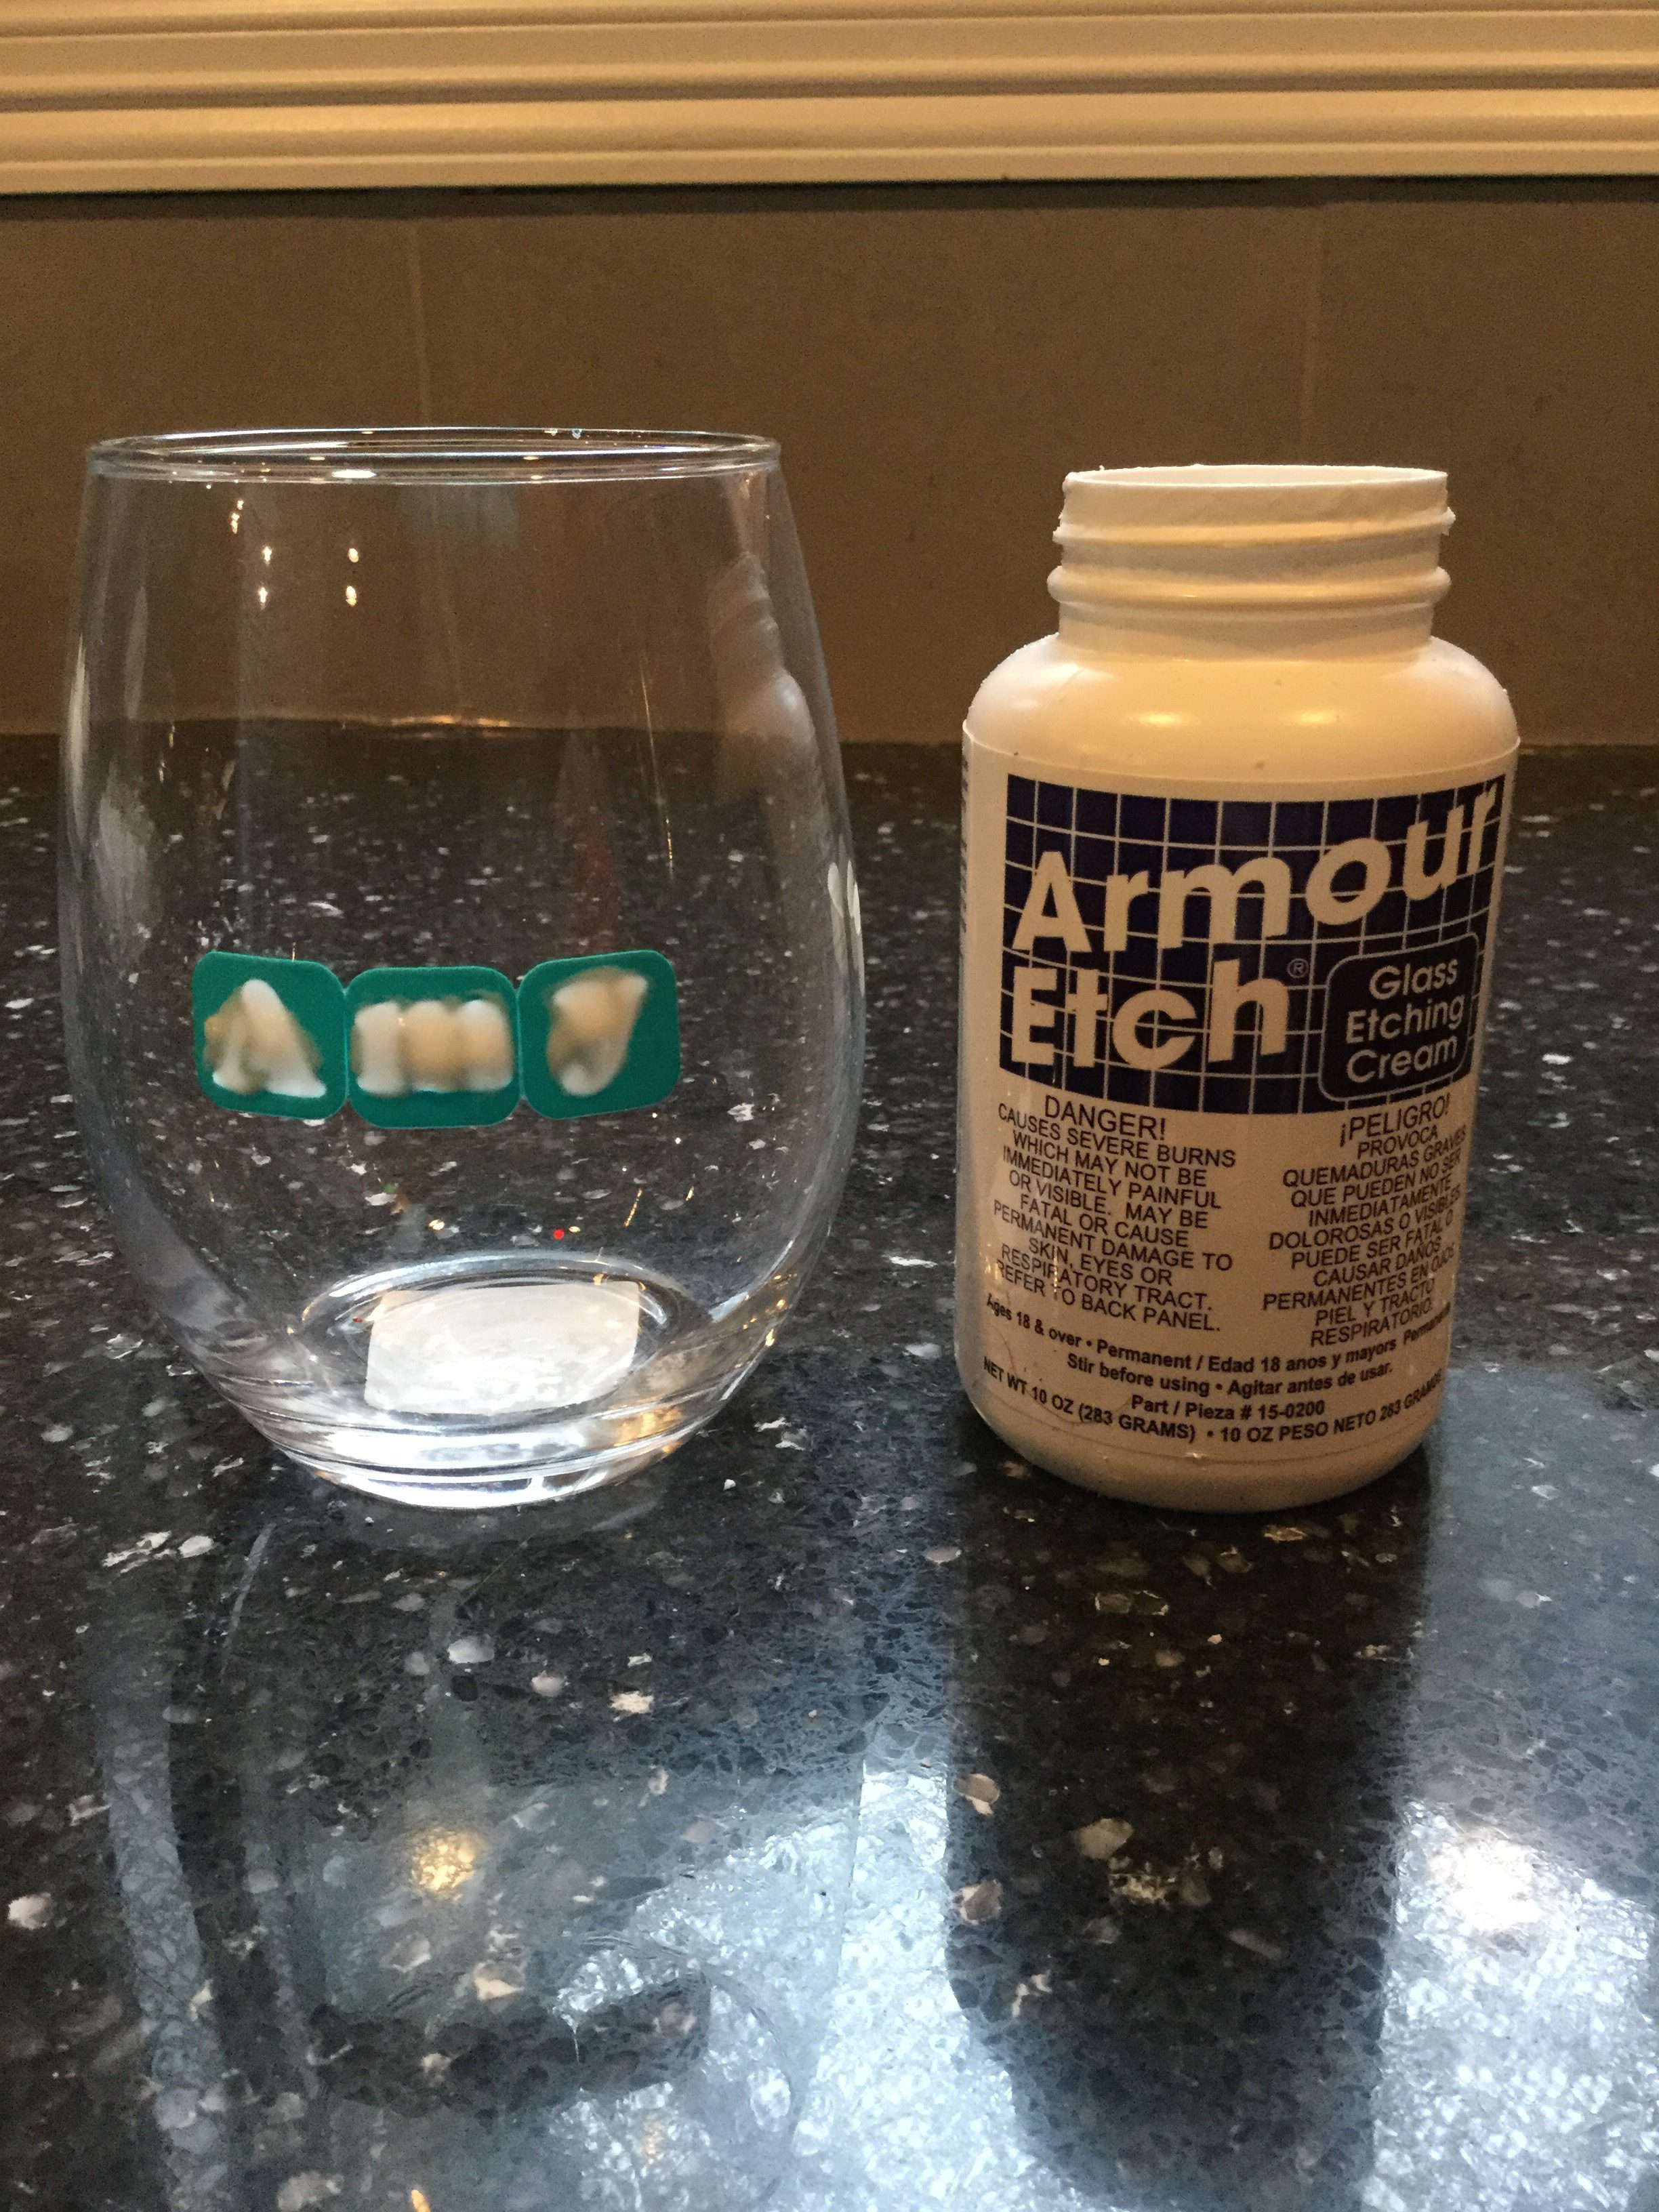
How long should you leave Armour etch on?
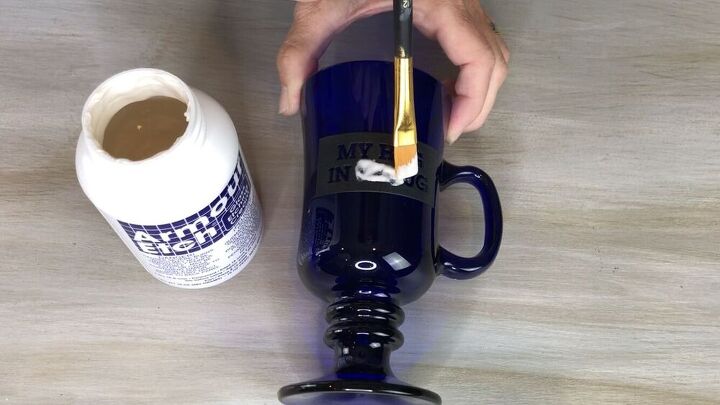
Use a small paintbrush to apply the Armour Etch Cream. Make sure you use a thick layer of etching cream. Let stand for 10 minutes.
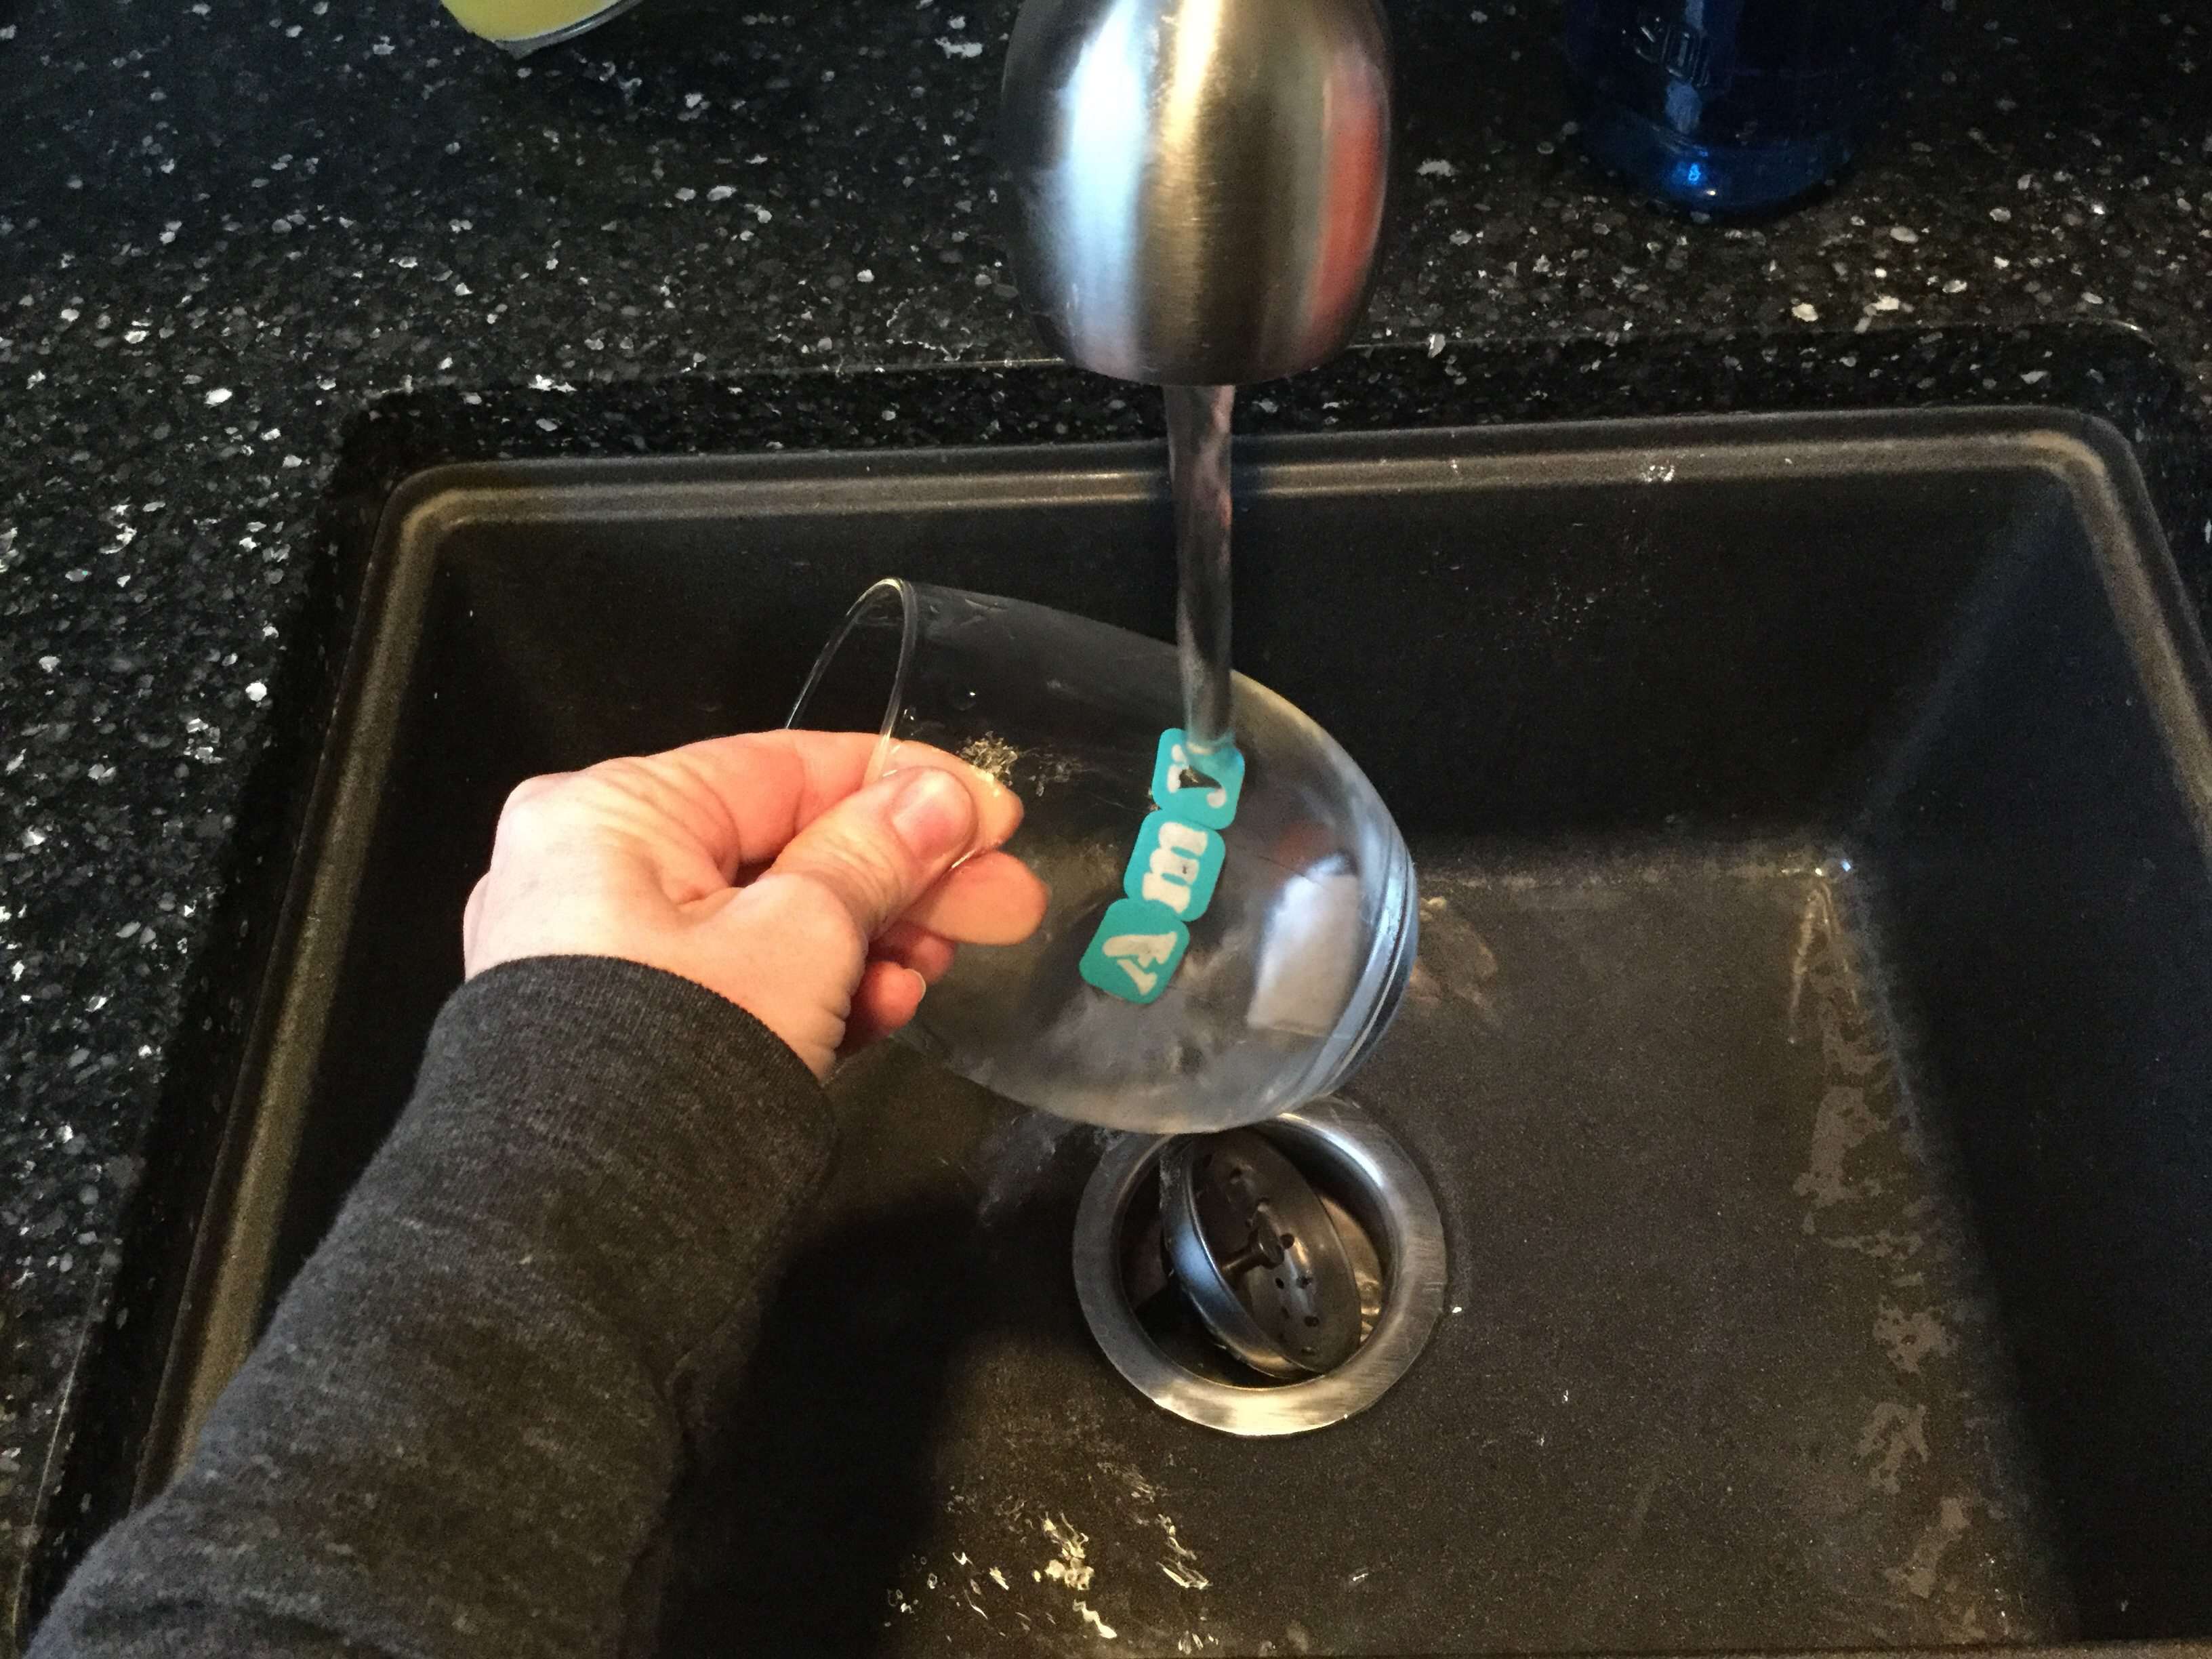
Does Armour etch wash off?
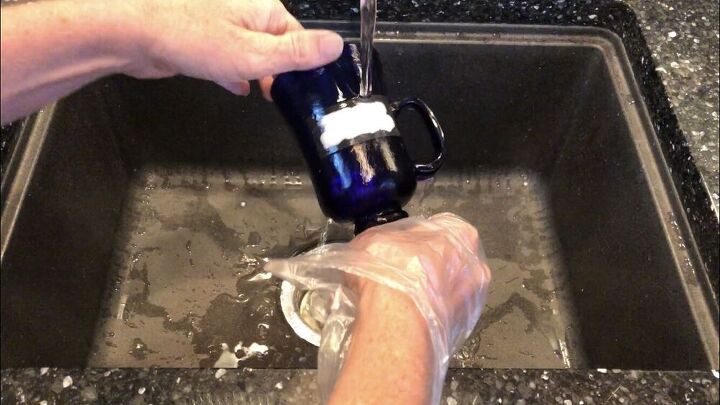
Rinse off the etching cream in the sink. Clean up your stencils and put them back on their backing.
You can use a weeding tool to get off your stencil stickers if needed.
You should be able to get several uses out of your stencils. Wash off the rest of the etching cream from the glass.
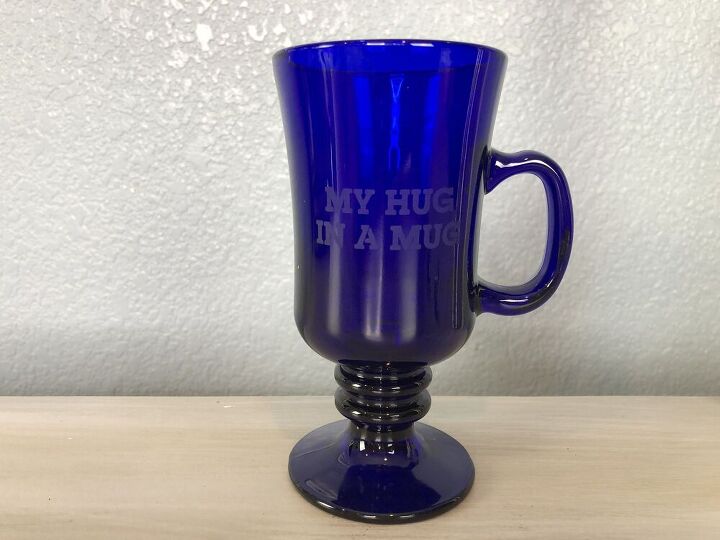
Dry off and your done – see how easy that is? Now think of all the amazing gifts you can make with this idea!
Once your glass is etched, you can wash it in the top rack of a dishwasher.
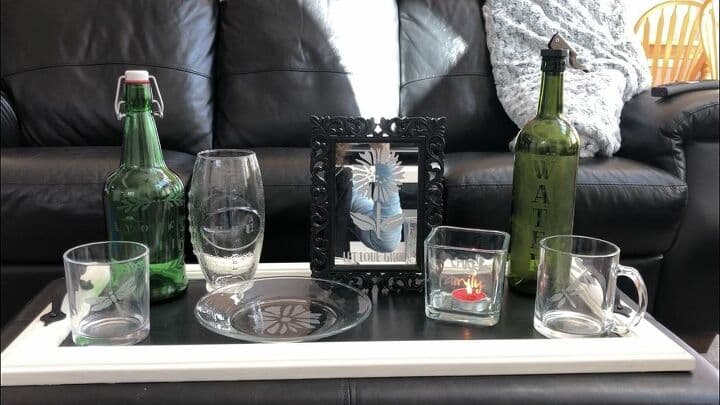
Here are just a few others I have made, and you can watch the video below to see more…
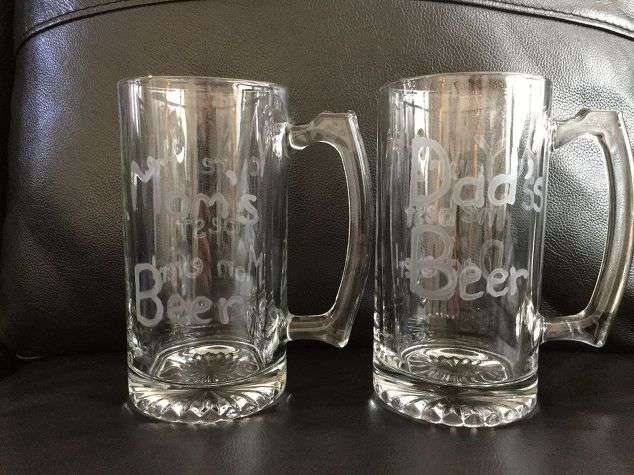
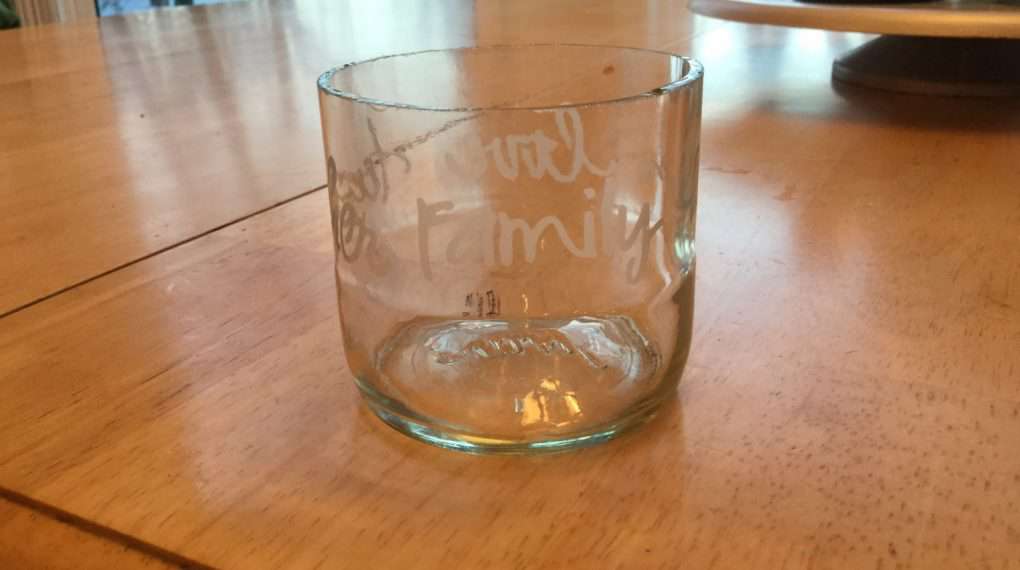
This is the front of some glasses that my daughter made when she was little. I had her write on the glasses with a sharpie what she wanted to say. I traced over it with the etching cream and now we have her hand writing preserved forever!
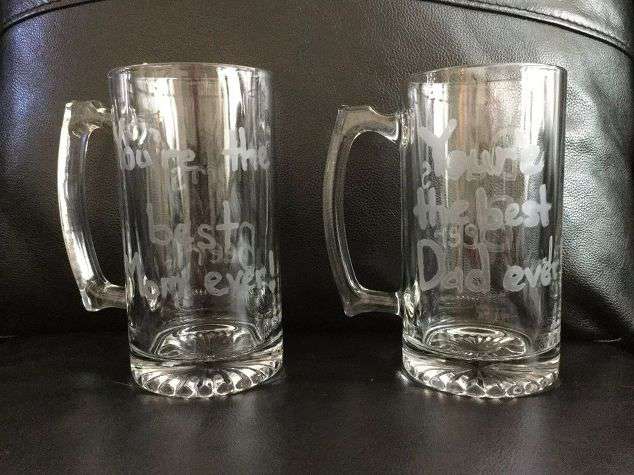
Here is the backside. I just love them!
More Glass Etched Projects:
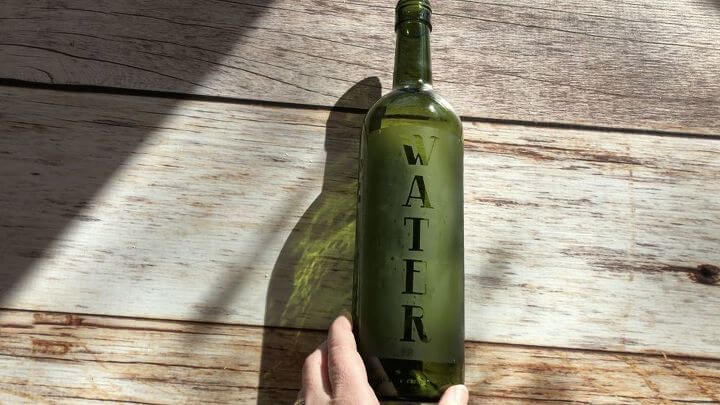
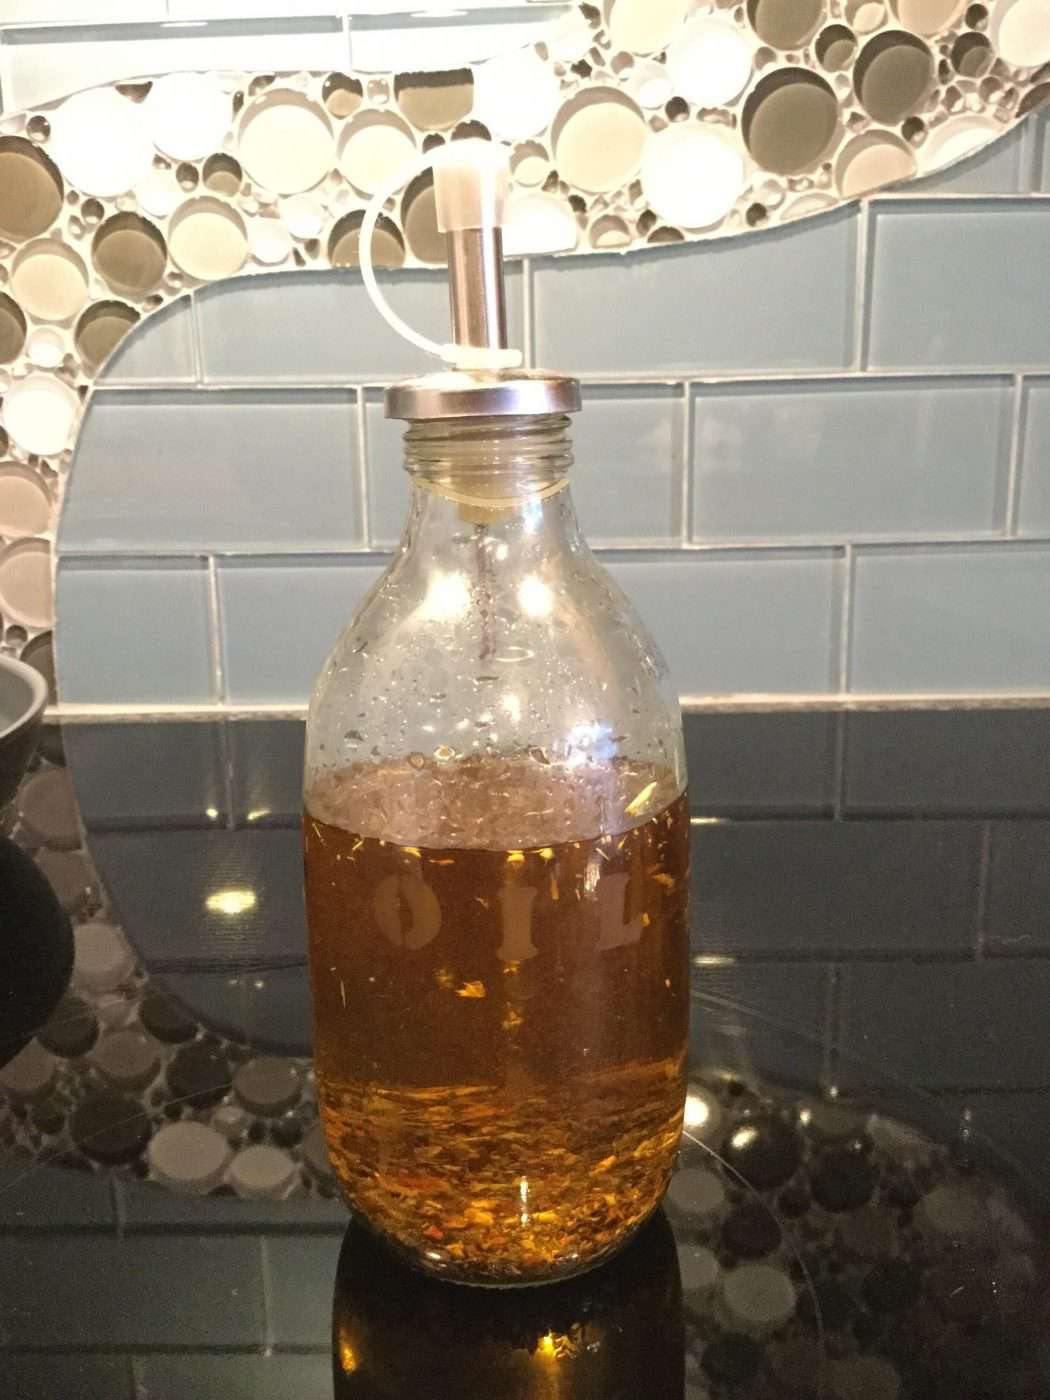
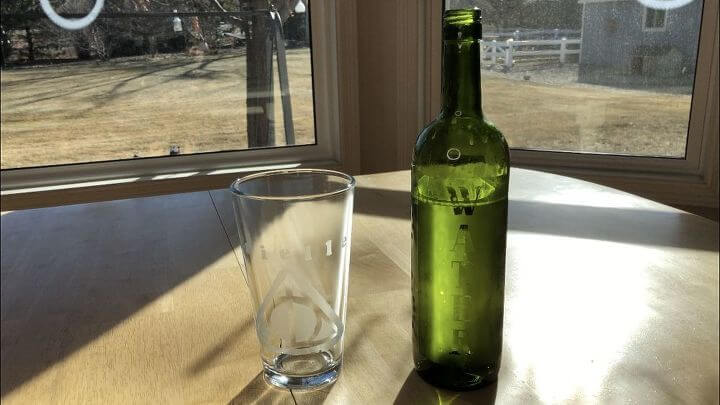
Do you want to create an etched wine bottle? Etching cream is so wonderful and easy to work with. I took a recycled wine bottle, added a little etching cream, and turned it into a decorative bottle that we’ll use again and again. You can find the full tutorial at The Fast and Easy Way To Create An Etched Wine Bottle
Did you know glass etching is so easy? With a few simple steps, you can easily customize dishes, candle holders, mirrors, and more with this easy technique. You can find all of these tutorials at Easy Glass Etching DIY with Video
How To Etch Glass Videos
You might enjoy seeing a few other etched projects that I did with a variety of dishes.
Shop any of these stores and I receive a small commission at no cost to you.
 Armour Etch Glass Etching C…Shop on Amazon
  Martha Stewart Plaid:Craft …Shop on Amazon
  Momenta Script Alphabet Adh…Shop on Amazon
  Momenta ST-252-25235 Adhesi…Shop on Amazon
 , 32269 19 Blossoms Designs") Martha Stewart Crafts Adhes…Shop on Amazon
Martha Stewart Crafts Adhes…Shop on Amazon
How To Etch Glass Q & A
You want to make sure your surface is clean of all dust, dirt and fingerprints. before applying the glass etching cream. You can use isopropyl alcohol or rubbing alcohol and a lint-free cloth to clean the surface of the glass.
Glass etching is a permanent process. When glass is etched, it undergoes a chemical or mechanical alteration that creates a frosted, textured, or patterned surface. This alteration is usually done by using abrasive materials or chemicals to remove a layer of glass, creating a design or pattern. Once the glass is etched, the change is permanent and cannot be easily reversed.
While glass etching is permanent, it’s important to note that there are different levels of etching depth. Some etchings are relatively shallow, while others can be deeper, depending on the specific technique used and the desired effect. Deeper etchings may be more resistant to wear and fading over time.
It’s also worth mentioning that etching can be done on various types of glass, including windows, mirrors, glassware, and more. The durability of the etching may vary depending on factors like the type of glass, exposure to elements, and how the glass is maintained. In general, though, glass etching is considered a long-lasting and permanent decorative technique.
How do you etch glass with vinegar?
Vinegar can be used as an etching agent to create a frosted effect on glass, but it is a relatively mild etchant and may not produce very deep or dramatic results. The process involves using vinegar as an acid to react with the glass and create a frosted appearance. Here’s a basic method for etching glass with vinegar:
Materials You’ll Need:
- Safety gear: Safety glasses, gloves, and an apron to protect yourself from any potential splashes.
- Glass item: Choose the glass item you want to etch, such as a glass vase, jar, or mirror.
- White vinegar: Ordinary white vinegar (5% acetic acid) is commonly used for this method.
- Stencil: Create or obtain a stencil or adhesive vinyl sheet with the design you want to etch. You can use a vinyl cutting machine for intricate designs or cut a stencil by hand.
- Paintbrush or sponge: A soft-bristle paintbrush or a sponge will be used to apply the vinegar.
- Adhesive tape or stencil adhesive: To securely attach the stencil to the glass.
Instructions:
- Prepare Your Workspace: Work in a well-ventilated area or outdoors. Cover your work surface with a plastic drop cloth or newspaper to catch any drips.
- Safety Gear: Put on safety glasses, gloves, and an apron to protect yourself.
- Clean the Glass: Ensure the glass surface is clean and free of dust and fingerprints. Wipe it down with isopropyl alcohol to remove any oils or residues.
- Apply the Stencil: Attach your stencil or adhesive vinyl to the glass, making sure it is smooth and secure. You can use adhesive tape or stencil adhesive to keep it in place.
- Apply Vinegar: Using a soft paintbrush or sponge, apply white vinegar to the exposed glass areas within the stencil. Make sure to cover the entire design area evenly. The vinegar will react with the glass, creating a frosted effect.
- Wait and Reapply: Allow the vinegar to sit on the glass for at least 15-20 minutes. You can check the progress to see if you’re satisfied with the etching. If you want a deeper etch, you may need to reapply the vinegar and wait longer.
- Rinse and Remove Stencil: Once you’re happy with the etching, rinse the glass with water to remove the vinegar. Carefully peel off the stencil.
- Clean and Dry: Clean the glass again with isopropyl alcohol to remove any remaining residue, and then let it dry completely.
- Inspect and Touch Up: Check your etched design, and if you need to make any touch-ups or adjustments, you can do so by reapplying the stencil and vinegar.
Keep in mind that this method of glass etching using vinegar is relatively mild and may produce a subtle frosted effect. If you want a more pronounced and deep etch, you may need to use stronger etching creams or chemicals specifically designed for glass etching. Additionally, always follow safety precautions when working with acids and wear appropriate protective gear.
How do you etch glass without bleeding?
To achieve clean, sharp lines when etching glass without bleeding or smudging, you need to pay careful attention to the etching process and ensure that your stencil is properly adhered to the glass.
Can you etch glass in color?
Traditional glass etching is typically done to create frosted or translucent designs on glass surfaces, which are generally monochromatic. However, there are ways to incorporate color into your glass etching projects. Here are a couple of techniques to achieve colored glass etching:
- Colored Glass: You can start with colored glass and then selectively etch areas to create a contrast in color. The etched areas will be frosted or translucent against the colored background. This is especially effective with stained glass projects.
- Glass Staining or Painting: After etching your design, you can use glass paints or stains to add color to the etched areas. This can be done by hand with a paintbrush or by using a stencil to guide your painting. The paint or stain will adhere to the etched areas, creating colorful accents within the design.
- Colored Vinyl Stencils: Use adhesive vinyl stencils that are colored. Apply the colored stencil to the glass, and then etch the exposed glass surface. When you remove the stencil, the etched design will reveal the color of the stencil.
- Colored Etching Cream: Some specialty glass etching creams come in different colors. These colored creams can be applied to the glass, etching the surface while simultaneously adding color. Keep in mind that these colored etching creams may not produce the same level of contrast as traditional etching.
These methods allow you to add color to your glass etching projects, making your designs more vibrant and personalized. However, it’s essential to follow the instructions and safety precautions for any coloring or staining materials you use, as they may have specific application and curing processes.
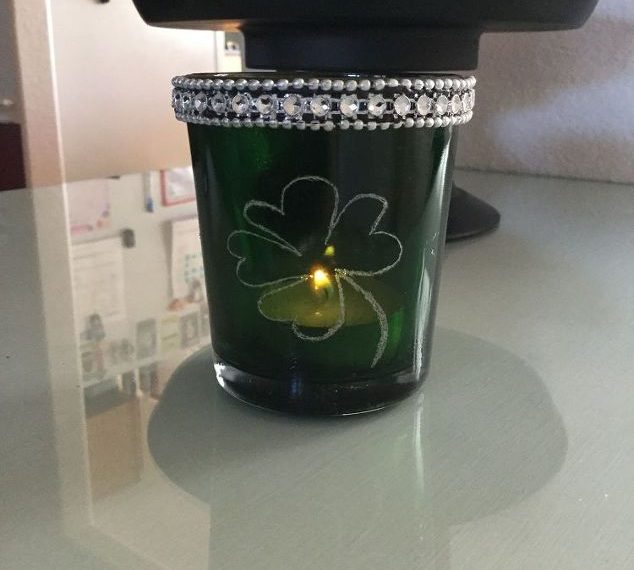
You can find this blue glass’s tutorial at DIY CRAFT IDEAS TO MAKE AND SELL
Why is my glass etching splotchy?
Splotchy or uneven glass etching can occur due to various reasons, and it’s essential to identify and address the specific issue causing the problem. Here are some common reasons why your glass etching may appear splotchy:
- Inconsistent Application of Etching Cream: If you’re using etching cream, an uneven or inconsistent application of the cream can result in splotchy etching. Make sure you apply the cream evenly, with a sufficient amount, and avoid spreading it too thin in some areas and too thick in others.
- Stencil Adherence: Splotchy etching can occur if your stencil is not adhered properly to the glass. Any gaps, bubbles, or imperfections in the stencil can lead to uneven etching. Ensure the stencil is firmly pressed onto the glass surface with no openings.
- Cleanliness of Glass: The glass should be thoroughly cleaned and free of any oils, fingerprints, or residue before etching. Even minor contaminants can cause uneven etching.
- Dwell Time: The time you leave the etching cream on the glass is crucial. If you under-etch (not enough time) or over-etch (too much time), it can result in uneven etching. Follow the manufacturer’s recommended time for the specific etching product you’re using.
- Quality of the Etching Cream: The quality and age of the etching cream can impact the results. Ensure you’re using fresh and high-quality etching cream for consistent results.
- Glass Type: Different types of glass may etch differently due to their chemical composition. Some glass types may require longer etching times or specific etching techniques to achieve uniform results.
- Technique: The technique you use to apply the etching cream, including the type of applicator (brush or sponge), the pressure applied, and the motion, can affect the outcome. Always follow the recommended techniques for the specific etching product.
- Etching Cream Agitation: Agitate the etching cream during application to keep the etchant’s consistency consistent. This is important for even etching results.
- Environmental Factors: Temperature and humidity can influence the etching process. Extreme conditions can affect the etching cream’s performance. Try to work in a stable and moderate environment.
- Surface Imperfections: Any imperfections or defects on the glass surface may result in uneven etching. Make sure your glass is in good condition.
To achieve more even and consistent glass etching, pay close attention to these factors, and make adjustments as needed. Practice and experience will also improve your etching skills over time.
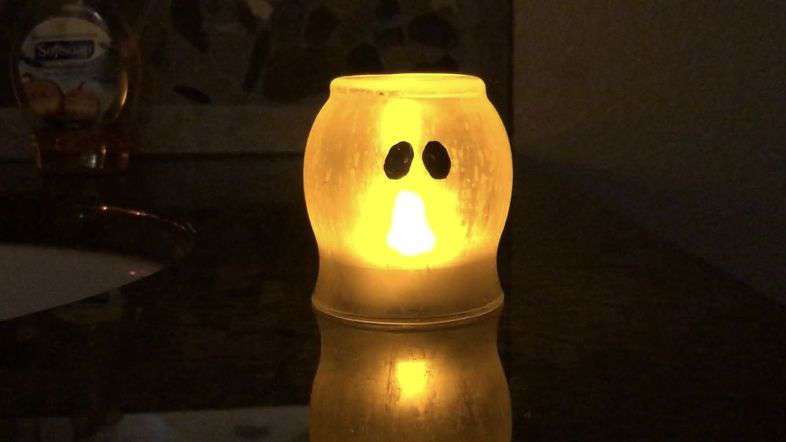
You can find this tutorial at Candle Holder to Etched Glowing Ghost
Can you leave etching cream on too long?
Yes, you can leave etching cream on glass for too long, and doing so can lead to over-etching or unintended results. Etching cream is a chemical product that works by removing a layer of glass to create a frosted or etched effect. If the cream is left on the glass for an extended period, it will continue to etch, potentially deeper than you intended, which can result in one or more of the following issues:
- Over-Etching: If etching cream is left on for too long, it can etch the glass more deeply than you wanted. This can lead to a design that is too pronounced or aggressive, making it look messy or unclear.
- Blurry or Smudged Designs: Over-etching can also cause the edges of your design to become blurry or smudged because the cream will spread beyond the intended boundaries.
- Loss of Fine Details: Delicate or intricate details in your design can be lost if the cream is left on for an excessive amount of time.
To prevent over-etching:
- Always follow the manufacturer’s instructions that come with the specific etching cream you are using. These instructions will specify the recommended etching time for that product.
- Use a timer to keep track of the etching time precisely.
- Start with a conservative etching time, and if you want a deeper etch, you can reapply the cream for additional time, following the product’s instructions.
- If you’re unsure, perform a test etching on a spare piece of glass to determine the optimal etching time for your project.
It’s important to follow these guidelines to achieve the desired etching effect while avoiding over-etching, which can be challenging to correct once it occurs.
Can you etch glass with a dremel?
Yes, you can etch glass with a Dremel rotary tool, but it requires a specific type of attachment and some skill. Here’s a general process for etching glass with a Dremel: Engrave Glass To Create Easy and Stunning Gifts For Any Occasion
Can you etch glass with a Cricut machine or silhouette machine?
While a Cricut machine or silhouette machine is primarily designed for cutting and scoring materials like paper, vinyl, fabric, and cardboard, it is possible to use it for etching glass with the help of some additional tools and materials.
Here’s a general process for etching glass with a Cricut:
Materials and Tools:
- Cricut cutting machine (e.g., Cricut Explore, Cricut Maker).
- Vinyl sheets or stencil material.
- Transfer tape.
- Etching cream (e.g., Armour Etch).
- Glass item to be etched.
- Safety glasses and gloves for personal protection.
- Stencil or design template.
Procedure:
- Create Your Design: Design your etching pattern or use a pre-made design in your preferred design software, such as Cricut Design Space. The design should be suitable for cutting on vinyl or stencil material.
- Cut the Stencil: Load the vinyl sheet or stencil material into your Cricut machine and follow the instructions to cut your design. Ensure that you choose the appropriate settings for cutting stencil material.
- Weed the Stencil: Remove the excess vinyl or stencil material to reveal your design.
- Apply Transfer Tape: Place transfer tape over your stencil to help transfer it onto the glass.
- Apply the Stencil: Carefully adhere the stencil to the glass in the desired etching area. Make sure it is firmly pressed onto the glass with no openings or gaps.
- Safety Precautions: Put on safety glasses and gloves to protect your eyes and hands.
- Apply Etching Cream: Using a paintbrush or sponge, apply a thick, even layer of etching cream over the stencil. Follow the manufacturer’s recommended time for the etching cream to work.
- Rinse and Remove Stencil: Carefully rinse the glass to remove all the etching cream. Gently peel off the stencil while the glass is still wet.
- Clean and Dry: Clean the glass to remove any remaining residue and let it dry completely.
- Inspect and Touch Up: Check your etched design, and if you need to make any touch-ups or adjustments, you can do so by reapplying the stencil and etching cream.
Using a Cricut machine for glass etching allows you to create intricate and precise designs. However, please note that this method will create a frosted or translucent design on the glass, not a deep or permanent etch. Always follow safety precautions when working with etching cream or any chemical substances.

EASY & AWESOME DIY GIFTS ON A BUDGET TO MAKE AND SELL Ebook
Do you love to make gifts for friends and family members? Would you like to personalize your gifts too? This book is for you! Over 30 DIYs gifts on a budget plus extra tips, tricks, eco-friendly gift wrapping ideas, and more!
So what are you waiting for?!!! Get your copy today and start creating!
Check out some of my other etching projects!

Don’t forget to link to ThriveCart – Book
Wow – I didn’t know there was such a thing as etching cream! Definitely going to have to get some of that – I love the look of etched glass. Thanks for the info and the inspiration my friend!
Thank you so much, Barbara, and you’ll love it! So fun to work with.
Hi Crazy,
My significant other etches on glass with a dremel tool! I find the drawing on Pinterest, make sure it isn’t copyrighted, print it, he puts the copy under glass and starts the dremel. Anywhere from 4 hrs to 18 hrs later is a finished product ready to frame and hang on somebody’s wall!!
Hi Jerri, thank you so much for sharing. Isn’t it lovely all the creations and possibilities you can create?
Are these etched glasses still dishwasher safe? Could the etched design be a different color ? Thanks
Hi Cheryl, yes they are dishwasher safe. The glass is permanently etched. I do not know of a way to change the color but you etch on colored glass like this – https://chascrazycreations.com/recycled-bottle-to-etched-beauty/
I am surprised at how easy this is. This caught my eye since the glass said Amy! This is something that I will use and am excited to try. Thank you for sharing.
Thank you Amy, it is really easy and works great on so many glass things – mirrors, picture frames, etc. Makes great gift ideas too 🙂
I etched the glass doors on our cabinets and used to love glass etching. I really need to try some basic etching with my boys; I bet they’d love it and they’re finally old enough to give it a try! Thanks for sharing with us at the Vitual Refrigerator. Pinned.
Thank you and I hope your boys have a lot of fun with it. There are so many things to be created 🙂
I had no idea it was that easy, Oh the possibilities!
Thank you Julie. It really has been so fun creating so many things with just a little etching cream.
Wow that does look easy! Cute ideas! Love the beer mugs. Thank you for sharing on Merry Monday! Hope to see ya next week!
Kim
Thank you Kim 🙂
I can’t wait to give this a try! Thanks for teaching us how!
Thank you Teresa, I hope it helps you make many personalized gifts as it as me.
I never realized how easy this was to do! Thanks for sharing at The Blogger’s Pit Stop! Roseann from http://www.thisautoimmunelife.com
Thank you Roseann
I love the idea of using your daughters handwriting and tracing over it. I’ve put doing this out of my mind, but you just made it fly back in. Great idea!
Thank you Linda, I know how much you like to preserve those memories as much as me. Hugs 🙂
WOW! Who knew it was so easy! Thanks for sharing, dear Chas!
Have a splendid day. Hugs! Stephanie-The Enchanting Rose
Thanks Stephanie, it has been so fun to make things for everyone! Maybe a tea cup or mug for this year’s exchange …. 🙂 Hugs!