
How To Make A DIY Light Up Canvas Art
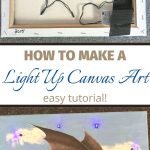
Learn how to make a DIY light up canvas art for your kids, or as a gift for Christmas, or birthdays. It’s an easy craft project, and really fun to make.
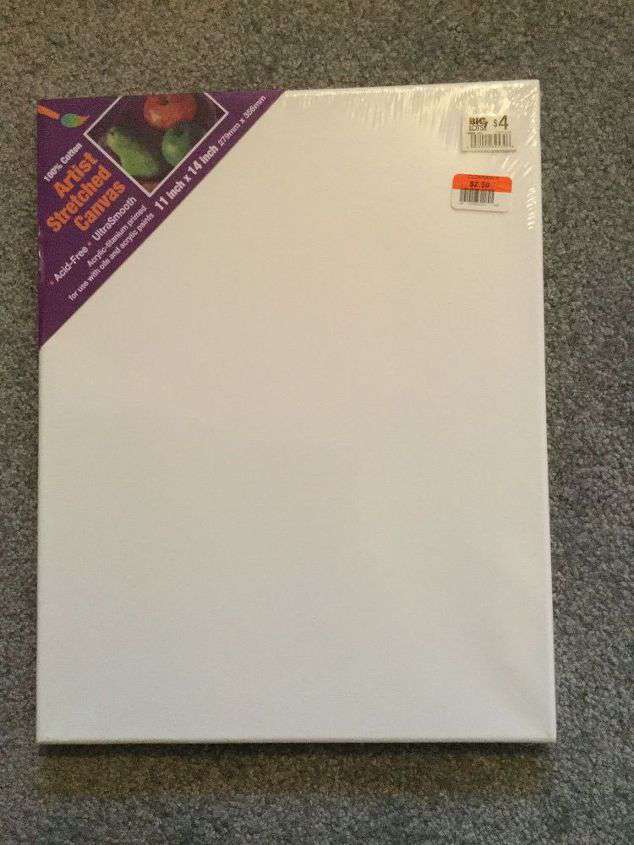
I had some fun making DIY light up canvas art for my kids, and I love how they turned out! What’s even better, is they loved them even more! I started with a simple white canvas that you can find at any craft store. Keep an eye out at thrift stores, or even the dollar store, as you can sometimes find them there for cheap.
SUPPLIES needed FOR LIGHT UP CANVAS ART:
- 1 canvas – I scored mine at Big Lots for $2.50
- Acrylic Paint of your choice
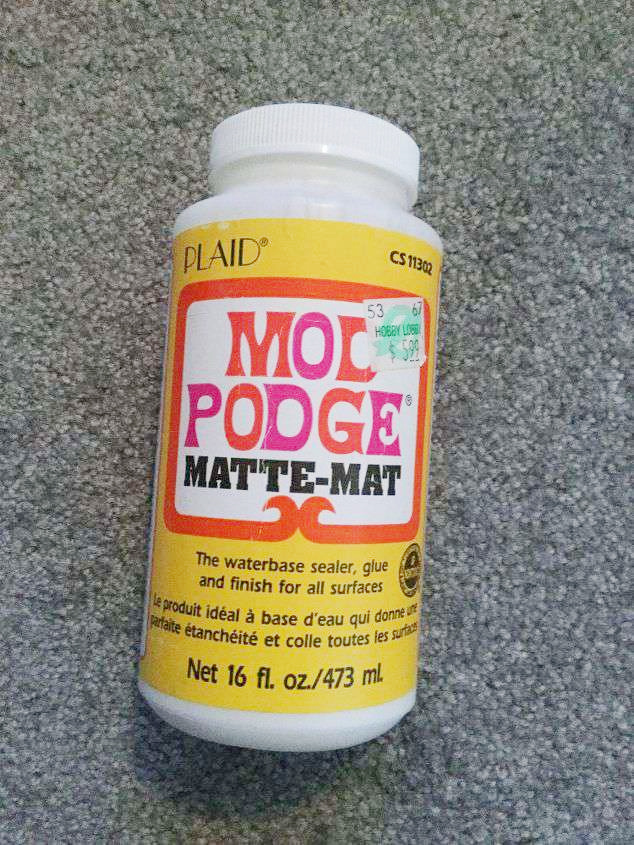
- Mod Podge
- Paint brush
- Image printed out – mine was printed on a laser printer so the ink wouldn’t run.
- Ice Pick
- 1 pack battery operated lights
- Tape
INSTRUCTIONS FOR LIGHT UP CANVAS ART:
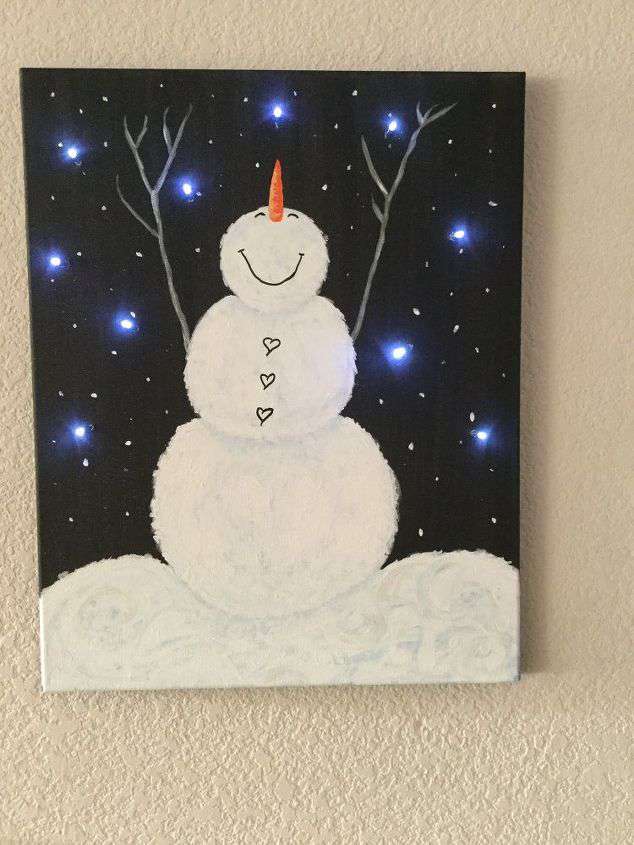
- Paint the canvas with acrylic paint of your choice. My son’s favorite color is red and my daughter’s is blue so those are the colors I went with. Once done, let dry.
- For my daughter’s I wanted some clouds so I painted some white clouds on her canvas with acrylic paint and let dry.
- Print out your image. I’m sure you could used photo paper too, but I printed out the images I wanted on good old paper using a laser printer.
- Cut your image and space out how you would like it to look on your canvas.
- Mod Podge the back of the image(s) and stick to the canvas. You might have to hold them in place a bit to make sure they’ll stick as paper tends to curl. After they were staying in place I Mod Podged over the top of the images and onto the canvas. Again holding them down to make sure they sticked. Once that had settled I decided to Mod Podge lightly over the whole canvas and images again. Let this dry well.
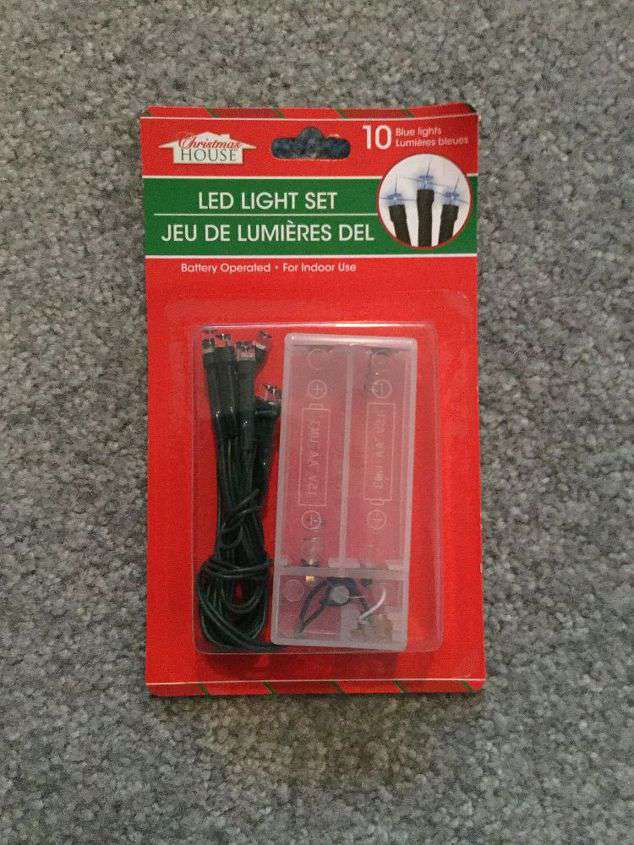
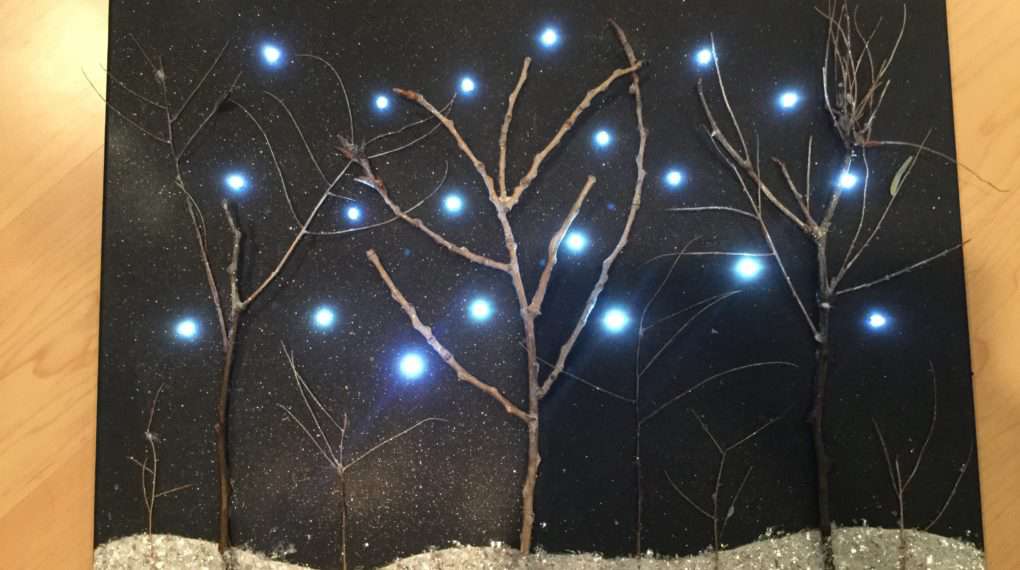
- I took out my battery-operated lights (mine came from Dollar Tree). I roughly planned out where I wanted my lights to be measuring them out on the front of the canvas. I used the ice pick to poke holes through the canvas where the lights would go.
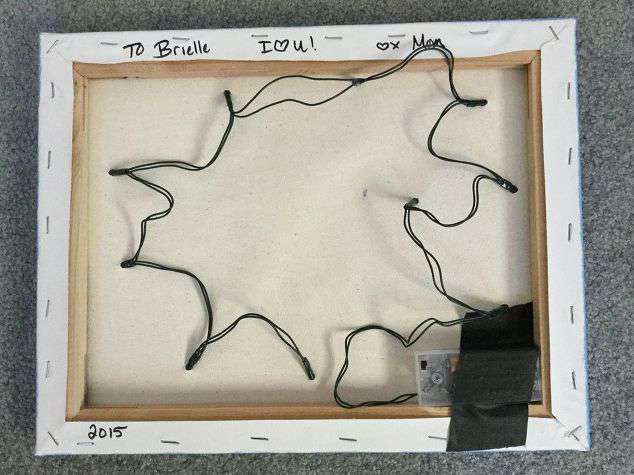
- I turned the picture over and taped the base to the back of the frame inside the wood setting. You could hot glue it as well. I just wanted the flexibility to change my lights in and out if they die. I pushed the lights in the holes.
*The only thing I would change is that I didn’t realize how long each LED light truly was. I ended up pushing them through a little more than I wanted to because the bulb was so long it pushed against the wall when I hung them not letting them hang flush. I might change them to regular lights… we’ll see.
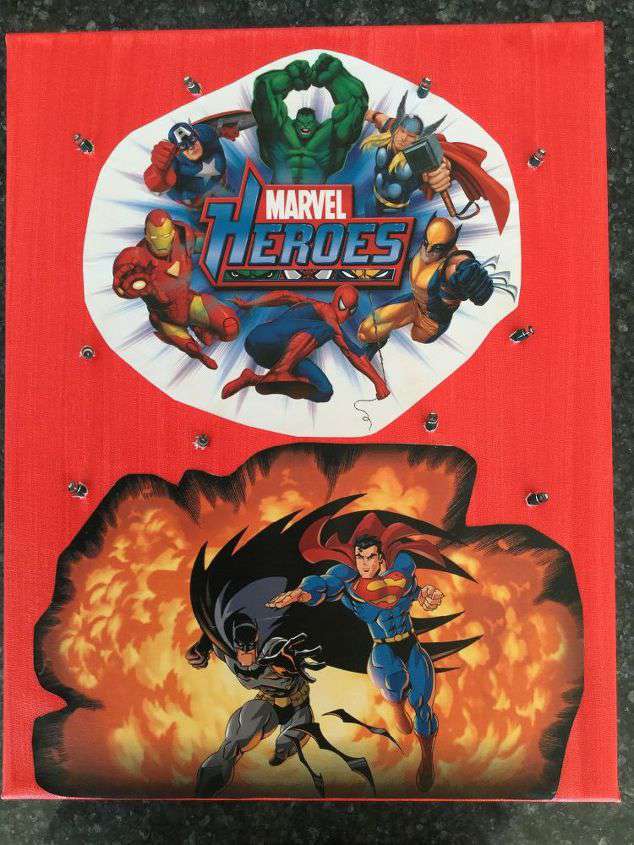
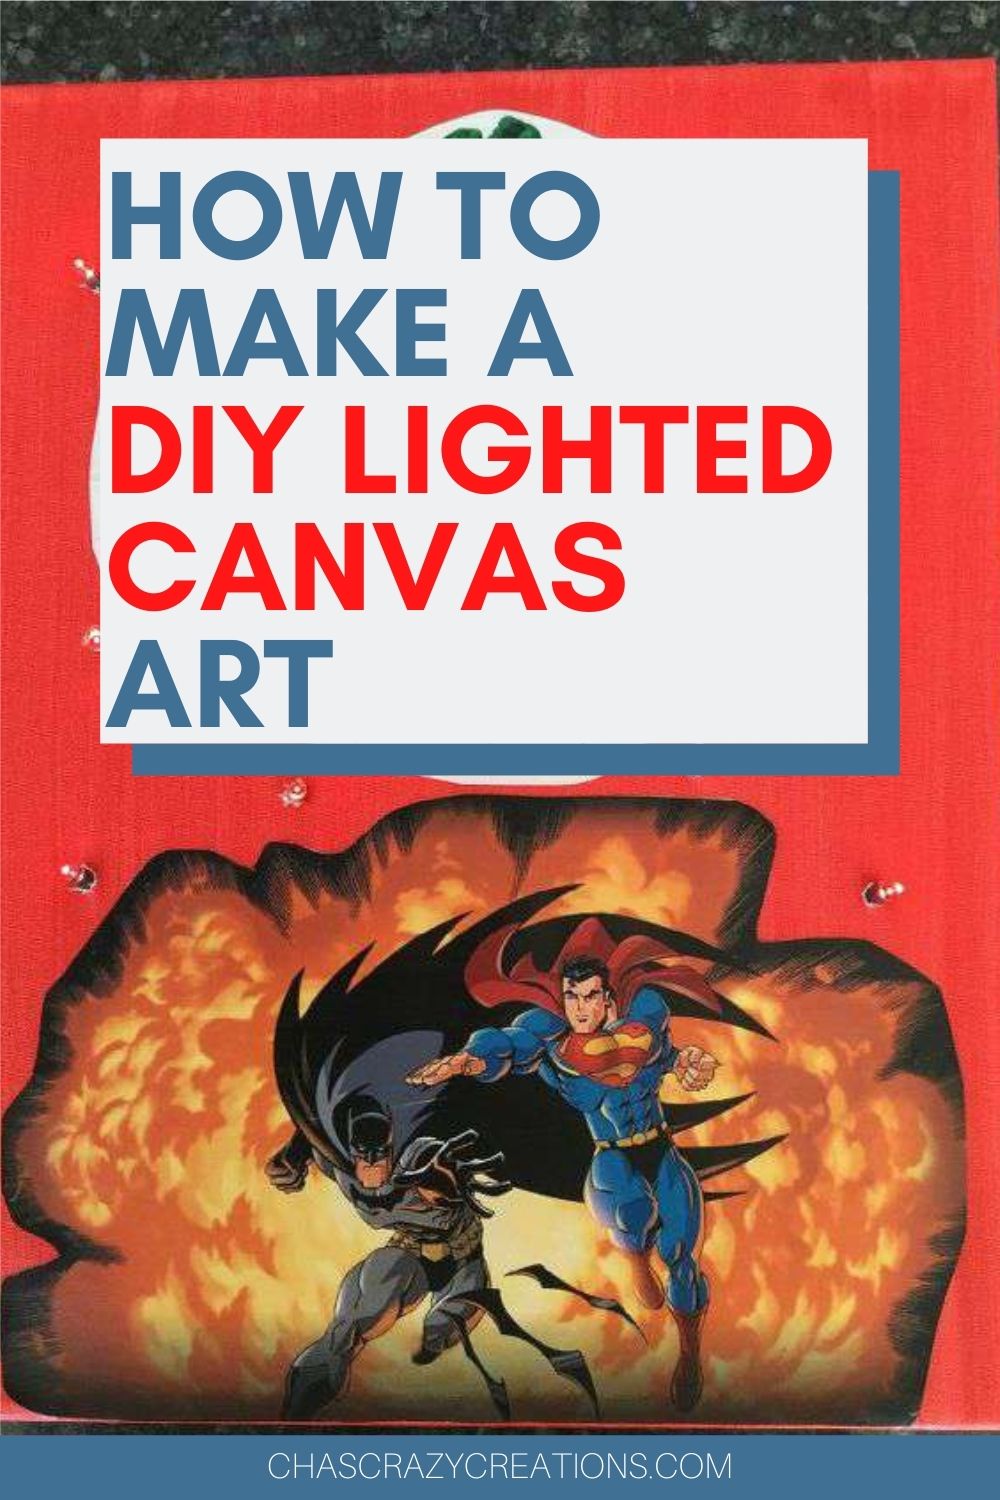
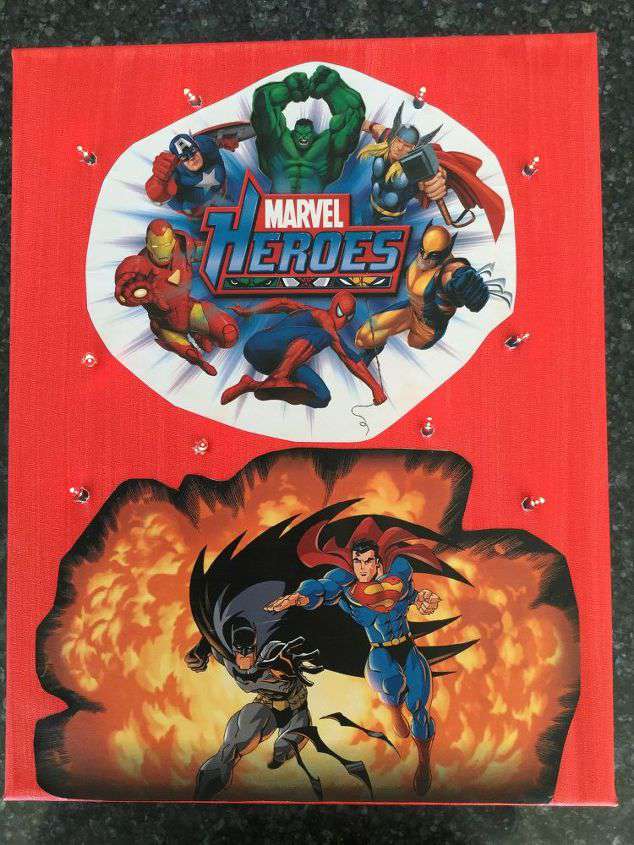
My son loves superheroes.

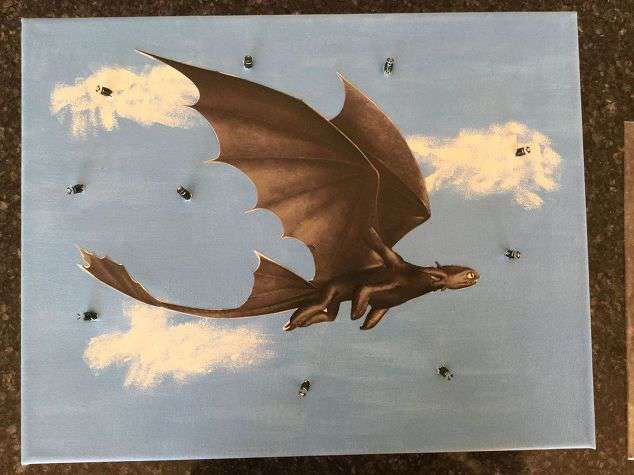
My daughter loves Night Fury – Toothless
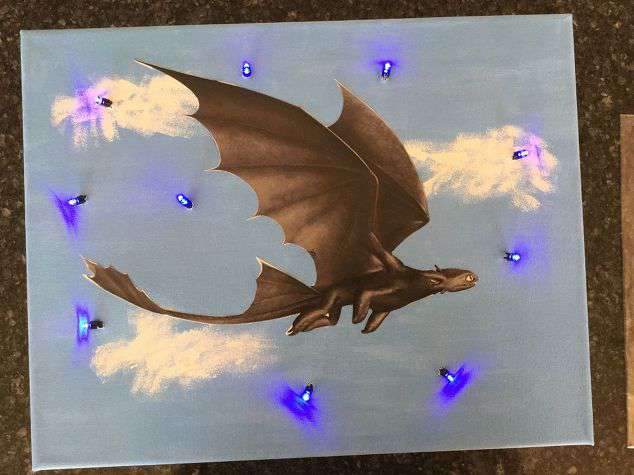

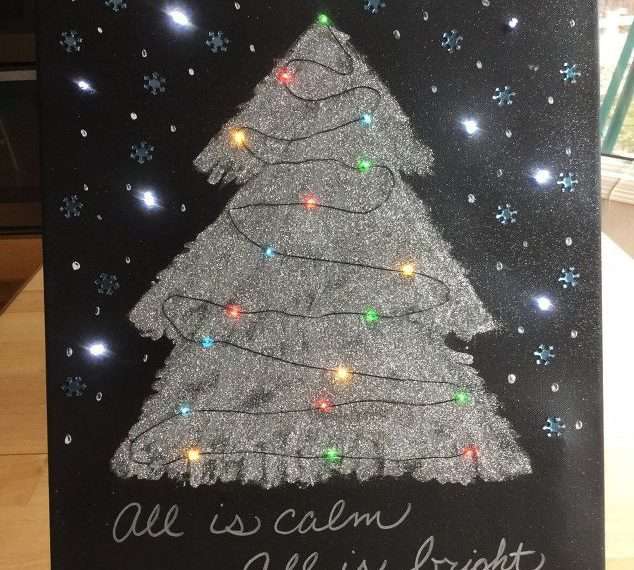
I had fun doing theirs so I made one for myself. I painted my picture and then just added the lights to it.
PLEASE PIN FOR LATER:

Find out “What Exactly Does It Mean To Repurpose Or Upcycle“, save money, and create the most amazing things.

How To Make A DIY Light Up Canvas Art
Equipment
- Ice Pick
Materials
- 1 canvas
- Acrylic Paint
- Mod Podge
- Paint brush
- Image printed out
- 1 pack battery operated lights
- Tape
Instructions
- Paint the canvas with acrylic paint of your choice.
- Let dry.
- Print out your image.
- Mod podge the back of the image and stick it to the canvas.
- Smooth it out and make sure it is secure.
- Add additional mod podge to the top of the image as well.
- Let dry.
- Use the ice pick to poke holes in the canvas for the lights.
- Push the lights through the holes.
- Add tape to hold the lights in place.
Shop any of these stores and I receive a small commission at no cost to you.
 Darice Cotton Stretched Can…Shop on Amazon
  Bottles, Best Colors For Painting Canvas, Wood, Clay, Fabric, Nail Art & Ceramic, Rich Pigments, Heavy Body, Gift Box") Color Technik Acrylic Paint…Shop on Amazon
Color Technik Acrylic Paint…Shop on Amazon  Mod Podge Gloss Sealer, Glu…Shop on Amazon
  Krylon K03804A00 Glitter Bl…Shop on Amazon
  ROYAL BRUSH RFOMW-3P Foam B…Shop on Amazon
  Clever Creations 16 x 12 In…Shop on Amazon
  Clever Creations Moon Light…Shop on Amazon
 ![Infinity Necklace with Cross Pendant - Premium Platinum Silver Plated - [Eternal Collection] - Christian Heirloom](https://m.media-amazon.com/images/I/31O1QO+yd6L._SL500_.jpg "Infinity Necklace with Cross Pendant - Premium Platinum Silver Plated - [Eternal Collection] - Christian Heirloom") Infinity Necklace with Cros…Shop on Amazon
Infinity Necklace with Cros…Shop on Amazon
EASY & AWESOME DIY GIFTS ON A BUDGET TO MAKE AND SELL Ebook
Do you love to make gifts for friends and family members? Would you like to personalize your gifts too? This book is for you! Over 30 DIYs gifts on a budget plus extra tips, tricks, eco-friendly gift wrapping ideas, and more!
So what are you waiting for?!!! Get your copy today and start creating!
Check out some of my other canvas art projects!

Don’t forget to link to ThriveCart – Book


These are lovely. The snowman is my favourite too.
Thank you Julie. I’m making more this season 🙂
What a lovely decoration, and even though I’m not very good at crafts or DIY, I think I could do this! The snowman is my favourite too. Thank you so much for sharing, and for being a part of The Hearth and Soul Link Party!
Thank you April, and if you give it a try please send me pictures 🙂 Thank you for having a place for all of us to share ideas.
I love this idea. The lights really bring it to life.
Thank you very much 🙂
This is such a fabulous idea! I can see brand new avenues for holiday gifting opening up because of your post 🙂 #HappyNowLinkUp
Thank you Jen, I truly enjoyed making these for my kids and giving it to them for Christmas. They have been enjoying them ever since. 🙂
This is such a creative project. I’m sure your kids love them! Thanks for sharing at #HomeMattersParty
Thanks Donna and thank you for stopping by.
What a fun project this is, I love that painting with the snowman , it came out so good.
@tisonlyme143
Thank you so much Dorothy, and thanks for stopping by