
Astonishing and Easy DIY Fall LED Lighted Wall Art

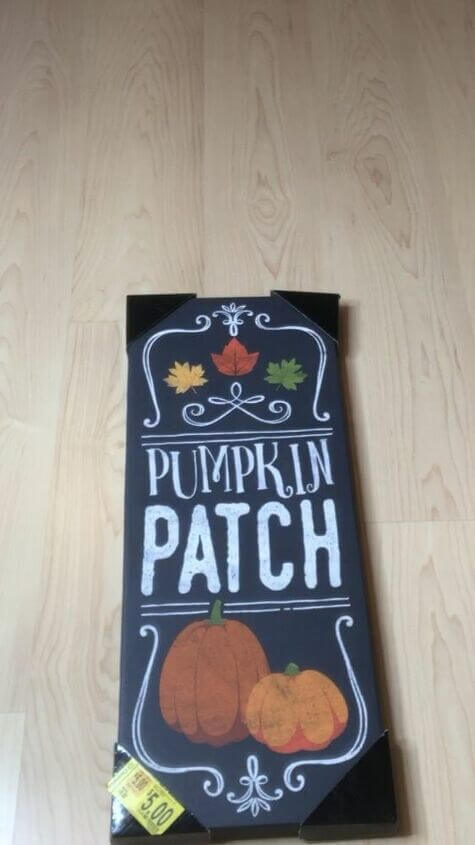
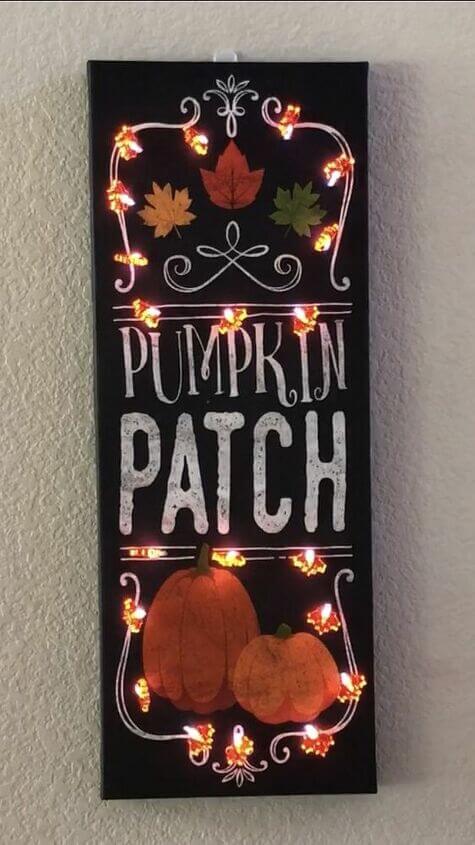
I found a canvas pumpkin patch wall art sign on clearance for $5. I added some leaf lights from the dollar store to create fall LED lighted wall art.
Here are the materials needed
- Prefabricated artwork or sign or you could paint your own artwork
- Punch
- LED lights
- Tape or hot glue
Astonishing and Easy DIY Fall LED Lighted Wall Art Video
Here are the instructions for this Lighted wall art
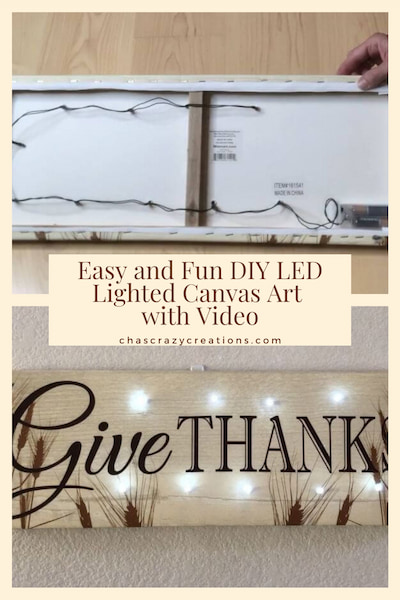
I found some fun artwork and signs on clearance at Walmart. I sifted through it all and found this pumpkin patch sign for just $5! I just couldn’t walk away from it for that amazing price.
How do I make a lighted picture?
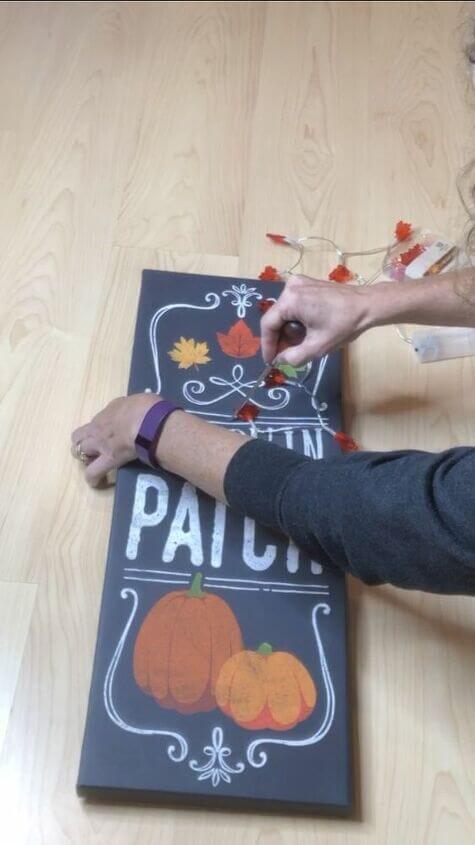
I grabbed 2 packages of LED leaf light strands at Dollar Tree. I measured out where I wanted the lights to go on top of the canvas. One strand would go on the top half of the artwork and the second strand would go on the bottom half of the artwork.

How do you poke holes for canvas lights?
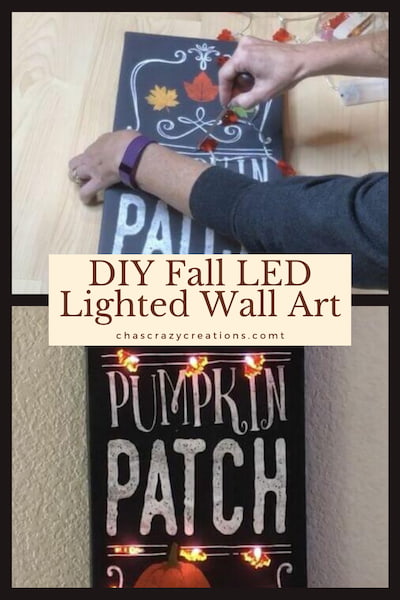
I poked holes with a punch through the canvas so the lights could go through. I removed the leaves from the lights, pushed the lights through from the back of the canvas, and used gaffers tape to hold the battery packs on the back of the canvas.

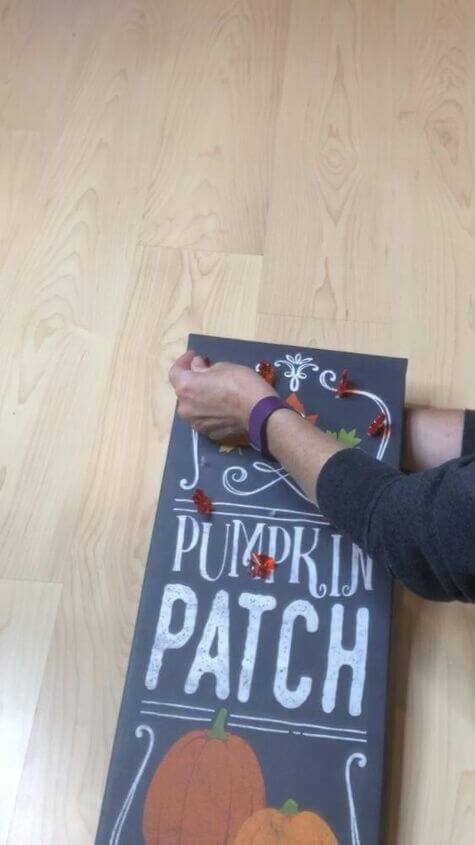
I flipped the piece over and put the leaves back onto the lights.
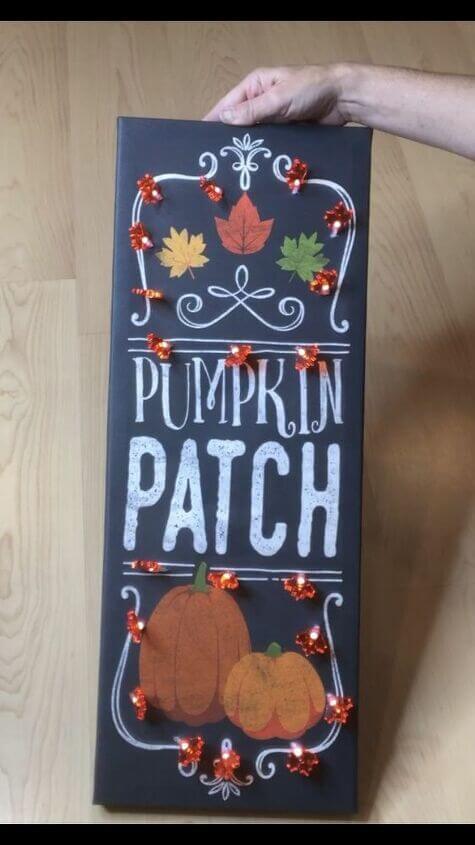
Turn the light switches on and it was ready to be hung on and put on display. I love how it turned out. I’m a huge fan when it comes to decorating for a season. This sign will be great for all fall. I’ll get to put this sign up for 3 months of the year rather than just a single month. You definitely get more bang for your buck by decorating this way.
You can also paint your own picture instead of starting with a store-bought canvas. You might be interested in this fun family canvas we made.
Fall LED Lighted Wall Art Video
Shop any of these stores and I receive a small commission at no cost to you.
 Ohio Wholesale Halloween Be…Shop on Amazon
 Ohio Wholesale Radiance Lig…Shop on AmazonShop on Amazon
 BANBERRY DESIGNS LED Wall A…Shop on Amazon
Check out some of my other fall decor!

Thank you for sharing at #OverTheMoon. Pinned and shared. Have a lovely week. I hope to see you at next week’s party too!
Thank you so much Marilyn, I appreciate it. Have a wonderful weekend.
Love this project – so festive for fall! Thanks for linking up to Best of the Weekend. Your post was one of my features this week. I will also be pinning and sharing on Instagram stories this weekend. Thanks again for joining us and have a fabulous weekend!
Shelley
Thank you so very much for the feature Shelley and thanks for hosting a great link party. See you at the next one.
Genius! You took a great find and made it better. Featuring when my party opens tonight !
You’re so sweet Carol, thank you so much and thanks for the feature.
Thank you for sharing at #ThursdayFavoriteThings. Pinned and shared. Have a lovely week. I hope to see you at next week’s party too!
Thank you very much Marilyn and I’ll see you at the next party.
That is so cute! I have yet to make a light up canvas anything but I keep adding it to my list of “must try” crafts. Pinned.
Thank you so much and thanks for the Pin 🙂
Awesome! Thanks for linking up to Creative Compassions!
Thank you Michelle, see you at the next one.
Very nice work! You are a very creative person :). have a lovely weekend!
Thank you so much Sinziana
Oh Chas’, your light up pictures are absolutely wonderful. I love this latest one! So perfect for fall. 🙂
Thank you so much Linda, I’m so glad you think so. I just love adding lights to my home… you can’t have too many right???
Super cute idea! Adding the lights adds so much fun the pumpkin sign.
Happy Fall,
Kippi
Thank you so much Kippi, have a wonderful week.