
Awesome and Easy Furniture Makeover with Video
Are you looking for a furniture makeover? Here are some basic and easy steps to get you started today. Plus there’s a video.
I wanted to try my hand at furniture makeovers and when I found this shelf for $5 I knew it was a great piece to work on. Added bonus, I already had several items on hand to work on it.
Awesome and Easy Furniture Makeover Video
Awesome and Easy Furniture Makeover Instructions
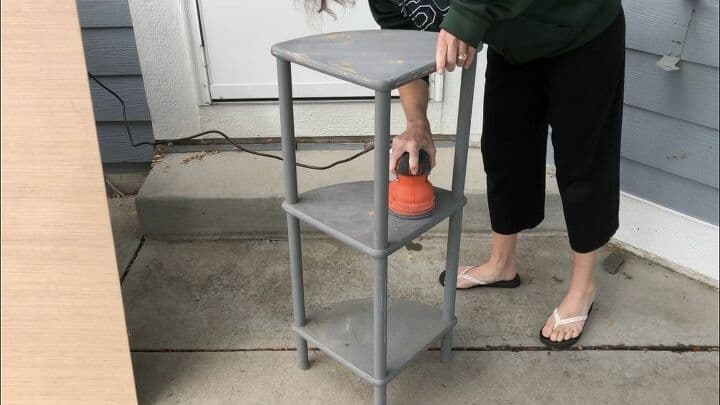
1. Sand the Furniture
Here’s the original shelf unit. It was an oak shelf that had been painted gray. I used my Black and Decker Orbital Sander on the piece. I sanded most of the gray paint off, and got it ready so the new paint would adhere well.
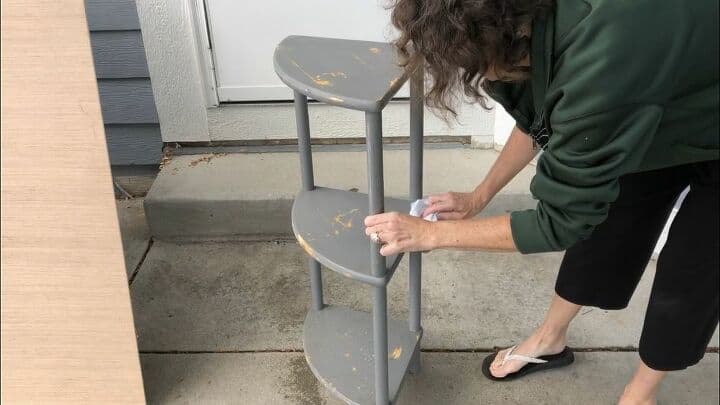
2. Clean the piece of furniture
I used Krud Kutter and wiped the piece to clean it.
Turned out the old paint was latex paint so it started wiping right off. I cleaned up as much as I could, sanded it again, and then cleaned it again.
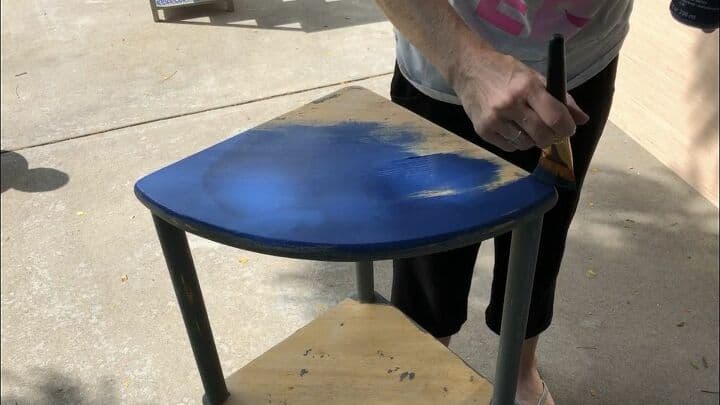
3. Paint the furniture
I painted the entire piece with Folk Art Home Decor Chalk Paint in the color Nautical. I painted on one coat, let it dry, and then painted on a second coat.
4. Add a stencil (optional)
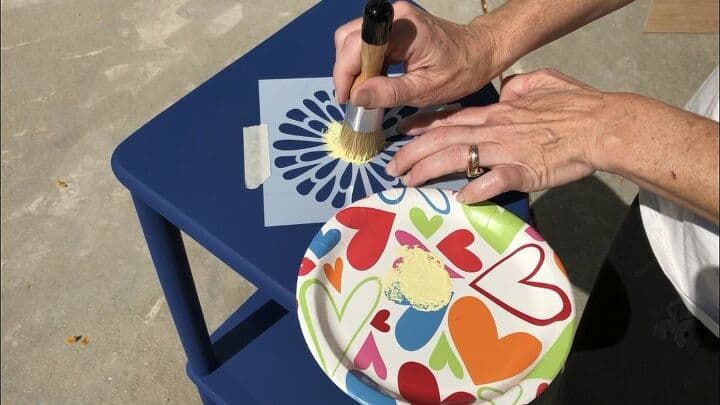
I picked out a Plaid stencil that reminded me of a daisy. I used Plaid stencil tape to hold the stencil in place while I would be working with it.
I used Folk Art Home Decor Chalk Paint in the color Summer Porch to stencil the center portion of the daisy. I loaded my Plaid stencil brush with paint, then dabbed it onto a paper plate to off load as much paint as possible. Then I dabbed it onto the stencil. You can see this in the video provided with this tutorial.
I then used Folk Art Home Decor Chalk Paint in the color Sheepskin to continue the daisy look finishing the stencil.
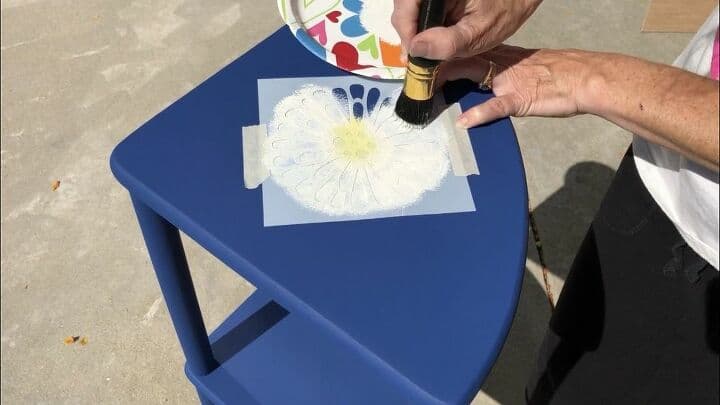
Once the paint was on, I carefully peeled the stencil away. I washed the stencil while the paint dried so I could use it later.
I painted the top and bottom shelves the same with the yellow in the middle and white on the outside. The center shelf I did the reverse, and painted white in the middle and yellow on the outside.
I let this dry completely before moving onto the next step.
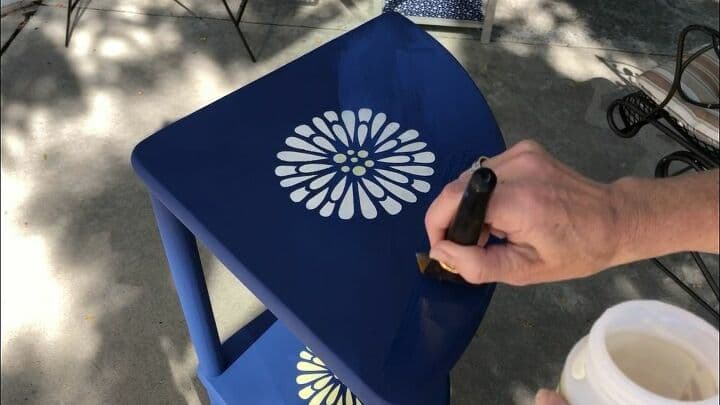
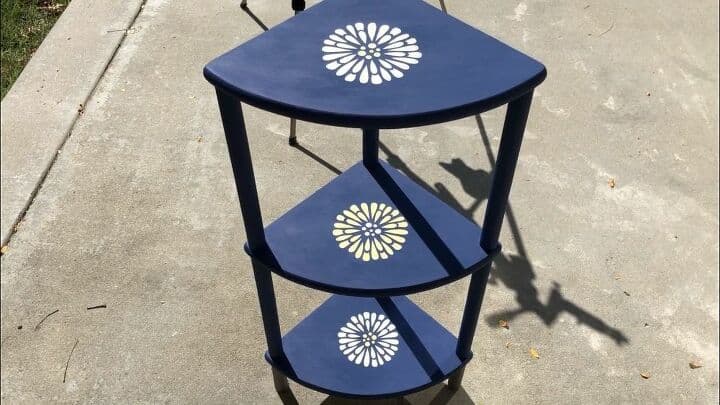
5. Seal the furniture
I painted the entire piece with Folk Art Home Decor Varnish, let it dry and then painted on a second coat to seal it.
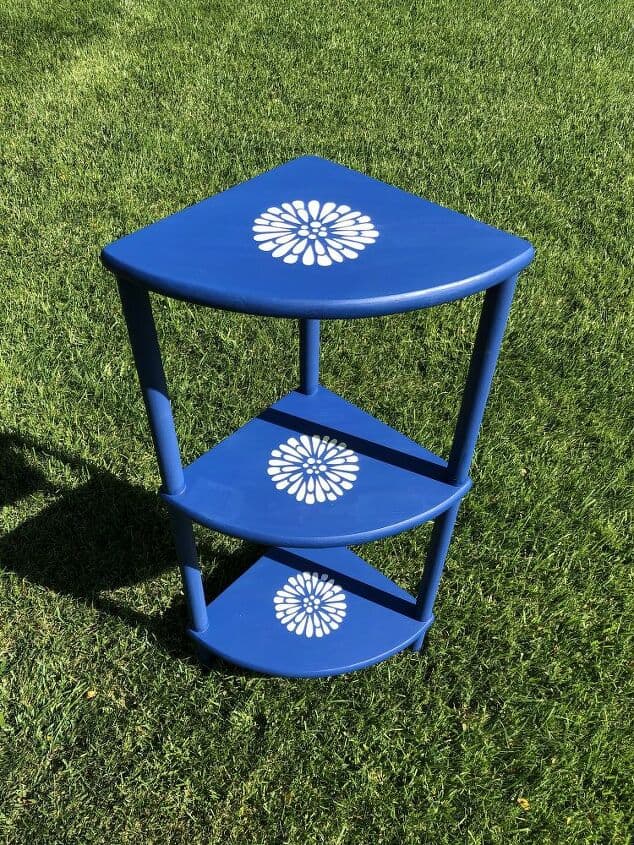
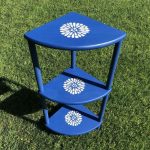
I let it dry and it was ready for use. I’m thrilled with how it turned out.
Awesome and Easy Furniture Makeover Video
Shop any of these stores and I receive a small commission at no cost to you.
 IRIS USA 3 Tier Open Booksh…Shop on Amazon
") FolkArt Home Decor Ultra Ma…Shop on Amazon
FolkArt Home Decor Ultra Ma…Shop on Amazon FolkArt Small Painting Sten…Shop on Amazon
 Plaid 1IN STENCIL BRUSH LON…Shop on Amazon
, 2/Pkg") Plaid Enterprises 50557E En…Shop on Amazon
Plaid Enterprises 50557E En…Shop on Amazon FolkArt Home Decor Chalk Fu…Shop on Amazon
") BLACK+DECKER Orbital Sander…Shop on Amazon
BLACK+DECKER Orbital Sander…Shop on Amazon
Find out “What Exactly Does It Mean To Repurpose Or Upcycle“, save money, and create the most amazing things.
What kind of furniture should I look for to give a makeover?
- dresser makeover
- armoire
- old bookcase makeover
- old hutch
- old desks
- couch
- lamps
- bench
- filing cabinet
- old chairs
Where should I look for old pieces of furniture?
- garage sales
- thrift store
Where should I put old furniture pieces?
- make an outdoor sofa
- dining room
- family room
- bedroom
- office
- just about anywhere in your home
A fresh coat of paint goes a long way. You can spray paint it or use a paint brush (just be careful of brush marks). Go with a bright color or something darker like navy. Add accents like gold leaf, or stenciling. Be sure to add a top coat to protect your hard work and preserve that beautiful finish. It’s an inexpensive way to furnish your home. I hope this DIY furniture makeover inspires you. I’d love it if you would subscribe.
Check out some of my other furniture makeovers!


Thank you for sharing at #OverTheMoon. Pinned and shared. Have a lovely week. I hope to see you at next week’s party too! Please stay safe and healthy. Come party with us at Over The Moon! Catapult your content Over The Moon! @marilyn_lesniak @EclecticRedBarn
Thank you so much Marilyn, I will see you at the next onel
I love this! My mom used to have a little table/shelf like this and I now have the perfect place for one, of course, she no longer has the shelf and I have yet to find something similar that works for my space. You are so lucky and I love the makeover
Thank you Emily and I totally know what you mean. I was lucky to find this table for $5 and it was fun to re-do. It’s getting lots of use.
This is a great DIY makeover. I wish I had seen this before I sold the one we had in our bathroom. #TrafficJamWeekend
Thank you Antionette, I’m so glad you like it. I can totally relate, learning how to do something just after you let it go.