
Easy and Inexpensive DIY Rolling Storage Crate
Do you want a rolling crate for easy storage? We have limited storage space in our place and I needed to find a way to store blankets and other bulky items. I found just how to do it using wooden crates! These are perfect for a small space and can be used for so many different purposes. These would work in a craft room to store larger items like glue guns. They can be made to fit perfectly under a craft table. They can also function as a utility cart in the garage or utility room
Step-by-Step Tutorial: DIY Rolling Storage Crate Video
Learn how to transform a simple wooden crate into a stylish and functional rolling storage crate with this easy DIY tutorial. Using affordable supplies from Dollar Tree, follow step-by-step instructions to sand, varnish, and add wheels to your crate. Enhance its versatility with a lid covered in fabric, making it perfect for storing blankets, DVDs, board games, and more. Maximize your small space with this creative and customizable storage solution!
Now you can make this a few different ways and start with a sheet of plywood and cut it with a miter saw, use a kreg tools, kreg jig, etc, but I’m going to start with a wooden crate.
Rolling Storage Crate Instructions
Step 1: Gather Supplies
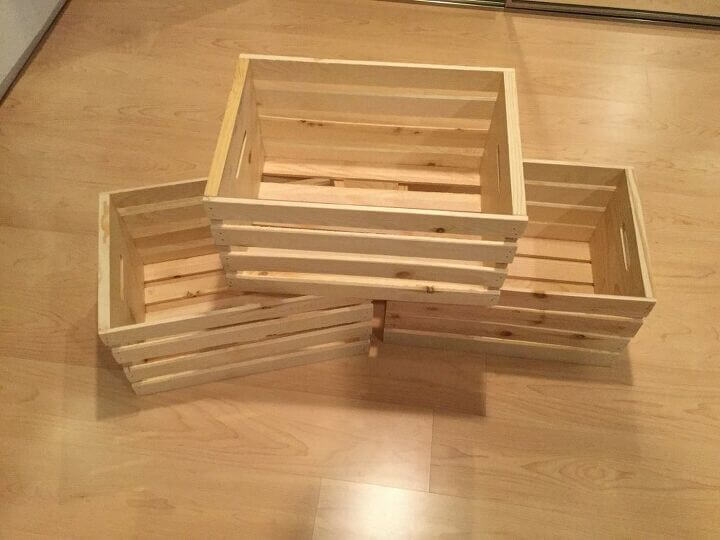
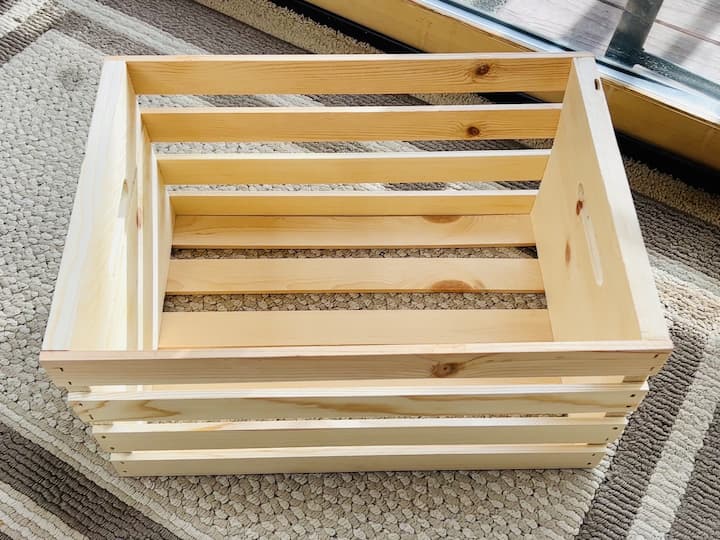
Head over to Dollar Tree to grab your supplies, including a wooden crate (available at Walmart), a sanding block, a damp cloth, folk art home decor varnish, and four furniture wheels.
Rolling Storage Crate Materials
They sell these crates everywhere, and mine came from Walmart. You can also find crates with a durable plastic frame if you would prefer that over wood.
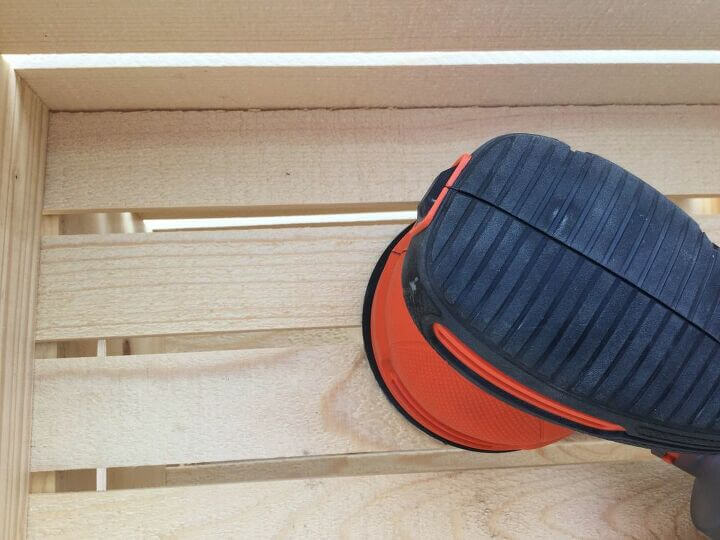
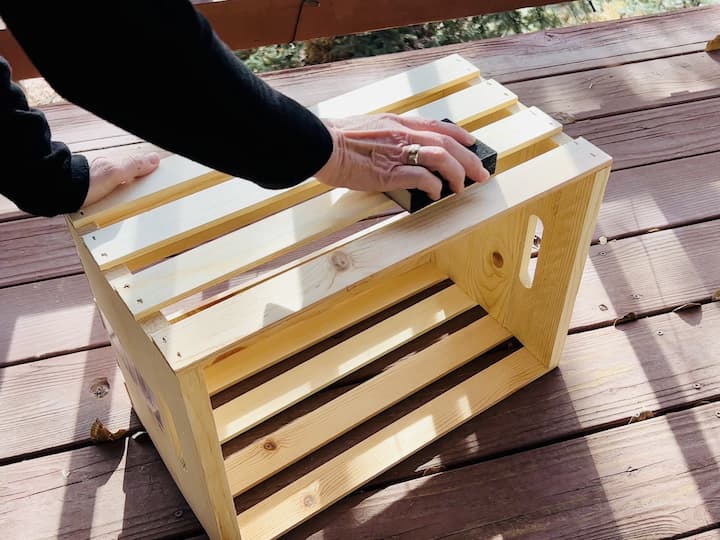
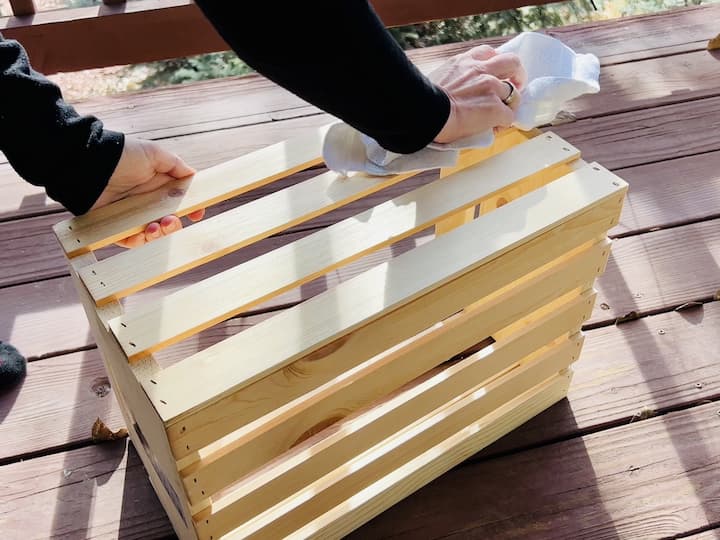
Step 2: Sand and Prep
Begin by sanding the entire exterior and interior of the crate to remove slivers and splinters. Wipe it down with a damp cloth to eliminate sawdust, ensuring a smooth surface for the next steps.
I decided to lightly sand the crate since we’d be storing blankets in them and our hands would be reaching in and out of them. You can use an orbital sander or a sanding block, whichever you prefer.
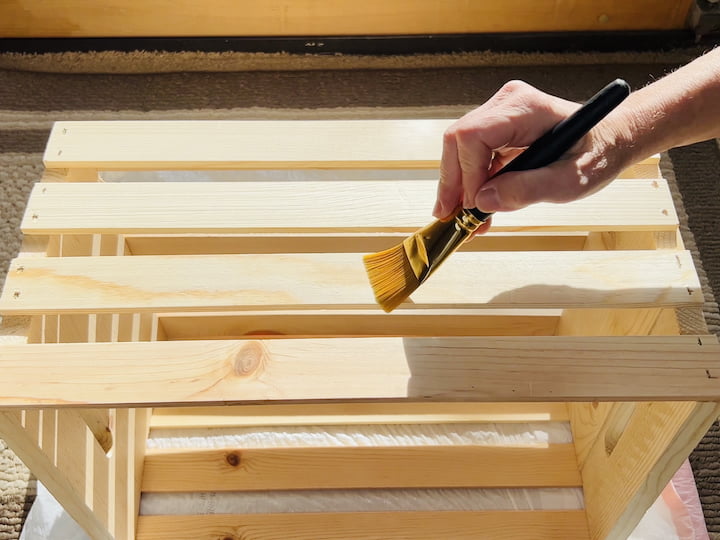
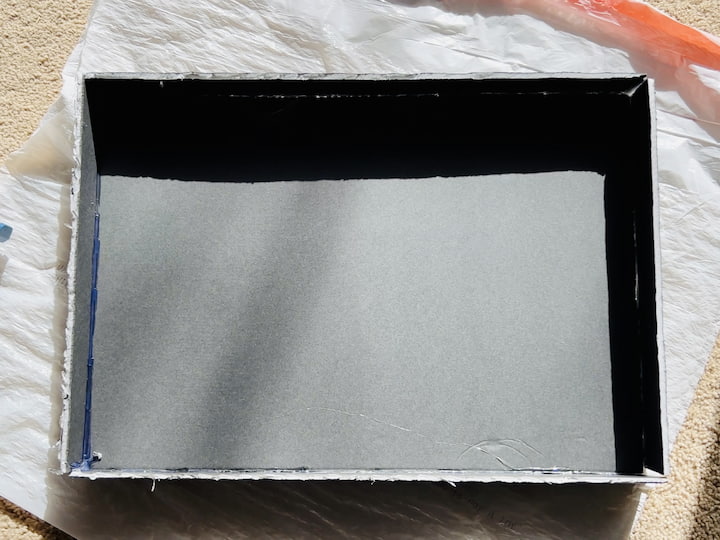
Step 3: Varnish the Crate
Apply folk art home decor varnish to the crate’s exterior and interior. If you prefer a stained or painted look, do this step first. Let the varnish dry completely before moving on to the next step.
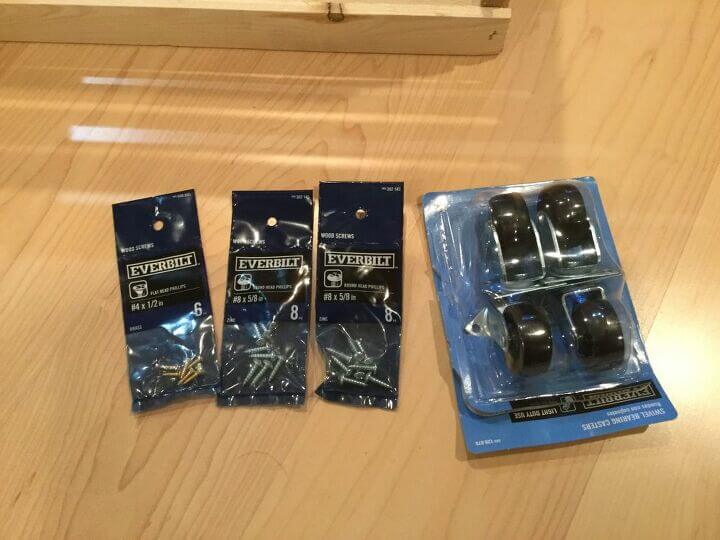

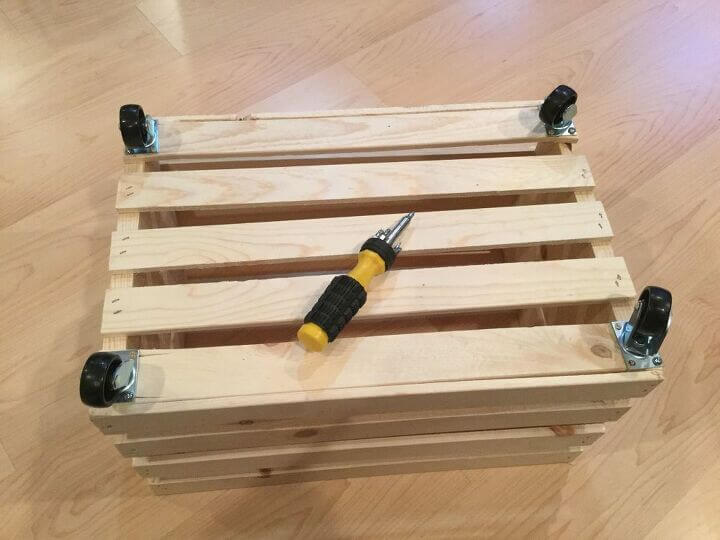
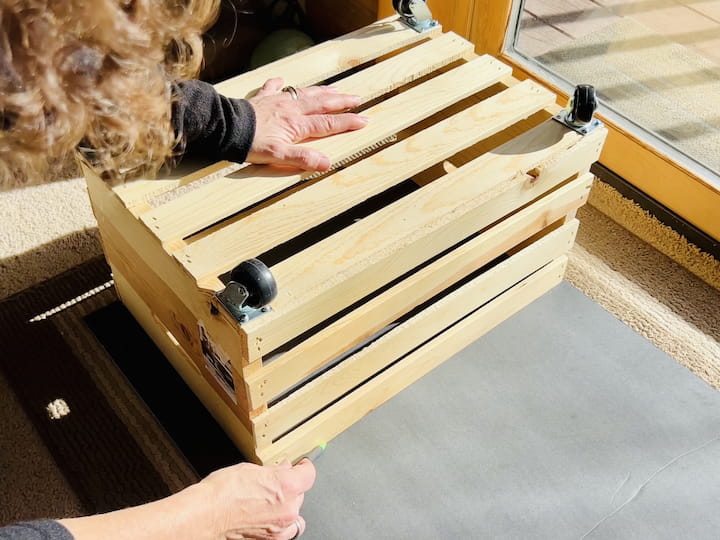
Step 4: Attach Wheels
Flip the crate upside down and attach one wheel to each corner. Consider making pilot holes with a drill for easier screwing. Repeat the process for all four corners.
I went to Home Depot and grabbed some caster wheels and screws. The longer screws would be done in 3 of the 4 holes and the smaller screw would go in the last hole.
*Hind site, I would have bought the wood crates with the extra wood in the 4 corners so that I could have used the same sized screw in all of the holes.
I started by drilling a pilot hole (pocket holes) with a drill bit in first where all of the screws would go. This would prevent the wood from splitting when I placed the screws in. I then screwed in the screws in all 4 holes of all the wheels.
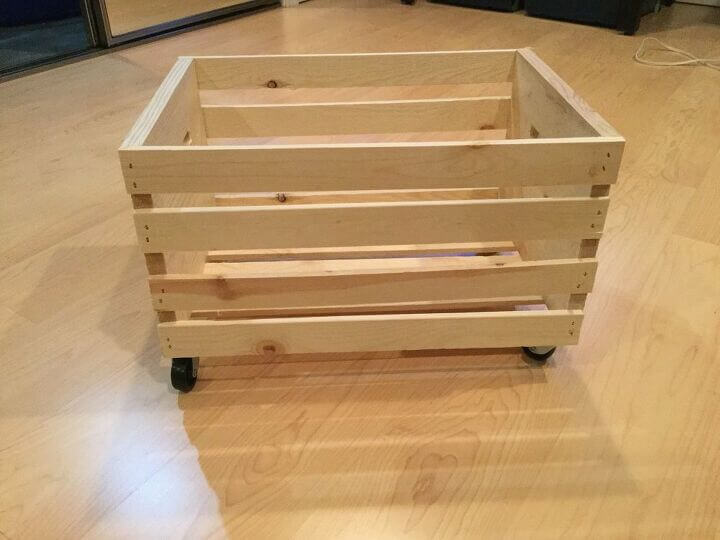
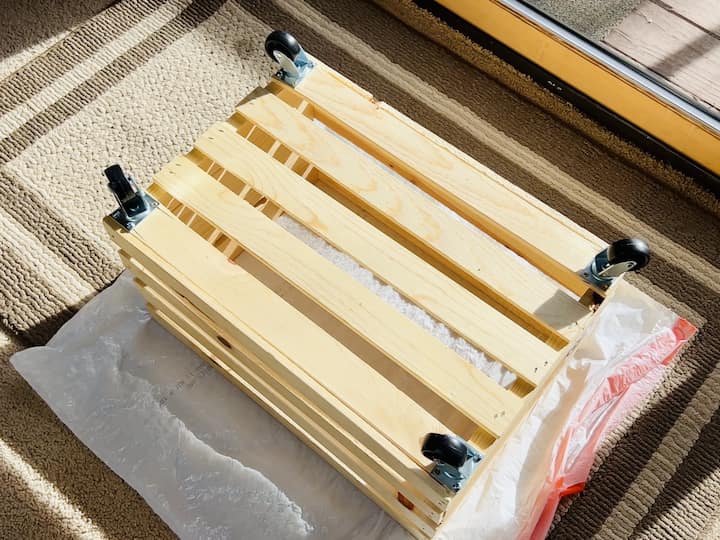
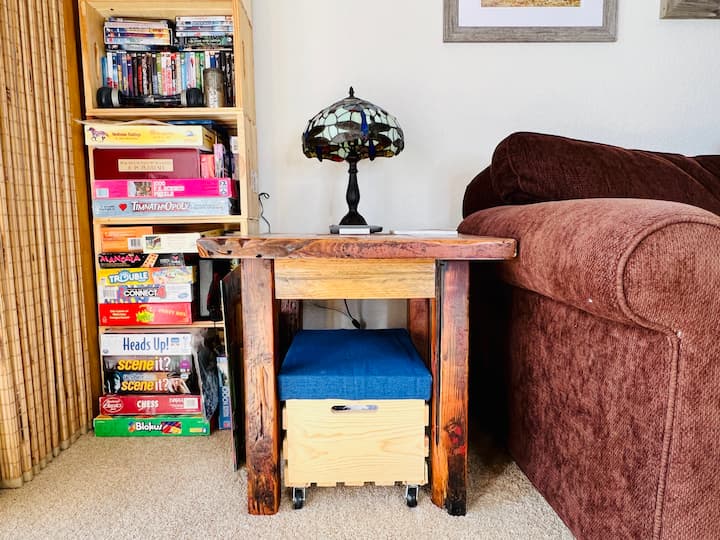
Here’s the completed rolling crate.
Step 5: Explore Storage Options
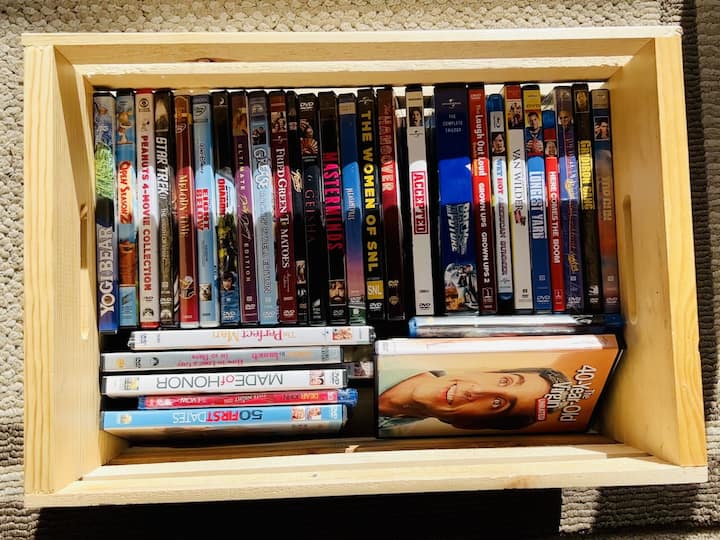
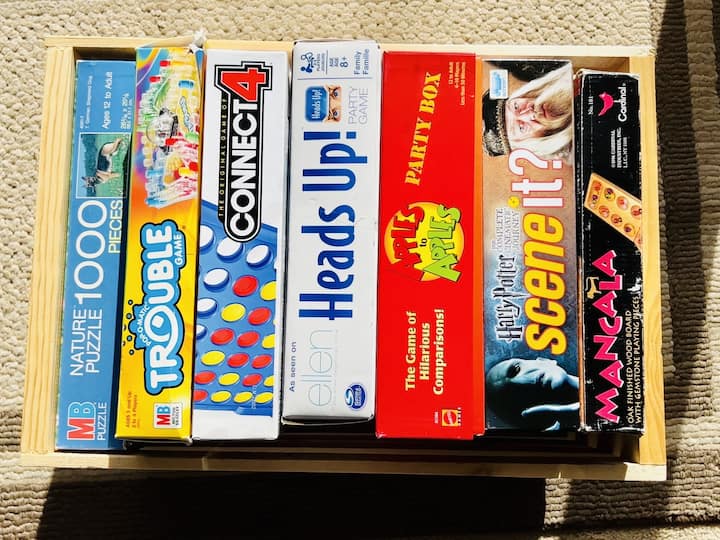
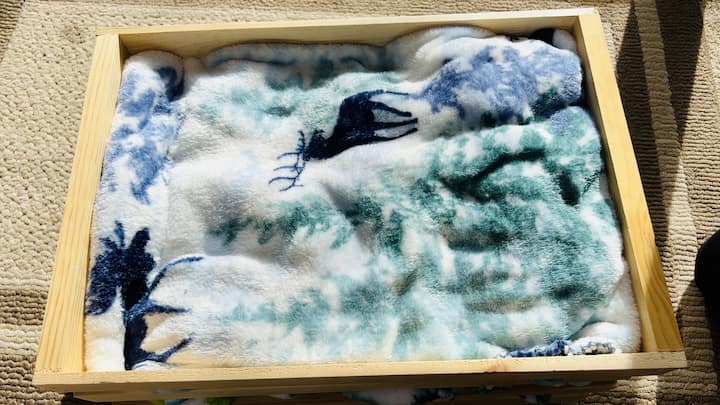
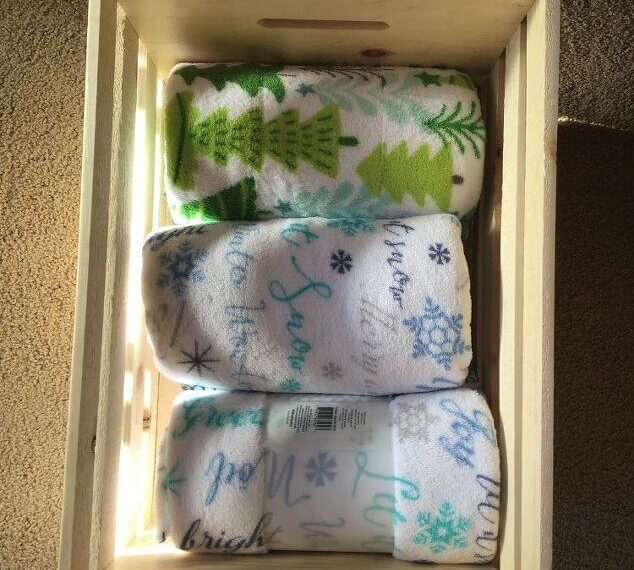
Your rolling crate is now functional and versatile. Consider using it for DVDs, board games, toys, cleaning supplies, shoes, and more. Share your ideas in the comments!
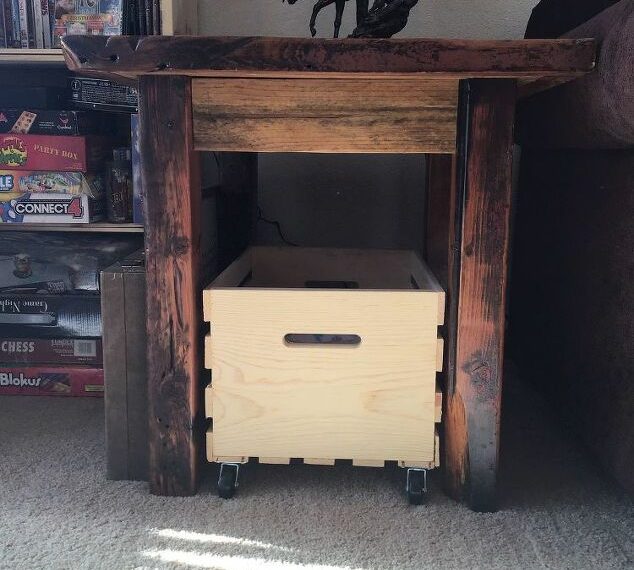
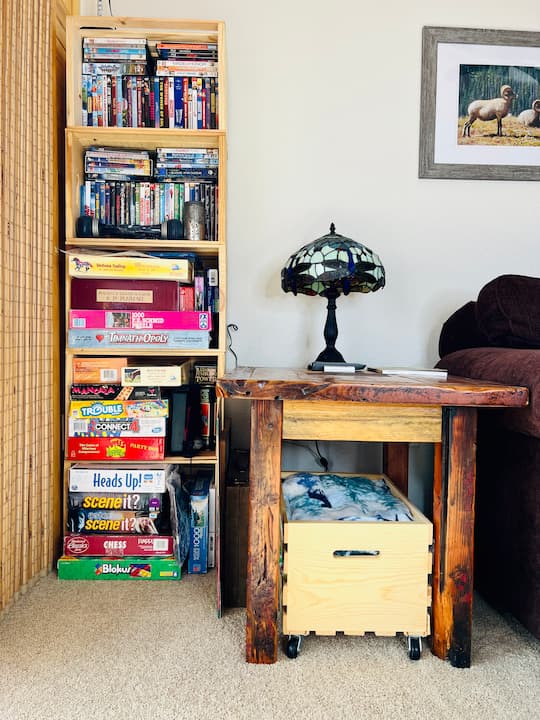
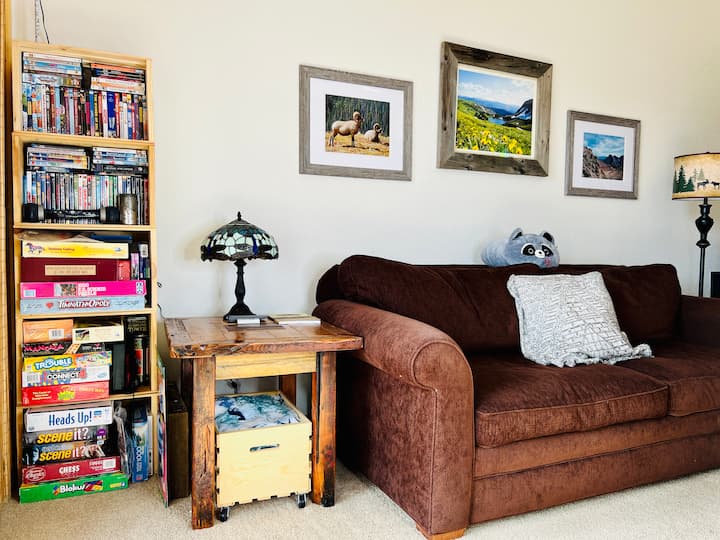
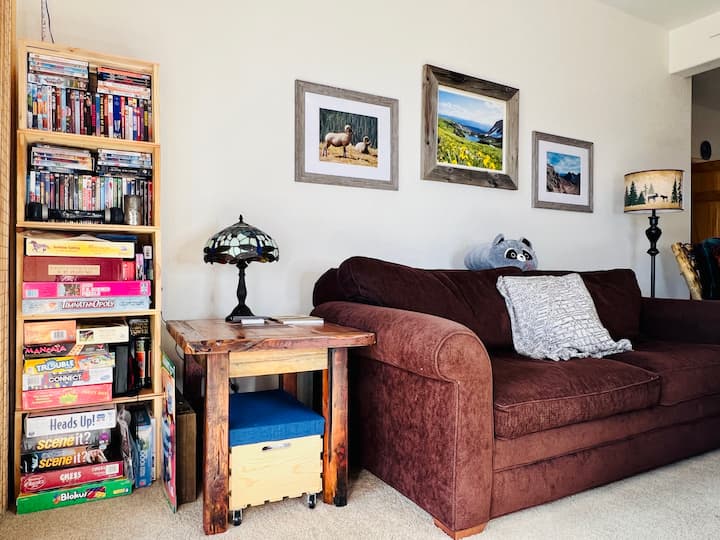
I placed my blankets in the storage cart and wheeled it under our side table.
Step 6: Creating the Lid – Optional
Measure and Trace: Place your wooden crate upside down on a flat surface. Use a ruler or measuring tape to determine the dimensions of the top surface of the crate. Draw a line to trace the size of the top surface onto the poster board.
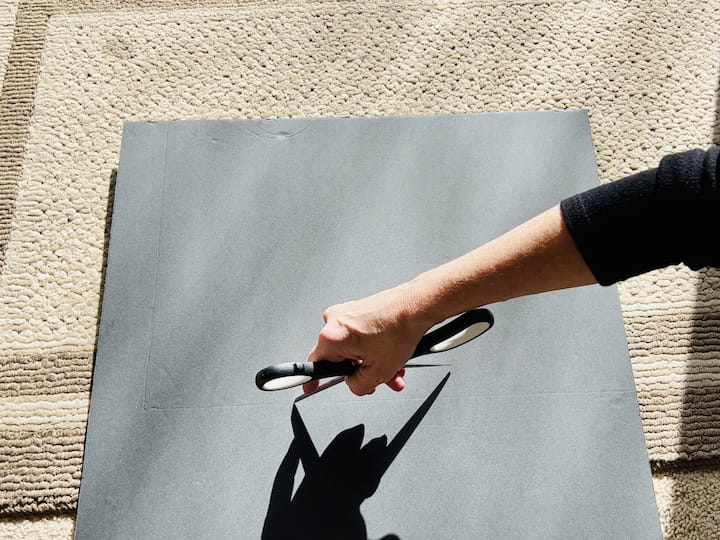
Cutting the Poster Board: Cut the poster board along the traced line, ensuring it’s slightly larger than the crate’s top surface. Scissors work well for this step, but you can also use an X-Acto knife or another cutting tool of your choice for precision.
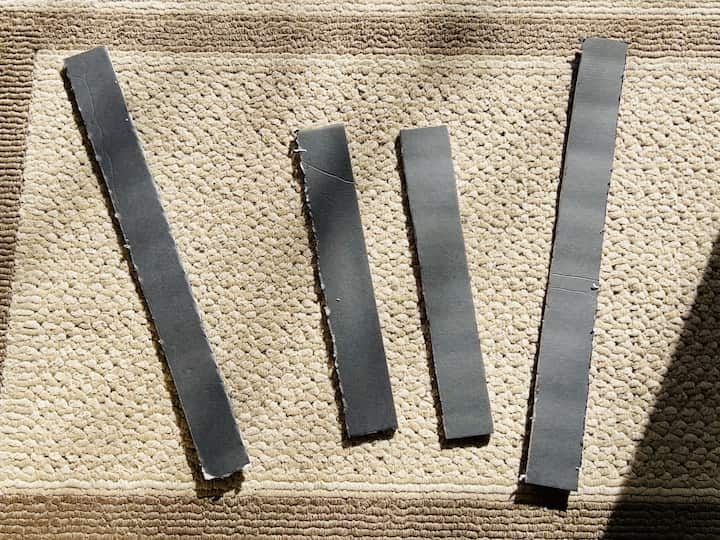
Prepare Side Pieces: Trace the dimensions of the two long sides and the two short sides of the crate onto the poster board, leaving about an inch of extra space. Cut these pieces out carefully with scissors or your preferred cutting tool.
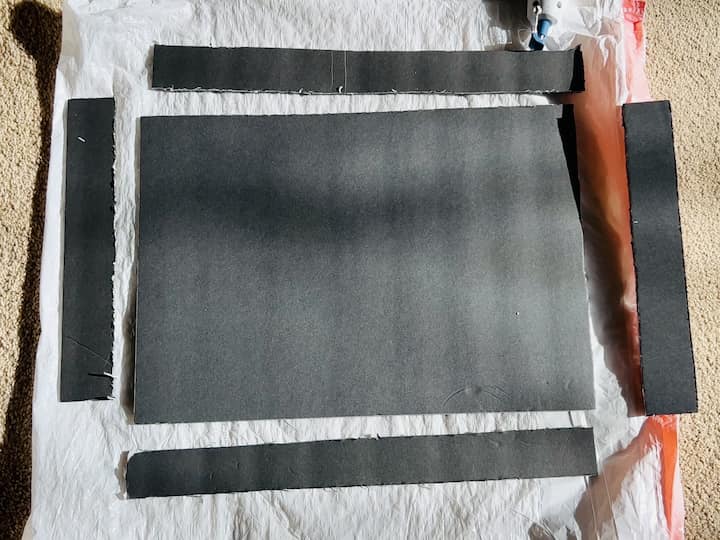
Layout Preparation: Arrange the cutout pieces, starting with the large piece in the middle (matching the crate’s top size). Position the long and short side pieces around the edges, forming a cohesive lid shape.
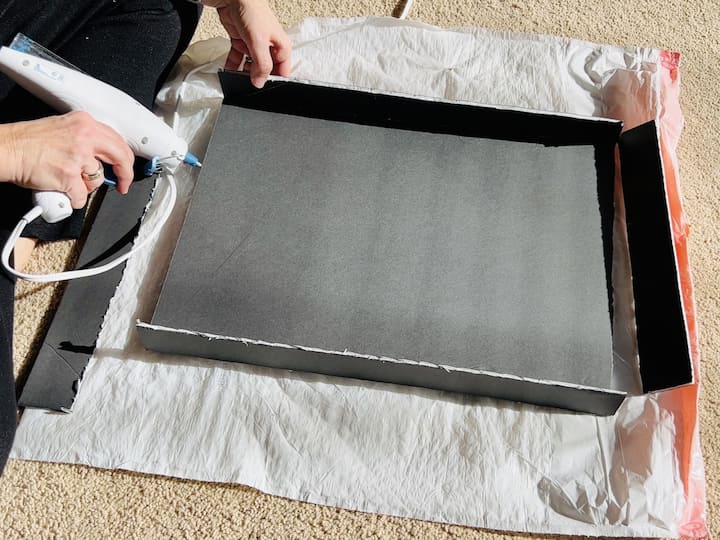
Assembly with Hot Glue: Heat up your hot glue gun. Run a line of hot glue along one edge of the large piece. Position one of the long side pieces against the glue, creating a joint. Hold it in place until the glue sets. Repeat this process with all the edges, attaching the side pieces around the central piece. This creates the framework for your lid.
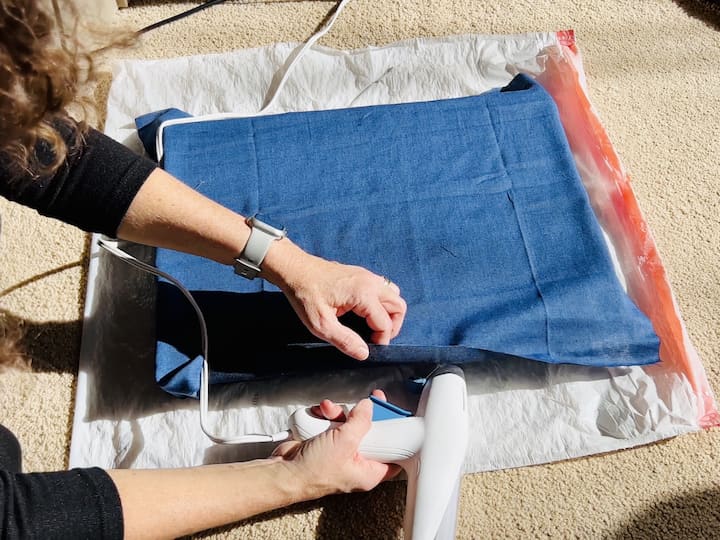
Adding Fabric: Cut a piece of fabric from Crafter’s Corner large enough to cover the entire lid. Apply a line of glue to one side of the lid and carefully press the fabric onto it, ensuring a secure seal. Continue this process for all sides, wrapping the fabric around the edges and sealing it onto the lid.
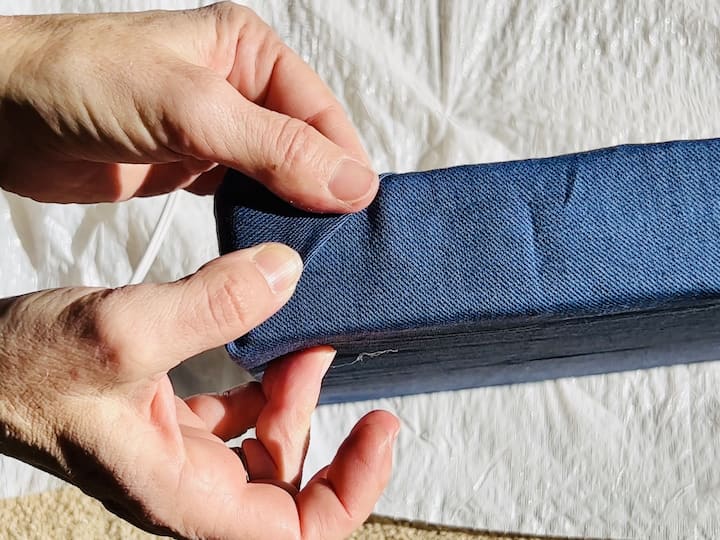
Finishing Touches: Fold the fabric neatly at the corners, adding a bit of glue to secure them in place. This step is similar to wrapping a present. Continue until all sides are covered and the fabric is securely attached to the lid.

Attaching the Lid: Once the lid is complete, position it on top of your crate.
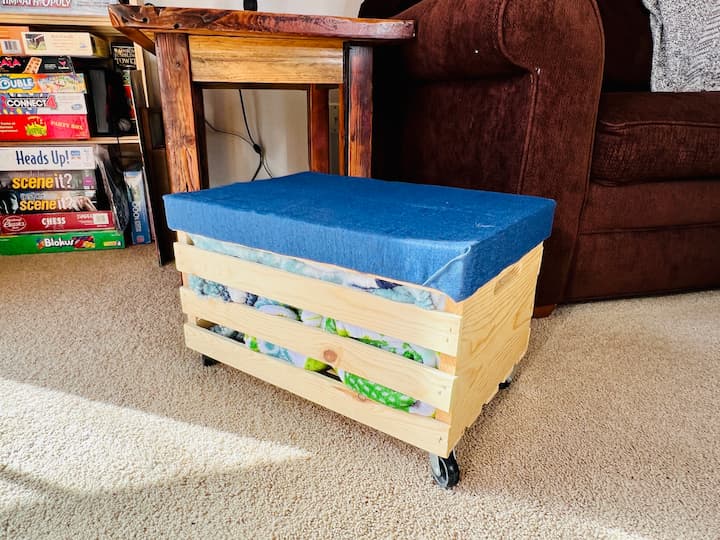
Lid or no lid? What do you think? Let me know in the comments below.
DIY Rolling Cart Video
Shop any of these stores and I receive a small commission at no cost to you.
 HOUSEWORKS 67140 18" Lx12.5…Shop on Amazon
 Amazon Basics 5-Shelf Heavy…Shop on Amazon
 Love-KANKEI Floating Shelve…Shop on Amazon
 VASAGLE Ladder Shelf, 4-Tie…Shop on Amazon
 Amazon Basics 4 Cube Wire G…Shop on Amazon
Other DIY Rolling Cart and Crate Ideas
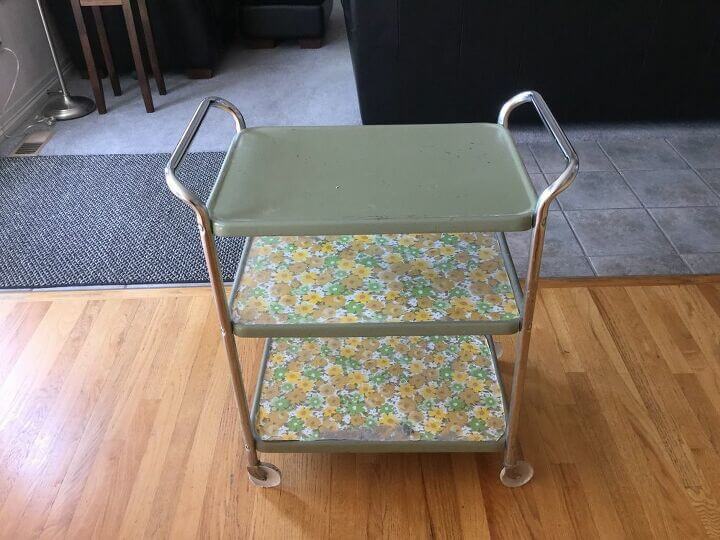
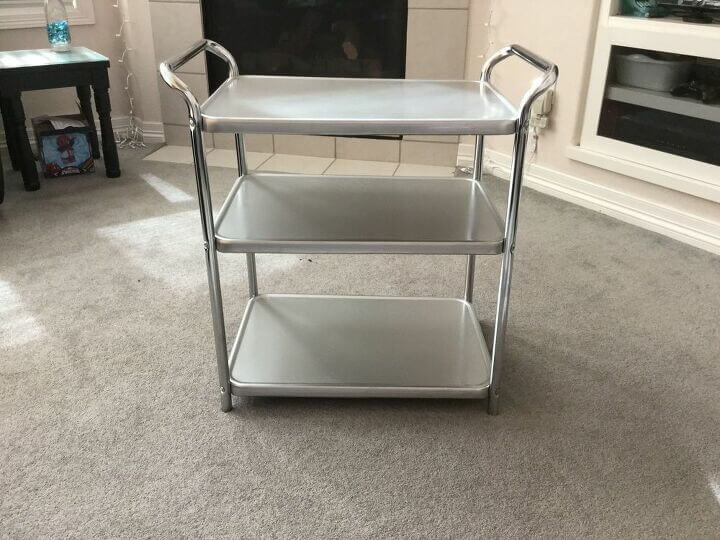
You might also be interested in my DIY Rolling Cart Upcycle! I found a vintage 3 tiered serving cart for $6 at the thrift store, and I was so excited! With a little cleaning, sanding, and painting, I upcycled it to fit in my home. You can find the full tutorial at Upcycled 3 Tiered Serving Cart
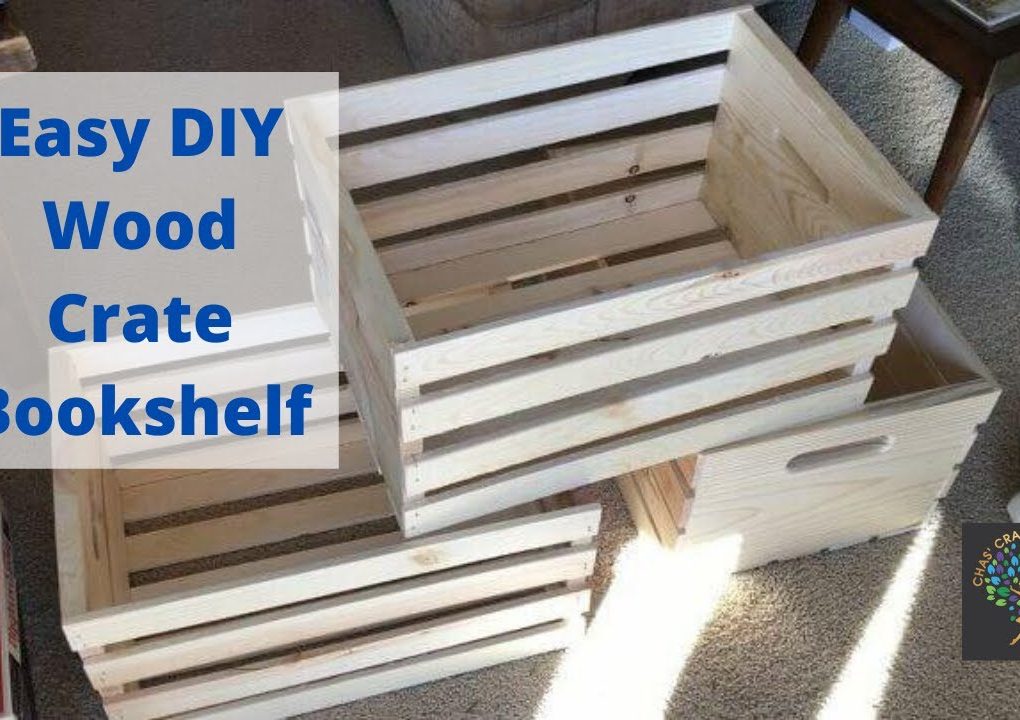
How do you make a bookshelf out of wooden crates? With a limited amount of storage space and some wood crates from Walmart, I found just what I needed to create an easy DIY wood crate bookshelf. I am always looking for ways to add extra storage, especially in a small space. I thought making a unique rustic shelf would be a fun diy project. You can find the full tutorial at Easy and Awesome DIY Wood Crate Bookshelf with Video
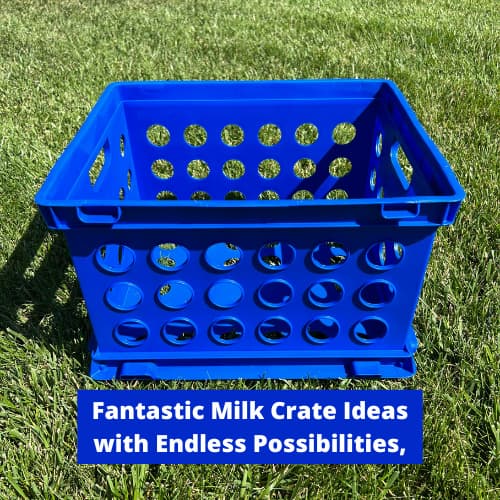
Do you want milk crate ideas? I have a few to share with you and you won’t believe the possibilities that are so incredibly useful. you can find the full tutorial at Fantastic Milk Crate Ideas with Endless Possibilities, You Won’t Believe It
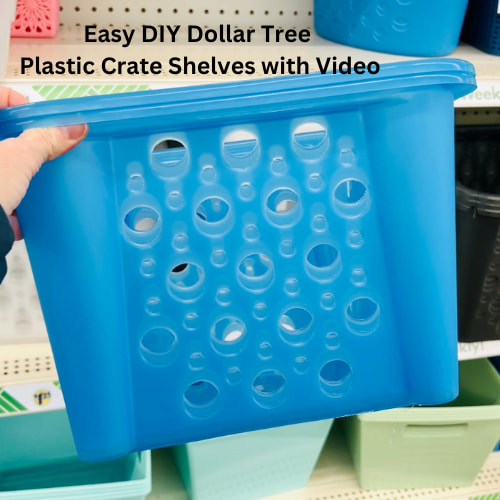
Are you looking for some easy shelves? I am always looking for various ways to add storage and I love to get creative. I ran to Dollar Store, grabbed some bins, and made easy plastic crate shelves on a budget. You can find similar plastic crates at Walmart or your favorite local stores that sell crafting or storage supplies. They come in different sizes and a variety of colors. You can find the full tutorial at Easy DIY Dollar Tree Plastic Crate Shelves with Video
This worked great for my storage area, and you can change cart’s design from this easy-roll cart by rotating the crates vertically or stacking more than one of them to make a rolling laundry cart for your laundry room. I’ve even taken these crates and made extra storage above my washers and dryer to store my detergent, dryer sheets, etc.

Are you looking for a DIY wooden Christmas tree? Here is a super simple idea that won’t break the bank and it’s reversible! Easy and Unique DIY Wooden Christmas Tree with Video
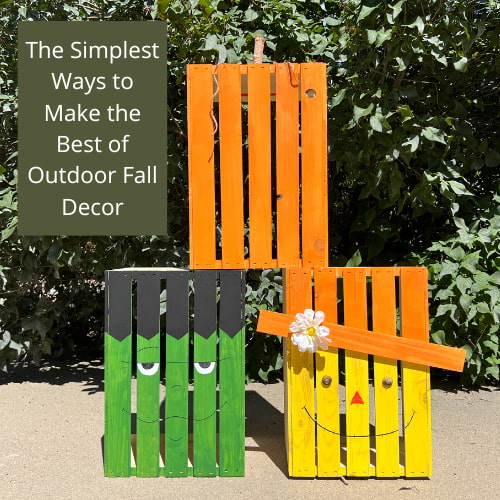
Are you looking for outdoor fall decor? Here are some easy projects and a couple you can leave up all season long. You can find the full tutorial at The Simplest Ways to Make the Best of Outdoor Fall Decor

DIY Rolling Cart Q & A
A utility cart can be used for a variety of purposes such as organizing tools and supplies in the garage, storing craft materials in a craft room, or even as a mobile storage solution for blankets and bulky items in a small living space.
A 3-tier rolling cart can be used for organizing and storing various items. For example, you can use it to store and organize craft supplies, kitchen essentials, office supplies, or even as a mobile bar cart for entertaining. The possibilities are endless!
Building a wooden rolling cart can be a fun and practical woodworking project. Here’s a basic guide to help you get started. Keep in mind that specific details may vary based on your design preferences and the materials you have available. Adjust the measurements and steps accordingly.
Materials:
Wood: Choose a sturdy wood such as hardwood (oak, maple, birch) or plywood.
Tools: Saw, drill, screws, wood glue, sandpaper, measuring tape, pencil.
Casters/Wheels: Choose durable wheels that can support the weight of your cart.
Steps:
Design Your Cart:
Determine the dimensions of your cart based on its intended use.
Sketch a simple design, including the number and placement of shelves or drawers.
Gather Materials:
Purchase the wood and other materials based on your design.
Ensure you have the necessary tools and safety equipment.
Cutting the Wood:
Use the saw to cut the wood pieces according to your design.
If you’re creating shelves or drawers, cut those pieces as well.
Assembly:
Assemble the frame of the cart by attaching the sides, top, and bottom pieces.
Use wood glue and screws to secure the joints.
If your cart has shelves, install them at this stage.
Adding Wheels:
Attach the casters or wheels to the bottom of the cart.
Make sure they are securely fastened to handle the weight.
Finishing:
Sand the entire cart to smooth any rough edges or surfaces.
Apply a finish such as paint, stain, or clear varnish to protect the wood and enhance its appearance.
Optional Features:
Add handles for easy maneuvering.
Install hooks or racks for hanging tools or accessories.
Test and Adjust:
Test the cart to ensure it rolls smoothly and is sturdy.
Make any necessary adjustments or reinforcements.
Final Touches:
Add any final decorative elements or features based on your preferences.
Always prioritize safety when working with tools and follow proper guidelines for cutting and assembling wood. Additionally, adapt these steps based on your specific design and requirements. If you’re new to woodworking, consider seeking guidance from experienced individuals or tutorials for more detailed instructions.
Happy Building!


How perfect is this!?! It is such a great idea to use a storage crate to make a rolling cart. Thank you for sharing.
Thanks Amy, it has come in so very handy 🙂
Love I’m sick and many expenses! Thank you?wish you could come advise! Discouraged and need to sale and get smaller. Great work shop etc but so many surgeries, and sad. But better than so many so grateful? thank you
Thank you for sharing at #OverTheMoon. Pinned and shared.
Thank you so very much Marilyn 🙂
I have downsized to a cottage style home, always looking for storage ideas. Thank you for sharing on the Classy Flamingos Blog Party this week. poinsettiadr.com
Thank you Linda, and I totally understand. These crates are great because the are so versatile and can be used in so many ways.
You cannot have too much storage – fact! This crate is such a perfect fit under your side table, what a great find!
Thank you Julie, and it is so handy in our small space. Those crates are just so versatile for so many uses – love them 🙂
What a great project! Schh a simple idea. I love it. Thank you for sharing on Merry Monday! We hope you will join us again next week!
Kim
Thank you so much Kim. I love how easy it was to make and how it can be used for so many different things. Thanks for a great party and see you next week.
This is a brilliant idea! I may have to put this idea to use soon, although I have a feeling my 18 month old would have a little too much fun with these… Thanks for sharing at Sweet Inspiration!
Thank you Amy and yes I could totally see my kids when they were younger pushing it around or even getting into it themselves. See you at the next party 🙂
What a great way to save space and so easily! Thanks!
Thanks so much Betty 🙂
What a great idea! I am going to make myself one!! Thank you for the inspiration!
Thank you so much Amanda and I’m thrilled you want to make one too 🙂
This is a great idea Chas. I know I love those smaller blankets and have many of them around my house. I’m lucky that I have my mother’s cedar chest to store blankets but this is a great idea for anyone who doesn’t have something like that.
Thank you so much Linda. You can never have too many blankets right? We have such limited space at our condo that I just had to come up with something that would conserve and serve a purpose we needed 🙂