
Easy and Cute Dollar Tree DIY Gnome Christmas Tree

I’m sharing a gnome Christmas Tree made with items from Dollar Tree, and the best part is you can adjust this to any size tree you want.
Gnome Christmas Tree Materials
- Christmas Tree
- Lights (optional)
- Stocking
- kid’s gloves or mittens
- plastic ornament
- santa ornament with fuzzy beard, or mop
Gnome Christmas Tree Video
Instructions for gnome christmas tree
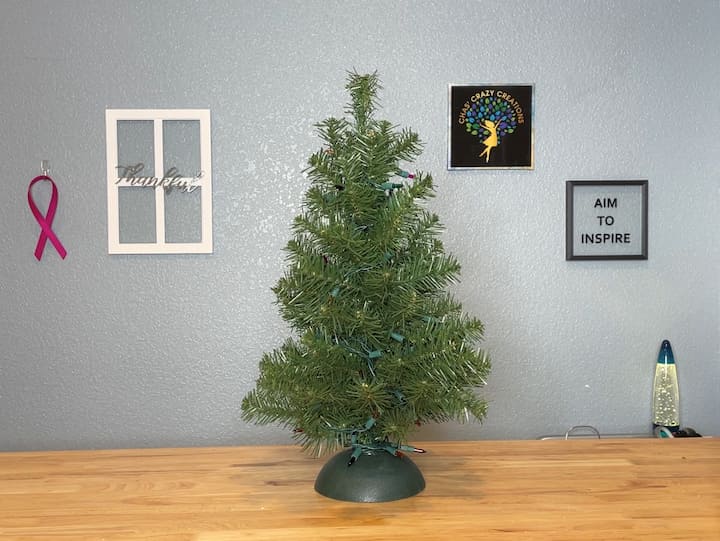
I have a mini tree that I’ll be using for this project. You can easily adjust this to any size tree, in fact, I’ll be showing you our 9-foot tree gnome at the end.
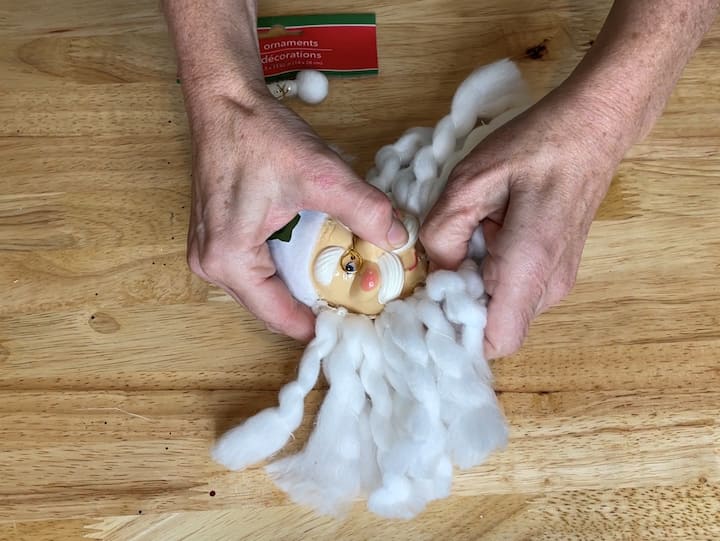
I bought this Santa ornament from Dollar Tree. I pulled the beard off the ornament for my gnome. If you can’t find an ornament like this you could buy a dollar store mop or use yarn instead.

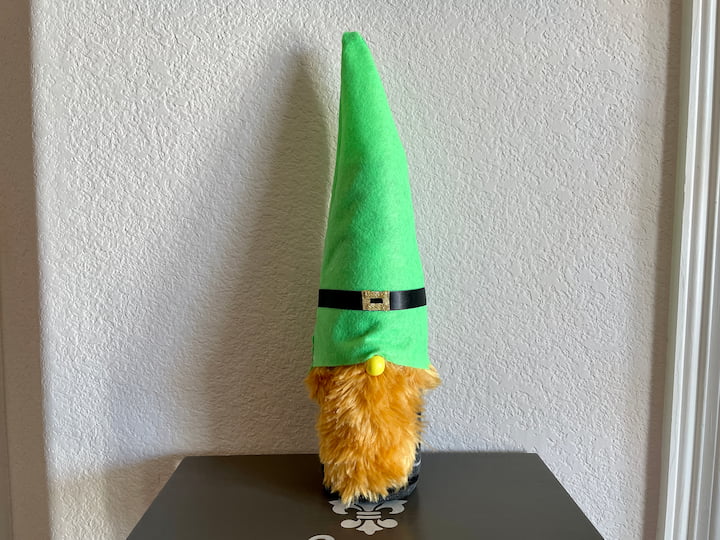
I bought a stocking at Dollar Tree. I cut the bottom of the stocking off in a triangle shape to help form my gnome hat.

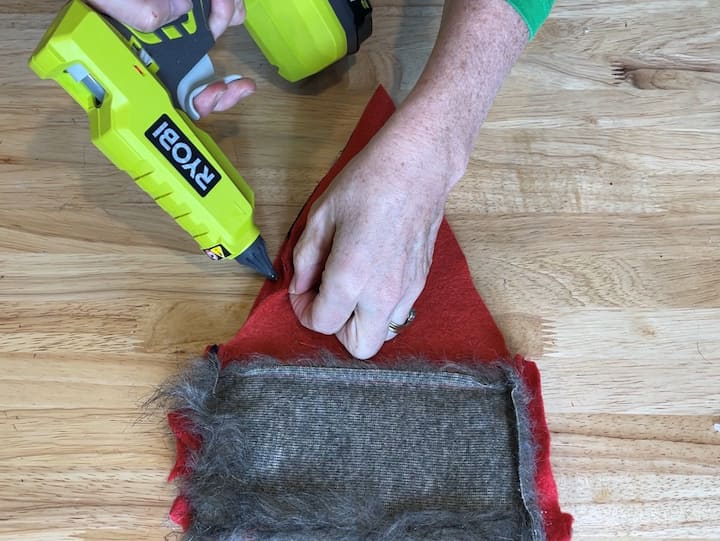
I turned the stocking inside out and used my hot glue gun to adhere the edges together. You could sew this step if you prefer.
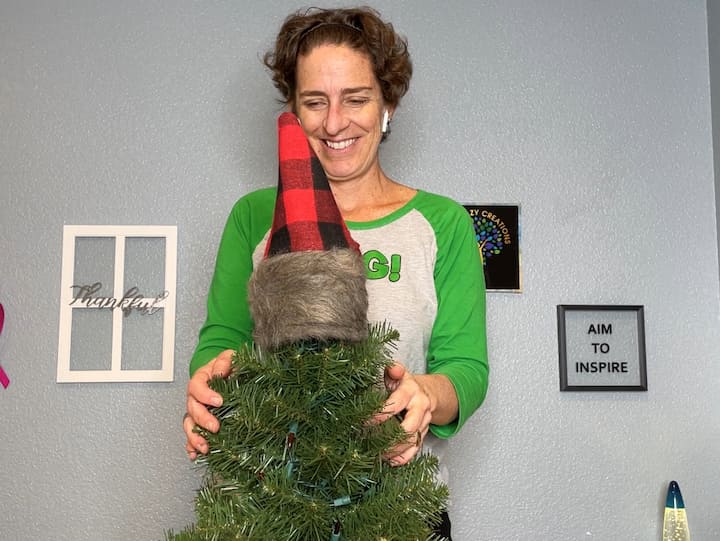
Once the glue was cool, I turned the hat right side out. I placed the hat on the top of my small tree.
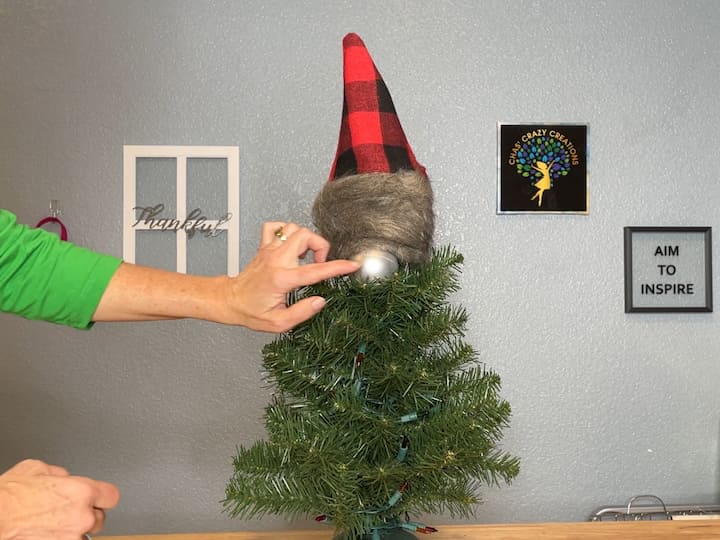
I placed a small ornament bulb under the hat for my gnome’s nose.

I added the Santa beard to the front of my tree to create my gnome’s beard.

I added some kid’s gloves to create hands-on my tree. You could use mittens if you prefer. You can also stuff the mittens or gloves if you like.
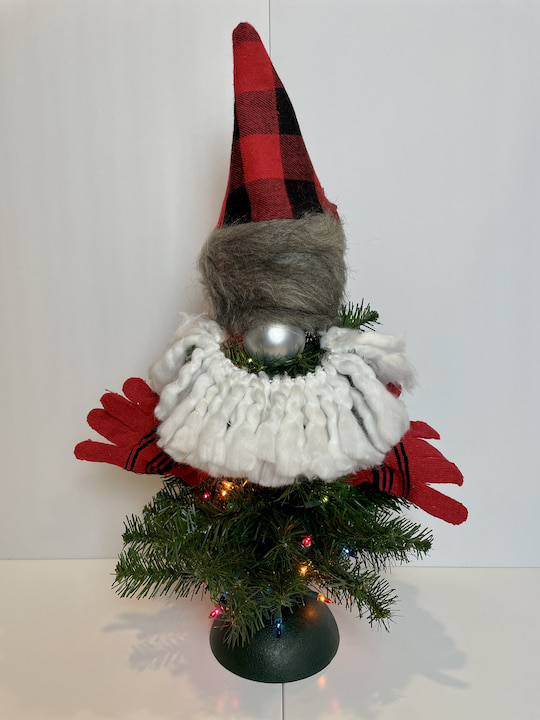
My gnome is all ready, and we leave this small one in our family room. Now let me show you our large tree in our living room….
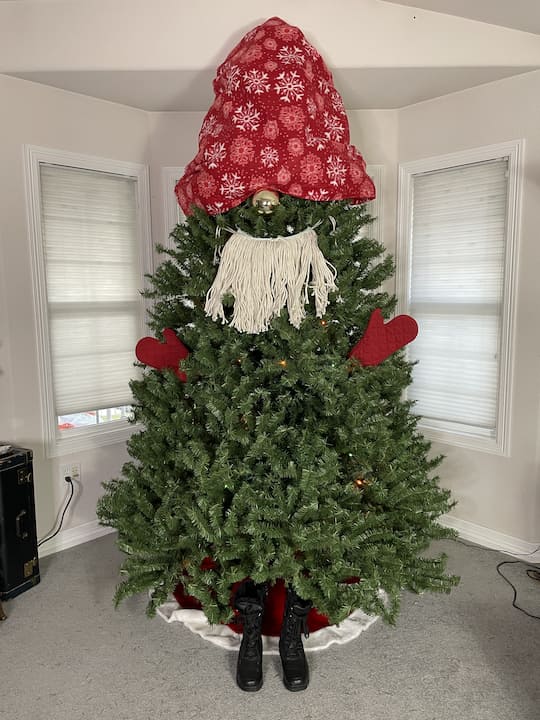
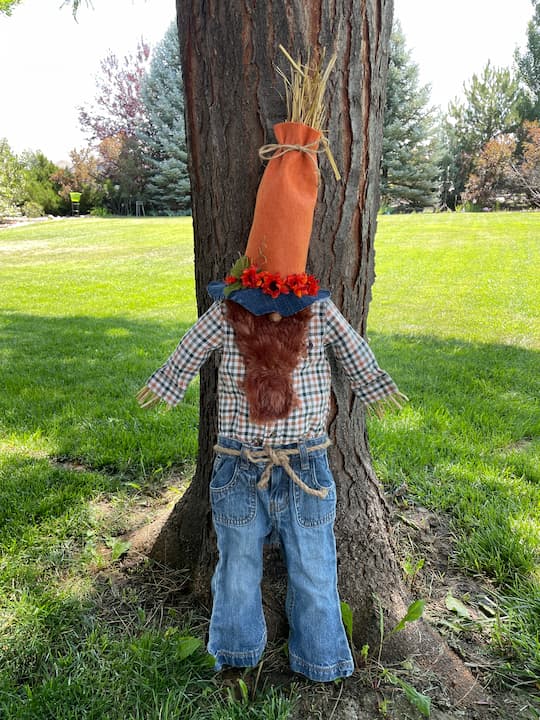
For our large tree, I wrapped a blanket around the top to become the gnome’s hat. I then added a large dollar store bulb for his nose. I added some oven mittens for his hands and my black boots for his feet. For his beard, I bought a mop, cut it in half, and tied the ends together. I made loops on either end and hung the beard on the tree.
Easy and Cute Dollar Tree DIY Gnome Christmas Tree Video
Shop any of these stores and I receive a small commission at no cost to you.


WATCH CHAS’ CRAZY CREATIONS HOLIDAY HOME TOUR

Easy and Cute Dollar Tree DIY Gnome Christmas Tree
Equipment
- Hot Glue Gun
Materials
- Christmas Tree
- Lights optional
- Stocking
- kid’s gloves or mittens
- plastic ornament
- santa ornament with fuzzy beard or mop
Instructions
- I bought this Santa ornament from Dollar Tree. I pulled the beard off the ornament for my gnome. If you can’t find an ornament like this you could buy a dollar store mop or use yarn instead.
- I bought a stocking at Dollar Tree. I cut the bottom of the stocking off in a triangle shape to help form my gnome hat.
- I turned the stocking inside out and used my hot glue gun to adhere the edges together. You could sew this step if you prefer.
- Once the glue was cool, I turned the hat right side out. I placed the hat on the top of my small tree.
- I placed a small ornament bulb under the hat for my gnome’s nose.
- I added the Santa beard to the front of my tree to create my gnome’s beard.
- I added some kid’s gloves to create hands-on my tree. You could use mittens if you prefer. You can also stuff the mittens or gloves if you like.
Video

Check out my other gnome projects!


Ha – that’s adorable Chas! Happy Holidays to you your family and your gnomes! 🙂
You look really good in today’s blog!!!
You’re so sweet, thank you so much! I’m growing my hair back out… takes forever lol