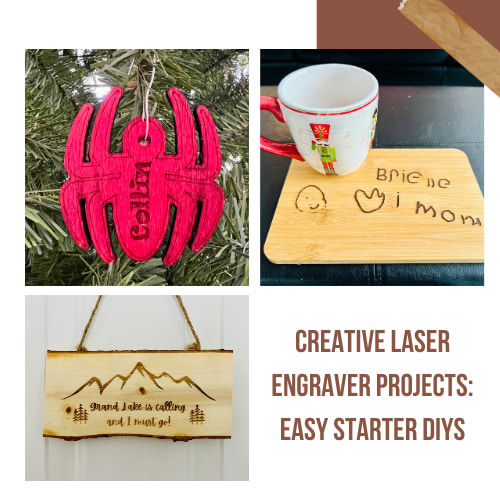
Creative Laser Engraver Projects: Easy Beginner DIYs

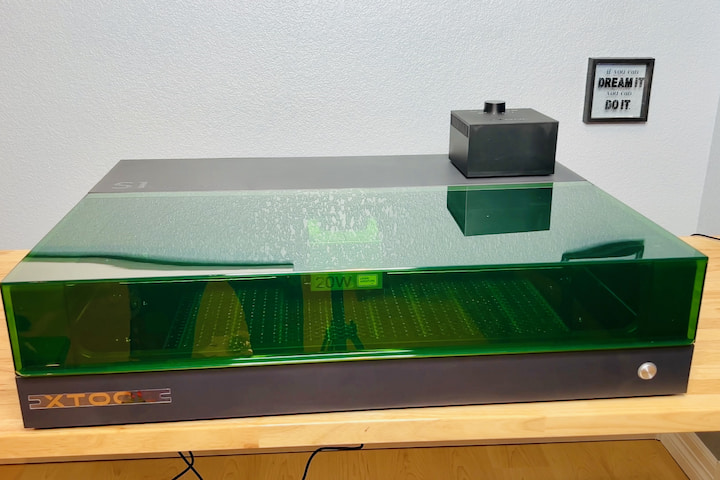
Are you looking for some laser engraver projects? Welcome to a world of laser engraving possibilities! In this blog post, we’ll take you through a series of exciting do-it-yourself projects using the xTool S1 laser cutter. The best part? You can find most of the supplies at your local Dollar Tree, and these are my first projects which are great for beginners. Let’s dive into the details of each project and unleash your creativity.
This post is in collaboration with xTool. All thoughts and opinions are my own. A big thanks to xTool for the S1 Laser Cutter
Laser Engraver Projects Video
Laser Engraver Projects
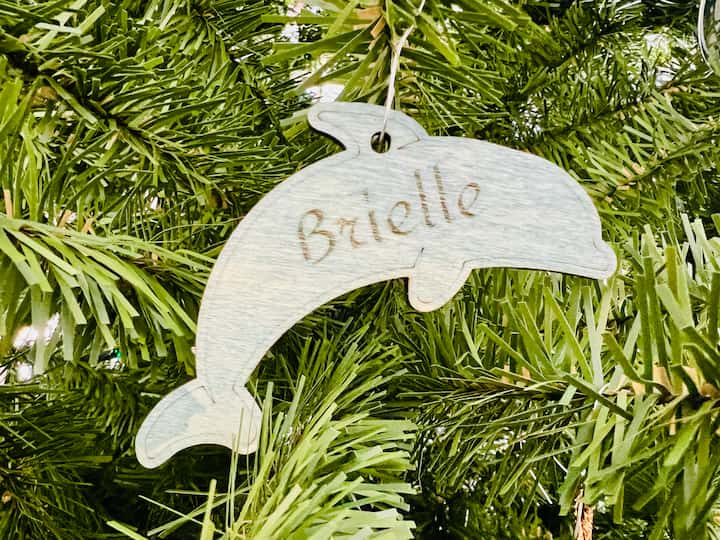
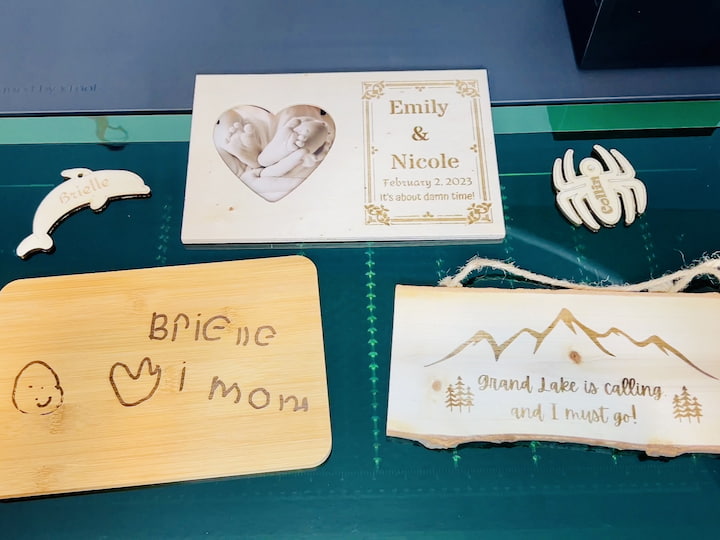
Project 1: Personalized Wooden Ornaments
In this tutorial, we’ll walk you through the process of making a personalized wood ornament featuring a cute dolphin design. Head over to Dollar Tree to grab the supplies you need, and let’s get started on these awesome DIYs!
Materials List:
- xTool S1 laser cutter
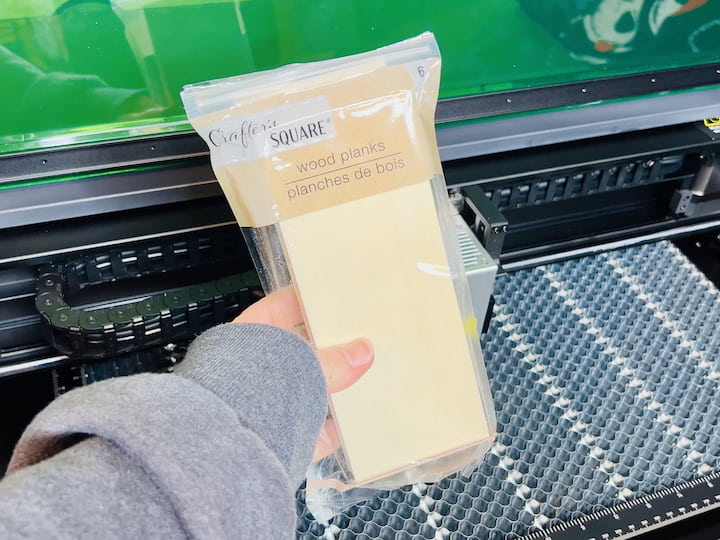
- Wood Blanks
- Computer with xTool Creative Space software
- Safety goggles
- Optional: String or ribbon for hanging
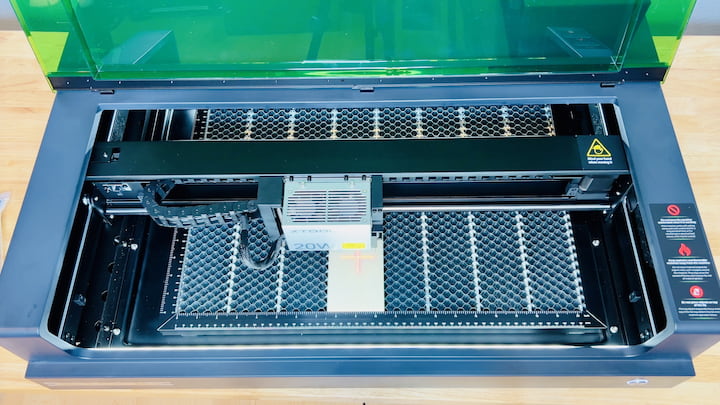
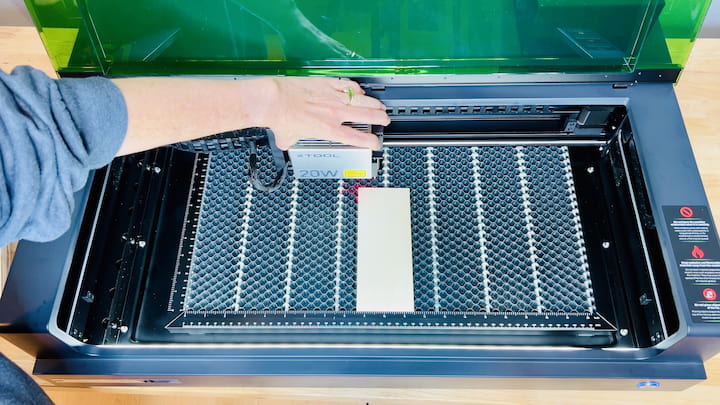
Step 1: Set up the xTool S1 Laser Cutter Begin by opening the xTool Creative Space software on your computer. Select the type of material you’re working with, which in my case is wood. Place the Crafter Square Wood Blank onto the laser cutter bed. Put on your safety goggles to protect your eyes during the engraving process.
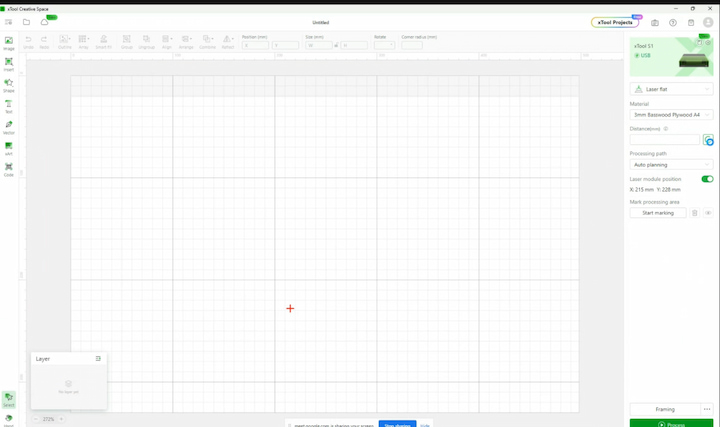
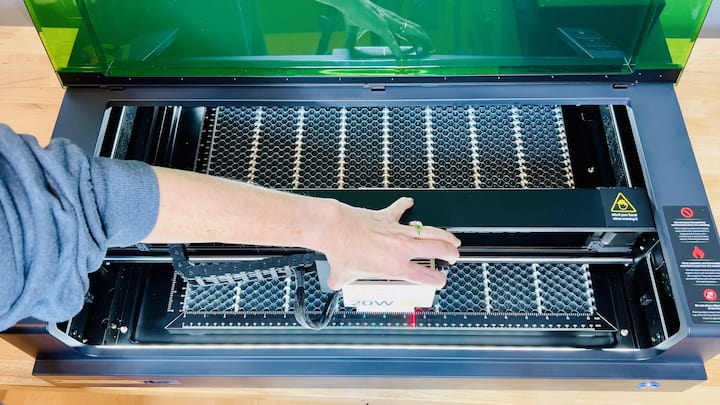
Step 2: Mark Wood and Set Distance In the software, mark the type of wood you’re using and set up the distance. This ensures accurate positioning of the piece on the laser cutter bed.
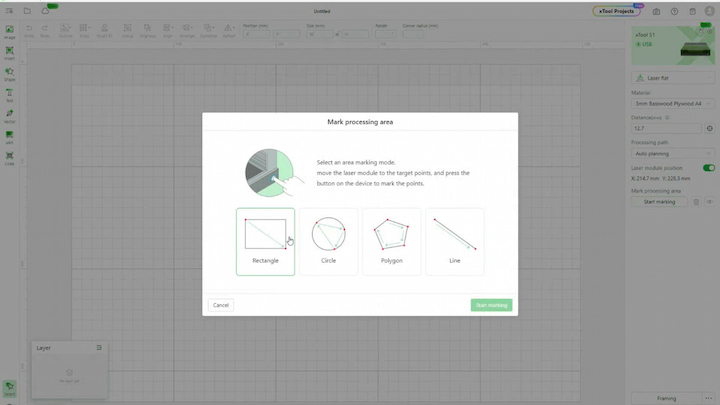
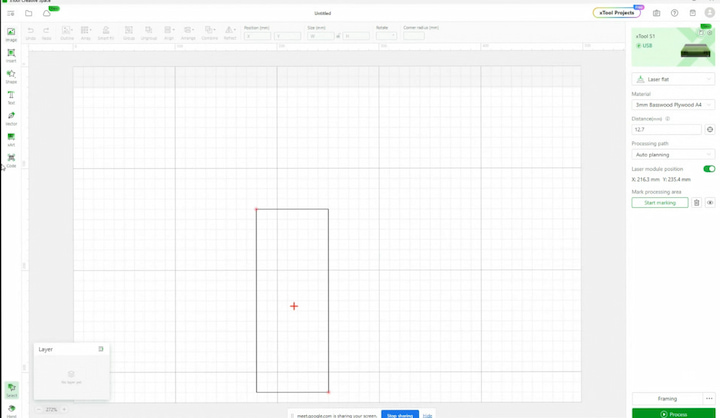
Step 3: Set Up Marking Process Choose the shape for your project using the marking process in the software. Follow on-screen instructions to mark the top and bottom corners of the wood piece.
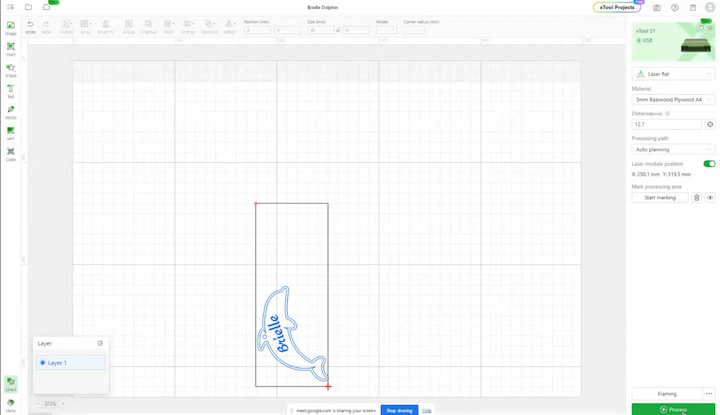
Step 4: Design Your Project Explore the creative options in xTool Creative Space. For this project, select an animal shape – we chose a dolphin. Enlarge the shape, mark it for scoring, duplicate it for cutting, and add text for engraving. Optionally, include a small circle for hanging.
Step 5: Group and Position Elements Group all elements of your design together and position them within a rectangle. Double-check your settings to ensure everything is ready for the laser engraving process.
Step 6: Frame the Design Mark the design to frame on the laser cutter. This step allows you to preview the positioning on the machine before the actual engraving process.
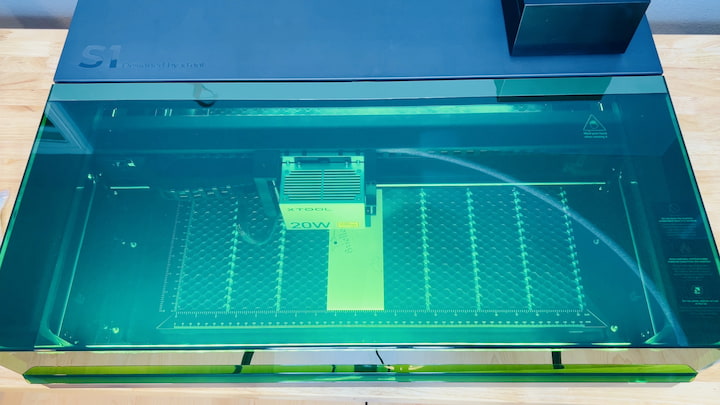
Step 7: Start the Engraving Process Once satisfied with the framing, press OK on the machine to begin the engraving and cutting process. Watch as the xTool S1 laser cutter brings your design to life on the wood.
Step 8: Clean Up Once the engraving and cutting are complete, open the machine lid and carefully remove the wood ornament. Gently clean up any excess material to reveal your beautifully crafted laser-engraved project.

Step 9: Optional Hanging If you added a circle for hanging, thread a string or ribbon through it to create a charming wood ornament that’s ready to be displayed or gifted.
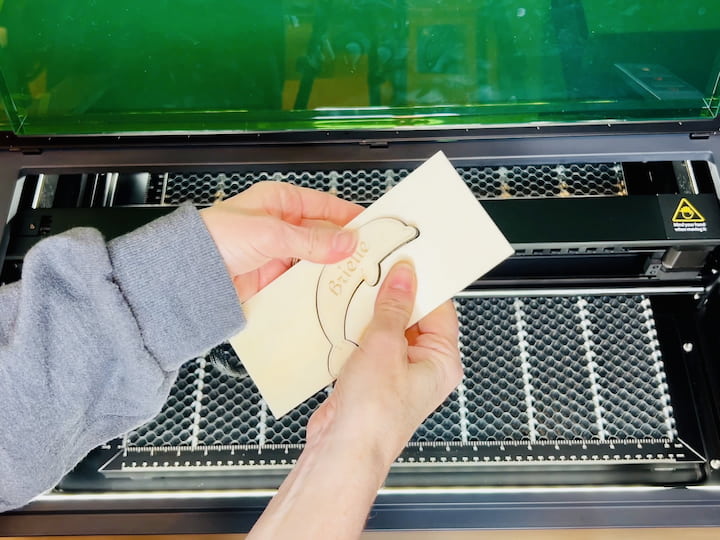
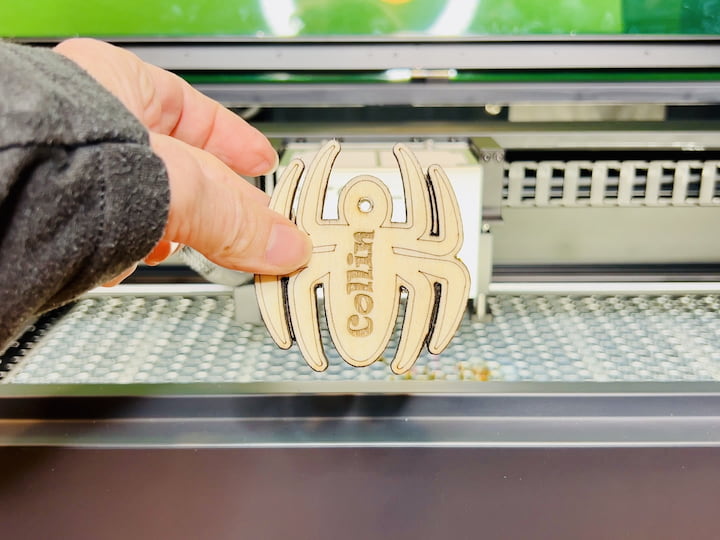
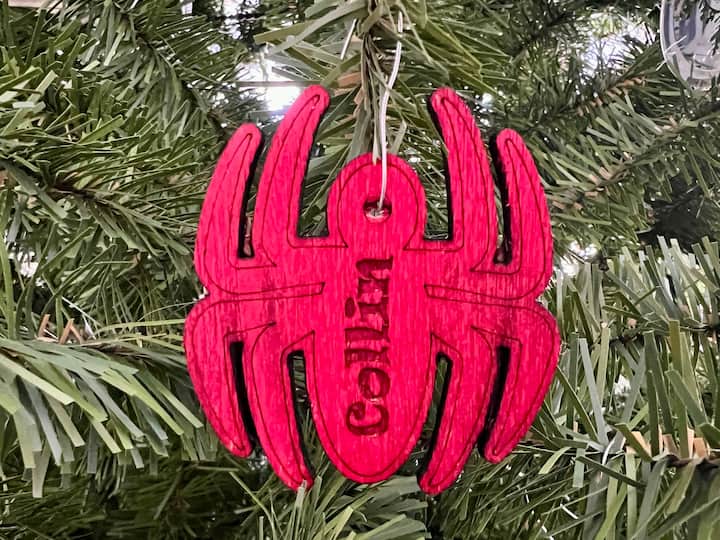
Option 2: Spider Ornament
Step 1: Repeat the Setup Process Just like with the dolphin ornament, repeat the entire setup process for the spider ornament. Open xTool Creative Space, mark the wood type, set the distance, and mark the top and bottom corners of the machine.
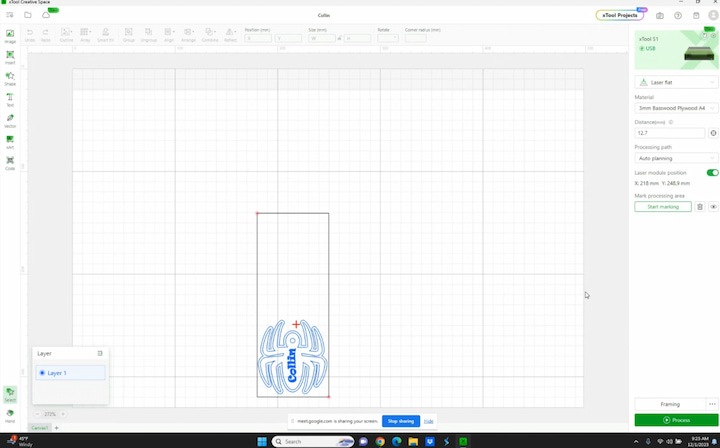
Step 2: Design Your Spider Ornament Choose a spider shape from the creative options in xTool Creative Space. Enlarge the shape, mark it for engraving, duplicate it for scoring, and add any desired text. Feel free to customize the order of operations based on your preferences.
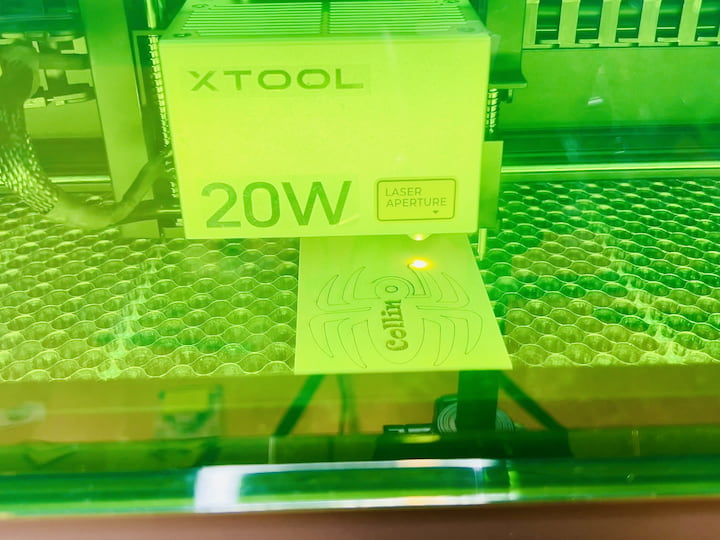
Step 3: Process and Let the Machine Decide After setting up your spider design, process it using the xTool S1 laser cutter. Unlike the dolphin ornament, this time let the machine choose the order of operations. It might start with engraving, followed by scoring, and then cutting.
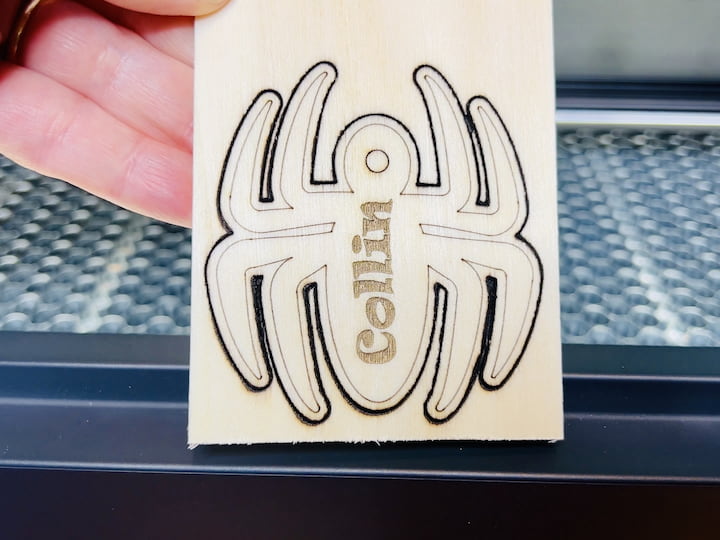
Step 4: Complete the Spider Ornament Once the machine finishes its work, carefully remove the spider ornament from the laser cutter. As with the dolphin, this one should pop out easily. Use a small tool to clean up any remaining pieces between the legs, and your spider ornament is complete!
Step 5: Optional Hanging If you included a circle for hanging, thread a string or ribbon through it to create a spooky yet charming wood ornament. The cleaning process is fast and easy, leaving you with a professionally crafted piece.
Congratulations! You’ve now mastered the art of laser engraving with two delightful ornament options. Whether it’s a playful dolphin or a quirky spider, the xTool S1 laser cutter allows you to bring your creative visions to life. Enjoy displaying or gifting your personalized wood ornaments!
Additional Steps: Enhancing Your Laser-Engraved Ornaments with Wood Tint
Materials Needed:
- Folk Art Home Decor Wood Tint in the color Cascade (for the dolphin)
- Folk Art Ultra Dye in the color Infrared (for the spider)
- Paintbrushes
- Damp rag
- Gloves (recommended)
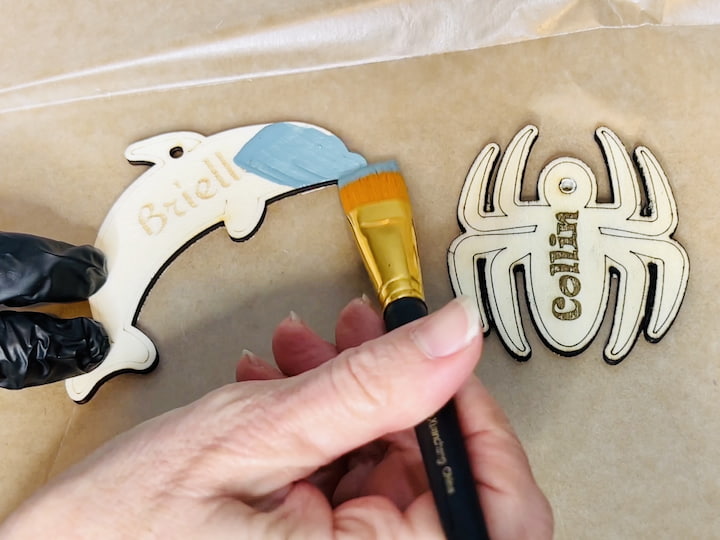
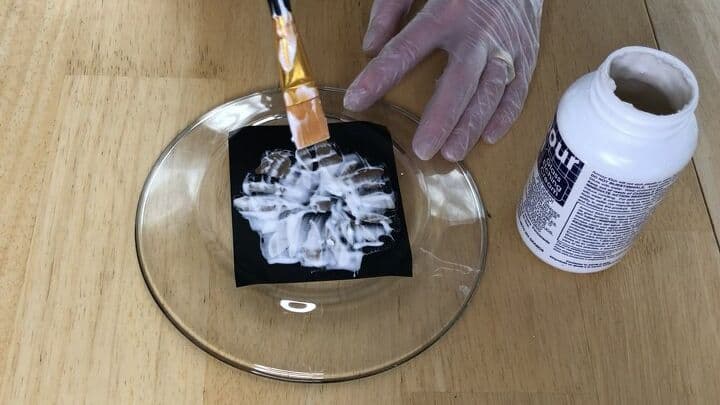
Step 1: Dolphin Wood Tinting Now that your laser-engraved dolphin ornament is complete, it’s time to add a touch of color. Using Folk Art Home Decor Wood Tint in Cascade, start painting directly onto the wood. The wood tint acts like a stain, absorbing into the wood for a beautiful finish. Apply one layer for a subtle look, or add more layers for increased intensity. For a stained appearance, take a damp rag and wipe off any excess. Embrace the transformative power of wood tint to enhance the visual appeal of your dolphin ornament.
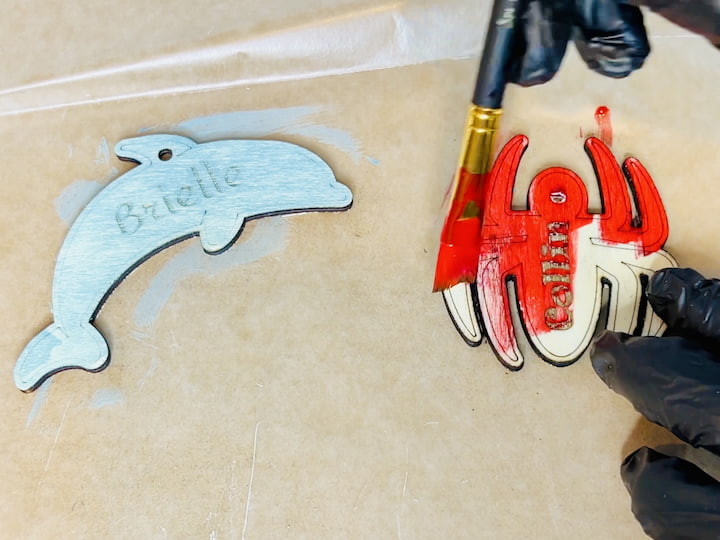
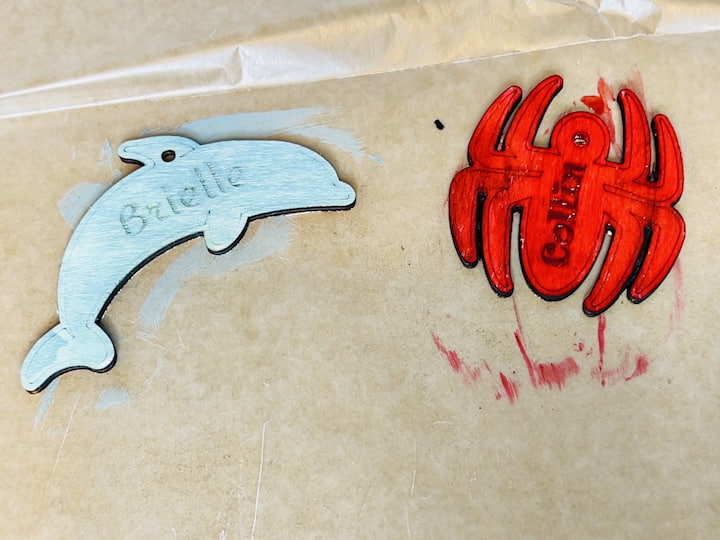
Step 2: Spider Wood Tinting Similarly, if you’ve crafted the laser-engraved spider ornament, it’s time to infuse it with color. Utilize Folk Art Ultra Dye in Infrared to paint the spider. As with the wood tint, this dye behaves like a stain, gracefully soaking into the wood. Experiment with the number of coats to achieve the desired vibrancy. Like the dolphin, you can use a damp rag to wipe off excess dye for a stained effect. Embrace the versatility of wood tinting to bring your laser-engraved spider to life.
Step 3: Clean Up Both Folk Art Home Decor Wood Tint and Folk Art Ultra Dye are water-based, making them easy to clean from your brushes. However, to avoid staining your skin, it’s advisable to wear gloves during the tinting process. Once your ornaments are beautifully tinted, allow them to dry completely before handling or displaying.
Step 4: Admire Your Colorful Creations After the wood tinting process is complete and your ornaments have dried, take a moment to admire the enhanced beauty and vibrancy. The combination of laser engraving and wood tinting adds depth and personality to your creations, making them truly unique pieces of art. Enjoy your personalized and colorful laser-engraved ornaments!
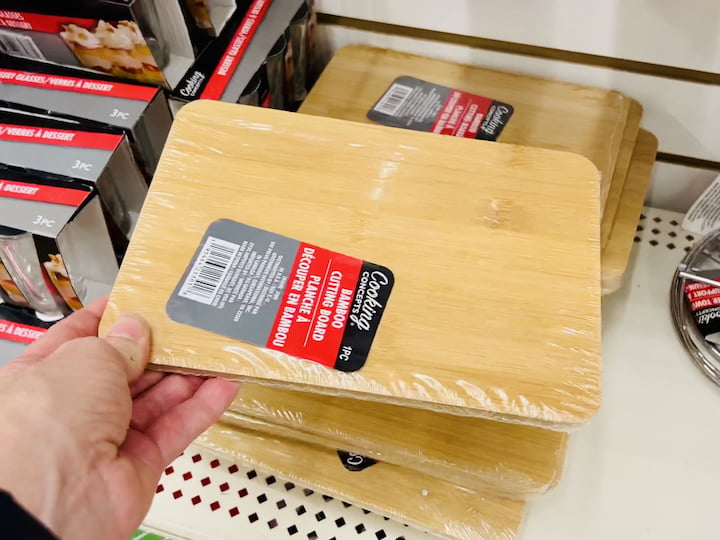
Project 2: Laser-Engraved Bamboo Cutting Board
Welcome to another exciting laser engraving project. In this tutorial, we’ll be transforming a simple Dollar Store bamboo cutting board into a personalized masterpiece using a photo. Curious about what you’d make? Let us know in the comments below! Let’s dive into the step-by-step process.
Materials List:
- xTool S1 laser cutter
- Bamboo cutting board
- Computer with xTool Creative Space software
- Safety goggles
- High-resolution photo for engraving

Step 1: Choose Your Design Decide on the photo you want to engrave onto the bamboo cutting board. For this project, we used a photo of some art created by the maker’s daughter. Make sure the photo is high-resolution for the best results.
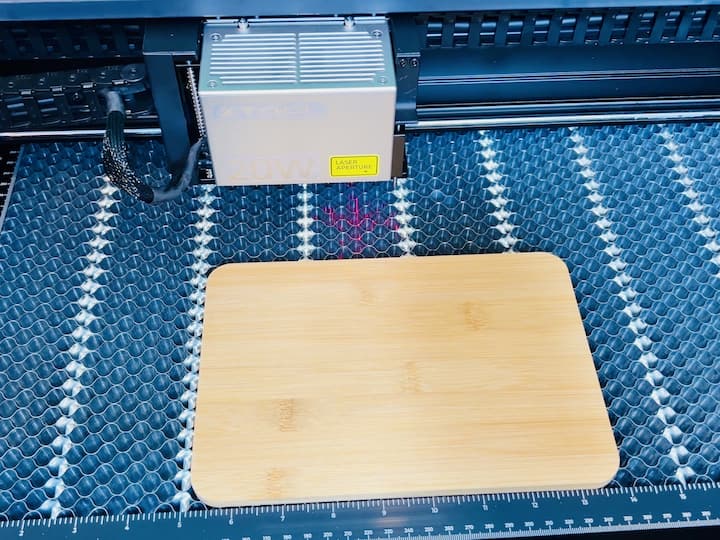
Step 2: Set Up Parameters Just like in the previous projects, set up all the parameters in xTool Creative Space ahead of time. This includes marking the type of material (bamboo cutting board) and configuring the distance on the laser cutter bed.
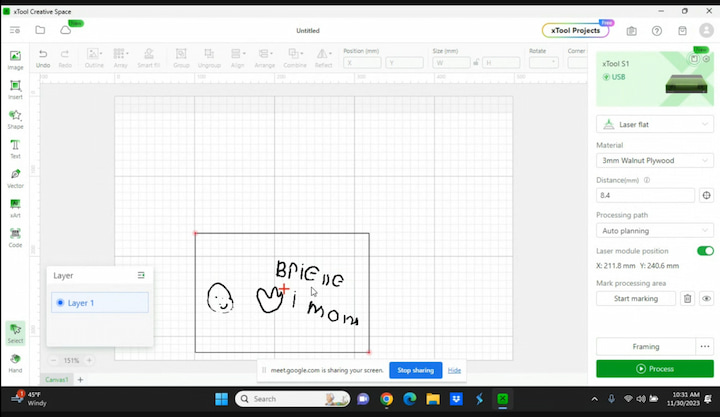
Step 3: Import Your Photo Import the chosen photo into xTool Creative Space. Follow the software’s instructions for importing an image. Once uploaded, you’ll have various options for manipulating the image.
Step 4: Configure Engraving Settings Adjust the settings to fit your engraving preferences. For this project, the maker set up the laser cutter to engrave the entire photo onto the cutting board. Take note of the power and speed settings for manual adjustment.
Step 5: Process the Design With all the settings in place, process the design in xTool Creative Space. This step prepares the laser cutter for the engraving job.

Step 6: Start the Engraving Process Turn on the xTool S1 laser cutter and let it do its magic. The machine will follow the parameters set up in the software and start engraving the photo onto the bamboo cutting board. In this case, it started from the top and worked its way down.
Step 7: Manual Power and Speed Adjustment, Unlike the previous projects, for this cutting board, the maker manually adjusted the power and speed settings. Experiment with different settings to achieve the desired engraving outcome.
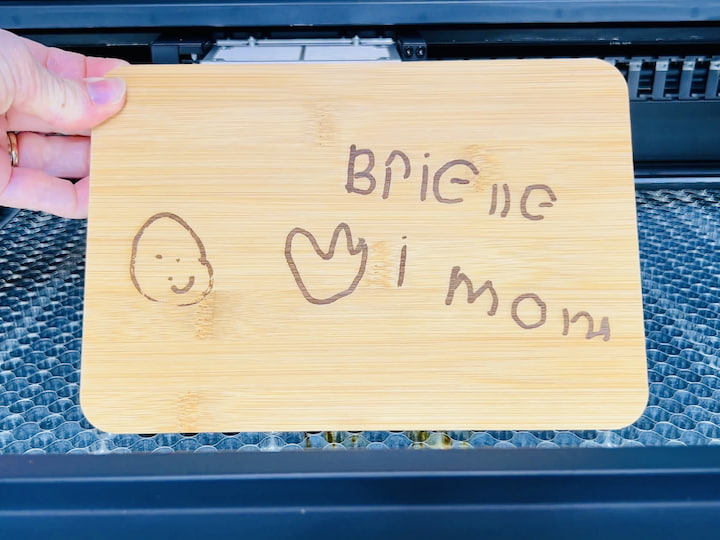
Step 8: Admire Your Laser-Engraved Cutting Board Once the laser cutter completes the job, marvel at the laser-engraved cutting board. The detailed engraving adds a personal touch, making it a unique and meaningful piece of functional art.
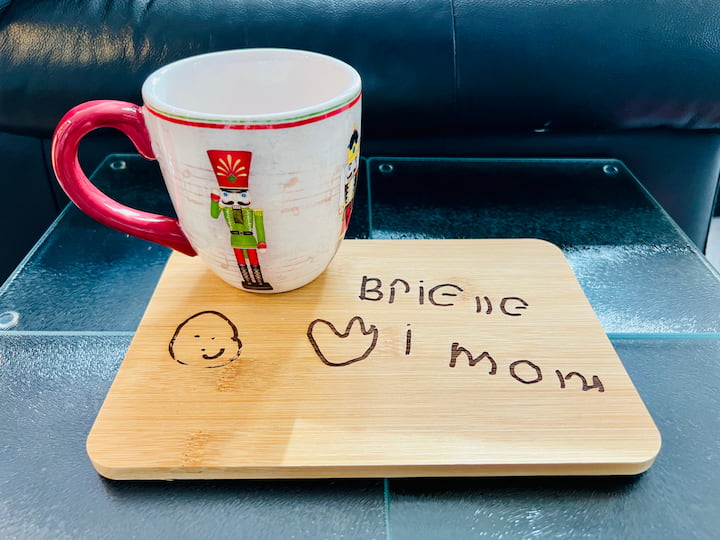
Congratulations! You’ve successfully turned a Dollar Store bamboo cutting board into a personalized work of art using laser engraving. Feel free to experiment with different photos and settings for more creative possibilities. What will you engrave next? Let us know in the comments below! Enjoy your DIY laser engraving projects.
Project 3: Personalized Wooden Picture Frame
We’re diving into an exciting laser engraving project where we’ll transform a humble Dollar Store wooden frame into a thoughtful and personalized wedding gift for a friend. Join us as we guide you through the step-by-step process using the xTool S1 machine and the Creator Space software.
Materials List:
- xTool S1 laser cutter
- Wooden picture frame
- Computer with xTool Creator Space software
- Safety goggles
Step 1: Choose Your Canvas For this project, start by grabbing a wooden picture frame from the Dollar Store. The simplicity of the frame provides the perfect canvas for a personalized touch.
Step 2: Set Up the xTool S1 Machine Place the wooden picture frame into the xTool S1 machine. Ensure it’s securely positioned on the laser cutter bed. Don’t forget your safety goggles!
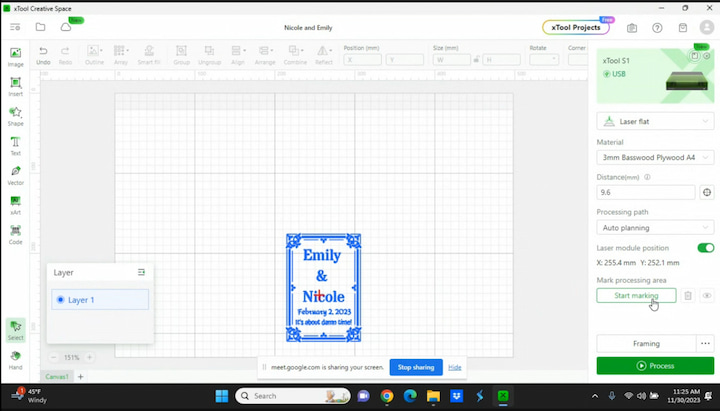
Step 3: Design Your Wedding Gift Fire up the Creator Space software on your computer. Create a design for your wedding gift by adding a perimeter and text. In this case, the maker is crafting a wedding-themed engraving for a friend.
Step 4: Arrange and Customize Once your design is set up, take advantage of the software’s features to arrange the elements. The perimeter and text are key components in crafting a unique and memorable wedding gift.
Step 5: Process the Design With the design finalized, process it using Creator Space. This step prepares the X Tool S1 machine for the engraving task ahead.
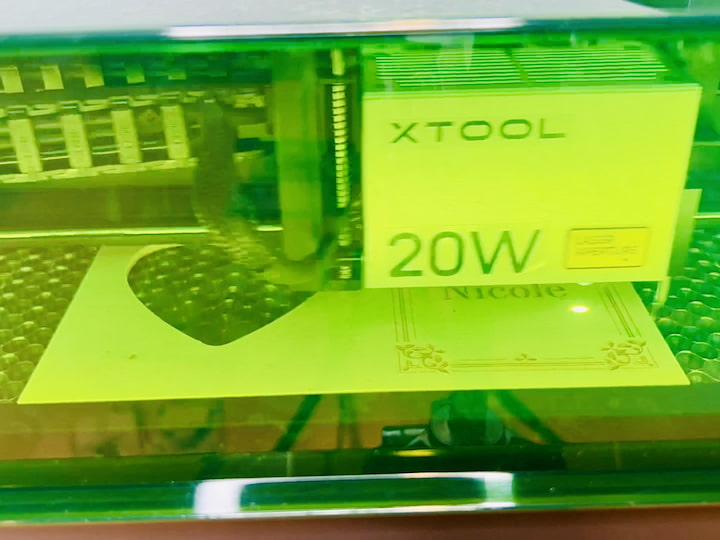
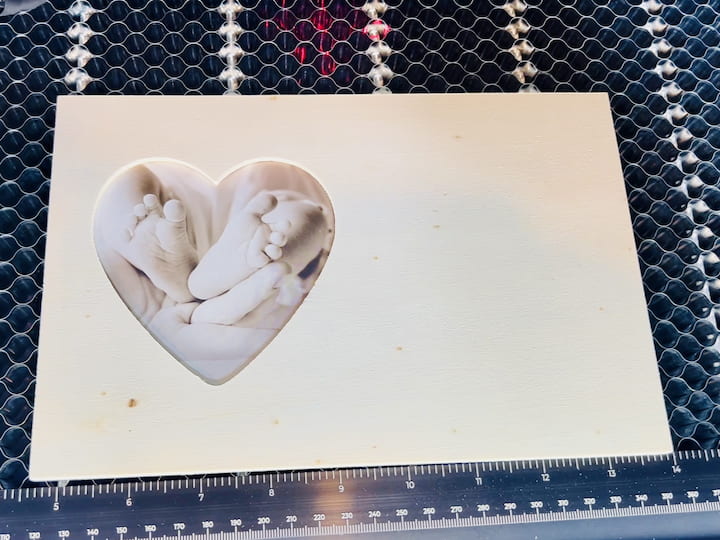
Step 6: Start the Laser Engraving Process Switch on the laser cutter, and let it work its magic. The machine will start with the outside perimeter and, interestingly, choose its own order for the subsequent tasks. In this case, it moved on to engraving the text from top to bottom.
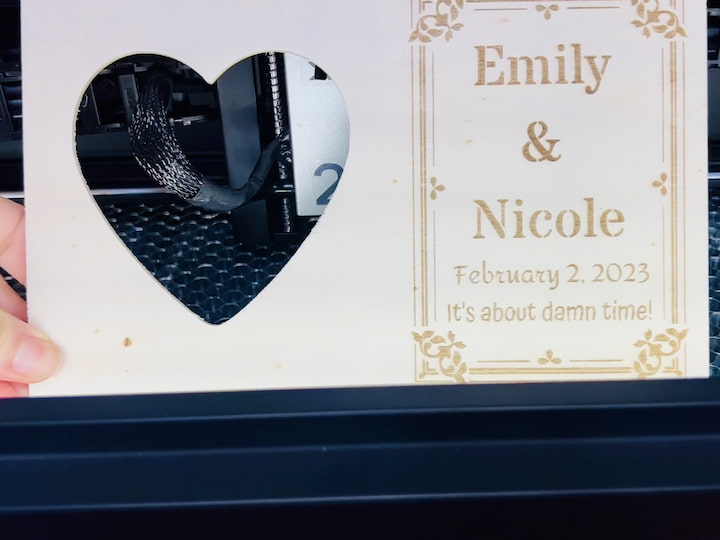
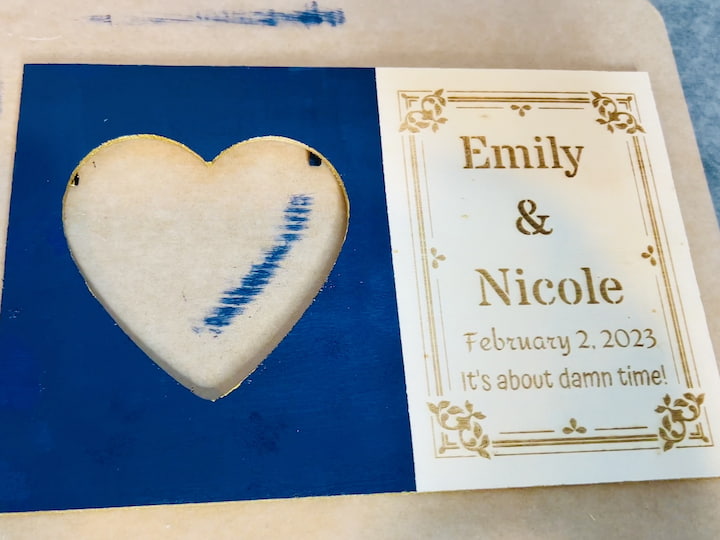
Step 7: Check the Progress Once the machine completes its work, open the lid and pull out the wooden picture frame. Take a moment to admire the progress and see how the engraving has transformed the frame.
Step 8: Admire Your Personalized Picture Frame Behold the personalized wooden picture frame that now carries sentimental value as a wedding gift. The engraving adds a unique touch, making it a cherished keepsake for the happy couple.
Congratulations! You’ve successfully created a personalized wedding gift using laser engraving. The Dollar Store wooden picture frame has been transformed into a unique and heartfelt present. Feel free to explore different designs for various occasions, and let your creativity shine! Enjoy your DIY laser engraving projects.
Additional Steps: Enhancing Your Laser-Engraved Picture Frame with Acrylic Paint and Treasure Gold
Materials Needed:
- Folk Art Acrylic Paint in the color Navy
- Folk Art Treasure Gold
- Paintbrushes
- Stencil tape
- Protective top coat
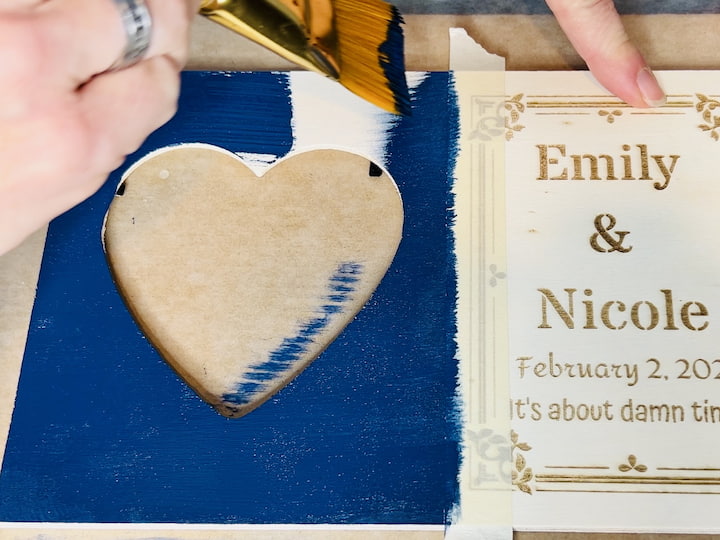
Step 1: Applying Navy Acrylic Paint To complement the wedding theme, we’ll be using Folk Art Acrylic Paint in Navy. Place a piece of stencil tape along the edge of the wooden picture frame, focusing on one side at a time. This ensures precision and prevents paint from spreading. Work with the wood grain and apply the Navy paint to the designated side. Since it’s paint, it will float on top of the wood while still soaking in. While the paint is wet, carefully peel off the stencil tape to avoid any paint sticking to it. This step defines clean lines and prevents unwanted peeling.
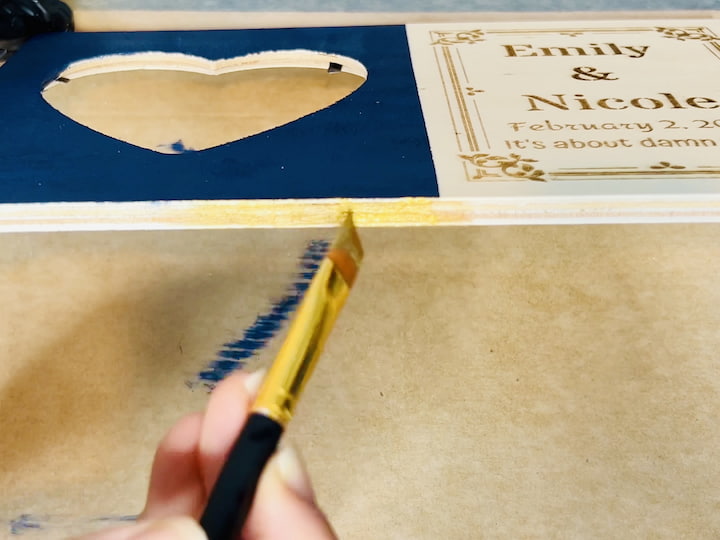
Step 2: Adding Treasure Gold Accents For an elegant touch, incorporate Folk Art Treasure Gold into the design. Paint the edges, including the top, bottom, and sides, as well as the edges within the heart engraving. This gold accent will enhance the overall aesthetic and tie in with the wedding colors. Take your time to ensure even coverage and precise detailing.
Step 3: Allow for Complete Drying Let the painted picture frame dry completely. This step is crucial before applying any additional coats or protective finishes. Patience ensures that the paint sets well, and you achieve the desired result.
Step 4: Apply a Protective Top Coat Once the paint has dried thoroughly, consider giving the picture frame a protective top coat. This step adds durability and shields your painted design from wear and tear over time. Choose a clear top coat suitable for your project and apply it according to the product instructions.
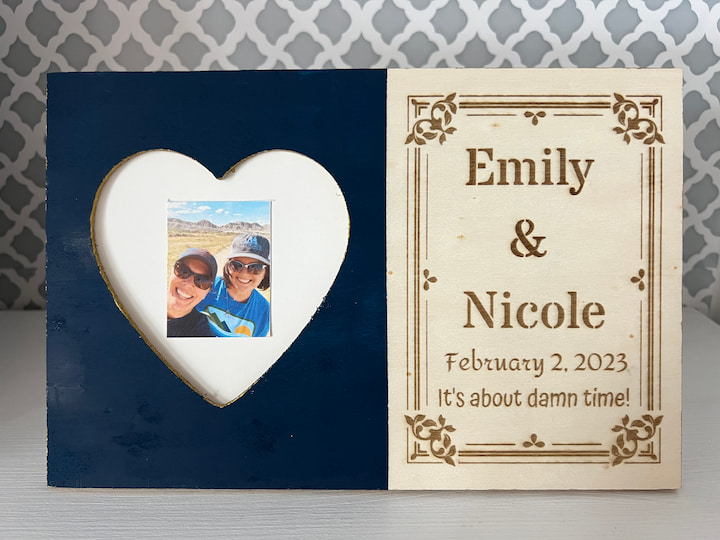
Step 5: Admire Your Craftsmanship After allowing the top coat to dry, take a moment to admire your handiwork. The combination of Navy acrylic paint and Treasure Gold accents adds a touch of sophistication to your laser-engraved picture frame. Display your creation with pride or consider it as a thoughtful wedding gift.
Congratulations! You’ve successfully elevated your laser-engraved picture frame with a combination of navy acrylic paint and gold accents. The attention to detail and choice of colors make this project a beautiful addition to your décor or a special gift for the happy couple. Enjoy your personalized and tastefully enhanced picture frame!
Project 4: Custom Wood Slice Sign
we embark on a creative journey to turn a simple wood slice sign from the Dollar Store into a charming and personalized piece using laser engraving. Follow along as we guide you through the step-by-step process, from designing in Canva to the final result using X Tools Creator Space.
Materials List:
- xTool S1 laser cutter
- Wood slice sign
- Computer with Canva and xTool Creator Space software
- Safety goggles
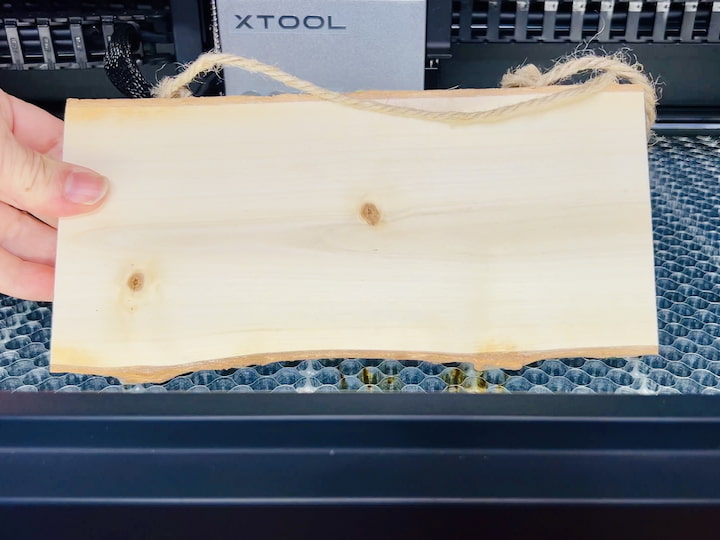
Step 1: Source Your Wood Slice Sign Head to the Dollar Store and grab a wood slice sign. These can be fantastic canvases for laser engraving projects, offering a rustic touch to your creations.
Step 2: Design in Canva Open Canva on your computer and create a design for your wood slice sign. Let your creativity flow, whether it’s a quote, image, or a combination of both. Once satisfied, export your design for the next step.
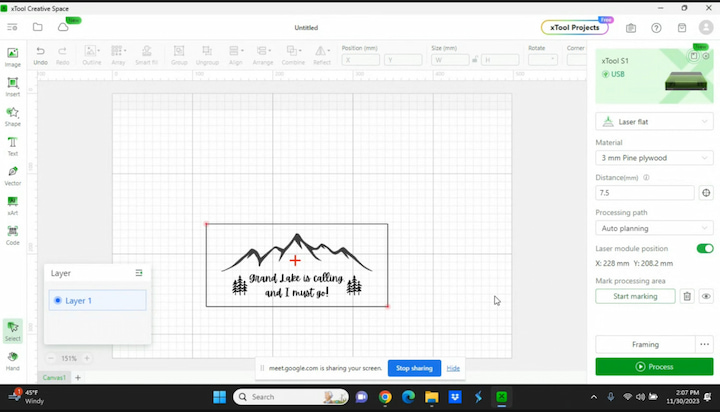
Step 3: Import into xTool Creator Space Launch xTool Creator Space and import your design. Ensure all the settings are adjusted according to your preferences. This step sets the stage for a seamless engraving process.
Step 4: Customize Settings Adjust the power and speed settings based on your design and the wood material. Experimenting with different settings allows you to achieve the desired depth and appearance. Keep in mind that engraving times vary depending on these settings.
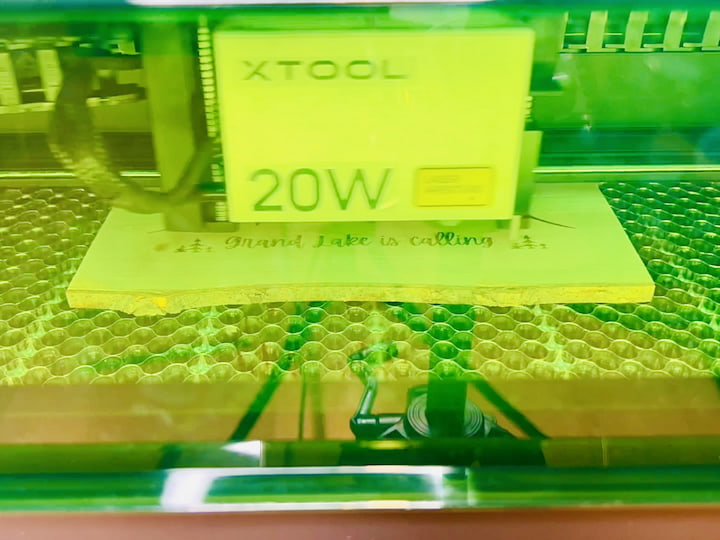
Step 5: Start the Laser Engraving Process With all settings ready, start the xTool S1 machine. The laser engraving process begins, and the machine will work its magic on the wood slice sign. The time it takes depends on the chosen settings and the intricacy of the design.
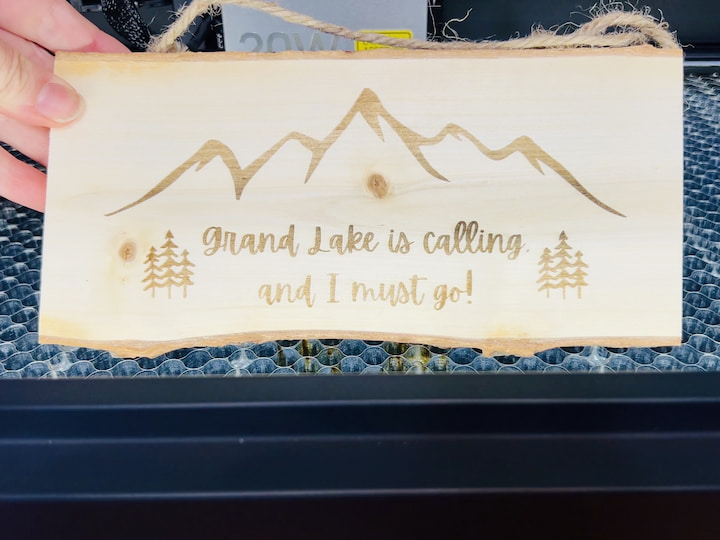
Step 6: Check Completion Once the machine completes the engraving, open the lid and carefully remove the wood slice sign. Take a moment to appreciate the unique design that the laser has etched onto the wood.
Step 7: Admire Your Engraved Wood Slice Sign Behold your personalized wood slice sign! The laser engraving adds character and detail, transforming the humble Dollar Store find into a rustic, one-of-a-kind piece.
Congratulations! You’ve successfully created a DIY laser-engraved wood slice sign. The possibilities are endless with different designs and quotes. Experiment with various projects, and let your creativity shine through. Enjoy your rustic and personalized creations!
Additional Steps: Preserving Your Wood Slice Sign with Outdoor Satin Sealer
Materials Needed:
- Folk Art Outdoor Satin Sealer
- Paintbrush
- Protective gloves (optional)
Step 1: Decision to Preserve After creating your laser-engraved wood slice sign, if you prefer to maintain its natural appearance while providing protection, consider applying Folk Art Outdoor Satin Sealer. This step is especially useful if you plan to display your sign outdoors, but it also works well for indoor use.

Step 2: Application of Sealer Using a paintbrush, generously apply the Folk Art Outdoor Satin Sealer over the entire surface of the wood slice sign. Since this sealer is water-based, it is advisable to wear protective gloves during the application process.
Step 3: Smooth and Light Coats Ensure an even application by applying smooth and light coats across the wood surface. This helps in preventing streaks and achieving a consistent finish. Take your time to cover the entire sign thoroughly.
Step 4: Drying Time Follow the package instructions for drying time. Typically, it’s recommended to let the sealer dry completely between coats. Allow the first layer to dry before proceeding to the next steps.
Step 5: Add Multiple Layers For a durable and smooth finish, add several layers of the sealer. Apply each layer once the previous one has dried completely. Multiple coats contribute to a more robust protective barrier and enhance the longevity of your wood slice sign.
Step 6: Admire the Finished Look Once you’ve applied the desired number of layers and allowed them to dry thoroughly, admire the finished look of your preserved wood slice sign. The sealer not only protects the wood but also adds a subtle satin sheen, elevating the overall appearance.
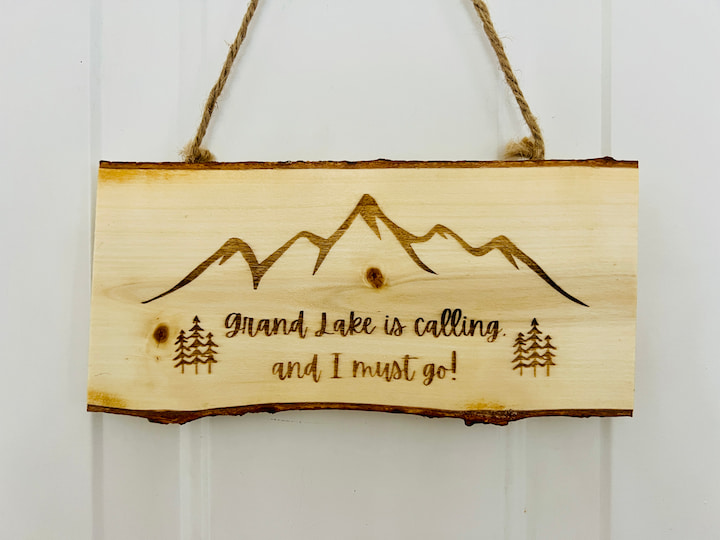
Congratulations! You’ve successfully preserved your laser-engraved wood slice sign using Folk Art Outdoor Satin Sealer. Whether you choose to display it indoors or outdoors, this protective layer ensures the longevity of your creation. Enjoy showcasing your personalized wood slice sign with confidence!
Laser Engraver Projects Video
Laser Engraver Projects Q & A
Is laser engraving profitable?
Absolutely! Laser engraving can be a profitable business venture. With the right equipment, such as the xTool S1 laser cutter, and a bit of creativity, you can create personalized and custom-engraved products that people are willing to pay for. The demand for unique and customized items, such as engraved ornaments, cutting boards, picture frames, and more, is constantly growing. By offering your laser engraving services and products, you can tap into this market and generate a steady stream of income. Plus, with the affordable supplies available at stores like Dollar Tree, your profit margins can be quite attractive. So, if you’re looking to start a profitable business or side hustle, laser engraving is definitely worth considering.
What can I make to sell with a laser engraver?
Laser engravers offer a versatile range of possibilities for creating unique and personalized items. Here are various products you can make and sell with a laser engraver:
- Personalized Gifts:
- Engraved photo frames
- Customized keychains
- Personalized jewelry (bracelets, pendants)
- Engraved glassware (mugs, wine glasses)
- Laser-engraved lamps
- Home Decor:
- Wooden signs and plaques
- Decorative wooden coasters
- Custom wall art
- Engraved cutting boards or kitchen utensils
- Wooden puzzles
- Special Occasion Items:
- Wedding favors (engraved candles, coasters, invites)
- Anniversary gifts (personalized keepsakes)
- Birthday or baby shower decorations
- Promotional Products:
- Branded pens and pencils
- Engraved USB drives
- Customized notebooks or journals
- Logo-engraved drinkware (water bottles, travel mugs)
- Personalized key holders
- Stationery:
- Personalized notebooks
- Engraved stationery sets
- Customized bookmarks
- Pet Accessories:
- Engraved pet tags
- Customized pet bowls
- Personalized pet memorial items
- Technology Accessories:
- Engraved laptop or phone cases
- Personalized charging stations
- Customized tech gadget accessories
- Apparel:
- Laser-cut and engraved fabric patches
- Personalized leather goods (wallets, belts)
- Customized clothing accessories (hats, scarves, necklaces)
- Educational Products:
- Engraved educational puzzles
- Customized learning charts
- Personalized bookmarks for schools or libraries
- Holiday and Seasonal Items:
- Engraved ornaments
- Customized Halloween decorations
- Personalized Easter eggs
- Architectural Models:
- Laser-cut architectural models
- Engraved building or cityscape artwork
- Personalized Electronics:
- Customized laptop stands
- Engraved phone stands or holders
- Personalized headphone or earbud cases
- Event and Hospitality:
- Engraved invitations
- Personalized luggage tags
- Toys:
- Customized and engraved toys
What kinds of material can a laser engraver work on?
Laser engravers are versatile tools that can work on a variety of materials. The suitability of a material for laser engraving depends on its composition and how it interacts with the laser beam. Here’s a list of common materials that laser engravers can work on:
- Wood:
- Hardwoods (e.g., oak, maple)
- Softwoods (e.g., pine, cedar)
- Plywood and MDF
- Acrylic:
- Transparent, colored, or frosted acrylic sheets
- Leather:
- Natural leather
- Synthetic leather
- Paper and Cardboard:
- Cardstock
- Craft paper
- Cardboard
- Glass:
- Some laser engravers can mark or etch glass surfaces
- Metal:
- Coated metals (e.g., anodized aluminum)
- Some laser engravers can mark metals, but cutting is limited to certain types and thicknesses
- Plastics:
- ABS
- Delrin
- PETG
- Polycarbonate
- Stone and Ceramic:
- Marble
- Granite
- Ceramic tiles
- Rubber:
- Natural rubber
- Synthetic rubber
- Fabric and Textiles:
- Cotton
- Denim
- Polyester
- Coated Materials:
- Materials with special coatings designed for laser engraving
- Foam:
- Foam boards
- Styrofoam
- Anodized or Coated Surfaces:
- Anodized aluminum
- Some coated surfaces on various materials
It’s important to note that the laser engraving process may produce different results depending on the material’s color, density, and composition. Additionally, safety considerations are crucial when working with certain materials, especially when cutting or engraving produces fumes or dust.
Always refer to the manufacturer’s guidelines for your specific laser engraver and test materials to ensure compatibility and achieve the desired results. Additionally, wearing appropriate personal protective equipment, such as safety goggles and gloves, is recommended when operating a laser engraving machine.
Laser engraver projects are a fantastic avenue for unleashing creativity, making them an excellent option for enthusiasts of all ages, including kids. By simply clicking to see examples, individuals can find inspiration for their next masterpiece, exploring a plethora of high-quality templates that serve as a must-have resource. Whether you’re diving into a laser cut project for a company logo or delving into intricate details for a personalized gift, laser engraving offers a world of possibilities. The laser cutter projects available from various sellers cater to both beginners and seasoned lovers of the craft, ensuring that anyone can embark on their artistic journey. From laser cut wedding invitations to custom rubber stamps, these projects make for a great addition to celebrations, anniversaries, or as an excellent gift for someone special. With the added advantage of free laser cutter projects to download, creating unique and memorable items has never been more accessible.
Embrace the world of laser engraving with the xTool S1 laser cutter and Dollar Tree supplies. From personalized ornaments to engraved cutting boards, the possibilities are limitless. Unleash your creativity and share your laser-engraved masterpieces with us in the comments below. Don’t forget to subscribe to the crafter’s YouTube channel and blog for more inspiring DIY projects. Happy engraving!
Further Reading
Don’t forget to link to ThriveCart – Book