
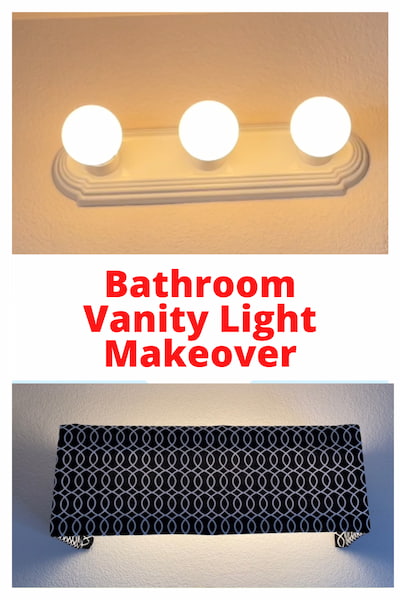
Easy DIY Bathroom Vanity Light Makeover (No Tools Needed!)
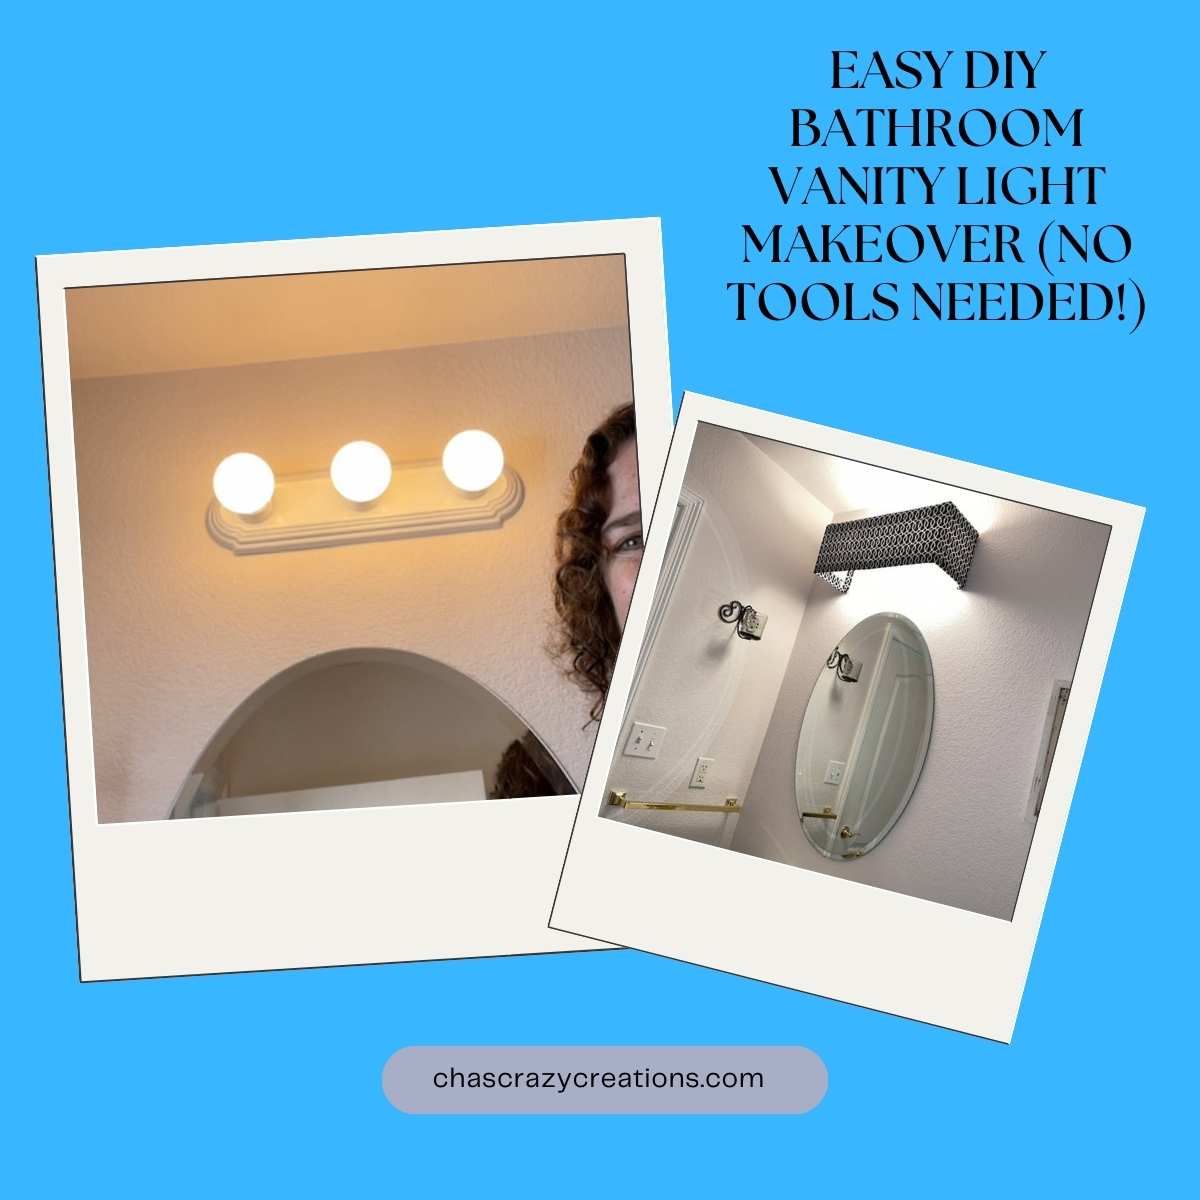
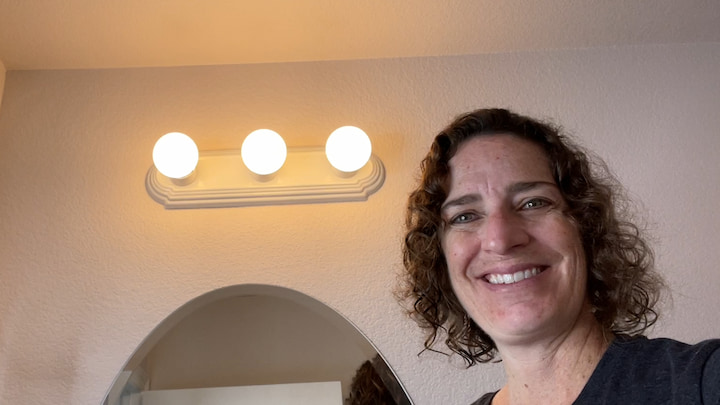
Have you ever stared at the “Hollywood Style” light strip in your bathroom and wished it would just disappear? We had a dated fixture in our powder room that was glaringly ugly, but since we didn’t want to hire an electrician to replace it, I had to get creative.
Quick Answer: How can I update my bathroom light without replacing it?
You can cover a dated vanity light strip with a lightweight DIY valance!
- Step 1: Cut foam core board to create a 3-sided box shape that fits over your light.
- Step 2: Cover the board with fabric (canvas, drop cloth, or patterned cotton).
- Step 3: Attach Command Hooks to the inside of the box.
- Step 4: Stick it to the wall over your existing light. It’s removable and rental-friendly!
I realized I didn’t need to replace the light—I just needed to cover it. Using simple craft supplies, I created a custom “valance” that slides right over the existing fixture.
This is one of my favorite Rental Hacks because it uses [Command Hook Hacks], meaning it causes zero damage to the wall. Whether you are doing a full [Bathroom Makeover on a Budget] or just want to soften the lighting, this project takes less than an hour to make.
Materials Needed
- Foam Core Board (Black or White, depending on your fabric)
- Fabric of choice (I used a neutral texture, but you could use a [Drop Cloth] for a farmhouse look!)
- Hot Glue Gun & Glue Sticks
- Command Strips (Picture Hanging Strips work best)
- Tape Measure & Razor Blade
How to Make a Vanity Light Cover
Step 1: Measure Your Light
Measure the height, width, and depth of your existing light fixture.
- Important: You need to make your cover slightly larger than the fixture so it doesn’t touch the lightbulbs. I added about 2 inches of clearance to my measurements to be safe.
- My Dimensions: My light was 18″ wide, so I cut my board to be 22″ wide.
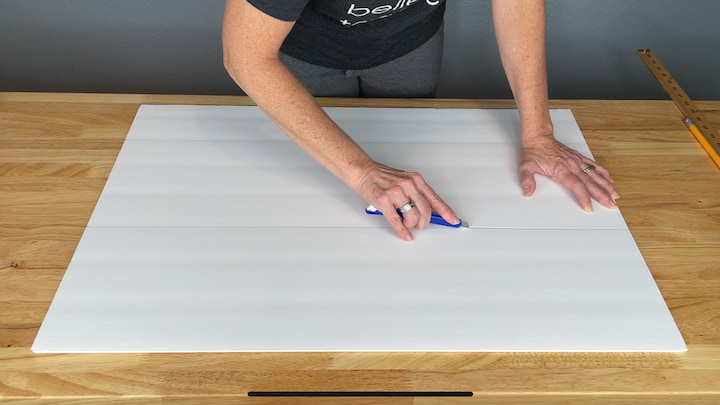
Step 2: Cut the Foam Core
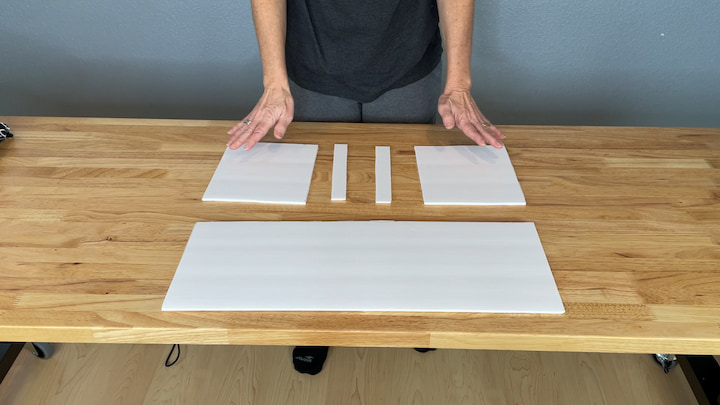
You need to cut 5 separate pieces to create the structure and the mounting points:
- Front Panel (x1): The main face of the cover (Width x Height).
- Side Panels (x2): The depth of the cover (Depth x Height).
- Mounting Strips (x2): Small strips (approx 1-2 inches wide) that will glue to the back of the side panels. These create a flat surface for the Command Strips to stick to.You need three pieces to make a “U” shape box:
Step 3: Cut the Fabric
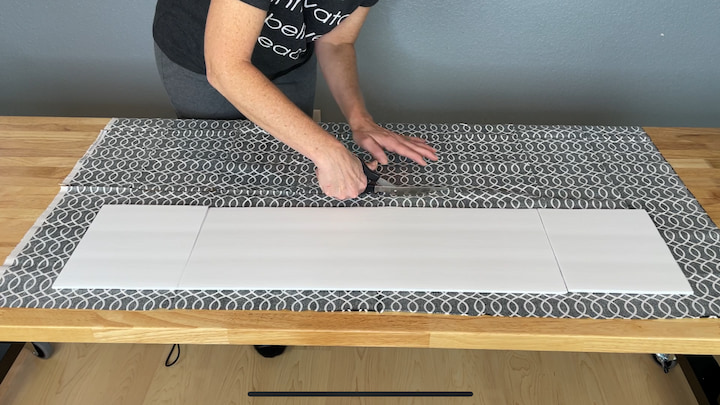
Before you glue the board together, it is easier to cut your fabric now.
- Lay your fabric flat on a table.
- Place your cut foam pieces on top to visualize the size.
- Cut your fabric so that it is large enough to cover the entire front and sides, leaving about 2 inches of extra fabric on all edges to wrap around the back.
Step 4: Glue the Box Structure
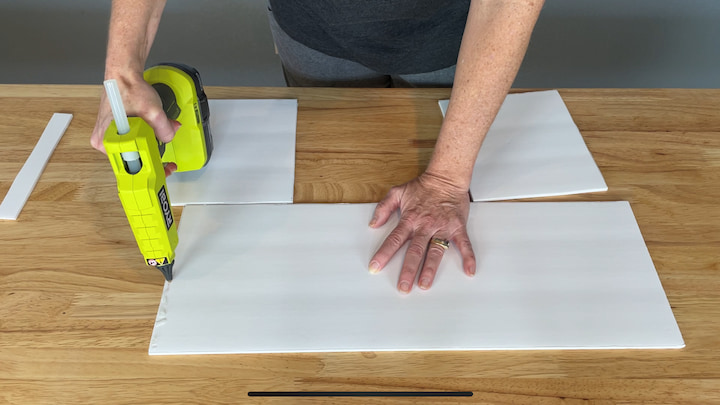
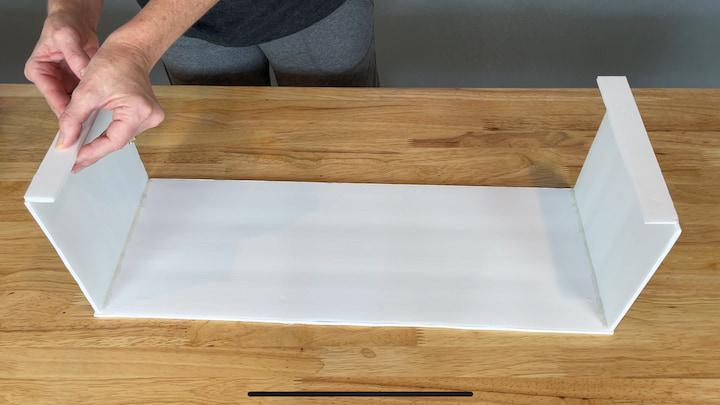
- Hot glue the Side Panels to the ends of the Front Panel to create a “U” shape.
- Hot glue the Mounting Strips to the back edge of the side panels. Your structure should now look like a “C” shape or a box with small wings on the back.
- Tip: Be generous with the hot glue and reinforce the corners to ensure it is sturdy.
Step 5: Add the Fabric
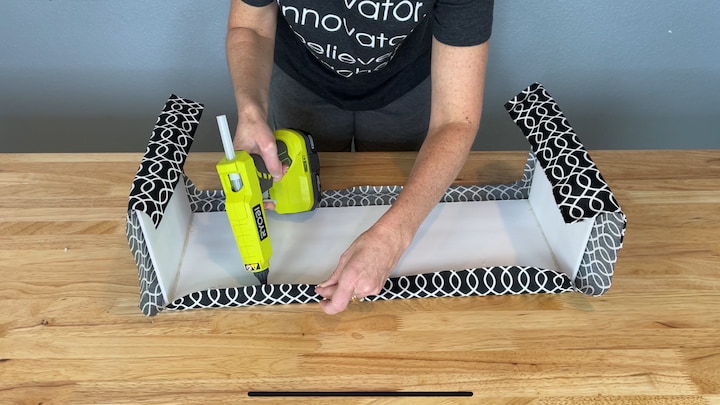
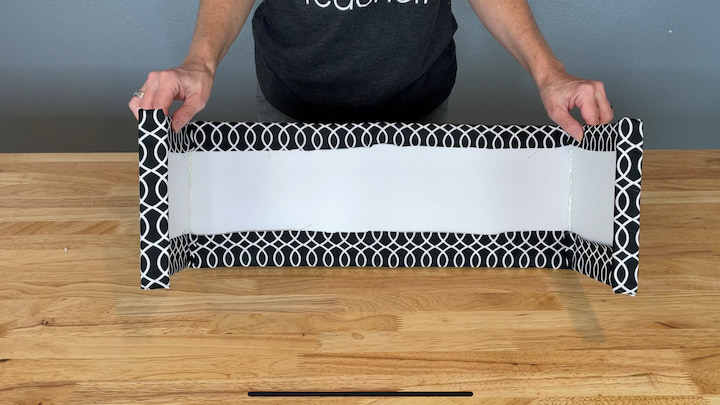
Lay your fabric face down on a table. Place your foam box on top.
- Wrap the fabric around the box just like you are wrapping a present.
- Pull it tight and hot glue the fabric to the inside of the foam board.
- Safety Note: Make sure no loose fabric is hanging down where it could touch a hot bulb.
Step 6: Attach Command Strips
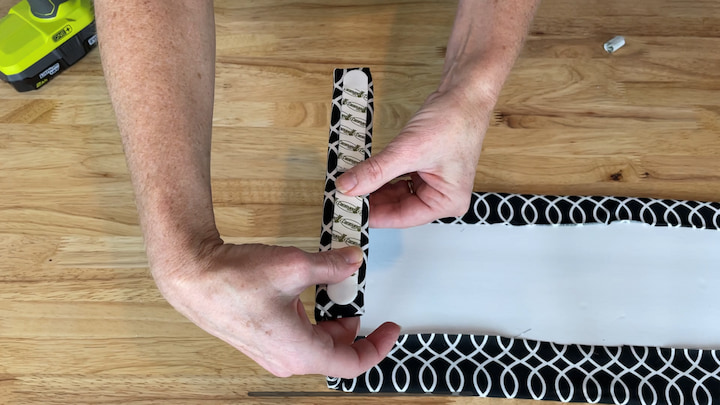
- Stick your Command Picture Hanging Strips onto the two Mounting Strips you built in Step 4.
- Tip: Using picture hanging strips (the Velcro kind) allows you to remove the cover easily if you need to change a lightbulb later!
Step 7: Attach to the Wall
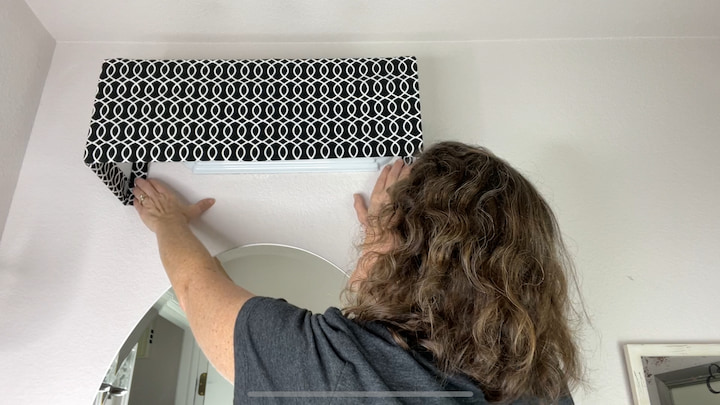
This is the magic part!
- Stick your Command Picture Hanging Strips onto the two Mounting Strips you built in Step 3.
- Peel off the backing and press the box firmly onto the wall surrounding your light fixture.
- Since the cover weighs almost nothing, the strips hold it perfectly secure!
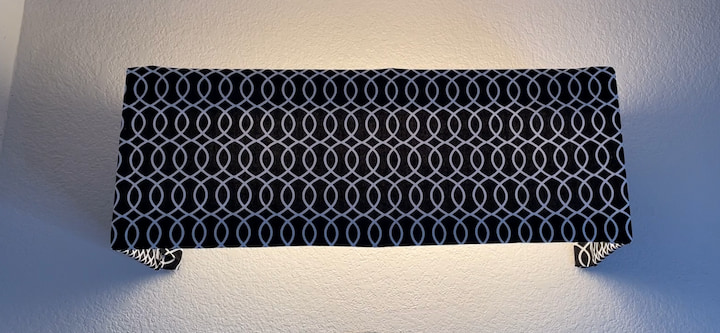
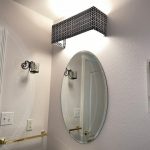
Here’s a look up close of the bathroom vanity light cover.
3 Reasons to Try This Makeover
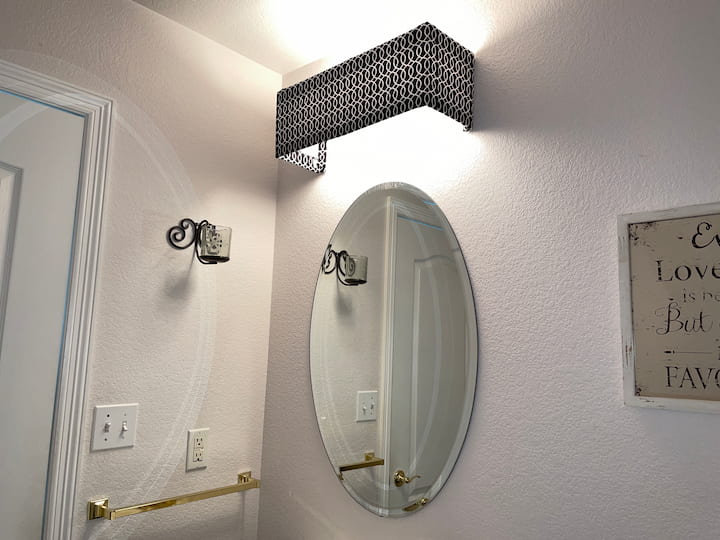
- It Fixes Off-Center Lights: If your builder installed your light slightly off-center from the mirror (like mine!), you can build this cover slightly wider to “fake” the center alignment.
- It Softens the Glare: Clear bulbs can be harsh. This shade directs the light down and up, creating a softer ambient glow.
- It is Temporary: Moving out? Just pull the Command Strips tab and take your custom light fixture with you!
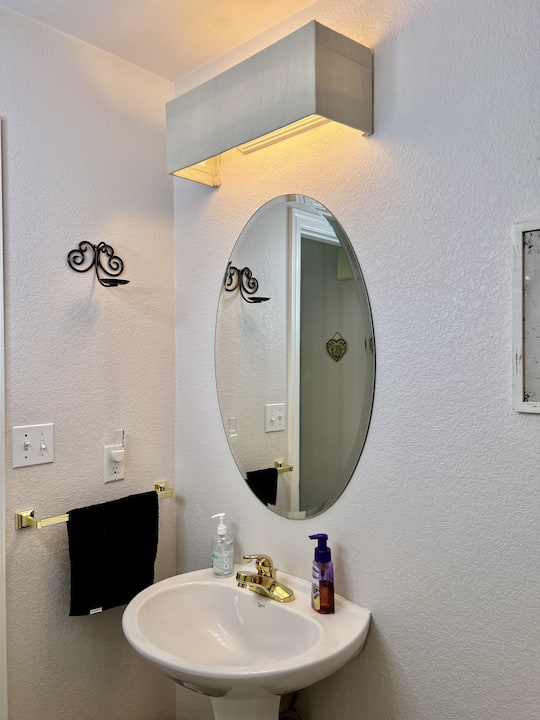
Hometalk loved the way my first valance turned out they asked me to create a second one with a drop cloth. I love how this one turned out too.
This technique can also be used for horizontal wall lights or bathroom wall sconces that are on either side of the mirror. If you are worried about moisture in the bathroom, maybe from the shower, you can wrap the foam board in water resistant fabric.
More Ways to Update Bathroom Lighting on a Budget
If you aren’t ready to build a cover, here are a few other quick ways to refresh your space without hiring an electrician:
- Change the Glass: Many vanity lights allow you to unscrew the glass shades. You can swap old bell-shaped shades for modern clear glass or seeded glass cylinders for under $20.
- Switch to LEDs: If your bathroom feels yellow and dingy, swap your old incandescent bulbs for “Daylight” LED bulbs. It instantly makes the room look cleaner and more modern.
- Paint the Fixture: If you have that dated “90s Gold” brass, you can tape off the wall and spray paint the metal bar matte black or oil-rubbed bronze.

Frequently Asked Questions
Yes, but you must follow two rules:
Clearance: Ensure the foam board is at least 2-3 inches away from the bulbs on all sides.
Bulbs: I strongly recommend switching to LED bulbs. They are energy-efficient and, most importantly, they generate very little heat compared to halogens or incandescents, making them safe to use near the fabric.
The Fix: If your builder installed a tiny light over a huge mirror, you can make this DIY cover wider than the actual light fixture to balance out the look!
No. Because the top and bottom of the box are open, the light bounces off the ceiling and washes down the wall. It actually creates a flattering “ambient” light that eliminates the harsh shadows under your eyes that down-lights often cause.
Absolutely. Because we are using Command Strips to mount the cover to the wall, there are no screw holes and no electrical wiring involved. When you move out, just pull the tabs to release the strips and take the cover with you!
This specific method works best for wall-mounted bars. However, you can use a similar technique to create a “drum shade” for a pendant using embroidery hoops!
Bathroom Vanity Light Makeover DIY
Equipment
- Hot Glue Gun
- Scissors
- Razor
- Tape Measure
Materials
- Foam Core Board
- Fabric
- Picture Command Strips
Instructions
- The first thing I did was measure the height, width, and depth of my light fixture.
- I measured each section off on my foam core board and drew my lines of where I would need to cut the board.
- I used my razor blade to cut the foam core board.
- I laid my fabric out and placed the foam core board on top so that I could cut the fabric. I added 2 inches to every side so that I’d have plenty of fabric to glue onto the board.
- I hot glued all the foam core pieces together for the bathroom light fixture cover.
- I hot glued the fabric onto the foam core board.
- I hot glued 2 picture hanging command hooks on each side of the vanity light cover.
- I pulled off the backs of the command strips and pressed them onto the wall over the top of the bathroom vanity light.
Check out some of my related posts!
- 5 Cost Effective Ways to Remodeling a Bathroom
- DIY Bathroom Makeover On A Budget, 5 Easy Tips
- Bathroom Necessities: How the Right Supplies Can Convey Luxe Style
I hope this hack helps you love your bathroom lighting again!
Do you have a rental hack you swear by? Let me know in the comments below!


Its a great idea. But I am woundering how hard would it be to change one of the light bulbs?
Luckily, it’s a velcro attachment, so super easy to change.
Wow! This is fabulous and so beautifully done. Thanks so much for the great and detailed instructions. This is the best example of how to upgrade bathroom lights that I have seen. Thanks so much!
Thank you I’m so pleased you like it.
I usually don’t comment under blog posts but this hack is GENIUS!!! Just moved to an old apartment that I LOVE … except that outrageous vanity light in our bathroom. Can’t wait to tag you on Instagram. Thank you thank you thank you!!!!
I’m so glad you like it and I hope it helps you with your light.
Thank you so much for this smart fix for an unattractive light fixture! I am moving into an apartment that has that type of light fixture and really needed a simple “renter-friendly” solution. Looks like it could be fun to do also!
I’m so glad you like the diy and inspired to make your own. I’d love to see pictures of yours when you’re done.
This is one of the best DIY projects I’ve come across in ages! I LOVE how you provide it in simple recipe format for printing too! Thank you so much for sharing. ❤️
Thank you so much, I’m glad you like it.
Love this!! I think I’m going to buy new shower curtains. Use one for the shower and use the other one to cover the new valance. This is something I can do!!
Thank you so much and I’m so excited you’re going to give it a try!
Chas, what a clever idea! Thanks for sharing all the steps. What a great way to reduce glare too!
Thank you for sharing at #OverTheMoon. We appreciate your shares. They have been Tweeted Pinned. Have a lovely week. I hope to see you at next week’s party too! Please stay safe and healthy. Come party with us at Over The Moon! Catapult your content Over The Moon! @marilyn_lesniak @EclecticRedBarn
Thank you Marilyn, I look forward to joining next week
I love this idea!!! It’s so pretty and doable!! I love how you include all the steps!
I love it so much I’m going to share in my weekend round up! My followers will love it!
Oh my gosh, thank you so much Kristin – I’m so glad you like it!