
Easy and Awesome DIY Dollar Tree Lazy Susan with Video
Are you ready to get organized in your home? Sometimes we just don’t have enough room in our pantry, kitchen cabinets, refrigerator, etc. Or maybe you want something that has a turntable in it. Today I’m sharing an awesome and simple DIY Dollar Tree lazy susan I made.
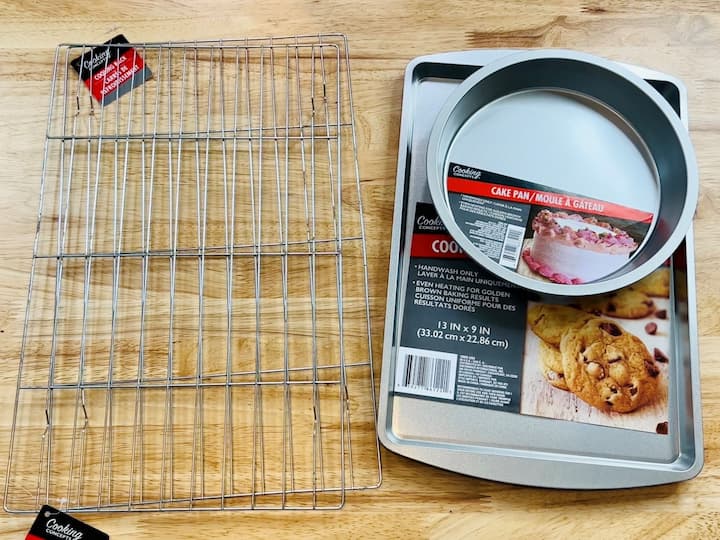
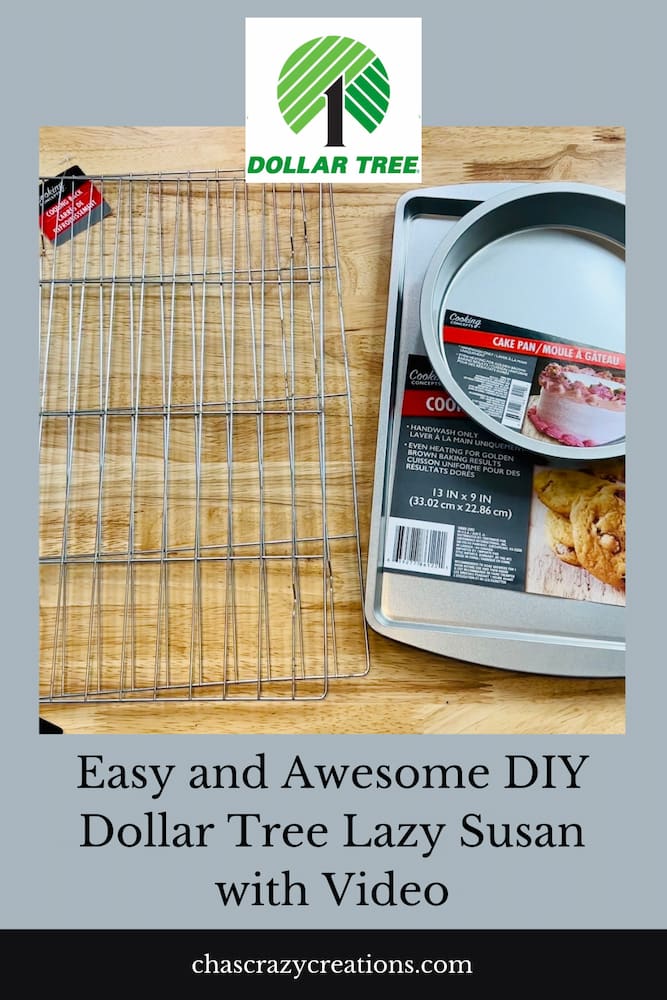
So today I am going to show you how to make a DIY lazy susan. Just wait until you see what we’re gonna do with these Dollar Store pans and racks. I started by removing all of the labels from these items.
Dollar Tree Lazy Susan Materials
 Amazon Basics Nonstick Roun…Shop on Amazon
 Wilton Easy Layers Sheet Ca…Shop on Amazon
 Cooling Rack for Baking 2-P…Shop on Amazon
 Anezus Fishing Line Nylon S…Shop on Amazon
 ALLFUN 1000 Pieces Clear Gl…Shop on Amazon
 Gddochn 3 Pack Grid Panel H…Shop on Amazon
") POPLAY 50 PCS Beautiful Pla…Shop on Amazon
POPLAY 50 PCS Beautiful Pla…Shop on Amazon
Dollar Tree Lazy Susan Video
Dollar Tree Lazy Susan instructions
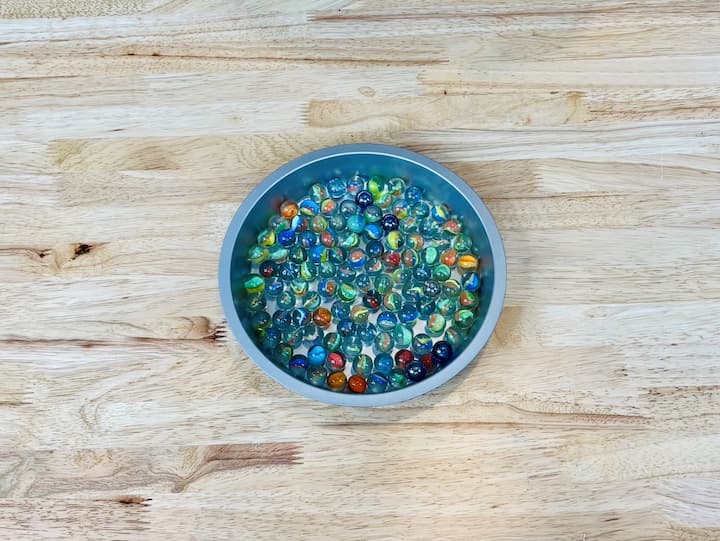
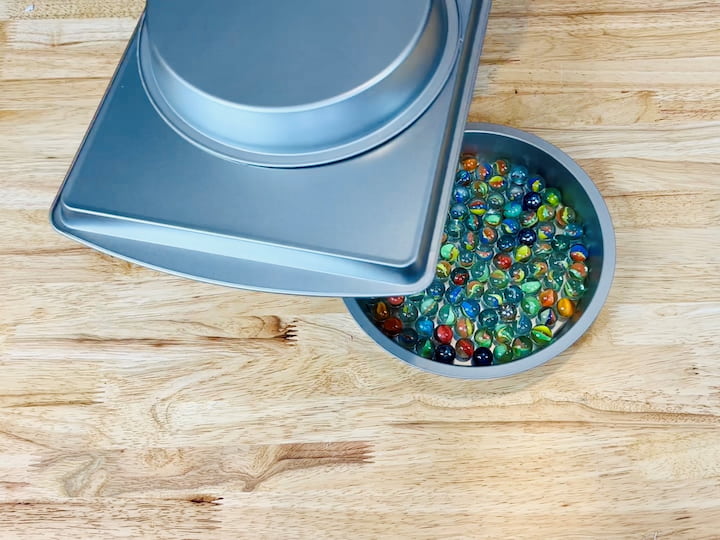
1. Fill one of the cake pans with marbles
The first thing to do is place one baking pan in the center and add a bag of marbles to the center of the pan.
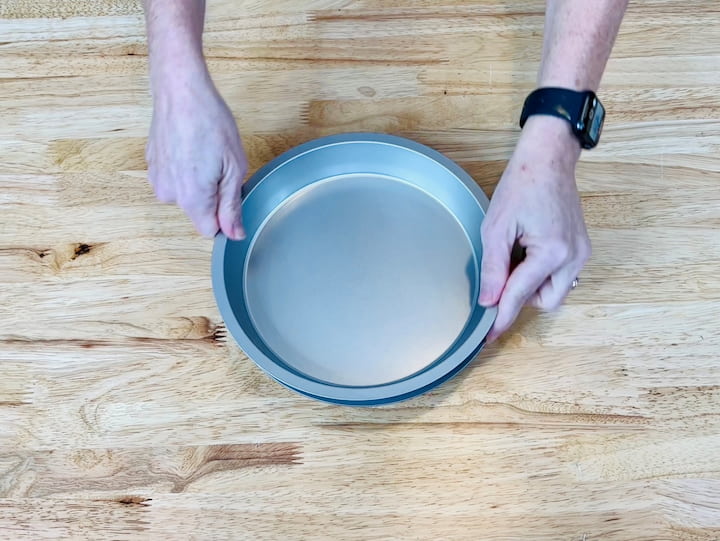
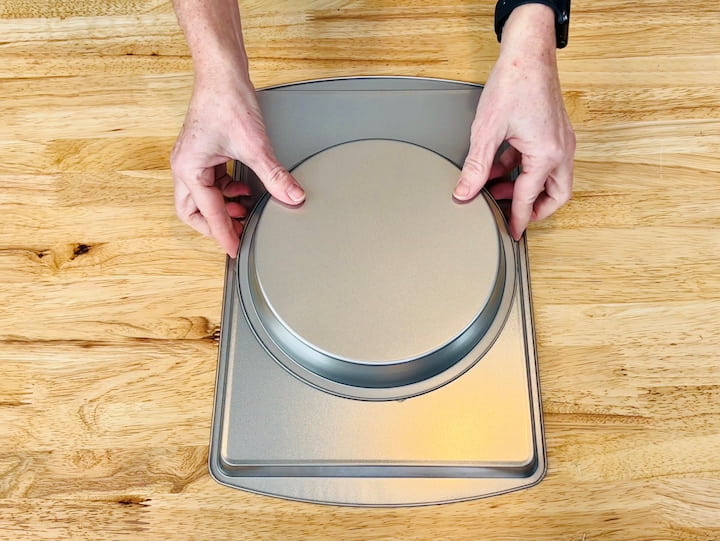
2. Place the second cake pan on top of the first cake pan.
I’m going to place the other cake pan on top and as you can see it swivels.
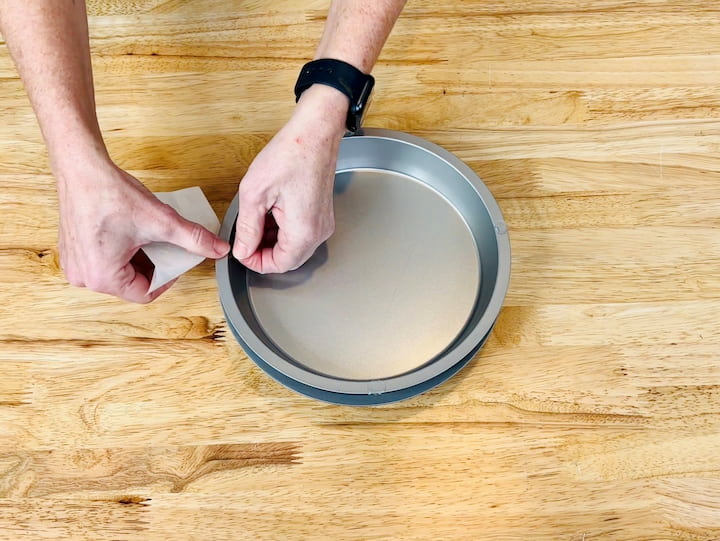
3. Add adhesive to the edges of the top cake pan
For this next step, you will need to the rim of the cake pan. You can use hot glue, super glue, or glue dots. I’ll be using the glue dots. I placed four glue dots around the edges of the empty pan (you can add more or less if you desire).
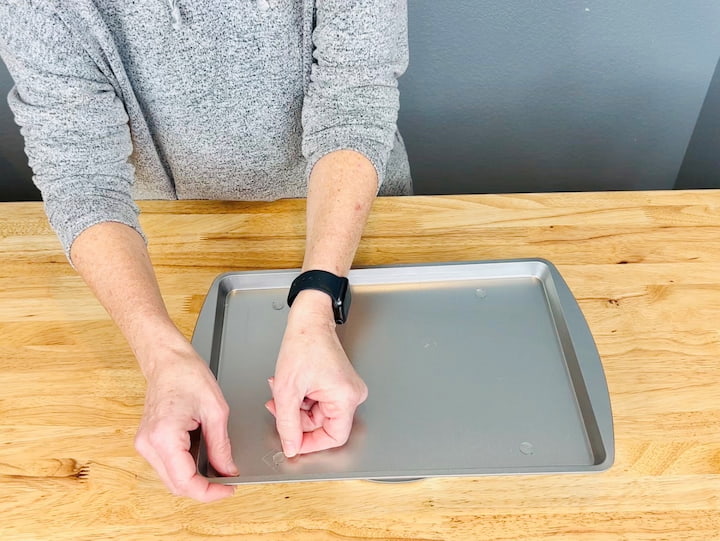
4. Place the adhesive cake pan onto the bottom of the baking sheet.
I then took my baking sheet and I flipped it upside down. I took the cake pan with the adhesive dots and placed it onto the baking tray then pressed firmly to make sure that everything stuck well.
5. place the cake pans back together to form the lazy susan base.
I flipped the pan back over and placed it back onto the pan filled with marbles. As you can see now I’ve created the base of my lazy Susan.
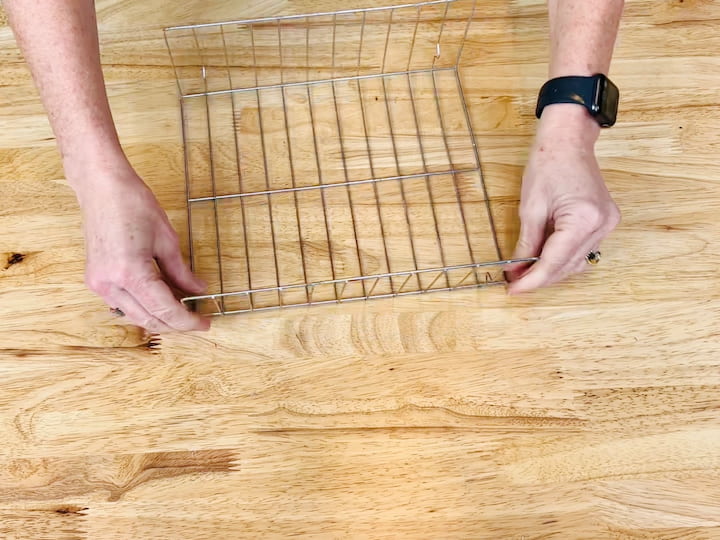
6. Bend the sides of the cooling racks at a 90-degree angle
Now we’re going to move on to the cooling racks. There are a couple of ways to do this. I am going to flip mine upside down and bend the sides up on either side of the baking cooling rack.
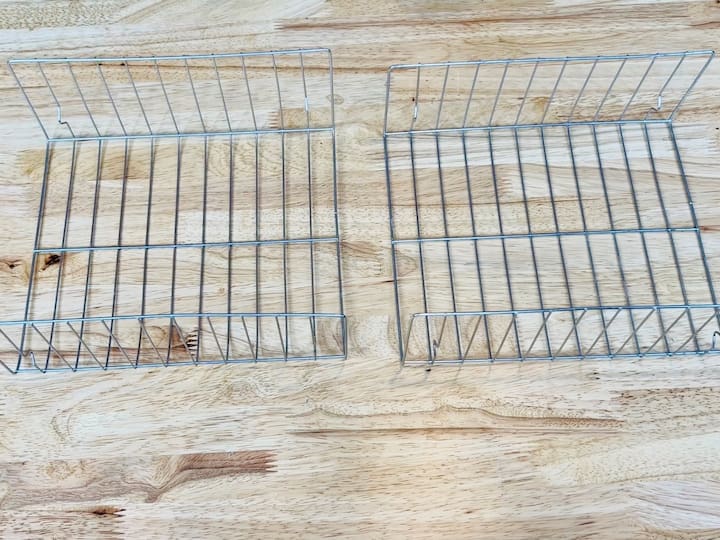
I’m going to do that to two racks.
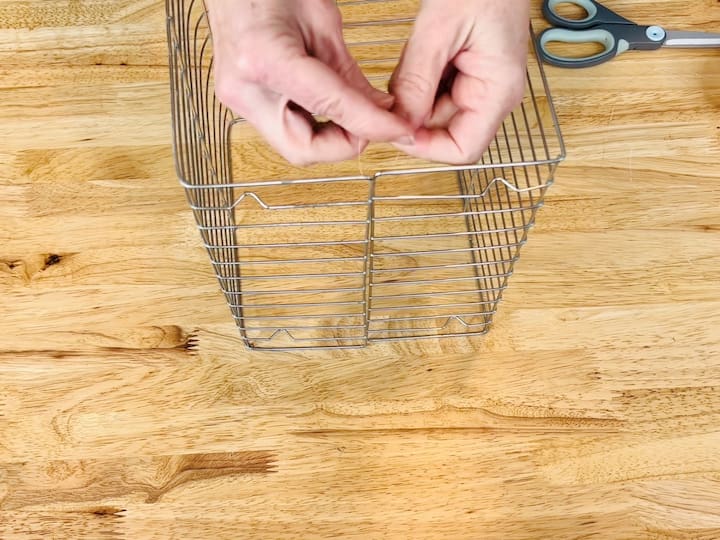
7. Tie the cooling racks together
Next, I’m going to stand them upright so that they’re touching on either end to basically form a box. I’ll be using some fishing line but you could use wire wrap if you choose. I’m going to start by tying the top and bottom together on this side and then I’m going to repeat that on the other side. If you need more stability you can tie more of the sides together.
8. Place adhesive on top of the baking pan
Now it’s time to put the two pieces together. I’m going to take some more of those adhesive dots and place them onto my baking sheet. Again you can use the adhesive of your choice.
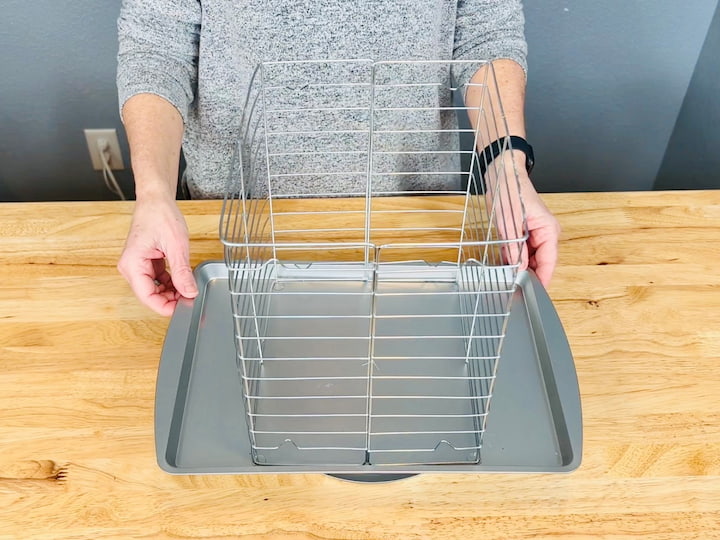
9. Attach the cooling racks to the baking pan
Next, I’m going to take the cooling racks and place them on the adhesive dots then press down firmly to make sure they adhere. So this completes the base and voila, as you can see here it swivels all the way around.
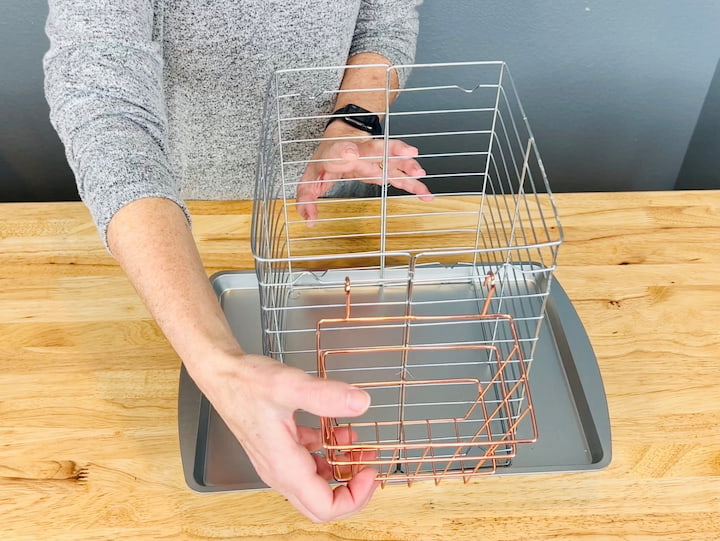
10. Add baskets and attachments to cooling racks
My local Dollar Store has these new small-hanging copper baskets. I purchased a deep one to hang on one side of the cooling rack.
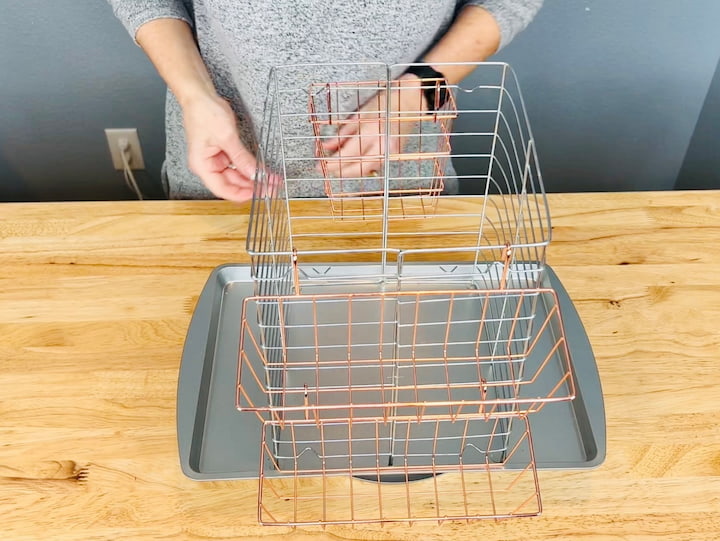
Two shallow baskets hang on top of each other.
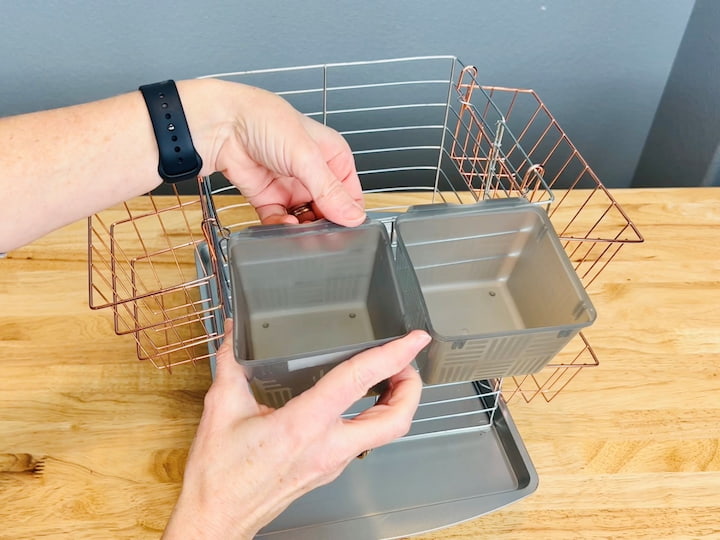
They also sell small plastic bins in sets of three in a variety of colors. I chose gray to match the silver of the backing rack. They have a little lip so they hook right over the top of the baking rack.
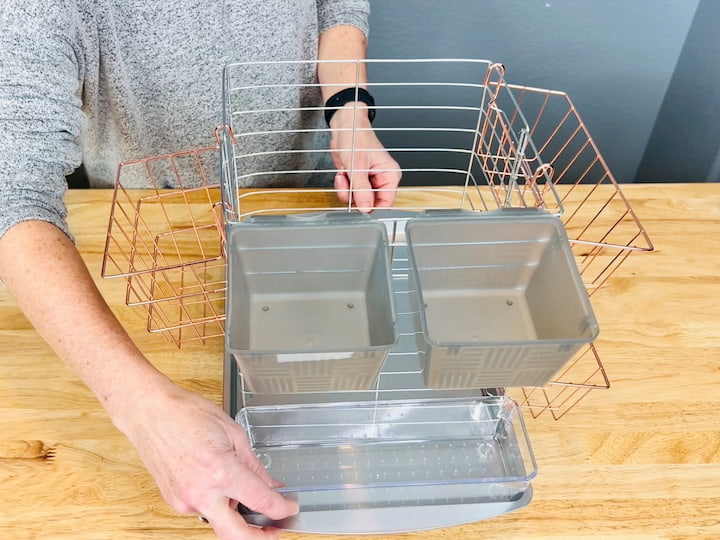
I also added a clear container that was just set right inside the baking sheet.

I added two clips. Keep in mind, all of this is interchangeable and adjustable so you can really add any sort of small storage bin you like. This should help you tackle the disarray and organize the clutter.
11. organize items according to space.
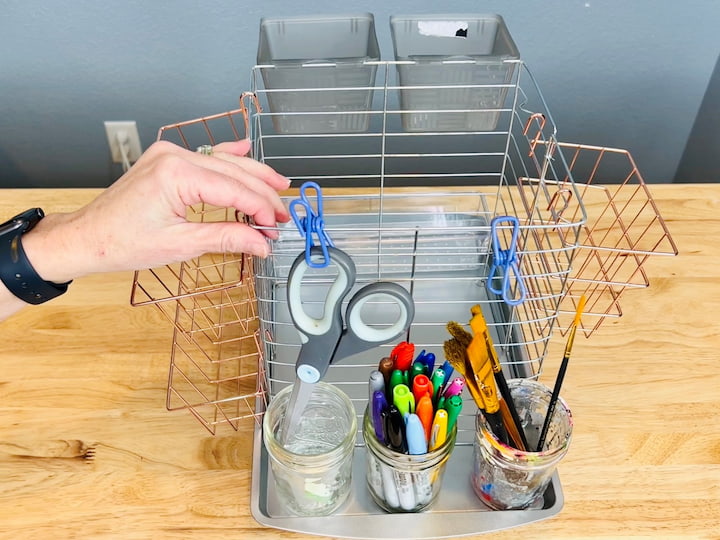
Lazy Susan for Craft Supply Organization
This DIY lazy susan swivels all the way around and it’s going to be great for so many rooms of our home. So let’s take a look at a few places it may come in handy. Let’s start organizing my craft room.
I have used glass jars, one for brushes and the other for sharpies. I will use some clips to hang my scissors and then I’m actually going to place the tip of the scissors inside another glass jar for protection.
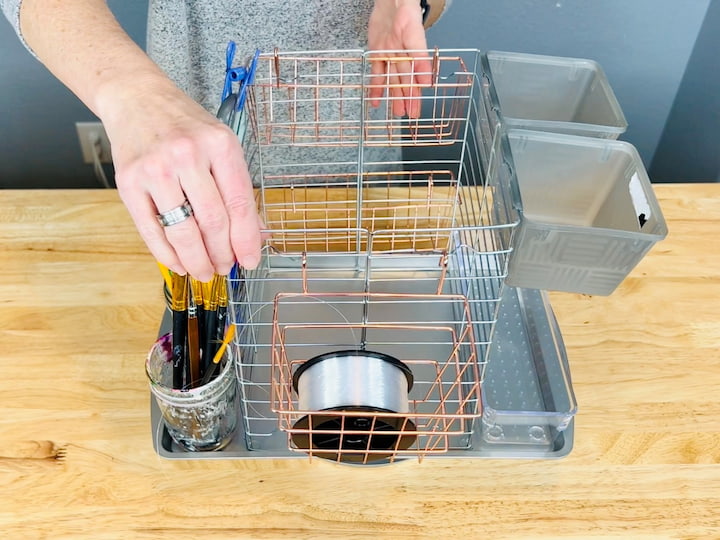
As you see, when I swivel it to the next side on this side I can use the dollar store baskets to store fishing line and ribbon.
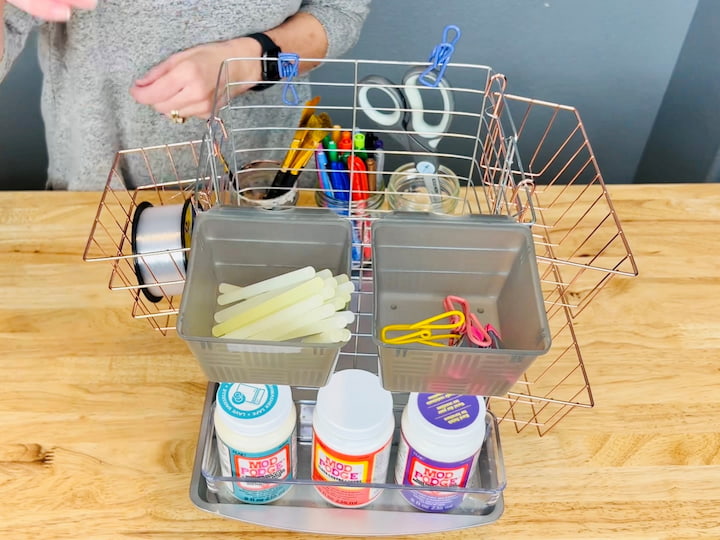
On the last side, we’re going to put Mod Podge on the bottom and store some clips and glue sticks on the top.
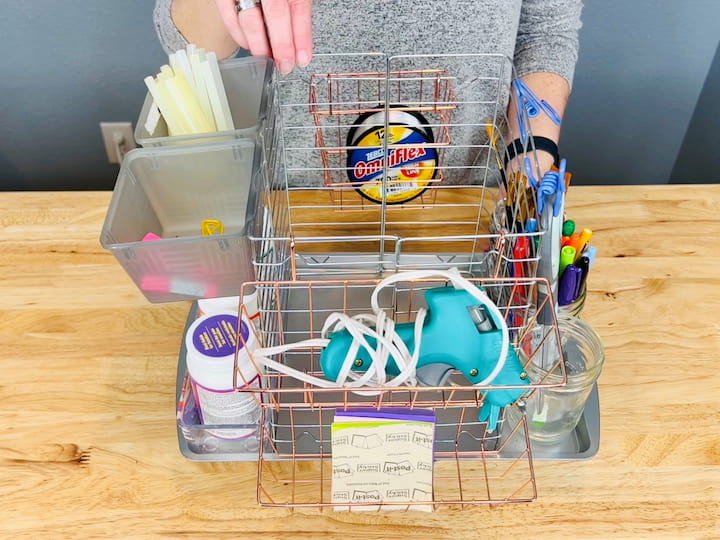
Finally, I will add my glue gun and post-it notes. This leaves the middle open to use for other supplies. Now I have easy access to all my craft supplies!
Lazy Susan for Kitchen Organization
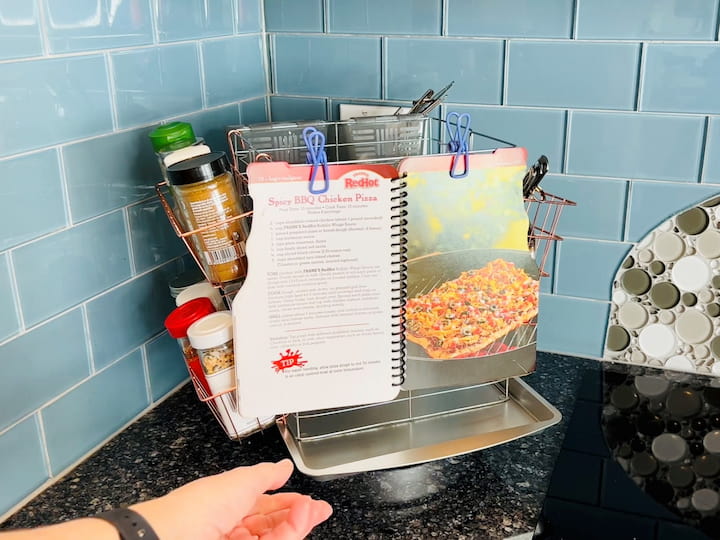
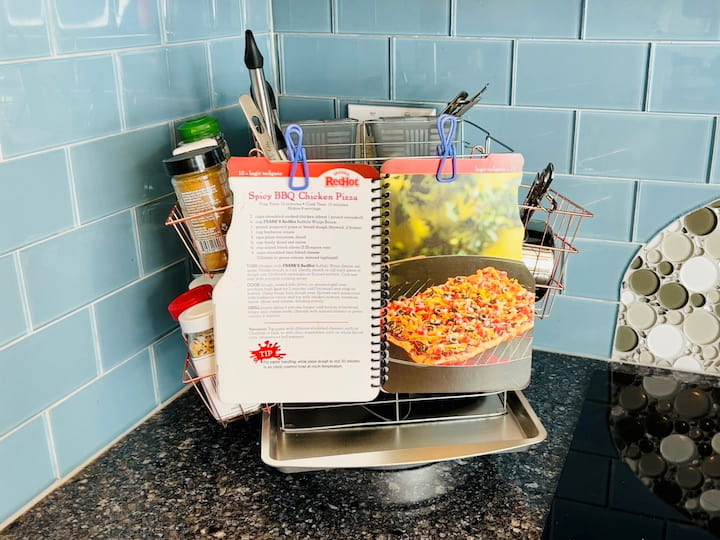
Let’s move on to the kitchen. As you can see I have used the clips to hold my cookbook with my recipe on display, ready to go.
On the next side in the large basket, I have my measuring cups.
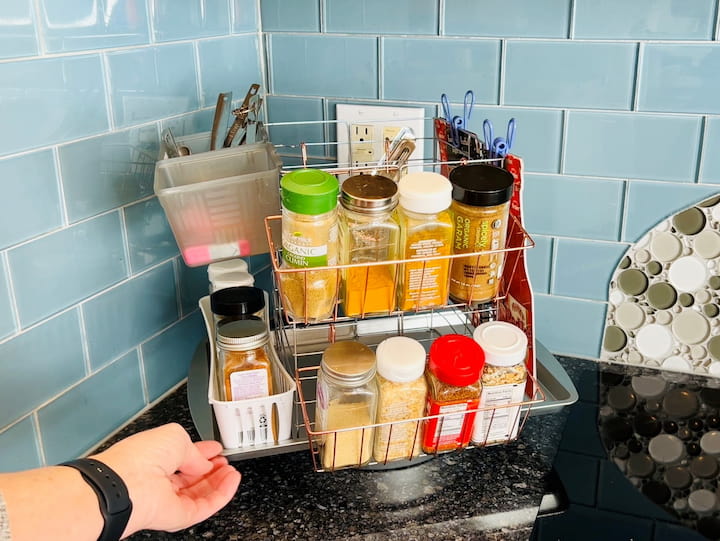
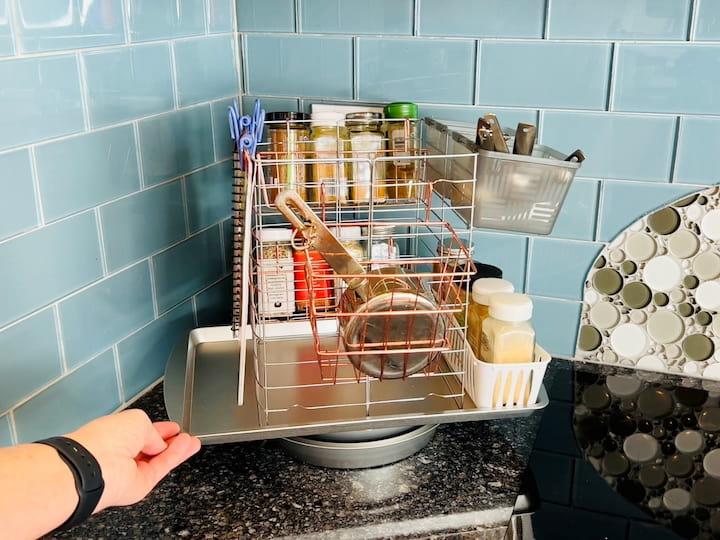
On the next side with the 2 skinny hanging racks, I placed my spices.
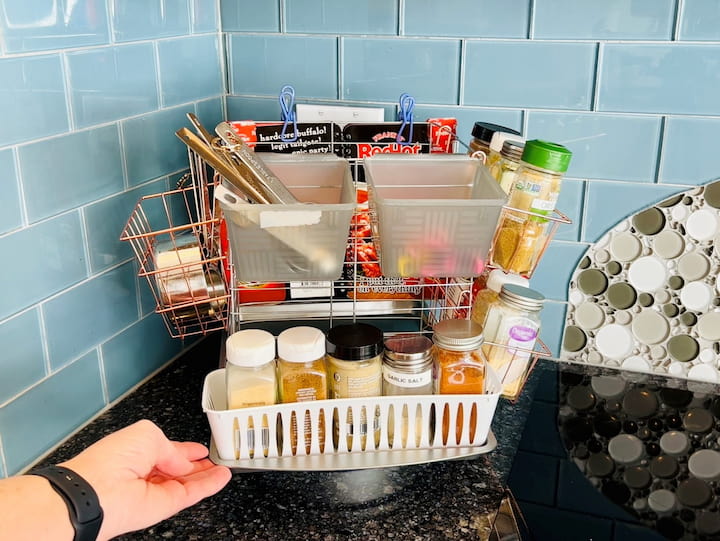
On my last side, I placed more spices and other small things in baskets like measuring spoons, clips, etc.
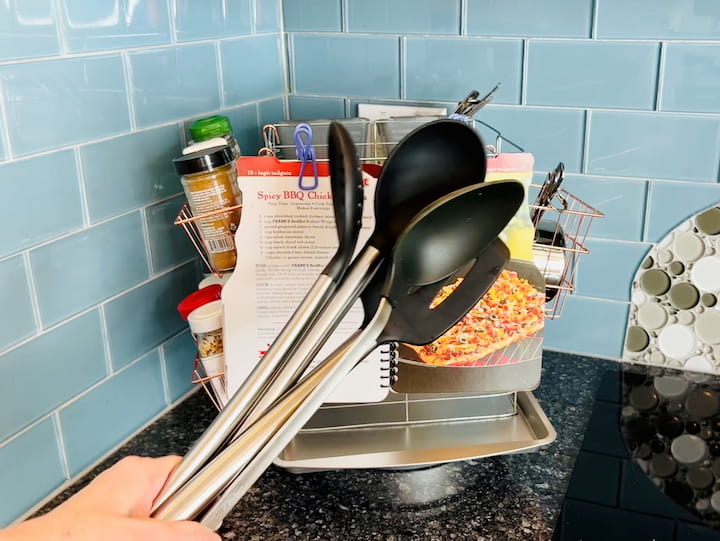
There is still a large space in the center. I’m going to put some of the utensils that I use on a regular basis in there.
This still leaves plenty of space for kitchen utensils, kitchen towels, dish towels, or cloth napkins.
Lazy Susan for Homework Station and Desk Organization
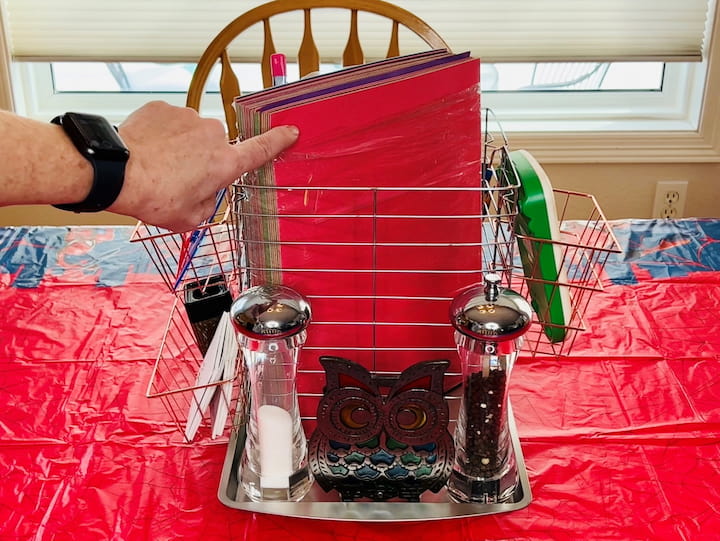
How about a homework station for the kids? On this first side, I included my salt and pepper shakers and napkins as this is our kitchen table. You can store construction paper in the center
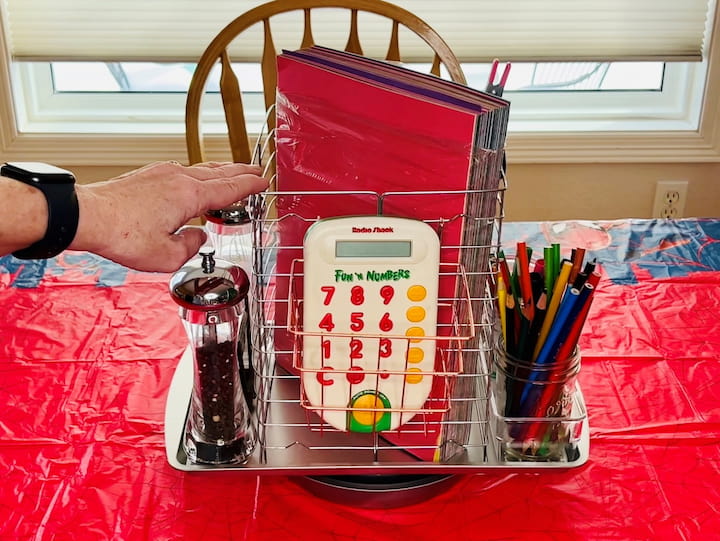
On the next side, I placed a calculator in the large storage basket.
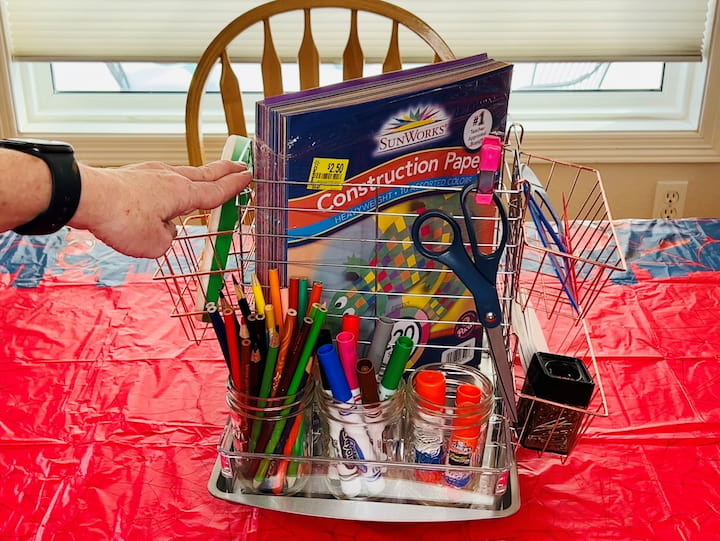
I added mason jars with pencils, markers, and glue sticks, and clipped on a pair of scissors.
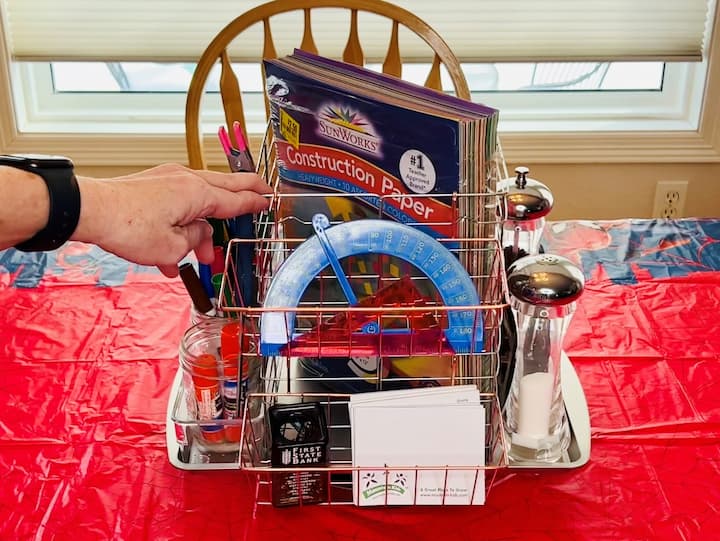
This last side is the small storage baskets for rulers, post-it notes, paper clips, or other office supplies.
As you can see, there are so many options.
More Dollar Tree Lazy Susan Ideas
- Use it to hold snacks on your table for when the kids need them
- Great for bathrooms when you don’t have drawer space
- Use it in your garage for tools, paper towels, and holding different things.
- Make it a magazine holder
- Use it to hold dishes and silverware
I hope this inspires you to make your own lazy Susan with inexpensive supplies from Dollar Tree. I’d love it if you’d subscribe to my YouTube channel and my blog.
Thanks for watching and I’ll see you in my next video don’t forget to like, share and subscribe
Dollar Tree Lazy Susan Video
Shop any of these stores and I receive a small commission at no cost to you.
 Lazy Susan Turntable Organi…Shop on Amazon
 Copco Non-Skid Turntable, 2…Shop on Amazon
 Juvale 2-Tier Lazy Susan Sp…Shop on Amazon
") Oizeir Lazy Susan Turntable…Shop on Amazon
Oizeir Lazy Susan Turntable…Shop on Amazon
Have you seen everyone making these?
As seen on YouTube videos, Instagram, Facebook, and TikTok. All rights reserved.


I love the Lazy Susan diy! Great idea! I also shared it with my sister.
Thank you for all the wonderful ideas!
Thank you so much Crystal, and thanks for sharing 🙂
I love this idea. WOW what a great way to store stuff on my counter! Thank you
So creative, Chas!! Love the Lazy Susan organizer!
Thank you so much 🙂