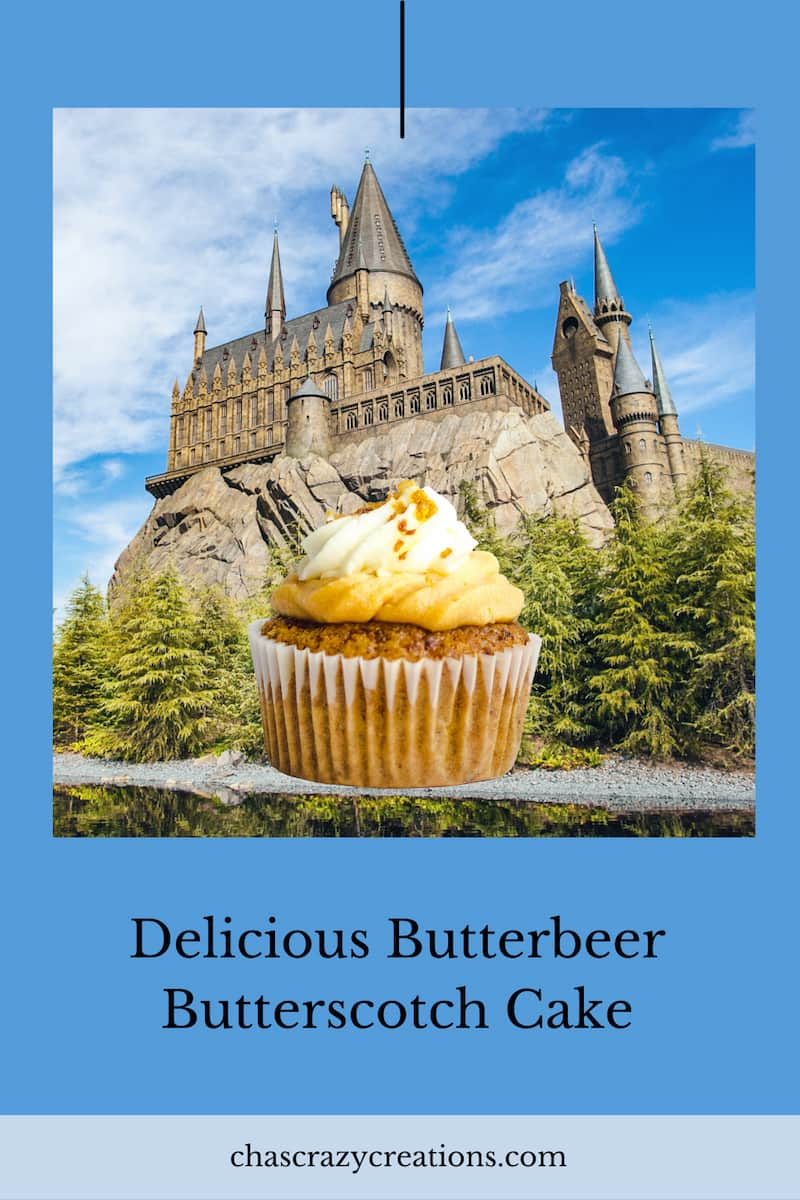
Delicious Butterbeer Butterscotch Cake
Welcome to my tutorial on creating a mouthwatering Butterbeer Butterscotch Cake! In this step-by-step guide, I’ll walk you through the process of making this delectable treat that combines the rich flavors of butterbeer and butterscotch. The prep time is minimal and you will be rewarded with a delicious treat. Get ready to indulge in a magical dessert that will leave you craving for more. So, let’s dive right in! Want to know the story about this cake? I’ll tell you about it at the end.
Butterbeer Butterscotch Cake Video
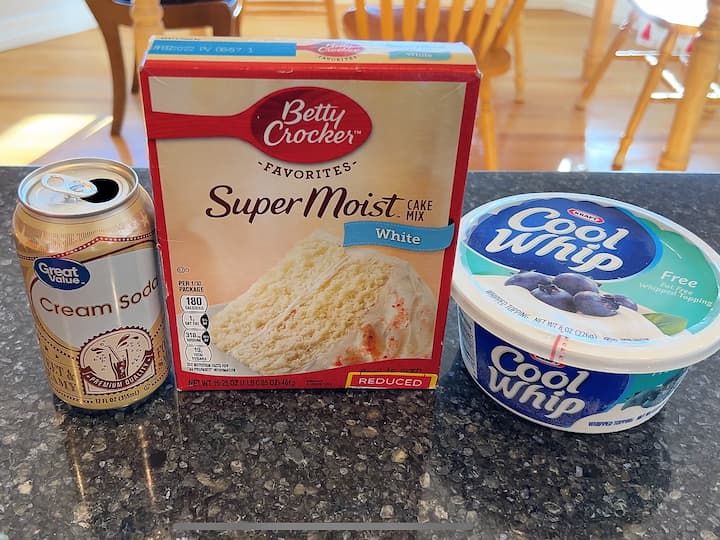
Ingredients
- 1 can of cream soda
- 1 box of yellow cake mix
- 1 tub of Cool Whip or whipping cream
- Butterscotch syrup
- Optional: butterscotch chips
I took shortcuts like using a cake mix to speed up the process and make it easier. This eliminates the need for all kinds of ingredients like all purpose flour, baking powder, salt, vanilla extract, regular sugar or light brown sugar, heavy cream, etc. Not melting of butter, no standing mixer needed.
Butterscotch Cake Recipe Steps
Step 1: Grease the pan.
Start by greasing a 9×13-inch cake pan to ensure that the cake doesn’t stick to the sides and bottom during baking. Use cooking spray or butter to grease the pan evenly.
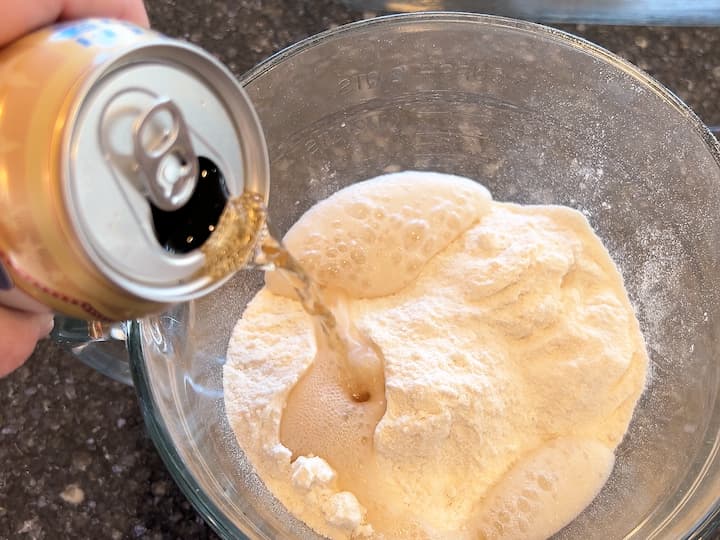
Step 2: Prepare the Cake Mix.
In a mixing bowl, empty the contents of the yellow cake mix. Then, pour in the can of cream soda. This unique twist replaces traditional ingredients like water, vegetable oil, unsalted butter, and eggs. The cream soda adds a delightful flavor and a hint of carbonation to the cake.
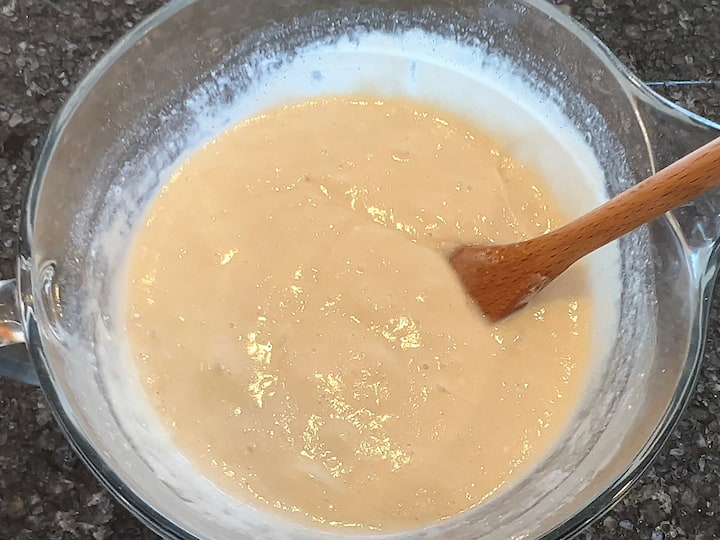
Step 3: Mix the Ingredients.
Thoroughly combine the cake mix and cream soda until you achieve a smooth, lump-free batter. Stir well to ensure that all the dry ingredients are fully incorporated for a consistent texture.
Step 4: Pour the Batter into the pan.
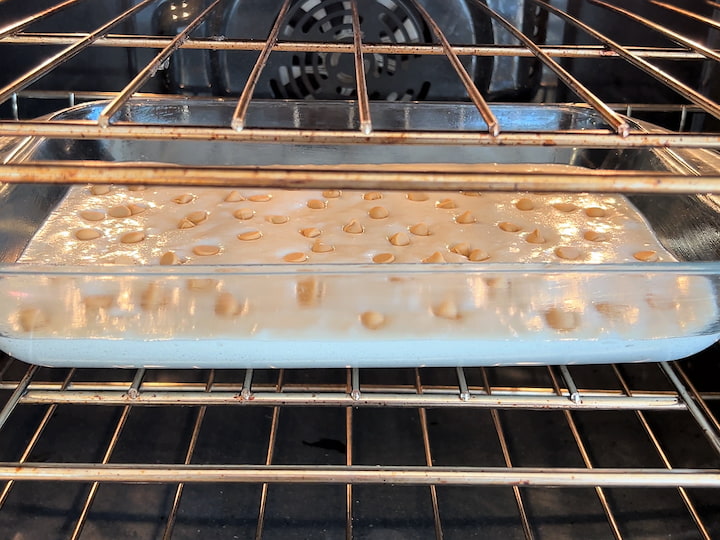
Pour the prepared cake batter into the greased 9×13-inch pan, spreading the mixture out evenly. If desired, you can sprinkle a handful of butterscotch chips onto the batter at this stage to enhance the butterscotch flavor.
Step 5: Follow the Baking Instructions.
Refer to the instructions on the cake mix box for baking guidelines specific to a 9×13-inch pan. Preheat your oven to the recommended temperature and carefully place the cake inside. Bake it according to the provided time and temperature instructions to ensure a perfectly cooked cake. You can test it with a toothpick to be sure it is completely cooked.
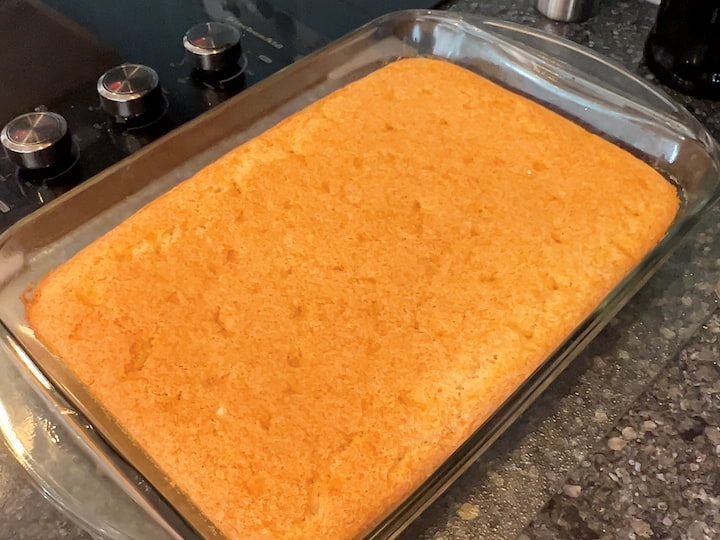
Step 6: Cool the Cake.
Once the cake is baked, remove it from the oven and let it cool completely in the pan on a cooling rack. This step is crucial as it allows the cake to be set and prevents it from crumbling when you slice it.
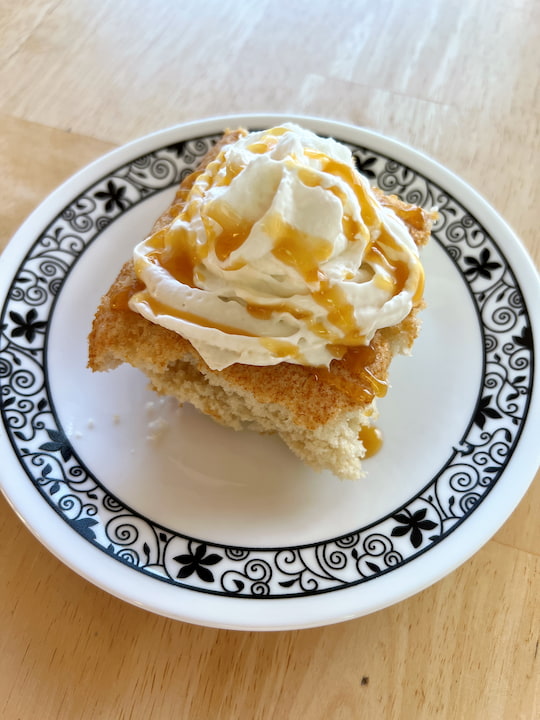
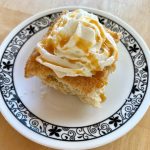
Step 7: Decorate with Cool Whip and Butterscotch Syrup.
Now that your cake has cooled to room temperature, it’s time to add the finishing touches. Spread a layer of Cool Whip or whipped cream over the top of the cake with a spatula, creating a smooth and creamy surface. Then, generously drizzle the cake with luscious butterscotch syrup, allowing it to cascade down the sides for an irresistible appearance and flavor.
Did you know that sometimes cake cuts better with a serrated knife?
Butterscotch Cake Modifications
You can try different additions and toppings depending on your tastes.
- Add chocolate chips in addition to or in place of butterscotch chips.
- Try caramel sauce drizzled over the top.
- You can make or buy cream cheese frosting or buttercream to use in place of cool whip.
- Want to make it higher, place in circle pans to make cake layers
- Use homemade butterscotch sauce instead of the jar
- Use melted butterscotch chips instead of butterscotch sauce
- Use sour cream instead of oil
- Use butterscotch pudding instead of syrup
- You can freeze the cake before you put on the cool whip
Place plastic wrap or a lid over your cake and store in the refrigerator
The why behind our butterbeer butterscotch cake.
We are Harry Potter fans in this house. When my kids reached the age they could start reading and understanding the books they blazed through them, and after each one, we watched the movie.
My kids would play Harry Potter around the house. My daughter had a Harry Potter-themed birthday, that was all DIY and extremely elaborate. It was an all-day event where I transformed the house into all things Harry Potter. They shopped for supplies, went to classes (we created potions, decorated pets, cast spells, etc), ate food, and at the end watched one of the movies.
This party then was so well received that every summer we started doing a Harry Potter party around Harry Potter’s birthday. Each year we replicated a book, which included crafts, games, and food, and then ended with the movie of that book. We made it through all of the books, and to this day (my kids are out of high school and college at this point), the kids all get together to reminisce, and they recreate some of the parties.
This last party included games and crafts, and I made my famous butter beer recipe for them and created this cake as a new treat.
Butterbeer Butterscotch Cake Video
Congratulations! You’ve successfully created a tantalizing Butterbeer Butterscotch Cake. I hope this tutorial has inspired you to embark on your own baking adventure and delight your taste buds with this magical dessert. For more exciting recipes and tutorials, remember to subscribe to my YouTube channel. Thank you for watching, and don’t forget to like, share, and subscribe. Enjoy every bite of this enchanting treat!
Related Recipes:
- Easy and Delicious 3 Ingredient Bread
- How To Make a Homemade Ice Cream Cake
- Bailey’s Irish Cream Chocolate Cake Easy & Delicious
Delicious Butterbeer Butterscotch Cake
Ingredients
- 1 can of cream soda
- 1 box of yellow cake mix
- 1 tub of Cool Whip or whipping cream
- 1 Butterscotch syrup
Instructions
- Start by greasing a 9×13-inch cake pan to ensure that the cake doesn’t stick to the sides and bottom during baking. Use cooking spray or butter to grease the pan evenly.
- In a mixing bowl, empty the contents of the yellow cake mix. Then, pour in the can of cream soda. This unique twist replaces traditional ingredients like water, vegetable oil, unsalted butter, and eggs. The cream soda adds a delightful flavor and a hint of carbonation to the cake.
- Thoroughly combine the cake mix and cream soda until you achieve a smooth, lump-free batter. Stir well to ensure that all the dry ingredients are fully incorporated for a consistent texture.
- Pour the prepared cake batter into the greased 9×13-inch pan, spreading the mixture out evenly. If desired, you can sprinkle a handful of butterscotch chips onto the batter at this stage to enhance the butterscotch flavor.
- Refer to the instructions on the cake mix box for baking guidelines specific to a 9×13-inch pan. Preheat your oven to the recommended temperature and carefully place the cake inside. Bake it according to the provided time and temperature instructions to ensure a perfectly cooked cake. You can test it with a toothpick to be sure it is completely cooked.
- Once the cake is baked, remove it from the oven and let it cool completely in the pan on a cooling rack. This step is crucial as it allows the cake to be set and prevents it from crumbling when you slice it.
- Now that your cake has cooled to room temperature, it’s time to add the finishing touches. Spread a layer of Cool Whip or whipped cream over the top of the cake with a spatula, creating a smooth and creamy surface. Then, generously drizzle the cake with luscious butterscotch syrup, allowing it to cascade down the sides for an irresistible appearance and flavor.
Video