Easy and Amazing Bathroom Vanity Light Makeover DIY on a Budget
Have you ever wanted to makeover a bathroom vanity light? We had a dated bathroom vanity lighting fixture that needed a modern design update. This is my DIY and you could easily do this in a rental home.
This post may contain affiliate links, I earn from qualifying purchases at no extra cost to you. Click here for my disclosure policy
Updating your powder room or bathroom wall lights doesn’t have to be expensive. The good news is you can update your bath lights with just a few dollars, and you won’t believe the difference it makes. DIY vanity light fixtures can be as easy as creating a vanity light cover.
s ad will end in 6
Please see my easy step-by-step guide to creating this bathroom lighting vanity fixture cover in this blog post.
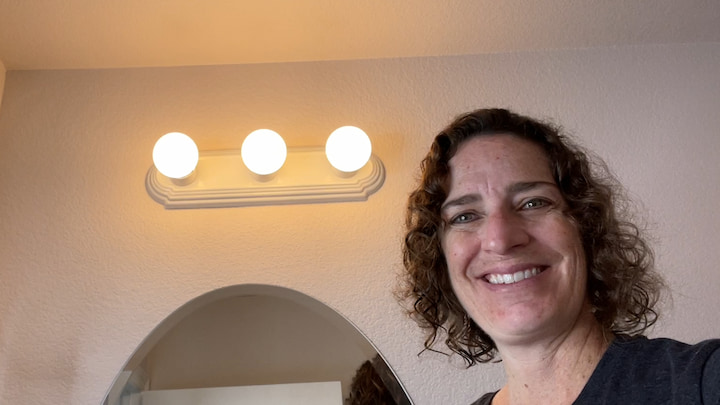
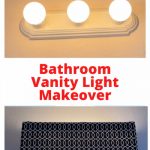
Here is the original light in our bathroom. This is a 3-light vanity fixture, but this will work for any type of vanity light. Want to know something else? The builder didn’t center the vanity mirror under it so it’s always been off-center. It was time to update it, and come up with a way to fix the bathroom mirror centering issue.
Materials needed for this light fixture update?
Table of Contents
HOW DO YOU COVER UP LIGHTING FIXTURES?
HERE ARE THE INSTRUCTIONS FOR THE BATHROOM VANITY LIGHT MAKEOVER
1. MEASURE YOUR LIGHT
The first thing I did was measure the height, width, and depth of my light fixture so I would know what shade shape to make. The number of lights doesn’t matter, you are just measuring the light bar.
My measurements were 5 inches high, 18 inches wide, and 6 inches deep. To make this project I needed to add some clearance onto these measurements so it could cover the light fixture and not be too close to the lights.
I came to the conclusion that my measurements for this cover would be 8 inches high, 22 inches wide, & 7 inches deep. In addition to that, I would need a couple of inches to attach the cover to the wall.
2. MEASURE THE FOAM CORE BOARD
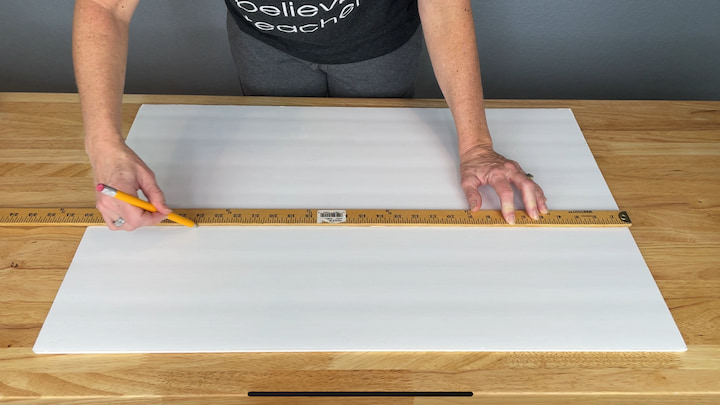
I measured each section off on my foam core board and drew my lines where I would need to cut the board.
3. CUT THE FOAM CORE BOARD
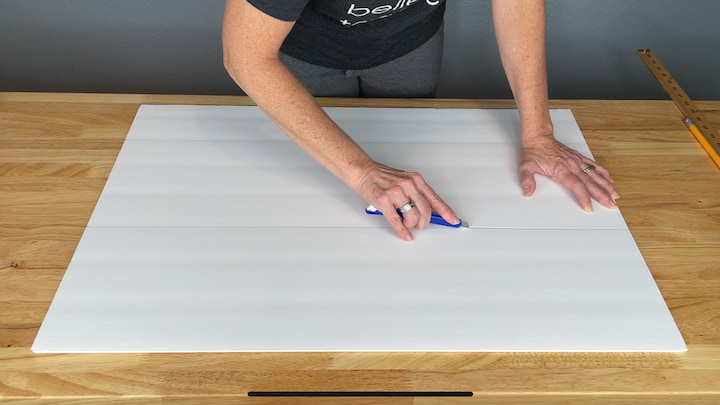
I used my razor blade to cut the foam core board.
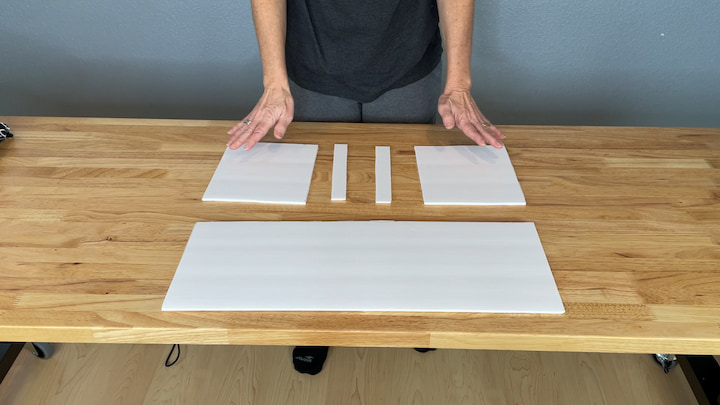
Here’s a quick look at all of the cut pieces.
4. CUT THE FABRIC
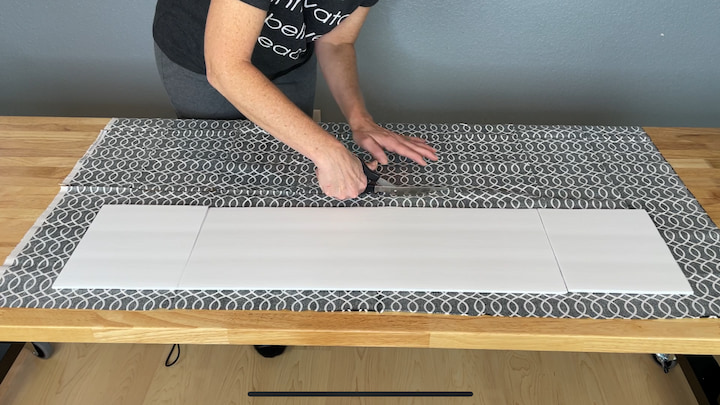
I laid my fabric out and placed the foam core board on top so that I could cut the fabric. I added 2 inches to every side so that I’d have plenty of fabric to glue onto the board. You can get fabric in a large variety of styles so you are sure to find one that matches your home decor.
5. GLUE THE BOARD TOGETHER
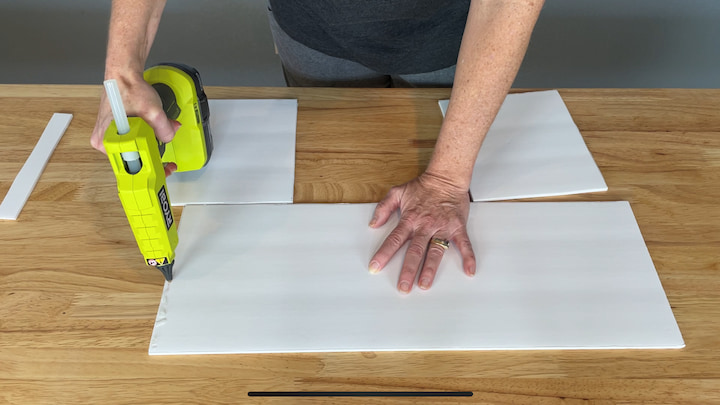
I hot-glued all the foam core pieces together for the bathroom light fixture cover.
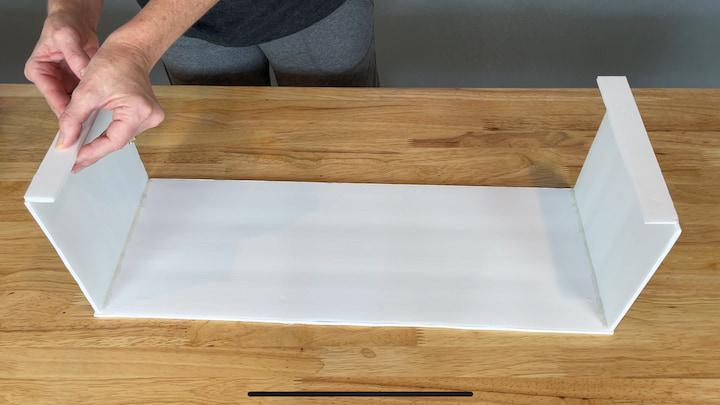
I was generous with the hot glue, and I reinforced all of the edges to make it sturdy.
6. GLUE THE FABRIC TO THE BOARD
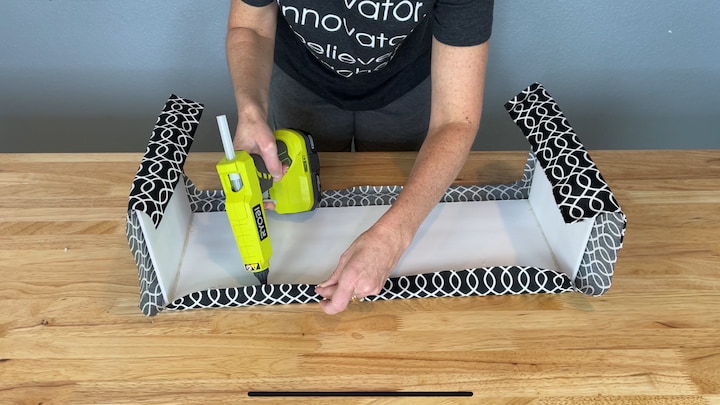
I hot glued the fabric onto the foam core board.
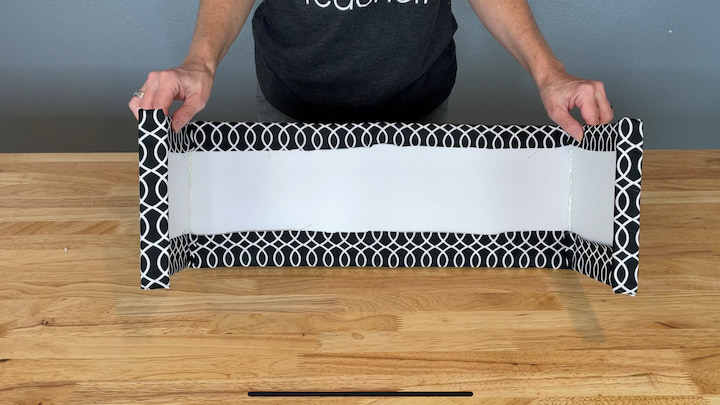
Here’s a look at the backside once the whole bathroom light fixture was covered.
7. ATTACH THE COMMAND STRIPS
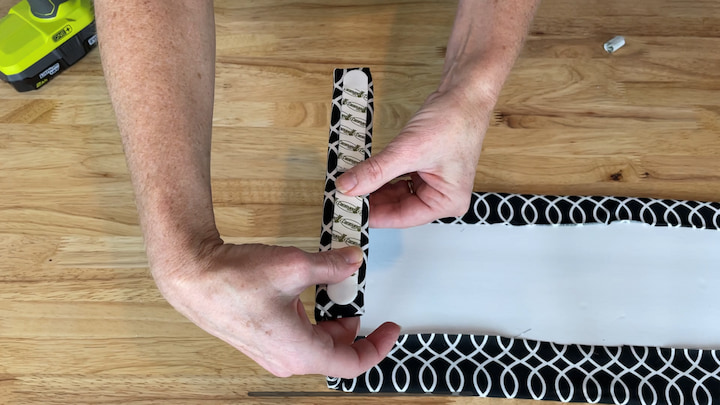
I hot-glued on 2 picture hanging command hooks to each side of the vanity light cover.
8. ATTACH THE VANITY LIGHT COVER TO THE WALL
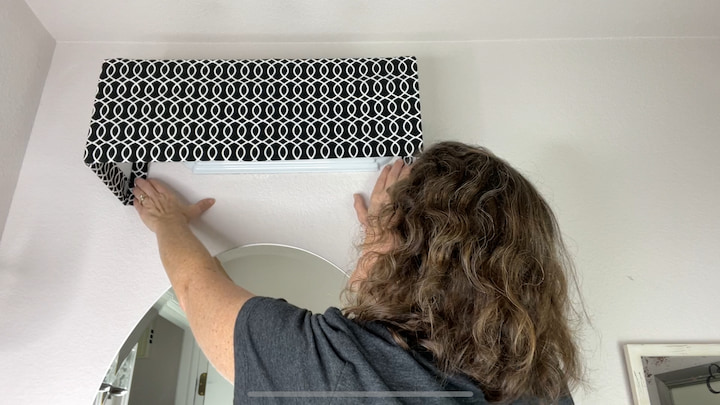
I pulled off the backs of the command strips and pressed them onto the wall over the top of the bathroom vanity light.
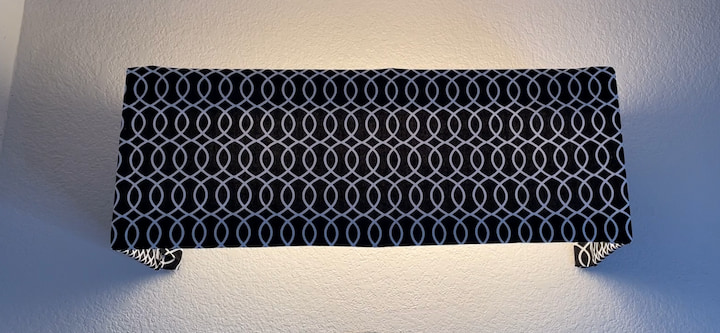
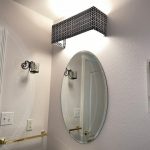
Here’s a look up close of the bathroom vanity light cover.
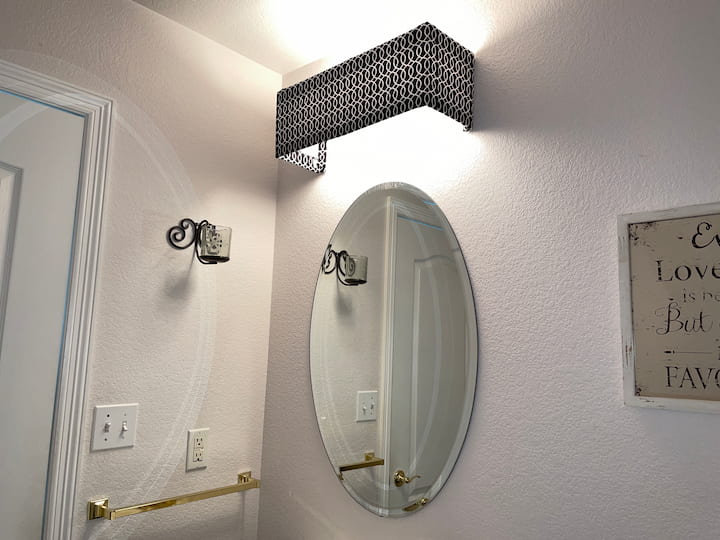
I’m really happy with how it turned out.
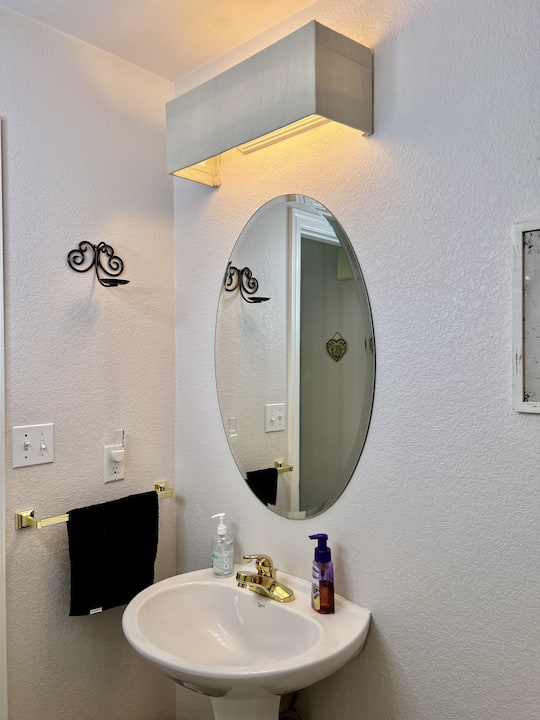
Hometalk loved the way my first valance turned out they asked me to create a second one with a drop cloth. I love how this one turned out too.
This technique can also be used for horizontal wall lights or bathroom wall sconces that are on either side of the mirror. If you are worried about moisture in the bathroom, maybe from the shower, you can wrap the foam board in water resistant fabric.
The great thing is that you can create beautiful bathrooms on a budget it makes a bold statement, and no power tools are needed. Here are some other ideas you can include in your bathroom:
- crystal vanity lights
- wall sconces or bathroom sconces
- light bars
- individual mirror
- drum pendants
- replacement shades
- incandescent light bulbs
- bathroom chandelier
- bathroom light cover
- glass covers
- white glass shade or clear glass shade
- ambient lighting
- decorative lights
- change your light bulb to LED to save money
- update to modern bathroom vanity lights
- halogen bulbs are brighter
- we changed our master bathroom light to a wide bathroom vanity light for adequate lighting
- update that 90s gold to a chrome vanity light
- light dark bathroom areas by adding lights you can aim and pivot to hit those areas
- think outside the box by adding a combination of bathroom light fixtures
- update the shade from outdated to clear glass shades
- update your ceiling lights, when thinking about your bathroom ceiling lights you can decide if you want to update to LEDs
- Bath Bars
- Decide on your metal – brass, nickel, silver, etc
You can paint a light fixture, or you can create a valance to cover the light fixture.
Start by measuring the light fixture, cut foam core board, glue the foam core board together, cover the foam core board with fabric, and use command strips to adhere the cover to the wall over the light.
Shop any of these stores and I receive a small commission at no cost to you.
 Mat Board Center, Pack of 1...Shop on Amazon
 Hot Glue Gun High Temp-Cobi...Shop on Amazon
 56 Pieces 9.8"x 9.8" (25cm ...Shop on Amazon
 Command 3M Command Adhesive...Shop on Amazon
 Kichler 24" 3-Light Vanity ...Shop on Amazon
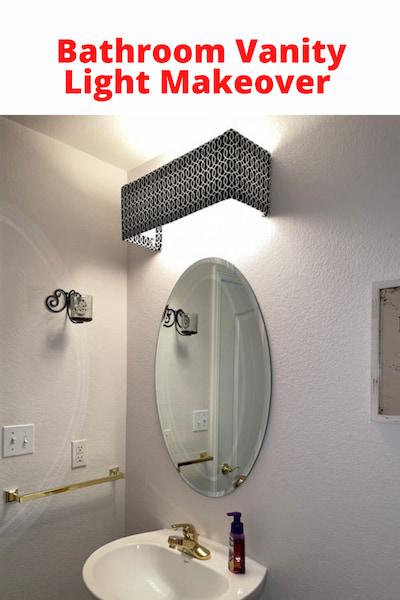
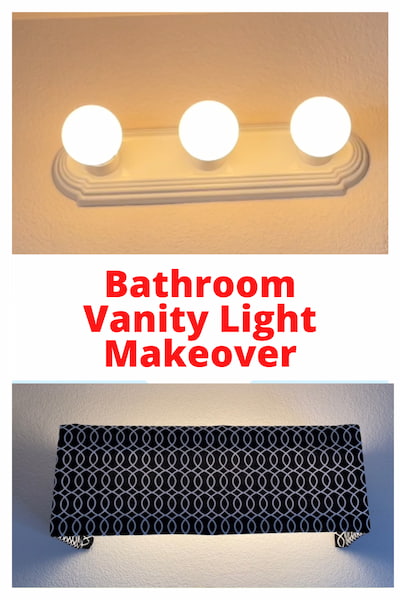
Bathroom Vanity Light Makeover DIY
Equipment
- Hot Glue Gun
- Scissors
- Razor
- Tape Measure
Ingredients
- Foam Core Board
- Fabric
- Picture Command Strips
Instructions
- The first thing I did was measure the height, width, and depth of my light fixture.
- I measured each section off on my foam core board and drew my lines of where I would need to cut the board.
- I used my razor blade to cut the foam core board.
- I laid my fabric out and placed the foam core board on top so that I could cut the fabric. I added 2 inches to every side so that I’d have plenty of fabric to glue onto the board.
- I hot glued all the foam core pieces together for the bathroom light fixture cover.
- I hot glued the fabric onto the foam core board.
- I hot glued 2 picture hanging command hooks on each side of the vanity light cover.
- I pulled off the backs of the command strips and pressed them onto the wall over the top of the bathroom vanity light.
Learn more about “Why to Deep Clean and Organize Your Home” to save money, function better, and keep your sanity.
Bathroom Vanity Light Q & A
What kind of lighting is best for bathroom vanity?
The best lighting for a bathroom vanity is one that provides even and adequate illumination for grooming and personal care tasks. It’s important to consider both the quality and quantity of light to create a functional and visually appealing bathroom space. Here are some recommendations for bathroom vanity lighting:
- Natural Light: Whenever possible, try to maximize natural light in the bathroom. Natural light is ideal for grooming tasks as it provides a true representation of colors. If your bathroom has windows, consider using sheer curtains or frosted glass to allow light in while maintaining privacy.
- LED or CFL Lights: Energy-efficient and long-lasting, LED (Light Emitting Diode) or CFL (Compact Fluorescent Lamp) lights are excellent choices for bathroom vanity lighting. They produce little heat, making them safer for bathroom use, and they come in a variety of color temperatures to suit your preferences.
- Light Placement: Placing lights on both sides of the bathroom mirror, rather than just above it, is a great way to minimize shadows on the face. This setup provides even illumination for tasks like shaving, applying makeup, or styling hair.
- Avoid Overhead Lighting Alone: Relying solely on overhead lighting can cast unflattering shadows on the face, making grooming tasks more challenging. If you have an overhead fixture, consider complementing it with side lighting.
- Dimmable Lights: Installing dimmable lights allows you to adjust the brightness according to your needs and mood. Lower light levels can create a relaxing atmosphere for a bath, while brighter light is helpful for detailed grooming tasks.
- Choose the Right Bulbs: Opt for bulbs with a color temperature around 3000K to 4000K, as this range closely resembles natural daylight. Avoid bulbs that are too warm (lower Kelvin values) or too cool (higher Kelvin values) as they may distort colors and make tasks harder.
- Lighting Design Aesthetics: Apart from functionality, consider the aesthetic aspect of the lighting fixtures. Choose fixtures that complement the overall design and decor of your bathroom.
- Waterproof and Rated for Bathrooms: Ensure that the lighting fixtures you choose are rated for use in damp environments to avoid safety issues.
In summary, a combination of natural light, side-mounted fixtures, LED or CFL bulbs with appropriate color temperature, and dimmable options will offer the best lighting for a bathroom vanity. Always consider your personal needs and preferences while selecting the lighting fixtures and design for your bathroom.
Should bathroom vanity light be longer than mirror?
Ideally, the bathroom vanity light should be approximately the same width as the mirror or slightly narrower. This ensures that the light is evenly distributed across the face and eliminates shadows, providing optimal lighting for grooming tasks.
If the vanity light fixture is too long or extends beyond the sides of the mirror, it may cast shadows on the face when standing at certain angles, which can make grooming activities like shaving or applying makeup more challenging.
On the other hand, if the light fixture is significantly narrower than the mirror, it may not provide enough coverage, leading to uneven lighting and potential difficulties in performing tasks that require precise visibility.
To achieve the best results, choose a vanity light fixture that matches the width of your mirror or is slightly smaller. This will help create a balanced and even lighting environment, ensuring that the mirror’s entire surface is well-illuminated without any dark spots or shadows on your face.
Are LED lights good for bathroom vanity?
Yes, LED lights are an excellent choice for bathroom vanity lighting. There are several reasons why LED lights are considered ideal for this purpose:
- Energy Efficiency: LED lights are highly energy-efficient, consuming significantly less electricity compared to traditional incandescent or fluorescent bulbs. This efficiency helps reduce energy costs and is environmentally friendly.
- Longevity: LED lights have an impressively long lifespan, often lasting tens of thousands of hours. This means you won’t need to replace them as frequently as other types of bulbs, saving you money in the long run.
- Minimal Heat Generation: LED lights produce very little heat compared to incandescent or halogen bulbs. This is especially important in the bathroom, where excess heat can be uncomfortable and may create a more humid environment.
- Color Temperature Options: LED lights are available in a wide range of color temperatures, from warm white to cool white. You can choose the color temperature that best suits your preferences and complements the bathroom’s overall design.
- Dimmable Options: Many LED lights are dimmable, allowing you to adjust the brightness to your liking. This flexibility is useful for creating different atmospheres in the bathroom, from bright and functional for grooming tasks to softer and more relaxing for a bath or nighttime use.
- Instant On: LED lights reach their full brightness immediately when switched on, making them convenient for use in the bathroom, where you often want instant illumination.
- Design Versatility: LED lights come in various shapes and sizes, providing a wide range of design options for bathroom vanity fixtures. They can be integrated into sleek and modern designs or traditional and decorative styles.
- No UV Emissions: Unlike some other types of bulbs, LED lights do not emit harmful ultraviolet (UV) rays, which can cause fading and damage to certain materials in the bathroom over time.
Overall, LED lights offer numerous advantages, making them a popular and practical choice for bathroom vanity lighting. They combine energy efficiency, longevity, and design versatility, providing you with a well-lit and visually appealing bathroom space.
Is it better to have bathroom vanity lights facing up or down?
The orientation of bathroom vanity lights (facing up or down) depends on your preferences and the desired lighting effect you want to achieve. Both orientations have their advantages and considerations:
1. Facing Up:
- Soft and Ambient Lighting: When the lights are directed upwards towards the ceiling, the light bounces off the ceiling and creates a softer, more diffused ambient lighting in the bathroom. This can be a great choice if you want to create a relaxing and calming atmosphere, especially when using dimmable LED lights.
- Reduced Glare: Facing the lights upwards reduces direct glare on the eyes, making it more comfortable when you look into the mirror. It minimizes harsh shadows on the face and provides more flattering illumination for grooming tasks.
2. Facing Down:
- Direct Task Lighting: When the lights are facing downwards, they provide more focused and direct task lighting. This setup can be beneficial for precise grooming tasks like shaving, applying makeup, or styling hair, as it casts even light on the face and reduces shadows.
- More Illuminated Mirror: Downward-facing lights tend to illuminate the mirror surface better, making it easier to see your reflection and perform tasks with accuracy.
- Enhanced Design Aesthetics: Some people prefer the visual aesthetics of downward-facing lights, especially if the fixtures themselves have decorative elements or a particular design that they want to showcase.
In general, a combination of both upward and downward-facing lights can create a balanced and well-lit bathroom. Installing fixtures with multiple bulbs or placing sconces on both sides of the mirror can achieve this combination. Additionally, using dimmable LED lights provides the flexibility to adjust the brightness according to your needs and the desired ambiance.
Ultimately, the choice between facing the lights up or down comes down to personal preference, the specific lighting needs of your bathroom space, and the overall design style you want to achieve. Consider your daily activities and how you use the bathroom to determine which orientation best suits your needs.
Check out some of my related posts!







This is one of the best DIY projects I’ve come across in ages! I LOVE how you provide it in simple recipe format for printing too! Thank you so much for sharing. ❤️
Thank you so much, I’m glad you like it.
Love this!! I think I’m going to buy new shower curtains. Use one for the shower and use the other one to cover the new valance. This is something I can do!!
Thank you so much and I’m so excited you’re going to give it a try!
Chas, what a clever idea! Thanks for sharing all the steps. What a great way to reduce glare too!
Thank you for sharing at #OverTheMoon. We appreciate your shares. They have been Tweeted Pinned. Have a lovely week. I hope to see you at next week’s party too! Please stay safe and healthy. Come party with us at Over The Moon! Catapult your content Over The Moon! @marilyn_lesniak @EclecticRedBarn
Thank you Marilyn, I look forward to joining next week
I love this idea!!! It’s so pretty and doable!! I love how you include all the steps!
I love it so much I’m going to share in my weekend round up! My followers will love it!
Oh my gosh, thank you so much Kristin – I’m so glad you like it!