
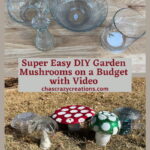
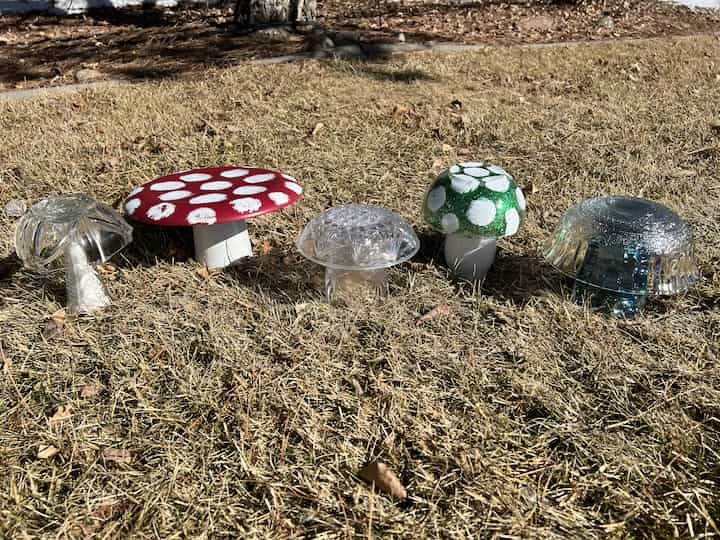
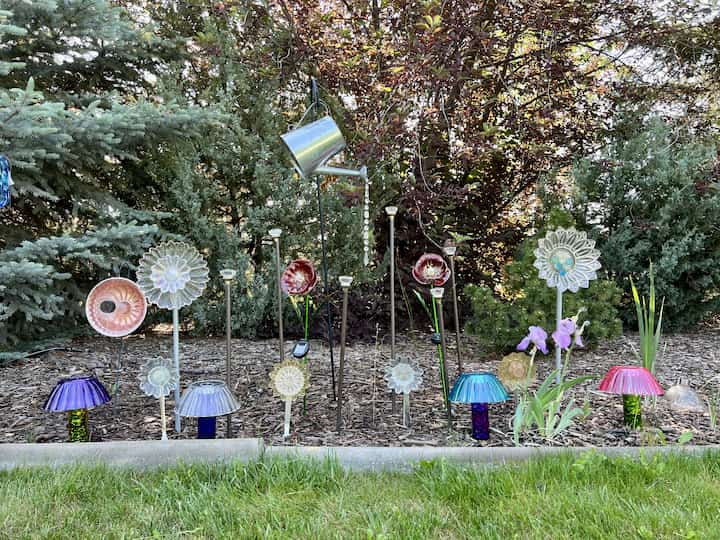
Super Easy DIY Garden Mushrooms on a Budget with Video
Have you ever wanted to make some DIY garden mushrooms? All you need is a few items from the thrift store and you can make some mushroom decor on a budget. You may also like my Easy Dollar Tree DIY Mushroom Solar Light Decor turning Dollar Tree party items into glowing mushrooms for my garden.
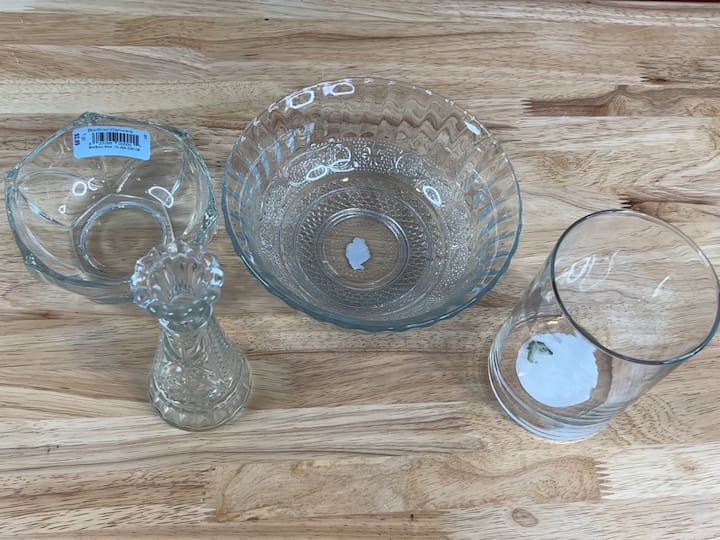
DIY Garden Mushroom Materials
- Thrift Store Dishes, vases, candle holders (mine are from Dollar Tree and local thrift stores)
- E6000, Silicone, or Hot Glue
- Fillers – Sand, Decorative Rocks
DIY Garden Mushroom Videos
How do you make glass mushrooms for a garden?
DIY Garden Mushrooms Instructions
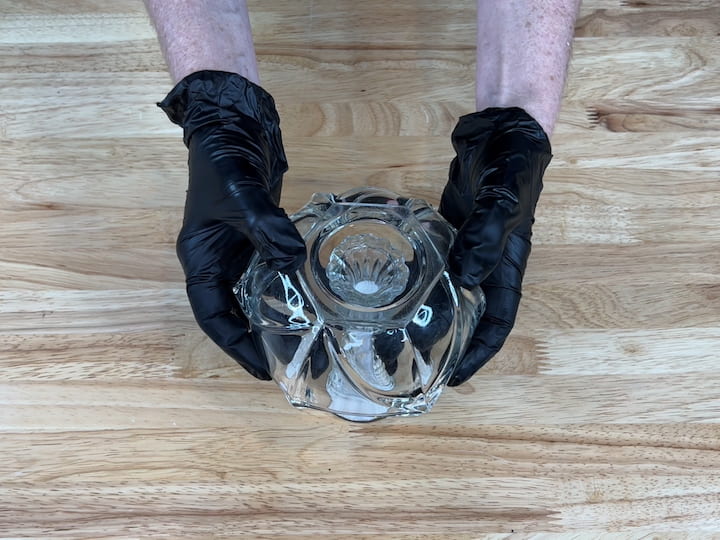
1. Mix and match dishes at the store
I like to go to the thrift store and mix and match glassware like vases and candle holders as the base, and different glass bowls and candle holders as the mushroom tops of the DIY mushrooms.
2. Wash your dishes
To make these glass mushrooms, start by washing all of the items you purchased and remove tags.
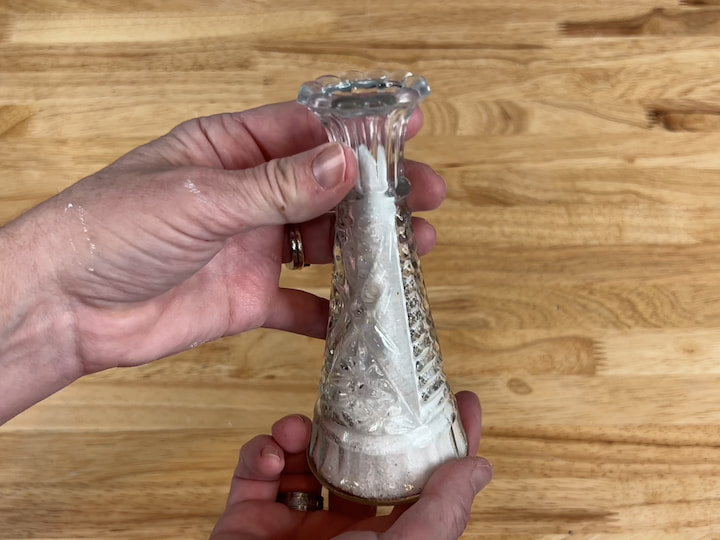
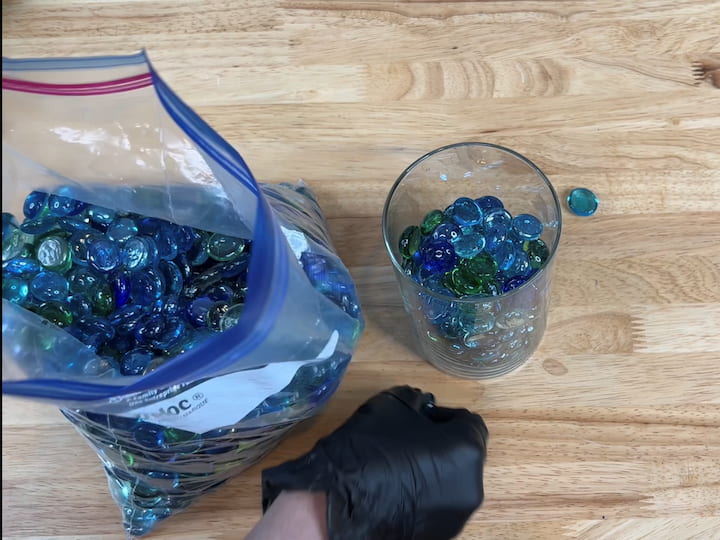
3. Fill your base for stability
For this particular glass mushroom, I’m using a small vase and I filled it with white decorative sand. Other ideas include water, gems or those glass stones from Dollar Tree, rocks, etc
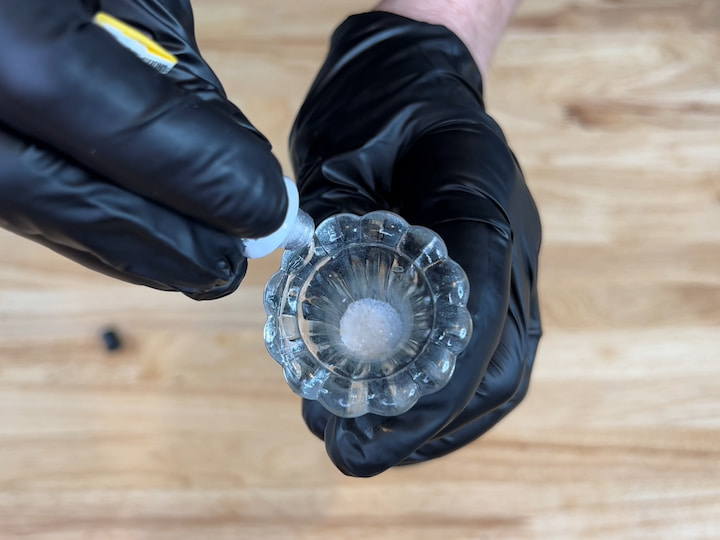
4. Add adhesive to the base
You’ll select your adhesive based on where your glass mushrooms are going and what your weather is. For this one, I am using E6000, and I placed it on top of the vase.
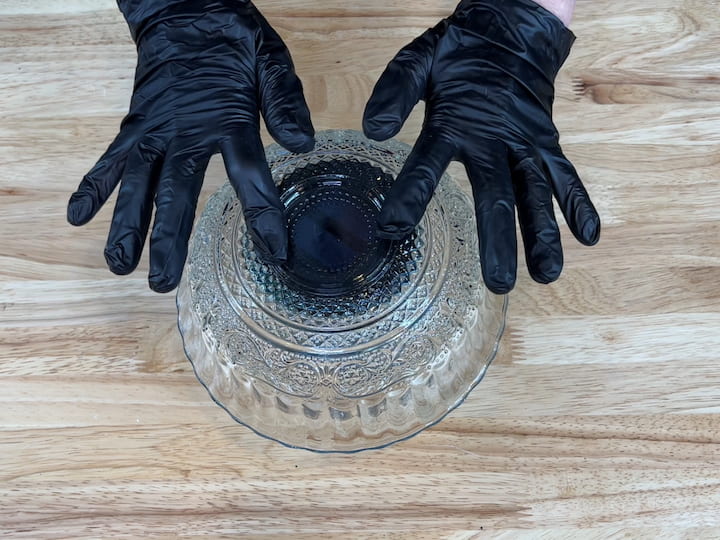
5. Place your bowl on top of the adhesive on the base.
I placed a bowl upside down on my adhesive on top of the vase.
I let this dry for 24 hours.
How do you make solar mushroom lights?
For this one, I am recycling an old candle jar. I removed all of the wax residues and washed it. I added decorative rocks for weight in the base.
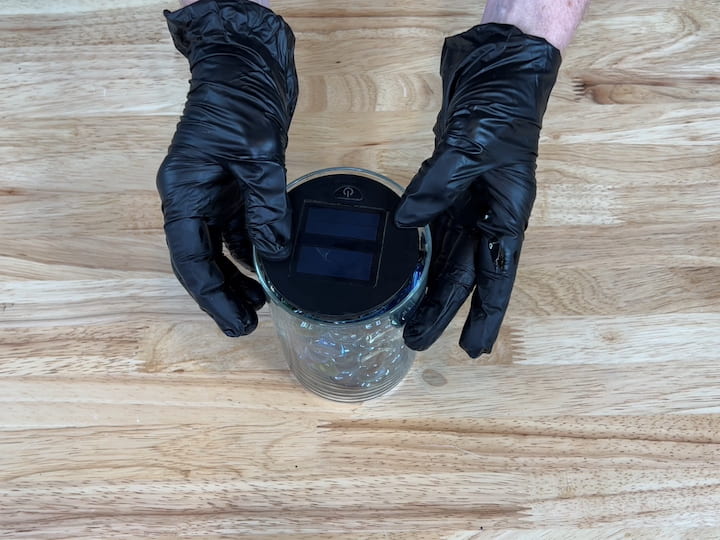
I added a solar light to the top of the glass candle holder.
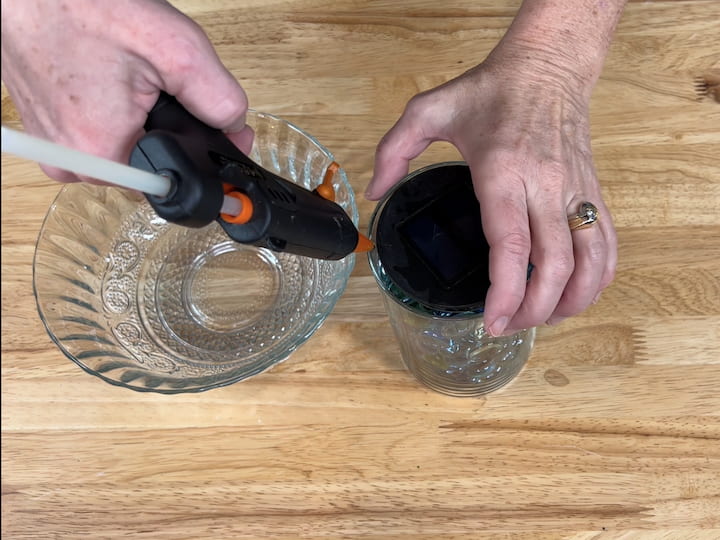
I added hot glue to the top of the glass candle holder because I will want to get into this glass mushroom in the future to replace the solar light.
I placed an upside-down bowl on top of the hot glue. I let it cool and this DIY glass mushroom is ready.
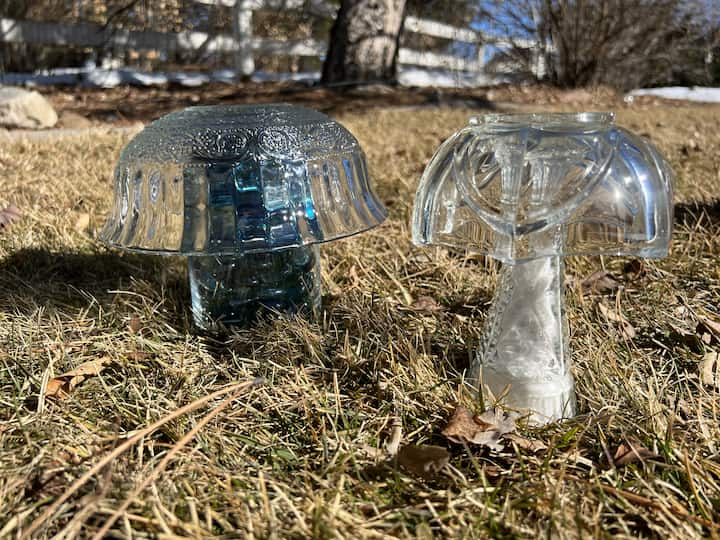
Depending on your weather you can place this outside. In Colorado, we have sun, rain, wind, and snow. With a stable base, mine have held up outside just fine.
How do you make yard mushroom art?
If you don’t want to use glass, you can find plastic dishes that look as good as crystal. Here is how I made this yard mushroom art:
- I placed a plastic glass upside down
- I put E6000 on the base of the glass
- I put an upside down plastic bowl on top of the glass
- I let it dry for 24 hours
How do you make garden toadstools?
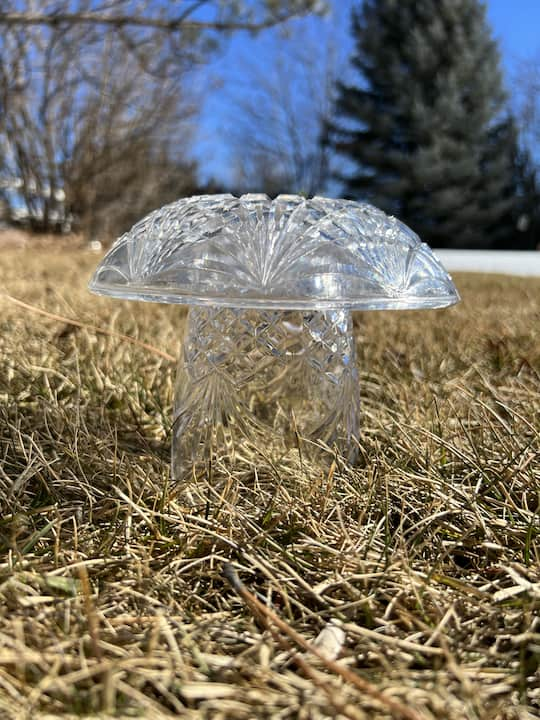
I made 2 different toadstools, one out of glass and one out of plastic.
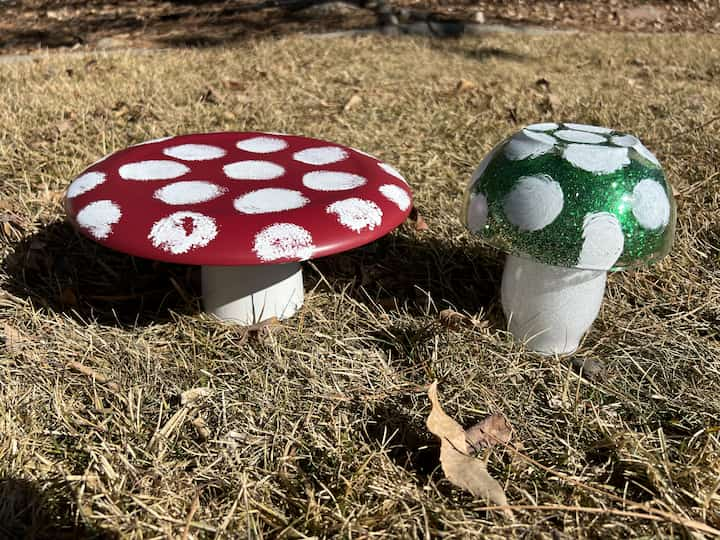
Plastic Toadstool Instructions
- I painted a plastic cup white and let it dry
- I tipped the glass upide down, added some E6000 to the bottom of the glass
- I placed an upside down red plastic plate onto the cup and let that dry.
- I used a stencil brush and added spots to the toad stool using Folk Art Home Decor Chalk Paint in the color white to the top of the red plate. (You could use spray paint as well)
- I let the paint dry completely
Glass Toadstool Instructions
- I placed Pledge floor cleaner into a small vase, swirled it around and dumped out the excess
- I placed white glitter inside of the bowl or vase, swirled it around until it coated the whole vase, and dumped out the excess.
- I placed Pledge floor cleaner into a small bowl, swirled it around, and dumped out the excess.
- I placed green glitter into the bowl, swirled it around unti lit coated the whole bowl, and dumped out the excess.
- I let both items dry completely.
- I added E6000 to the top of the vase
- I placed the bowl upside down on top of the vase
- I let the adhesive dry completely
- I used a stencil brush and added spots to the toad stool using Folk Art Home Decor Chalk Paint in the color white to the top of the glass bowl.
- I let the paint dry completely.
You can decide which type of material you want to use depending on where it’s going to be in your home. Will it be in the outside elements or under your covered porch?
Super Easy DIY Garden Mushrooms on a Budget Video
Shop any of these stores and I receive a small commission at no cost to you.
Shop on Amazon GE Advanced Silicone Window…Shop on Amazon
 - Dual Temp, Precision Nozzle, and Easy Squeeze Trigger") Gorilla Mini Hot Glue Gun K…Shop on Amazon
Gorilla Mini Hot Glue Gun K…Shop on Amazon Hygloss Colored Sand for Cr…Shop on Amazon
 FUTUREPLUSX 1 pounds, Flat …Shop on Amazon
 VP Home Enchanted Mushroom …Shop on Amazon
 Prsildan Garden Gnome Statu…Shop on Amazon
Welcome to our spring hop! Welcome if you’re coming from Mary Anne, and after my project please head to JJ from Thriving with Less and her amazing Energizing Herbal Bath Salts.
Energizing Herbal Bath Salts – Thriving with Less
Easy DIY Faux Topiary as Centerpiece – Design Garnish
Meet The Farmhouse: A Spring Tour – One Step Woman
Spring Table Scape – House of Mar

More Garden Decor Ideas
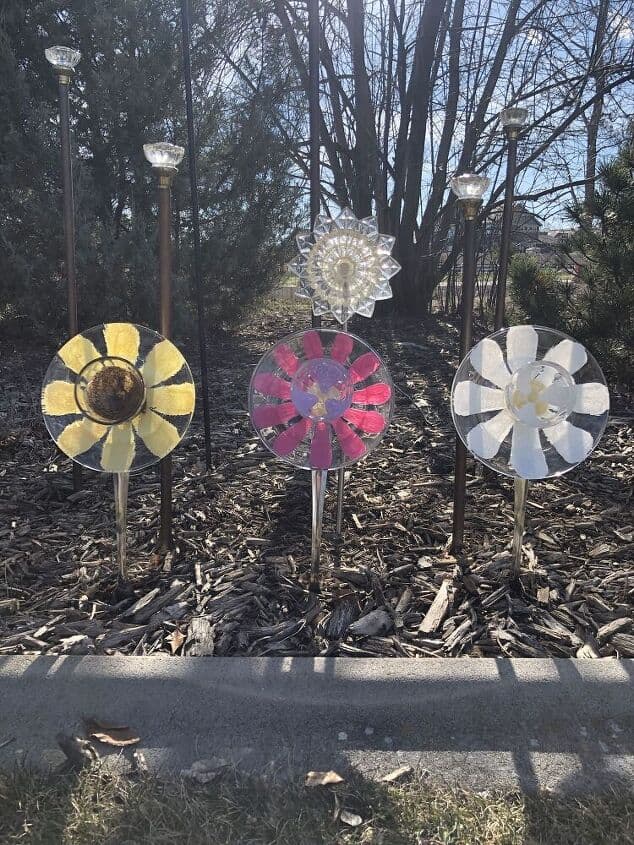
Check out some of my other creations!


Your garden mushrooms are just the cutest Chas. Congratulations on being invited to be a presenter.
Thank you so much Kim 🙂
These are so stinking cute! I am building my grandson a little playground area. I may use all plastic, but it will be adorable with these in it!
I poked around your other crafts. You are so talented friend!
You are just so sweet, thank you Deanna
These are just adorable! What a creative idea for the garden! I just love the glass idea! Adding a solar light so clever! Now we can have a little mushroom lamp in the garden too!!!
Thank you so much Mary Anne 🙂
These garden mushrooms are absolutely adorable! I can’t wait to make a few for my garden. Thanks for sharing these – they’re perfect for my garden!
Thank you so much JJ, and thanks for hopping with me.