
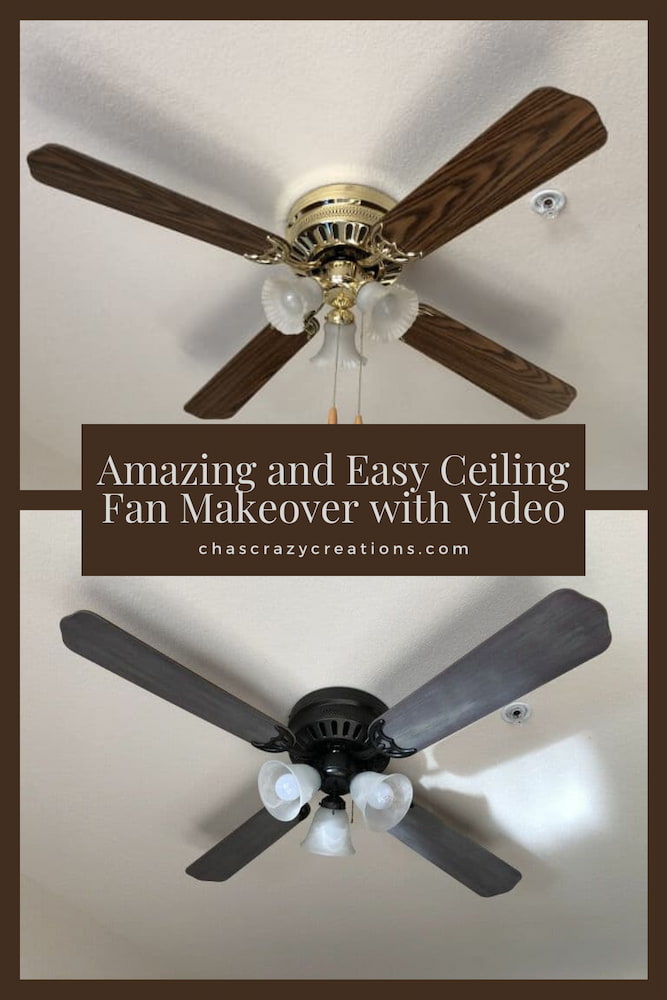
Amazing and Easy Ceiling Fan Makeover with Video

Are you looking for a ceiling fan makeover? I was looking for an easy diy project and decided to upgrade my old ugly ceiling fan. I didn’t want to buy a new fan or new light fixture, but I knew that with a little imagination and elbow grease I could turn my ugly fan into a new stylish ceiling fan with just a few easy steps.
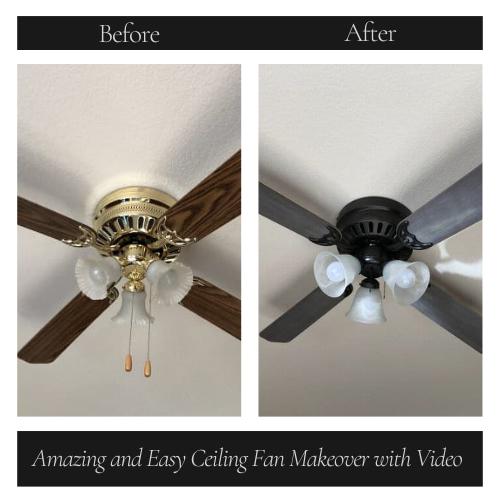
I finally did a ceiling fan update in our place! It just took a simple change with a little time a little love and some paint and wow what a difference! This is one of those simple makeovers that just take a couple of hours but can have a huge impact. The whole process with was fairly easy.
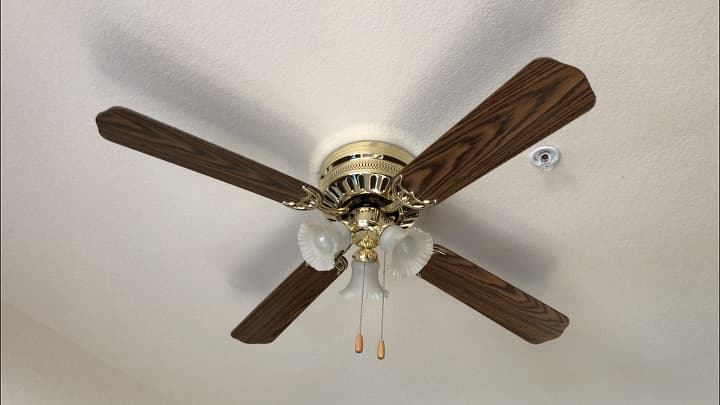
Here is the original old ceiling fan.
Ceiling Fan Makeover instructions
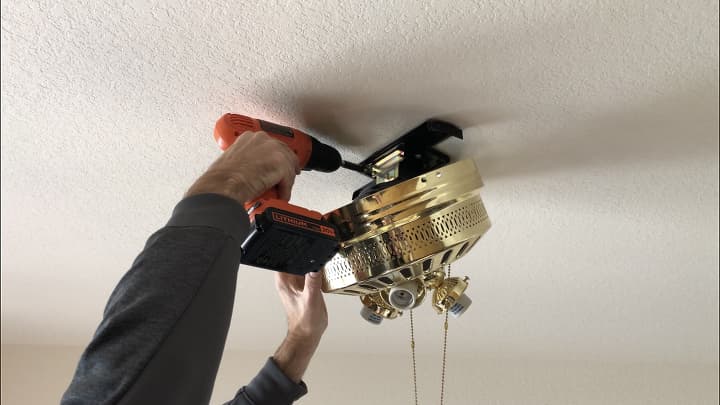
Take the fan down and clean it
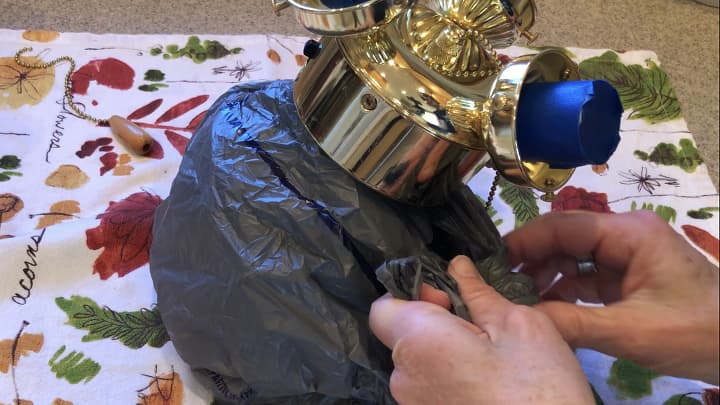
The first thing we did was take down the whole fan unit.
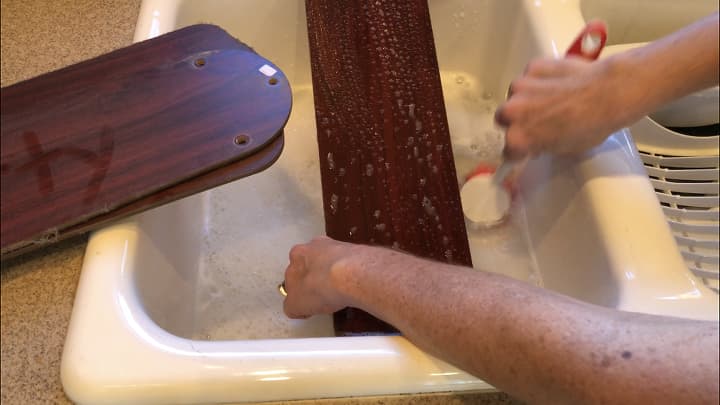
I washed and cleaned all of the fan parts.
Paint the fan parts
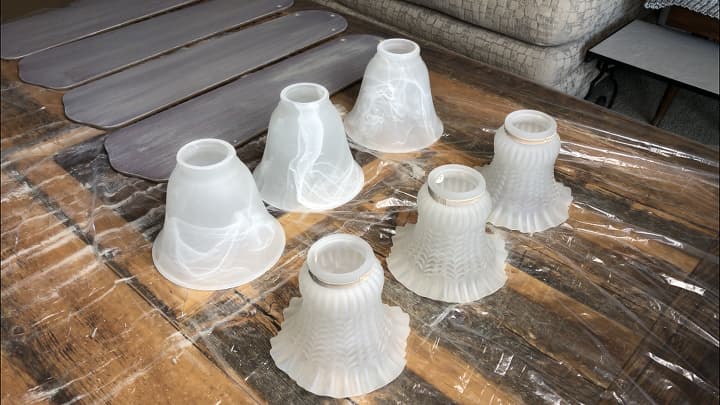
I covered the motor with a plastic bag and used painter’s tape to cover the bulb socket so I wouldn’t get paint in them. (The motor cover was also brass)
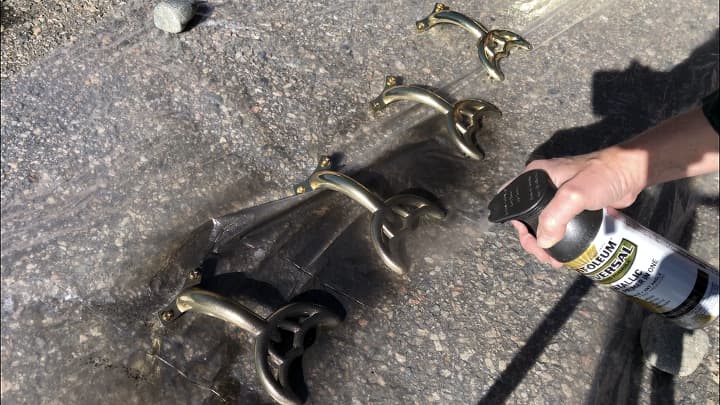
I spray-painted the brass parts with Rustoleum Oil Rubbed Bronze spray paint. It was a primer and paint all in one. I would recommend painting on drop cloths or a piece of cardboard. I let that dry completely.

I painted the ceiling fan blades with 1 coat of Folk Art Home Decor Chalk Paint in the color Castle. I did a light coat so the old color would show through. I was going for a weather barn wood look.
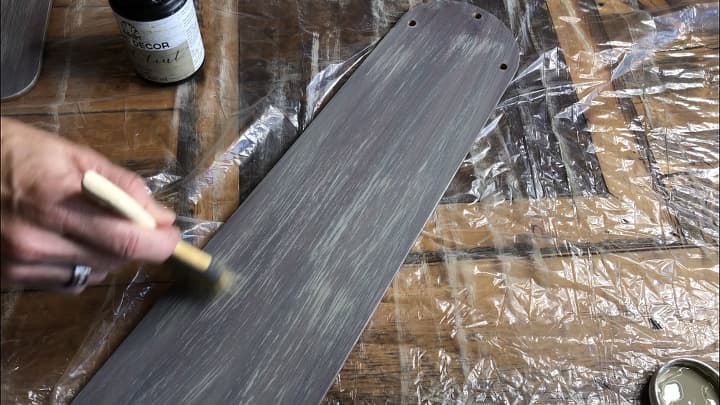
Once the paint was dry, I dry brushed Folk Art Home Decor Wood Tint in the color Grey. I wanted the wood grain to show through.
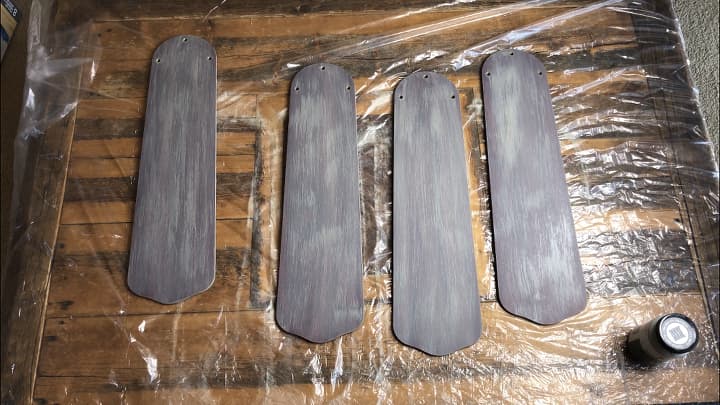
I let the fan blade arms dry completely.
Update the rest of the fan if desired
I bought new glass globes as I wanted to update the old ones. I got these at Walmart but you can also find them at the Home Depot or your local hardware store.
Assemble the fan
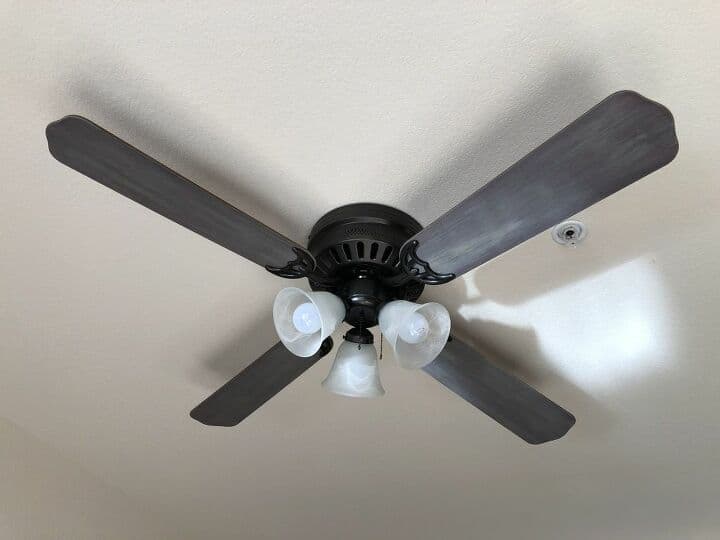
After everything was dry, the last step of course was to re-assemble the fan and hang it back up. Here is the end result and I think it looks like a completely new ceiling fan. I absolutely love it!
I have several other furniture flips and makeovers that you might be interested in seeing.
Find out “What Exactly Does It Mean To Repurpose Or Upcycle“, save money, and create the most amazing things.
Ceiling Fan Makeover Video
You can see my makeover with Hometalk.
Shop any of these stores and I receive a small commission at no cost to you.
 Hunter Indoor Ceiling Fan, ...Shop on Amazon
, PROMOFAHDC") FolkArt Home Décor Chalk F...Shop on Amazon
FolkArt Home Décor Chalk F...Shop on Amazon Rust-Oleum 327906 American ...Shop on Amazon

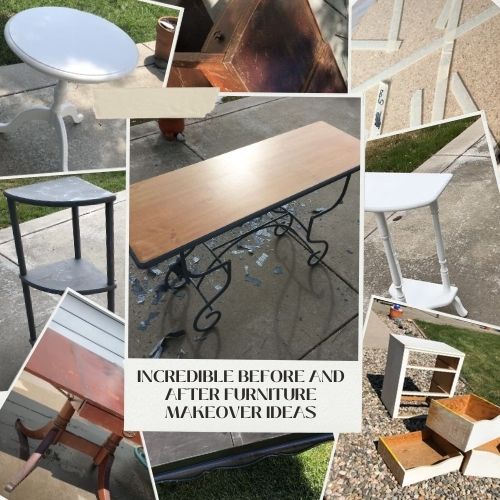
Check out some of my other furniture makeovers!


Love this! how much would you say you spent on all the supplies?
How did you paint the motor housing? Thanks.
I removed the cover and painted it. To protect the motor and paint the blade attachments, I placed a plastic bag over it and sealed it with painter’s tape.
I love these updates. That ceiling fan is just like one that I used to have. I can’t believe the difference – so nice!
You are so sweet Amy, thank you so very much