
Easy Bottle Opener For Indoors or Outdoors
Who needs and wants a bottle opener that is easy to make? I do, and it’s also just in time for Father’s day or a gift for that special man in your life anytime.
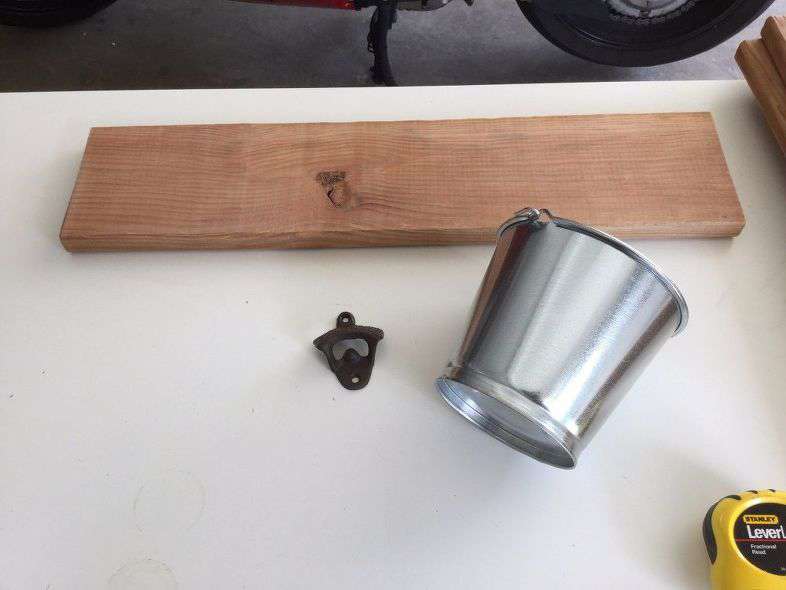
You’ll need:
1 x 6 ” red wood board
bottle opener
galvanized bucket
ruler
pencil
10 x 1 oval Phillips sheet metal screws x 2
10 x 3/4″ hexagonal sheet metal screw
nut driver
drill
saw
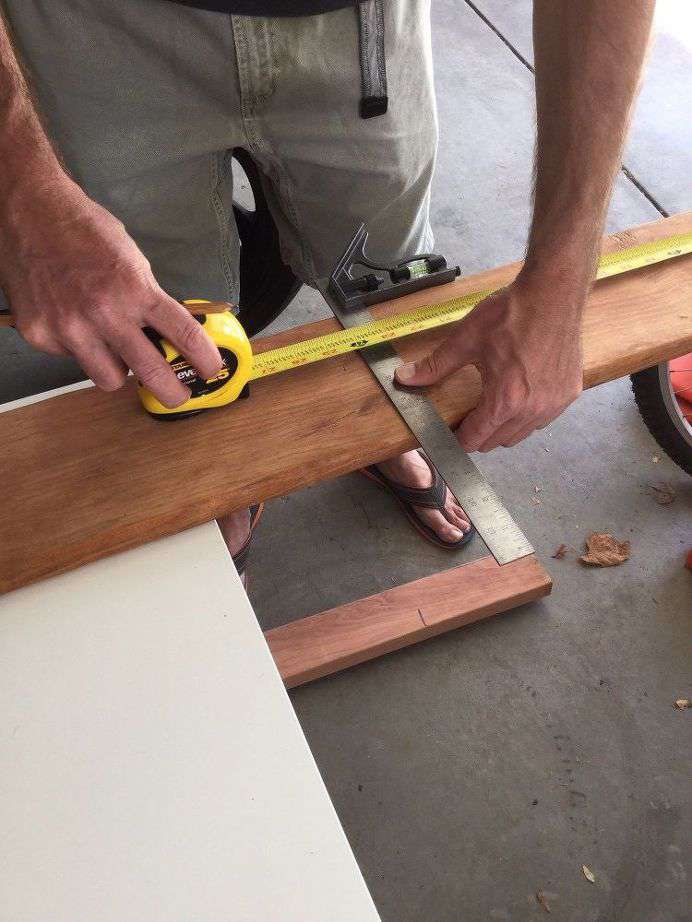
Cut your red wood so that it is 2 feet in length.
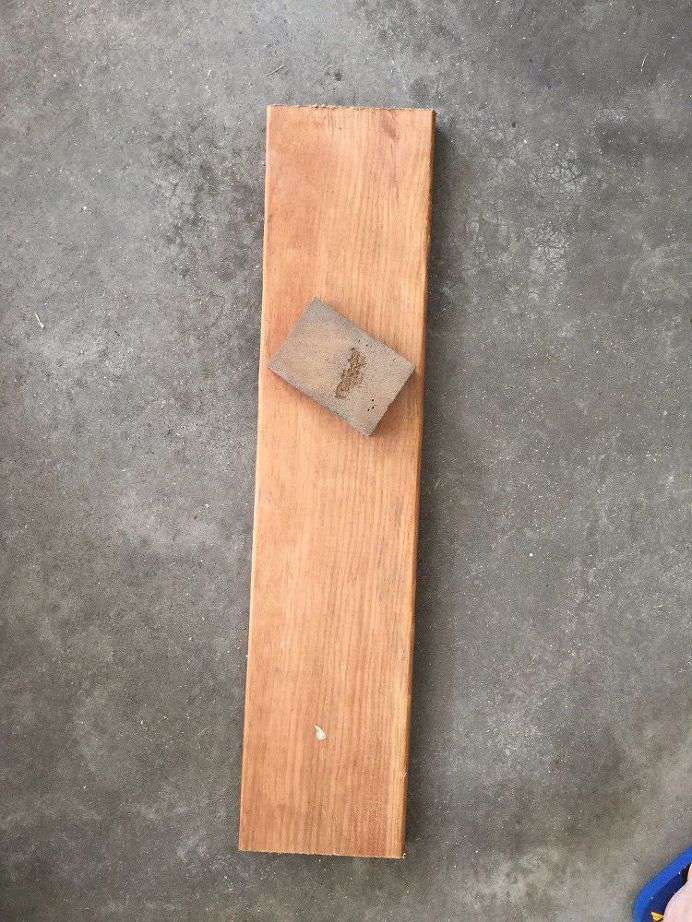
Sand your red wood.
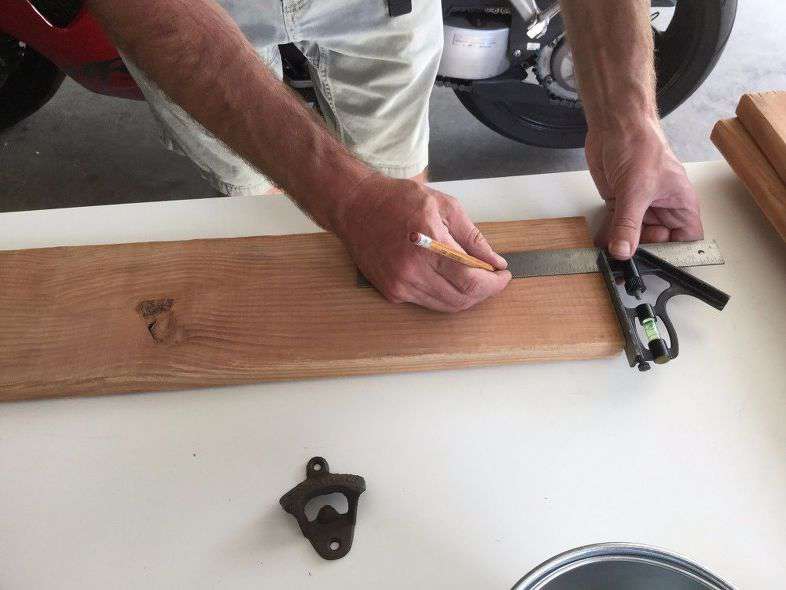
To find the spot where your bottle opener will go, measure 2 inches from the top and …
2 and 3/4″ from the sides and place a dot with your pencil.
Use a drill and drill a pre-hole where your screw will go. This will make it easier to drill in your hole. We used a 3/32nd drill bit.
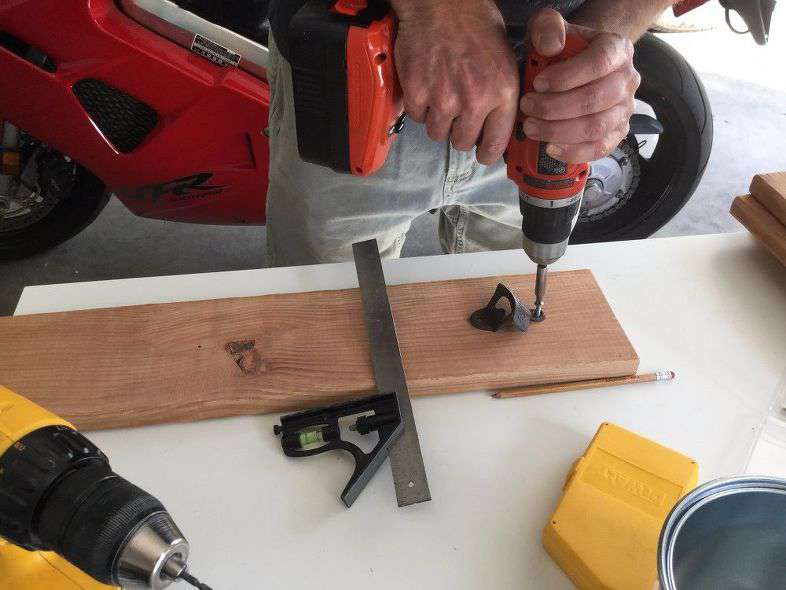
After having your top hole ready – place the top bottle opener hole over the pre-drilled hole and drill into place using your 10 x 1 oval Phillips sheet metal screw.
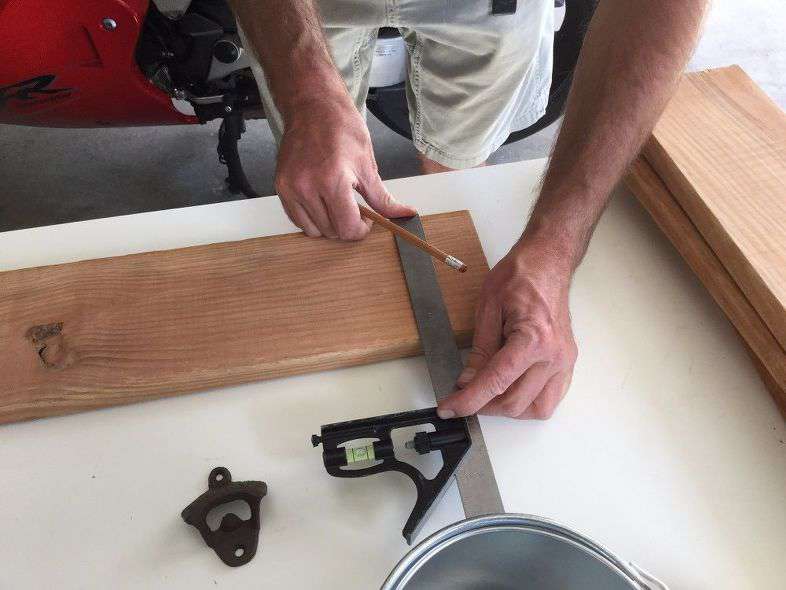
Center up the bottom hole, 2 and 3/4″ from the sides.
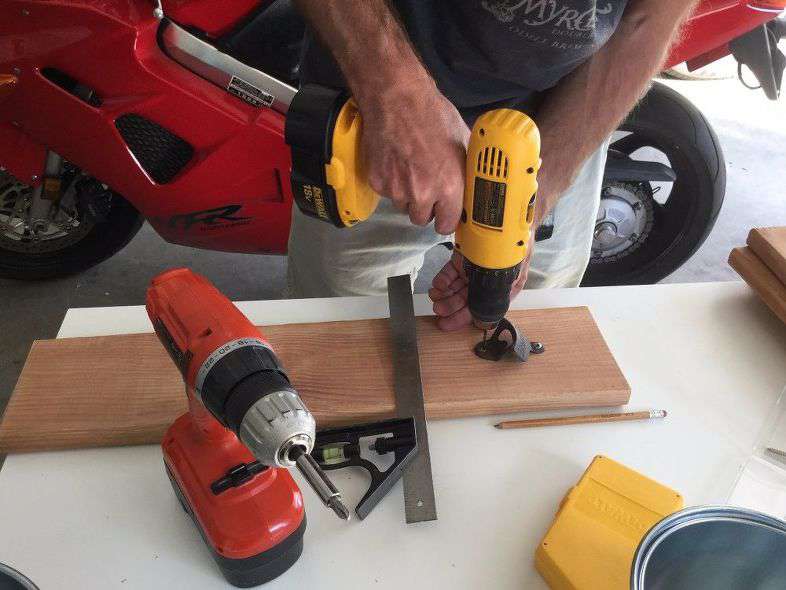
Use a drill and drill a pre-hole where your screw will go. This will make it easier to drill in your hole. We used a 3/32nd drill bit.
After having your bottom hole ready – place the bottom bottle opener hole over the pre-drilled hole and drill into place using your 10 x 1 oval Phillips sheet metal screw.

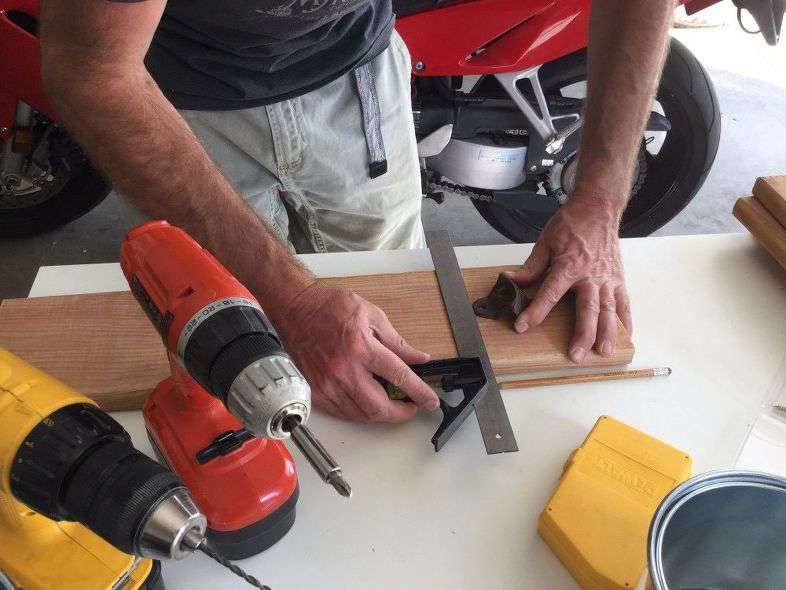
Measure 8 inches from the bottom and 2 and 3/4″ from the sides and make a pencil mark. Pre-drill a hole where your next screw will go.

Using a nut driver, screw in your 10 x 3/4″ hexagonal sheet metal screw.
(Our design started with a hook but we found the hook and handle got in the way and the bottle caps wouldn’t land in the bucket.)

Place your bucket on the hexagon screw and you’re done.
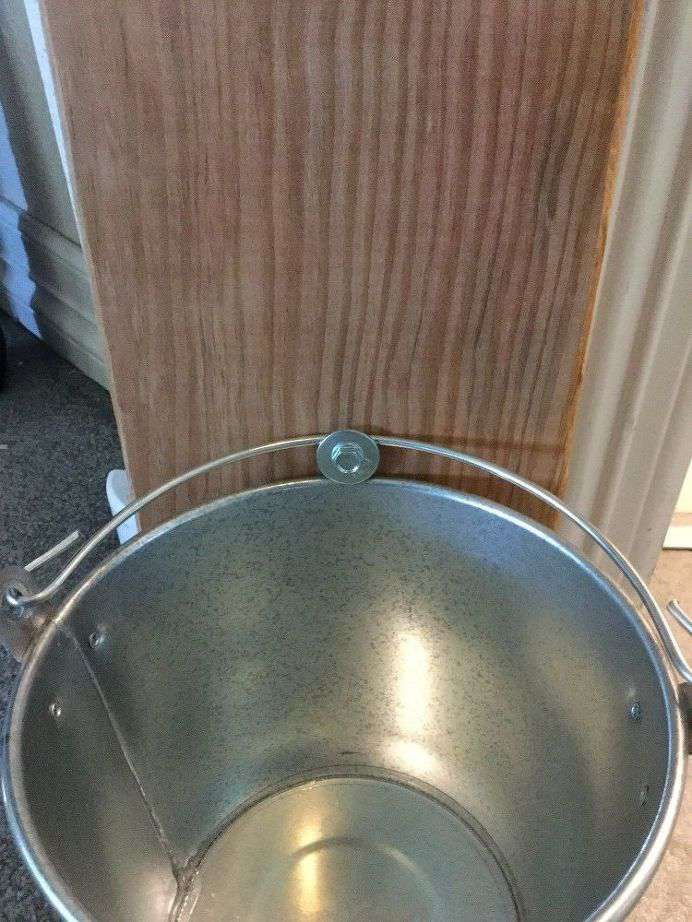
We have updated our design by adding a washer to the nut screw. This holds the bucket a little more secure but still allows for a removable bucket.
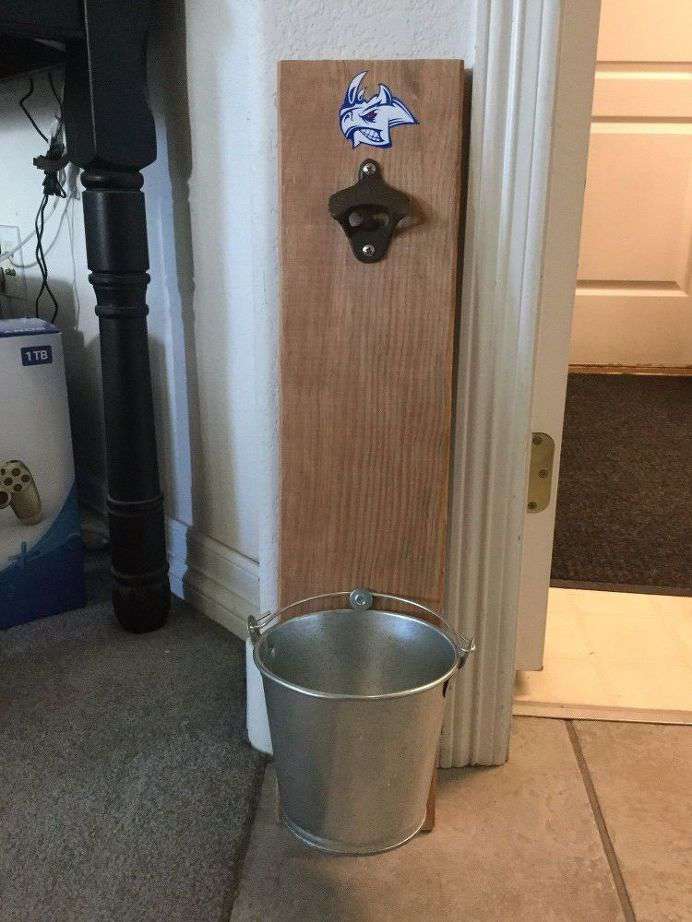
We made 5 of these as end of the year gifts for our son’s baseball coaches. We are planning on having the boys all sign them.
As seen on Hometalk Live – want to watch the video? Click on the photo below –
Subscribe to my blog
and get my crazy creations delivered straight to you inbox.
Never miss a project, update, or latest news!
&
I’d love for you to visit my YouTube Channel and subscribe
Chas’ Crazy Creations YouTube

Check out some of my similar posts!


This is such a lovely gift idea. I feel like every garden should have one ready for the next barbecue.
Thank you so much Julie 🙂
This would be perfect for my BBQ and the Heineken Beer drinkers, lol. Thanks for sharing on Sunday’s Best. I’ll be Pinning this post.
Thank you so much Rhonda and thanks for the Pin 🙂
Several people around here where we live have made these openers. Found you on Blogger’s Pit Stop Link party.
I was initially intimidated to give one a go, but they are so simple we just wanted to share.
Did I miss a step? Des this sit on the grounds? Does it hang on a wall? If so, how is it hung? Cool idea, would be great on the patio or porch.
Hi Linda, great question. Since mine were gifts for the coaches I didn’t hang it up. So to hang it up – I recommend buying 2 large screws and screw through the board into the wall/deck/post. Place one screw near the top, and one near the bottom for stability.
This is a really clever idea for a large party. I think about how no one would have to keep track of a tiny bottle opener. LOL 🙂
That made me laugh Linda! So very true, a little one always disappears at a party.