
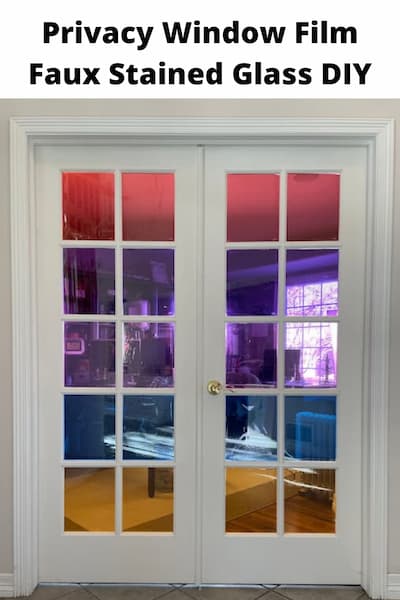
Privacy Window Film Faux Stained Glass DIY
Are you looking for a privacy window film? We needed this for our French doors at home and I created an easy and temporary faux stained glass look on a budget!
We have some French doors in our home that lead to our office. My husband started working from home full time and we wanted to create a little more privacy as he was participating in his video calls.
Materials Needed:
- Ruler
- Scrap Paper
- Cellophane Wraps
- Clear School Glue
- Scissors
- Dry Erase Marker
Here are the instructions for your privacy window film
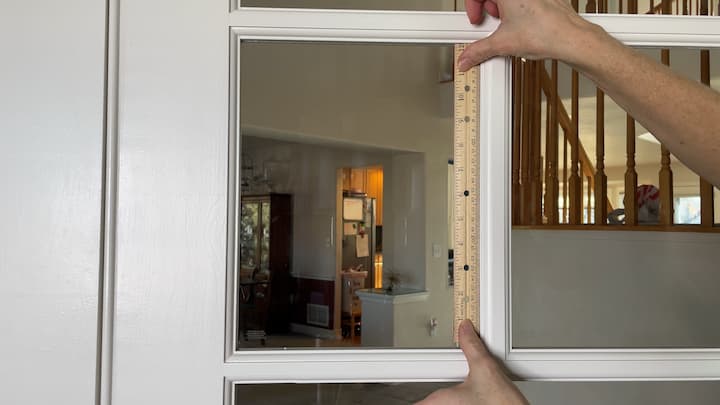
I started by measuring the windows.
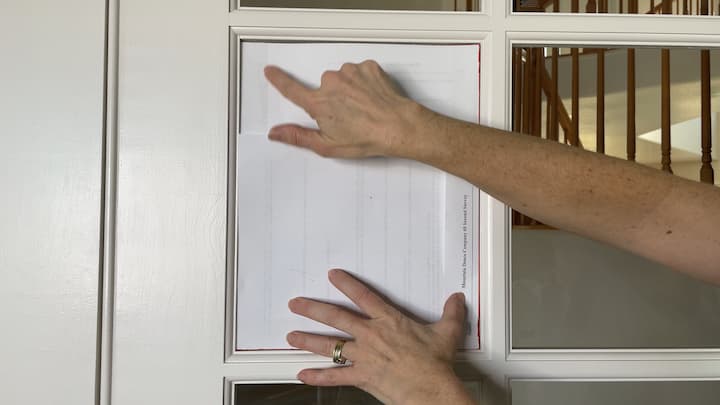
Next, I made a template with some scratch paper. This would help me cut the cellophane to the right size to fit within the windows.
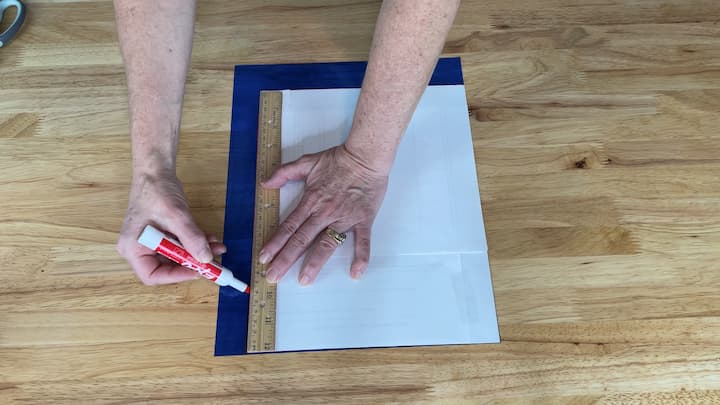
I placed the template onto the cellophane square. I used a ruler and I drew a line to cut on with a dry erase marker. Using a dry erase marker allows you to remove any mark that remains.
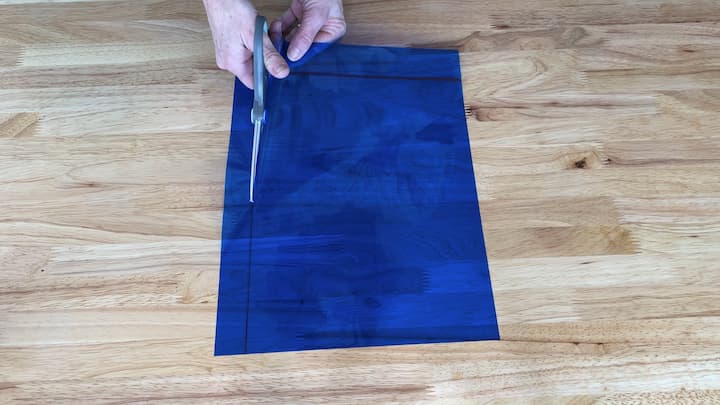
I cut the cellophane on the lines. I continued doing this to all the squares I would need to cover all of the windows on the French doors.
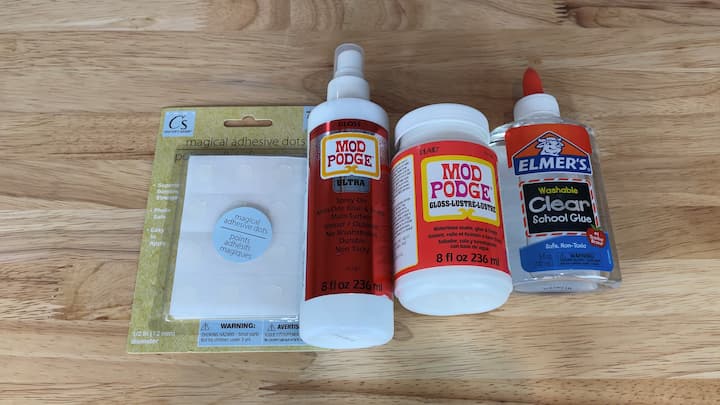
When it comes to putting the cellophane on the window you have options. I wanted a temporary option so that I can remove the faux stained glass later.

I opted to use clear school glue. It dries clear, and it’s easily removed with soapy water. You can use as much or as little as you want. I placed a small dot of glue in each corner of the window.
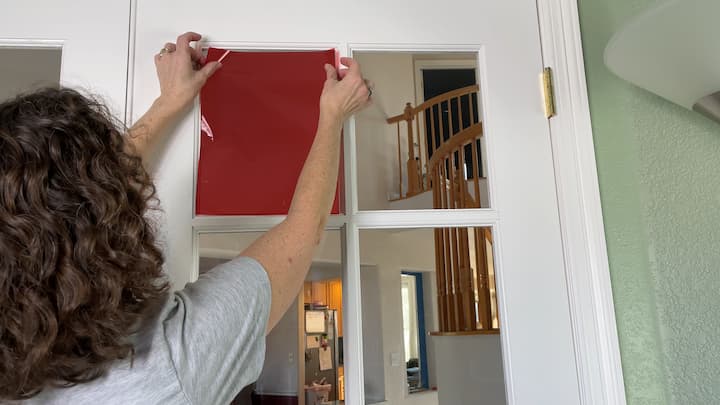
I placed the cellophane square into the window and smoothed it out.
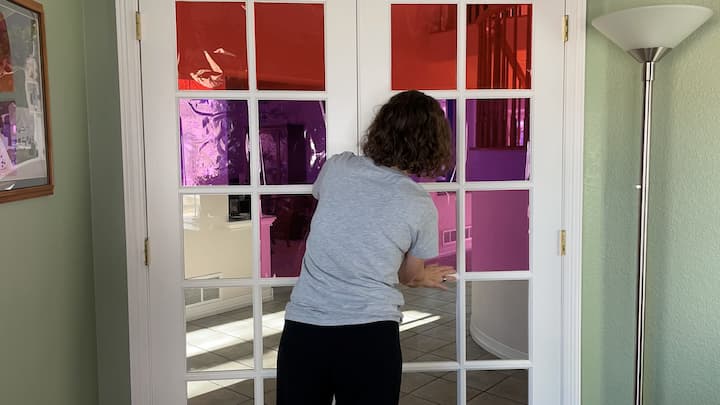
I continued gluing the windows and placing on the cellophane squares until all of the windows were covered and I let the glue dry completely.
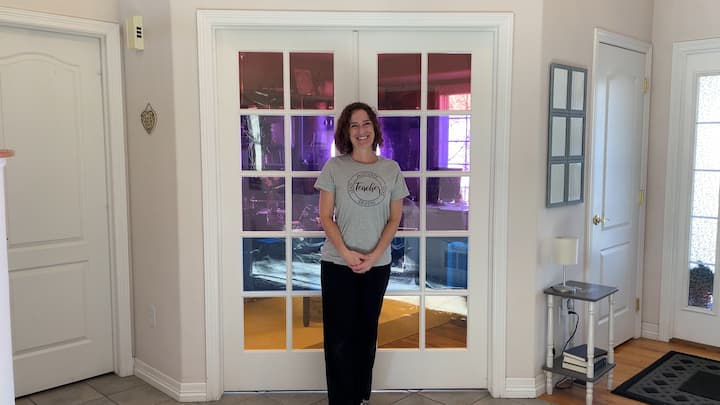
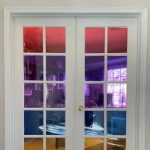
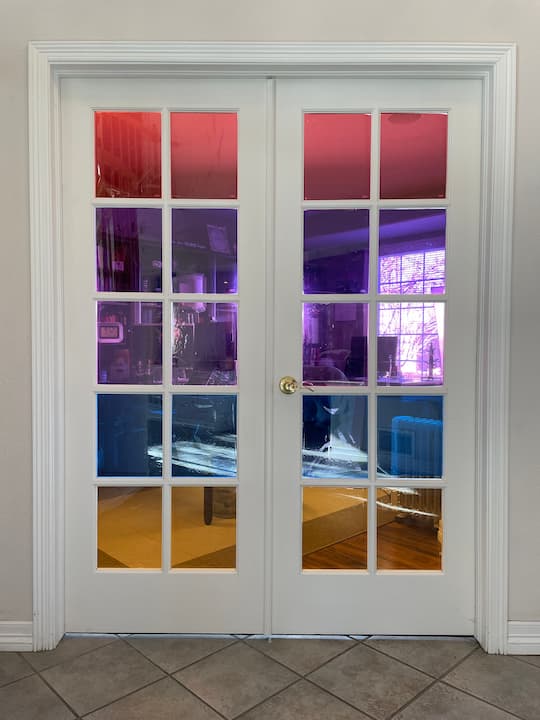
Here is a quick view from the front. This project was easy and affordable. You could buy thicker cellophane which would help with any bubbles you might have.
Learn more about “Why to Deep Clean and Organize Your Home” to save money, function better, and keep your sanity.
I used cellophane wrap that I purchased on Amazon.
You can buy peel and stick film that has a pattern on it, you can use translucent contact paper, or you can use cellophane wrap.
Measure the surface, make a template, cut cellophane wrap, glue onto your windows.
Use thicker film to avoid bubbles before starting. If you have bubbles during the process use a credit card or other surface and push the bubbles to the edges by working from the middle out.
Shop any of these stores and I receive a small commission at no cost to you.
") Outus 104 Pcs Colored Cello…Shop on Amazon
Outus 104 Pcs Colored Cello…Shop on Amazon
Other uses for decorative window film:
- bathroom windows and bedroom windows for privacy
- conference rooms and office space
- glass doors or glass windows to block unwanted views
- shower doors
- solar film or reflective window film to block the sun and heat
- home office or even commercial properties
Other window film options:
- decorative films
- translucent films
- adhesive film
- one-way window film
- mirror window film
- static cling window film
Easy solution:
- daytime privacy while still giving you natural light.
- affordable way to cover large windows in a stylish way to match your interior design.
- nighttime privacy.
This is a great option to help with your specific needs! You can use a mirror effect film to take your plain glass surface and turn it into a reflective piece! Business owners could create a sense of privacy without taking away light.
Have fun with this project! The only limitation is your own imagination!

Privacy Window Film Faux Stained Glass DIY
Equipment
- Scissors
Materials
- Ruler
- Scrap Paper
- Cellophane Wraps
- Clear School Glue
- Dry Erase Marker
Instructions
- I started by measuring the windows.
- Next, I made a template with some scratch paper. This would help me cut the cellophane to the right size to fit within the windows.
- I placed the template onto the cellophane square. I used a ruler and I drew a line to cut on with a dry erase marker. Using a dry erase marker allows you to remove any mark that remains.
- I cut the cellophane on the lines. I continued doing this to all the squares I would need to cover all of the windows on the French doors.
- When it comes to putting the cellophane on the window you have options. I wanted a temporary option so that I can remove the faux stained glass later.
- I opted to use clear school glue. It dries clear, and it’s easily removed with soapy water. You can use as much or as little as you want. I placed a small dot of glue in each corner of the window.
- I placed the cellophane square into the window and smoothed it out.
- I continued gluing the windows and placing on the cellophane squares until all of the windows were covered and I let the glue dry completely.
Video
Learn more about “Why to Deep Clean and Organize Your Home” to save money, function better, and keep your sanity.
Check out some of my other window-related posts!


I really meant I LOVE this!
Love this Chas! I really don’t know where you come up with these creative ideas. All that color is so fun.
You are so sweet Kim, thank you so much.