Easy DIY Summer Wreath Tutorial with Video

Learn how to create a beautiful DIY summer wreath bursting with sunshine and blooms in this easy-to-follow tutorial. Perfect for adding a touch of seasonal cheer to your home décor!

DIY Summer Wreath Video
DIY Summer Wreath Ideas
Summer crafts are a perfect way to welcome the warm weather. Here are six summer wreath ideas for you to make as gifts or for your front door. I’ll show you examples of summer wreaths for the entire summer season, ranging from floral wreaths to patriotic wreaths.
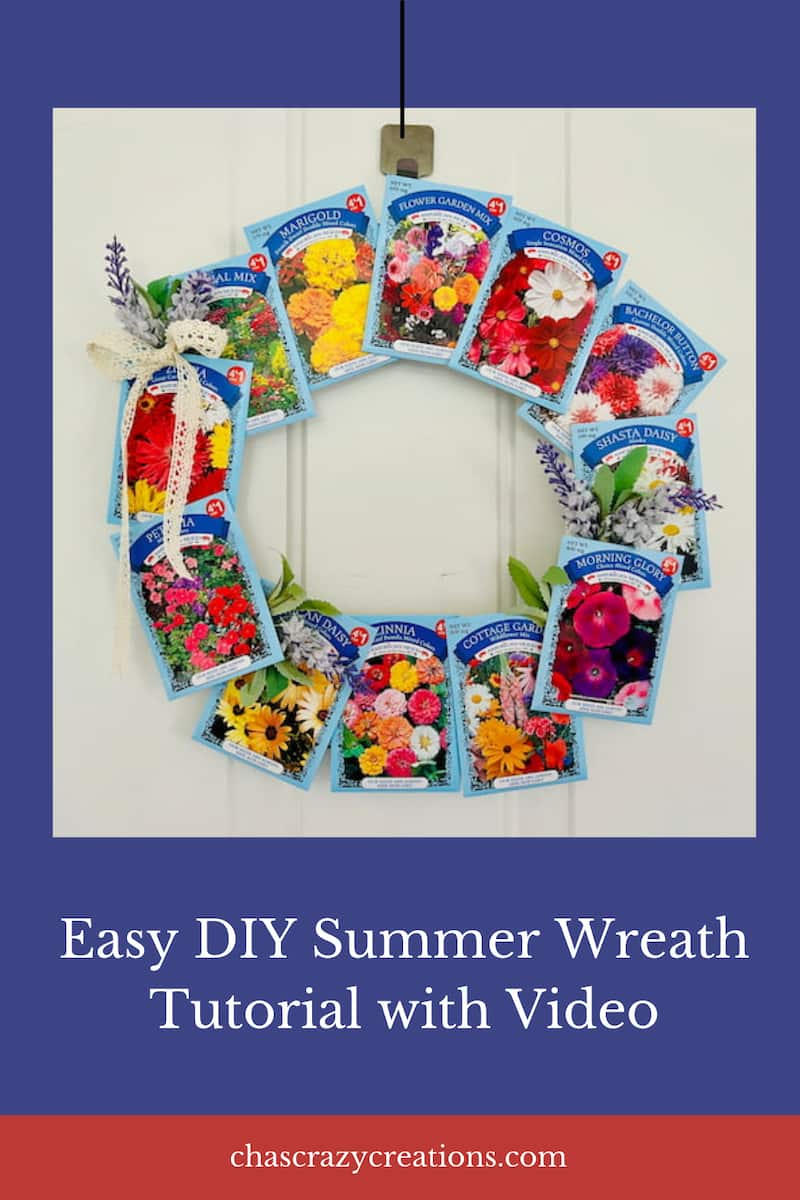
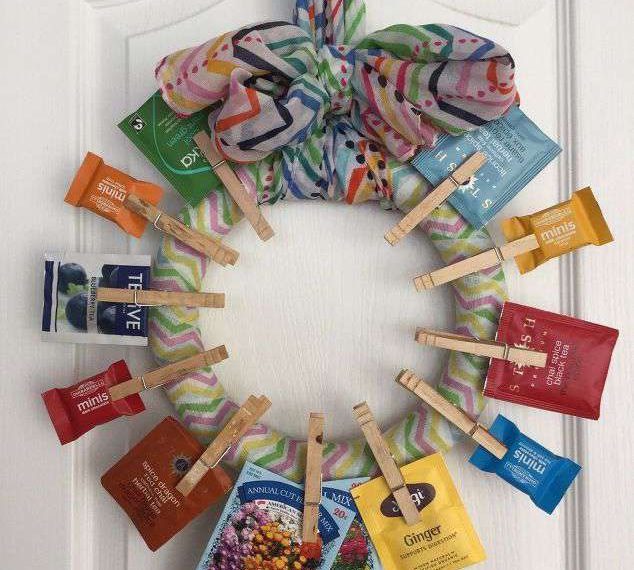
Flower Seed Packet Summer Wreath
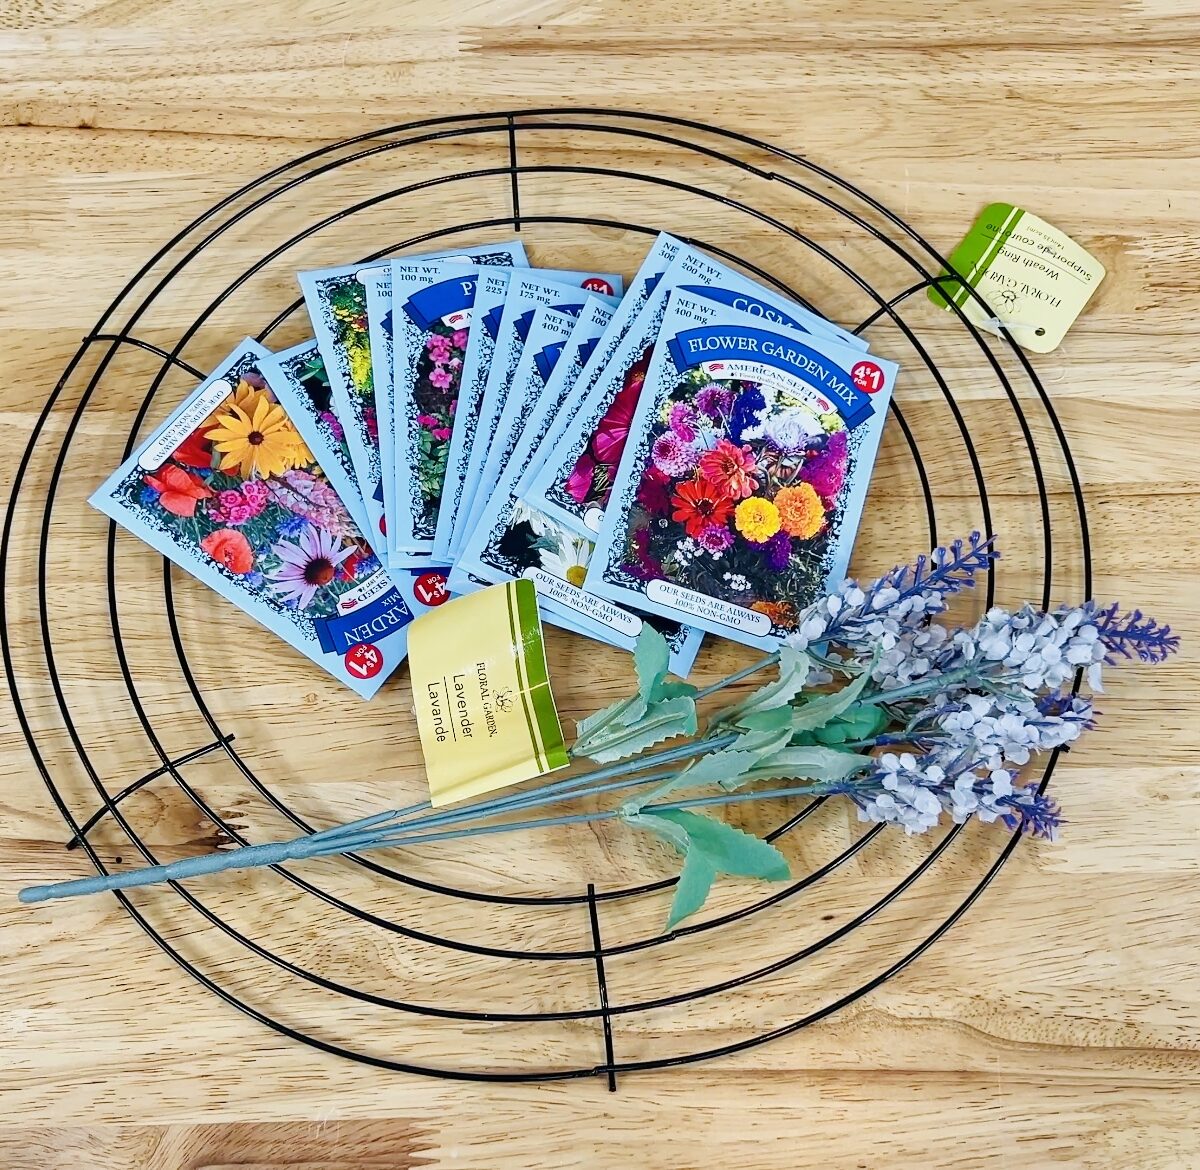
Head over to the dollar store and grab a few wreath and floral supplies. We’re going to turn this boring wreath form into something fun for summer and a great gift idea.
Wreath Materials List:
- seed packets
- faux flowers
- wreath form
- hot glue gun
- ribbon
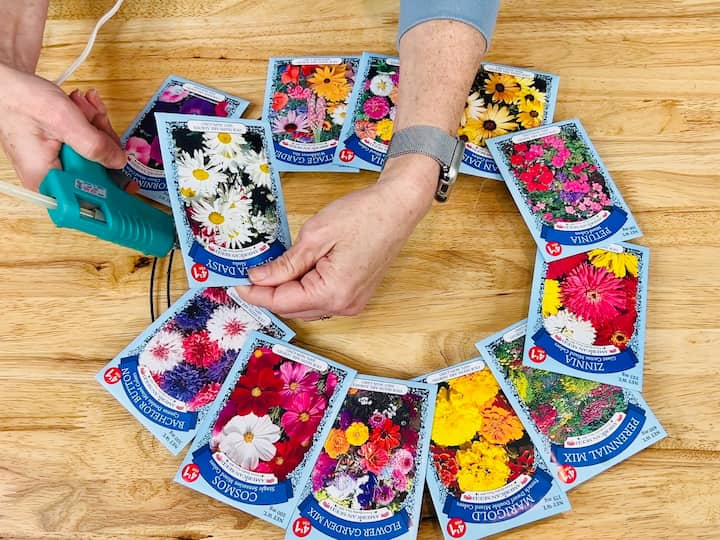
Step 1: Arrange Seed Packets
I grabbed 12 seed packets from the dollar store and then I placed them onto the wreath form the way I’d like them to be.

I just arranged them to get an idea of the best places to glue them. I looked at the colors of the flowers on the seed packets to space them around the wreath form. This tip helps prevent too much of one color together.
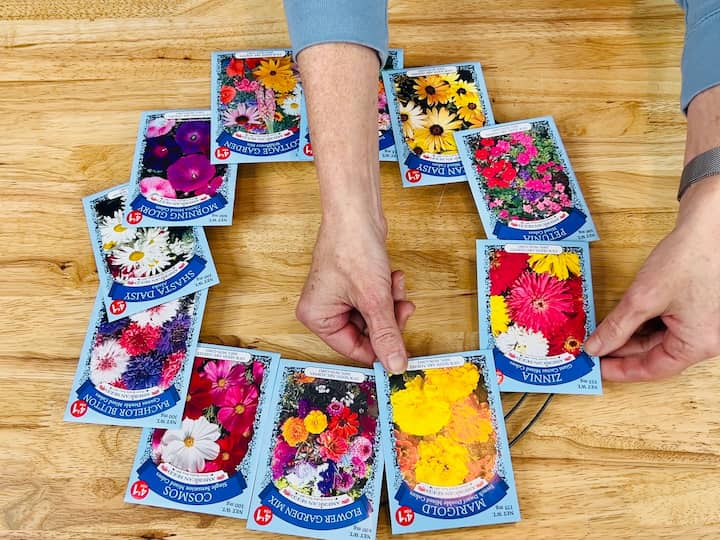
Step 2: Glue Seed Packets
For this next step, I’m using a cool glue gun. I started by placing little dabs of glue onto the wreath form. Then, I placed the seed packets on top of the glue.
Step 3: Reinforce Seed Packets
Now I waited for that to cool, and I kept moving around the wreath form till I got all of the seed packets onto the wreath form, and then I started hot gluing the seed packets to each other to reinforce them.
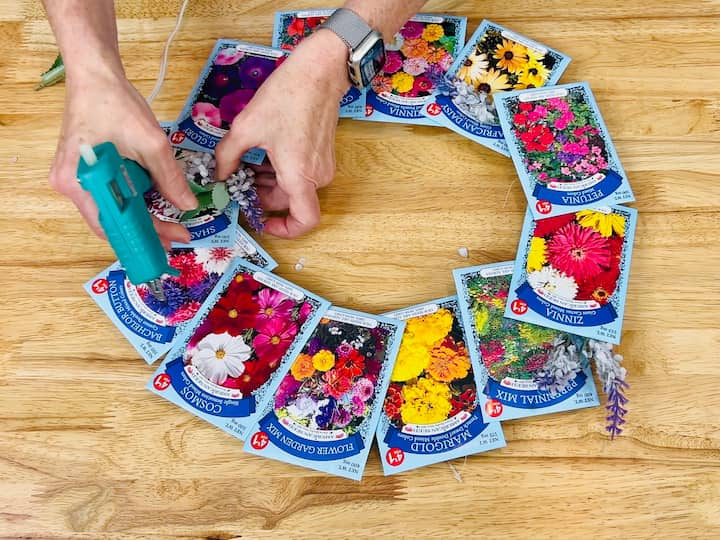
Step 4: Glue Flowers
I grabbed some faux flowers, as well, from the dollar store. I removed the little flowers and the leaves from the stems.
I took the flowers and hot glued them between some of the seed packets. I just placed them wherever I felt like doing it. I added the leaves, too, until I used all of them.
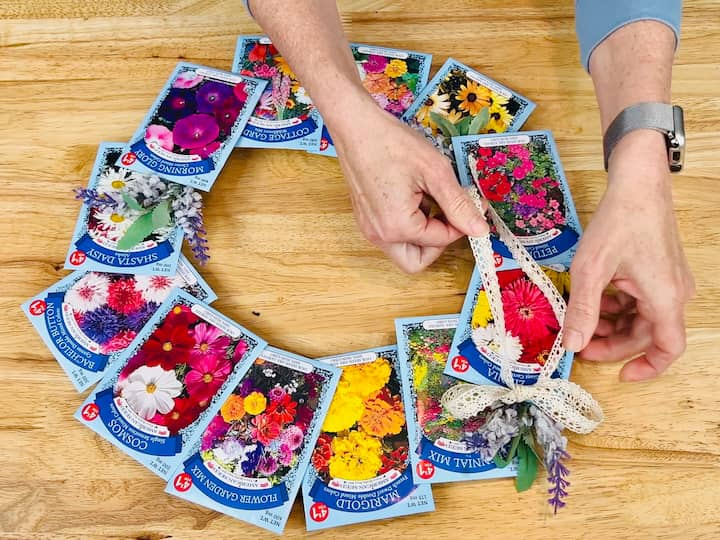
Step 5: Attach Ribbon
Then I grabbed the ribbon. I cut a piece off and I tied a little bow. Then I hot glued that bow near some flowers on the wreath.
Step 6: Attach Tab to Hang Wreath
I kept the tab that it hangs with in the dollar store to hang it on. But, you could easily use the wreath form, as well.
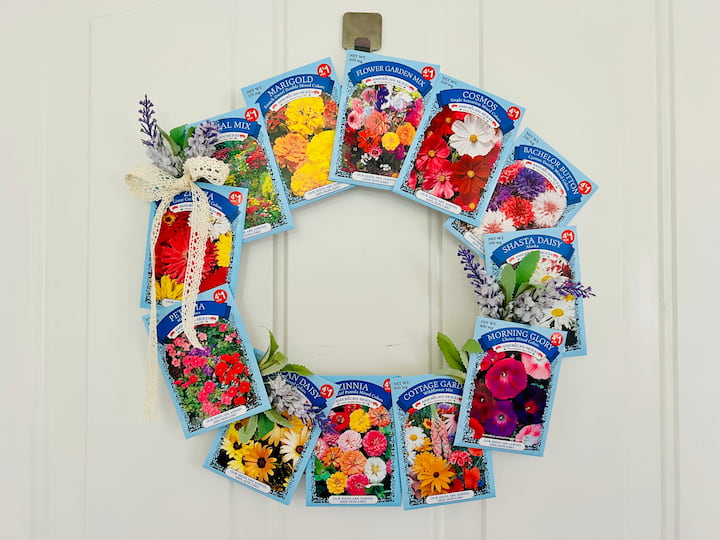
One of my favorite things about this project is not only is it a DIY summer wreath, but it also could be a great Mother’s Day gift idea as well or a gift for any occasion.
You can also make this seed packet wreath with different types of garden seeds. Try making it with herb or vegetable seed packets.
Would you give it as a gift or would you keep it for yourself? Let me know in the comments below.

DIY Summer Lemon Wreath
For this wreath, I started with a pizza pan. I took it outside and I spray painted the whole thing white and let it dry completely.
For this wreath, I was inspired by lemons. I drew the lemon wedges inside. Then I used a Sharpie to make the peel on the outside.
I used yellow paint to paint the wedges. I used another shade of yellow to create some texture for the lemon inside.
Then I used a galvanized metal sign that said “welcome.” I hot glued it to the top, as well as, a burlap bow.
On the back, I hot glued on a little twine so I’d be able to hang it up. My lemon wreath was done. I can hang it on my front porch door and leave it up for all Spring and Summer long for a warm welcome.
See the full tutorial here: Easy Dollar Tree Lemon Pizza Pan Wreath On A Budget.
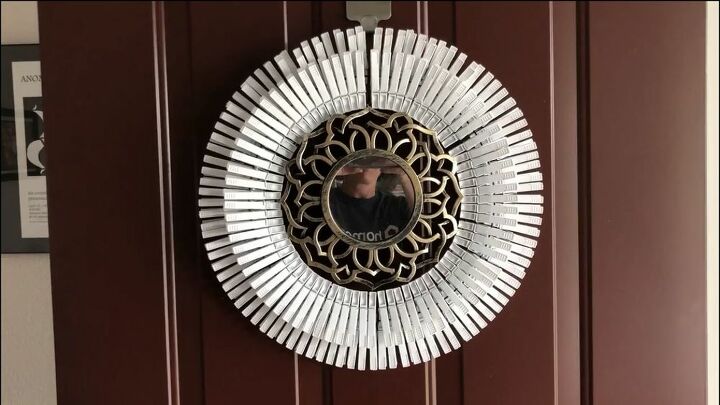
Summer Daisy Clothespin Wreath
One of my favorite flowers is a daisy. I’m going to show you how to a daisy wreath with a wire wreath form. A foam wreath form will not work for this craft. We’re going to also use some white plastic clothespins. Then we’re going to use a dollar store mirror.
Daisy Wreath Materials List:
- wire wreath form
- dollar store mirror
- white plastic clothespins
- fishing line
Step 1: Attach first petal layer
I started with the white clothespins. There’s a little tiny hole there, so I used that to clip on the outside edge. Sometimes it can reach up a little higher. I went and clipped these around the entire circle of the outside edge of the wreath form.
Step 2: Attach second petal layer
Now it’s time to work on the second layer, so this time I’m going to clip on the top two, and I’m going to try to glue both of those wires in so it lays nice and flat on that third wire.
And then I’m going to take that and do that all the way around so that I’ve got a second layer of clothespins on the top.
Step 3: Attach tab to hang wreath
Just like the seed packet wreath, I’m going to use the little tag that came with the clothespins to hang it. You could alternatively use some fishing line.
Step 4: Attach mirror
Now I’m going to add the mirror to the center. I’m going to use some fishing line to secure it. I’m just going to tie it to the top, the bottom, and the sides. Anywhere I feel like that I need to just get it secure to stay in the center of my daisy clothespin wreath.
Here it is all finished and hanging on my front door to greet guests, and I love how it turned out.
See the full tutorial here: Easy Tutorial How To Make A Clothespin Wreath.
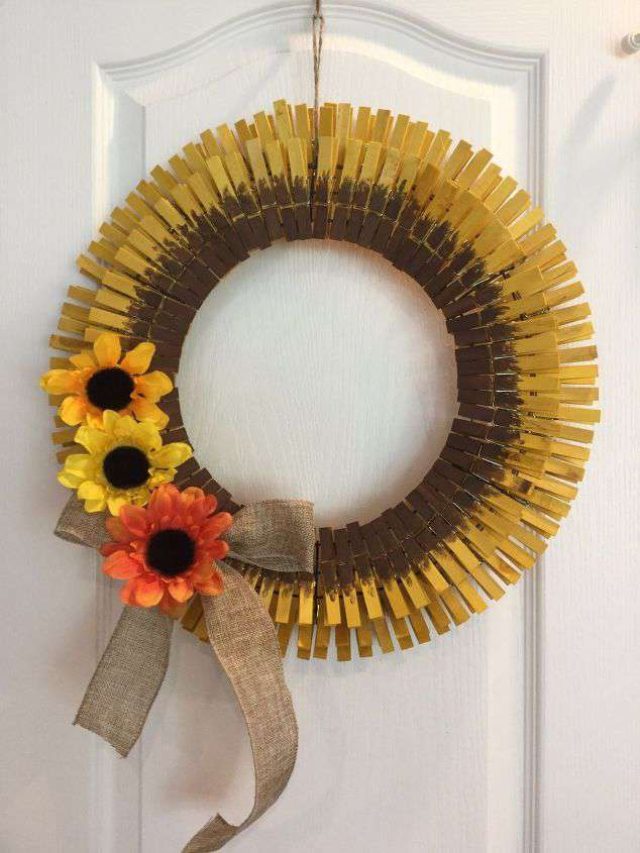
Sunflower Clothespin Summer Wreath
One of my other favorite clothespin wreaths that I made had Rit Dye involved.
Sunflower Wreath Materials List:
- wire wreath form
- faux flowers
- yellow Rit Dye (liquid)
- brown paint
- wood clothespins
- fishing line
- ribbon
Step 1: Dye clothespins
I started by placing the wooden clothespins in a bowl. Then I added water and Rit Dye, the liquid kind, to the bowl. I let these soak for quite a while overnight.
After they soaked, I let them dry out completely.
Step 2: Layer clothespins
Just like the daisy wreath, I placed a layer of clothespins around the bottom. Then I did another layer so that the wreath had two layers of clothespins.
Step 3: Paint center of flower
After that, I went ahead and took some brown paint and painted the center like a sunflower.
Step 4: Add faux flowers and ribbon
I added some faux flowers and some burlap ribbon. My sunflower wreath was complete. It is a beautiful wreath and I love how this one turned out.
See the full tutorial here: How To Make An Easy DIY Sunflower Clothespin Wreath.
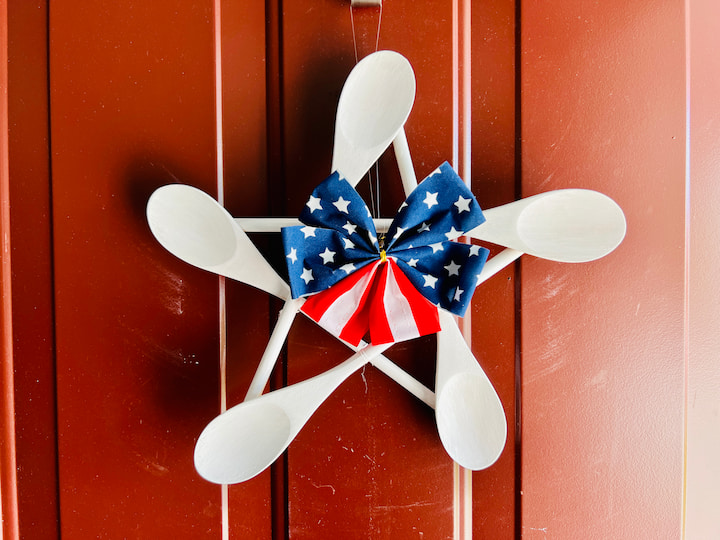
Patriotic Summer Wreath
I’m using five wooden spoons, and I purchased them very inexpensively from Amazon.
Spoon Wreath Materials List:
- wooden spoons
- ribbon
- fishing line
- hot glue gun
- Apple Barrel paint
Step 1: Glue spoons into star shape
I started by hot gluing the handle of one spoon to the back end of the spoon side of another spoon. I continued this step with a third spoon, again gluing the handle to the back of the spoon side of another spoon. I then added a fourth spoon and then finally a fifth spoon.
The great thing about the hot glue is it’s a little pliable, so you are able to make the star shape that I’m trying to create easily.
Step 2: Reinforce spoons
Now because of the layering, there are some gaps between all of the spoons. I went ahead and added some hot glue to just hold those a little more steadily into place.
Now the hot glue worked well on some of the sides. Some sides may have big gaps. Reinforce those a little bit more.
I didn’t want anything taking away from the star, so I used some fishing line. I cut little pieces of that and tied each of the intersections of the star together.
Step 3: Paint
Now you can leave the spoon as is. I’m going to go ahead and paint it white as my front door is pretty dark and I want it to pop.
use some Apple Barrel multi-surface paint in the color white. I painted one coat onto the entire spoon star. I let that dry. Then, I gave the entire thing a second coat.
I love Apple Barrel paint because it’s water-soluble. It’s easy to clean up, whether it’s on your skin or your brushes.
Step 4: Add ribbon
Now that the white paint is dry, we’re going to move back to the star. I grabbed these ribbons from Dollar Tree.
I’m going to be putting it in the center of the star. I want to shorten these ribbons. I could cut them, but instead, I’m going to take some hot glue and glue them to the back. Now we’re ready to hang it up.
I added a little fishing line to the top. You can hang it like that, or you could use a magnetic hook and hook it onto your door.
See the full tutorial here: Stunning Patriotic Wreath: An Easy and Unexpected DIY.

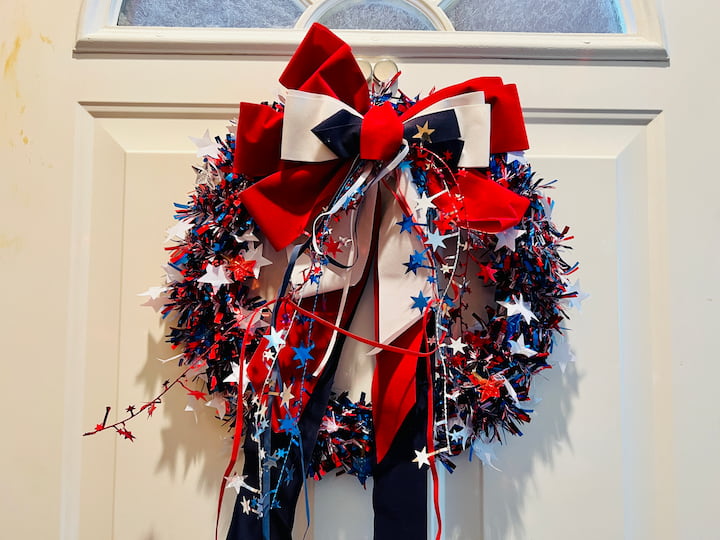
DIY Summer Patriotic Wreath
For this DIY summer wreath, I grabbed some tinsel and a wreath form from the dollar store.
Wreath Materials List:
- wire wreath form
- tinsel
- fishing line
- ribbons
- hot glue gun
I started by wrapping the tinsel around the wreath form. If you’d rather use a grapevine wreath or foam wreath form you’re welcome to do that as well.
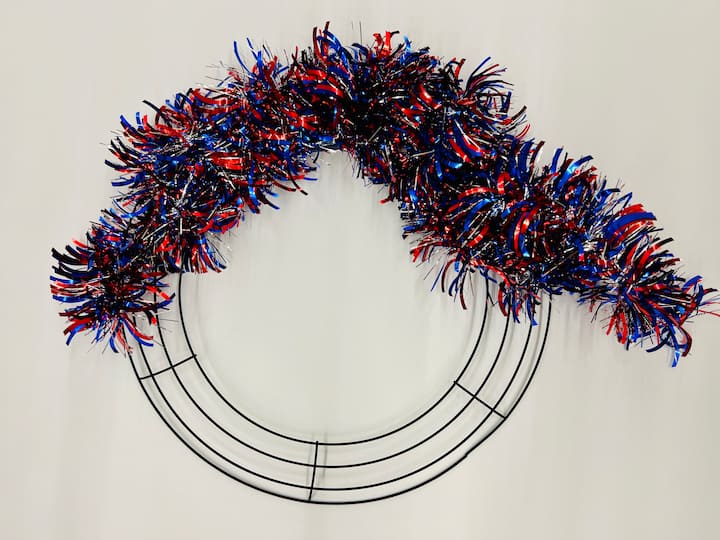
I continued around doing that. Once I was done, I added some lights to it as well as some extra ribbon. I hung it on my door, and I love how it turned out.
See the full tutorial here: Easy Patriotic Wreath

Beautiful Breast Cancer Awareness Wreath on a Budget
You might also like my breast cancer awareness wreath, I have several options, and you could amend this wreath by adding different flowers like peonies, hydrangeas, etc. You can find the full tutorial at Beautiful Breast Cancer Awareness Wreath on a Budget
DIY Summer Wreaths Video
Further Reading

And I hope these summer wreaths serve as inspiration for you to create some summer decor of your own.