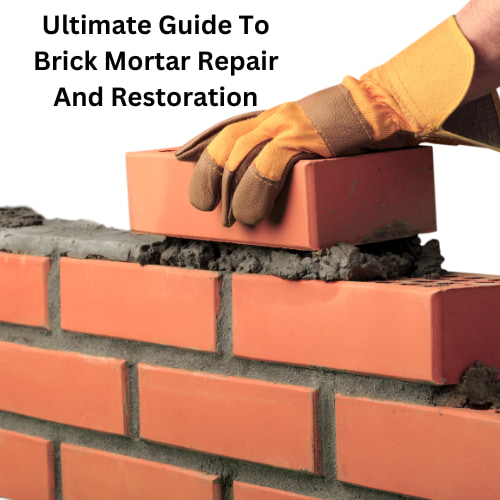
Ultimate Guide To Brick Mortar Repair And Restoration

Are you looking for brick mortar repair? Brick buildings have always been symbols of strength and beauty in towns and cities. From historic landmarks to modern skyscrapers, there’s just something classic about the look and feel of brick construction. But as lovely as these buildings are, they aren’t immune to the effects of time and weather. Over the years, brick structures develop cracks, eroded mortar, and other signs of aging that undermine their structural integrity and curb appeal.
In this guide, we’ll take an in-depth look at brick repair and restoration. Consider it your handbook for understanding brick as a building material, assessing wear and tear, and implementing repairs ranging from simple touch-ups to more complex mortar replacements. With the right know-how and techniques, you can restore aging brick buildings to their former glory. Weathered facades can regain their striking visual impact, while critical structural reinforcements will keep buildings solidly standing through the decades ahead.
So join us on a journey into the intricacies of brickwork maintenance and uncover secrets for enhancing enduring landmarks as well as modern constructions. Let’s make sure the brick buildings that make towns and cities special will continue to welcome generations to come.
Ultimate Guide To Brick Mortar Repair And Restoration
Understanding the Problem
Crumbling mortar is a common challenge that surfaces as the binding agent between bricks deteriorates. It’s imperative to conduct a thorough assessment, identifying loose mortar, crumbling bricks, and cleaned-out joints. The use of an angle grinder, equipped with the appropriate attachment, aids in efficient mortar removal, eliminating debris and preparing the surface for the repair process. The significance of estimating the extent of the repair cannot be overstated, as it guides the application of the right techniques and materials.
Understanding Brick Damage And Its Causes
When brick buildings start showing their age, the first step is figuring out what’s causing the wear and tear. It’s like diagnosing an illness before treating it. Without understanding the root problem, repairs might turn into nothing more than band-aid solutions.
There are usually a few main culprits behind brick damage. Environmental exposures—think of rain, sun, and dramatic temperature changes—can slowly eat away at brick and mortar over time. Moisture is especially nasty, leading to issues like efflorescence (the white powdery deposits) or severe structural weakening if left unchecked. Poor construction quality can also quicken deterioration down the road—subpar bricks, sloppy mortar work, and things like that. And even well-built brick structures simply fade with the natural aging of materials.
The point is, by studying the various factors attacking brick, you can understand what needs fixing on a deeper level. This allows you to tailor your restoration plan and techniques to address the specific problem areas efficiently. You’re aiming to restore both the cosmetic curb appeal of brick and the structural integrity that will keep it solid for years to come. It’s all about the right diagnosis followed by the right prescription when your classic brick constructions are showing some battle wounds. And if you require assistance, learn more here.
Choosing The Right Materials For Repair
Before commencing the repair, proper preparation is key. A brick trowel proves indispensable for applying mortar precisely into vertical and horizontal joints. The trowel’s edge ensures a clean finish, especially along the edge of the brick. Employing a stiff-bristled brush helps eliminate dust and loose debris, providing a clean canvas for the repair work. For larger-scale projects, a garden hose can be used to dampen the brick wall, promoting better adhesion and curing of the new mortar.
When it comes to fixing up your worn brick buildings, the materials you choose make all the difference. The goal is to match the look and performance of the existing bricks and mortar as closely as possible. Think of identical colors, textures, durability credentials—the works. The repair jobs must blend right in, not stick out like a sore thumb!
This becomes extra important in historical buildings. You may need a specially customized mortar that looks and behaves like what the masons originally used centuries ago. That’s why understanding old-school construction materials and methods helps tremendously here.
Overall, take your time with this step. Study that existing brick-and-mortar so you can find the closest possible fit. With some research and care, you’ll discover repair solutions that integrate flawlessly with the aged structures you’re preserving. The buildings will maintain their charming, weathered look that took decades to achieve. Except now, they’ll regain the sound structural integrity from their glory days, too. It’s all about balance—matching durability with aesthetics for brickwork repairs that stand the test of time.
Essential Tools For Brick Repair
When it comes to repairing bricks, having the right tools on hand can make all the difference in getting the job done right. As you embark on your brickwork project, be sure you’ve got these essentials within reach:
- Trowels for spreading mortar – These handy tools will become your best friend when it’s time to apply that mortar between bricks or into cracks. Choose a trowel with a shape and size that feels comfortable. The right trowel makes smoothing mortar feel effortless.
- Chisels for removing brick or mortar – Sometimes, you’ve got to chip away old, damaged sections before any repairs can happen. Chisels are a must for this tougher demolition work. Sharpened chisels allow you to carve out exactly the areas that need replacement.
- Pointing tools for finishing mortar joints – Now, the fun part is using your pointing trowel to shape and sculpt the mortar into clean, finished lines. The right pointing tool turns this finishing work into a satisfying task.
And don’t forget the safety gear! Gloves, goggles, all of it. Protecting your hands and eyes should be part of any DIY brick repair.
The right instruments in your hands will either hinder your progress or pave the way for success. As you apply mortar, rake out joints, and use other repair techniques, remember that getting comfortable with these tools is step one. Once you’ve got the tool basics down, achieving professional-looking results is within reach.
Types of Mortar
Choosing the correct mortar mix is pivotal for a successful repair. Options like Quikrete and Type N mortar offer a balance of compressive strength and flexibility, crucial for enduring the stresses imposed on brick walls. Lime mortars, historically significant and known for their cushioning effect, can be employed for restoration work, echoing traditional craftsmanship. Understanding the properties of each mortar type is paramount in achieving a durable and visually cohesive result.
Application Techniques
Applying mortar is an art that involves attention to detail. Ensuring that the mortar is evenly distributed in the head joints, horizontal joints, and courses of bed joints is crucial for stability and aesthetics. Utilizing a brick jointer helps shape the mortar joints, harmonizing them with the existing brick face. Employing a caulk gun for precision is particularly beneficial when addressing edge-of-the-brick repairs. Each step contributes to a seamlessly repaired brick wall that stands resilient against the test of time.
Step-By-Step Guide To Brick Replacement
When bricks need swapping out, the task can seem daunting. This section will walk you through each step so that replacing damaged bricks feels doable.
First up: brick detection. Spot cracks, chips, crumbling – all the telltale signs aging bricks show. Once you know which ones need replacing, safely remove them without harming good bricks or the wall itself.
With damaged bricks out of the way, preparing the open cavity is next. Ensure the space is in tip-top shape for fresh bricks to blend seamlessly. A little elbow grease here makes a big difference down the line!
Choosing replacement bricks is easier than it looks, too. You must know how to select the right size, shape, and color to match existing brickwork flawlessly. It’s all about maintaining a cohesive aesthetic.
Ready to get bricklaying? It’s time to carefully place the new bricks while protecting your hard work (and bodies!) along the way. Safety first, beauty second.
Lastly, seal the deal with mortar. Applying and properly curing it bonds new bricks right into the wall. With a little patience, no one will know repairs even happened!
When you break it down step-by-step, even big jobs feel manageable.
Mastering Mortar Repair And Repointing
Working with mortar is part craft, part sorcery—it takes equal parts precision and imagination! Let’s explore the artistry of repairing and repointing mortar together.
Picture crumbling, lackluster mortar joints transformed into strong, visually appealing bonds. That’s the mortar magic you’ll perform. First, remove the deteriorated sections while protecting good mortar nearby.
Next comes the fun part: mixing up fresh mortar to flawlessly match existing blends. You’ll even uncover the secret ratios for historically accurate results!
With the perfect mortar mixed, you’ll learn pro-pointing techniques to apply it for maximum durability and charm. The goal is to strengthen structures while preserving their aesthetic story. It’s a delicate balance but very rewarding.
When you’re done, you’ll never look at mortar the same way. Those once-crumbling joints will shine, doing their quiet but mighty job behind the scenes. Your little mortar magic will keep buildings happy for years to come!
Preventing Future Brick Damage
It all starts with being proactive. Put strategies in place to shield bricks from environmental threats looking to wear them down. It’s like building an invisible force field!
Ensuring proper drainage is step one. Excess moisture is public enemy number one for brickwork. Make sure water can easily flow away so it never piles up.
While you’re at it, wash away dirt and gunk trying to take up residence. Keeping walls clean means no stubborn stains or pesky plants digging their roots in places they don’t belong.
Finally, apply protective sealants to form an extra barrier against the elements. This smooth armor allows brickwork to deflect rain, sun, wind, and more.
With some thoughtful prevention, you might just prevent repairs altogether! Even if issues still pop up down the road, your efforts will minimize the damage. A little TLC now goes a long way.
Common Mistakes To Avoid In Brick Repair
Listen, we all slip up sometimes, even when doing our best brickwork. But knowing where others tend to miss the mark can help us sidestep similar pitfalls! Usually, mistakes happen when impatient enthusiasm outpaces proper preparation. Things like choosing mismatched replacement bricks that stand out instead of blending in or applying sealants under the hot sun. Oops! Other times, the lack of finesse messes with aesthetics, as when sloppy repointing permanently alters quaint historical charm. Luckily, awareness brings power – now you can swerve around such blunders! Remember, the right materials and techniques are key for repairs that not only stand the test of time functionally but look so flawless you’d never know work was done. With smart solutions, even common mistakes become springboards for success. Onward you go – thoughtfully avoiding goofs as you bring the damaged brick back to beauty!
Professional Help: When To Seek Expertise
Cowboys rode alone, but even they sometimes needed backup from the cavalry. The same goes for major brick repairs! If full structural restorations or specialized skills are needed, it’s time to seek professional reinforcements. Select the right expert for the operation, too. Remember, calling pros isn’t admitting defeat – it means ensuring the job gets done right!
Brick Mortar Repair Q & A
When it comes to cutting brick mortar for repair, it’s important to use a chisel and hammer to carefully chip away at the old mortar. Make sure to wear protective gear, such as gloves and safety goggles, and take your time to avoid damaging the surrounding bricks. You may also consider using a power grinder with a diamond blade for larger repair jobs. Always prioritize safety and precision when working with brick mortar repair.
Repairing mortar on a brick house is a relatively straightforward process, and it’s essential to address any deteriorating mortar promptly to prevent further damage. Here’s a step-by-step guide on how to repair mortar on a brick house:
Materials and Tools:
Mortar mix
Trowel
Pointing tool or jointer
Mason’s brush
Safety glasses
Dust mask
Bucket
Water
Procedure:
Assess the Damage:
Inspect the mortar joints to determine the extent of the damage. Look for cracks, gaps, or areas where the mortar has worn away.
Gather Materials:
Purchase a suitable mortar mix. Match the color and composition of the existing mortar as closely as possible.
Clean the Area:
Remove any loose or damaged mortar using a trowel or a chisel. Clean out the joints to create a solid base for the new mortar.
Wet the Joints:
Dampen the brick and mortar joints with water using a brush or a spray bottle. This helps the new mortar bond better with the existing masonry.
Mix the Mortar:
Follow the manufacturer’s instructions to mix the mortar. Typically, you’ll need to add water gradually and mix until you achieve a smooth, workable consistency.
Apply the Mortar:
Using a trowel, apply the mixed mortar into the joints. Press it firmly to ensure a good bond. Fill the joints, and avoid leaving voids.
Tool the Joints:
Use a pointing tool or jointer to shape and compress the new mortar, matching the style of the existing joints. This not only improves the appearance but also helps the mortar adhere better.
Clean Excess Mortar:
While the mortar is still pliable, use a damp sponge or cloth to wipe away any excess mortar on the bricks. Be careful not to disturb the newly applied mortar in the joints.
Cure the Mortar:
Allow the repaired mortar to cure according to the manufacturer’s recommendations. This typically involves keeping the mortar damp for a specified period to ensure proper hydration and strength development.
Protect from the Elements:
If possible, avoid exposing the repaired area to harsh weather conditions during the curing process. Covering it with plastic sheeting may be necessary.
Remember that the key to a successful mortar repair is proper preparation and attention to detail. If you’re unsure about the process or if the damage is extensive, it’s advisable to consult with a professional mason or contractor for assistance.


Further Reading
- 3 Spots That Need a Good Exterior Cleaning on Your Home
- 7 Fantastic Cladding Ideas to Rejuvenate Your Home’s Exterior

Ultimate Guide To Brick Mortar Repair And Restoration Conclusion
Well, we sure have covered a lot of ground together! From inspection to prevention and everything in between, we’ve explored all aspects of keeping brick buildings happy and healthy. We hope passing on these brick repair tips and mortar magic tricks empowers you to maintain, strengthen, and beautify the brick structures you care about. Patience and attention to detail are still key – but now you’ve got this guide by your side, too! Whether you’re a seasoned DIY whiz or just starting out, remember the goal: arm yourself with knowledge and take on brick projects with confidence. Your journey equips you to keep that charming brickwork standing tall.