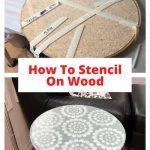
How To Stencil On Wood
How do you stencil on wood? I found this little table at a thrift store and was challenged to upcycle it. I used a stencil and loved how it turned out.
Servings 1
Cost 10
Equipment
- None
Ingredients
- Paint
- Stencil
- Stencil Brush
- Stencil Tape
Instructions
- I painted the surface of the table with Folk Art Home Decor Chalk Paint in the color Silver Shadow. I gave it one coat, let that dry completely, and then gave it a second coat.
- While the tabletop was drying I painted the legs with Folk Art Home Decor Wood Tint in white. I painted it on and then wiped off the excess. Although very pretty, it wasn’t the look I was going for so I decided to paint the legs with Folk Art Home Decor Chalk Paint in the color white.
- Once everything was dry, it was time to stencil. I placed the stencil on the table in the center and secured the stencil with stencil tape. This would prevent the stencil from moving around while I was working with it.
- I dipped my stencil brush into the paint, and then I tapped it on a paper plate to offload as much paint as possible. This will help prevent bleeding underneath the stencil. I then taped the stencil brush onto the table and stencil. I continued tapping until I got the look I wanted. When I ran out of paint, I dipped the brush into the paint, offloaded the paint on the paper plate, then continued tapping on the stencil.
- Once I got the entire stencil covered, I carefully peeled up the stencil.
- I checked to make sure there wasn’t wet paint under the stencil, and I moved it to a new spot on the table and taped it down. I was careful not to place anything on the other stencil while it was drying.
- I continued around the entire table. Once everything was stenciled I let it dry completely.
- I placed the glass top back on the table and it was ready to be used.