
How To Make An Easy Halloween Witch

Do you like decorating for Halloween but don’t want to break the bank doing it? I’m sharing how to make an easy Halloween witch on a budget! Let’s get ready for Halloween Night and make some Halloween decorations!
This post may contain affiliate links, I earn from qualifying purchases at no extra cost to you. Click here for my disclosure policy
How To Make An Easy Halloween Witch Video
How do I make a tomato cage witch?
These trash bag witches are so very easy to make, let’s get started.
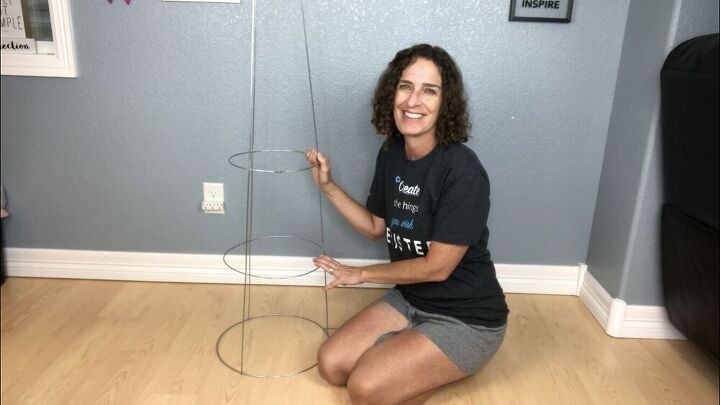
I started with a regular-sized tomato cage and placed it upside down on the floor.

I put a plastic pumpkin pail upside down onto the 3 stakes of the tomato cage.
Depending on the weather and where you’re putting them you can use twine to tie the pumpkin pail handle to the tomato cage for stability.
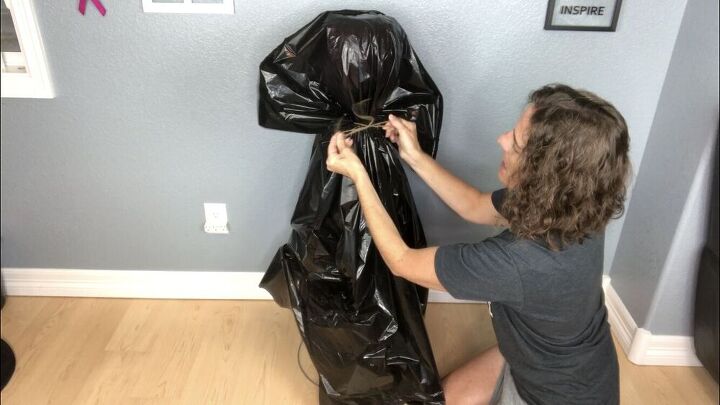
I placed yard-sized garbage back over the pumpkin pail and tomato cage and used twine to tie a waist for the witch under the pumpkin pail. The garbage bag will become their black dress.
Later I decided to switch this to some yarn I had on hand but you could also use ribbon or anything you want.
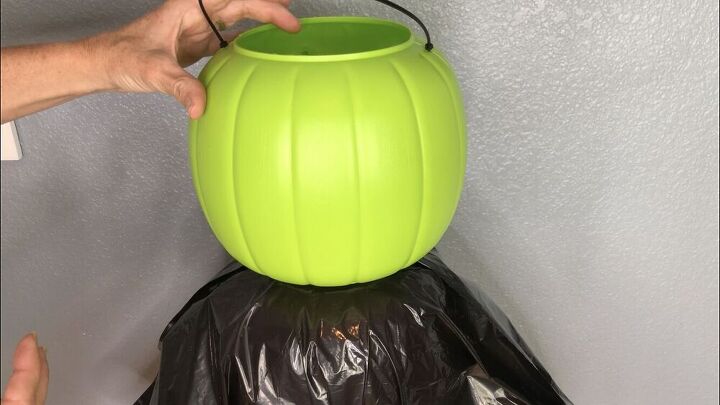
I hot glued another pumpkin bucket to the top for a head.
You could use the face of the pail or place it backward as I did.
I’ll leave mine blank but you could also draw or paint a face on if you like.
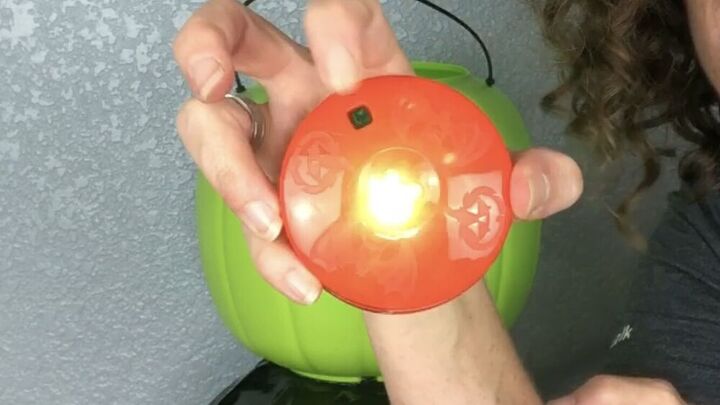
Optional step. I bought one of these battery-operated LED lights from the dollar store and placed it inside so my witch head would flicker at night.
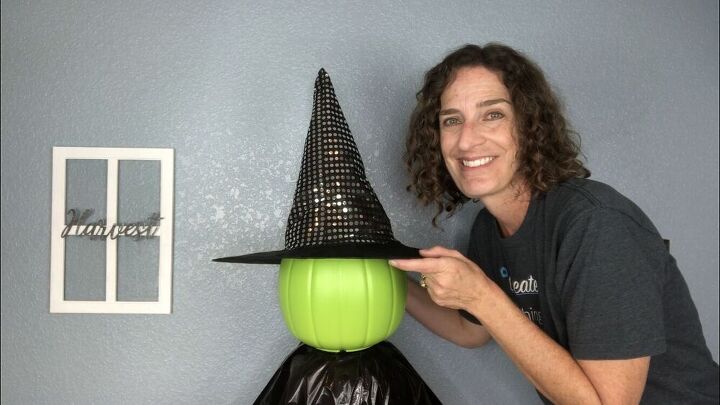
I added a witch hat to the top of the pumpkin pail.
If you put an LED light inside you’ll need to be able to reach inside and turn it on.
If you aren’t putting a light inside you can hot glue the hat to the head.
To make the hat stick upright I filled it with a couple of recycled grocery bags.
I made 3 of these witches.
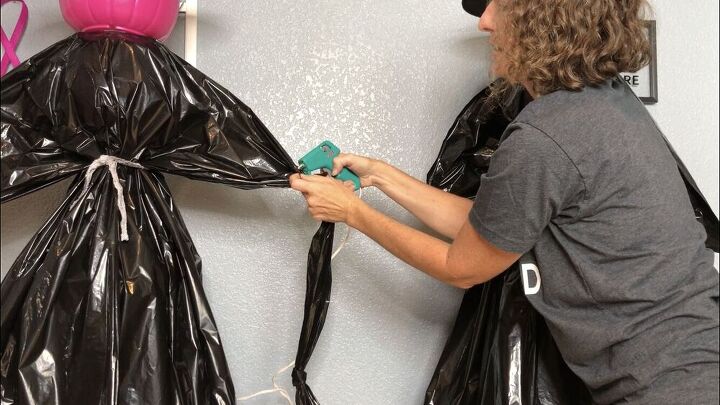
To create their arms, I cut strips of another garbage back, made a knot in the middle to represent a hand, and hot glued the ends to each witch.
This is the corner or shoulder of the garbage bag.
On the witch ends, I hot glued a strip to the shoulder and made a knot at the end, and left it hanging out.
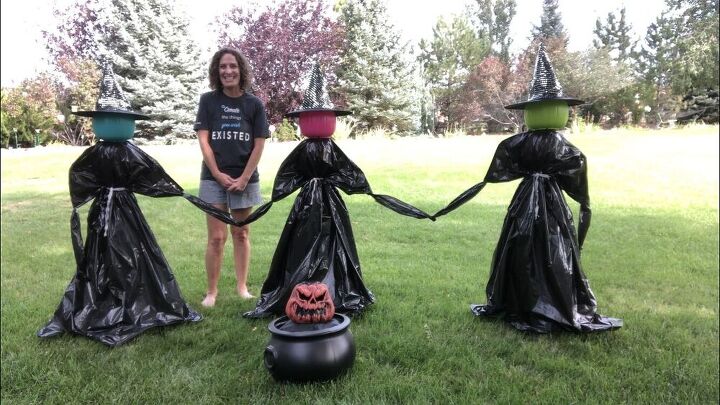
What do you think of my garbage bag witches? So easy right?!!! I’m placing them in my front yard with our Halloween pumpkins. Now maybe I need a black cat? Wouldn’t this be fun for a Halloween party too? My daughter loves Hocus Pocus. We can make a party invitation with Halloween witch images, and I can add some more Halloween witch decorations, witch silhouettes, and Halloween witch stock photos from the movie.
We can dress up in cute witch costumes with long hair, pointy hats, and black shoes. You can amend these witches to have any of these things as well.
We’ll watch the movie with our favorite foods.
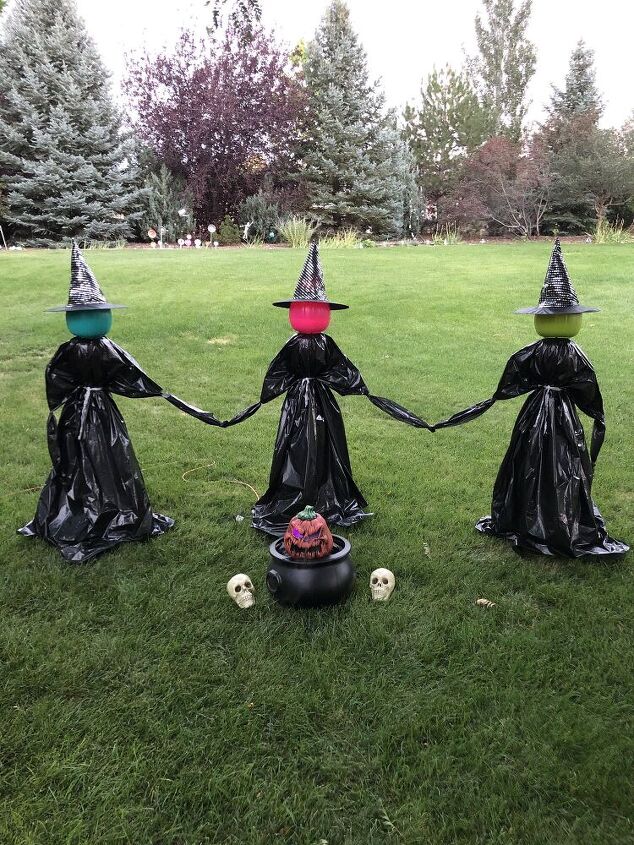
I added a cauldron to create a magic potion for the wicked witch. We’re getting ready in my Halloween costumes. Happy Halloween!
How To Make An Easy Halloween Witch Video
Shop any of these stores and I receive a small commission at no cost to you.
Click on the images to shop this post

Learn more about “Creating Seasonal Decor for Your Home” to create seasonal decor that doesn’t cost an arm and a leg.

Check out some of my other Halloween decor!
I used a tomato cage fall topiary by stuffing one with fake leaves and topping with a scarecrow.. it will look nice up to Christmas decorating time.
Thank you so much for sharing, and I’d love to see pictures 🙂
Such a cute and economical alternative to buying those expensive witch decorations for your yard! Pinned!
Thanks Chloe, yes those yard witches I found online were $80! No thanks for 1 month of the year 😉 Thanks for the Pin friend!
Your creativity is on fire, Chaz! Such a great idea and love how easy they are to make and for very little money. Must show my daughter this who goes all out for Halloween!
Thank you Marie, sounds like I need to connect with your daughter (and thanks for sharing).
Amazing as always Chas! I don’t know how you think of these things, but they’re fabulous! I couldn’t help but think of Shakespeare’s Enter Three Witches! 🙂 Hope you have a lovely day – thanks for being as inspiring as you always are!
Thank you so much Barbara, you are so very sweet. I know Halloween isn’t one of your favorites, and thinking of Shakespeare is awesome!
I love how your witches turned out. You really are a very creative talented person!
You are so very sweet Amy, thank you so much for the kind words friend.
These are awesome, Chas! What a cute idea!
Shelley
Thank you so much, I’m so glad you like them 🙂
Adorable Chas! So glad you posted! I did not want to go all out for Halloween because I’m thinking it will be a pretty quiet one here this year. But this is just the perfect! Thanks so much. Always Inspiring!
Thank you Denise, and you just made my day! I’m thrilled you like them and are thinking about giving them a go.
********************************************************
Thank you for sharing at #OverTheMoon. Pinned and shared. Have a lovely week. I hope to see you at next week’s party too! Please stay safe and healthy. Come party with us at Over The Moon! Catapult your content Over The Moon! @marilyn_lesniak @EclecticRedBarn
********************************************************
Thank you so much Marilyn 🙂
I love it that your witches can be made with common household items! It’s one of the features tomorrow on the Little Cottage Link Party.
Thank you so much Kristie, I appreciate that! I’ll see you at the next one
Chas,
OMG, those witches are just too cute for words. Congratulations, you are being featured at Over The Moon Linky Party. I hope you stop by. eclecticredbarn.com/2020/10/over-moon-linky-party_18.html
Hugs,
Bev
Thank you so very much Beverly, I’m so excited and honored. I’ll see you at the next one 🙂
Another amazing creation Chas! Love love love! Pinned. Thank you for sharing at Charming Homes and Gardens.
Thank you so much Kim 🙂
Very clever and well done for a spooktacular display! I have a trio of ghosts used to encircle a tree with a flood light shown up in the center branches. Love it but had to buy it in a post Halloween clearance.
Thank you so much Debbee. and your ghost display sounds fabulous.
Such a fun idea and the wirches look so cool!
Thank you so much Pat!
I made the 3 garbage bag witches. They turned out really cute. Unfortunately in Minnesota it’s a little windy and i kept ending up with headless witches. To solve that issue I filled a small hole in the bottom bucket and the top bucket and fastened them together with a small screw and bolt. Added a few rocks for extra weight. Problem solved.