Quick and Easy DIY Side Table Makeover For Your Home
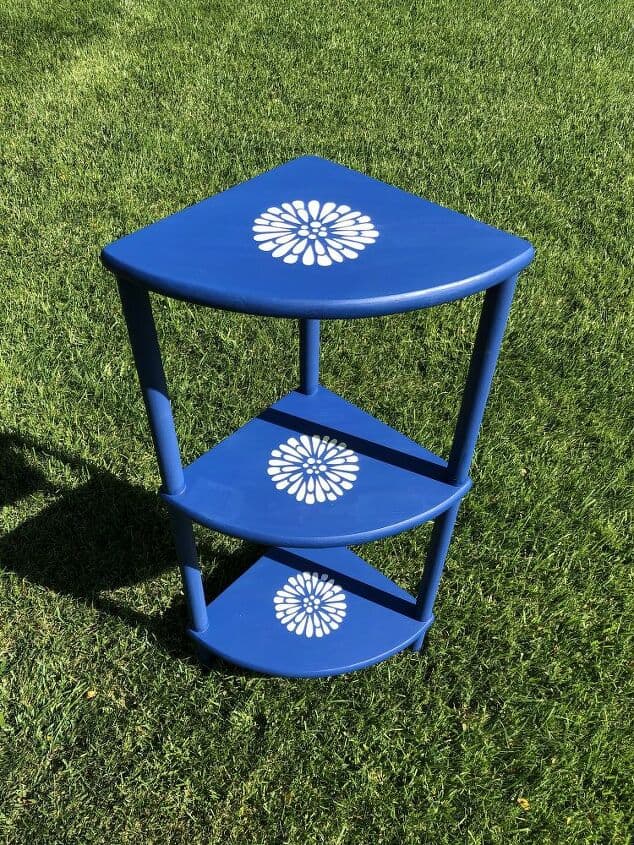
What can I use as a DIY side table? Today I am sharing a DIY project for a wooden side table. I often find an old side table at the thrift shop or at a garage sale that would make a unique accent table with just a little elbow grease. I found this game table at the thrift store and thought it would be the perfect DIY side table project to share with all of you. This is a simple project that doesn’t take much time and the best part is it can be done without using power tools. This simple side table can be customized for any living space at a fraction of the cost of a new side table. Below is the step-by-step tutorial for an easy DIY side table.
This post may contain affiliate links, I earn from qualifying purchases at no extra cost to you. Click here for my disclosure policy
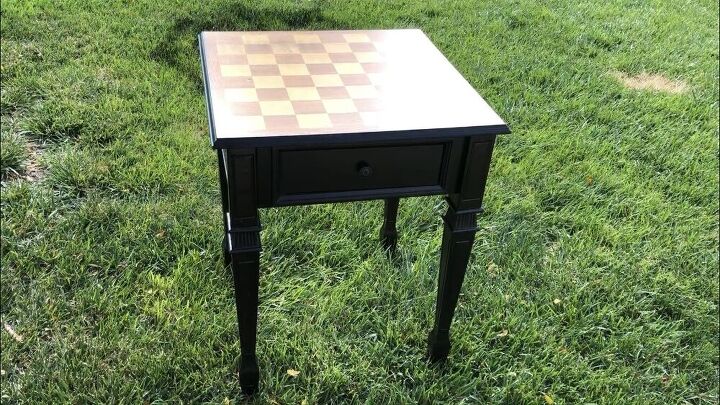
Here is the old table I found at a thrift store. In previous life, it was used as a game table. The table top had some water damage and scratches, but the rest of the table looked great! I knew it would make the perfect unique side table.
Quick and Easy DIY Side Table Makeover For Your Home
DIY Side Table Makeover Instructions
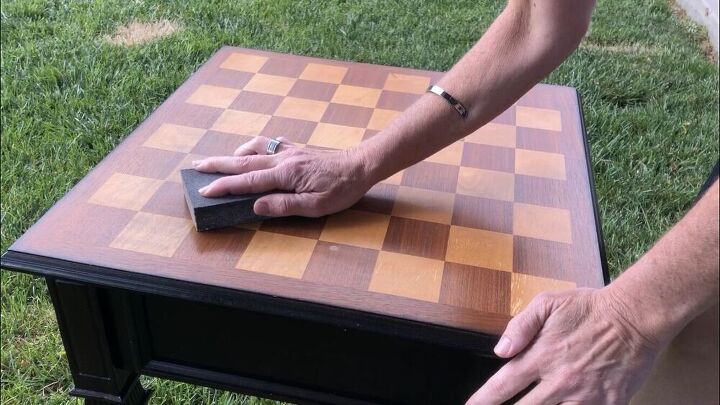
For the first step, I lightly sanded the top and then used Krud Kutter to clean the wooden top and wooden legs.
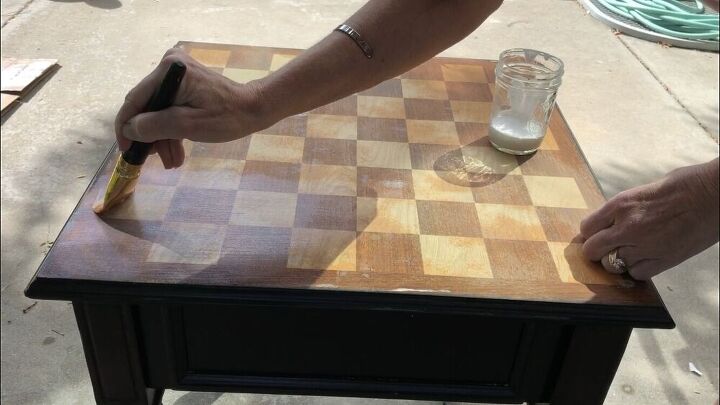
I painted the surface with Mod Podge. This is a great choice because it goes on white but dries clear.
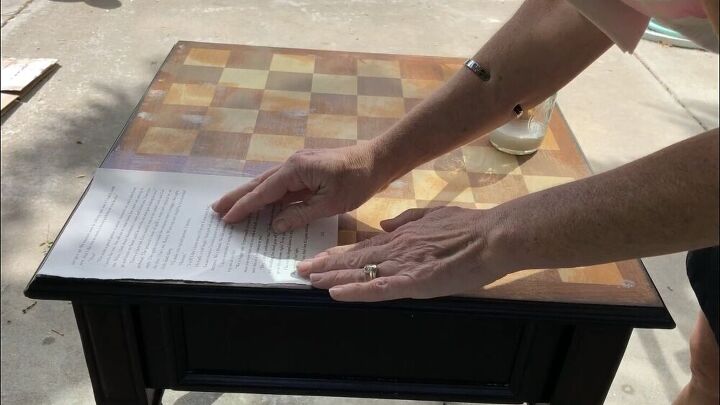
I had a book that was falling apart and not repairable. I thought this would be a great place to use the pages that were falling out. I placed them onto the Mod Podge and layered them so they’d overlap and be the perfect fit.
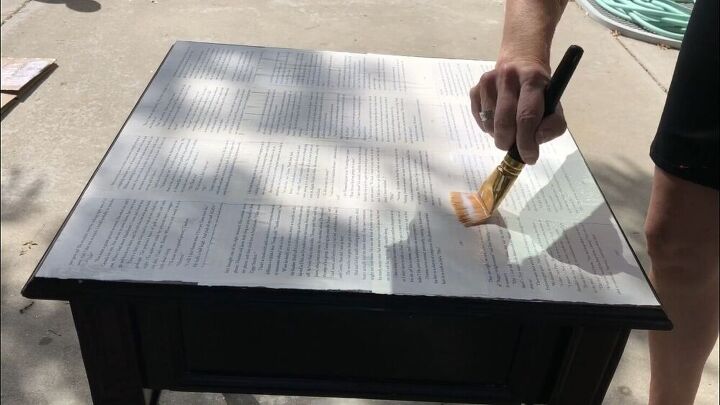
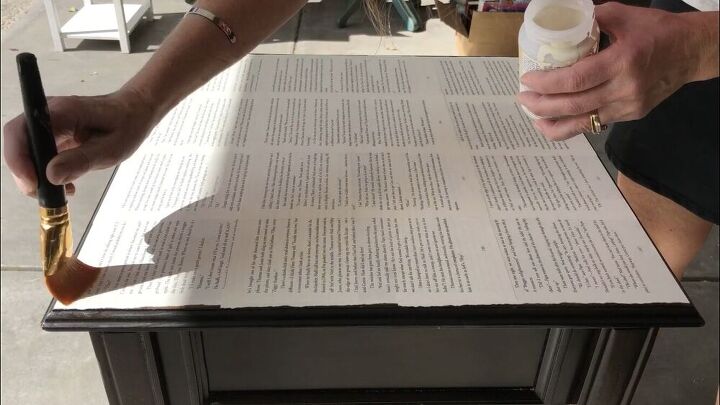
Once the first coat of Mod Podge had dried completely, I placed a second coat of Mod Podge over the pages to seal them.
I let this dry completely. If this was going to be the top coat, I would do several coats of the Mod Podge, letting it dry between each coat.
Since this table would be well used with glasses sitting on it, I wanted to make sure it would be protected from water or other beverages that might sweat or spill on the table. Mod Podge is a water-based sealer that is water-resistant but not waterproof.
I used Folk Art Home Decor Varnish. It is the best choice to protect the table from water spots or water damage. I followed the instructions on the bottle and gave it a few coats.
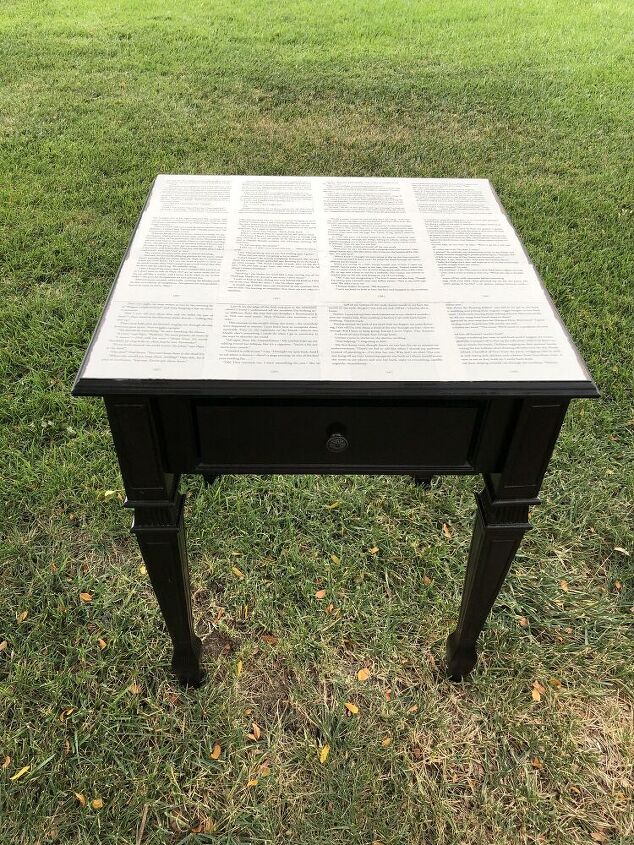
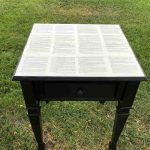
Once the table was dry, it was ready to be used. I love how it turned out! You can use these ideas to make a DIY end table that will be a unique piece of furniture.
You can always look into furniture flipping, it can be a profitable business.
Other perfect table tips:
- When you make your perfect side table you can place it in your living room.
- Make sure to check your furniture and apply wood glue if necessary for any repairs in advance.
- If you have any holes you can patch them with some wood filler from Home Depot
- You can take one of these tables and have a little fun outside the box and turn it into a bar cart.
- I have even made a tree stump side table, and all it took was a little thinking outside of the box. In addition to that it didn’t cost an arm and leg as the West Elm wooden stump version does.
- You can make your own DIY table by adding a wood disc wood and some hairpin legs. These make great outdoor furniture, and a small side table especially when you don’t have much space.
- You can take some scrap wood and turn it into a DIY outdoor side table, outdoor coffee table, rustic end table, etc.
- You can make a stylish side table out of a terracotta pot, and a piece of glass.
Check out some of my other furniture makeovers!
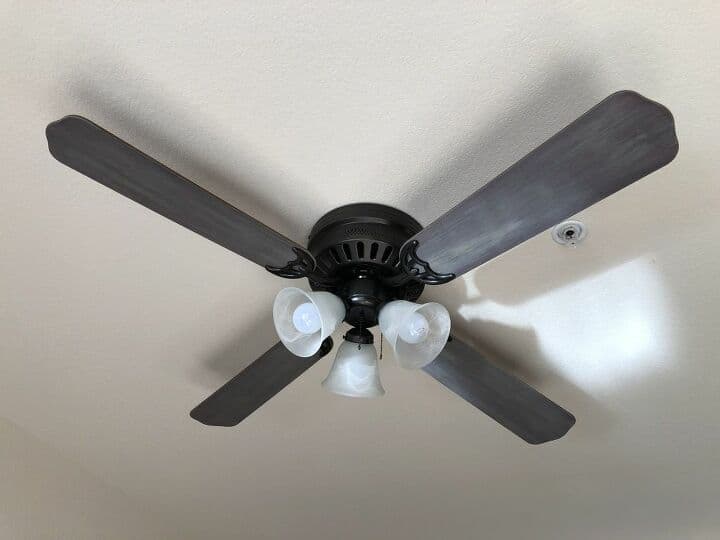
- Amazing and Easy Ceiling Fan Makeover with Video
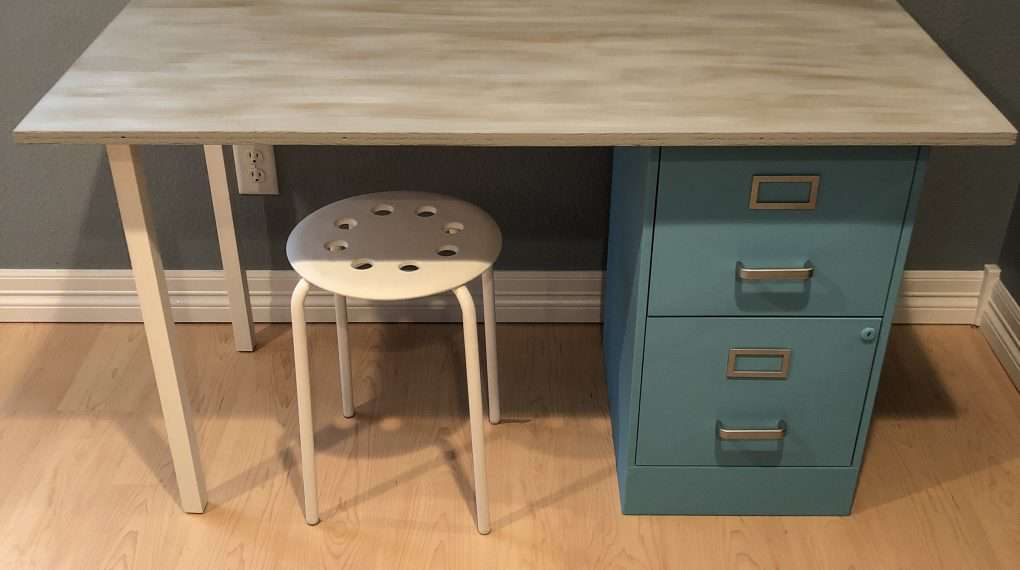
- Easy and Useful DIY Filing Cabinet Makeover with Video
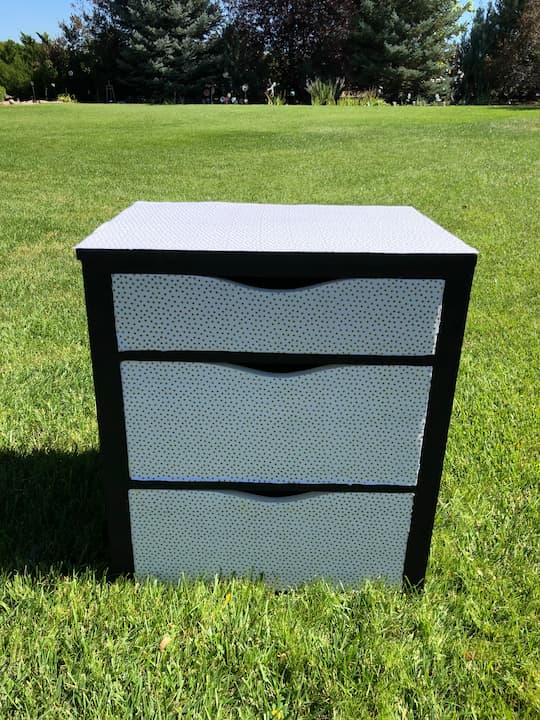
- Super Easy Chest of Drawers Makeover with Video
DIY Side Table Makeover Video
Shop any of these stores and I receive a small commission at no cost to you.
Click on the images to shop the post.
 Mod Podge Matte Sealer, Glu...Shop on Amazon
, 882 Gloss") FolkArt Varnish (2-Ounce), ...Shop on Amazon
FolkArt Varnish (2-Ounce), ...Shop on Amazon Acme Bishop Game Table in B...Shop on Amazon
 Winsome Wood Henry Accent T...Shop on Amazon
 Ameriwood Home Parsons Mode...Shop on Amazon
There are so many other options when it comes to updating a little side table.
- Create a farmhouse-style table with a couple of coats of paint, then use a fine grit sandpaper to distress it
- Create your own outdoor side table plans and get a building or look for free plans online.
- Create a modern vibe by using copper pipes and building a laptop table
- Use old trunks, I am currently using my grandfather’s old suitcase as a simple end table
- Head to Dollar Tree, grab a trashcan and a pizza pan and put together a narrow-end table. You can add some nautical rope if you like to create that beachy vibe
- If you want a century-side table look, add some gold spray paint to the legs
You do not have to spend copious amounts of money to do a makeover and give your room a fresh look. Sometimes spending money on quality bedside tables can liven your bedroom and give you much-needed practicality in your day-to-day life. The price is worth the money spent.
Find out “What Exactly Does It Mean To Repurpose Or Upcycle“, save money, and create the most amazing things.

Chas, I LOVE this idea! I actually have a book that recently fell apart and never thought to use the pages to cover the top of a table! You are so good at upcycling! And I like the idea of the varnish to protect it from spills. Thanks for sharing such wonderful ideas!Happy to be blog hopping with you!
Thank you so much Mary, I’m thrilled you like it and will maybe take a stab at it too. Wonderful hopping with you.
Cute little makeover, Chas! I love Mod Podge– it works great for so many projects. And, as a former English teacher, anything that uses books catches my eye! Great upcycle, and fun hopping with you again!
-Niky @ The House on Silverado
Thank you so much Niky, and I am so pleased you like the project. Wonderful hopping with you
You have an eye for choosing the perfect makeover piece at a thrift shop. I adore your idea of using decoupage with book pages to renew the top. It turned out perfect.
Happy New Year,
Kippi
Thank you so much Kippi, I’m thrilled you like it. Your project is amazing too! Happy New Year and wonderful hopping with you.
Wow that turned out so cute! I want to try it with sheet music for my husband. Great idea. You have done so many tables it’s pretty unbelievable. Thanks for hosting the hops today.
Thank you Andrea and as musicians I love your idea to use sheet music! I loved your project, I was needing that. Wonderful hopping with you.
I love your vision Chas! This really is a wonderful update to a tired game table. Mod Podge is my favorite! So fun hopping with you and the other talented ladies!
Thank you so much Kim, I’m so glad you like the project. Your table is darling and a great thrift flip. Wonderful hopping with you.
Love this idea! Craft Schooling sunday has resumed and hope to see you there! all the best in 2021!
Thank you so much Sarah, I’m so glad you like it.
Your table turned out incredible Chas! Love seeing your projects every month I hope you had a great new year!
Thank you so very much Tarah, and Happy New Year to you too! Wonderful hopping with you friend.
Love it, Chas! The book pages are so fun, and such an improvement from the checkerboard. 🙂 I love what you can do with just a little bit of Mod Podge and a dose of creativity. Thanks for sharing!
Thank you Amy, and I’m so thrilled you like it. Wonderful hopping with you.
Well THIS is cool! You come up with the most amazing ideas! This would be so perfect in a library, although I might just read the table instead of getting any books! 🙂 Thanks for another fabulous idea Chas!
Thank you so much Barbara, I’m so pleased you like the table. Thanks for the giggle by saying you’d read the table 🙂 Hugs friend.
Thank you for sharing at #OverTheMoon. Pinned and shared. Have a lovely week. I hope to see you at next week’s party too! Please stay safe and healthy. Come party with us at Over The Moon! Catapult your content Over The Moon! @marilyn_lesniak @EclecticRedBarn